Self-Service Portal
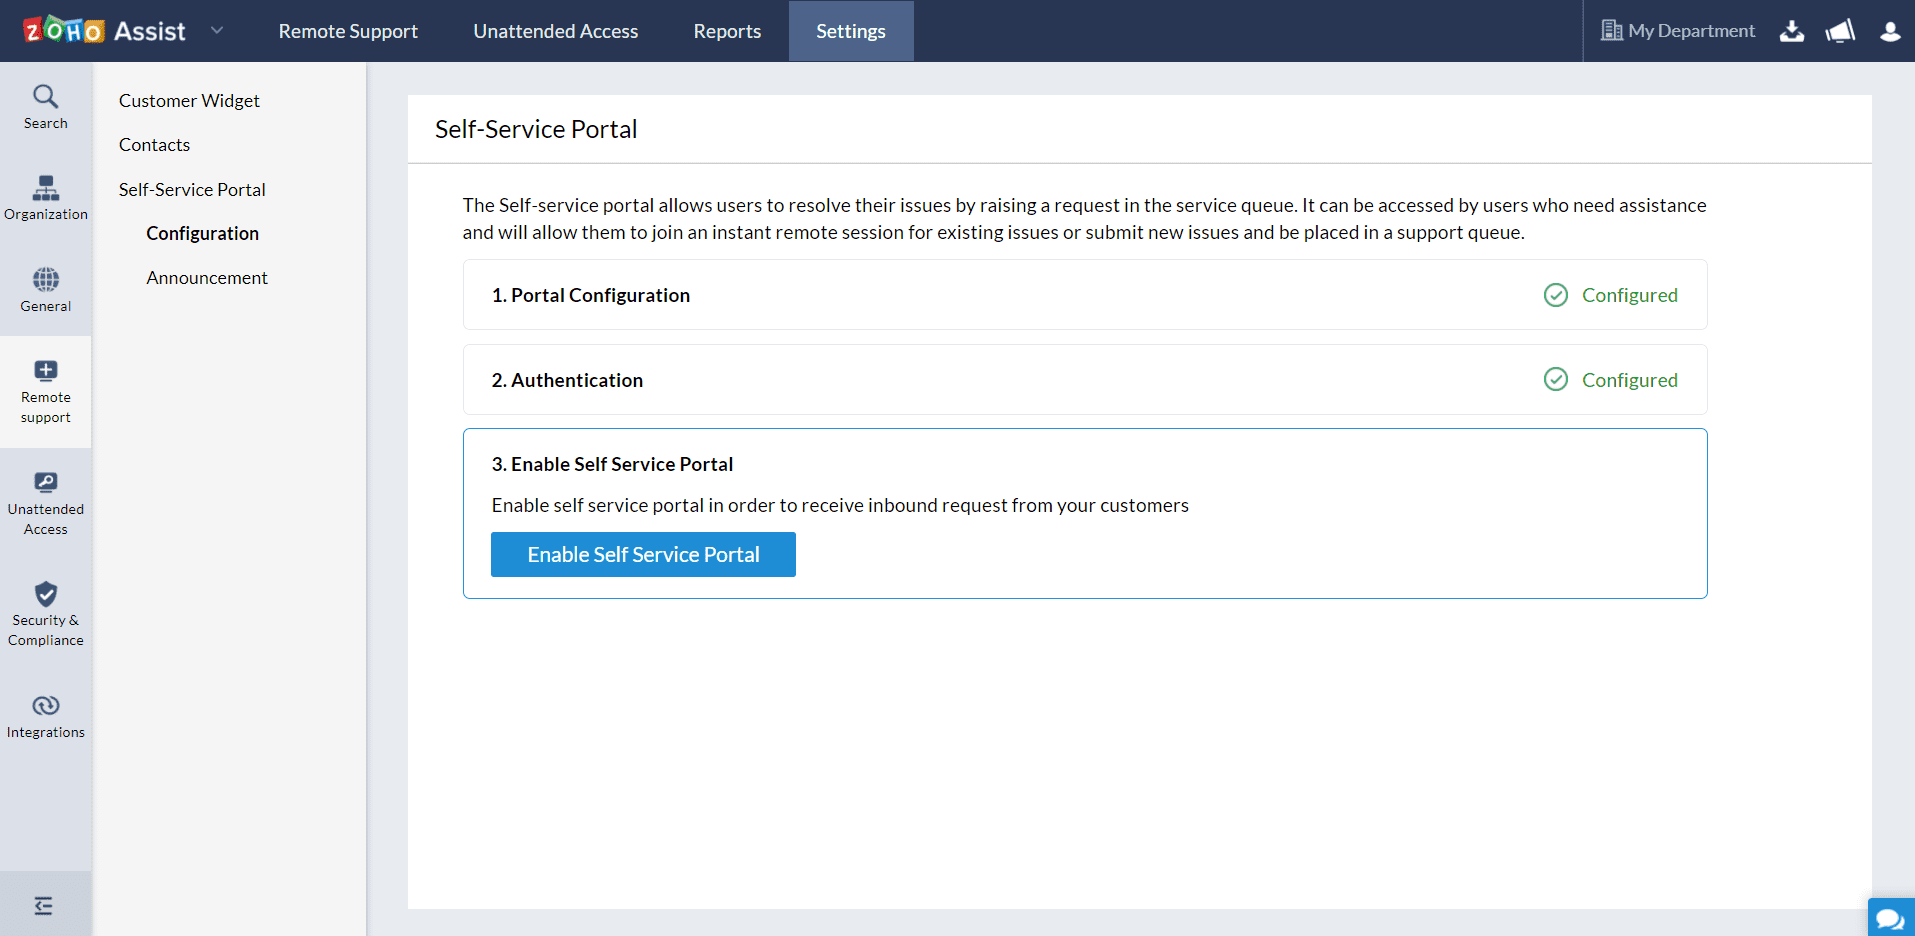
The Self-service portal allows users to resolve their issues by raising a request in the service queue, called as inbound request. It can be accessed by users who need assistance and will allow them to join an instant remote session for existing issues or submit new issues and be placed in a support queue.
Setting up the self-service portal Assist
You can set up your custom self-service portal by mapping your custom domain on to your Zoho Assist account and then create a Self-Service Portal URL based on your organizational preferences.
- Go to Settings > Remote Support > Self-Service Portal
Select Configuration to map your custom domain to start setting up your self-service portal.
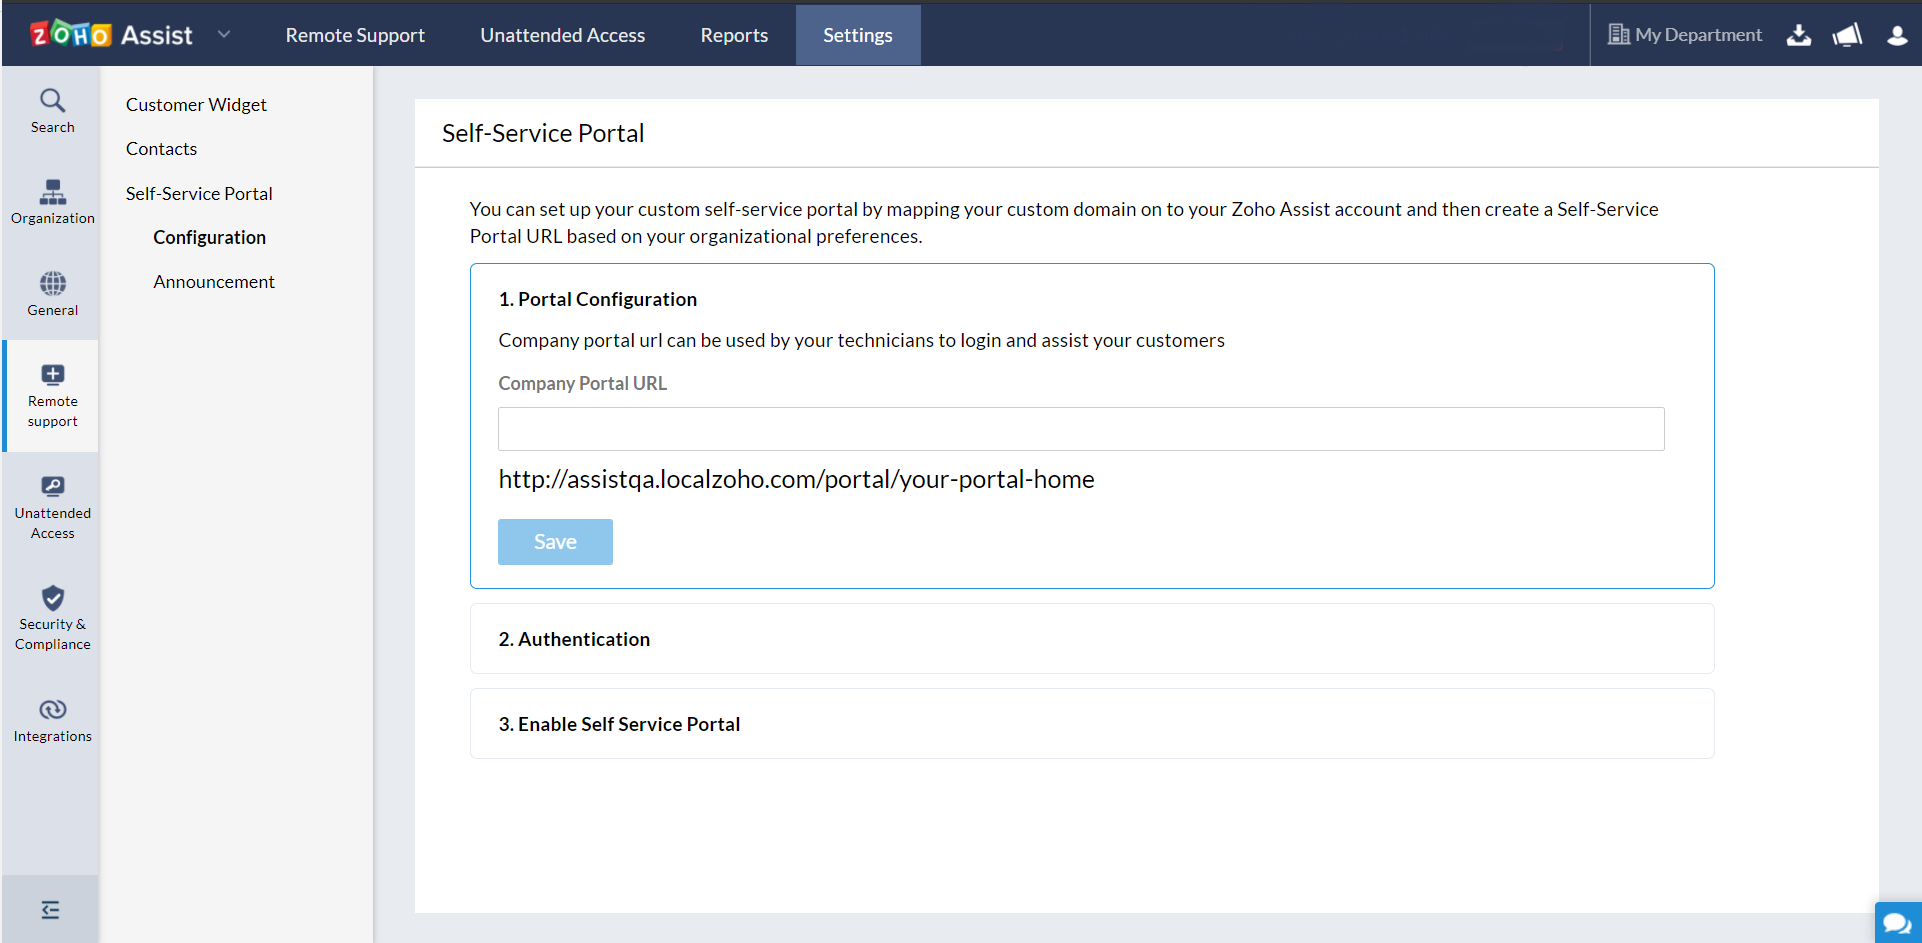
Enter your company portal url and click Save to configure the url.

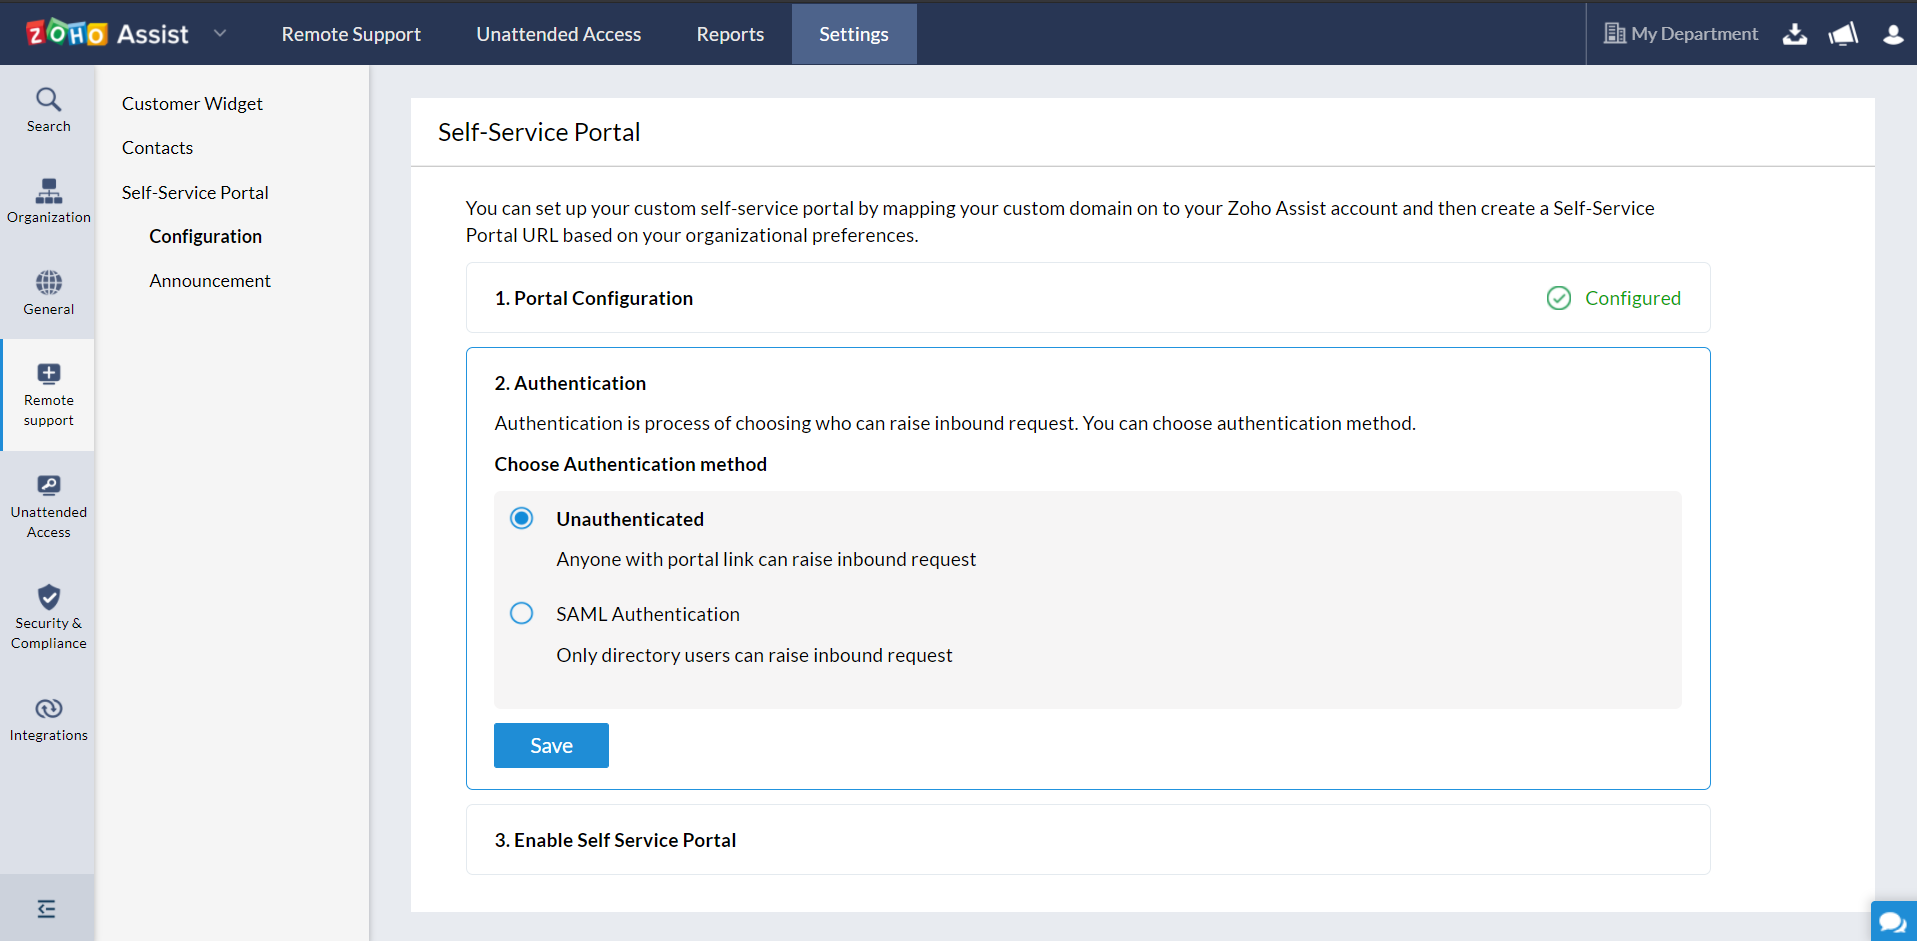
Select a preferred mode of authentication - SAML Authentication, allows only directory users to raise an inbound request and Unauthenticated, allows anyone with access to portal link to raise an inbound request, and click Save.
Set up your SAML Authentication for your Self-Service portal and click Save
Click Enable Self Service Portal to start receiving inbound requests from your customers.


What is SAML Authentication?
Security Assertion Markup Language (SAML) is the open standard protocol used for exchanging authentication and authorization data between applications, in particular, an identity provider (IdP) such as OneLogin, Okta, PingIdentity and a remote support provider (such as Zoho Assist).
Essentially, this means that you use one set of credentials to log into many different services.
How it works
SAML Authentication usually involves a service provider, in this case, Zoho Assist, and an identity provider. When you've enabled SAML, end-user management and authentication are handled through your company's identity provider (IdP).
When an end user requests access to the Zoho Assist's Self-Service Portal, they will be redirected to your identity provider for authentication. The identity provider authenticates the end user and in return, generates an authentication assertion, which indicates that a user has been authenticated. On receiving the assertion, the end user is redirected back to Zoho Assist and logs into their custom self -service portal seamlessly. This way SAML Authentication ensures maximum security and follows the stipulated security boundaries of your organization. How to set up your SAML Authentication for your Zoho Assist Self-Service Portal
The third-party identity provider provides the configuration details for the SAML. Note that you must log in with your administrator credentials to set up SAML in your Zoho Assist account.
- Select SAML Authentication
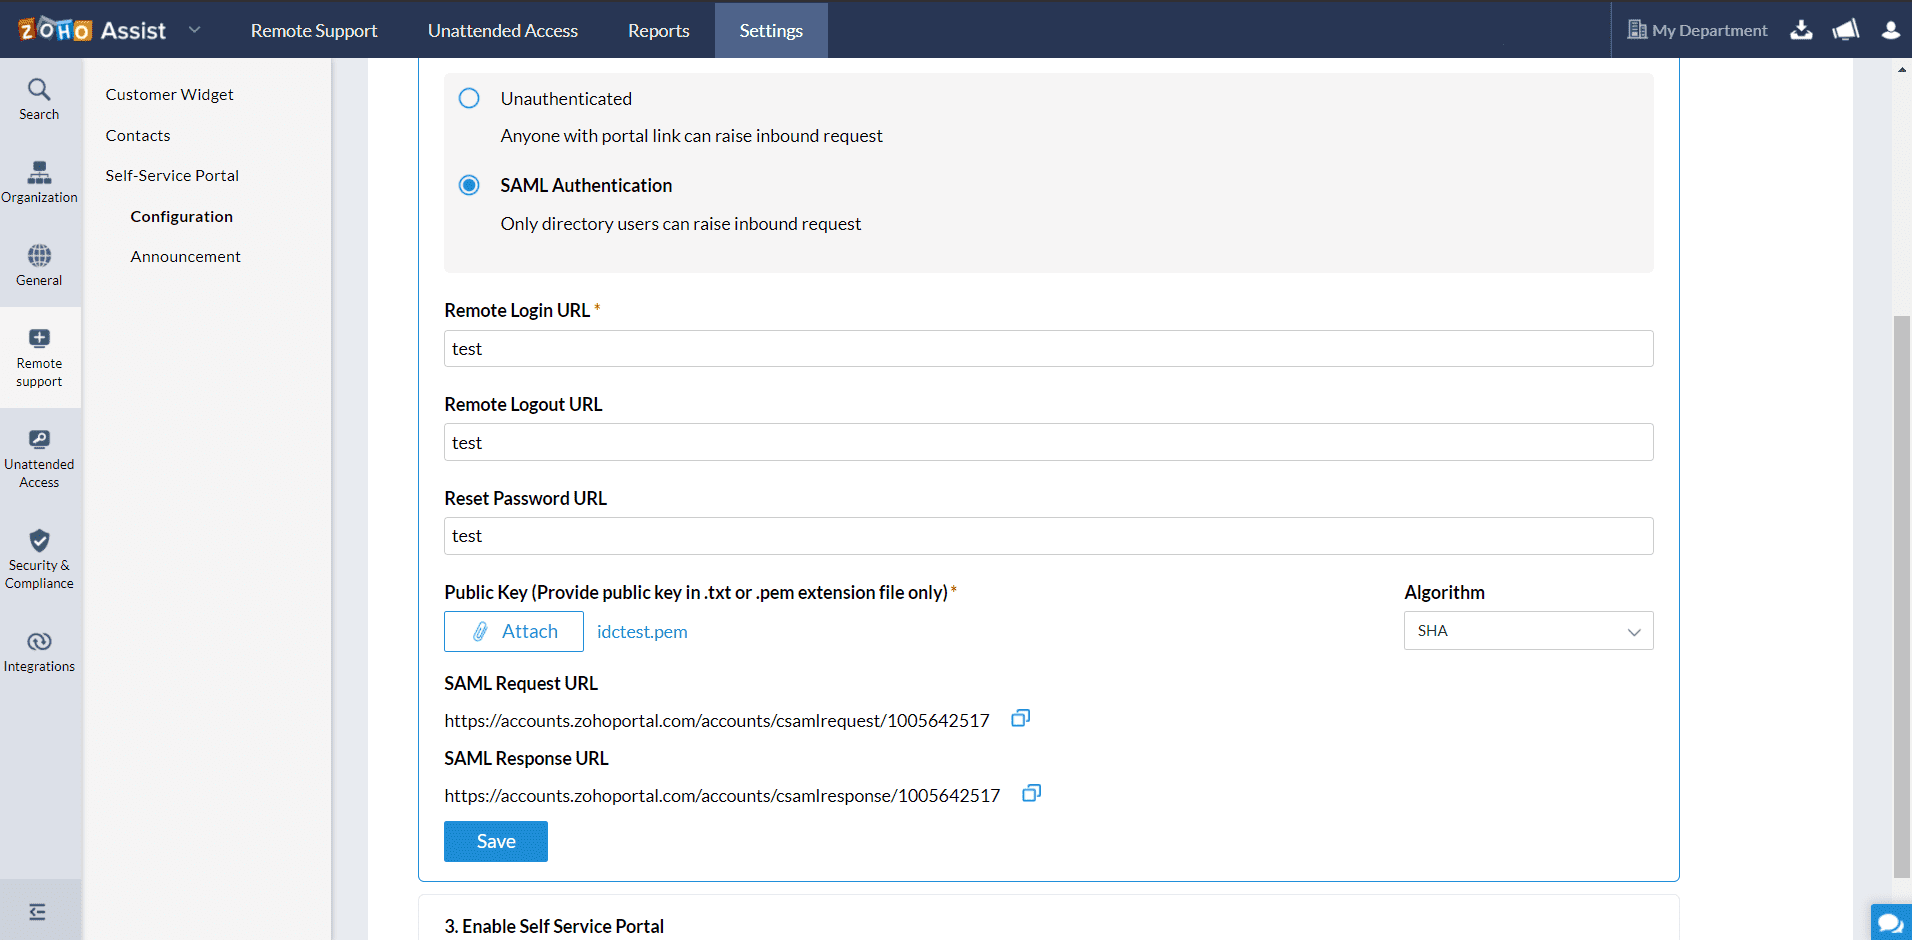
- On the SAML Authentication section, provide the following details:
- Remote Login URL: Enter the remote login URL of your IdP where Zoho Assist will redirect your end users when they login to the Self-Service Portal.
- Remote Logout URL: Enter the remote logout URL of your IdP that Zoho Assist will redirect your end users when they attempt to log out of the Self-Service Portal.
- Reset Password URL: Enter the reset password URL of your IdP where Zoho Assist will redirect your end users when they try to change their password for the Self-Service Portal.
- Public Key: Paste the Public X.509 certificate in the text format. We will use the public key contained in the certificate to verify that your identity provider has issued all received SAML authentication requests.
Algorithm: Select an algorithm between RSA and DSA using which your IdP generated the public keys and certificates.
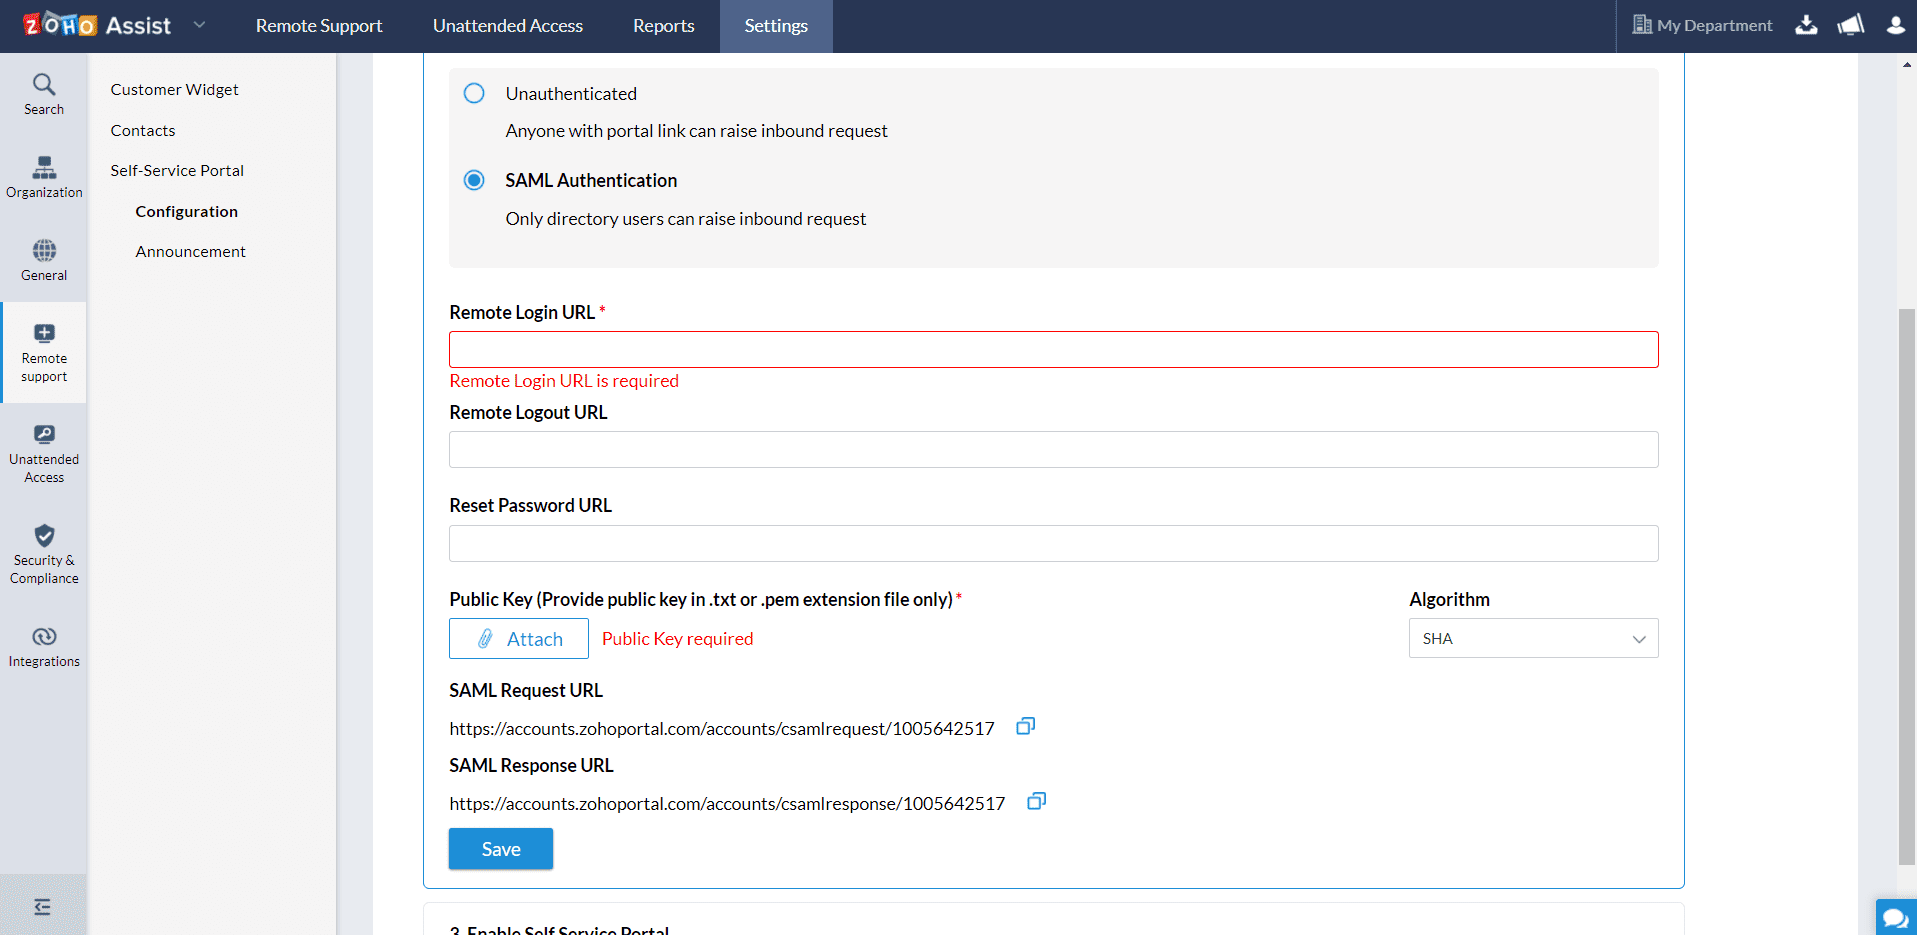
- Click Save.

How to publish an announcement on your Self-Service Portal?
You can publish a custom public announcement on your self-service portal based on your organizational prospects.
- Go to Settings > Remote Support > Self-Service Portal.
- Select Announcement.
Enter the announcement to be published in the text box and click Publish.
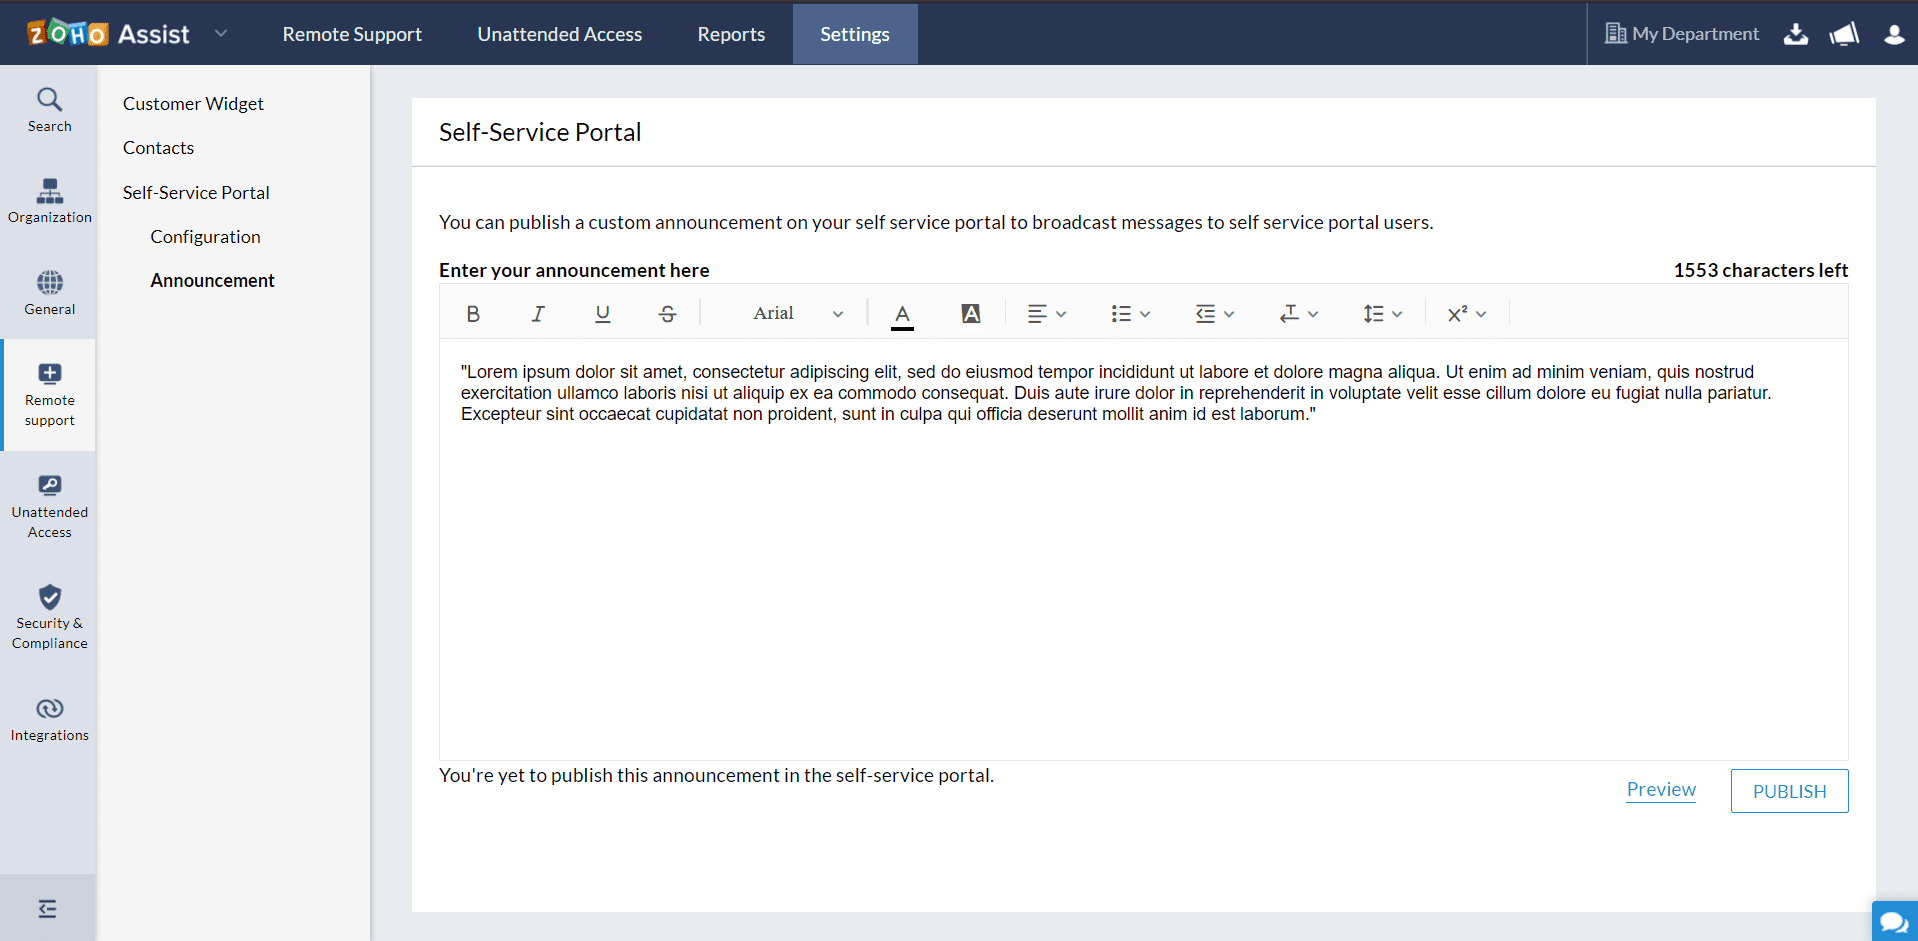
- You can also choose to schedule your announcements based on your preferences

How to configure your Identity Provider?
Okta
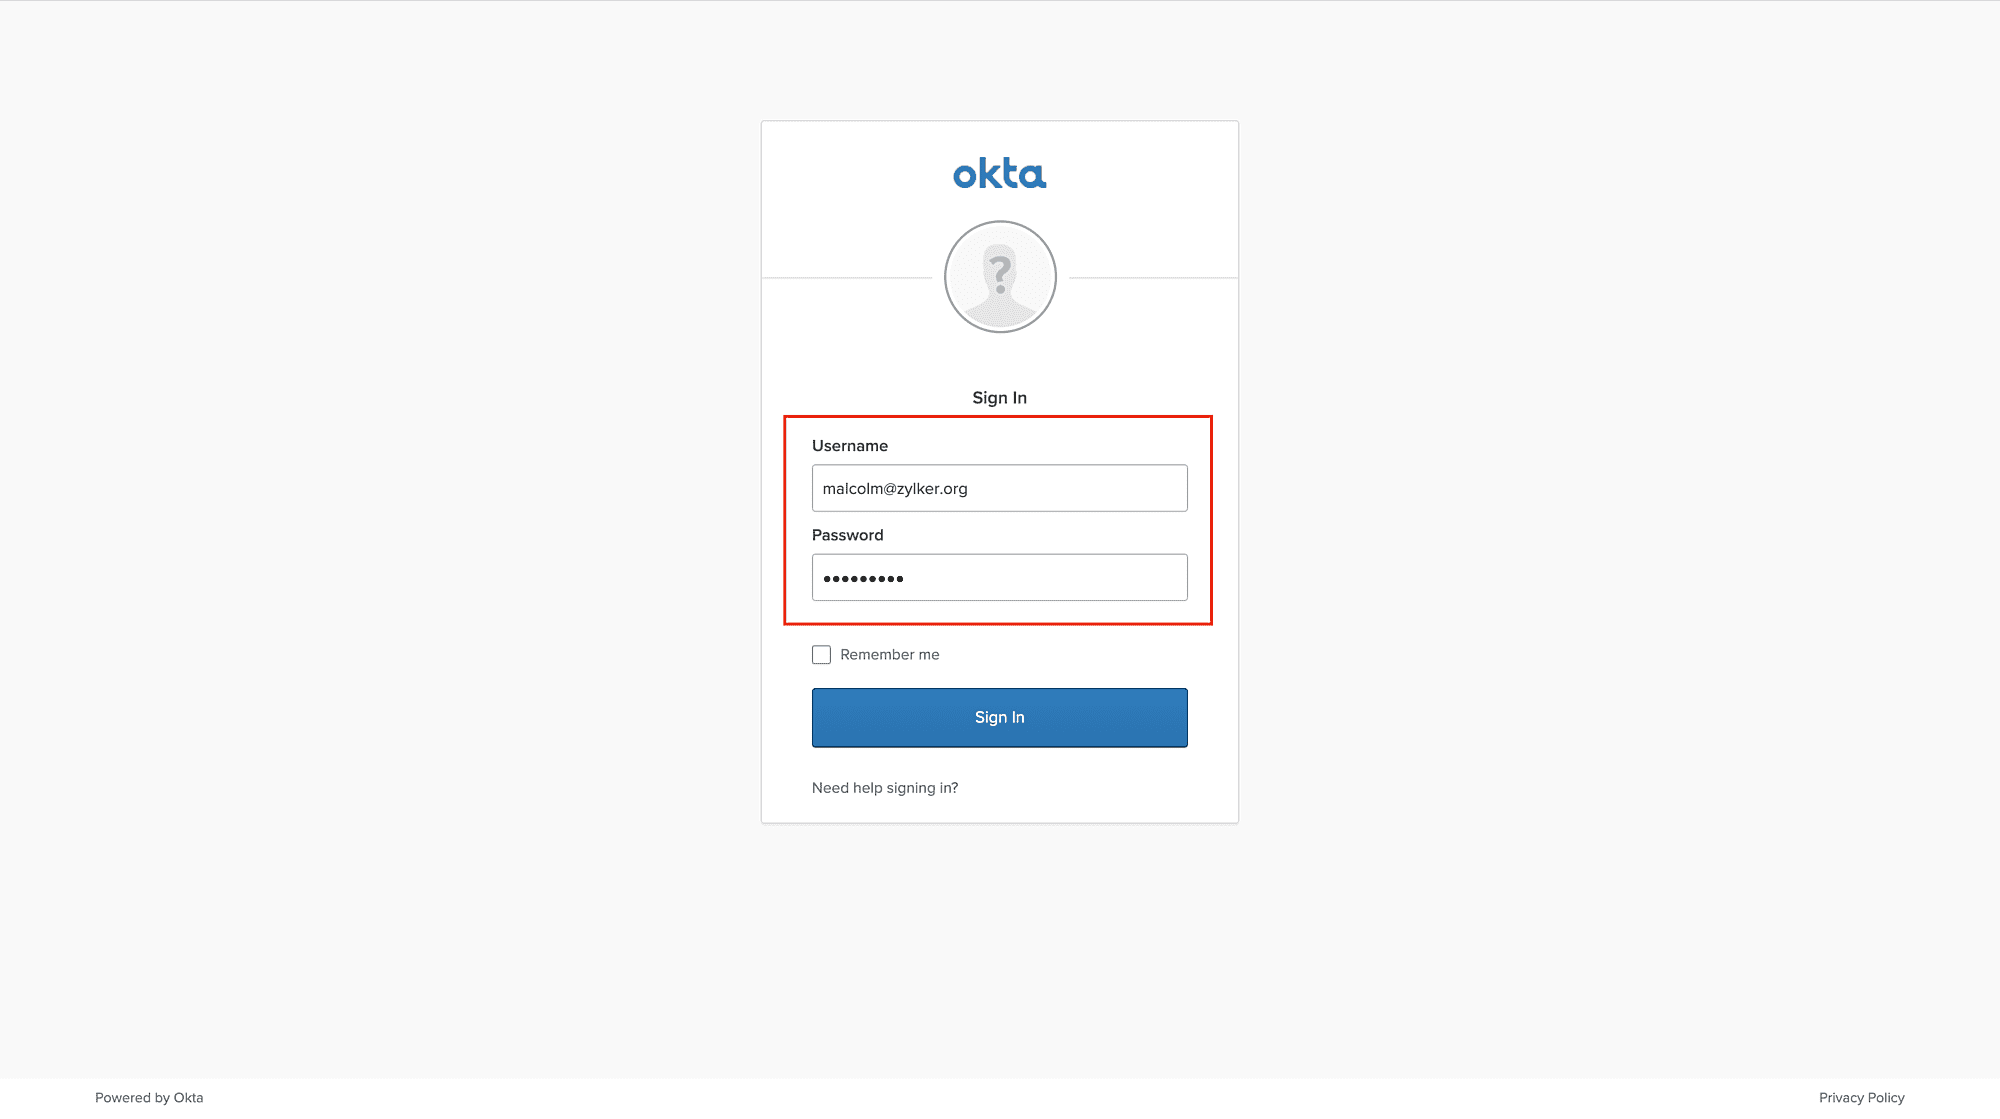
Log in to your Okta account with administrative privileges.
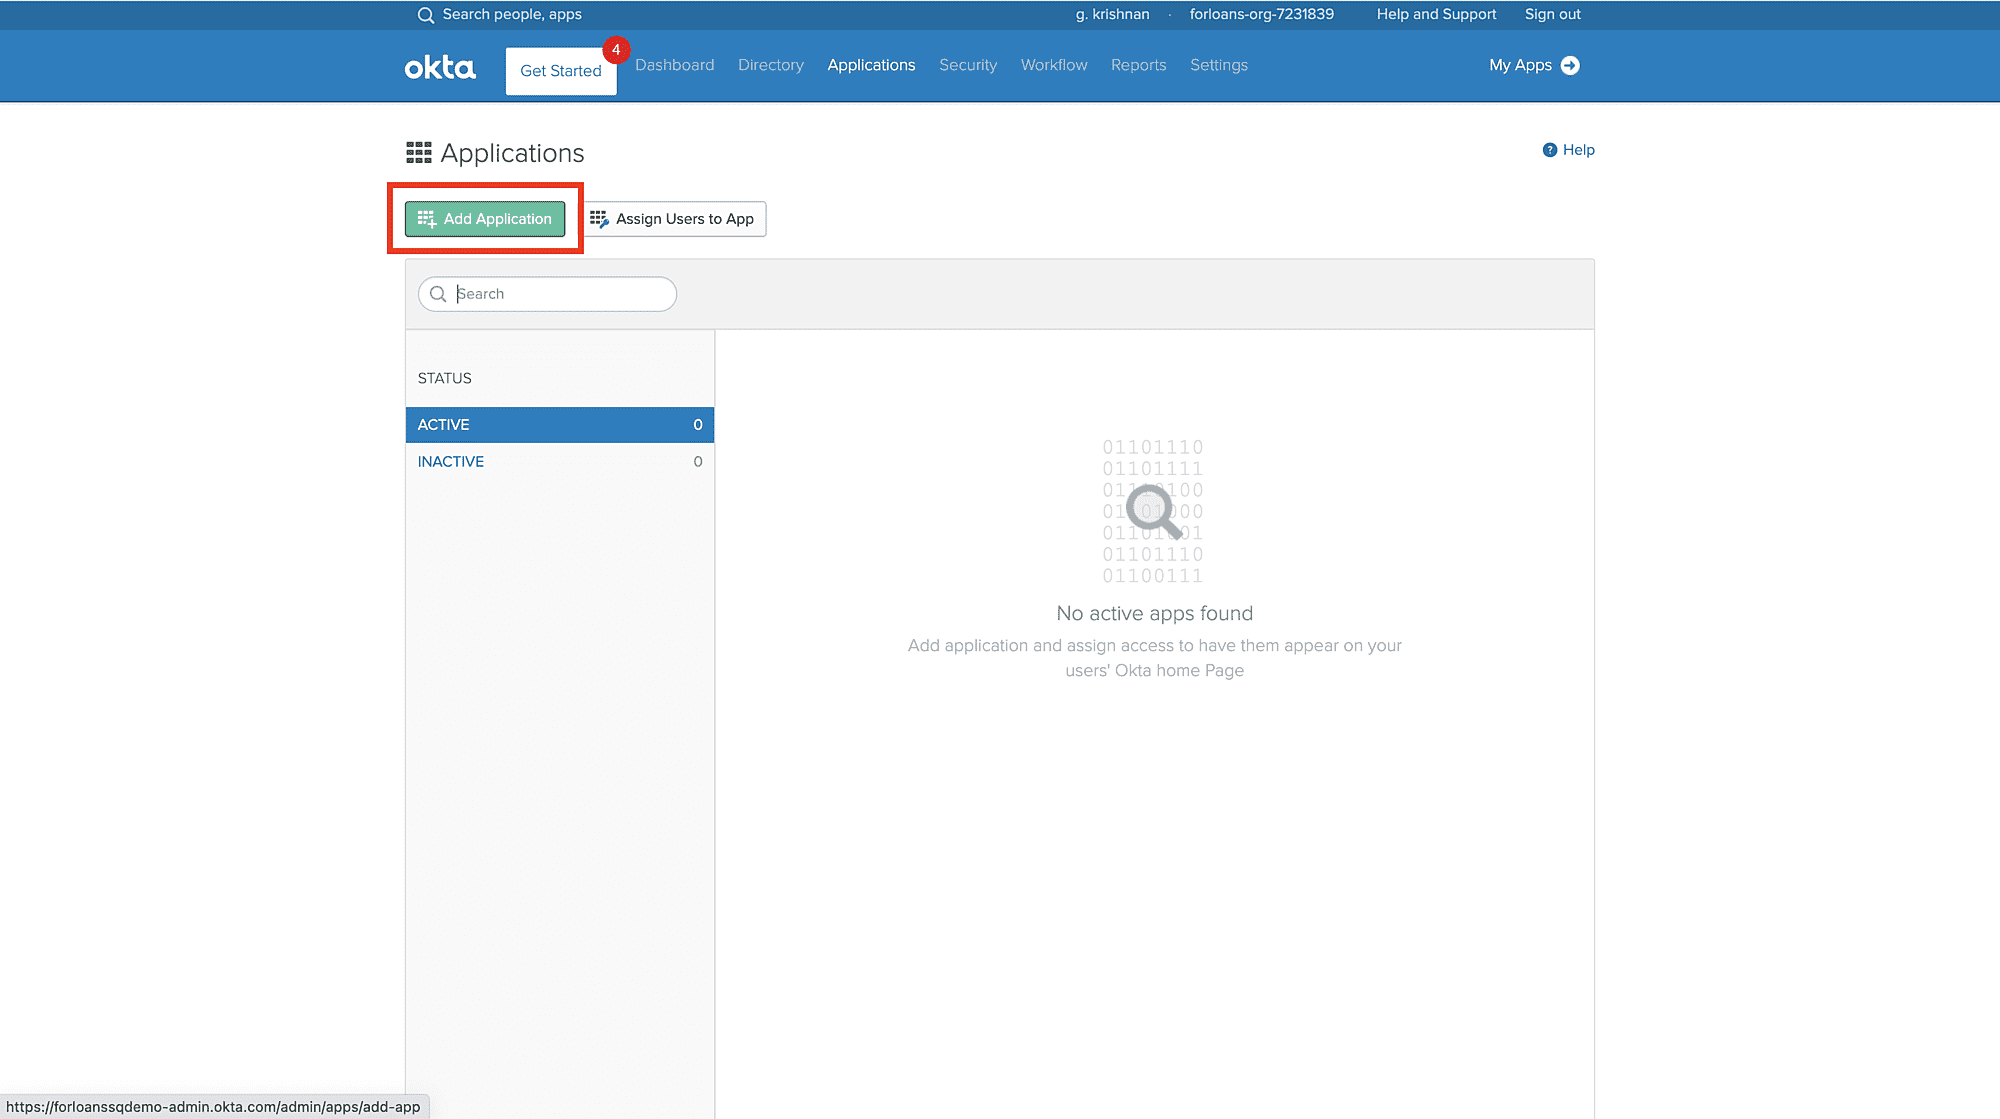
Click the Applications tab.

Click Add Application and then click Create New App.
On the pop-up window, select the SAML option and then click Create.

- In the General Settings page, provide a name for the application. For example, Zoho Assist.
- Click Next to continue.
In the Configure SAML page, do the following:
- Single sign on URL - Paste the value for SAML Response URL that you copied from the SAML screen in Zoho Assist.
- Audience URI (SP Entity ID) - Paste the value of SAML Response URL here as well.
- Default RelayState - Paste the value for Default Relay State that you copied from the SAML screen in Zoho Assist.
- Name ID format - Specify as Email Address.
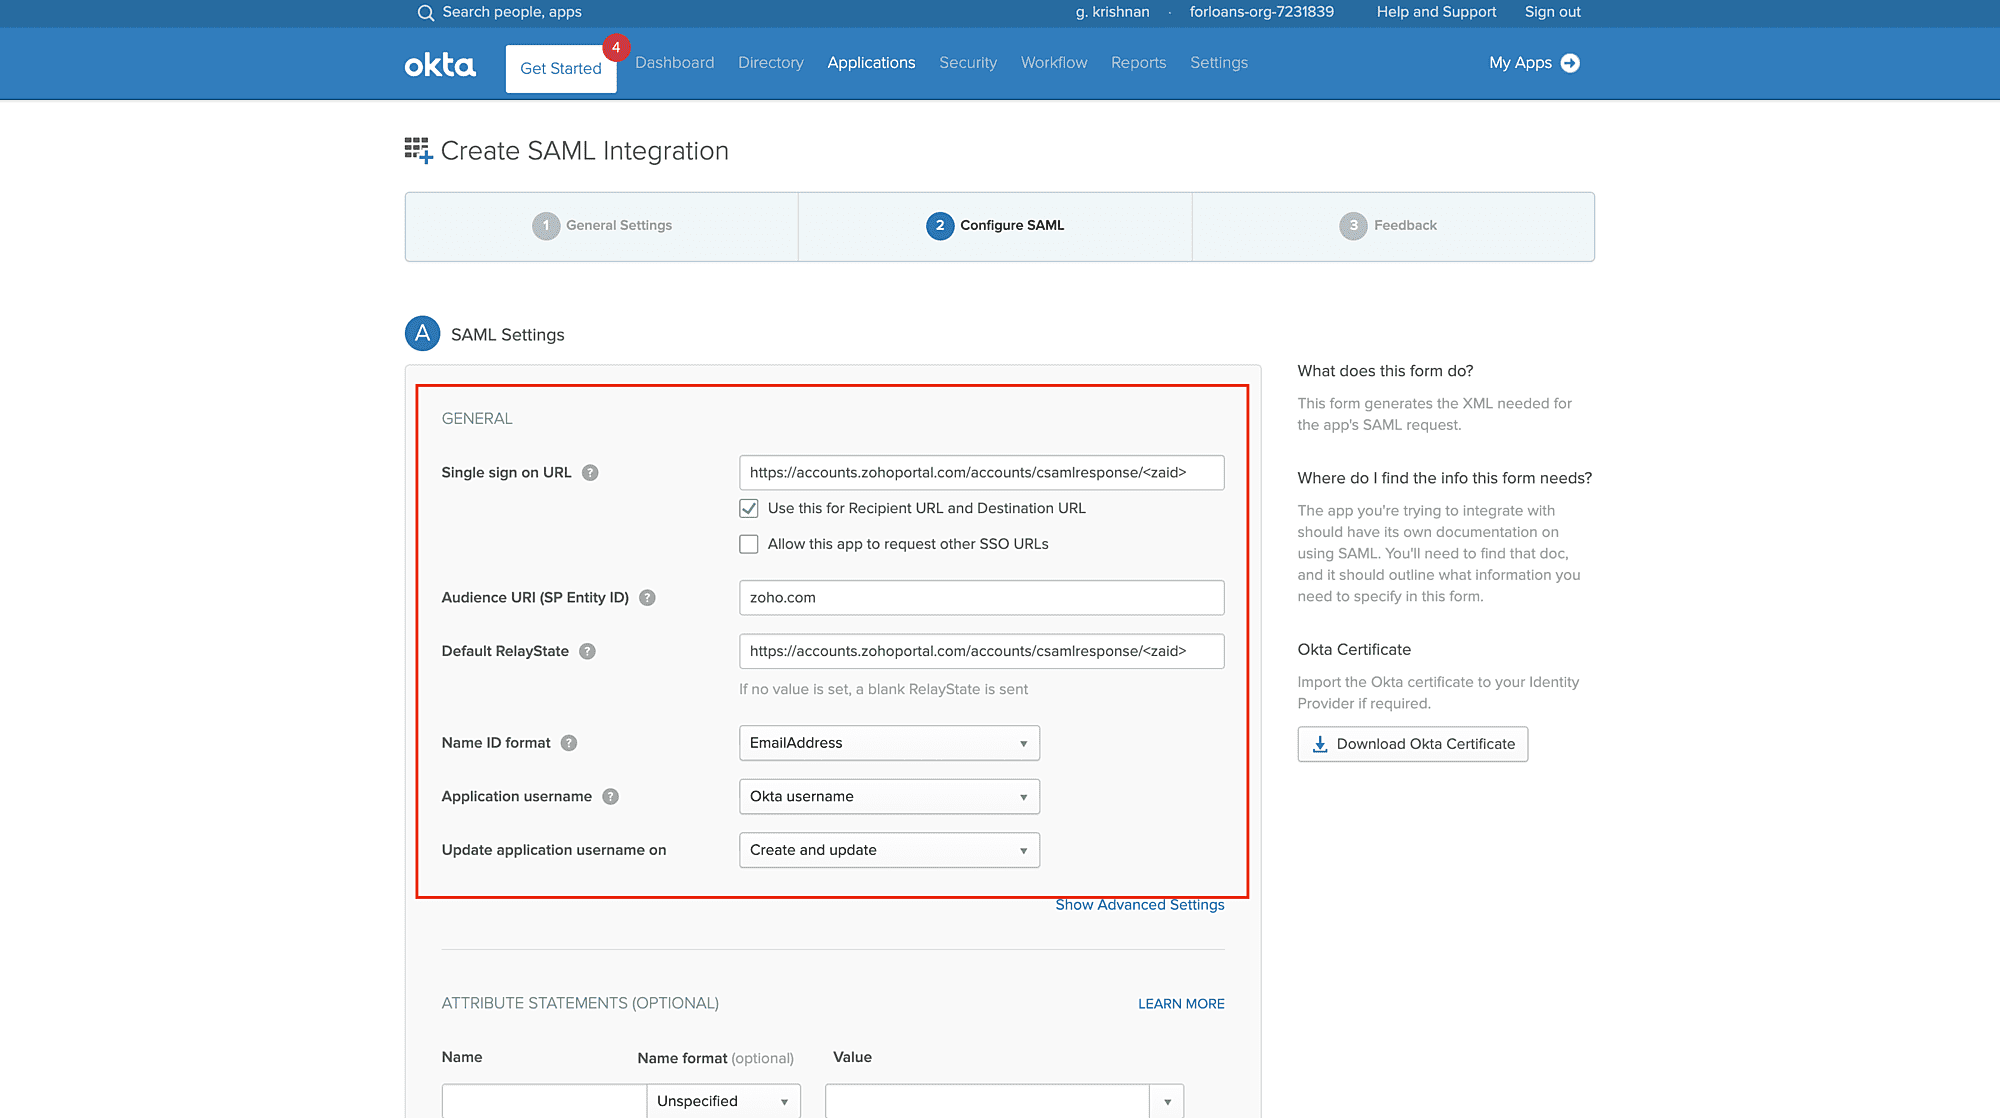
- Click Next and Finish.


The Sign On section of your newly created application appears.
- Click View Setup Instructions on the Sign On tab. It opens a new window to the IdP settings.
- On the IdP Settings window, do the following:
- Copy the Identity Provider Single Sign-On URL and paste it into the Remote Login URL field in Zoho Assist SAML page.
- Copy the Identity Provider Issuer and paste it into the Remote Logout URL field in Zoho Assist SAML page.
- Copy the Identity Provider Single Sign-On URL and paste it into the Reset Password URL field in Zoho Assist SAML page.
- Copy the X.509 Certificate and save it to a .txt file. Then upload the file into the Public Key field in Zoho Assist SAML page.
- Click Save.
Now you must select the users to whom you wish to give access to the SAML-enabled Self-Service portal. To do this:
- Click the Applications tab and select your newly created application on Okta.
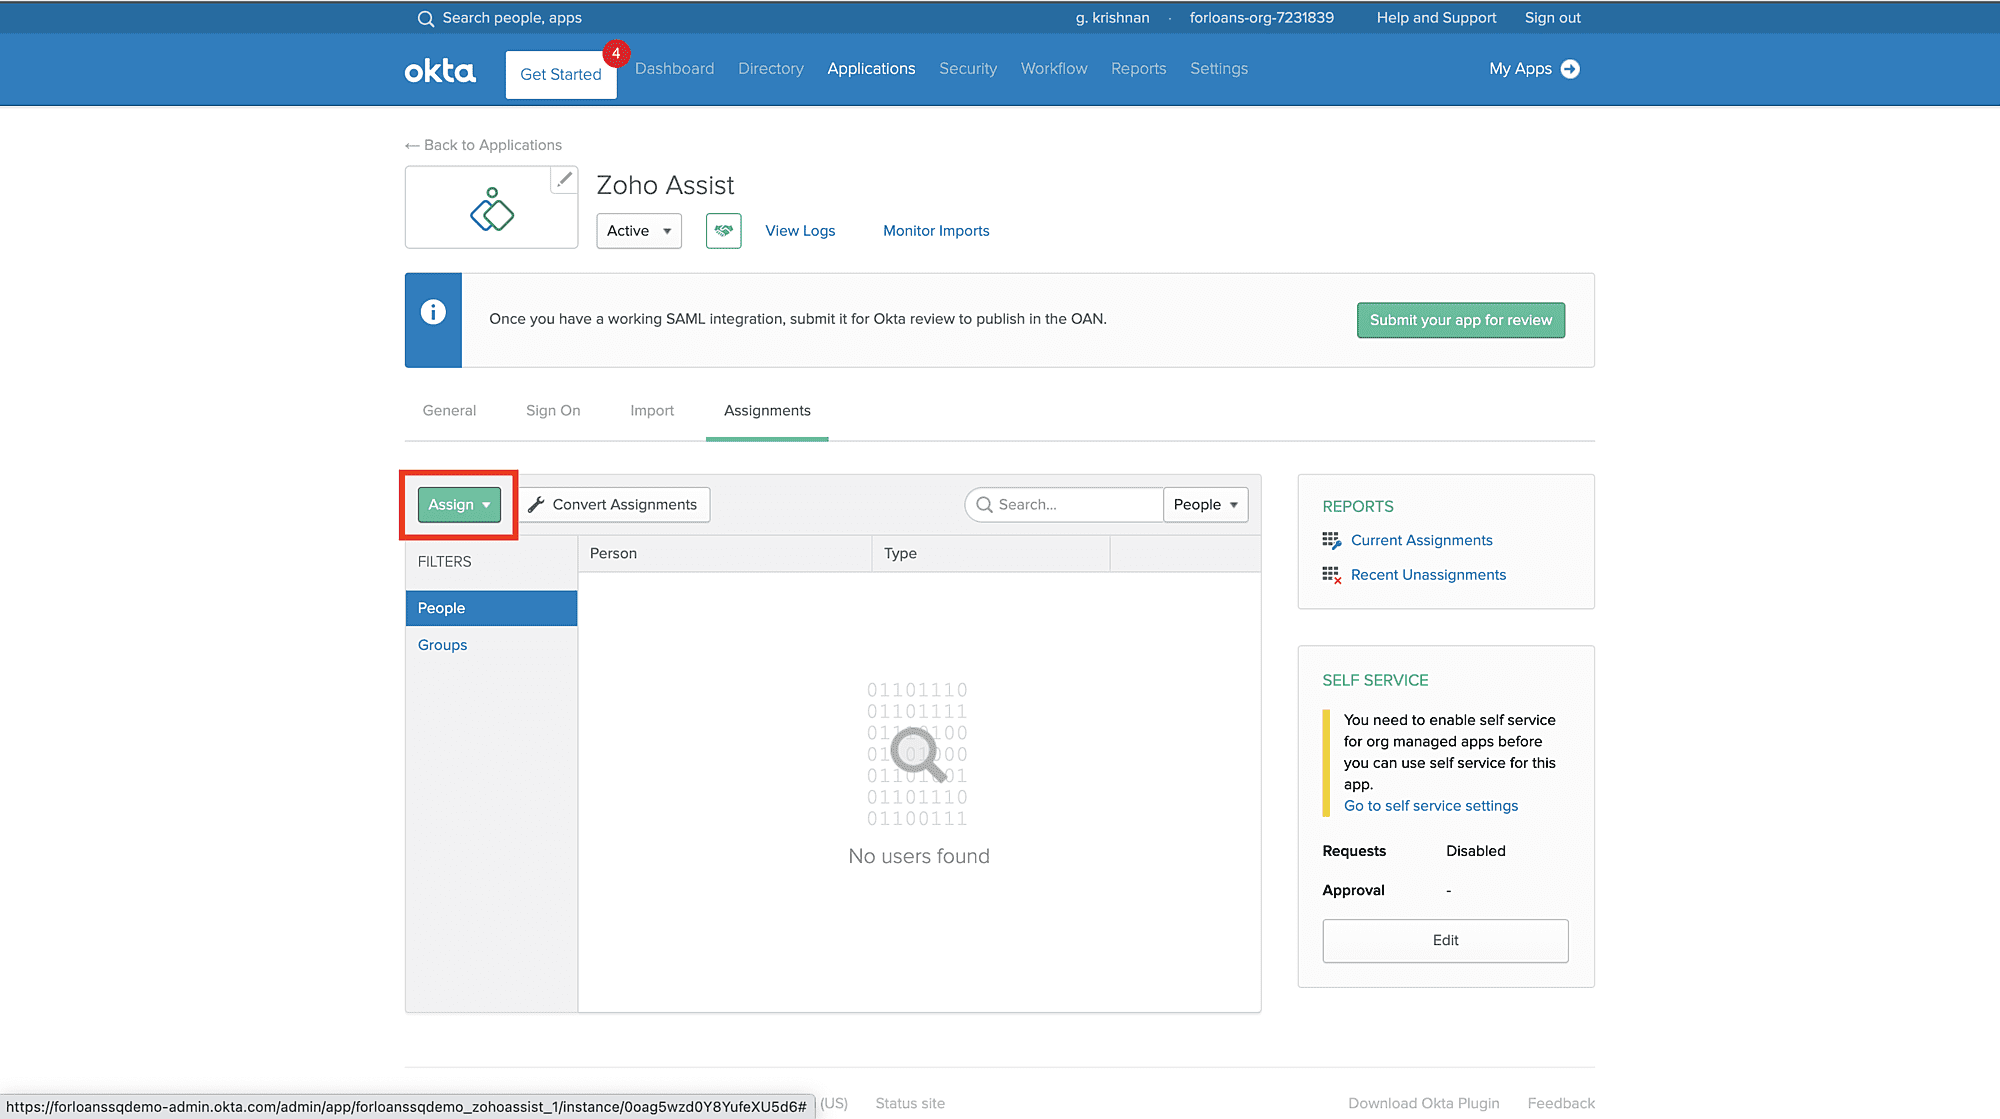
Click on the Assignments section of the application.
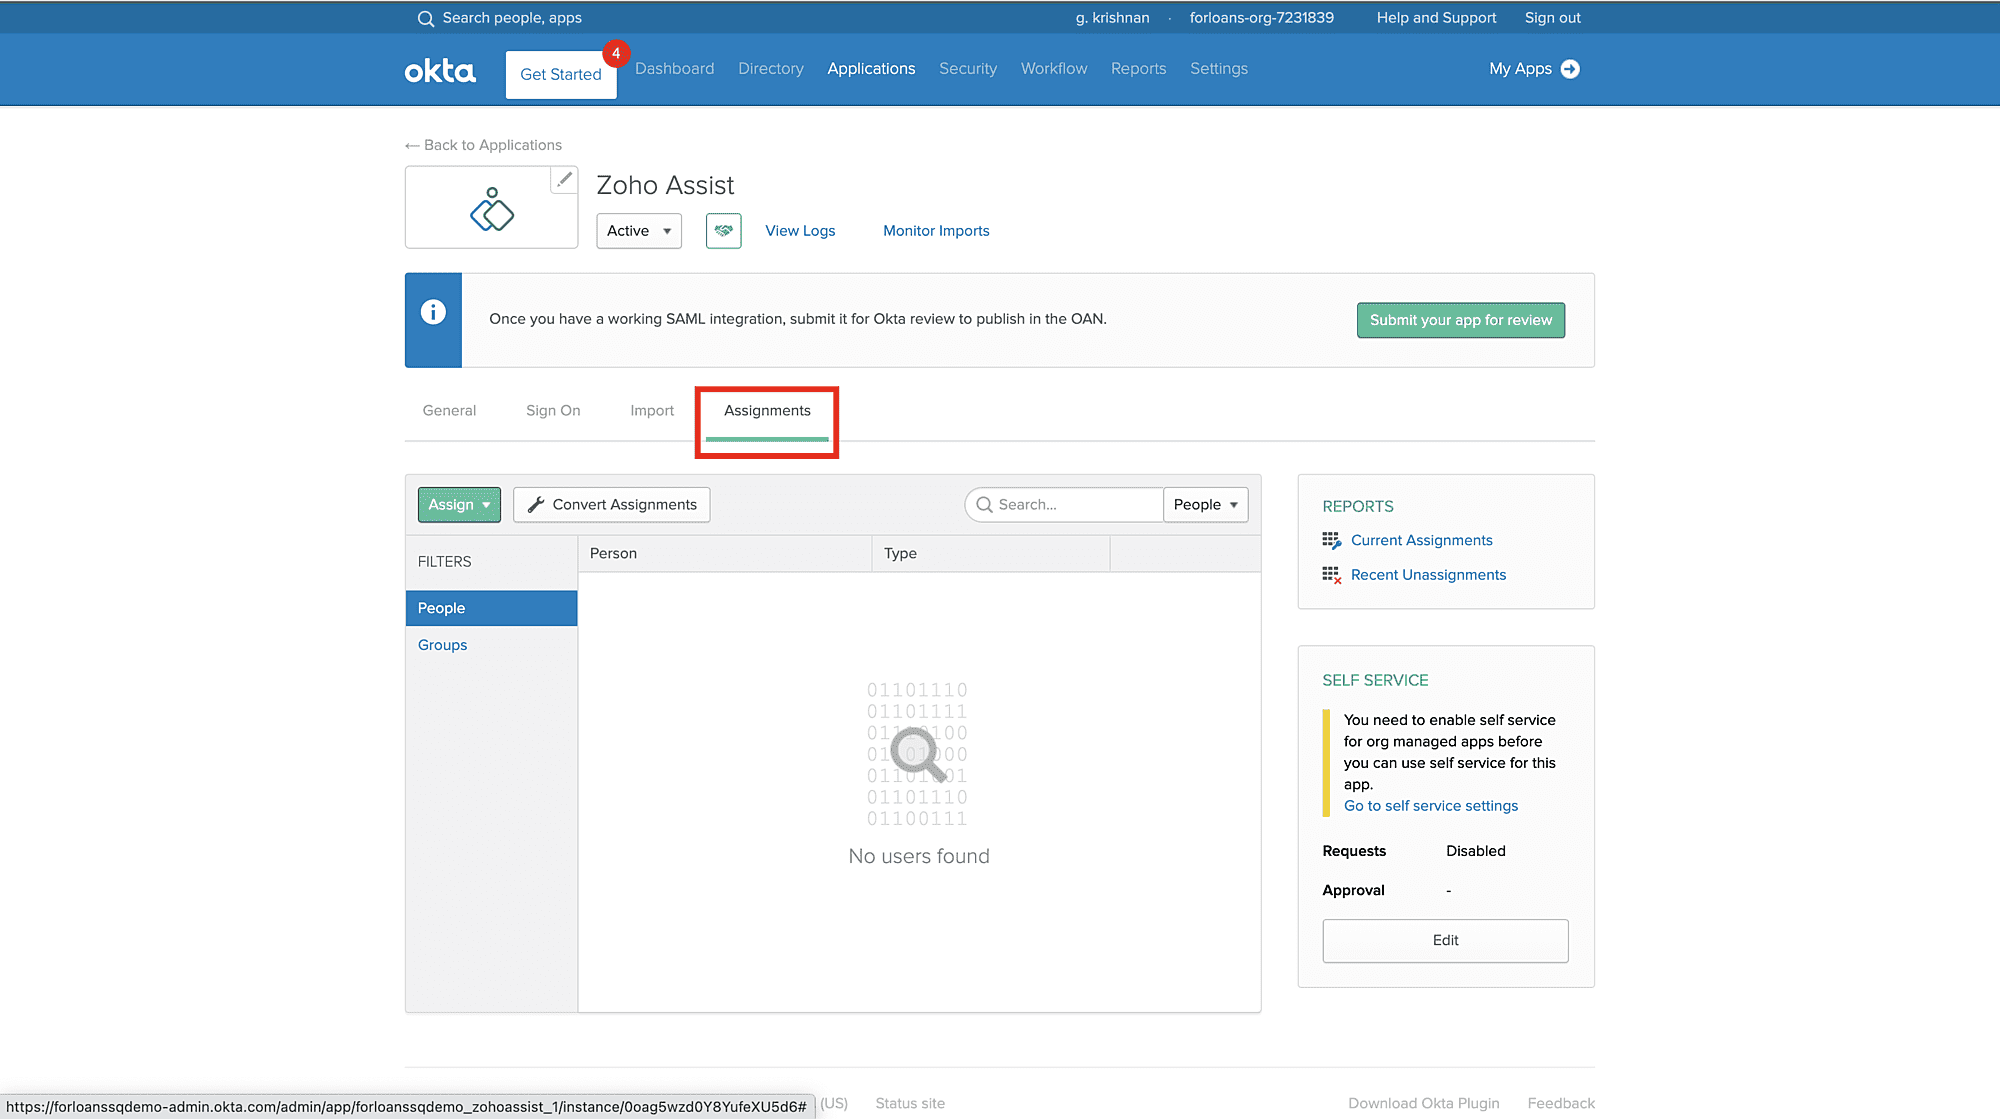
Click Assign and then select Assign to People.
In the pop-up window, type your username into the search box and then click Assign next to your username.
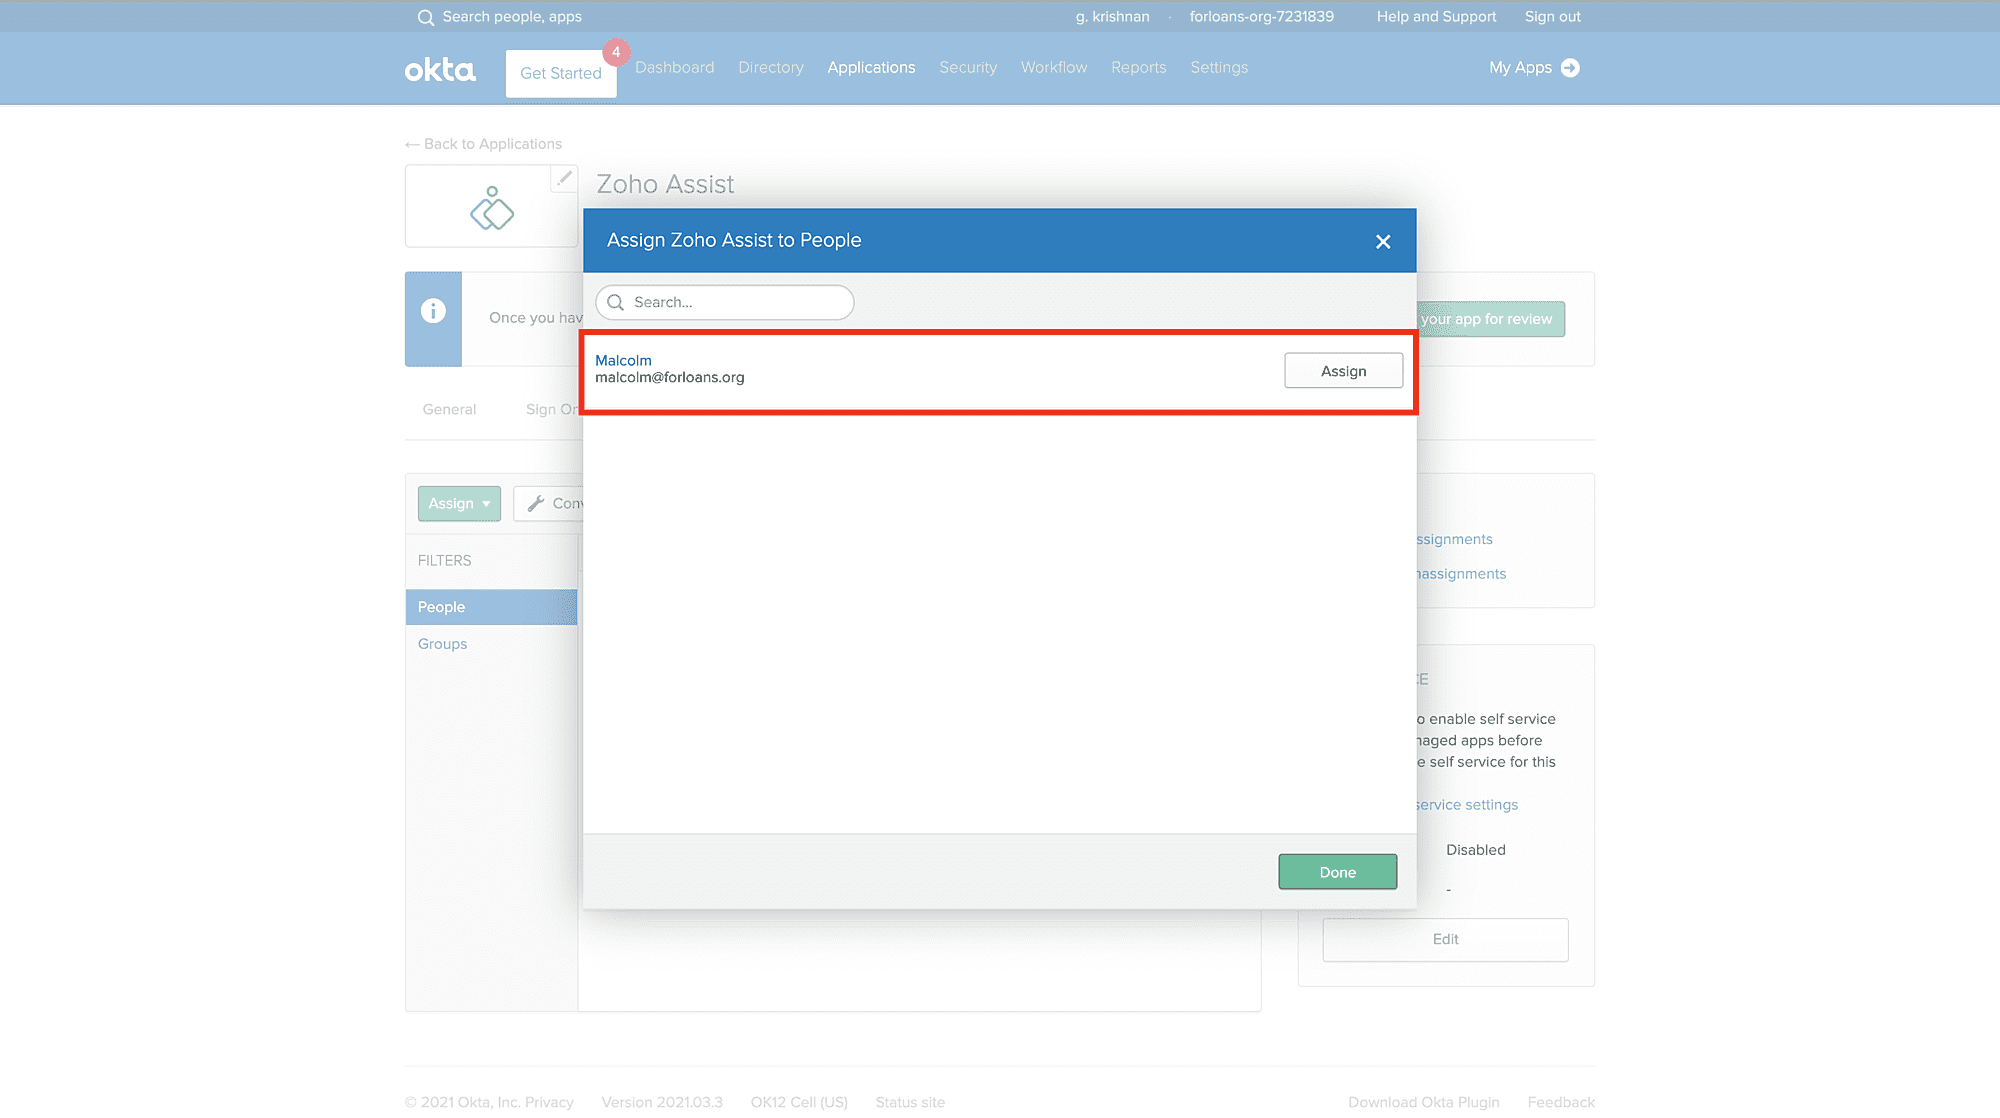


- Repeat this step to add more users.
- Click Done to exit the assignment wizard.
- Back in Zoho Assist, check the Self-Service Portal option on the Settings page under Remote Support.
How to transfer a service request raised using Self-Service Portal ?
The service requests raised using the self service portal are called as inbound requests . The inbound requests can also be transferred from one department to another easily, with the inbound request transfer feature as long as the technician has access to the feature.
Go to the Remote Support > Service Queue to access the inbound requests raised.

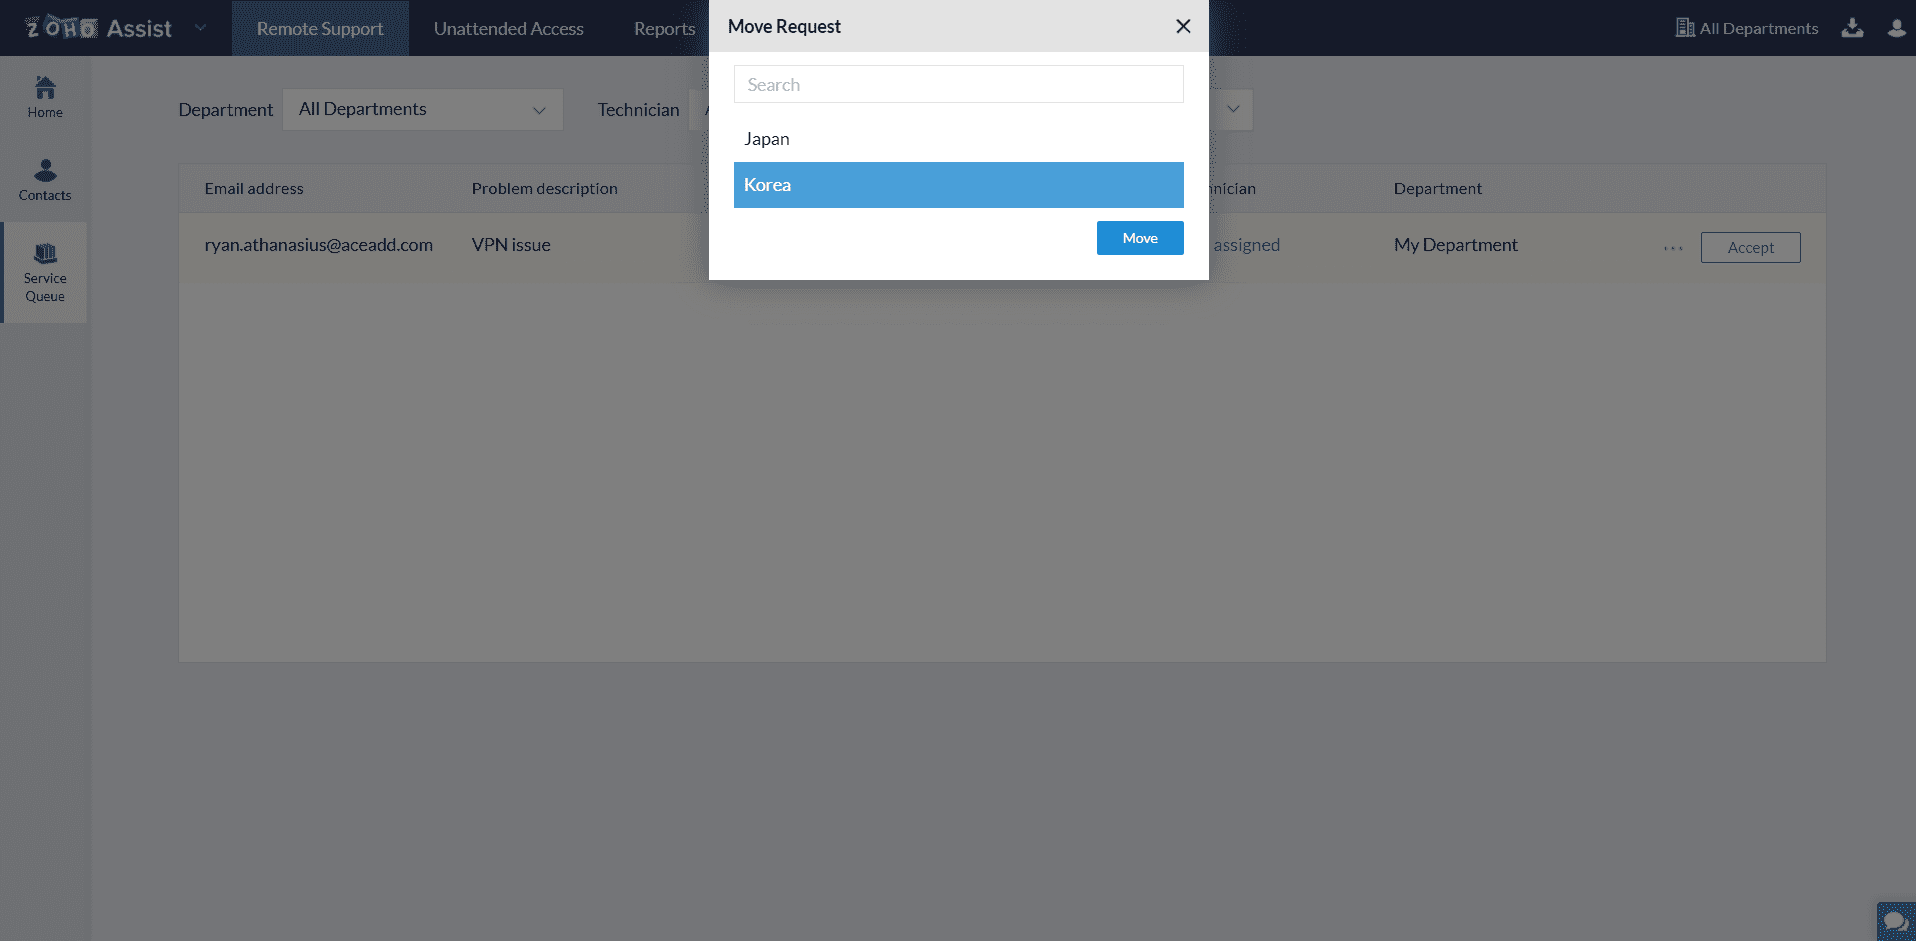
Move the cursor to the inbound request raised and select Move.
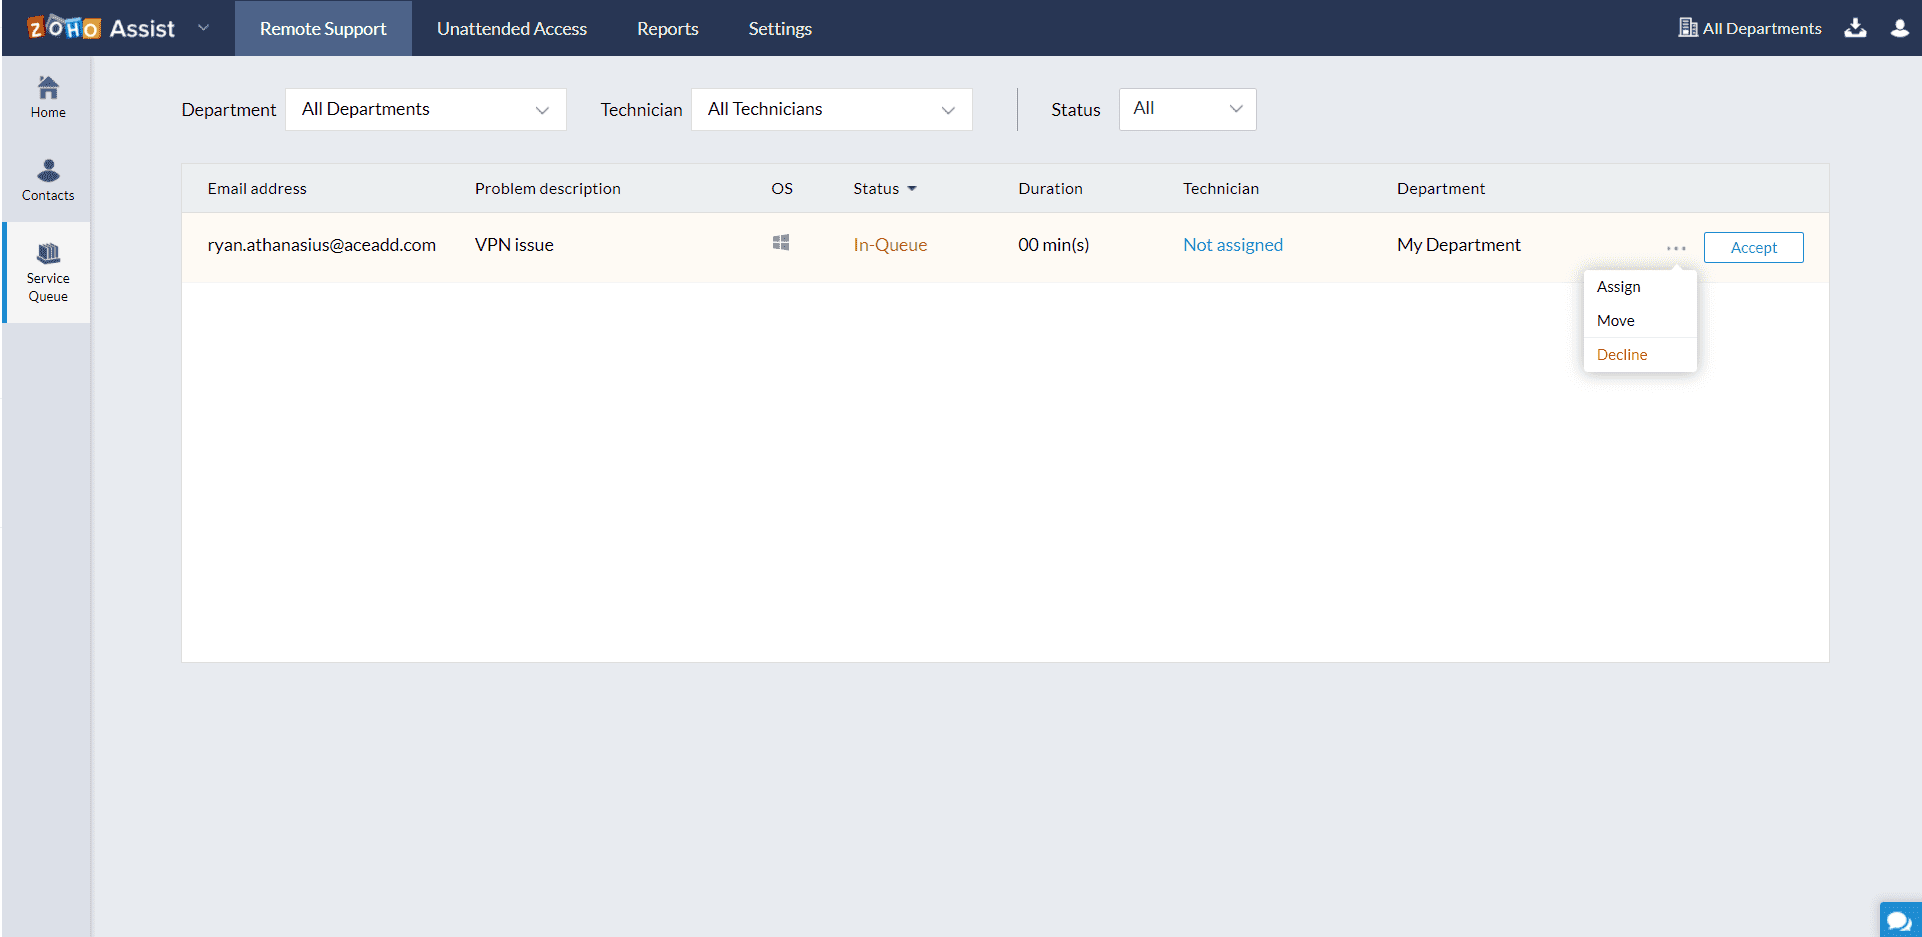
Select the department you want to move the raised inbound request and click Move.


Azure AD
- Sign in to your Azure AD portal with an administrator account.
- In the Azure portal, on the left navigation pane, click Azure Active Directory.
- Select Enterprise Applications and then All Applications.
- Click the New Application button.
- Click on Create your own application.
- Enter the app name and choose Integrate any other app you don't find in the gallery and click on create
- Upon successful creation of the app, Getting started page will be shown.Click on Assign Users and Groups to provide specific users access to this application.
- Click on Set up single sign on and then choose SAML for Mode.
- On the Set up Single Sign-On with SAML page, click Edit icon to open Basic SAML Configuration dialog.
- On the Basic SAML Configuration section, do the following:
- In the Identifier text box, enter zoho.com Note: If you are on the .eu domain enter zoho.eu. Likewise, enter zoho.in if you are on the .in domain.
- In the Reply URL text box, paste the value for SAML Response URL that you copied from the SAML tab in Zoho Assist.
- Check the radio boxes for the entered values.
- Click Save at the top of the page.
- On the Set up Single Sign-On with SAML page, click the Edit button to open User Attributes & Claims dialog.
- In the User Attributes section on the User Attributes & Claims dialog, do the following:
- Click Edit icon to open the Manage user claims dialog.
- Click on Unique User Identifier under Required Claim
- From the Source attribute list, select the attribute value user.mail.
- Click Save.
- Go to SAML Signing Certificate menu and do the following:
- In the Signing Option drop-down list, choose Sign SAML response.
This enables Azure AD to sign the SAML response with the X.509 certificate of the application.
- Click Save to apply the new SAML signing certificate settings.
- Download the certificate by clicking Certificate (PEM).
- Go to the next dialog in the Microsoft menu and do the following:
- Copy the Login URL and paste it into the Remote Login URL and the Reset Password URL field in Zoho Assist SAML tab.
- Copy the Logout URL and paste it into the Remote Logout URL field in Zoho Assist SAML tab.
- Upload the certificate you saved in Step 12 into the Public Key field in Zoho Assist SAML tab.
- Enter the algorithm used to generate the Public Key in Algorithm field in Zoho Assist SAML tab.
- Click Save
OneLogin:
- Log in to your OneLogin account.
- Go to Applications >> Add App in the OneLogin administrator dashboard.
- Search for 'SAML Test Connector' and select the first result from the search results. It should be SAML Test Connector (IdP).
- When the Configuration tab appears, provide a name for the application. For example, Zoho Assist.
- Click Save. Now, additional tabs appear, and you land on the Info tab.
- Click the Configuration tab and enter the following details:
- RelayState - Paste the value of SAML Response URL that you copied from the SAML screen in Zoho Assist.
- Recipient - Paste the value of SAML Response URL that you copied from the SAML screen in Zoho Assist.
- ACS (Consumer) URL Validator - Paste the value of SAML Response URL here as well.
- ACS (Consumer) URL - Paste the value of SAML Response URL here as well.
- Enter zoho.com/zoho.eu/etc(based on user DC) as Audience
- Once done, click the SSO tab and do the following:
- Copy the SAML 2.0 Endpoint (HTTP) URL and paste it into the Remote Login URL field in Zoho Assist SAML page.
- Copy the SAML 2.0 Endpoint (HTTP) URL and paste it into the Reset Password URL field in Zoho Assist SAML page.
- Copy the SLO Endpoint (HTTP) URL and paste it into the Remote Logout URL field in Zoho Assist SAML page.
- Copy the certificate from onelogin and paste it in the Certificate field in Zoho Assist SAML page.
- Enter the algorithm used to generate the Public Key in Algorithm field in Zoho Assist SAML page.
- Click Save
- Now you must select the users to whom you wish to give access to the SAML-enabled Help Center. To do this: Click the Users tab and then click All Users to add the app to individual user accounts.
- Click Save.
Keycloak IDP
This section describes how to configure Keycloak to provide SSO for your Zoho Assist Help Center.
- Log in to Keycloak and open the administration console.
- Click Clients from the left panel, and then click Create to start creating a new client application.
- On the Add Client page, enter the following details:
- Client ID: Enter as zoho.com or zoho.eu based on User DC
- Client Protocol: Select SAML from the drop-down menu
- Client SAML Endpoint: Paste the value for Help Center SAML Response URL that you copied from the SAML page in Zoho Assist.
- Click Save. This will create the client and bring you to the client Settings tab.
- On the Client Settings page, do the following:
- Select email in the Name ID Format drop-down box.
- Toggle Client Signature Required off.
- Toggle Front Channel Logout off.
- Click the + sign to enter https://accounts.zohoportal.com/* and https://assist.zoho.com/* as Valid Redirect URIs.(based on User DC)
- Click Save.
- The next step is to enter details on the Zoho Assist Help Center SAML page. Go to the URL: http://{your-keycloak-server:8080}/auth/realms/{your-realm}/protocol/saml/descriptor E.g. http://localhost:8080/auth/realms/master/protocol/saml/descriptor
- To get the public key:
- Copy the value of “dsig:X509Certificate” node in the XML configuration file.
- Paste the value to a text file. Make sure you place the value between "-----BEGIN CERTIFICATE-----" and "-----END CERTIFICATE-----".
- Save the text file.
- To get the Remote Login URL and Reset Password URL:
- Find the node SingleSignOnService with the attribute Binding="urn:oasis:names:tc:SAML:2.0:bindings:HTTP-POST" in the XML file.
- Copy the value of the location.
- To get the Remote Logout URL:
- Create an URL like http://{your-keycloak-server:8080}/auth/realms/{your-realm}/protocol/openid-connect/logout?redirect_uri={URL_encoded_Help Center URL} E.g. http://localhost:8080/auth/realms/master/protocol/openid-connect/logout?redirect_uri=https%3A%2F%2FAssist.zoho.com%2Fportal%2Fdeccanpl%2F
- Copy the value of the location.
- Back in the Zoho Assist Help Center SAML page, do the following:
- Paste the values for Remote Login URL, Remote Logout URL, and Reset Password URL.
- Upload the saved text file into the Public Key field.
- Click Save.
- Your federated SAML SSO is ready for use.
Google G Suite
This section describes how to configure G Suite to provide SSO for your Zoho Assist Help Center.
- Sign in to your Google G Suite admin console with an administrator account.
- In your Google G Suite admin console, click through to Apps > SAML Apps. You will see a list of any existing SAML apps.
- Click on Add App and select Add custom SAML app and give it a name.
- Under Google IdP Information, copy the SSO URL and paste it into the Remote Login URL and the Reset Password URL fields in Zoho Assist SAML page. Your members redirect here when they sign in with an email address with your Google domain.
- Enter the Remote Logout URL as https://accounts.google.com/logout in Zoho Assist SAML page.
- Under Certificate, select Download. Then upload the file into the Public Key field in Zoho Assist SAML page.
- Click Next.
- Under Service Provider Details, do the following:
- Paste the value for SAML Response URL from SAML screen in Zoho Assist in the ACS URL field.
- In the Entity ID field, enter the entity ID as zoho.com, and click Next. Note(1): If you are on the .eu domain enter zoho.eu. Likewise, enter zoho.in if you are on the .in domain.
- Select EMAIL as Name ID Format.
- Click Continue.
- Back in Zoho Assist, check the Enable Self Service portal option on the SAML page to allow new users to log in for the first time.
Auth0
This section describes how to configure Auth0 to provide SSO for your Zoho Assist Help Center.
- Log in to your Auth0 account.
- Go to Dashboard >> Applications.
- Click the + CREATE APPLICATION button on the right.
- In the Name field, enter a name for the application. For example, Zoho Assist.
- Select Single page application as the type of application.
- Click Save.
- Go back to Dashboard >> Applications.
- Find the application you just created in Step 4, and click it.
- Scroll down and click on the Advanced Settings link.
- In the expanded window, click the Download Certificate button under the Certificates section. The downloaded certificate will be a .pem file.
- Now scroll back up and click on the Addons tab. Then enable the SAML2 WEB APP option. You will see a screen asking you to provide additional configuration information.
- On the Settings section of the screen, enter the following details:
- Application Callback URL - Paste the value for SAML Response URL that you copied from the SAML screen in Zoho Assist.
- Settings - Paste the below SAML configuration into this field.
{
"mappings": {
"email": "http://schemas.xmlsoap.org/ws/2005/05/identity/claims/emailaddress",
"given_name": "User.FirstName",
"family_name": "User.LastName"
},
"createUpnClaim": false,
"passthroughClaimsWithNoMapping": false,
"mapUnknownClaimsAsIs": false,
"mapIdentities": false,
"nameIdentifierFormat": "urn:oasis:names:tc:SAML:1.1:nameid-format:emailAddress",
"nameIdentifierProbes": [
"http://schemas.xmlsoap.org/ws/2005/05/identity/claims/emailaddress"
]
}
- Click Save.
- In the Addon SAML2 Web App popup, click the Usage tab and do the following:
- Copy the Identity Provider Login URL and paste it into the Remote Login URL and the Reset Password URL fields in Zoho Assist SAML page.
- Enter https://your_auth0_domain/v2/logout in the the Remote Logout URL field. Replace YOUR_AUTH0_DOMAIN with your actual Auth0 domain.
- Upload the certificate you saved in Step 10 into the Public Key field in Zoho Assist SAML page.
- When done, click Save in Zoho Assist. Your end users will now be redirected to the Auth0's sign-in page when signing in to the Help Center.
Zoho Vault
This section describes how to configure Zoho Vault to provide SSO for your Zoho Assist Help Center.
- Log in to your Zoho Vault account.
- Navigate to Apps >> Manage Apps.
- Click Add Custom App
- In the Application Settings tab, provide the following details:
- Application Name: Provide a name for the application. For example, Zoho Assist.
- Assertion Consumer Service URL - Paste the value for SAML Response URL that you copied from the SAML page in Zoho Assist.
- Audience URI (SP Entity ID) - zoho.com or zoho.eu based on user DC.
- Click Next.
- You now need to provide the details of Zoho Vault (IdP) to Zoho Assist (SP).
- In the IdP Details tab, do the following:
- Copy the Identity Provider Single Sign-On URL and paste it into the Remote Login URL field in Zoho Assist SAML page.
- Copy the Identity Provider Single Logout URL and paste it into the Remote Logout URL field in Zoho Assist SAML page.
- Copy the Identity Provider Issuer and paste it into the Reset Password URL field in Zoho Assist SAML page.
- Copy the Identity Provider Certificate and save it to a .txt file. Then upload the file into the Public Key field in Zoho Assist SAML page.
- Click Next.
- In the Manage App Access tab, select the list of users to whom you wish to give access to the SAML-enabled Help Center.
- Click Save.