Email Templates
Create new templates to suit your organization prospects or use the default templates for remote support, unattended access and screen sharing sessions. Save the template and edit it further if needed. Now you can simply go ahead and add your flavor to invite your customers with style.
You get the following customization options:
- Use dynamic custom fields and position them in your invitations as you wish.
- Customize the email content using formatting tools.
- Preview, clone or edit the mail template whenever needed.
Steps
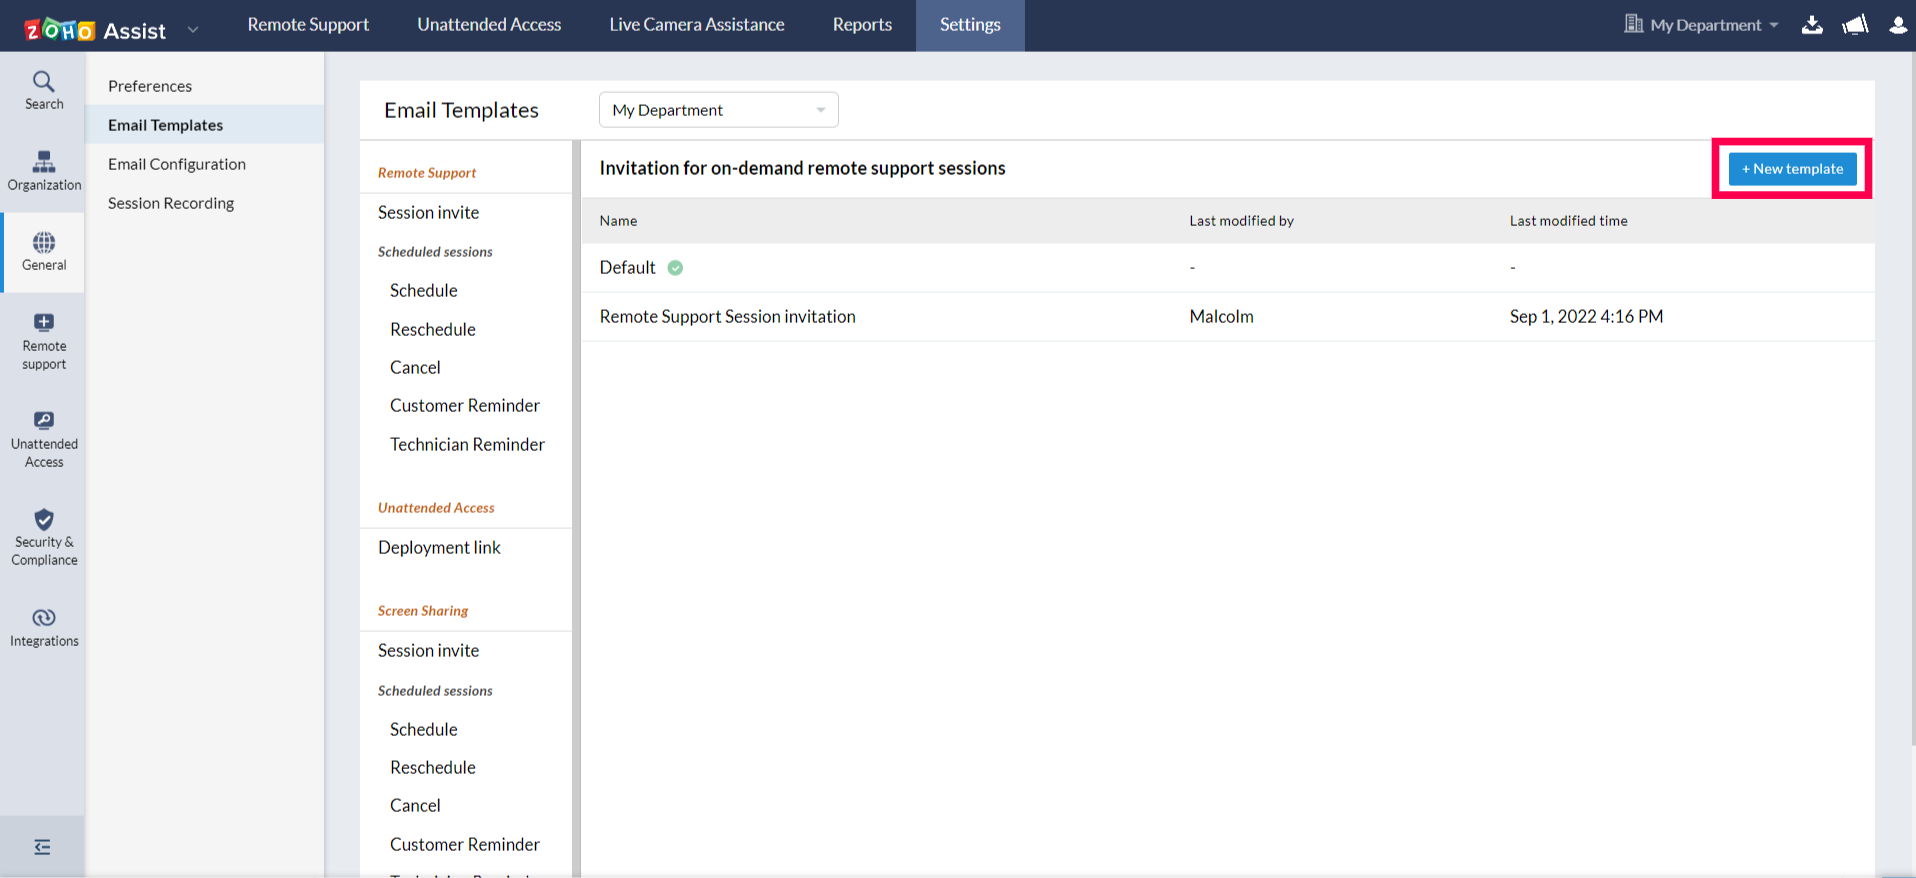
- In Settings, go to General and choose Email Templates.
- Select the type of session for which you want the email to be created.
Click on New template given on the top right corner of the page to start creating a new template.
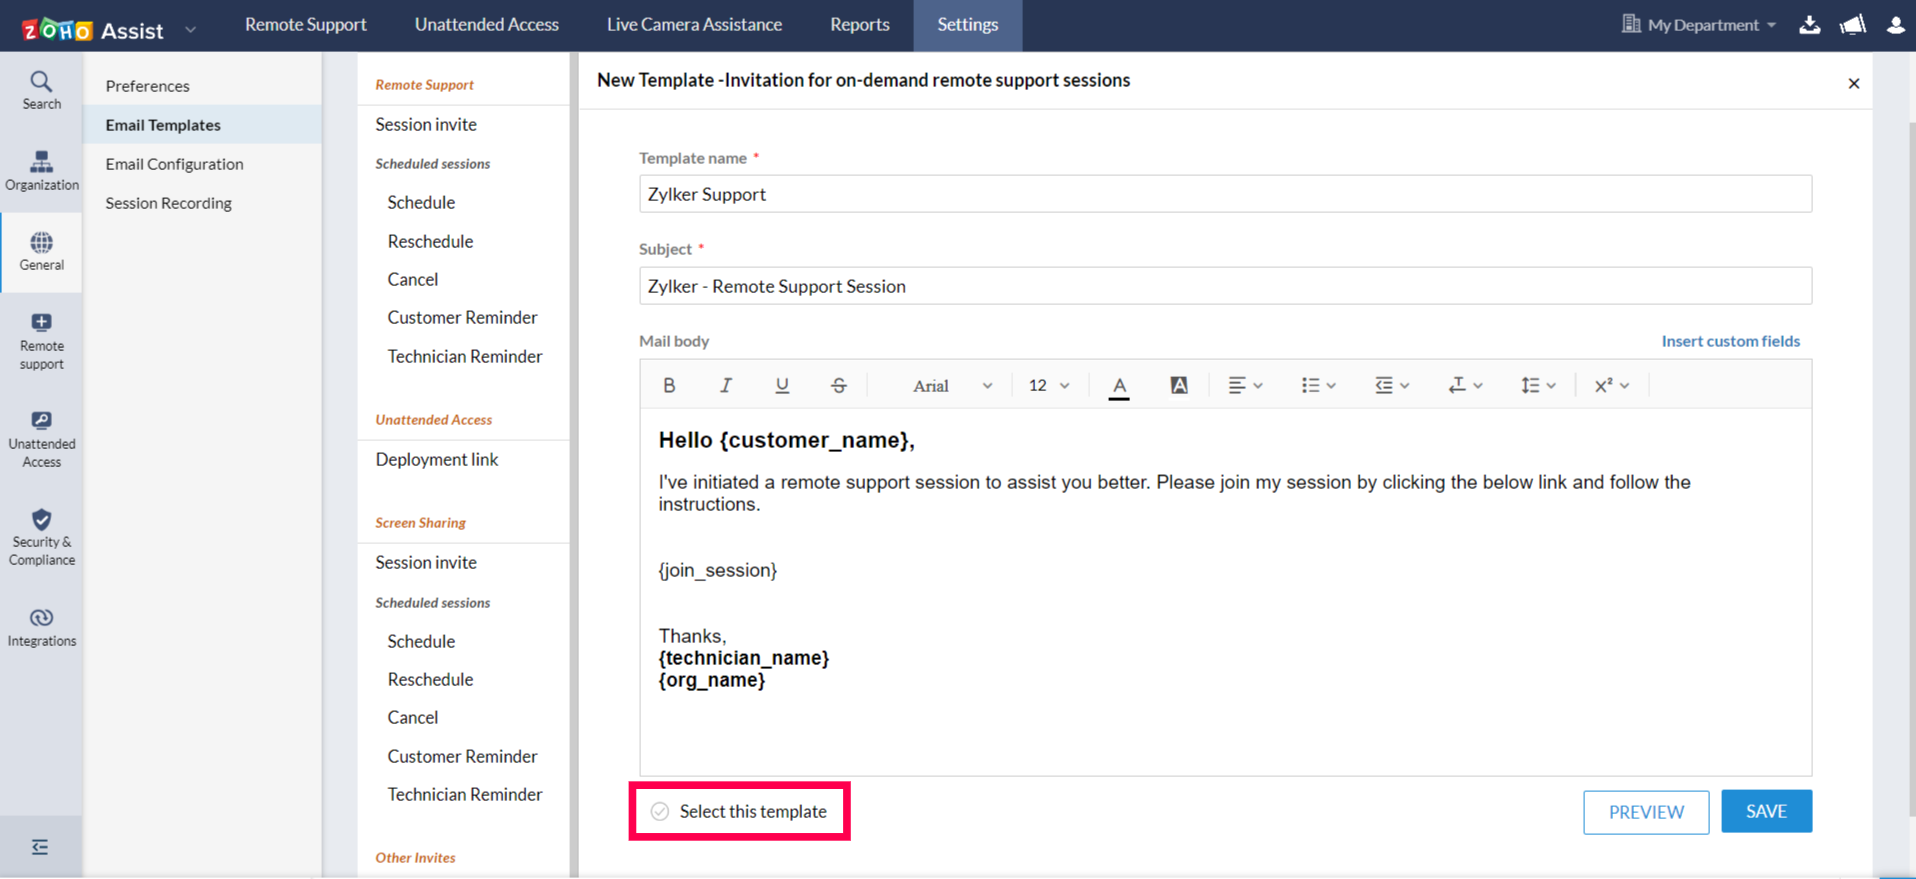
- Enter the template name, subject and the message body for the email.
- Basic editing icons are present on the top of the page.
- Choose Insert custom fields given beside Subject to add the technician's name, customer's name, and organization's name to your email subject.
- Choose Insert custom fields given beside Mail body to add the technician's name, customer's name, organization's name and the joining link to your email.
- Preview the email created and click Save for future use of the customized email template.
Click on Select this template for the template to be used the next time a mail is sent.