Folder Transfer in Zoho Assist
The Folder Transfer feature in Zoho Assist allows the technician to transfer the folder or multiple files in the specified folder from both the Windows and Linux OS remote devices during a remote session.
Folder Transfer in Windows OS
The Folder Transfer feature is enabled in both Windows Native Client and Web Client Technician Console. To switch between technician consoles:
- Go to Settings and select Preferences.
- Choose either Windows Native Client or Web Client under Technician Console before initiating a remote session.
In Windows Native Client Technician console
To transfer a folder from or to a remote Windows OS device:
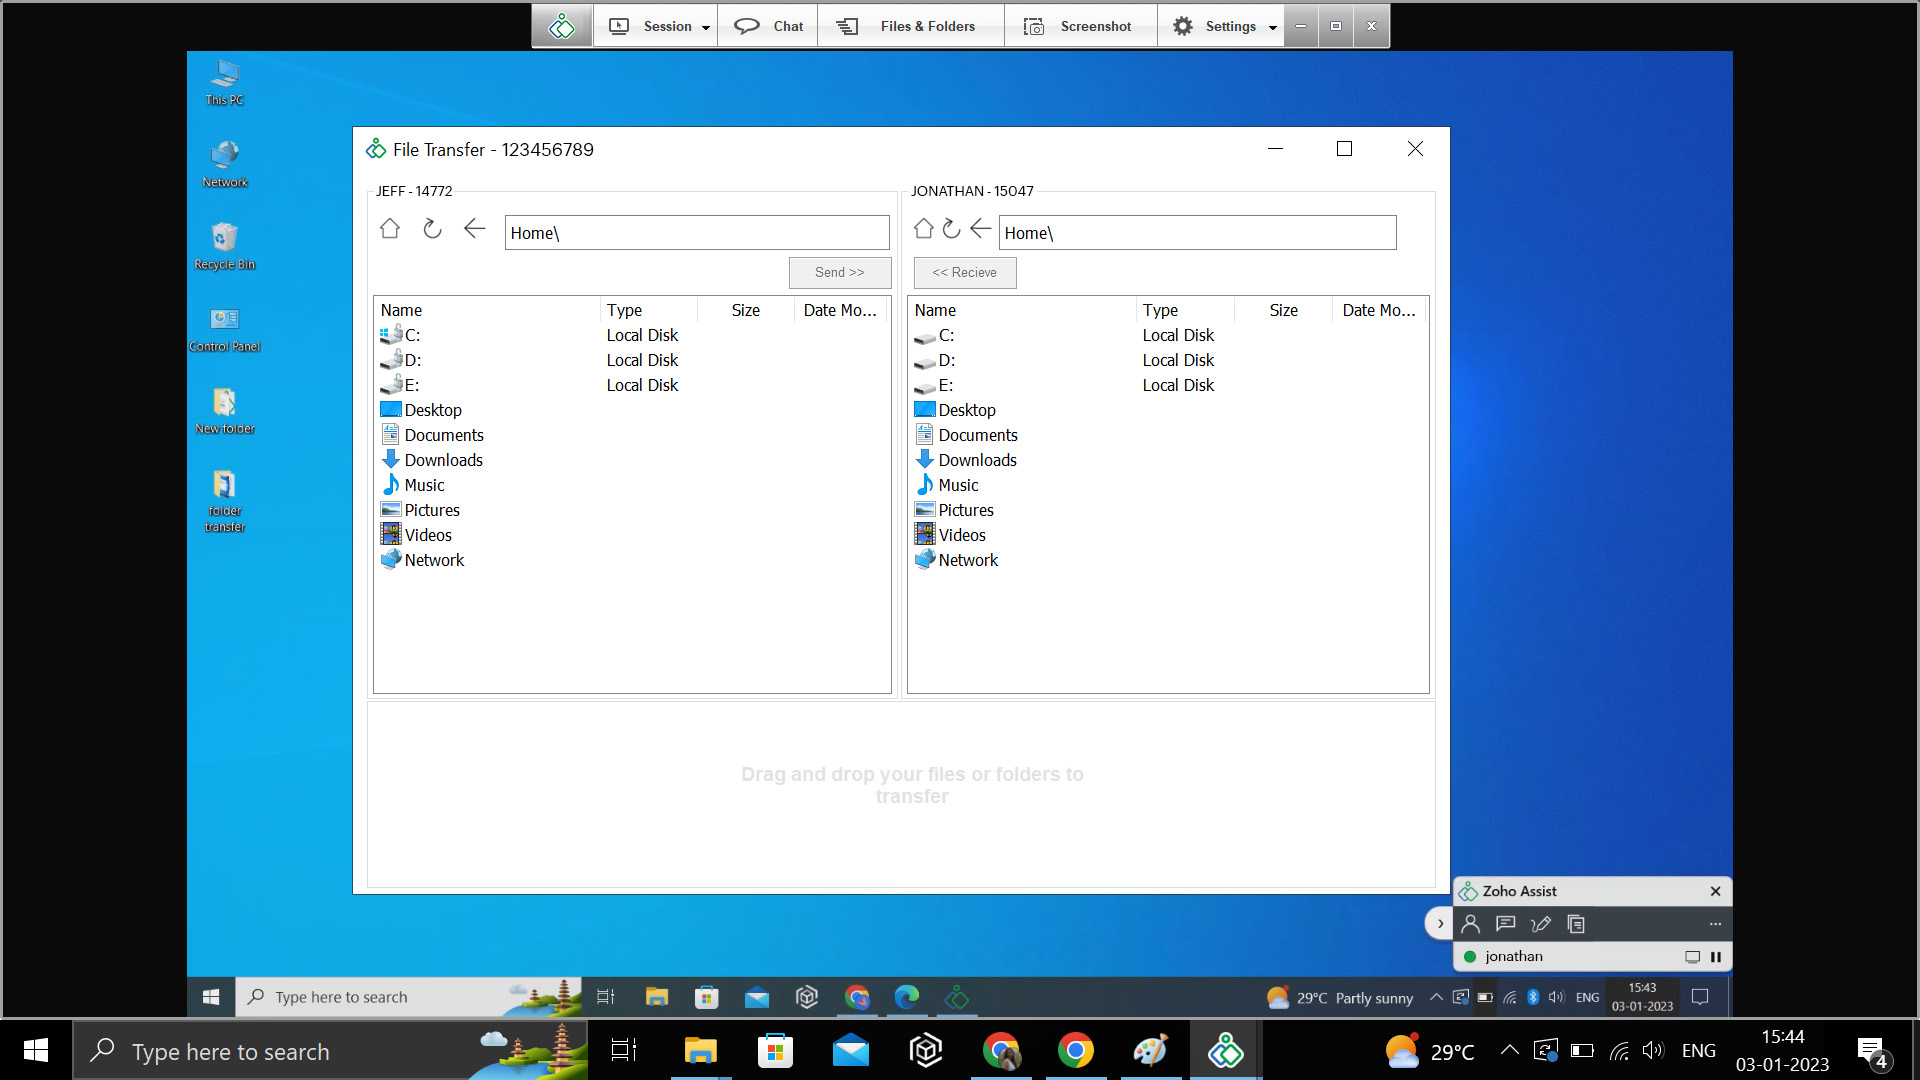
Once the session is connected, the folder can be transferred, by clicking the Files & Folders option from the top panel. A File Transfer window will appear, as shown below.
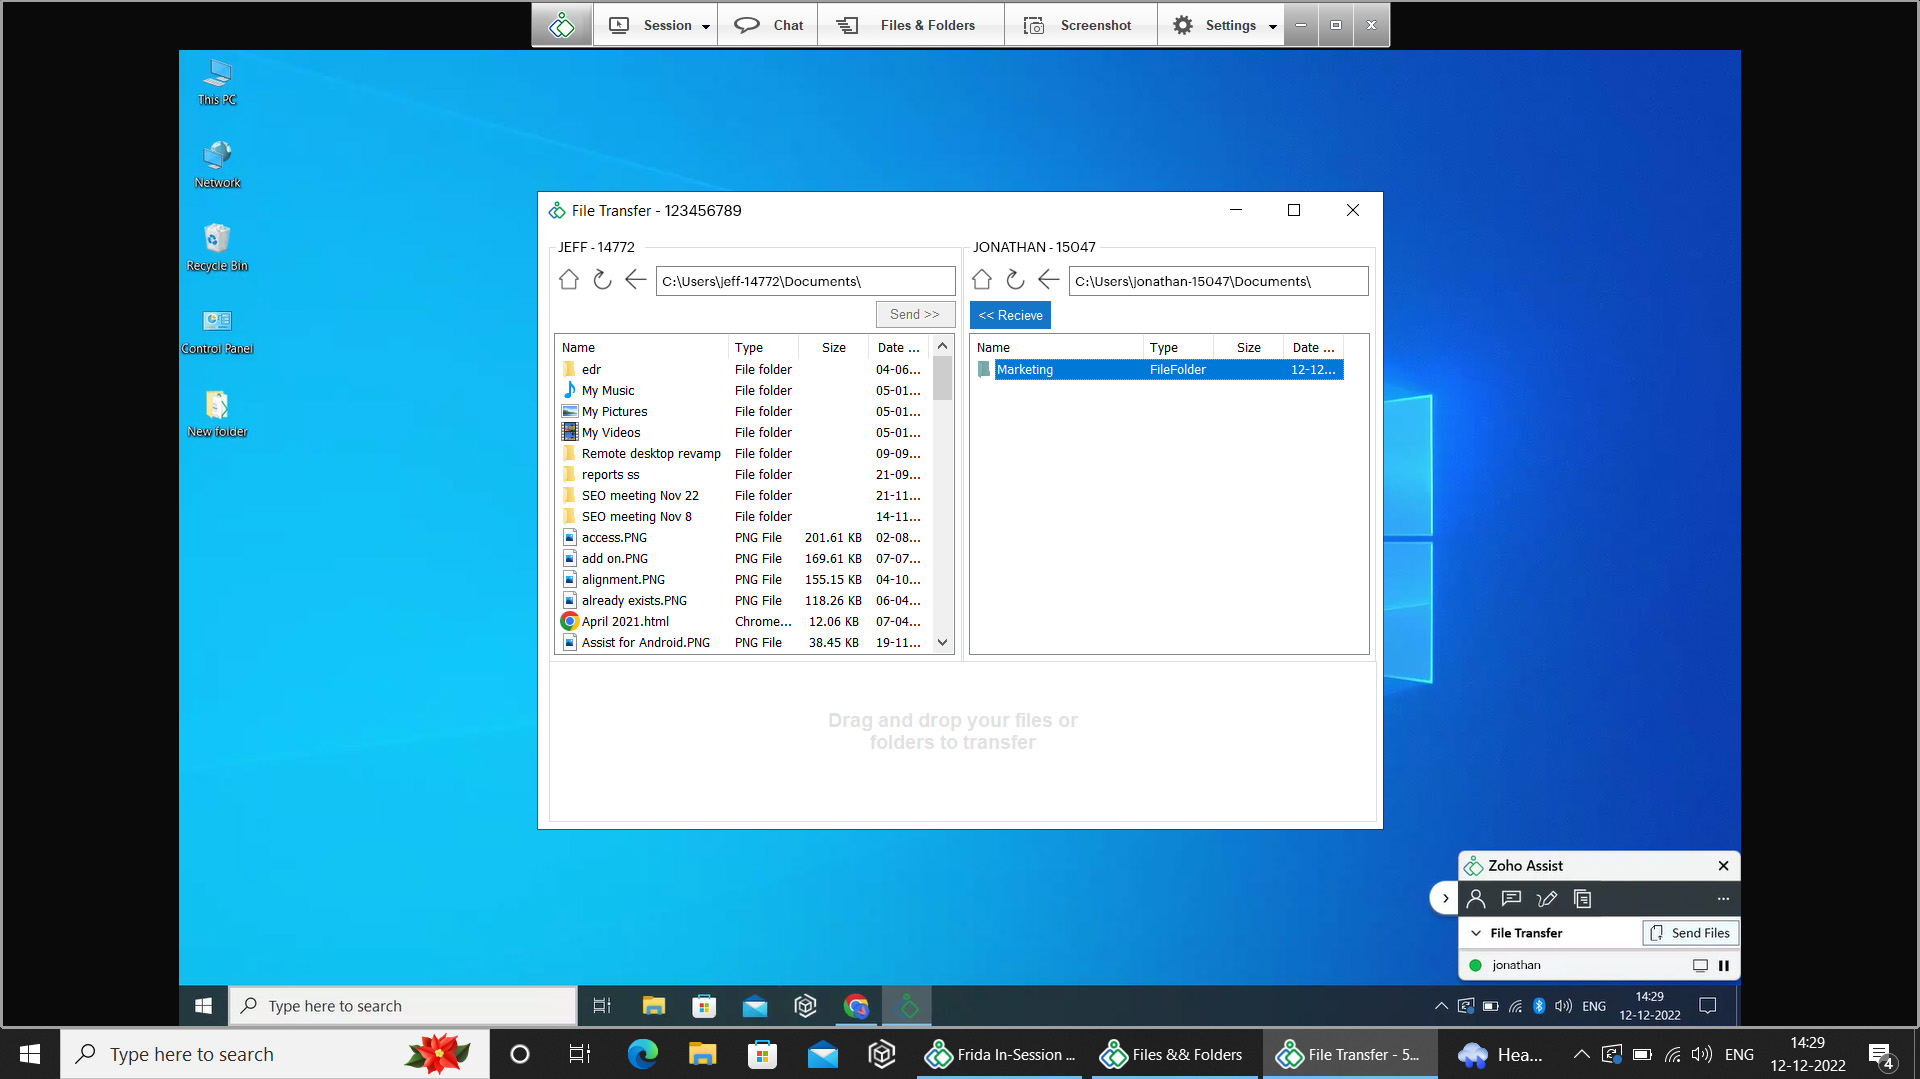
- To transfer a folder from remote device to the technician's device:
- Select the folder from the remote device.
- Choose the destination path for the folder in the technician's device.
Click Receive.
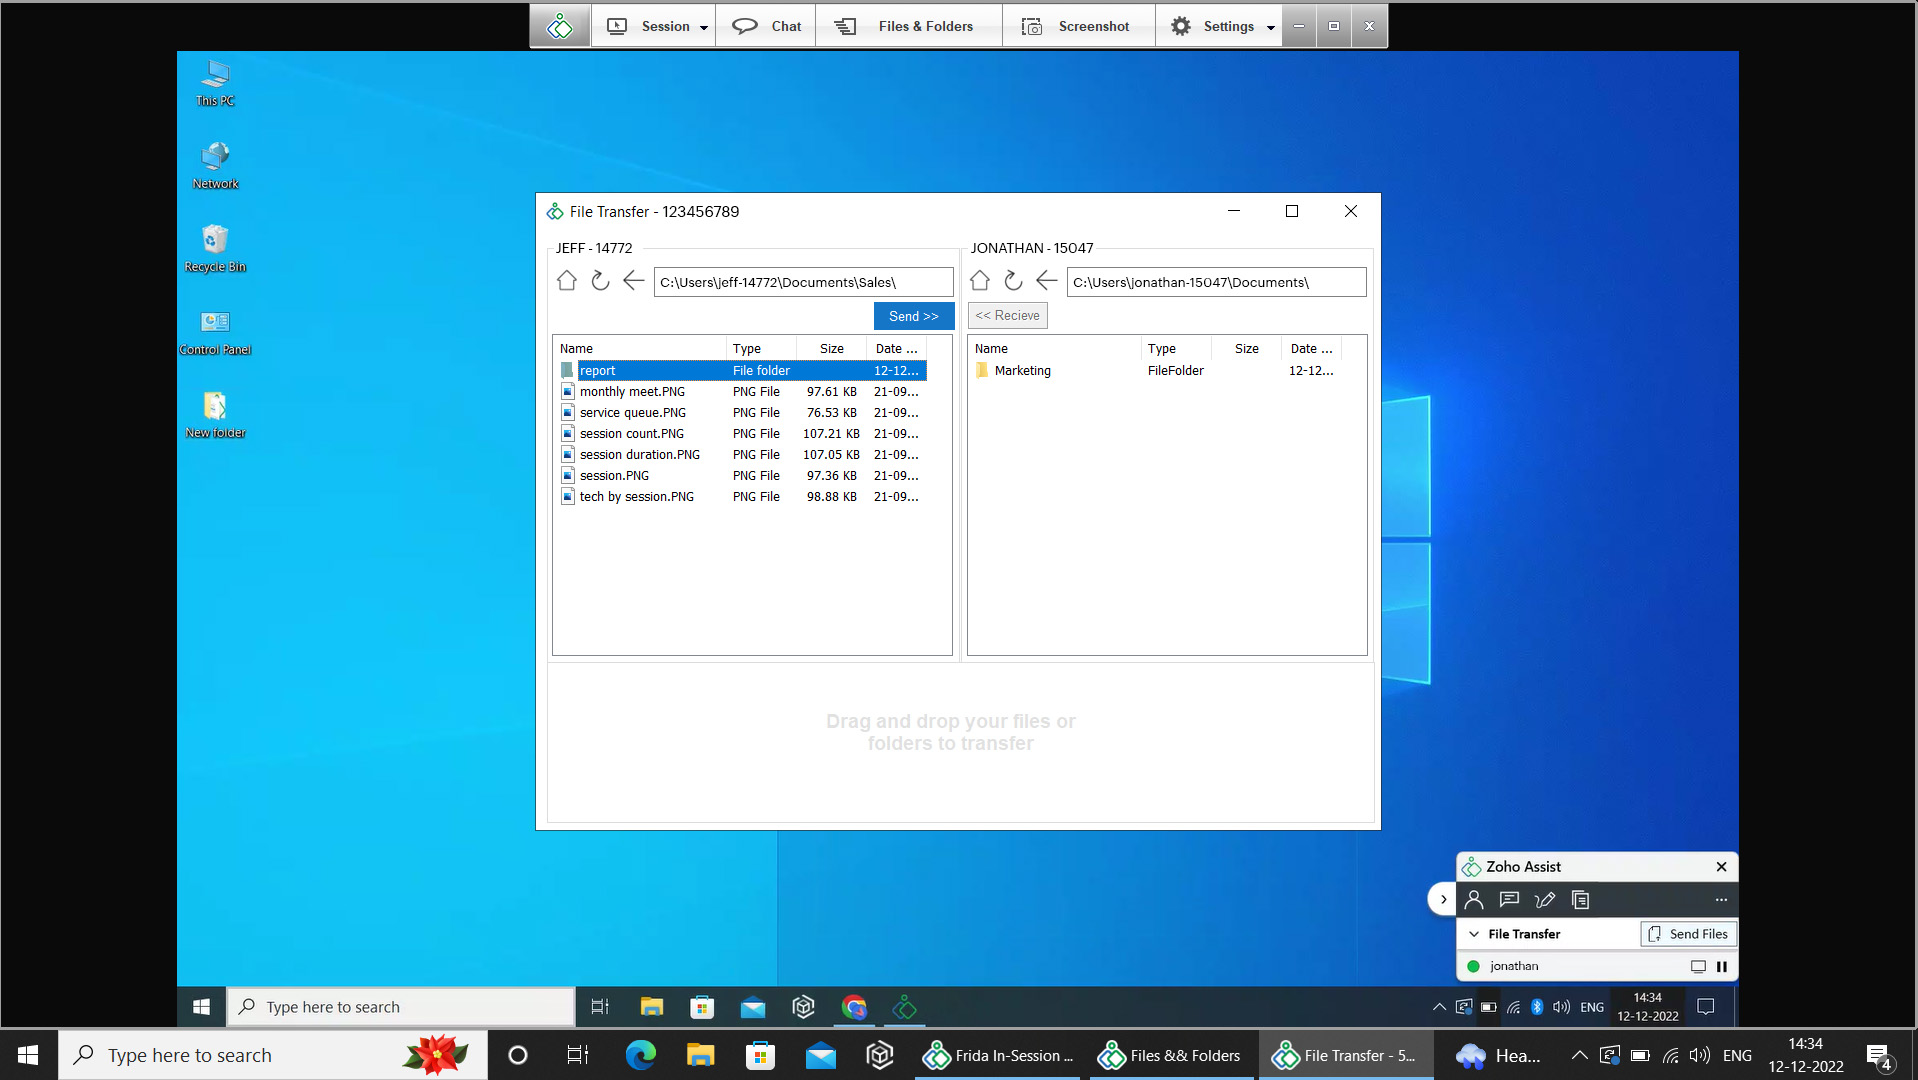
- To transfer a folder from the technician's device to the remote device:
- Select the folder from the technician's device.
- Choose the destination path for the folder in the remote device.
Click Send.


In Web Client Technician console
To transfer a folder from or to a remote Windows OS device:
Once the session is connected, choose Native Client under Files in the left tab to initiate the folder transfer.
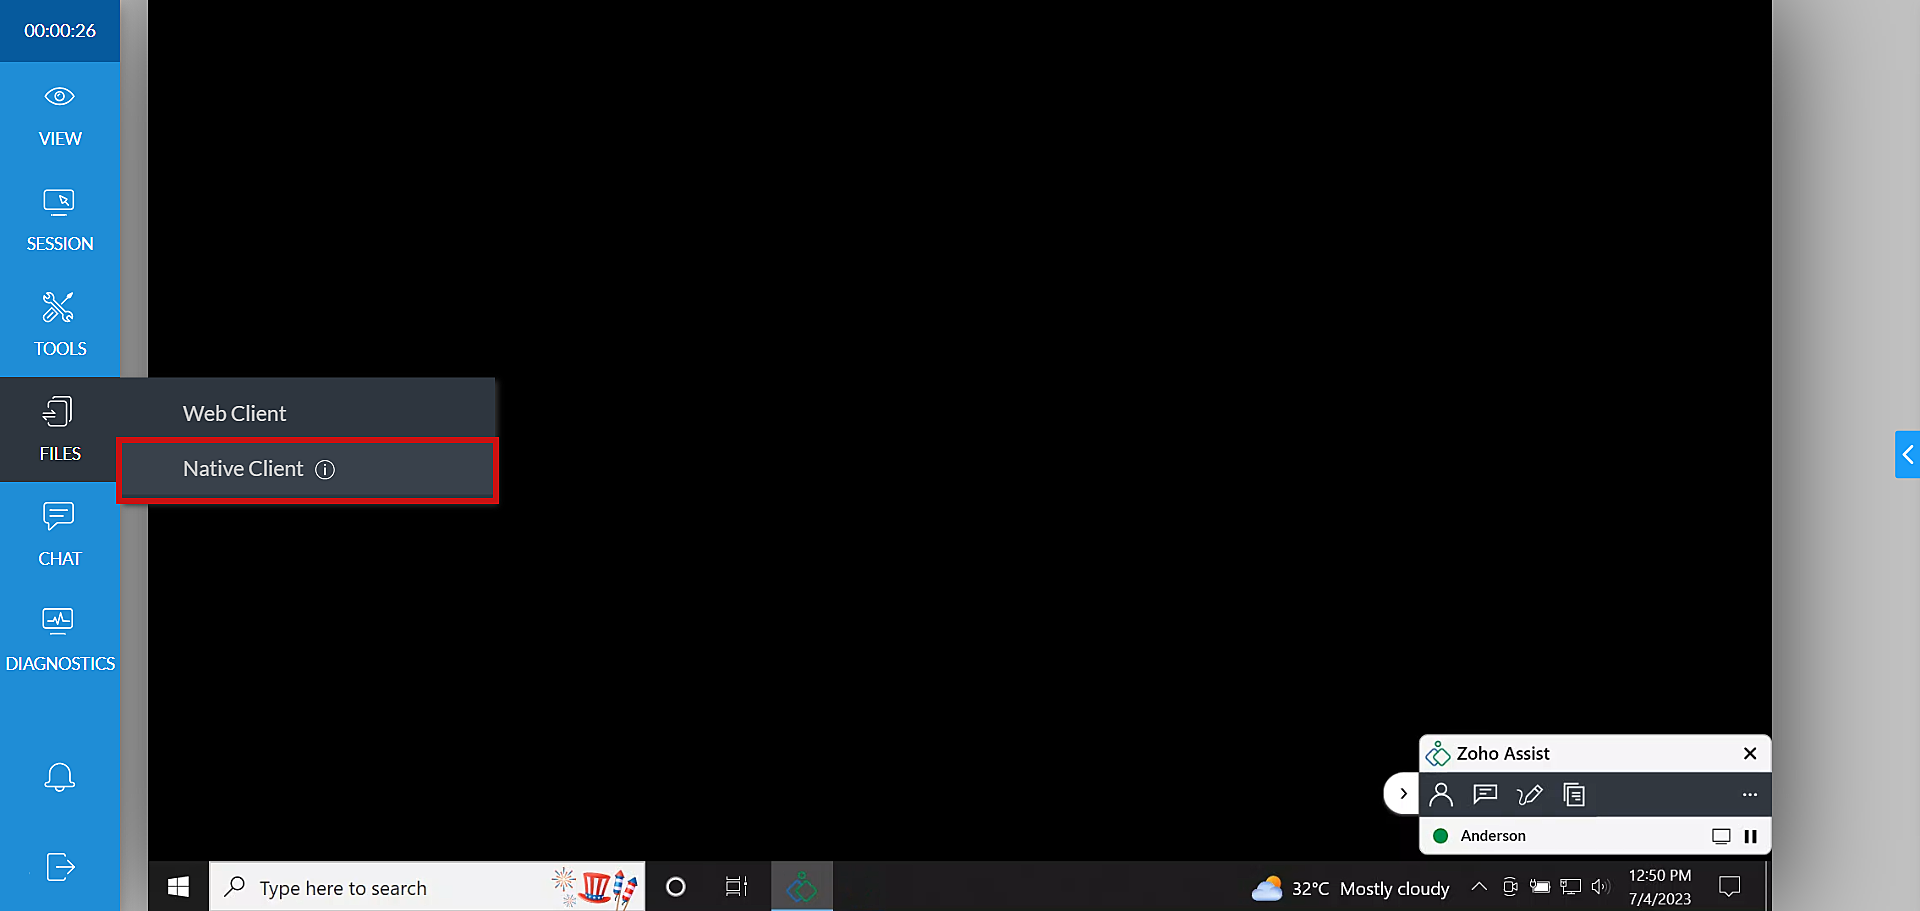
Click Install in the one-time installation prompt as shown below.
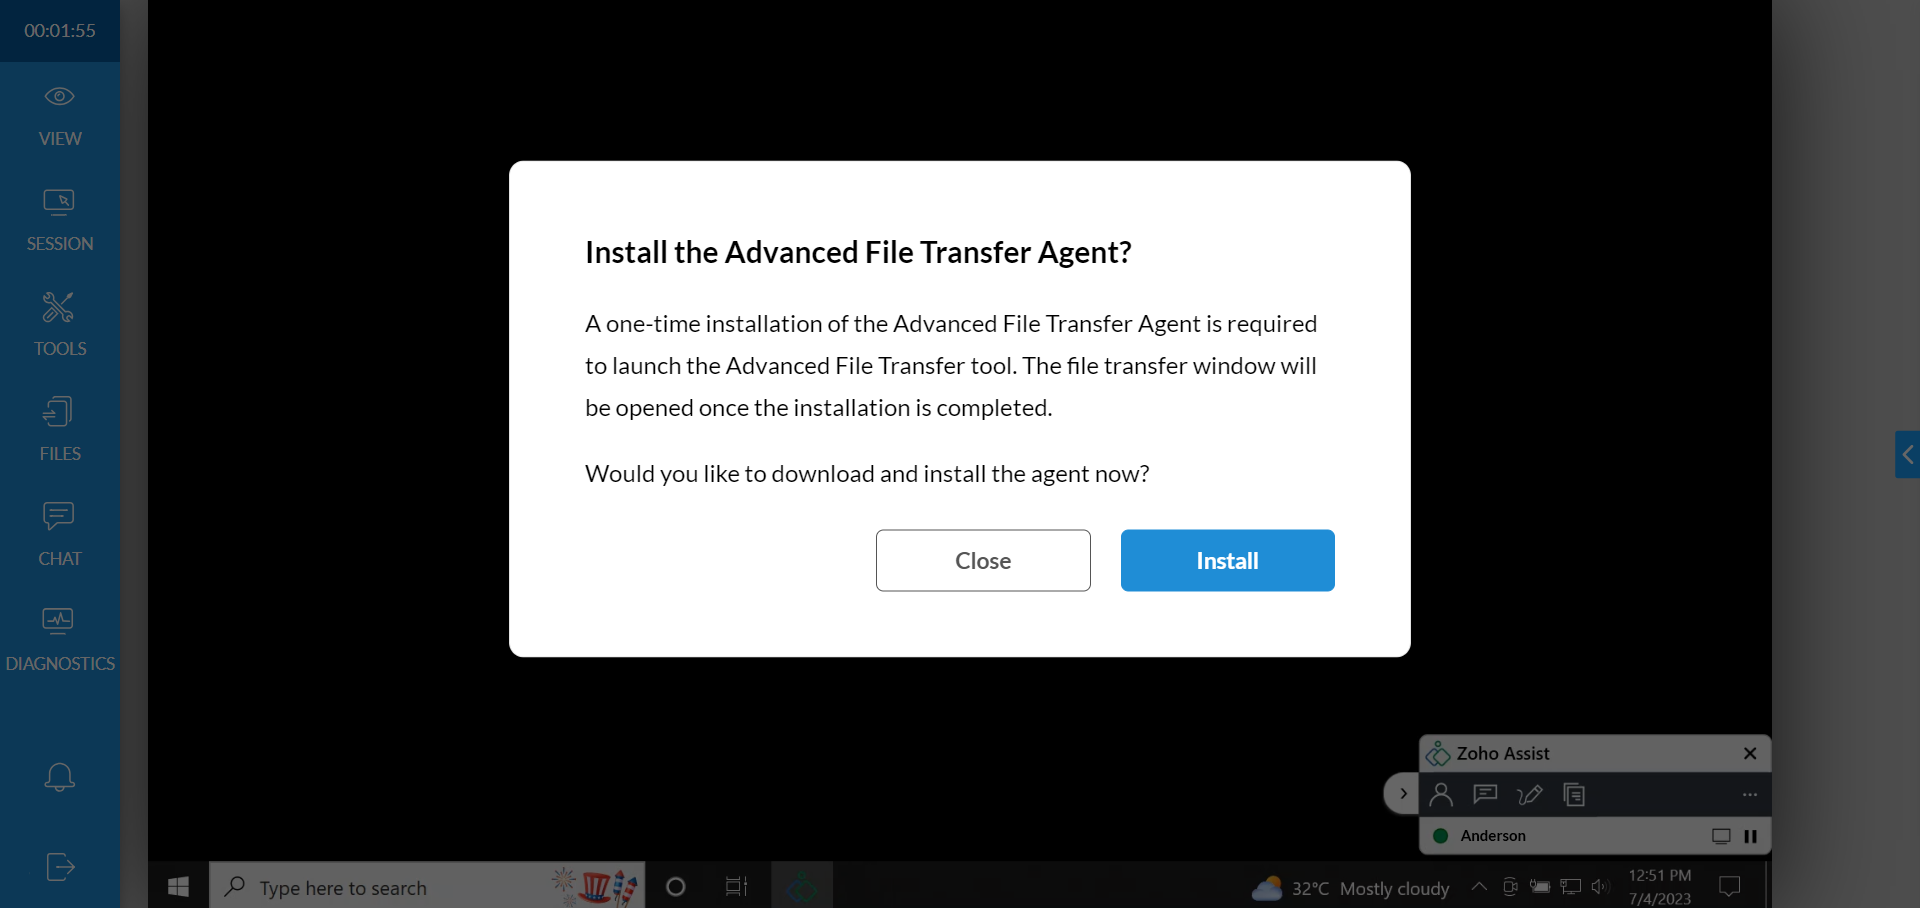
Upon successful installation, a File Transfer window will appear, as shown below.
- To transfer a folder from remote device to the technician's device:
- Select the folder from the remote device.
- Choose the destination path for the folder in the technician's device.
- Click Receive.
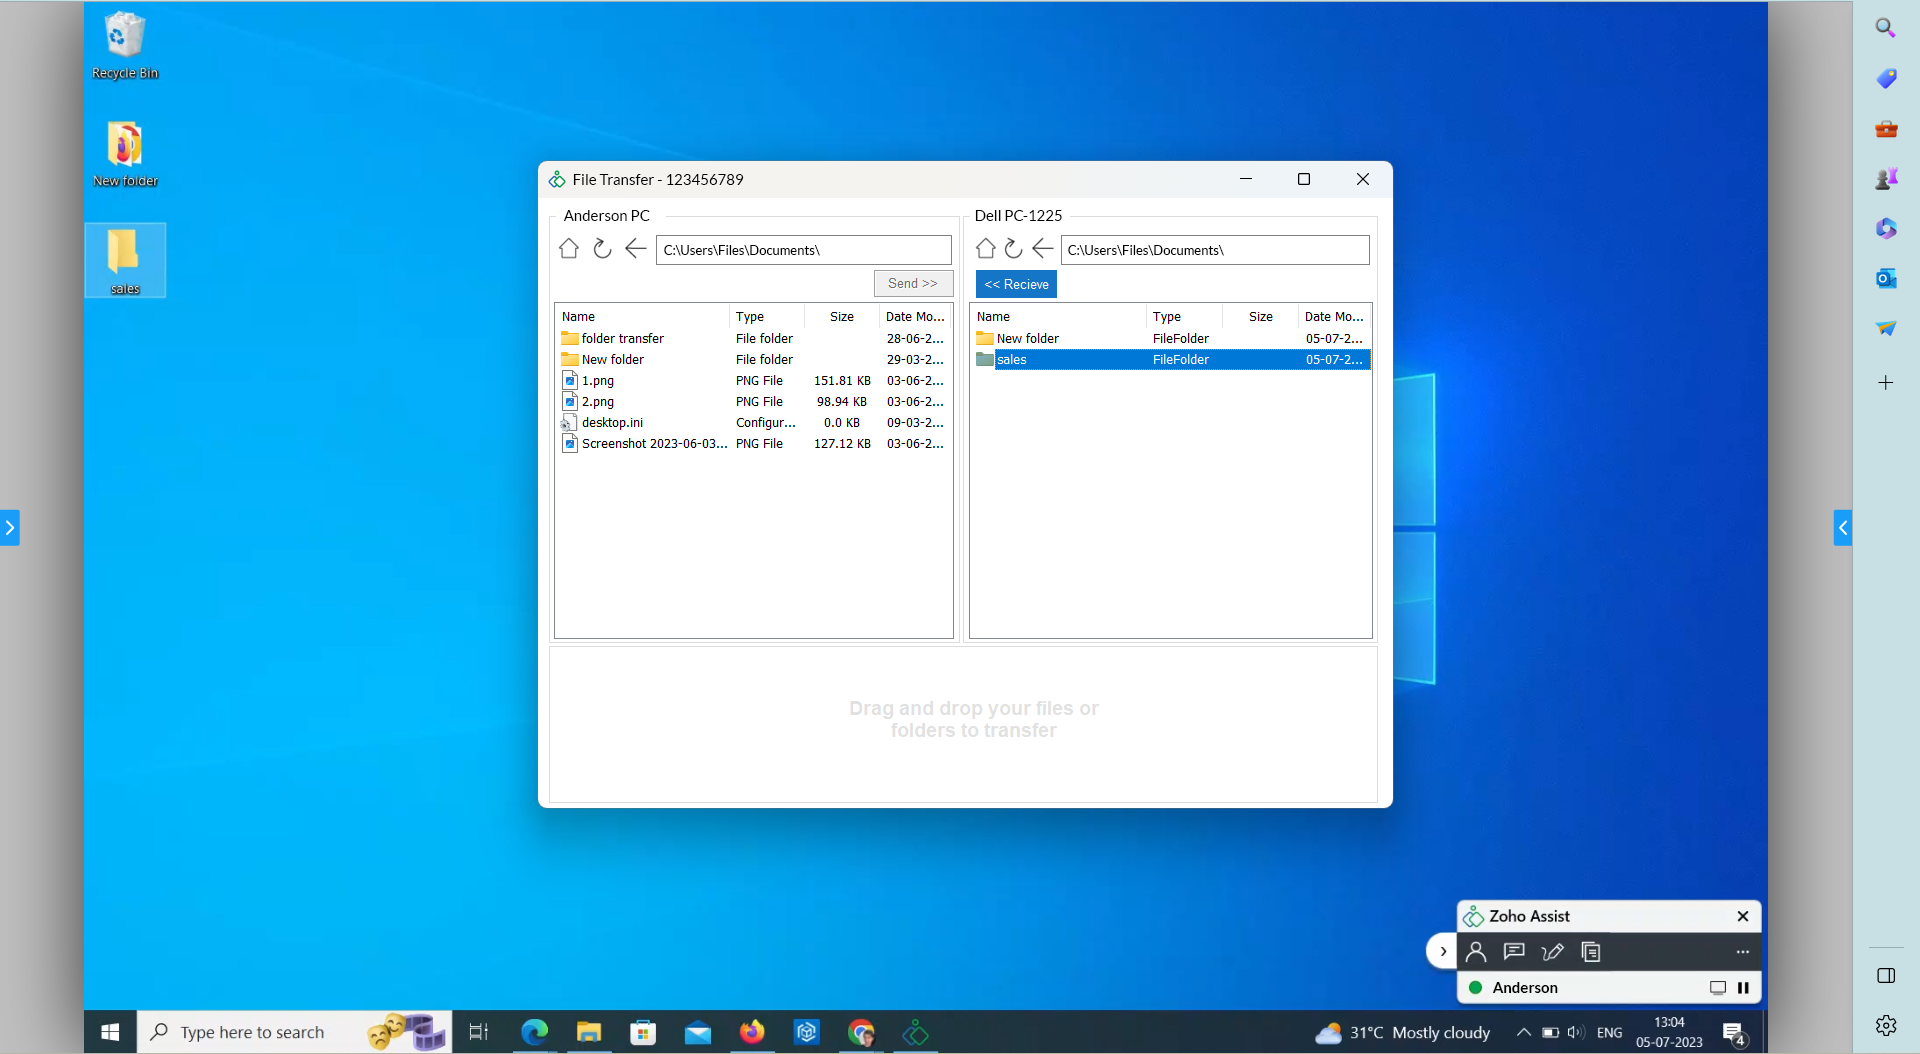
- To transfer a folder from the technician's device to the remote device:
- Select the folder from the technician's device.
- Choose the destination path for the folder in the remote device.
- Click Send.


Folder Transfer in Linux OS
The technician can select either multiple files or folder to be transferred, once allowed by the user in the remote session. The selected folder or multiple files of different format will be zipped and transferred from and to the remote desktop by the technician. Zipping happens automatically when multiple files are selected.
- Both folder transfer and multiple file transfer are supported in the Linux OS.
- Folder transfer is possible only when the customer's remote device is on the Linux OS and the technician begins the session from Windows device with Windows Native client technician console. Technician can receive folders from the remote Linux device.
To transfer one or more files from a remote Linux OS device:
- Navigate to the File Transfer option available in the panel of a support session
- Select the Send file option available in the File Transfer window.
Choose either the folder to be transferred or one or more files to be transferred.
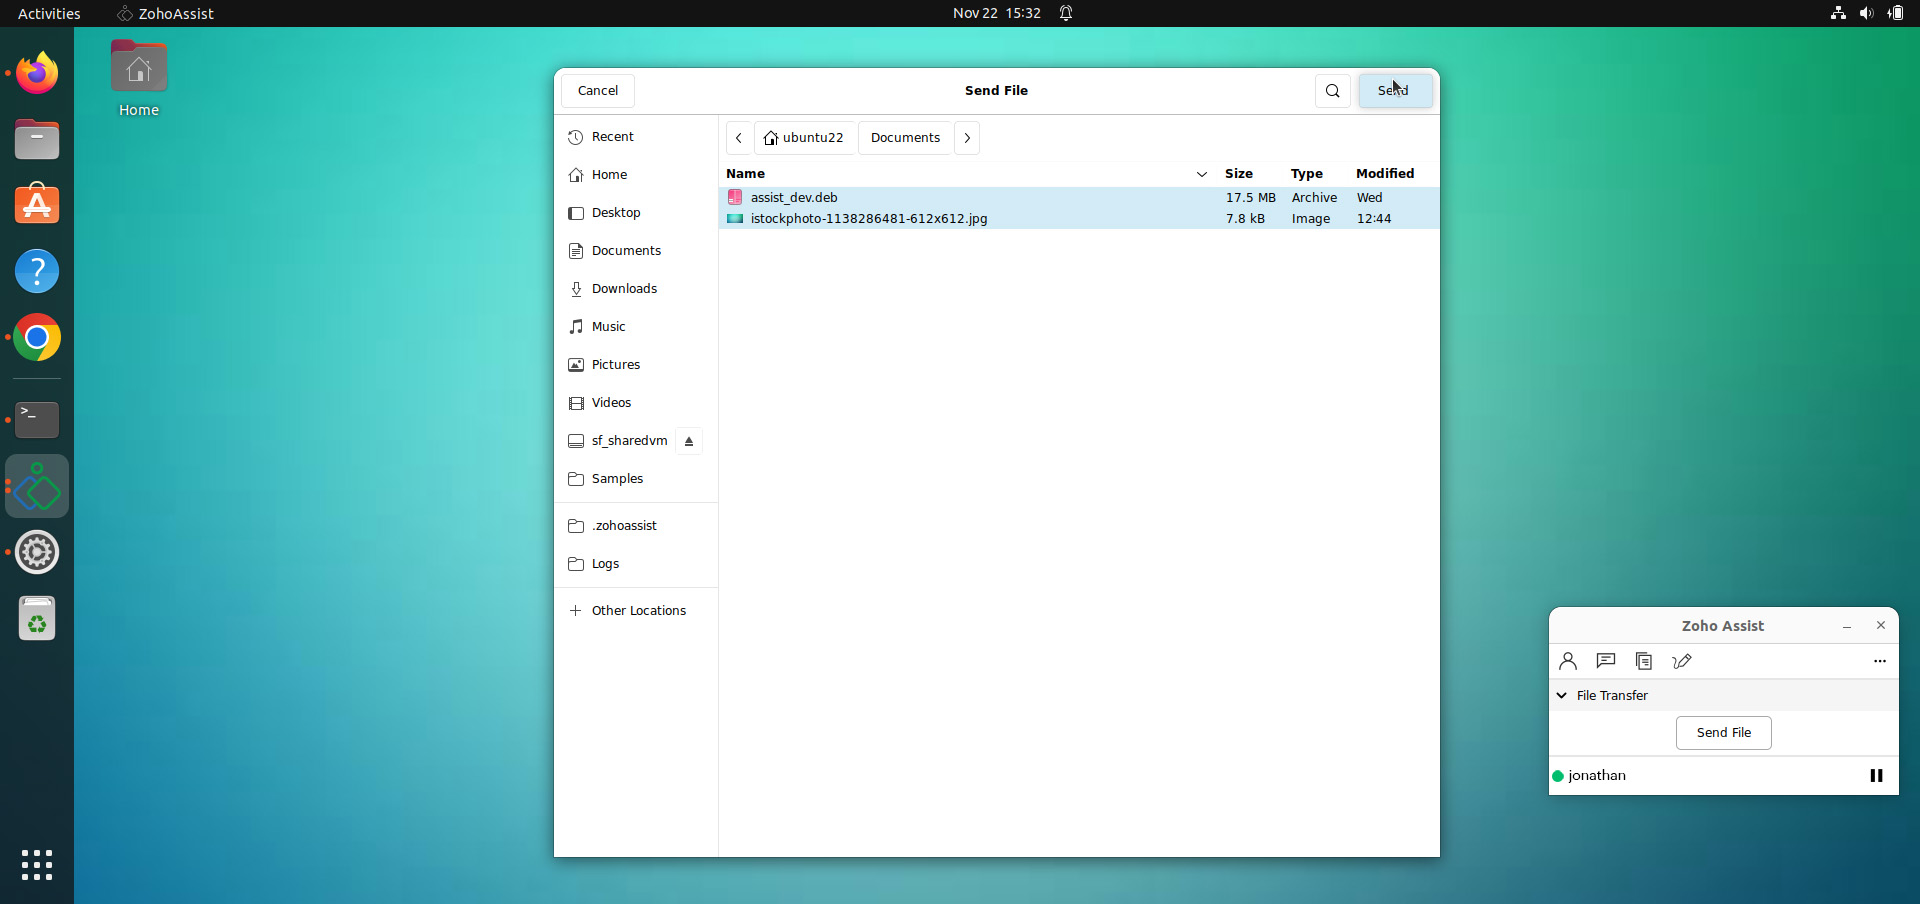
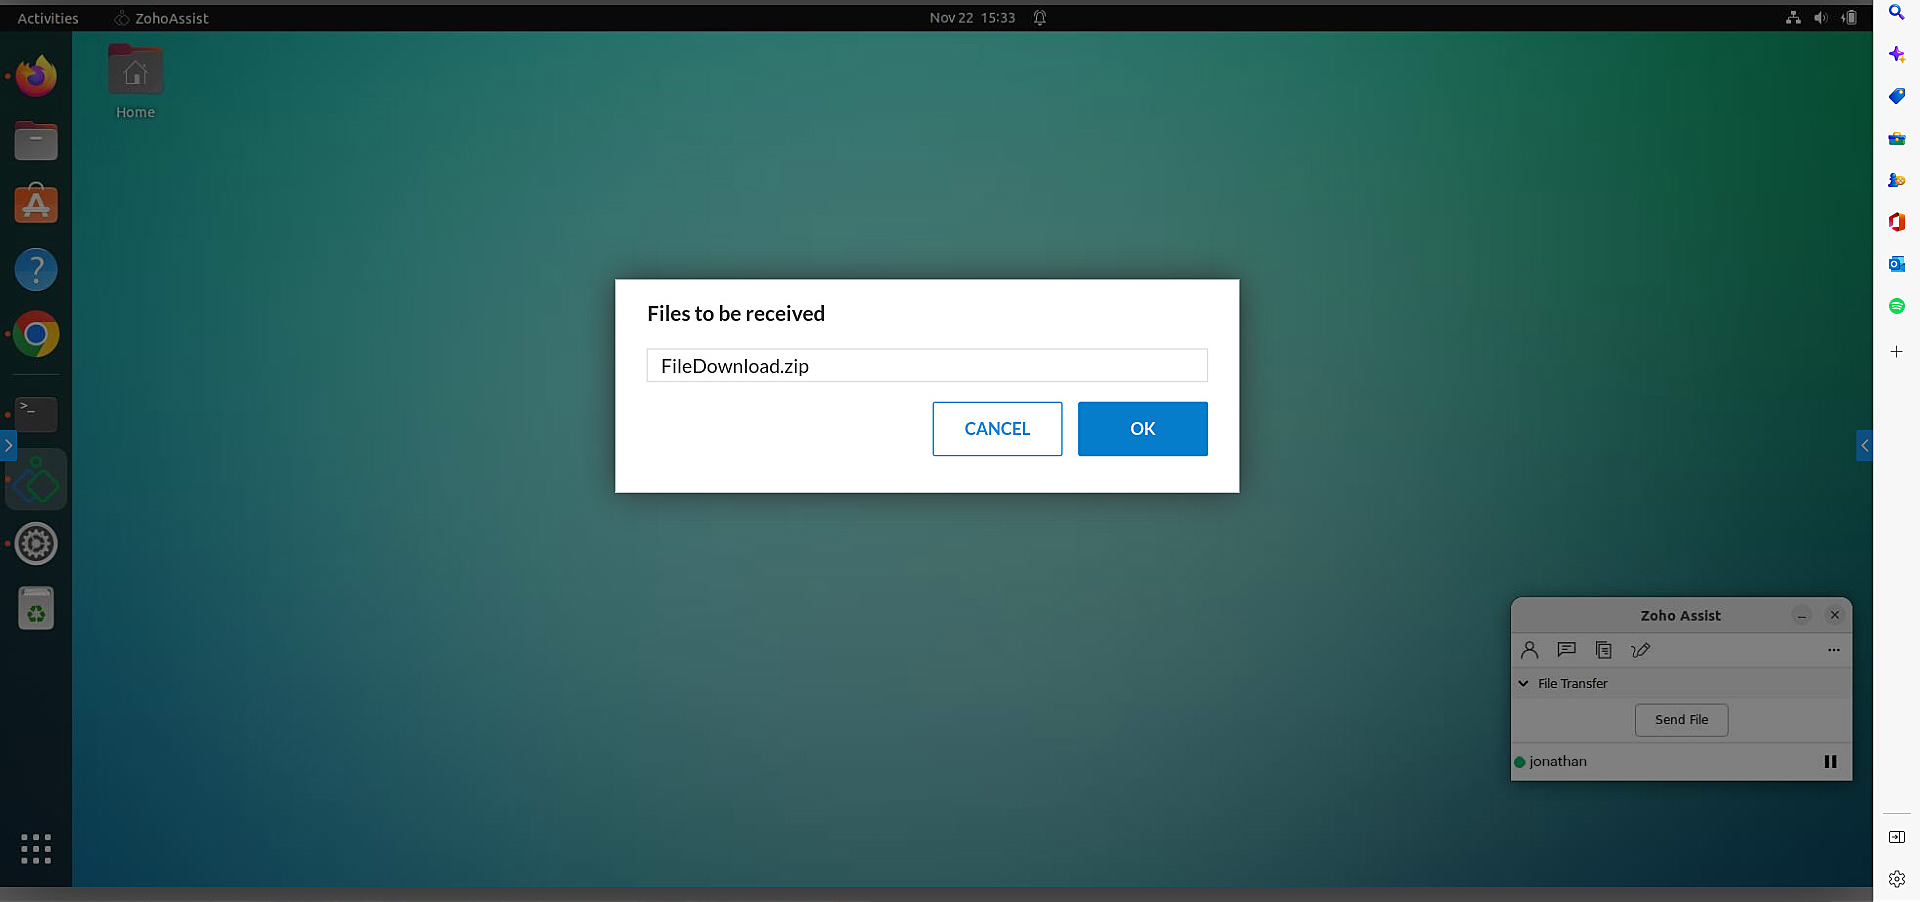
- Once selected, click Send to start transferring the files/folder from the remote device. The selected folder or the files will be zipped automatically.
The folder can be downloaded by the technician as zip by clicking OK in the below prompt.