Freshdesk
Integrate Freshdesk with Zoho Assist to resolve tickets by initiating an instant scheduled remote support sessions right from your Freshdesk ticket. The integration is simple, and does not require any software installation. On completion of a remote support session, you can update the ticket status and also add notes to the ticket.
To Configure Freshdesk in Zoho Assist:
Login to Zoho Assist.
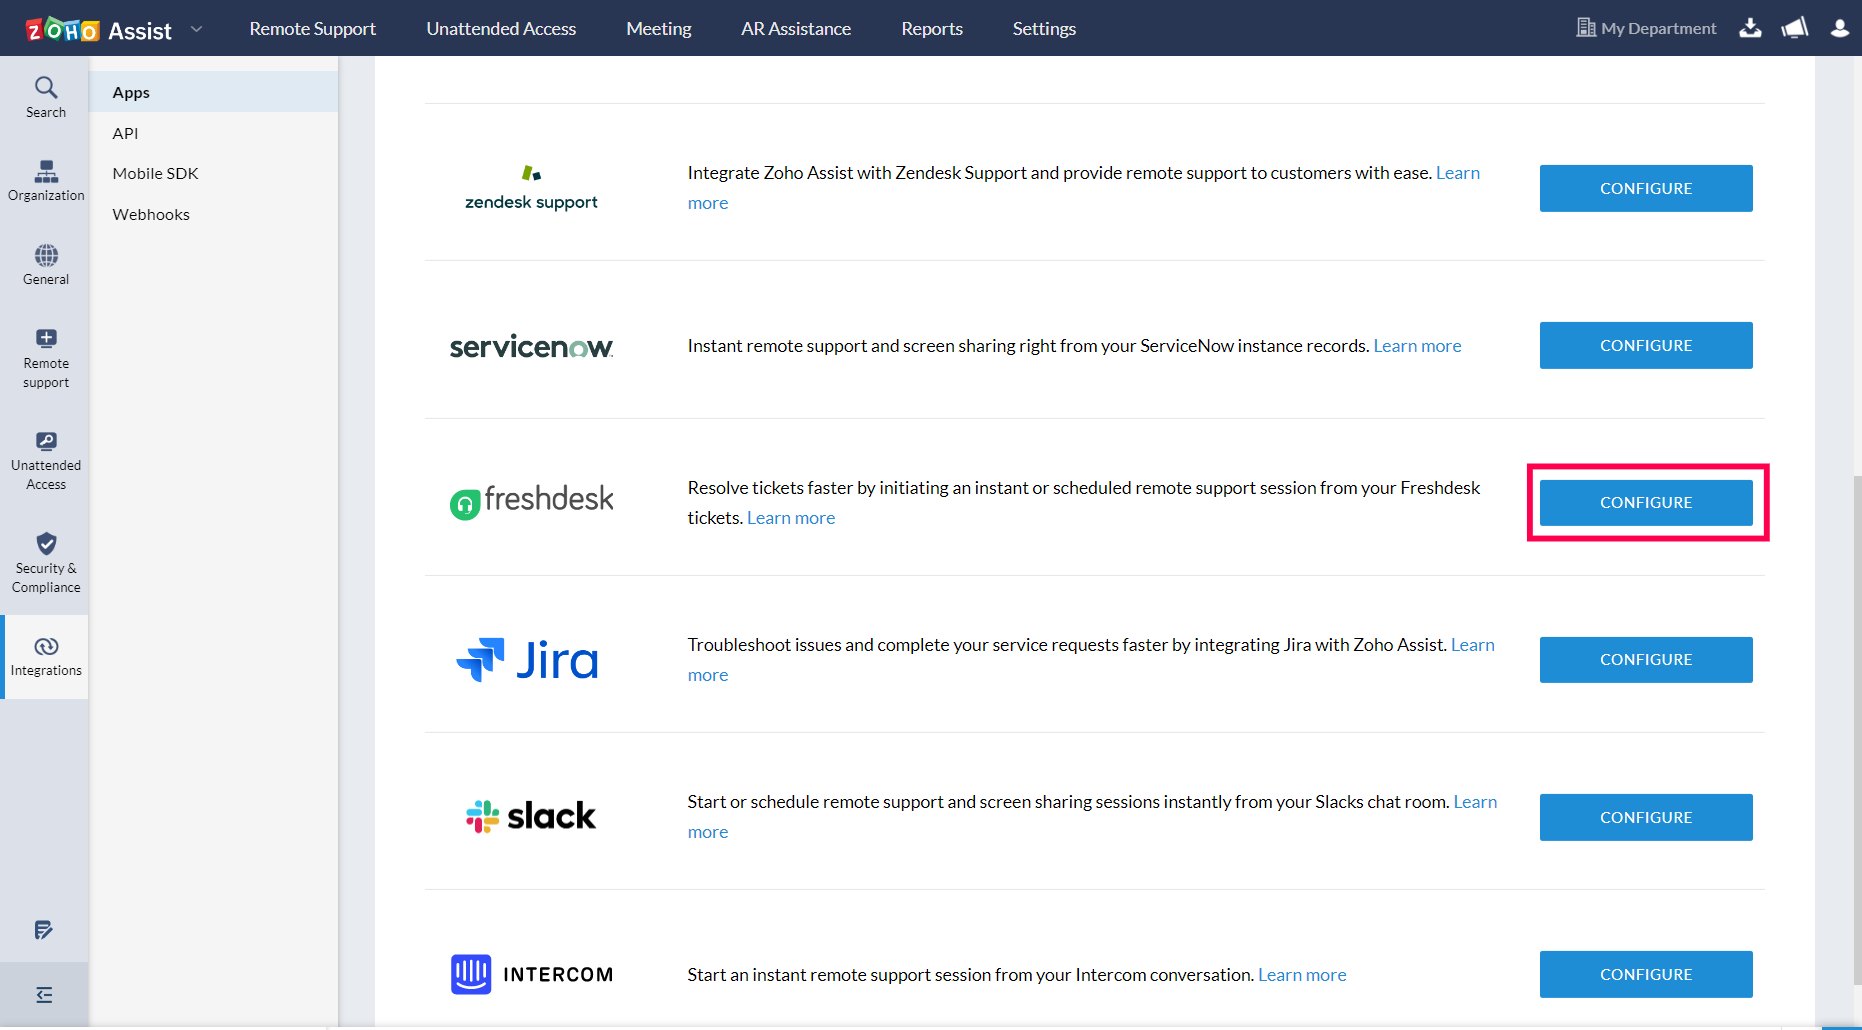
Go to Settings > Integrations.
Click Configure beside Freshdesk.
Fill in your Subdomain and API key to complete the configuration process.
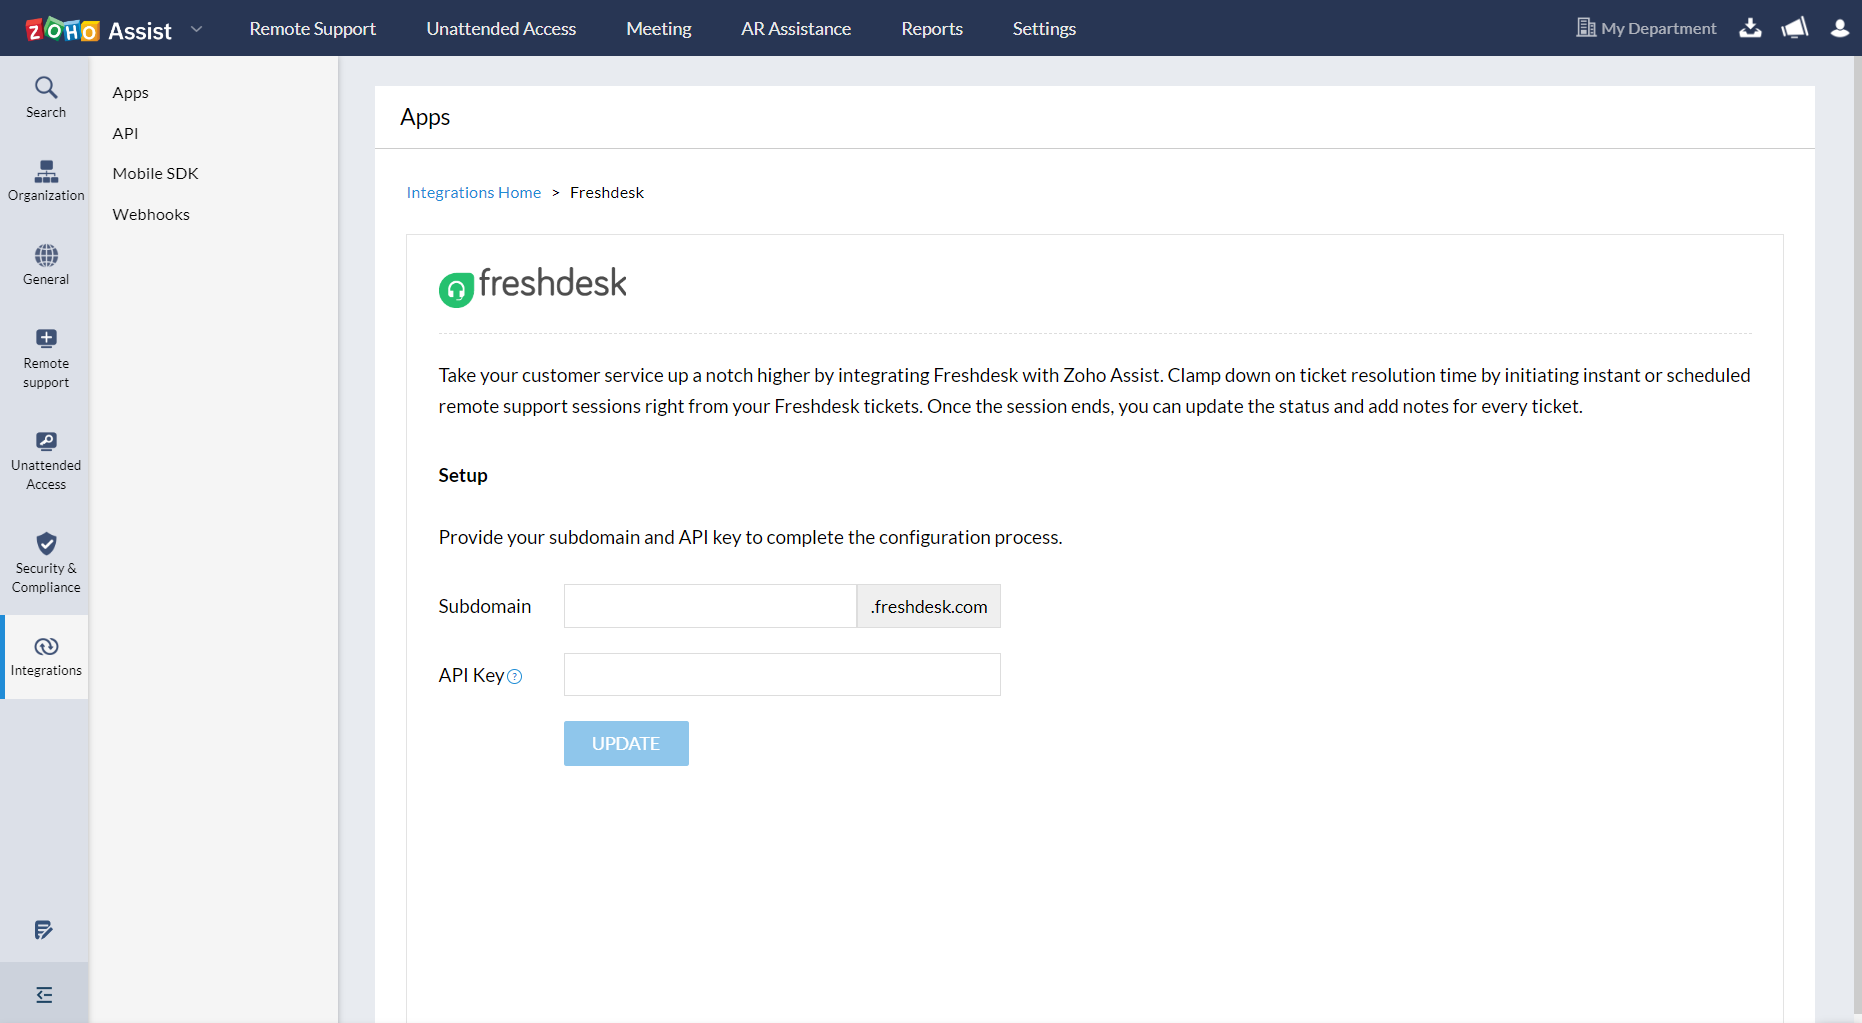


Note : To locate your Freshdesk subdomain, log in to your Freshdesk account and check the URL. Your subdomain can be identified as the first part of the URL that appears before ".freshdesk.com". 
To locate your API key, go to the Profile Settings tab of your Freshdesk account.
To install Zoho Assist from Freshdesk marketplace:
Login to your Freshdesk account.
Go to Admin > Apps > Get more Apps.
Look for Zoho Assist Remote Support app.
Click Install and select the domain name that you have been using with Zoho Assist to complete the integration process.
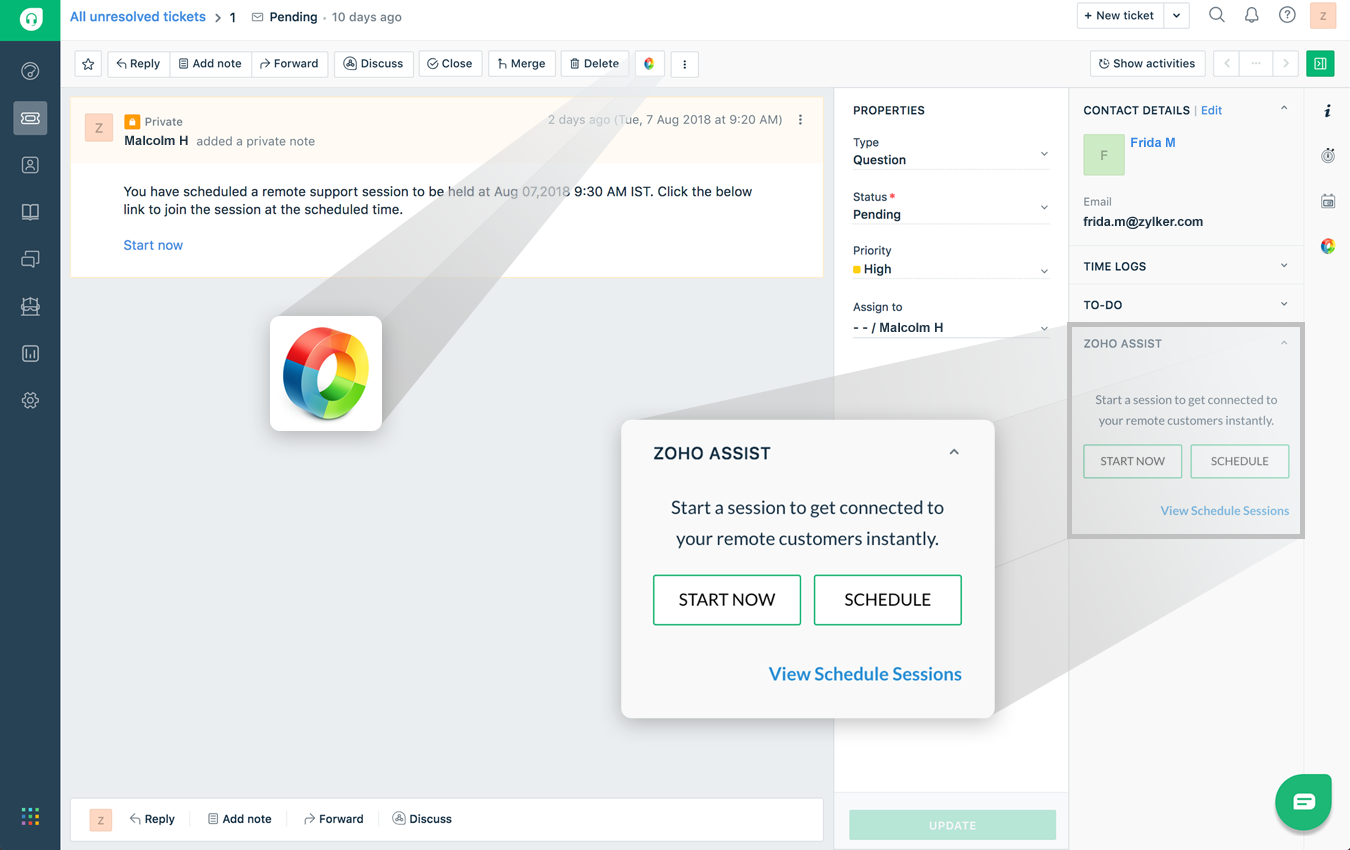
To start or schedule a remote support session:
Open the ticket to be resolved.
Click the Zoho Assist logo in the ticket menu bar at the top to initiate instant remote support sessions. (or)
Click START NOW or SCHEDULE in the ticket menu bar at the right side to initiate an instant or scheduled remote support session.

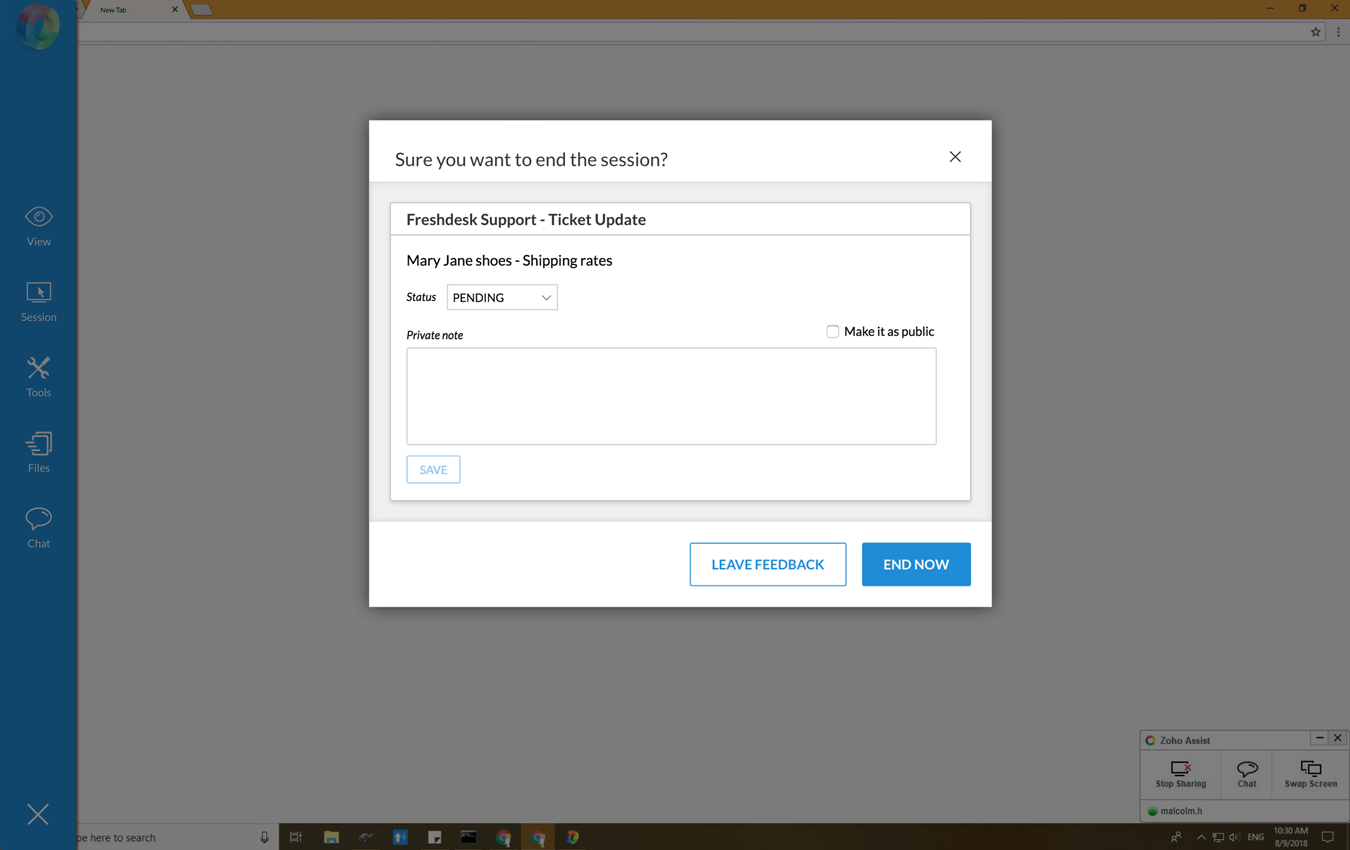
To update ticket status and add notes:
Once the remote support session ends, a dialog box will open up.
You can update the ticket status from the drop-down given beside Status.
You can add notes in the space provided and also make it public by clicking on the checkbox beside Make public.