Managing Groups
Group is a convenient option to group users for easy collaboration. You can use Groups to easily collaborate among its members through sharing or emailing of reports and dashboards.
Group - Basic
Using Workspace Group
- Where can I use Groups?
- How do I share view(s) to a Workspace Group?
- How do I use Workspace groups in a variable?
- How do I email view(s) to a Workspace Group?
- How do I create a cliq group for a Workspace Group?
Managing Groups
- How do I manage Groups?
- How can I edit a Group?
- Can I add users to an existing Group?
- How can I remove users from a Group?
- Can I edit permission for the shared views to a Group?
- How can I delete a Group?
Group - Basic
1. What is a Group?
Workspace Group is a collection of email addresses of your users. Groups will be helpful when you want to share or email reports and dashboards and grant the same permission to a set of users. In such scenarios, you could create a group, instead of specifying the users manually each time.
2. Who can create a Group?
Users with Standard Plan or above can avail the Groups option. Users with the following role can create Groups in a workspace
- Account Administrator
- Organization Administrators
- Workspace Administrators
3. How to create a Group?
Using Workspace Group
You can use the Workspace Group in the following options to collaborate with your users.
- Sharing Views to Groups
- Emailing Views to Users
- Creating Variable
2. How do I share view(s) to a Group?
3. How do I use groups in a variable?
Variables are placeholders that help you to assign dynamic values for individual users or Groups in the Workspace. You can further use these variables in the Share filter criteria to filter reports or apply default value for User Filters dynamically.
While creating a Variable, you can specify a Group instead of individuals email addresses.
Refer here to know how to create variables.
4. How do I email view(s) to a Group?
5. How do I create a cliq group for a Workspace Group?
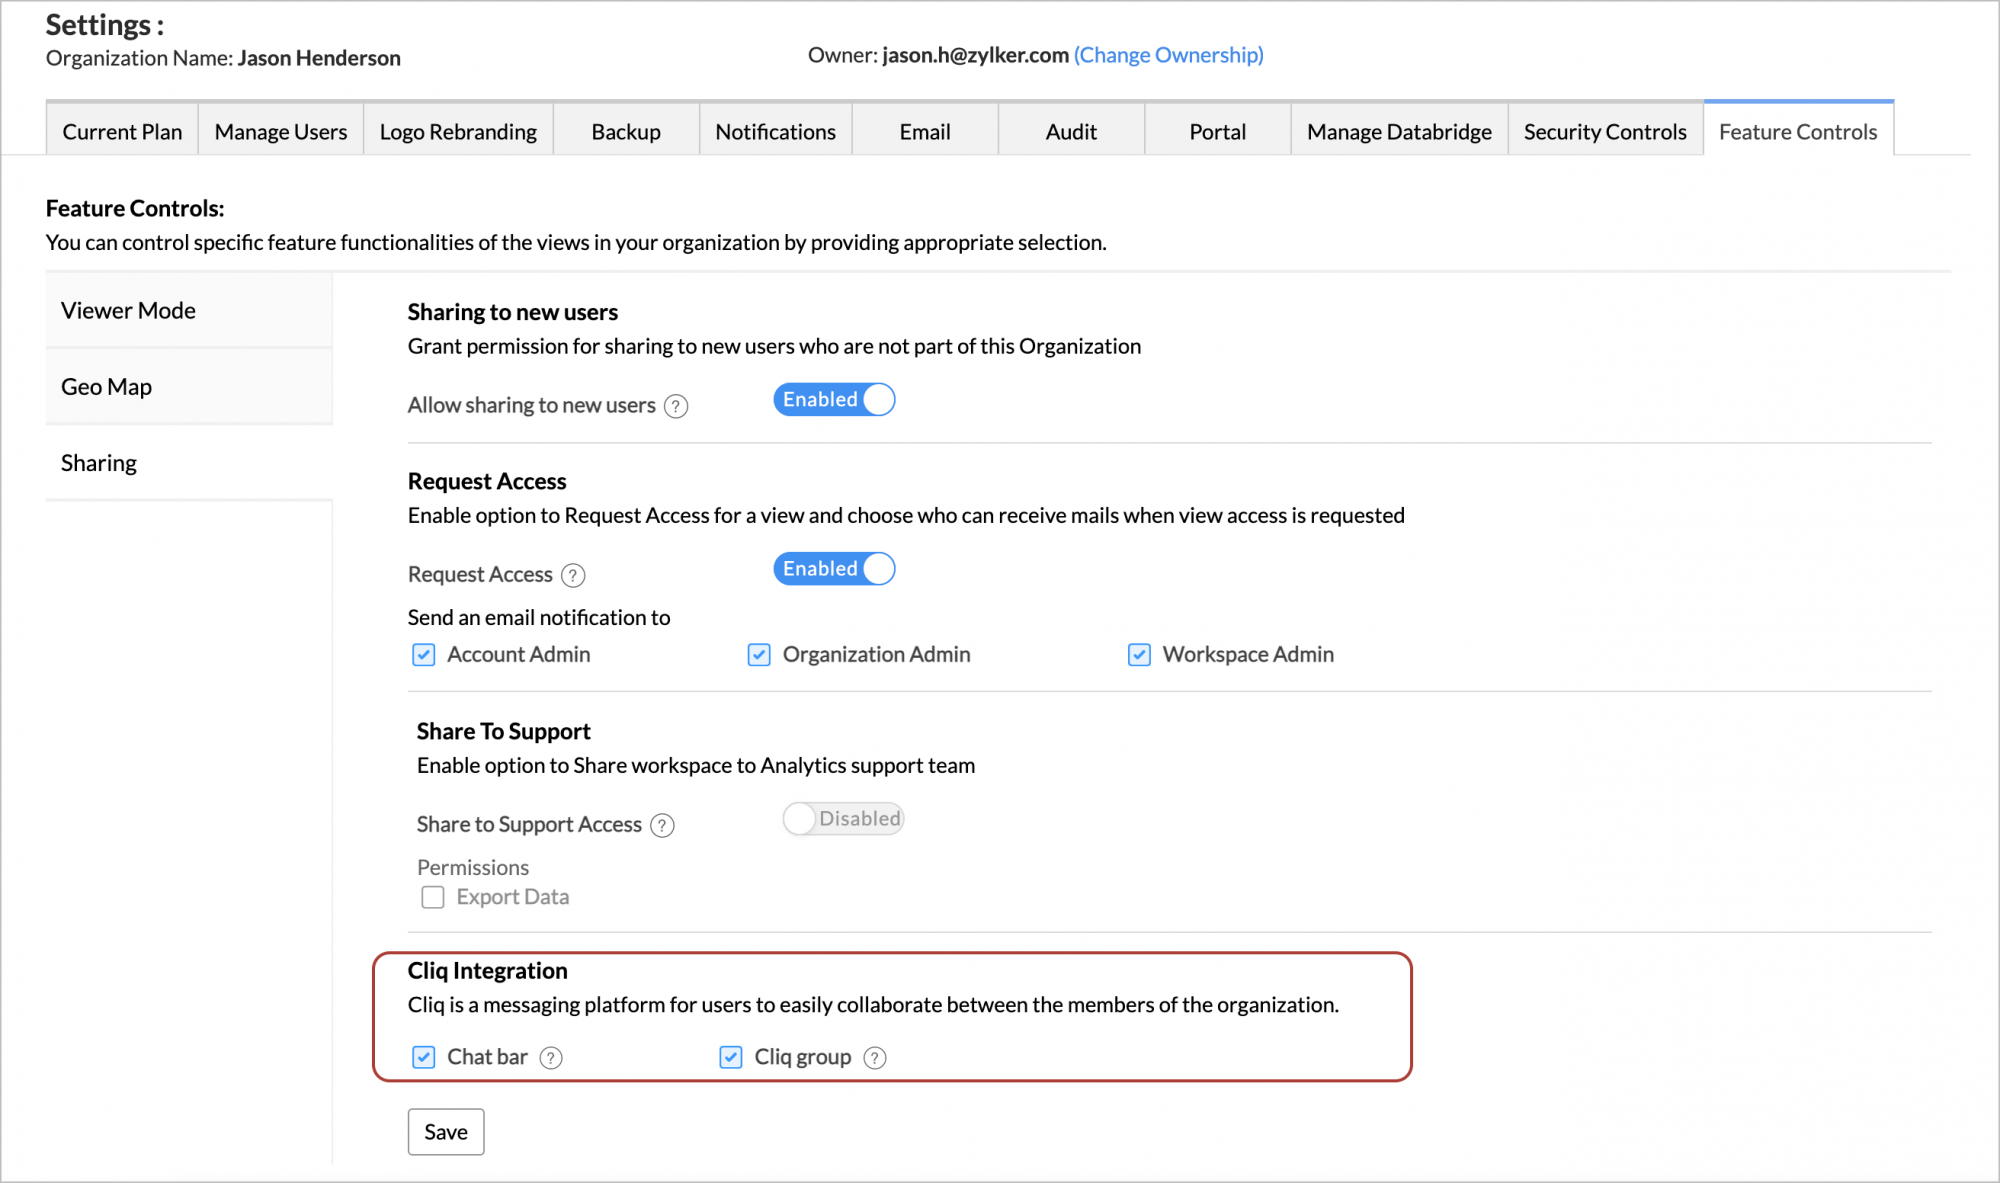
To create a cliq group for your Workspace Group, you need to enable this in the Organization Settings page. For more details, refer here.

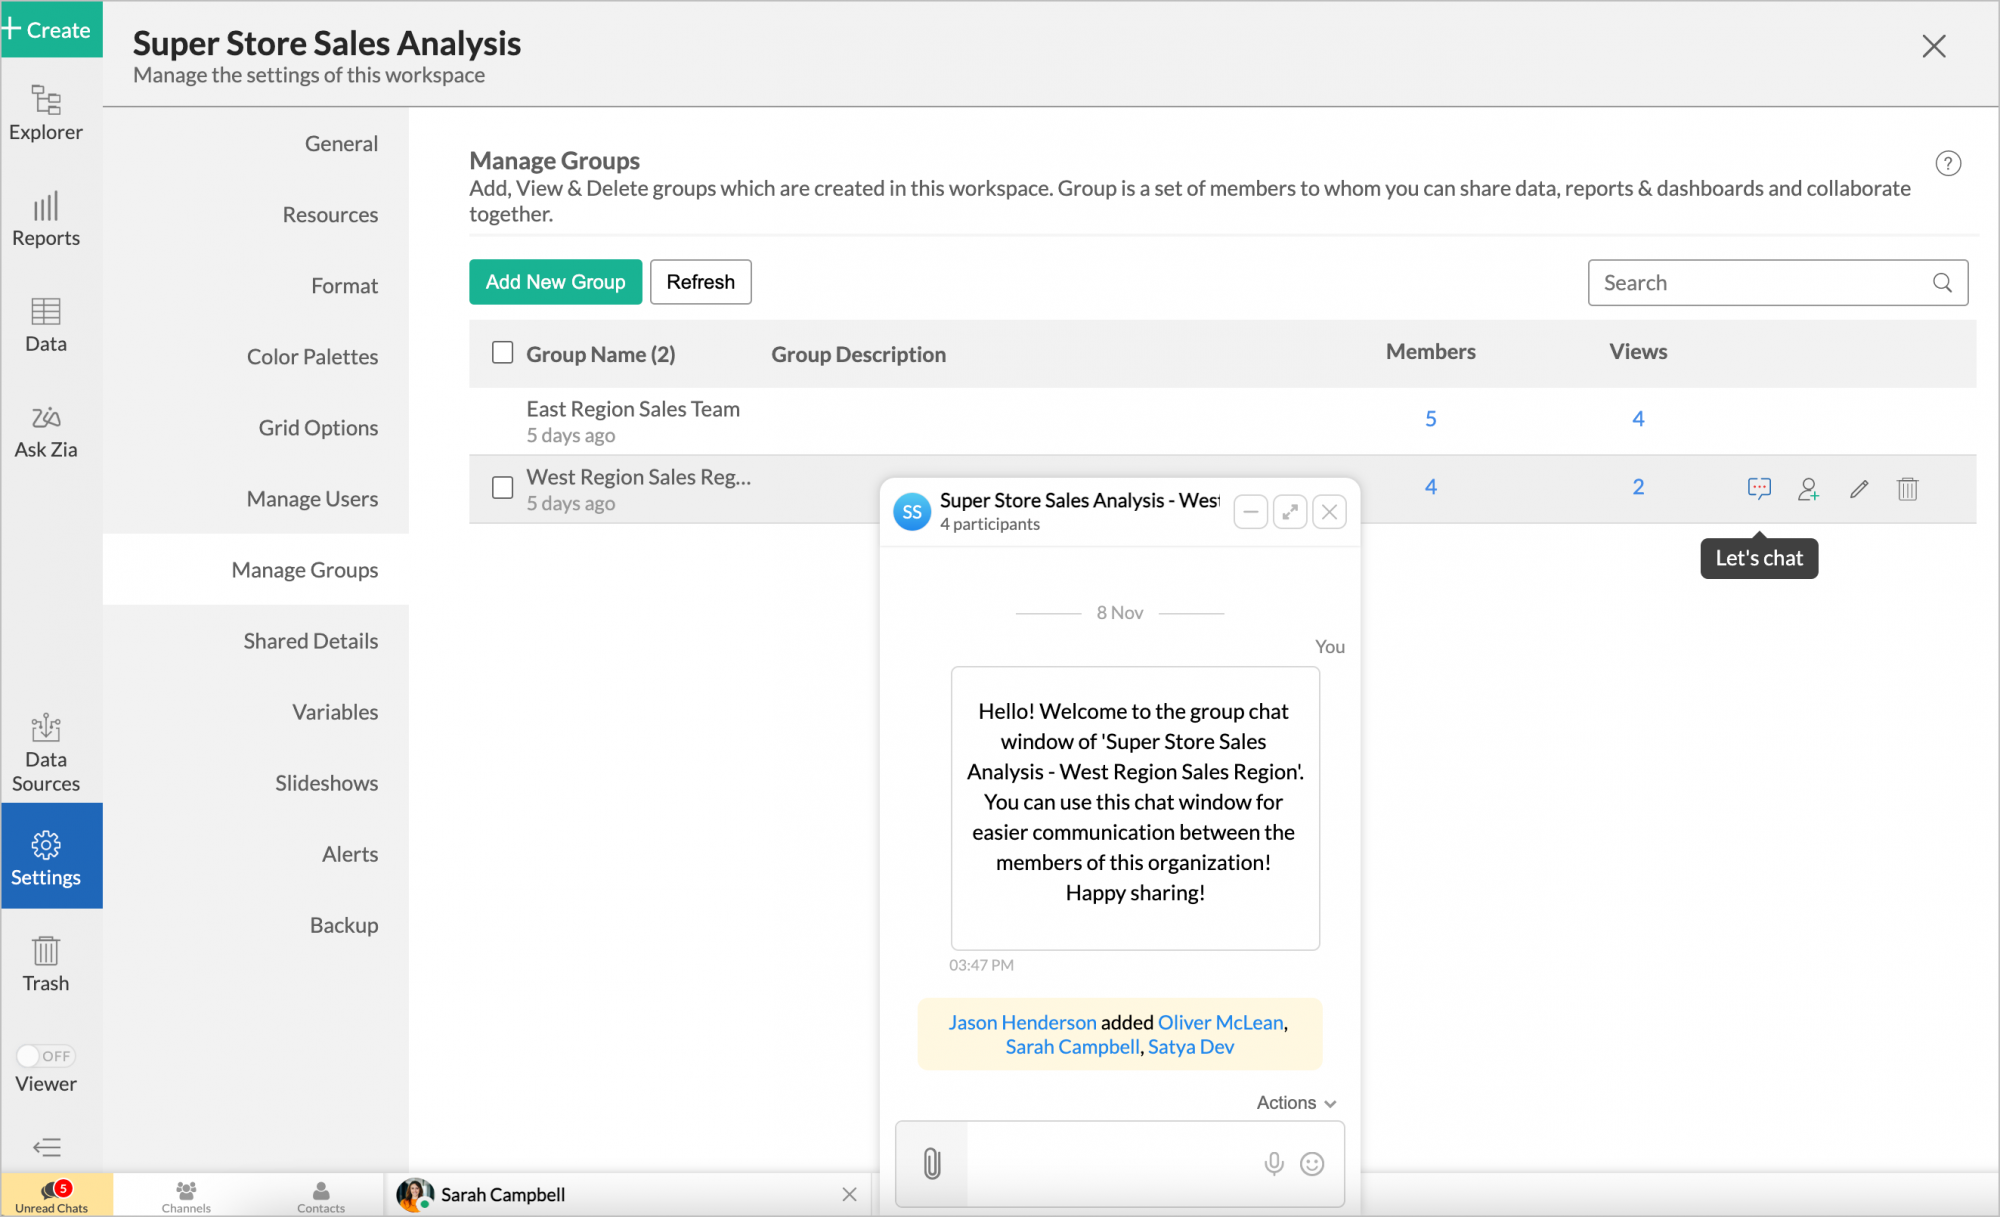
Once you have enabled this option, follow the below steps to create a Cliq group.
- From Explorer, click the Settings tab.
- Open the Manage Groups tab.
- Hover the mouse over the group for which you want to create a group.
- Click the Cliq icon that appears.
- A Cliq group will be created. Now you can continue conversing with your group members.

Note: The Cliq Group and the Workspace Group will be linked. You cannot add or remove members from the Cliq Group or create new groups directly from Cliq.
Managing Groups
1. How do I manage Groups?
2. How can I edit a Group?
- From Explorer, click the Settings tab.
- Open the Manage Groups tab.
- Click the Edit icon that appears on mouse over.
- The Edit Group dialog will open. You can edit the group as needed.
3. Can I add users to an existing Group?
Yes, you can easily add or remove users from a Group. Follow the below steps to do this.
- From Explorer, click the Settings tab.
- Open the Manage Groups tab.
- Click the Add User icon that appears on mouse over of the corresponding Group.
- The Add User dialog will open. Specify the users' email addresses and click Add.
4. How can I remove users from a Group?
You can easily remove users from a group. Follow the below steps to do this.
- From Explorer, click the Settings tab.
- Open the Manage Groups tab.
- Click the Edit icon that appears on mouse over.
- In the Members tab, click the Delete icon that appears on mouse over of the corresponding user to be deleted.
5.Can I edit permission for the shared views to a Group?
Yes, you can edit the permission for shared views. Follow the below steps to do this.
- From Explorer, click the Settings tab.
- Open the Manage Groups tab.
- Click the Edit icon that appears on mouse over.
- The Edit Group dialog will open. Click the Shared Views tab.
- Click the Edit icon of the corresponding view. The Edit Permission dialog will open. You can modify the Permission and Filter Criteria as needed for that specific view.
Note:
6. How can I delete a Group?
You can easily remove a group. Follow the below steps to do this.
- From Explorer, click the Settings tab.
- Open the Manage Groups tab.
- Click the Delete icon that appears on mouse over.
