


Linked Workspaces
Linked Workspaces in Zoho Analytics allows you to create a connection between two distinct workspaces, allowing them to push views from one workspace to another. In this relationship, one workspace acts as a primary workspace, so that changes in that workspace (updating existing views or creating new views) can be updated in the other workspace by pushing those changes to it. The workspace in the receiving end can be called a secondary workspace.
This feature is useful when multiple workspaces with the same kind of data sources and similar reports or dashboards are needed. By using linked workspaces, you can mark the workspace as a primary workspace and quickly push it as a template to other workspaces with just one click.
Only the Account Admin and Org Admins can establish a Linked Workspace.
Creating Linked Workspaces
You can easily create a linked workspace by following these steps:
- Open the Zoho Analytics home page, which displays all the workspaces in your organization.
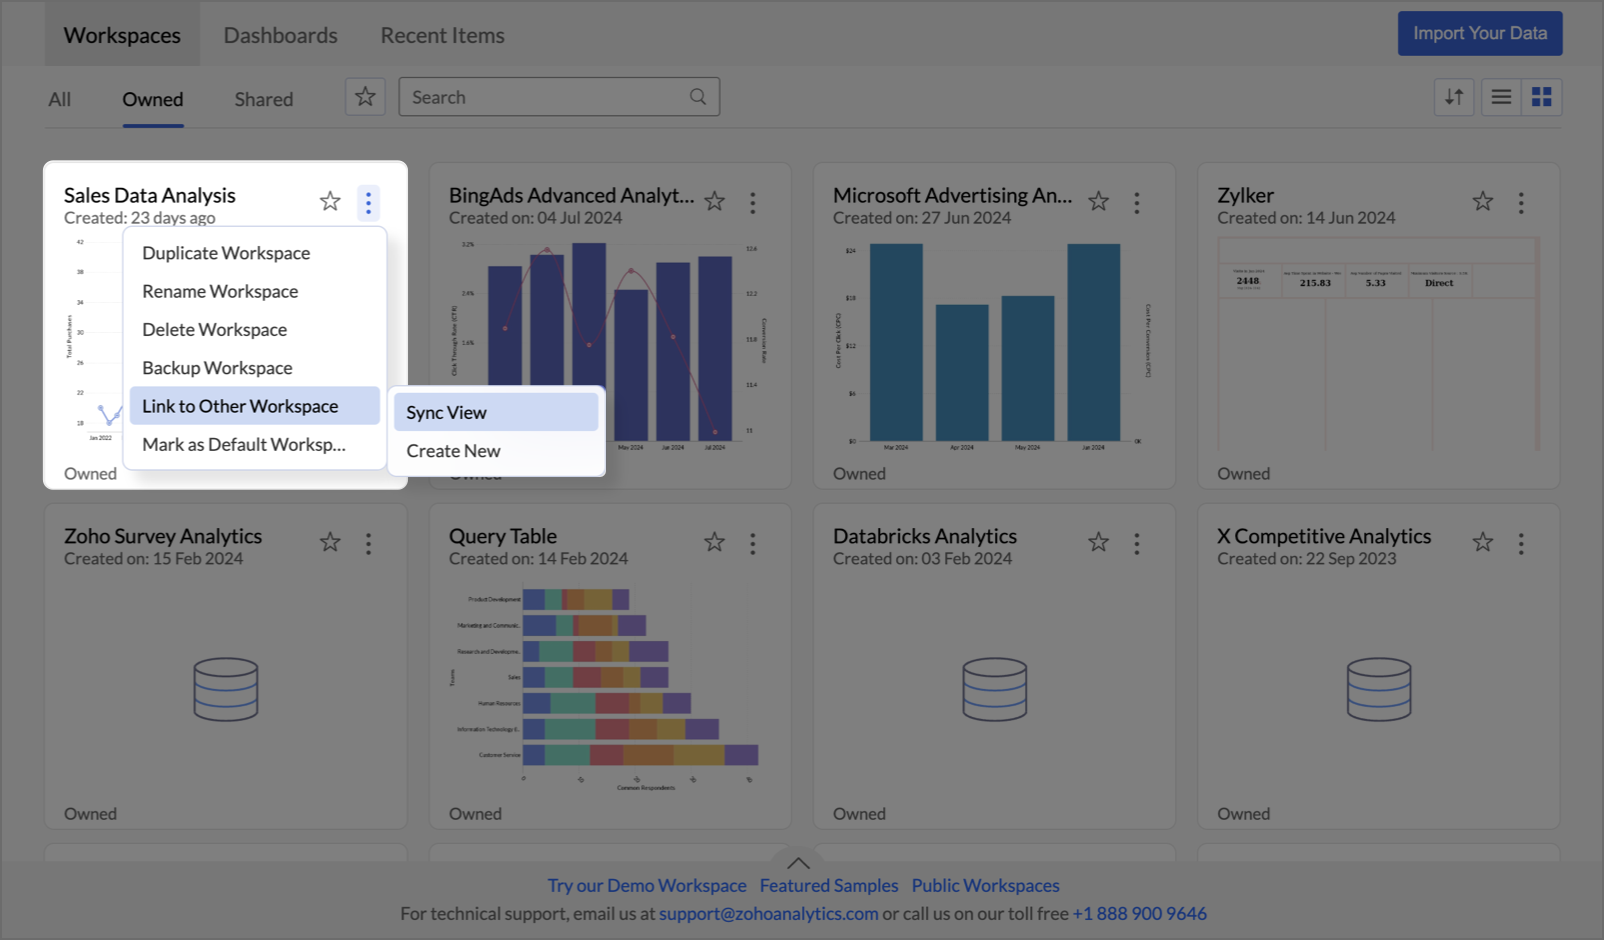
- Select the workspace you want to use as the primary workspace. The primary workspace can belong to any organization where you are an Account Admin or Org Admin.
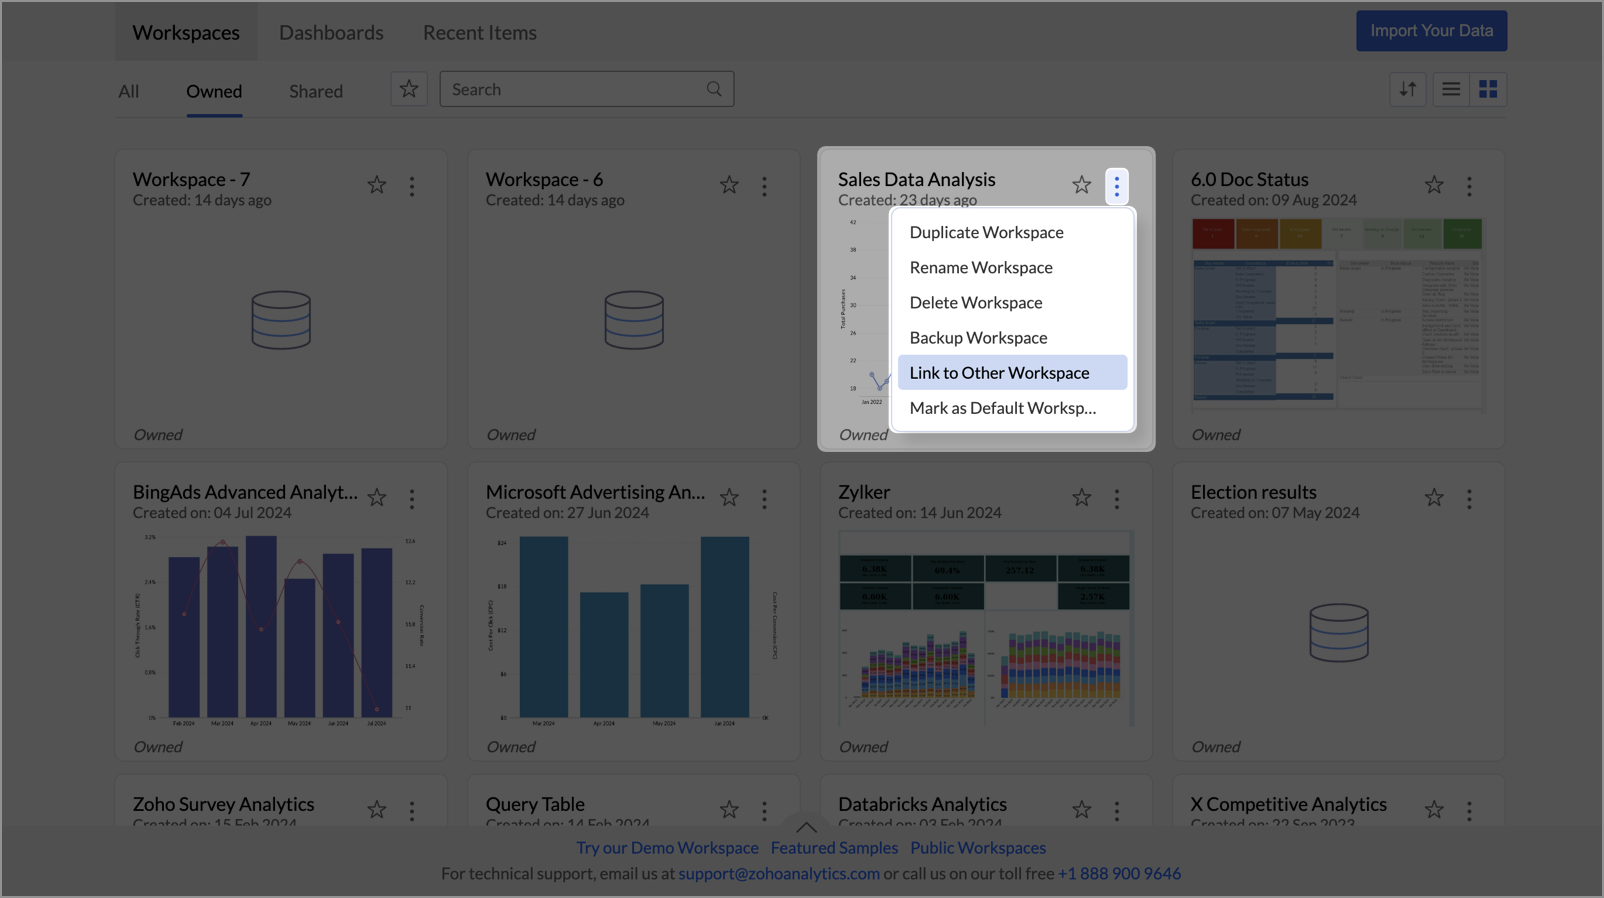
- Click the More Options icon at the top-right corner of the selected workspace, then select the Link to Other Workspace option.
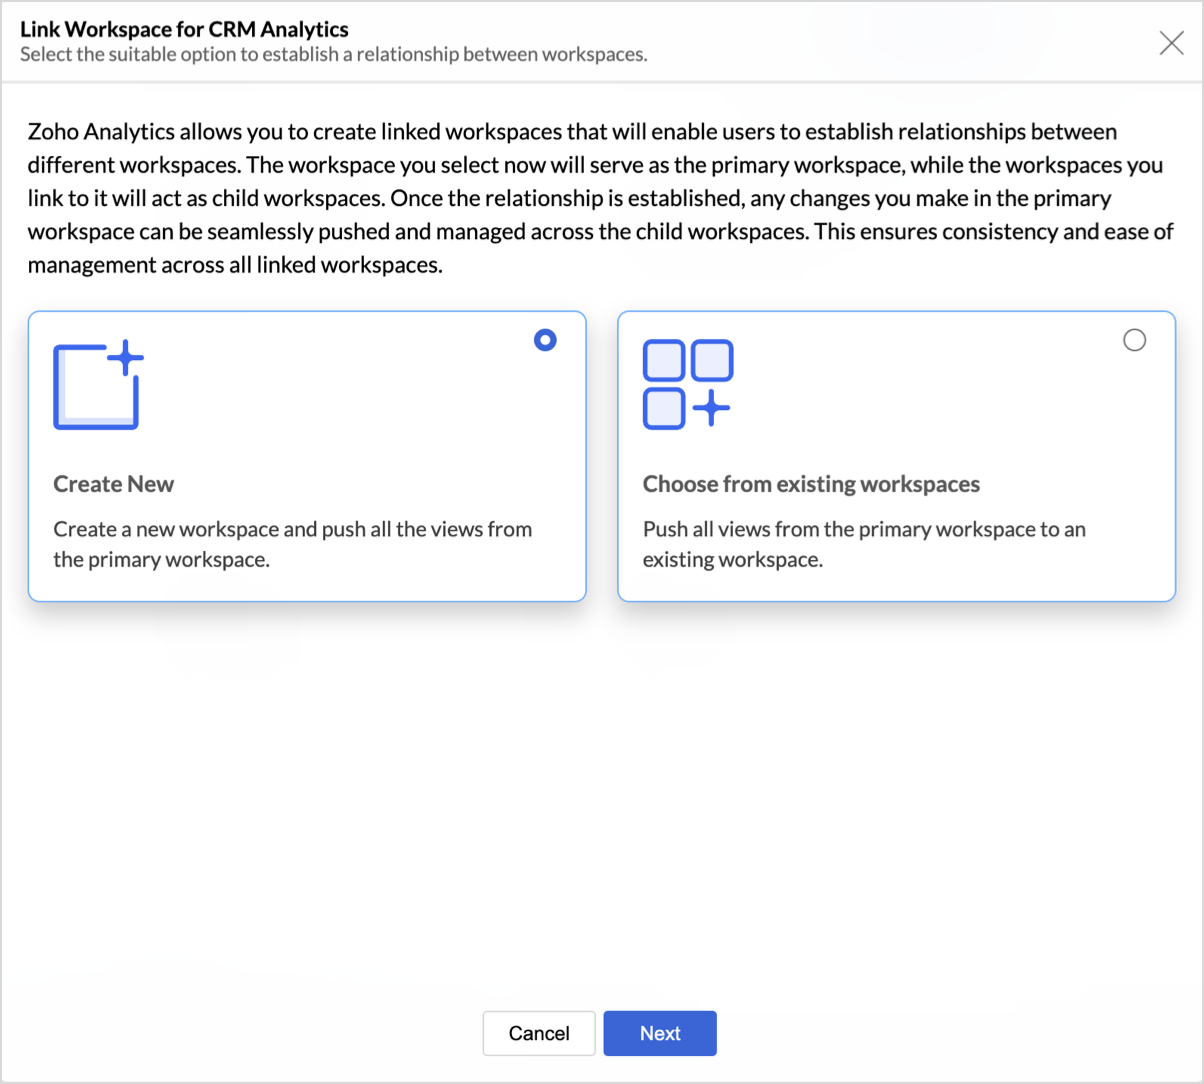
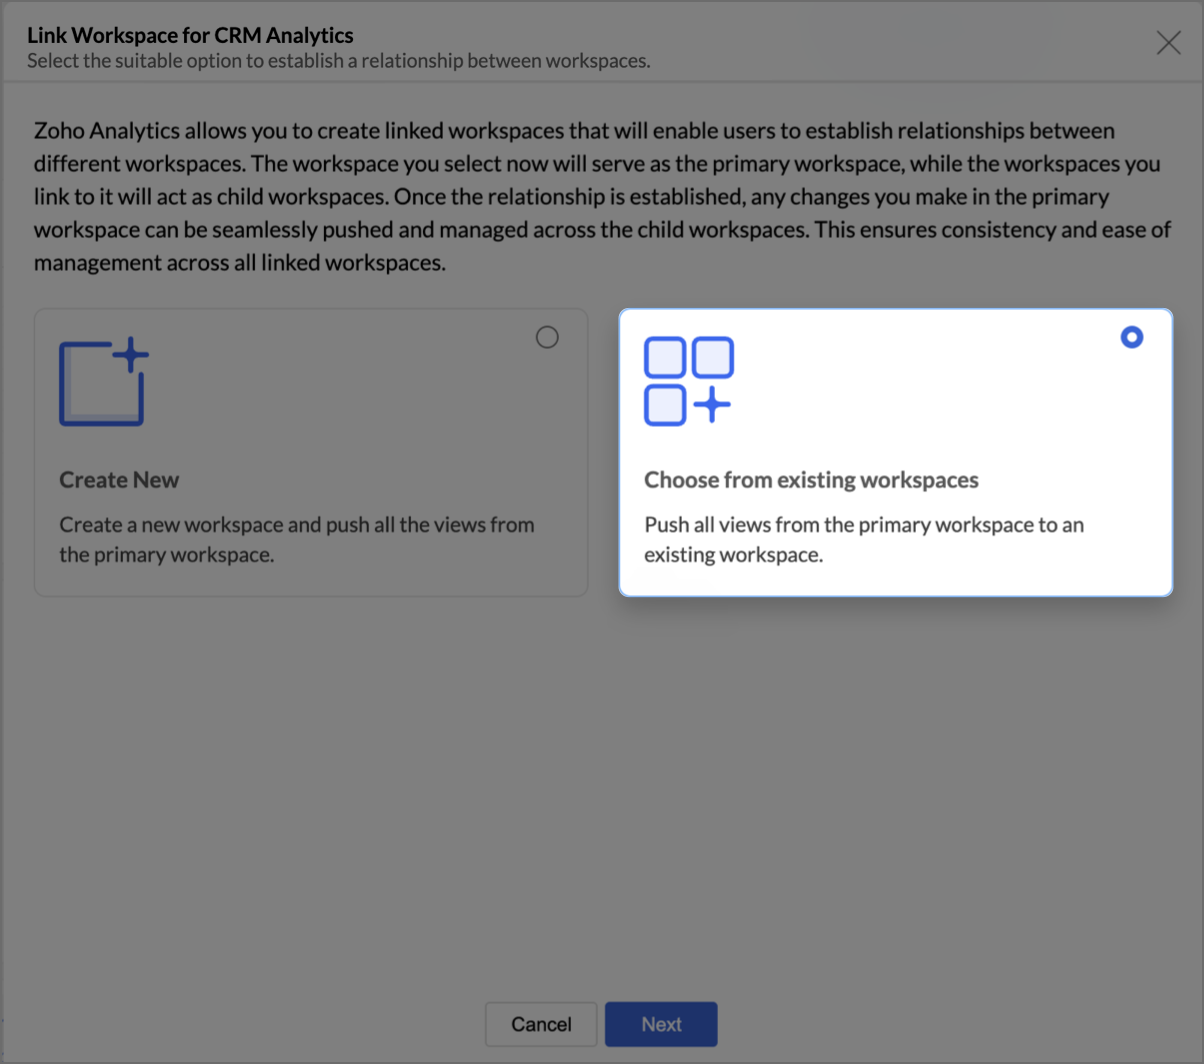
- In the Linked Workspace dialog box, choose one of the following options:
- Create New: Create a new secondary workspace and push all views from the primary workspace.
- Choose from existing workspaces: Select one or more existing workspaces to act as secondary workspaces.
- Follow the subsequent steps to complete the creation of linked workspaces.


Creating a new workspace
You can use this option to easily create a new workspace which will act as a secondary workspace with all the views in the master workspace.
To create a new secondary workspace,
- Select the desired workspace as the primary workspace.
- Click the More Options icon at the top-right corner and choose Link to Other Workspace.
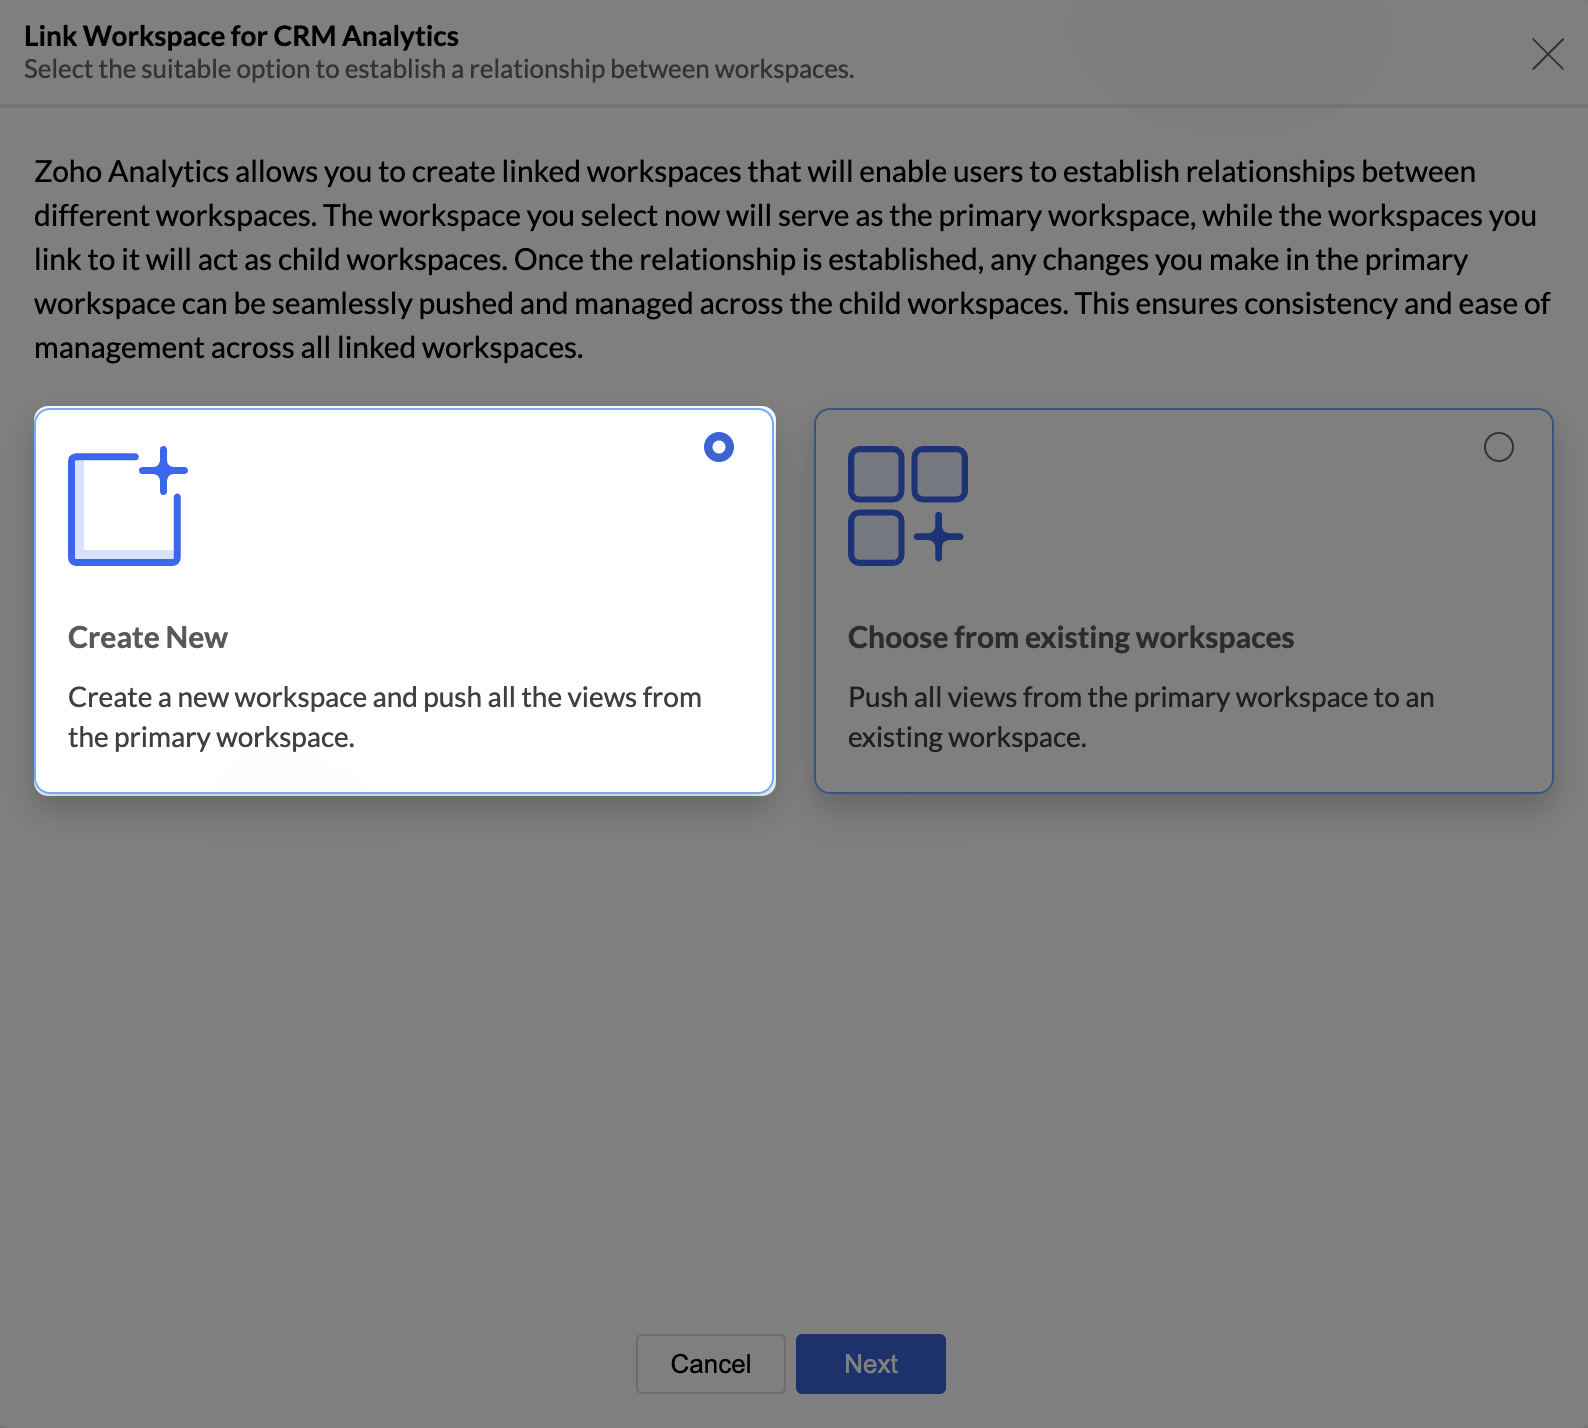
- In the Link Workspace dialog that opens, select Create New and click Next.
- In the next step, select the Organization Name from the drop-down.
- Enter the Workspace Name and Description (Optional).
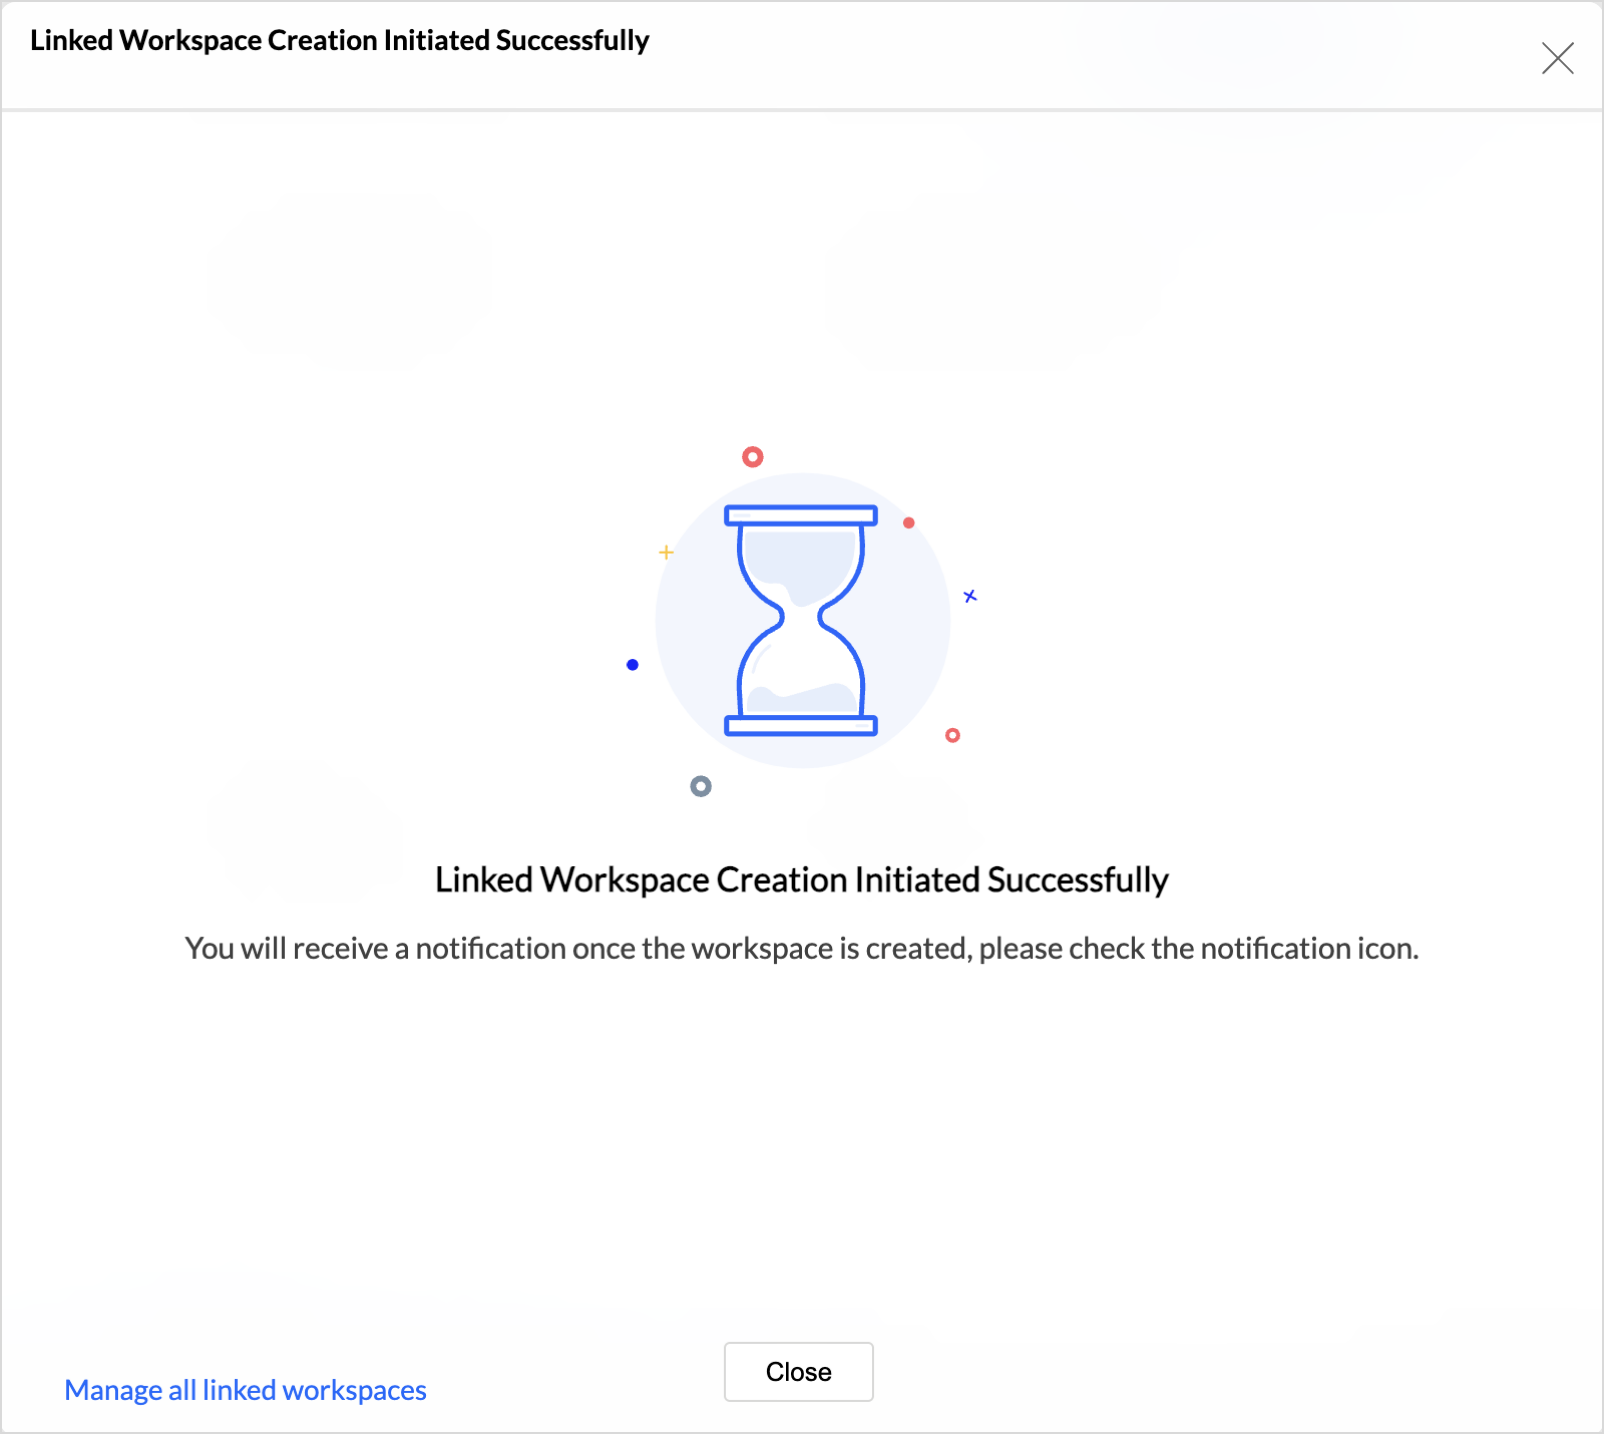
- Click Next to complete the creation of the linked workspace.

- Click Next to successfully create a linked workspace.


Choosing from existing workspaces
You can use this option to easily select one or more existing workspaces as secondary workspaces. The data sources, tables and views(reports and dashboards) from the primary workspace can be pushed to multiple secondary workspaces at the same instance.
Select one or more existing workspaces as secondary workspaces.
To create a new secondary workspace,
- Select the desired workspace as the primary workspace.
- Click the More Options icon at the top-right corner and choose Link to Other Workspace.
- In the Link Workspace dialog, select Choose from existing workspaces and click Next.
- A list of all workspaces where you are an Account Admin or Org Admin will be listed here.
- Select one or more workspaces from different organizations in the list based on your requirement.
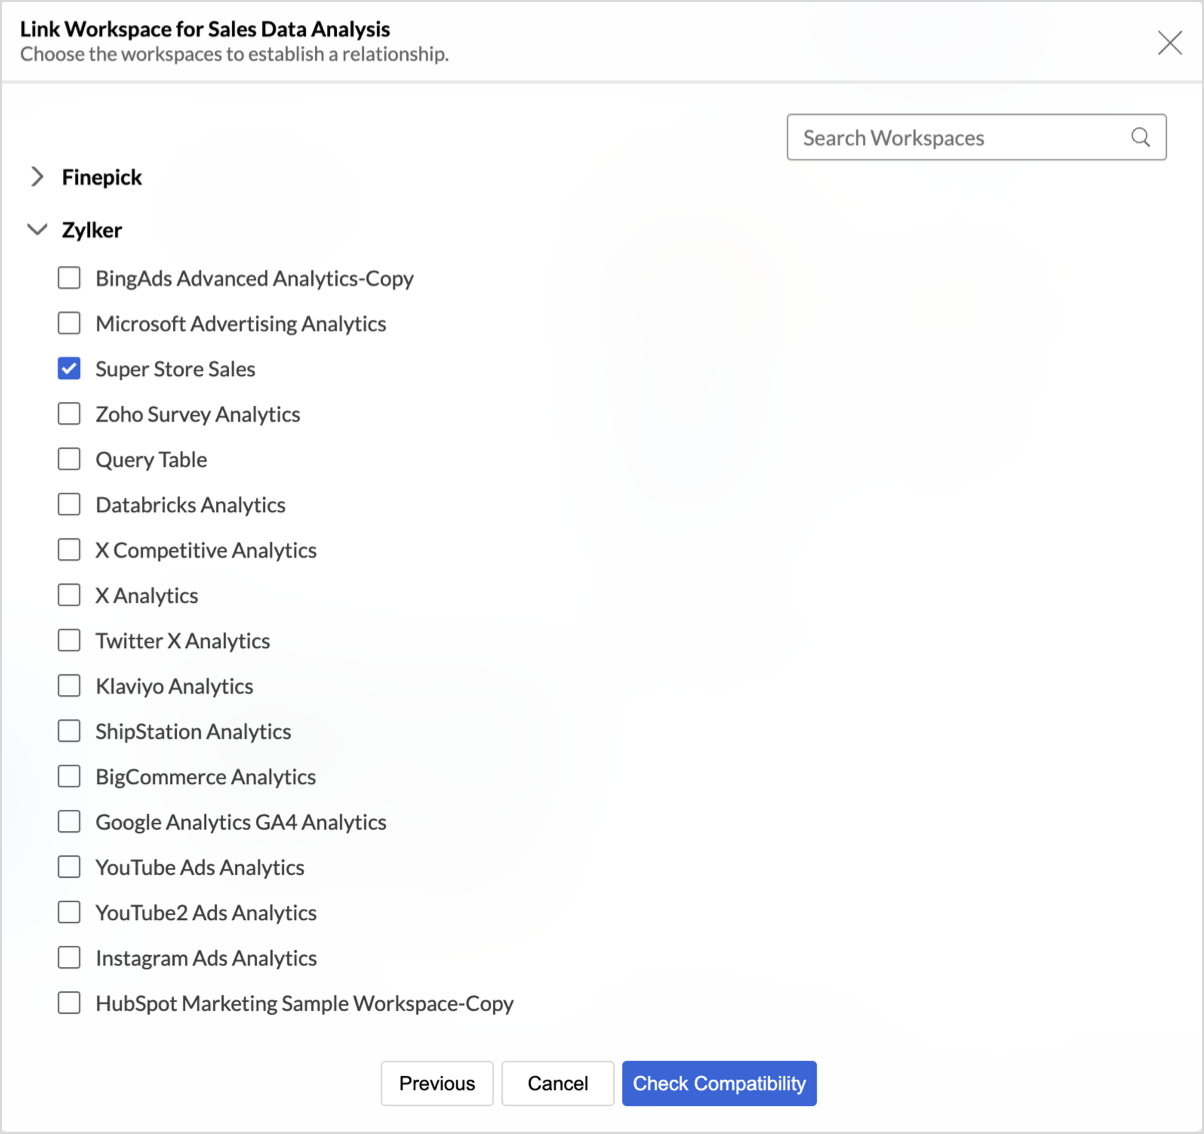
- Click Check Compatibility to verify if the workspaces can be linked based on data sources, views, and configurations in primary workspaces. Check the compatibility table to learn more.
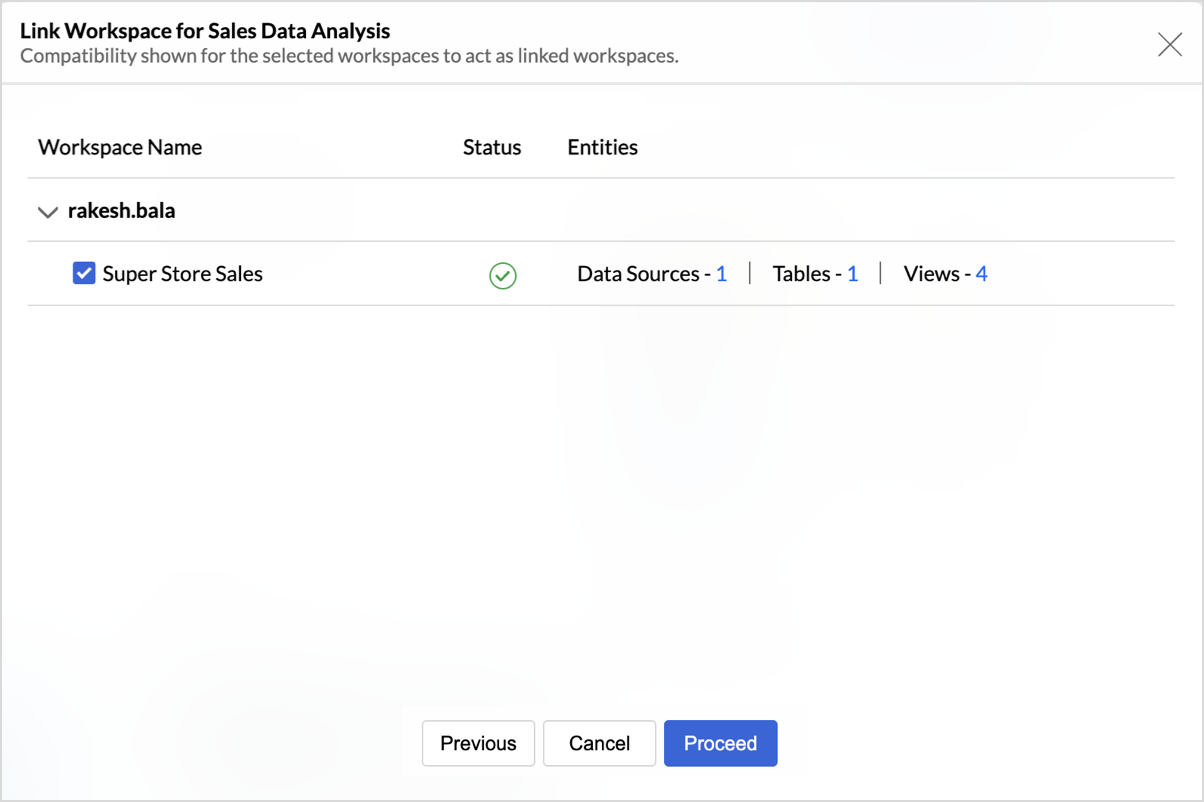
- If compatible, click Proceed to create the linked workspaces.


Checking compatibility
The Check Compatibility option verifies if the selected workspaces can be linked to the primary workspace by assessing their data sources, views, and configurations. It ensures that selected workspaces are compatible before linking them together.
For two existing workspaces to be linked,
- Datasources: Primary and secondary workspaces need to have the same kind of data source (Say both are CRM based data) to be mapped.
- Tables: Tables from both the workspaces need to be mapped (same name and same data source).
- Views: Views from both data sources should be mapped (same name and same data source).
To better understand how this works, let's consider a primary and a secondary workspace with a CRM-based data source. The table below illustrates how compatibility is determined in various scenarios.
Primary - Data Source | Secondary - Data Source | Secondary - Table (Available for mapping) | Secondary - View (Available for mapping) | Compatibility Results |
CRM | CRM | Yes | Yes | Push Success: |
CRM | CRM | Yes | No | Push Success: |
CRM | CRM | Yes | Yes, but views have a different data source | Push Parial -Success: |
CRM | CRM | Yes, but tables have a different data source | No | Push Failure: |
CRM | CRM | No | No | Push Success: |
CRM | CRM | No | Yes, but views have a different data source | Push Success: |
CRM | NA | No | No | Push Success: |
CRM | NA | No | Yes, but views have a different data source | Push Partial-Success: |
CRM | NA | Yes, but t ables have a different data source |
| Push Failure: |
Based on the compatibility results, you can proceed to create a linked workspace between already existing workspaces. The below image shows sample comaptibility results.
Pending Views
After establishing a linked workspace, there may be new views added or any existing views updated in the primary workspace. Pending views refers to these new /updated views that need to be pushed to the client workspace from the primary workspace.
The main advantage of using the linked workspace is that these changes (pending views) in the primary workspace can be easily updated in the secondary workspace in a few simple steps.
To sync pending views to the secondary workspace:
- Go to the primary workspace from the Zoho Analytics home page.
- Click the More Options icon at the top-right corner of the primary workspace and select Link to Other Workspace.
- From the menu, choose Sync View.
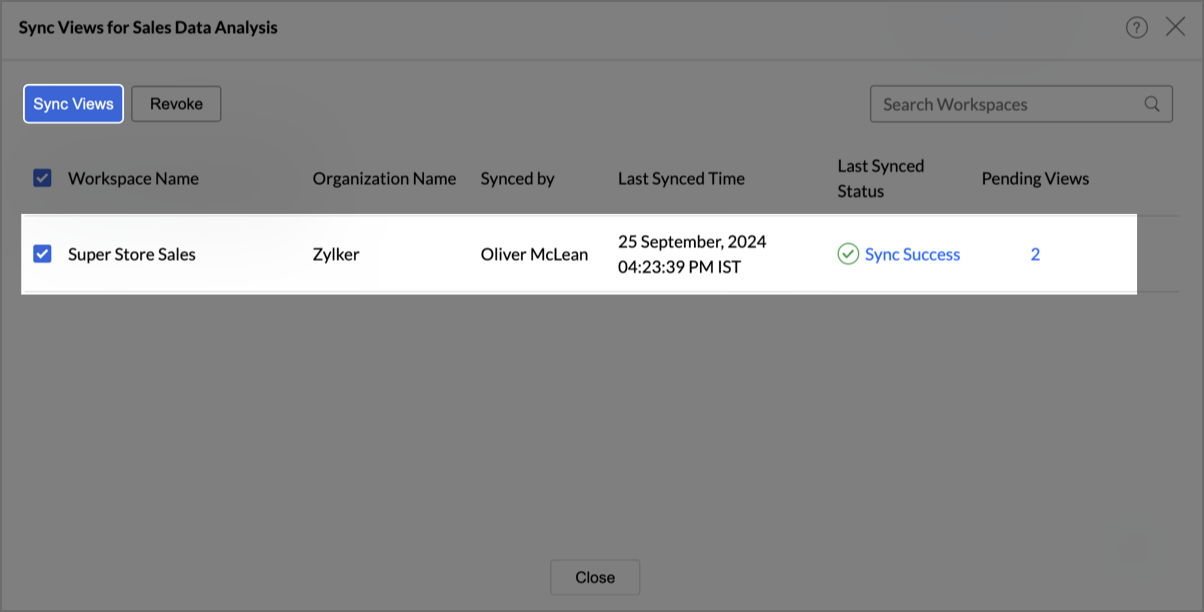
- The Sync Views dialog box will appear, listing all associated secondary workspaces with details such as Workspace Name, Organization Name, Synced by, Last Sync Status, Last Sync Time, and Pending Views.
- Select the checkbox next to the desired workspace and click the Sync Views button at the top to sync all pending views. You can select multiple secondary workspaces.
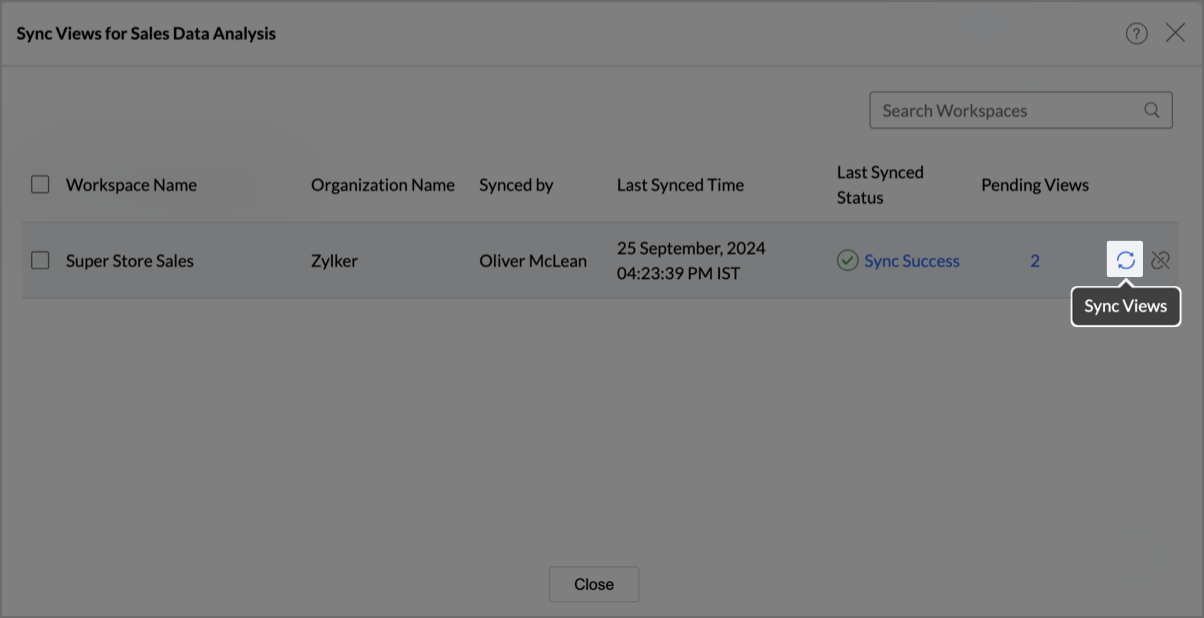
- Alternatively, use the Sync Views icon at the end of each workspace's details to sync pending views for a specific secondary workspace.


Managing Linked Workspace
1. Can I view and manage all the linked workspaces at the organization level?
Yes, you can check and manage all the linked workspaces in your organizations from your Organization Settings page.
To manage linked workspaces:
- Click the Organization Settings icon at the top right corner.
- Go to the Linked Workspaces tab under the Data Administration section.
- The Linked Workspaces page will display a list of all primary workspaces and their associated secondary workspaces.
- Each secondary workspace is listed with details such as Workspace Name, Organization Name, Synced by, Last Sync Status, Last Sync Time, and Pending Views.
- To sync pending views, select the desired secondary workspaces and click the Sync Views button at the top.
- To revoke the link between the primary and secondary workspaces, select the workspaces and click the Revoke button at the top.
- Alternatively, use the Sync Views icon and Revoke icon next to each workspace's details to sync views or revoke the link for a specific secondary workspace.
2. Can I make changes to the views pushed from the primary workspace?
Yes, you can make changes to views pushed from the primary workspace to the secondary workspace. You can update or delete these views in the secondary workspace, and such changes will not affect the views in the primary workspace. When pending views are synced, the modified views in the primary workspace will be synced to match those in the secondary workspace.
3. Who can manage and sync views to the linked workspaces in my organization?
All Org Admins within your organization can manage linked workspaces associated with their specific organization.
For example, consider three organizations: Zylker Overview, Zylker Marketing, and Zylker Sales.
- Zylker Overview has three Org Admins: one for each of Zylker Overview, Zylker Marketing, and Zylker Sales.
- The Zylker Overview admin is also an Org Admin for both Zylker Marketing and Zylker Sales.
If Zylker Overview establishes linked workspaces with both Zylker Marketing and Zylker Sales:
- Zylker Overview can manage all the linked workspaces.
- Zylker Marketing can only manage its own linked workspaces and cannot manage those associated with Zylker Sales. It can view the list but cannot manage other organizations' linked workspaces.