Import Data from Google Drive
Zoho Analytics allows you to import data from Google Drive to utilize the advanced analytical features, using the simple Import Wizard. You can also Schedule Imports periodically from Google Drive to analyze the latest data.
In this chapter we are going to learn about importing data from Google Drive.
Data Import
- How do I import data from Google Drive into Zoho Analytics?
- Can I import data into an existing table?
Import Settings
- How do I set a custom date format?
- How to map a column into an existing column while importing?
- Will the Import details be saved /can I view the Import details?
- Why do I see Warning Details in Import Summary?
- How do I resolve error conditions during import?
- Can I retain the relational data modelling from my source?
- Can I schedule importing data?
Data Import
1. How do I import data from Google Drive into Zoho Analytics?
2. Can I import data into an existing table?
Yes, you can import data into an existing table. Follow the given steps to import data into an existing table:
- Open the table into which you want to import data.
- Click Import Data > Import Data into this Table.

- Import Your Data page will open. Choose the data source from which you want to import.
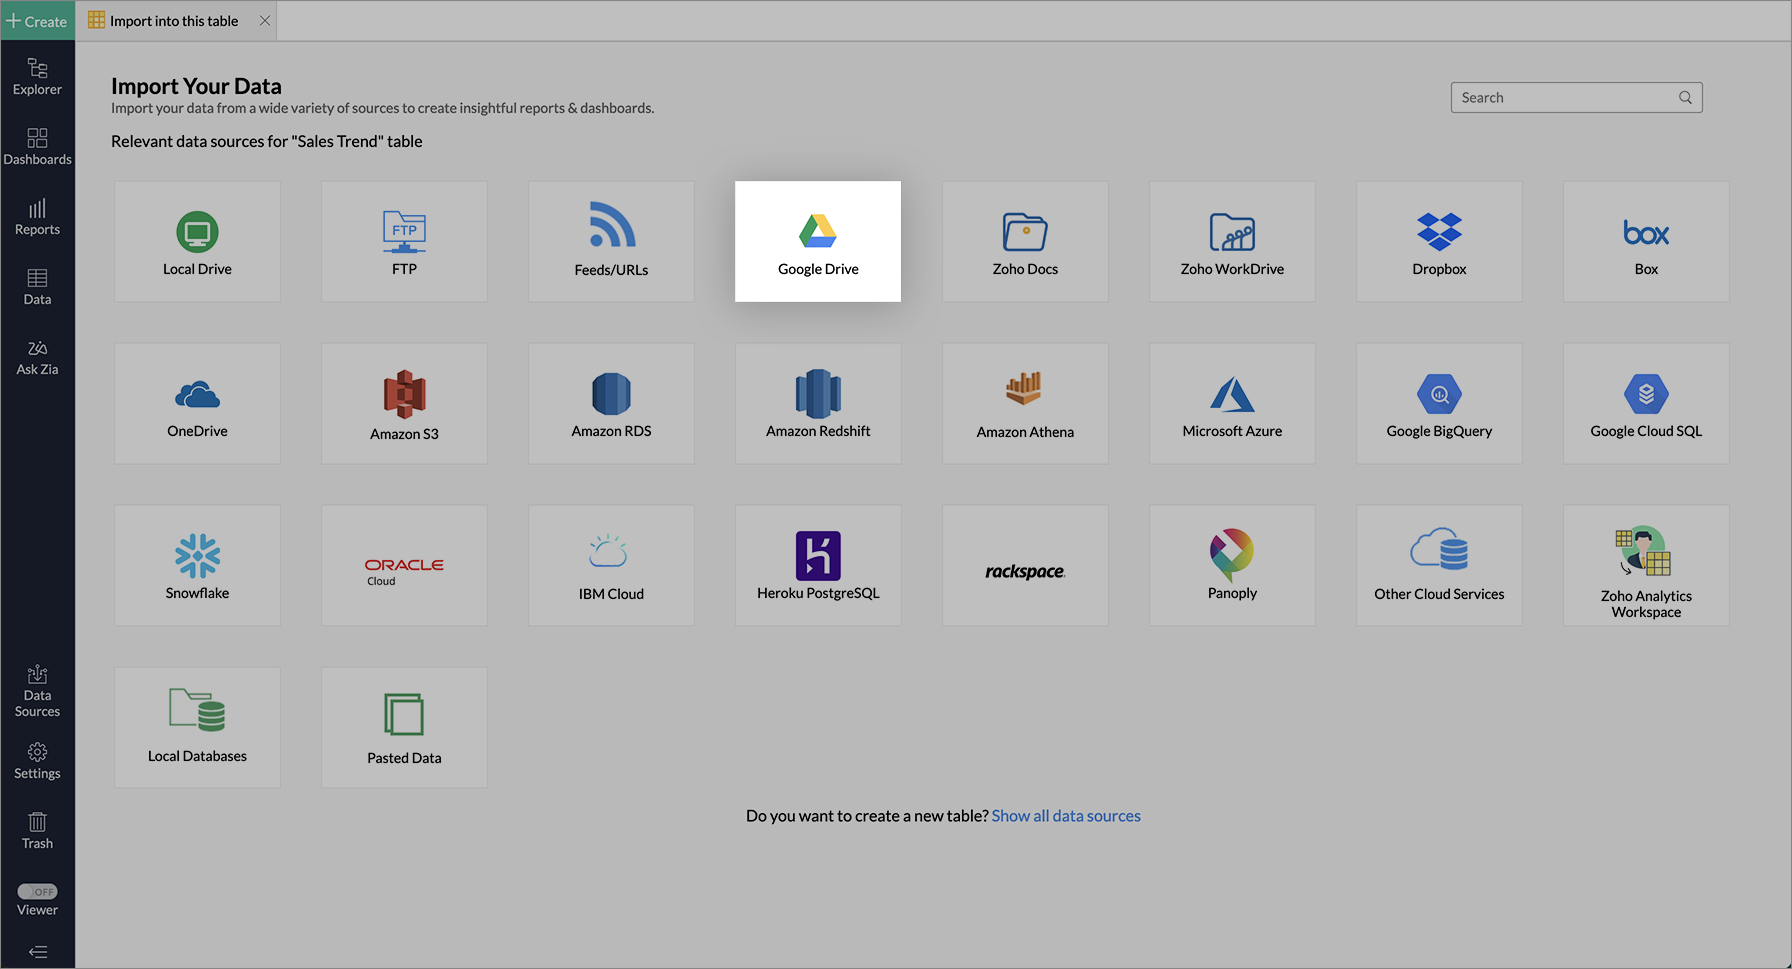
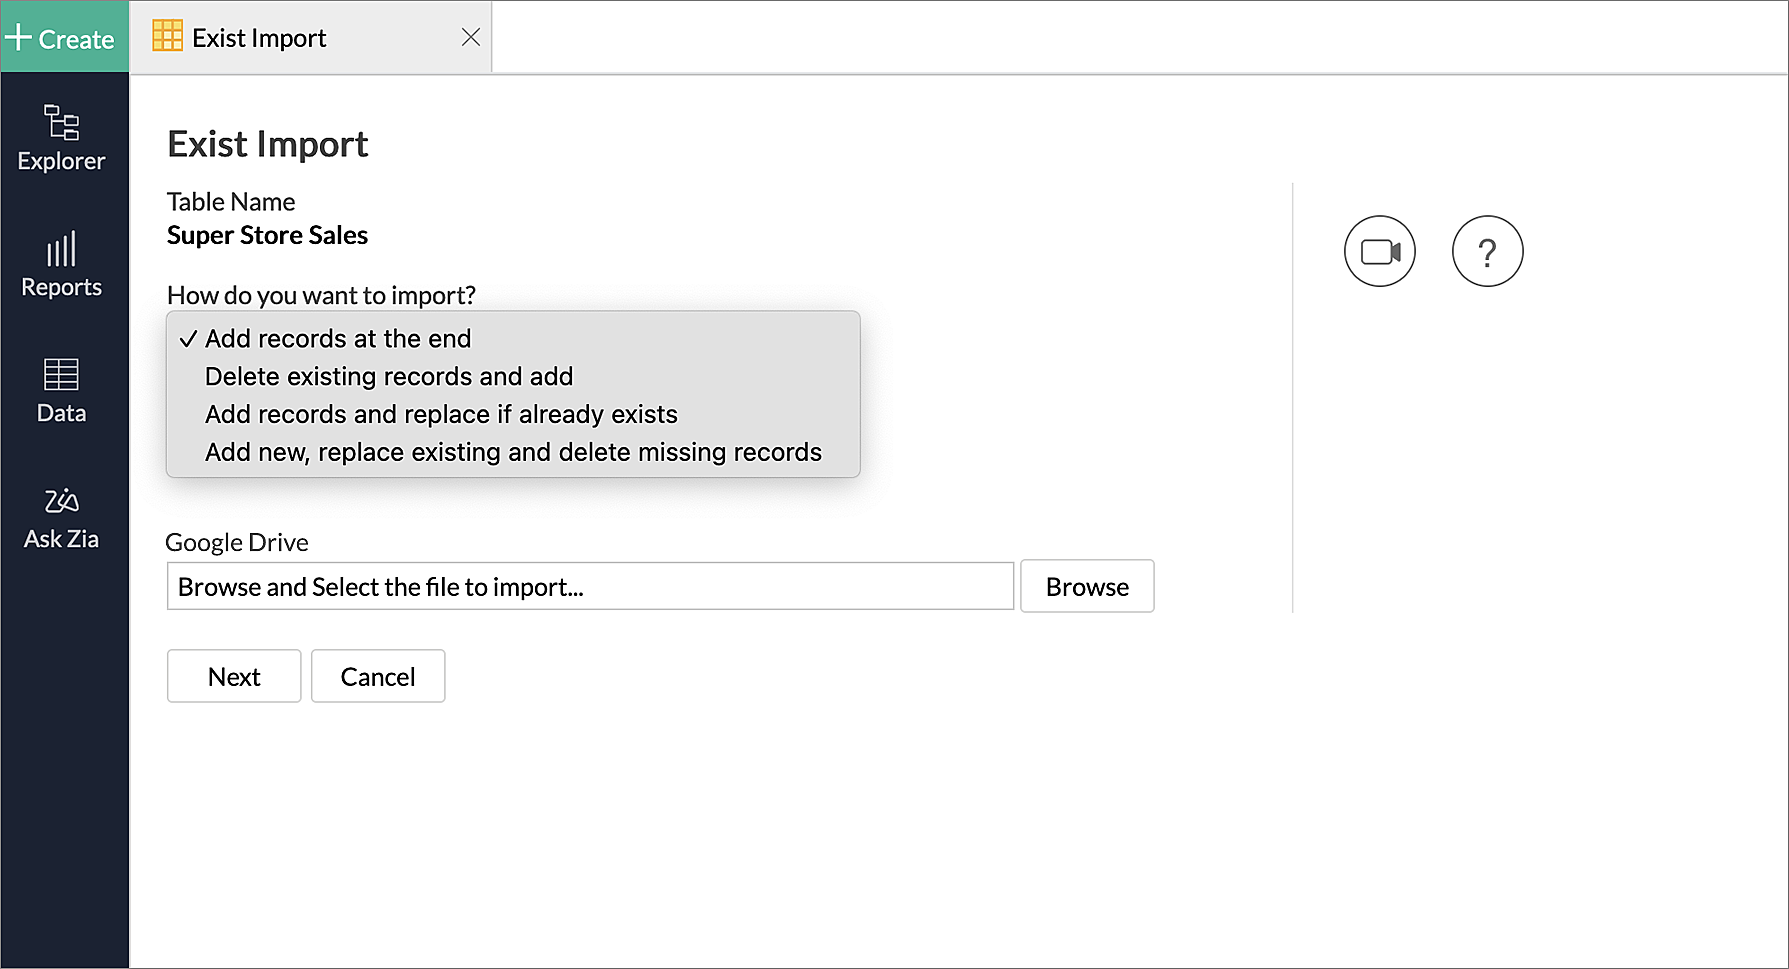
- The Exist Import Wizard will open. Select from How do you want to import dropdown menu. Zoho Analytics allows you to add data to an existing table in the following four ways.
- Add records at the end - This appends the record at the end of the table.
- Delete existing records and add - This deletes the entire records in Zoho Analytics table and adds the new records.
- Add records and replace if already exists - This updates the existing records on the table with the new values and append the new records at the end of the table.
- Add new, replace existing and delete the missing records - This updates the existing records in the table with the new values, append the new records at the end of the table and deletes records that are not present in the file but present only in the Zoho Analytics Table.
Note:
You can select one or more columns to match the existing records.
The matching columns should point to a single record.
- On selecting, Add records and replace if already exists or Add new, replace existing and delete the missing records options, it is mandatory to Select the column(s) to match the existing records.
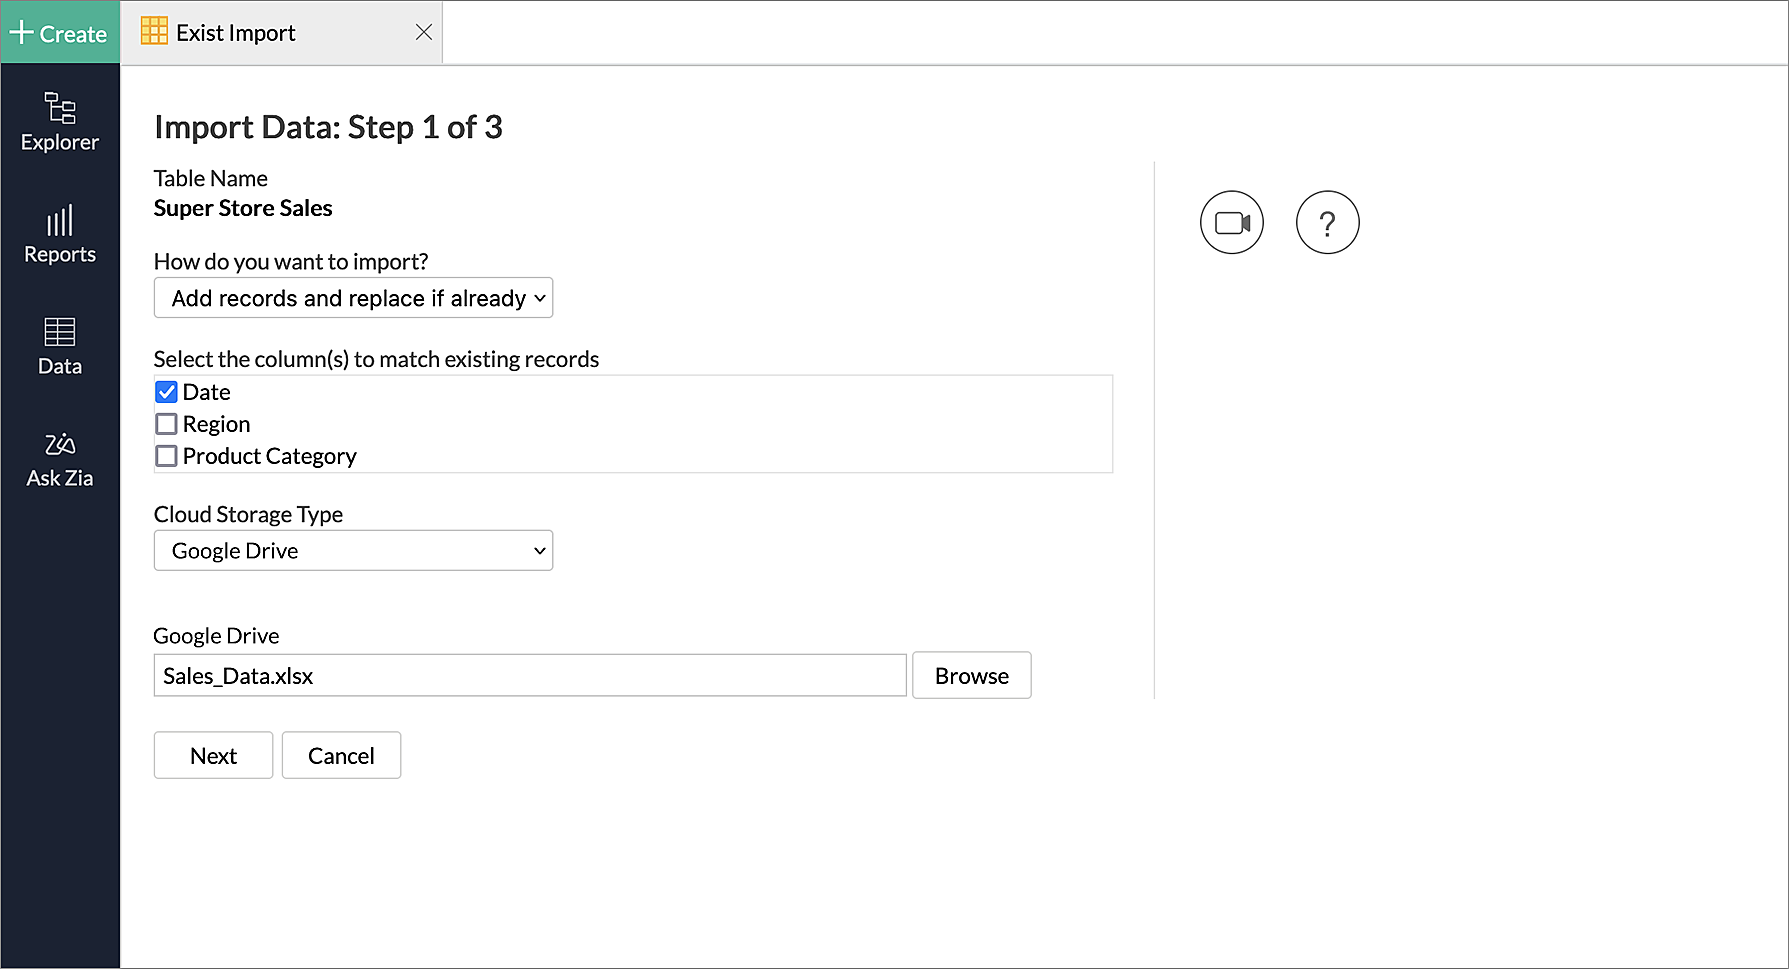
- Finally, select the Cloud Storage Type from which you have to import the data.
- Browse the Cloud Drive and select the file you want to import and click Next.
- In the following step, select the table you want to import and click Next.
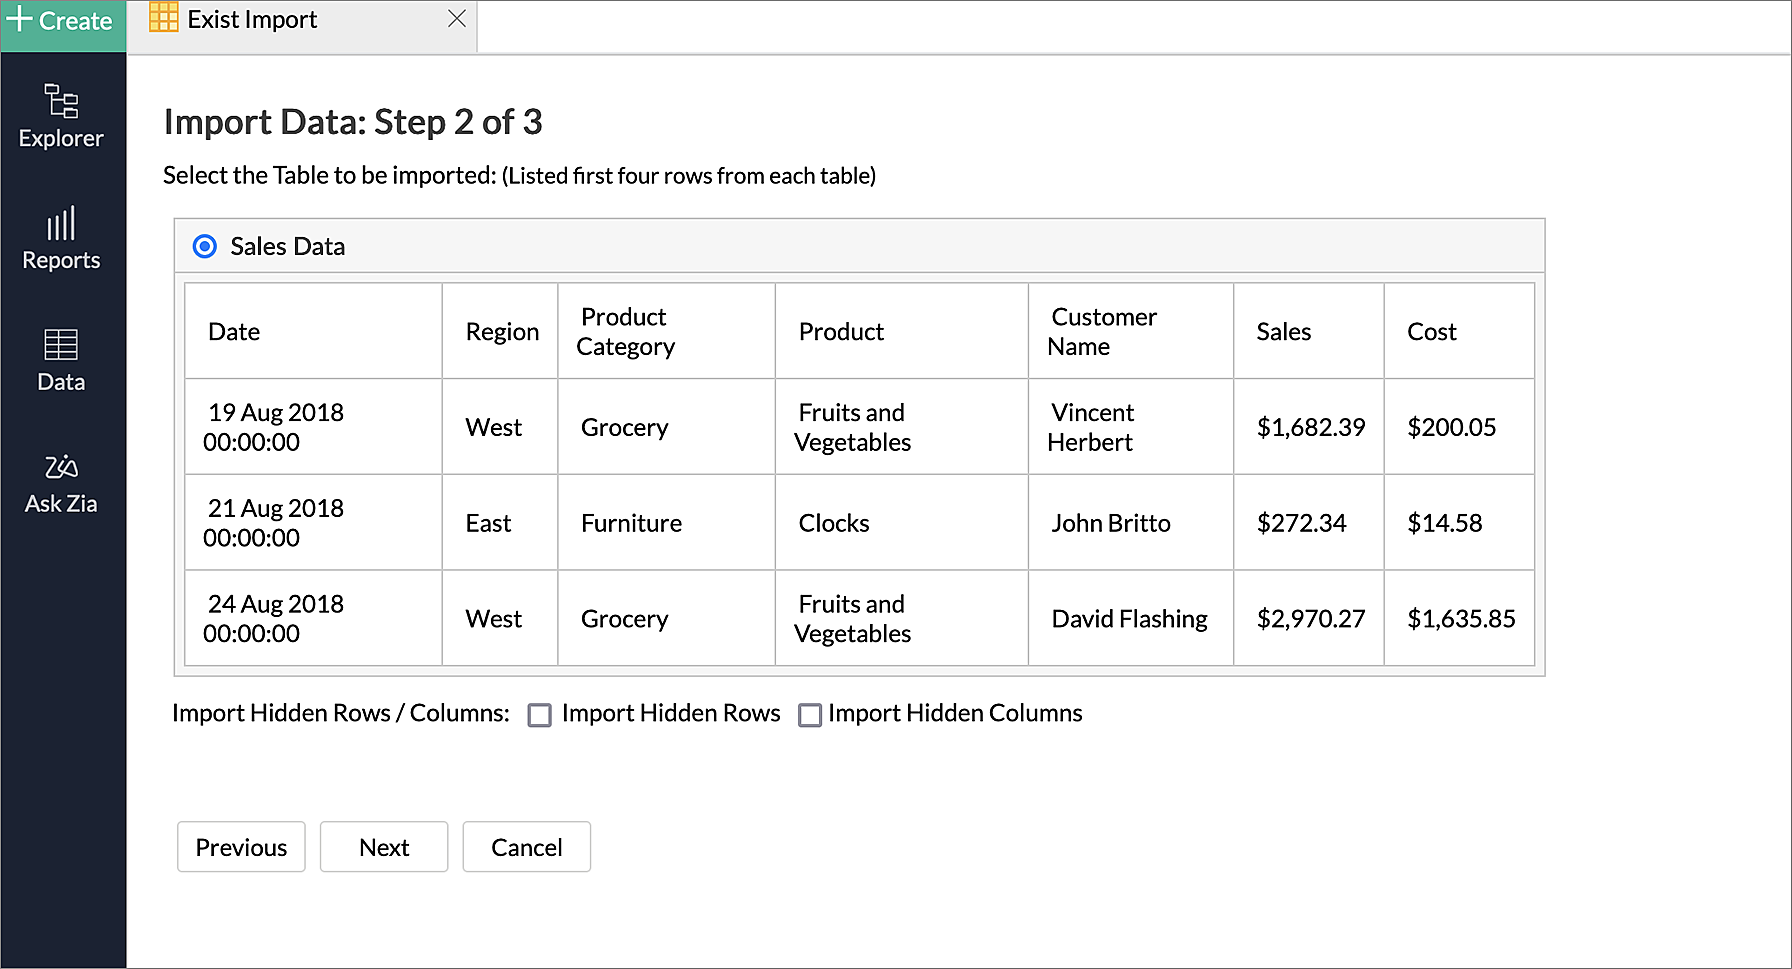
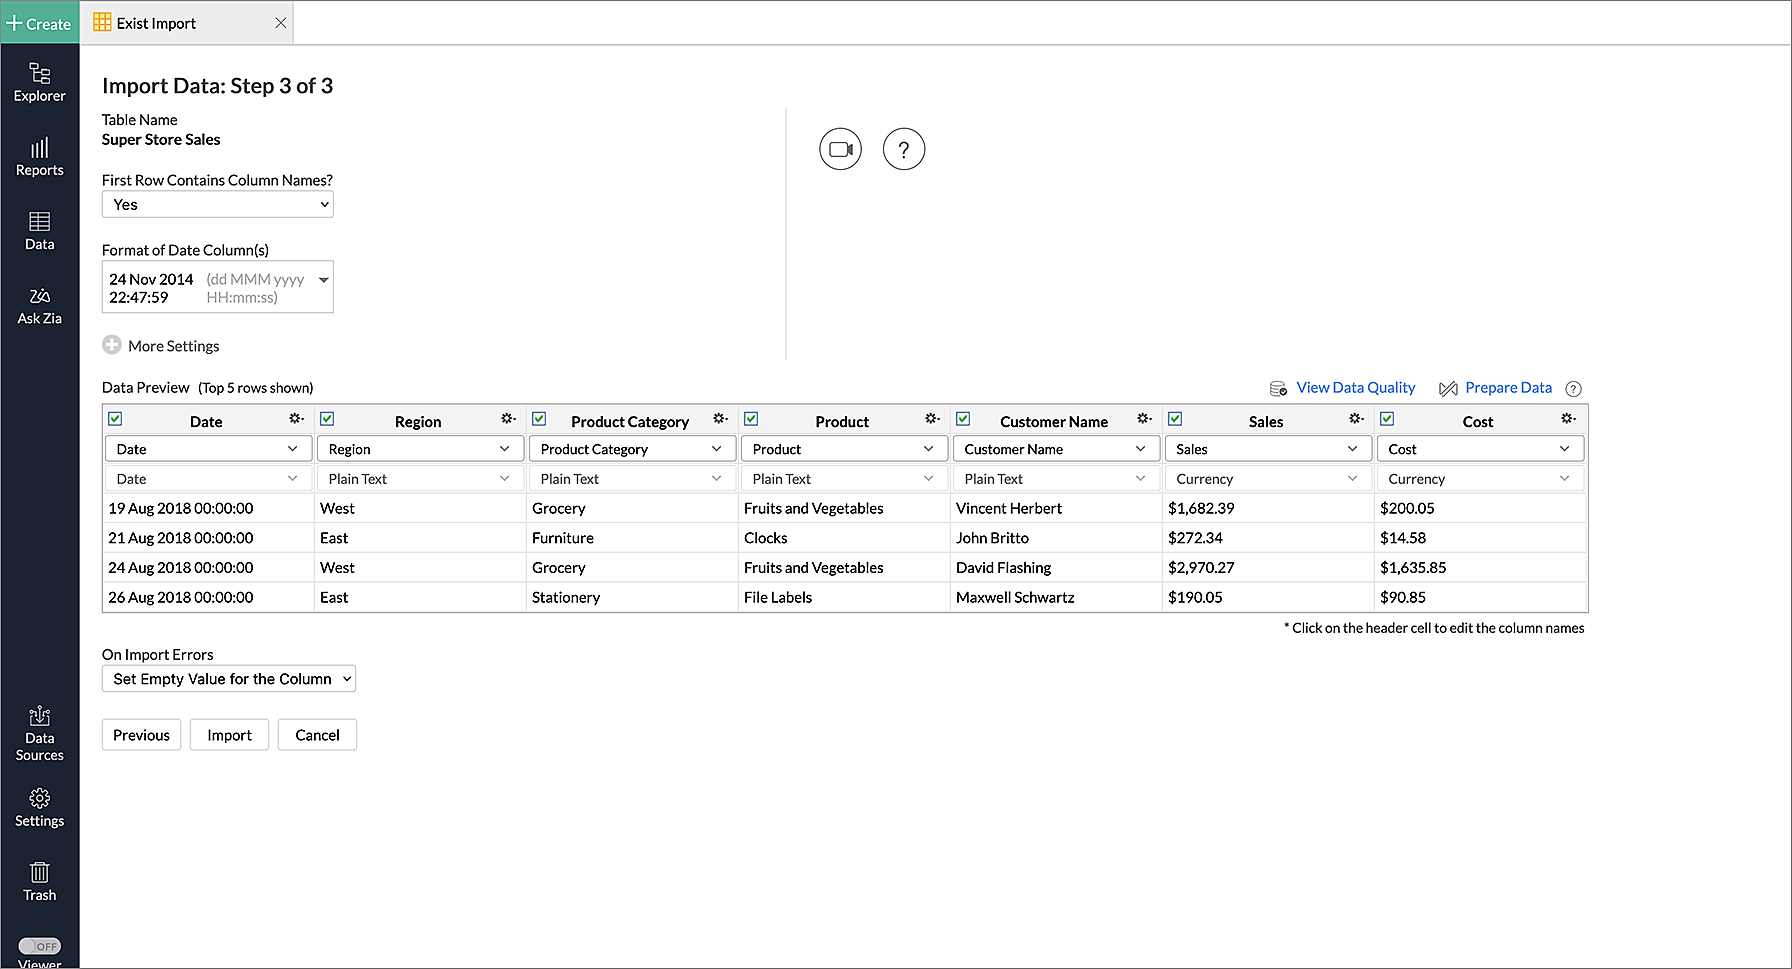
- The next step of the wizard will open. Provide the necessary settings for Zoho Analytics to properly understand the data being imported.
- Ensure that you have set all import settings, click Import to proceed with importing data. To know more on import settings, click here.
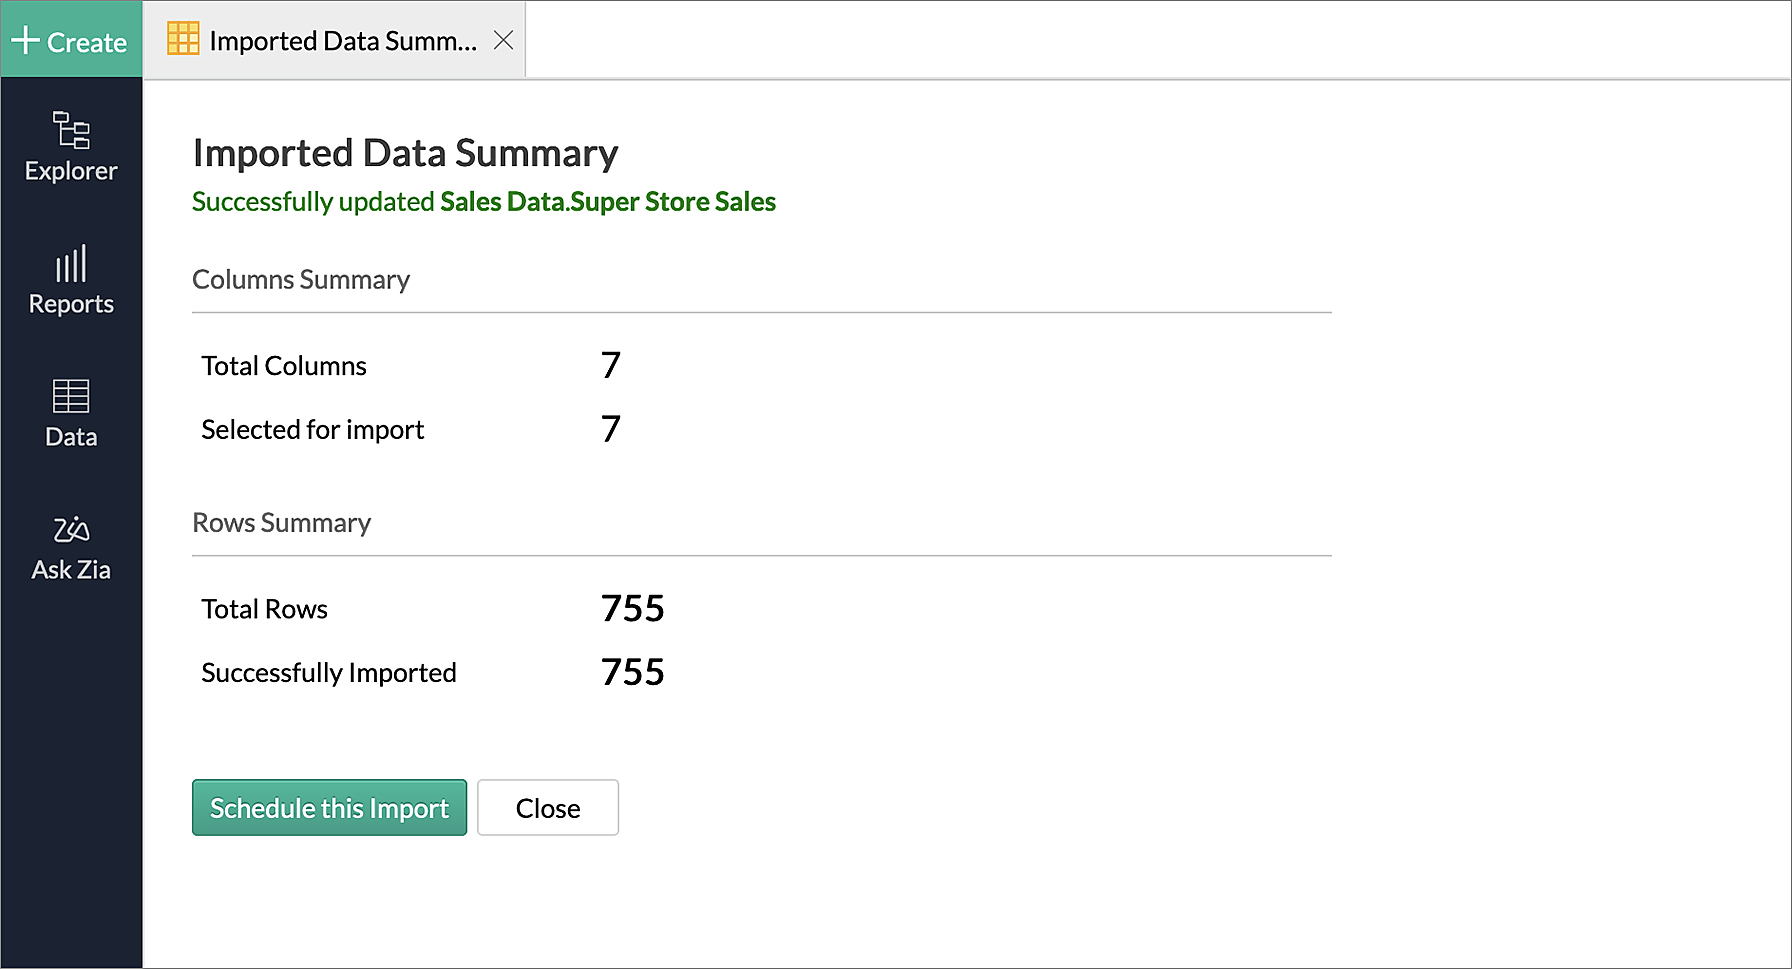
- The Import Data Summary dialog opens and gives information about the data imported.
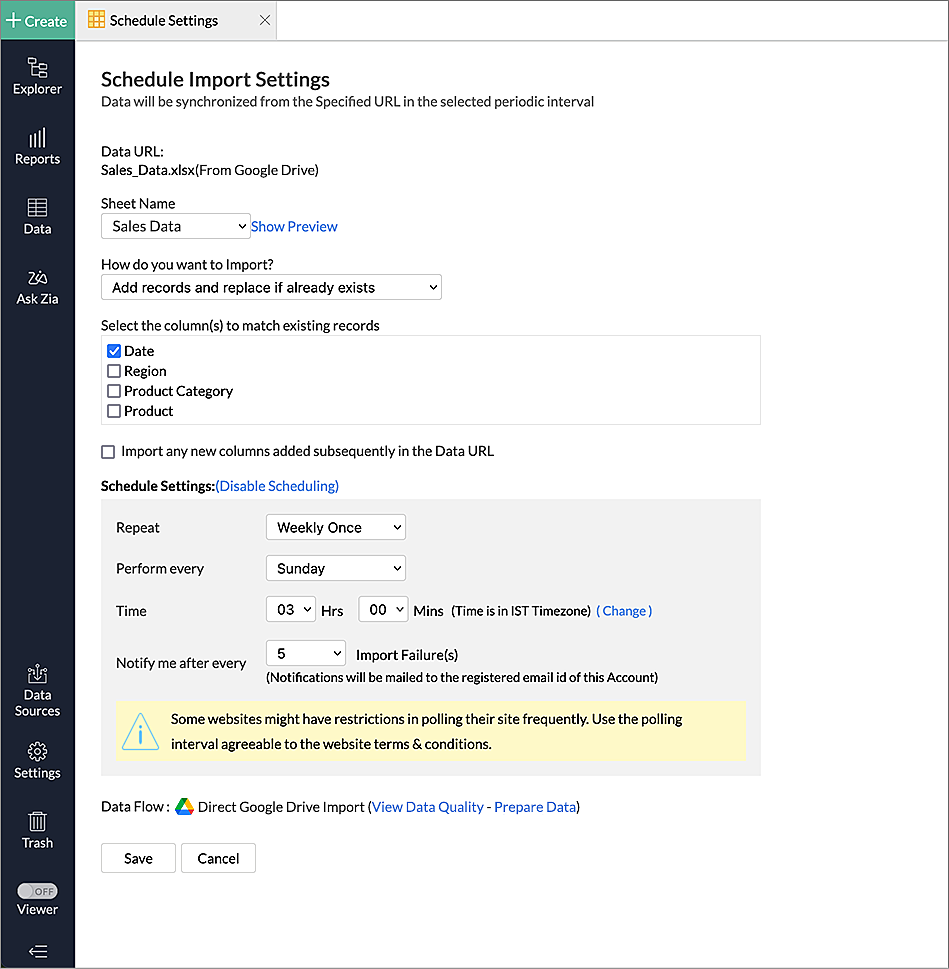
- In case you want to schedule your import, Click on Schedule this Import option. To know more about Schedule Import Setting. Click here.
Import Settings
1. How do I set custom date format?
During import, Zoho Analytics tries to determine the format of the date column automatically and display the same. If you find that to be incorrect or if Zoho Analytics had failed to recognize any date column, then you can set the date format using the Format of Date Column(s) option.
Refer to this link, to know more about custom date format.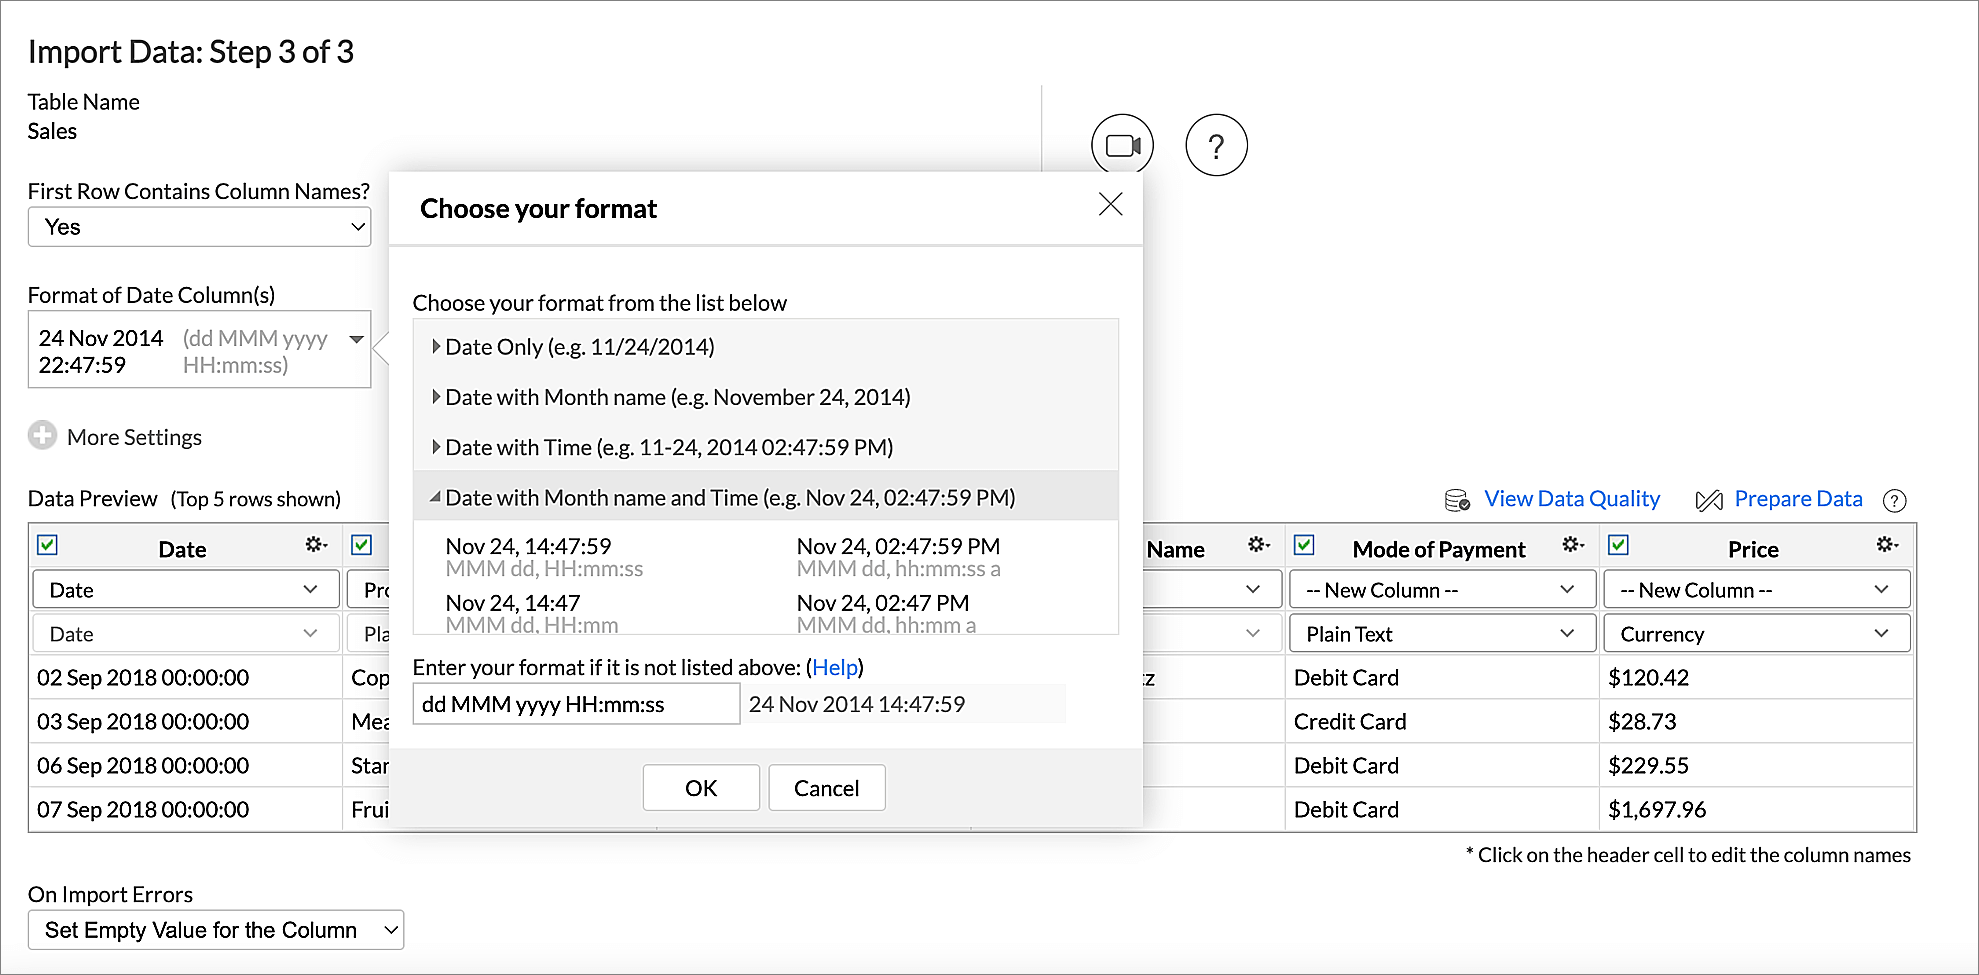
2. How to map a column into an existing column while importing?
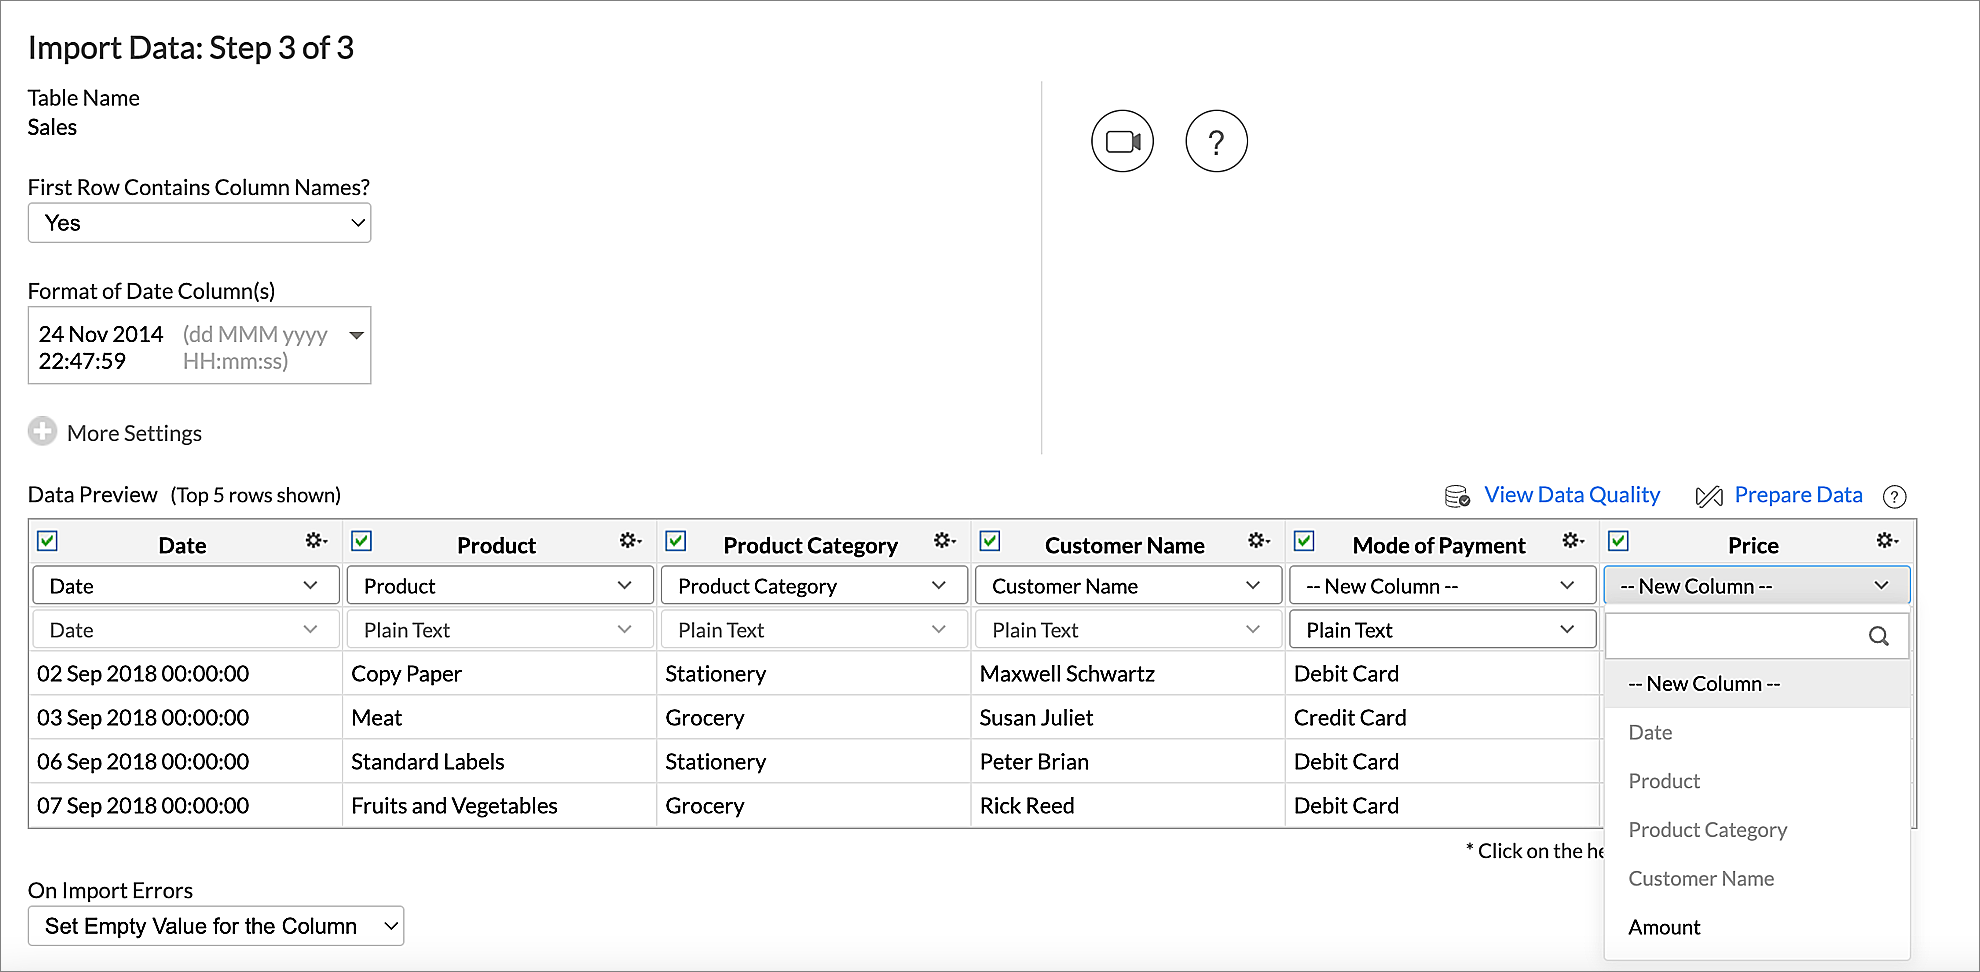
You can map columns while importing data into an existing table. In the Data Preview section of the Import wizard, a drop-down will list all the columns in the Zoho Analytics table. You can either map each column to an existing column or import it as a new column into your Zoho Analytics table.
In the image below, the column Amount is mapped to the column Price and the column Mode of payment is imported as a New Column.
3. Will the Import details be saved? Can I view the Import details?
Yes, Zoho Anlaytics saves and allows you to view the import details.
To view the import details:
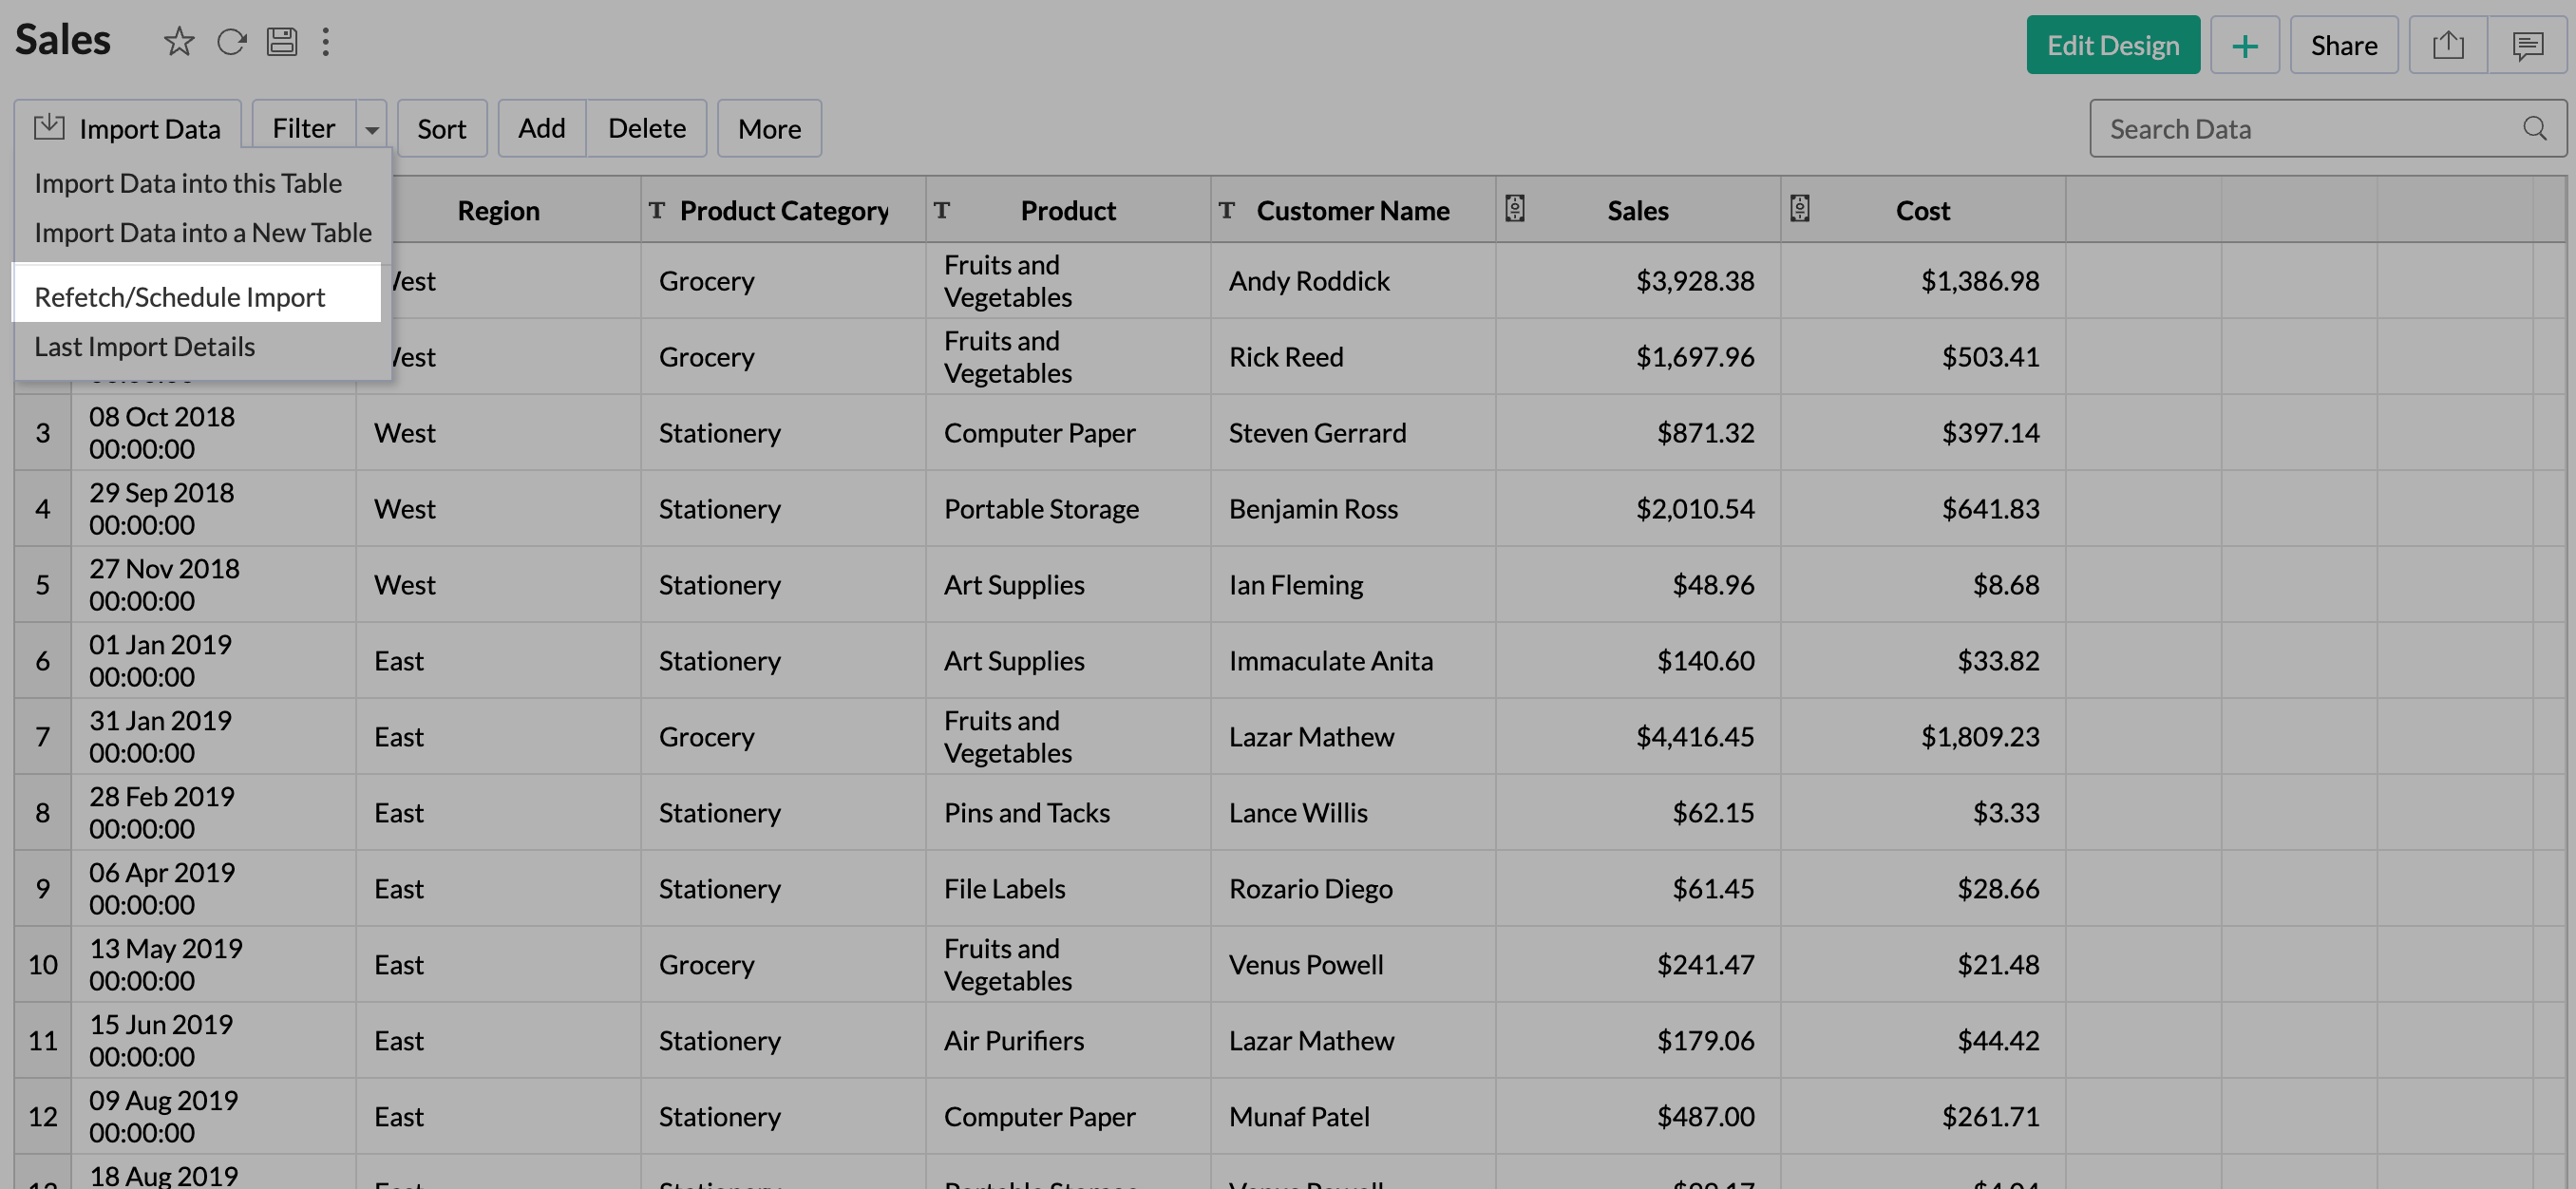
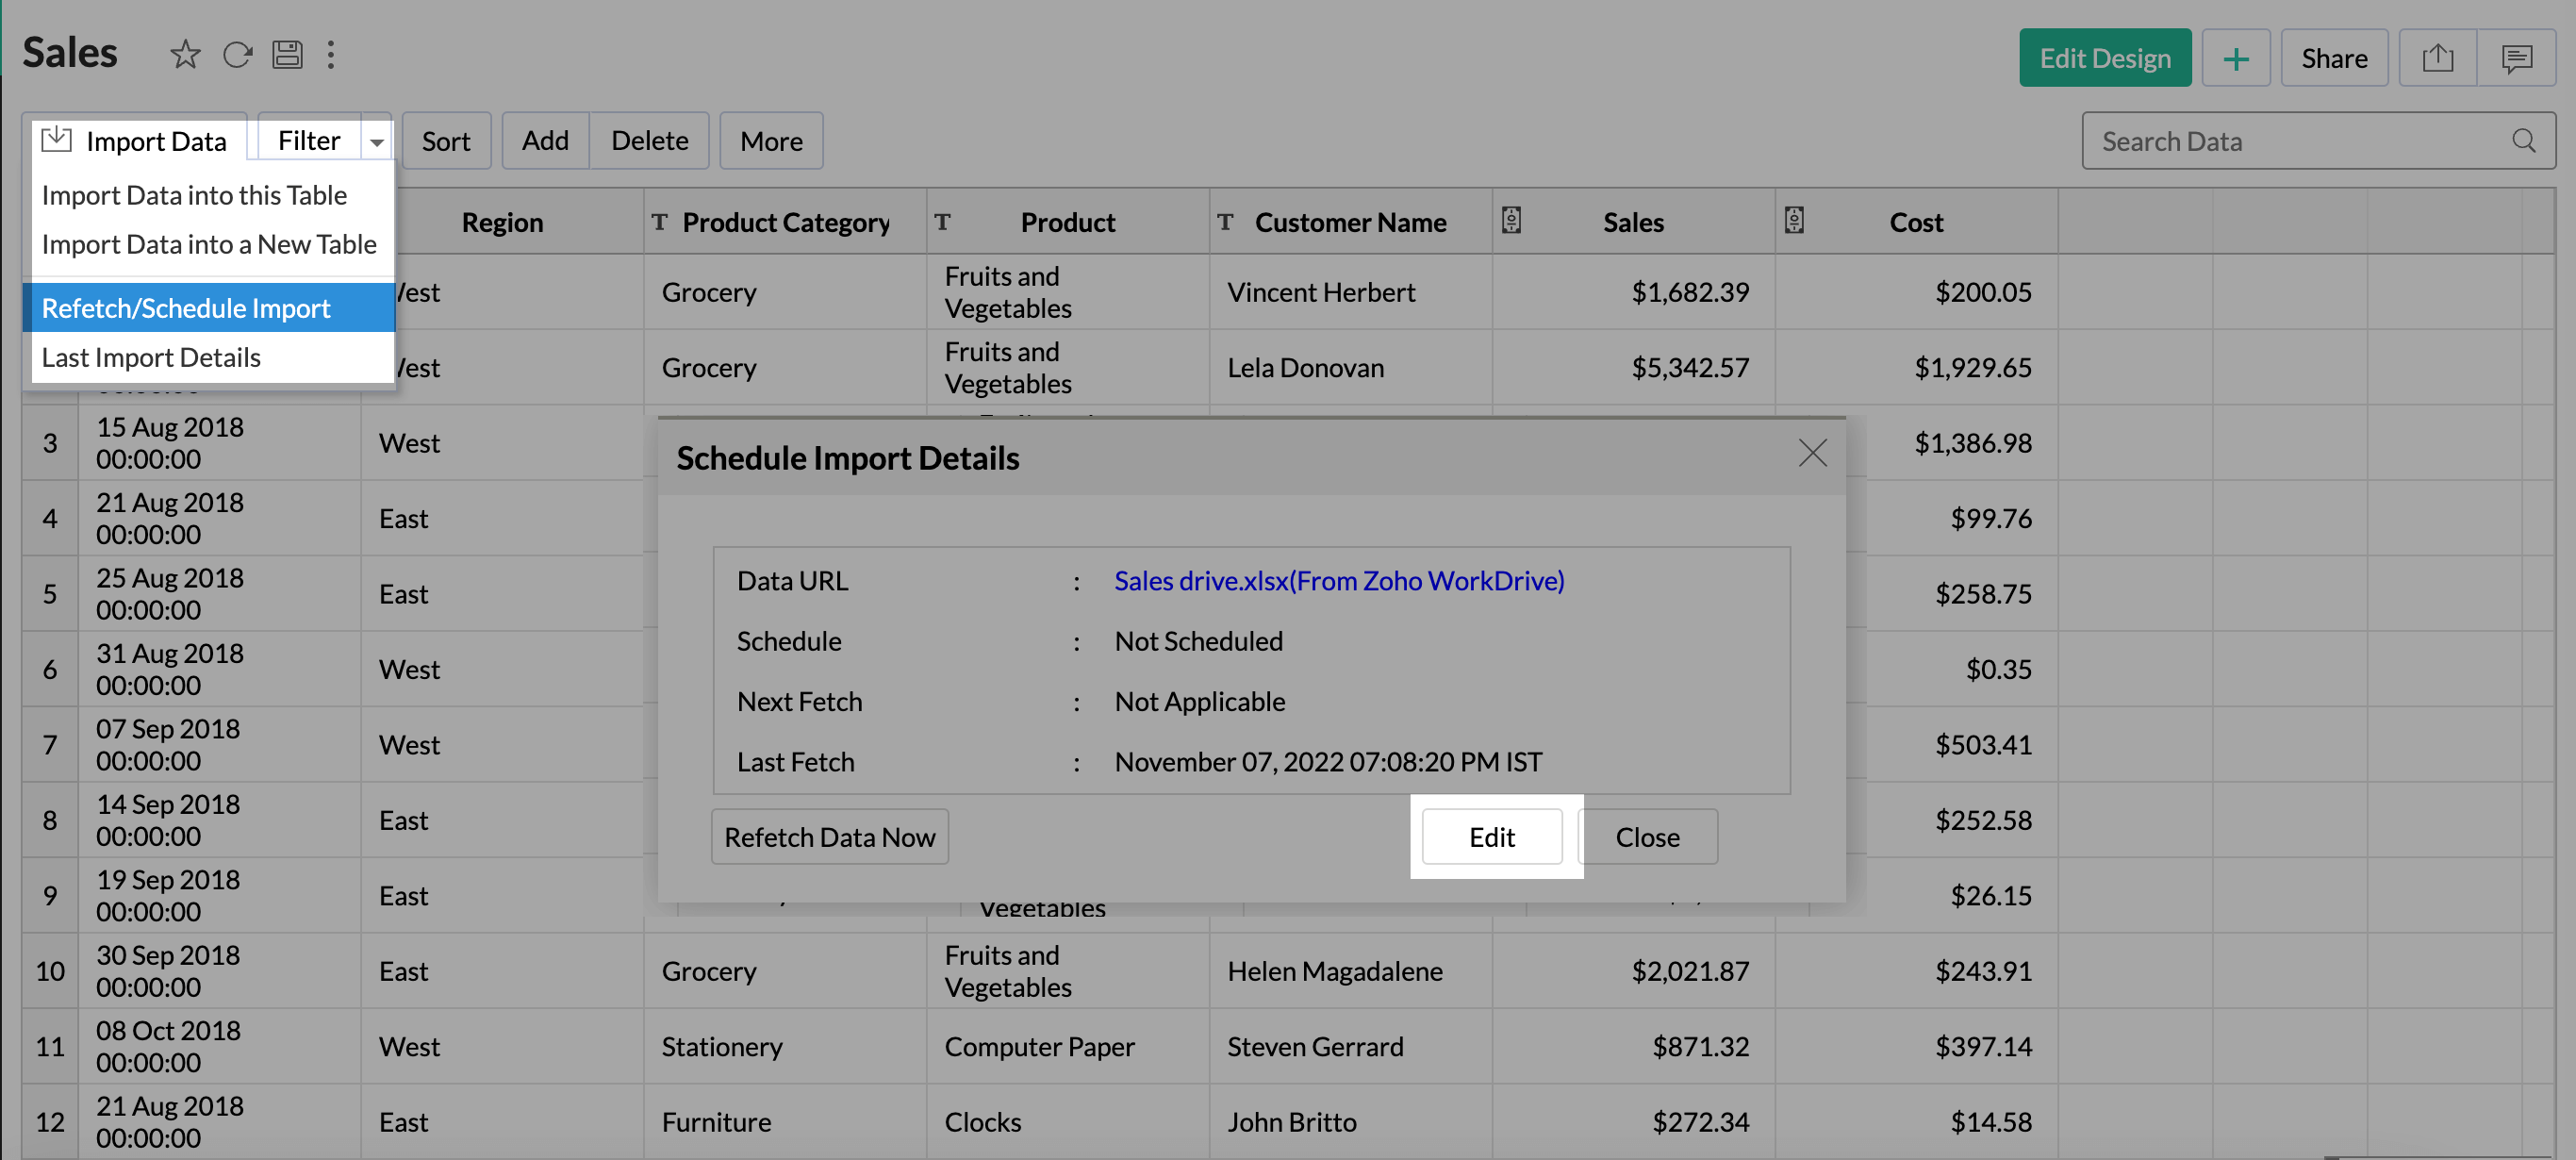
- Click Import Data.
- Select Refetch/Schedule Import from the drop-down.
- The Schedule Import Details dialog will open. You can view the following details
- Schedule: Provides the timing and the interval of when the data will be synced.( in which the data will be synced).
- Next Fetch : Provides the details of when the next sync is due.
- Last Fetch: Provides the details of when the data was last synced.
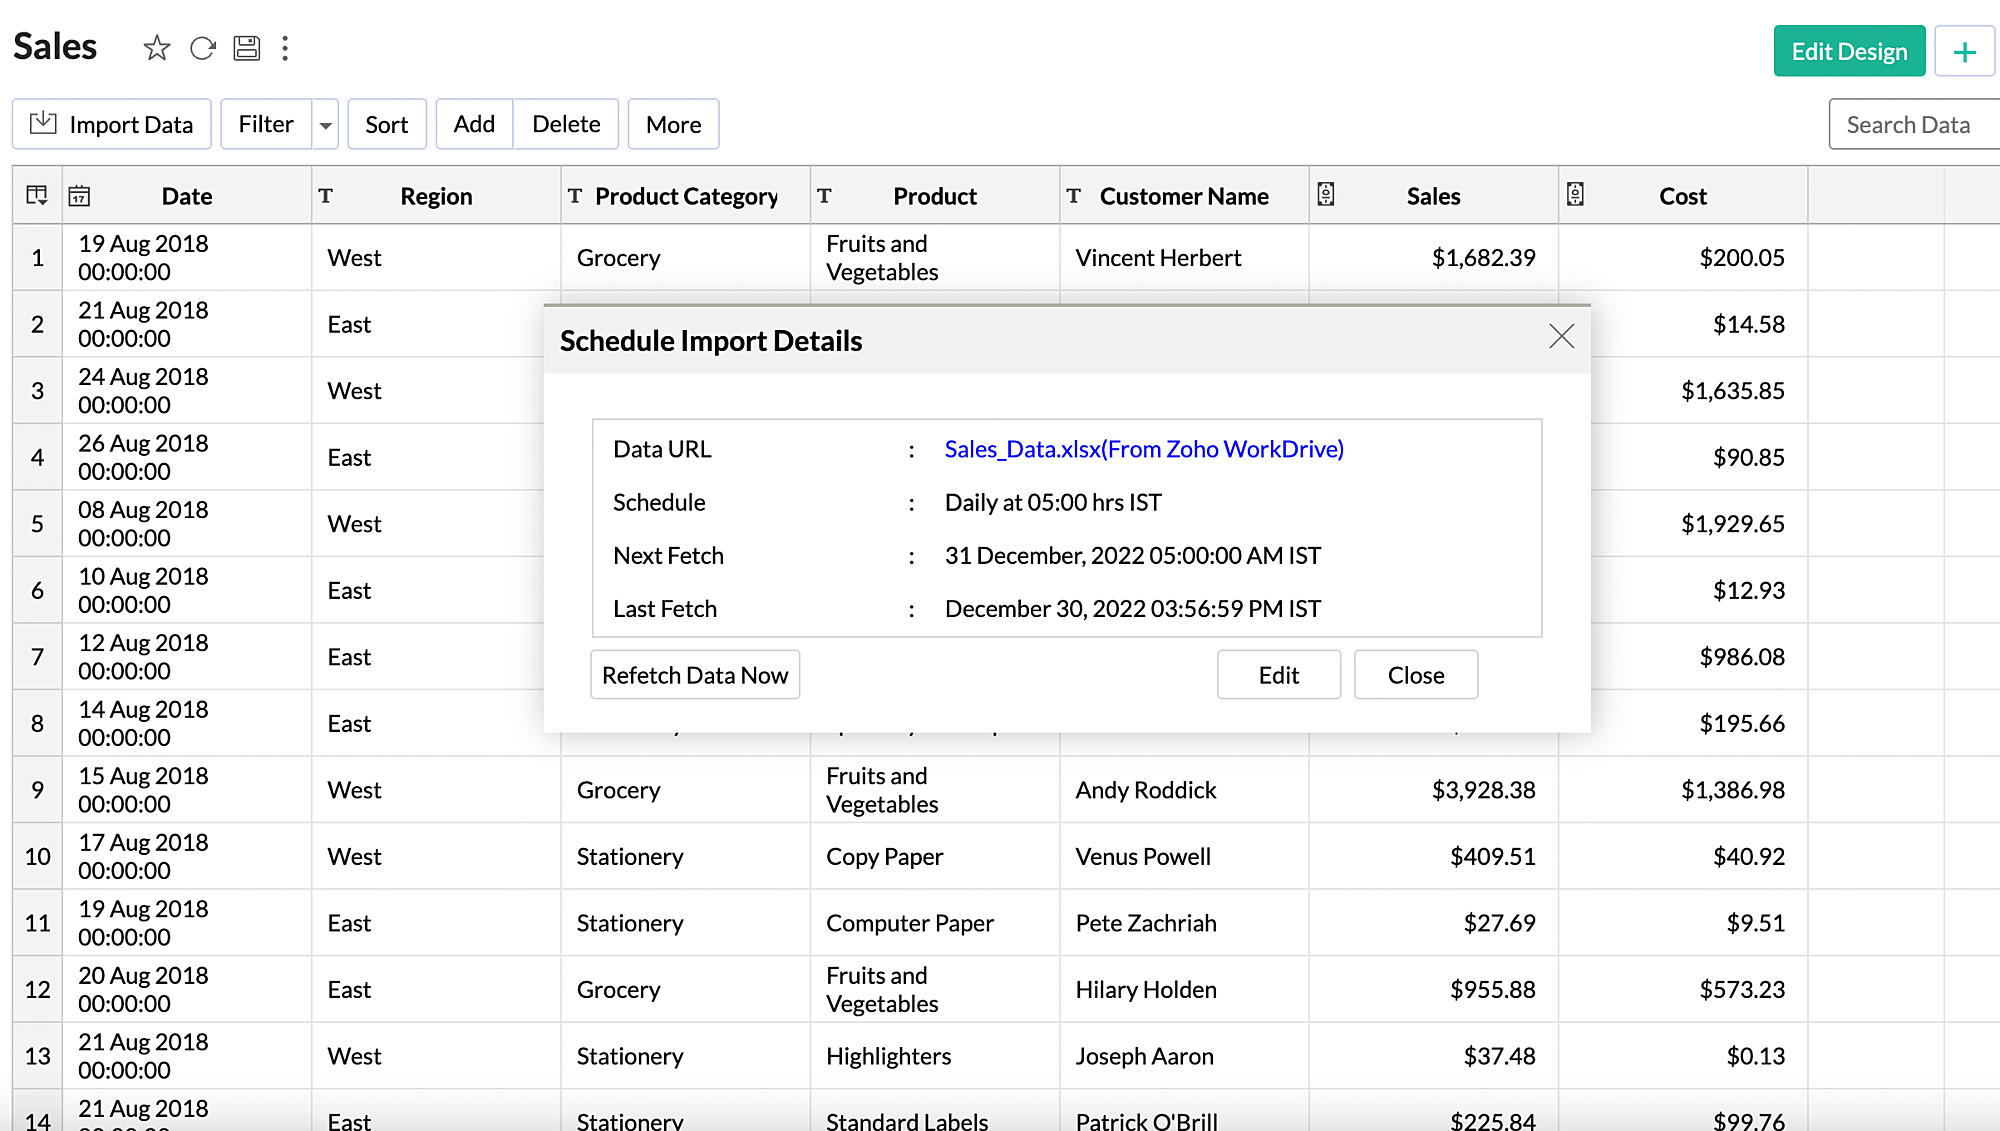
You can use the Refetch Data Now option to import data immediately without waiting until the next scheduled interval.
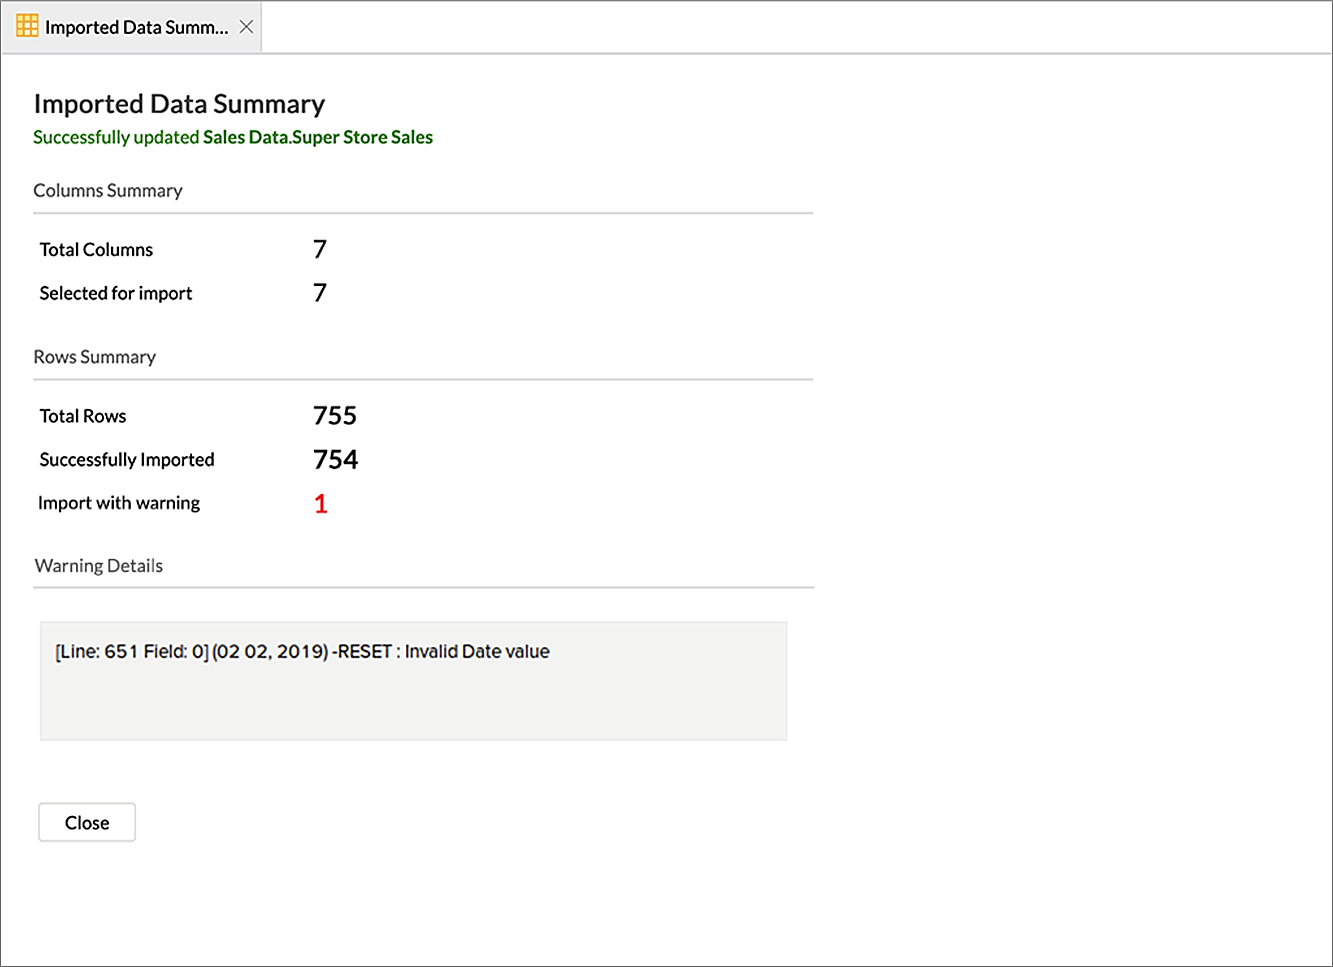
4. Why do I see Warning Details in the Imported Data Summary dialog?
While importing data, Zoho Analytics auto identifies datatypes based on the first few rows of the data. In case, if there is any mismatch in datatype in rest of the rows, then Zoho Analytics may show warning during import. Zoho Analytics will handle the error condition as you have set in the On Import Errors option.
In case of such errors, the details of the same would be shown in the Imported Data Summary dialog.
5. How do I resolve error conditions during import?
You can specify how Zoho Analytics should handle error conditions (in case it occurs) in the Import Your Data dialog of Import wizard.

The following are the possible options:
- Set Empty Value for the Column (default) - Select this option to set empty value to the corresponding column value which had problems while importing.
- Skip Corresponding Rows - Select this option to skip the corresponding rows in which an error occurs while importing.
- Don't Import the Data - Select this option to abort the import process, if any error occurs during importing.
In case any error occurs during import, the details of the same would be shown in the Imported Data Summary dialog (refer to the above question) which would be shown on Import process completion.
6. Can I retain the relational data modelling from my source?
You cannot retain the relational data modelling from your source. However, Zoho Analytics allows you to auto-join tables.
While importing a new table into an existing Workspace, Zoho Analytics auto identifies columns with the same column name and data type and provides suggestions for lookup. You can create this lookup by following the steps in the below slide.
7. Can I schedule importing data?
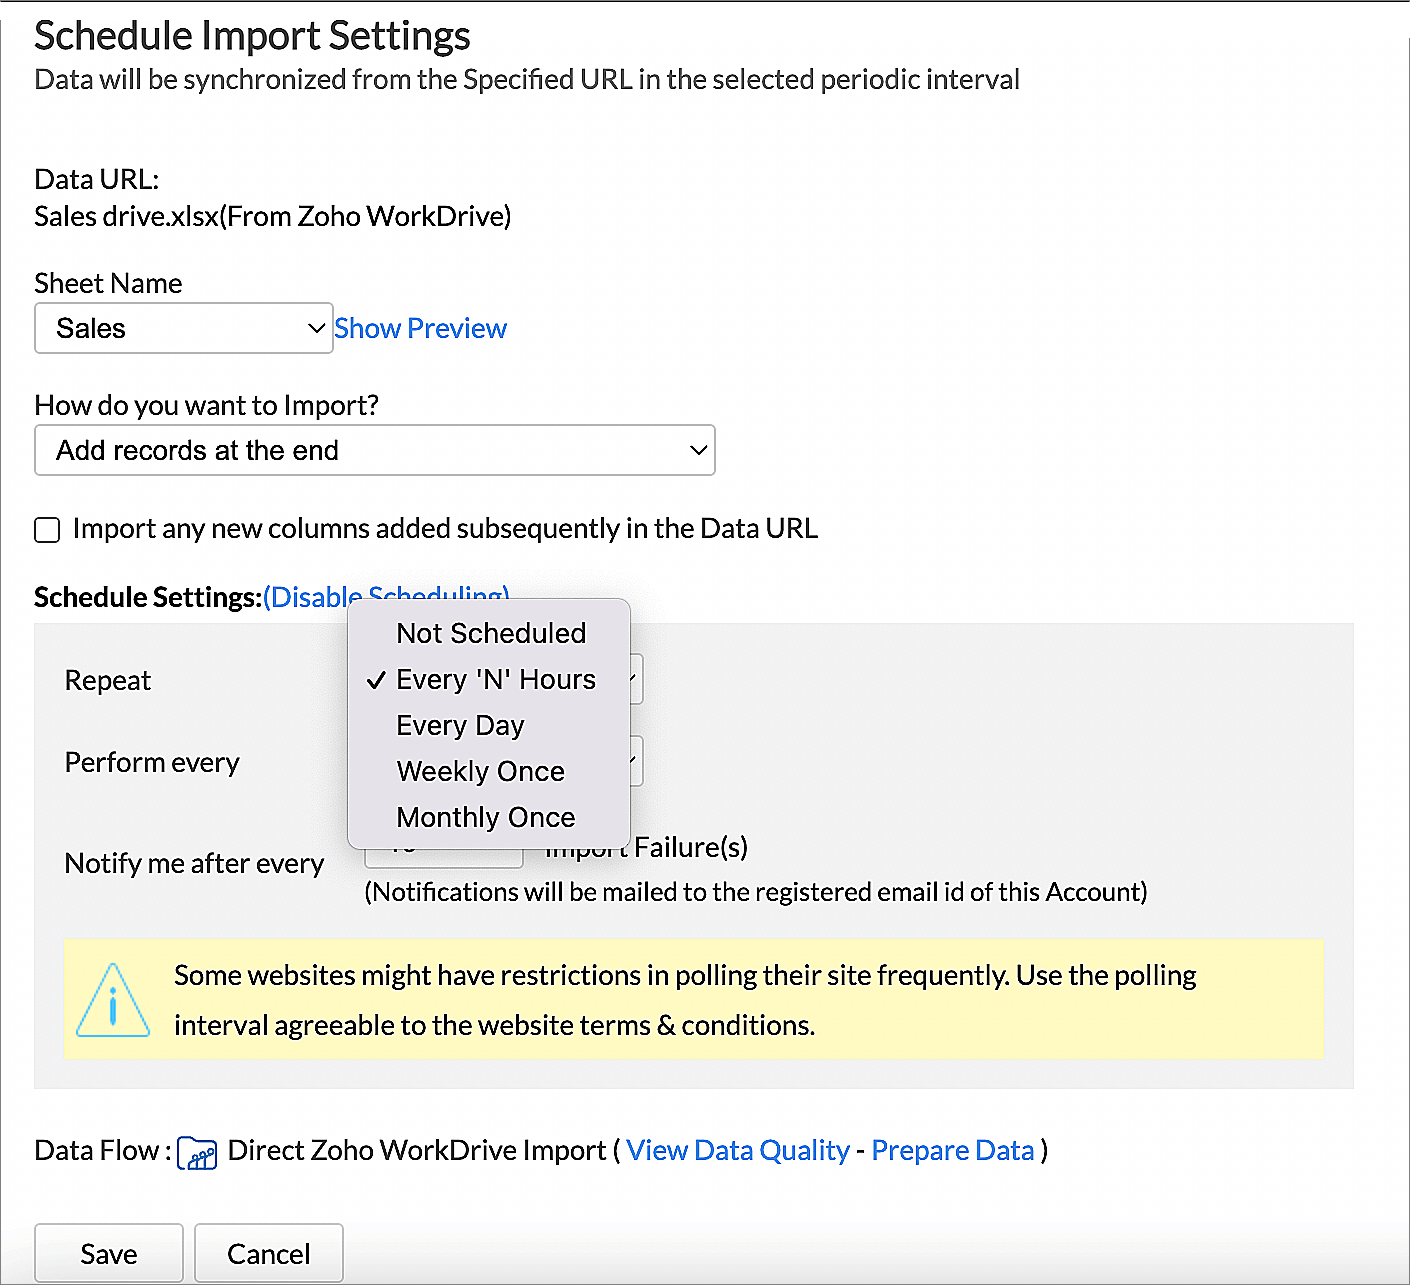
Yes, you can schedule import from a table that is already imported. You can schedule data import if you have your data stored in databases (local and cloud), web URLs and cloud drives. It is mandatory that your data has a column header to schedule import.
To schedule import from an existing table
- Click Import Data.
- Select Refetch/Schedule Import from the drop down menu.
- The Schedule Import details dialog will open. Click Edit.
- The Schedule Import settings page will open. Select your preferred option for How do you want to Import? from the drop-down menu.
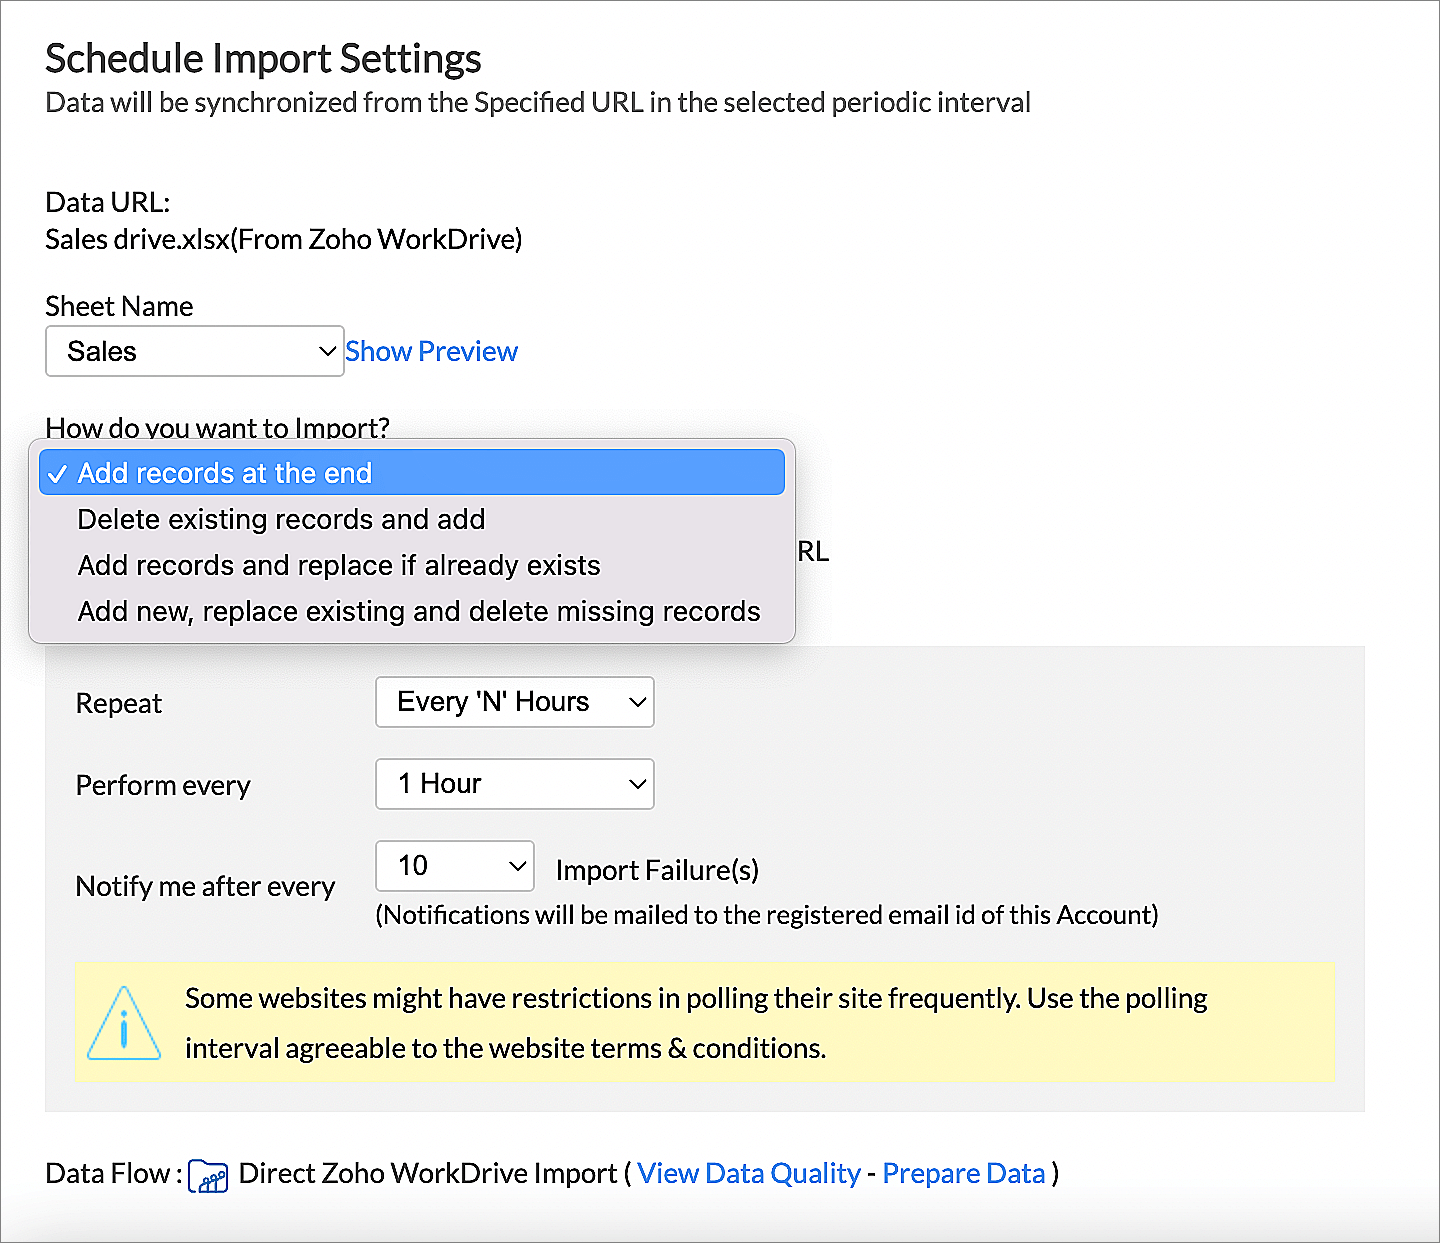
- In the Schedule Settings section, choose an interval from the Repeat field drop-down menu.
- Click Save.
