Manage Resources
In Zoho Calendar, the administrators can manage your branches, rooms, features and location from your Room Settings and Preferences. Add, edit and delete your branches and rooms, and make changes to your default location and view by accessing these controls from your Resource Booking Settings.
Manage Branches
Add Branch
You can add several branches to your organization from the room settings.
Steps to add a branch
- Log in to Zoho Calendar.
- Go to Resources > Settings > Manage resources.

- Click on Add Branch from the top-right corner of the screen.
- Enter the Branch Name and Time Zone.
- Enter the email address of the branch maintainer. You can add multiple maintainers to the same branch.

- Enter the Building Name and the No. of Floors in the building.
- Click Add Floor to add another floor to your building. You can change the name of the floors as well.
- To add another building, click the Add Building button in the form.

- To delete the building or the floor, click on the Trash icon next to the building/ floor.
- Click Create Branch to add the branch.


Edit Branch
Once you have added a branch, you can make changes to the branch anytime by accessing the branch and editing it from the room settings.
Steps to edit a branch
- Log in to Zoho Calendar.
- Go to Resources > Settings > Manage resources.

- To edit a branch, hover over the branch and click the Edit icon next to the branch.

- Make the necessary changes to the branch and click Update Branch.


Delete Branch
If you don't want to retain a branch, you can delete it from your resources. You can access the branch list and delete it from the room settings.
Steps to delete a branch
- Log in to Zoho Calendar and navigate to Resources
- Go to Settings > Manage resources > Branches.
- To delete a branch, hover over the branch and click the Delete icon next to the branch.

- The branch will be removed.

Import Branches
You can import branches as a file to resource booking in the settings. To import branches, you need to save your branch information in a CSV or TSV file.
Sample files for importing branches
Click here to download the sample files for importing branches for CSV and TSV formats from the attachments given at the bottom of this article.
Steps to import branches to Resource Booking
- Log in to Zoho Calendar and navigate to Resources.
- Go to Settings > Manage resources > Branches.

- Click on the Import icon from the top right corner of the screen.
- Select the file type as CSV or TSV file.
- Browse and select the import file.

- Click Import to start importing your branches.

- Once your branches are imported you can view them on the left pane of your Resource Booking window under Locations.


Export Branches
You can export the data of all your branches and rooms using the export option in the room settings.
Steps to export branches from Resource Booking
- Log in to Zoho Calendar and navigate to Resources
- Go to Settings > Manage Resources > Branches.
- Click on the Export icon from the top right corner of the screen.

- Choose to export the file as CSV or TSV type.

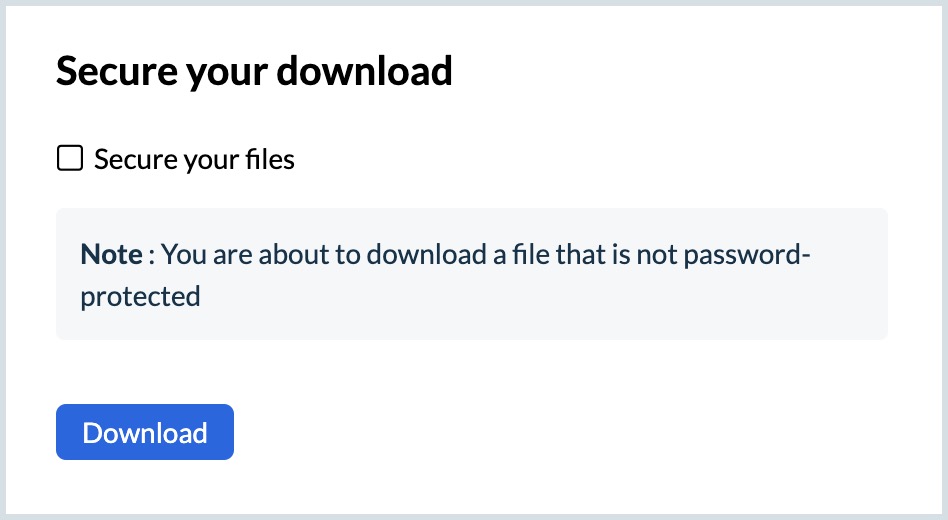
- Click Download to save the file to your computer.

- You can choose to secure your file using a password. Check the Secure your files checkbox to provide a password to protect the file you download<.


Note:
- The password must contain at least 8 characters with a mix of upper, lower case alphabets, numbers and special characters (#, ?,!, @, $, %, ^, &, *, -)
- You cannot recover the secured file if the password is forgotten.
Print Branch List
You can print the list of all the branches that are available in your organization using the Print Branch List option in your room settings.
Steps to print the branch list
- Log in to Zoho Calendar and navigate to Resources.
- Go to Settings > Manage Resources > Branches.
- Click on the Print icon in the top right corner of the screen.

- The Print window opens. Select the printer in the destination and click Print.

Manage Rooms
Add Room
You can add several rooms to your organization from the room settings.
Steps to add a room
- Log in to Zoho Calendar and navigate to Resources.
- Go to Settings > Resource Booking > Manage Rooms.
- Choose the branch, building, and floor to which you want to add rooms using the respective drop-downs.

- Click on Add Room from the top right corner of the screen.
- Enter the Room Name, Select floor, Category and Seating Capacity of the room.
- Select the check box "Require admin approval for room bookings" for users to seek admin permission before booking rooms. Learn more.

- Click Add Feature to start adding features like AC, Wi-Fi, Monitor, Projector, White Board and LAN to the room.
- To delete the features, use the Remove icon next to the feature you want to delete.
- Under Room Photo, select Add Image to insert a picture of the room.
- Once you have selected the image, click Add
- If you want to delete or edit the room photo, hover over the image and click on the Delete icon.
- To limit the room access to specific users, select the Enable room access restriction checkbox. Enter the user name or group for which the access needs to be applied.
- Click Save to add the room.


Note:
You can also add a room by clicking the Add room button on the top right corner of the Resource Booking grid and following the steps given above.
Edit Room
Once you have added a room, you can make changes to the room anytime by accessing the room and editing it from the room settings.
Steps to edit a room
- Log in to Zoho Calendar and navigate to Resources.
- Go to Settings > Manage Resources > Rooms.
- To edit a room, hover over the room and click the Edit icon next to the room.

- Make the necessary changes to the room and click Save.

Delete Room
If you don't want to retain a room, you can delete it from your resources. You can access the room list and delete it from the room settings.
Steps to delete a room
- Log in to Zoho Calendar and navigate to Resources.
- Go to Settings > Manage Resources > Rooms.
- To delete a room, hover over the room and click the Delete icon next to the room.

- The room will be removed.

QR code for Room Booking
Once you have added your room, you can generate a QR code for each room which can also be downloaded. Users can now book the room by scanning the QR code for that particular room directly from their devices.
Steps to generate and view QR code
- Log in to Zoho Calendar and navigate to Resources.
- Go to Settings > Manage Resources > Rooms.
- To generate a QR code for a room, hover over the room and click the 'Generate QR code' option.

- The QR code will be generated.
- Once created, to view the QR code hover over the room and click the 'View QR code' option.


You can also Generate the QR code in bulk for multiple rooms by selecting them and clicking the Generate QR code option from the top menu.
Steps to download the QR code
- Log in to Zoho Calendar and navigate to Resources.
- Go to Settings > Manage Resources > Rooms.
- To download the QR code for a room, hover over the room and click the 'view QR code' option.

- Click the Download icon to download the QR code as a pdf.

You can also Download the QR code in bulk for multiple rooms by selecting them and clicking the Download QR code option from the top menu.
Show/ Hide Room
You can choose to show or hide a room from the room listing and the grid. When you hide a room, it will not be visible to the users for booking.
Steps to show/ hide rooms
- Log in to Zoho Calendar and navigate to Resources.
- Go to Settings > Manage Resources > Rooms.
- To show/hide a room, turn on or turn off the show/ hide button next to the room.


Note:
The rooms will be hidden from being shown to the users in the organization but will not be deleted. You can use this option whenever the rooms are not in a condition to be used. You can again choose to show the rooms in the users' resource booking grid following the steps given above.
Import Rooms
You can import rooms as a file to resource booking in the settings. To import rooms, you need to save your rooms information in a CSV or TSV file.
Sample files for importing rooms
Click here to download the sample files for importing branches for CSV and TSV formats from the attachments given at the bottom of this article.
Steps to import rooms
- Log in to Zoho Calendar and navigate to Resources.
- Go to Settings > Manage Resources > Rooms.
- Click on the Import icon from the top right corner of the screen.

- Select the file type as CSV or TSV file.

- Browse and select the import file.
- Click Import to start importing your rooms.


The rooms will be imported and added to your resource booking grid.
The importing of rooms will take some time. If you face any issues with importing rooms and branches, mail your queries with details and screenshots to support@zohocalendar.com.
Export Rooms
You can export the data of all your rooms using the export option in the room settings.
Steps to export rooms
- Log in to Zoho Calendar and navigate to Resources.
- Go to Settings > Manage Resources > Rooms.
- Click on the Export icon from the top right corner of the screen.

- Choose to export the file as CSV or TSV type.

- Click Download to save the file to your computer.
- You can choose to secure your file using a password. Check the Secure your files check-box to provide a password to protect the file you download.


Note:
- The password must contain at least 8 characters with a mix of upper, and lower case alphabets, numbers and special characters (#, ?, !, @, $, %, ^, &, *, -)
- You cannot recover the secured file if the password is forgotten.
Print Room List
You can print the list of all the rooms that are available in your organization using the Print Room List option in your room settings.
Steps to print the room list
- Log in to Zoho Calendar and navigate to Resources.
- Go to Settings > Manage Resources > Rooms.
- Click on the Print icon in the top right corner of the screen.

- The Print window opens. Select the printer in the destination and click Print.

Manage Features
Add Feature
You can add several features to your rooms from the room settings. These features can be chosen when you add a room to any of the buildings.
Steps to add a feature
- Log in to Zoho Calendar and navigate to Resources.
- Go to Settings > Manage Resources > Features.
- Click on Add Feature from the top right corner of the screen..

- Enter the Feature Name and Feature Category. You can select feature categories as Character (Yes, No, etc.,), Count (1, 2,3, and so on) or Availability.

- Click Add to add the feature.

- The feature will now be listed while creating a room. You can choose to include the feature in the room.


Edit Feature Name
Once you have added a feature, you can make changes to the feature name anytime by accessing the feature and editing it from the room settings.
Steps to edit a feature
- Log in to Zoho Calendar and navigate to Resources.
- Go to Settings > Manage Resources > Features.
- To edit a feature name, hover over the feature and click the Edit icon next to the feature.

- Make the necessary changes to the feature name and click Save.

Delete Feature
If you don't want to retain a feature, you can delete it from your resources. You can access the feature list and delete it from the room settings.
Steps to delete a feature
- Log in to Zoho Calendar and navigate to Resources.
- Go to Settings > Manage Resources > Features.
- To delete a feature, hover over the room and click the Delete icon next to the feature.

- The feature will be removed.

Show/ Hide Feature
You can choose to show or hide a feature from the feature listing and the grid. When you hide a feature, it will not be visible to the users while booking a room or to the admin while creating a room.
Steps to show/ hide features
- Log in to Zoho Calendar and navigate to Resources.
- Go to Settings > Manage Resources > Features.
- To show/hide a feature, turn on or turn off the show/hide button next to the feature.


This will show/ hide the feature from being listed while creating a room instead of completely deleting it. You can again choose to show the feature in the add room window by following the steps given above.
Import Features
You can import features as a file to resource booking in the settings. To import features, you need to save your feature information in a CSV or TSV file.
Steps to import features to Resource Booking
- Log in to Zoho Calendar and navigate to Resources.
- Go to Settings > Manage Resources > Features.
- Click on the Import icon from the top right corner of the screen.

- Select the file type as CSV or TSV file.

- Browse and select the import file.
- Click Import to start importing your features.


Export Features
You can export the data of all your features using the export option in the room settings.
Steps to export features from Resource Booking
- Log in to Zoho Calendar and navigate to Resources.
- Go to Settings > Manage Resources > Features.
- Click on the Export icon from the top right corner of the screen.

- Choose to export the file as CSV or TSV type
- Click Download to save the file to your computer.

- You can choose to secure your file using a password. Check the Secure your files checkbox to provide a password to protect the file you download.


Note:
- The password must contain at least 8 characters with a mix of upper, and lower case alphabets, numbers and special characters (#, ?, !, @, $, %, ^, &, *, -)
- You cannot recover the secured file if the password is forgotten.
Print Feature List
You can print the list of all the features that are available in your organization using the Print Feature List option in your room settings.
Steps to print the feature list
- Log in to Zoho Calendar and navigate to Resources.
- Go to Settings > Manage Resources > Features.
- Click on the Print icon in the top right corner of the screen.

- The Print window opens. Select the printer in the destination and click Print.

Room Preferences
You can change your default location and customize your grid view using the options in Room Preferences. You can choose to show weekends and working hours in the grid while you make your bookings. Apart from these options, you also have the option to add your bookings as events in your calendar. When you switch on your Add to Calendar option, all the bookings created from your end will be added as events in Zoho Calendar. Find out more about Room Preferences in the User Guide.
Click here to download the sample file formats.
Note:
Resource Booking feature is available only for users with one of the Zoho Mail paid plans.