Reminders and Notifications
Zoho Calendar helps you stay updated about every event you're part of by providing reminder and notification options at both calendar and event levels through different modes like pop-up, notification bell, and email.
Calendar Reminders
Reminders help you stay on track with your schedule. In the Zoho Calendar, you can enable reminder notifications for every calendar separately. Once you set the reminder for a particular calendar, all the events in the calendar will be notified according to the reminder type that is set for the calendar.
Steps to Enable Reminders for Calendars
- Log in to Zoho Calendar.
- Click on the 3 dots or the More Options icon on the calendar from the left pane of the screen. Click the Edit option from the drop-down.
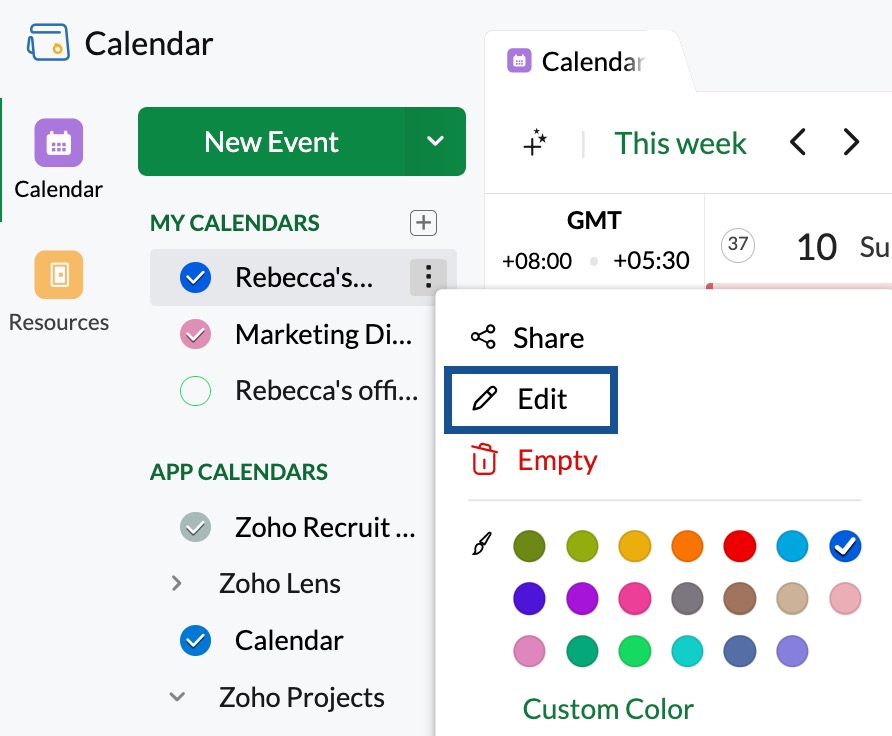
- This will take you to the My Calendar settings from where you can set up the reminders for each calendar.
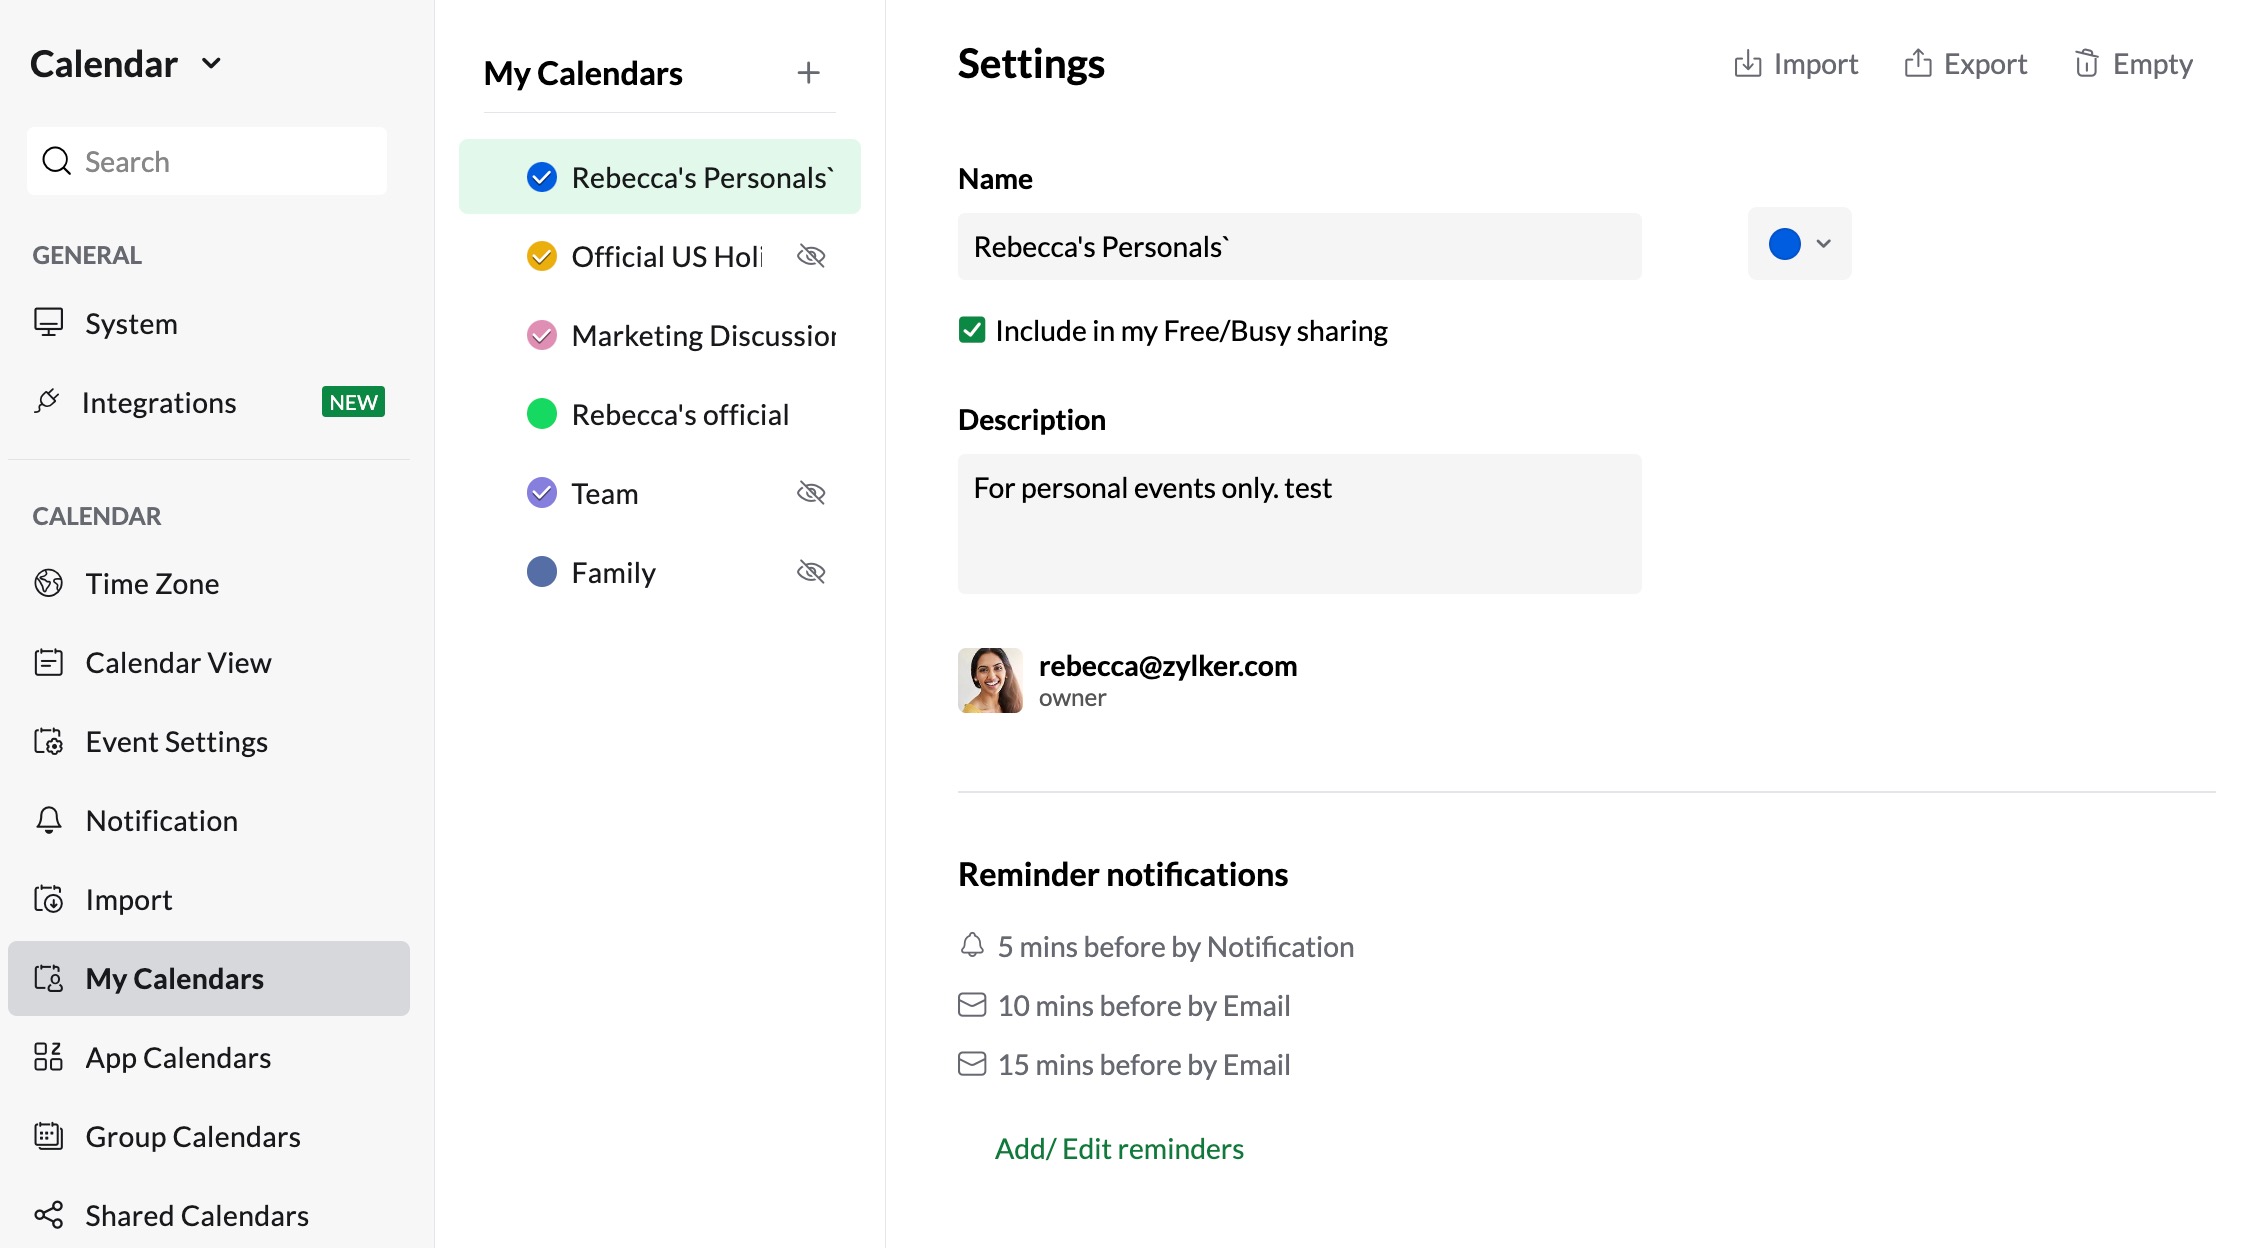
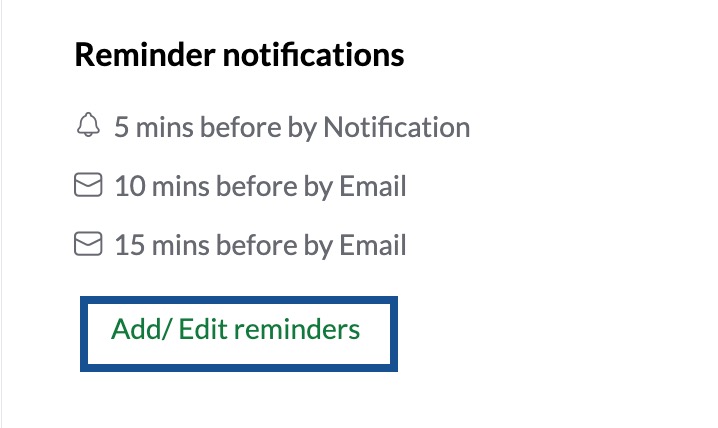
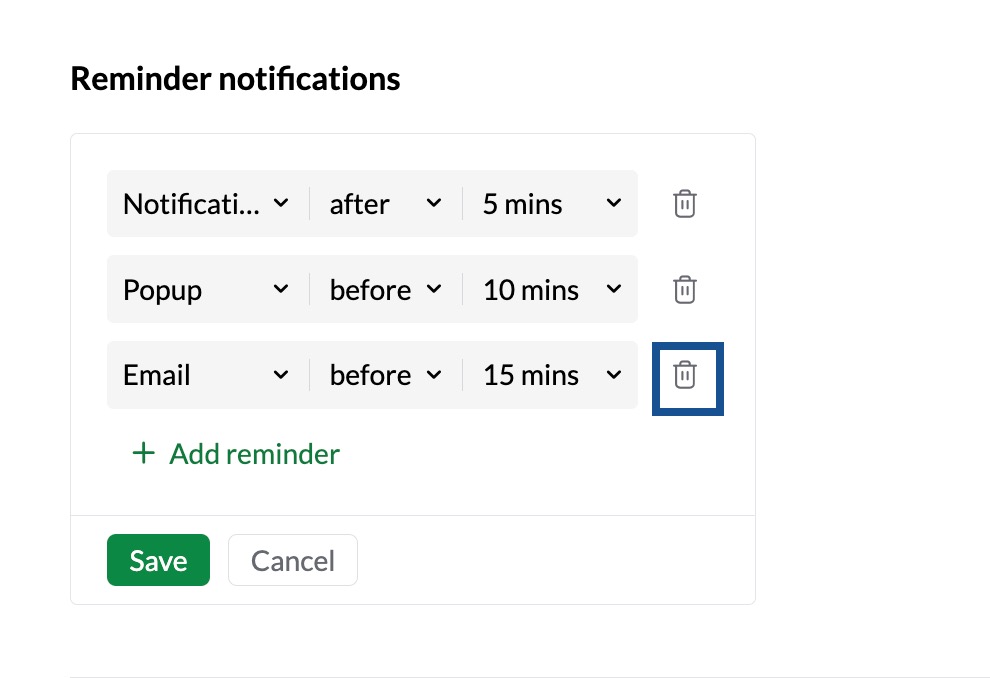
- Select Add/Edit Reminders from the Reminder Notifications section
- Choose the preferred reminder option as Email, Pop-up, or Notification from the drop-down.
- Choose if you want to receive the reminder before or after the event.
- Choose the time before/ after which you want to receive the reminders from the drop-down.
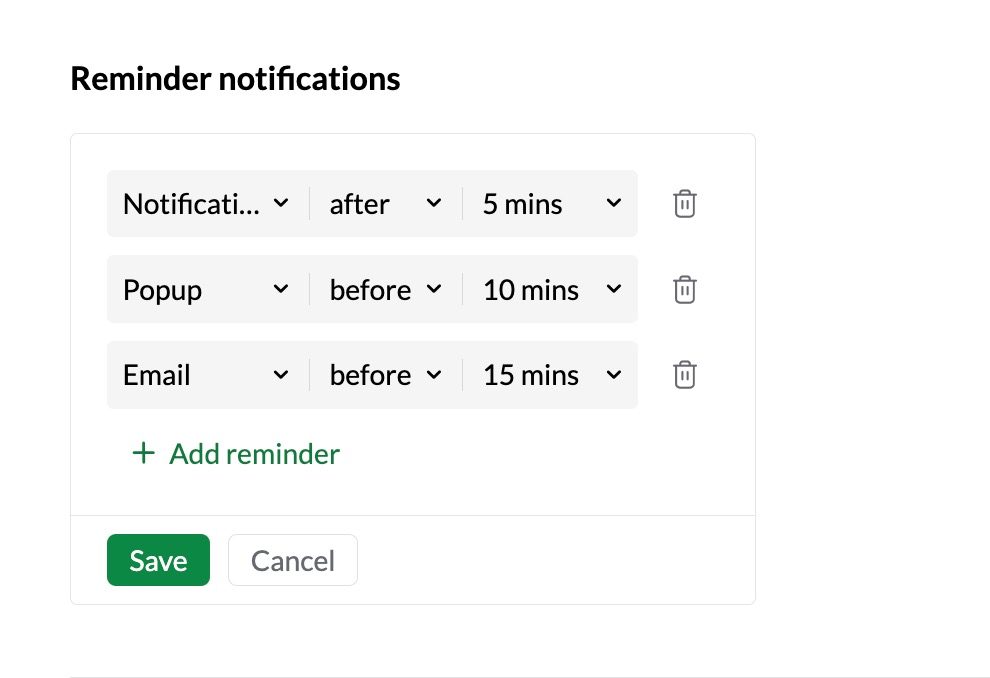
- Once done, click on Save.
- Hover over a set reminder and click on the Delete icon to delete a reminder.
Note:
You can add a maximum of 4 reminders for an event.
Exceptions
While importing calendars, some events in the calendar might have event-specific reminders. The calendar to which you are importing those events might have calendar-specific reminders. In such cases, you will be prompted to replace the event-specific reminders with calendar-specific reminders.
This prompt will appear in a dialogue box with two options. If you choose Yes, the event-specific reminders will be removed. If not, the event-specific reminders will be left as they are.
In order to receive the pop-up reminder, you will have to be logged into Zoho Calendar.
Event Reminders
After creating an event, you might need reminders before a specific period to inform you that the event is happening. This helps you adhere to your schedule. Apart from adding reminders for calendars as a whole, you can customize reminders for every event that is added to the calendar. Depending on the reminder criteria set, you will receive notifications either before the start of the event or after the event ends.
Steps to Set Event Reminders
- Log in to Zoho Calendar.
- Create a new event or click on the event you have created on your calendar.
- For existing events, click Edit in the quick view pop-up.
- In the Create Event/ Edit Event tab, click on Add Reminder
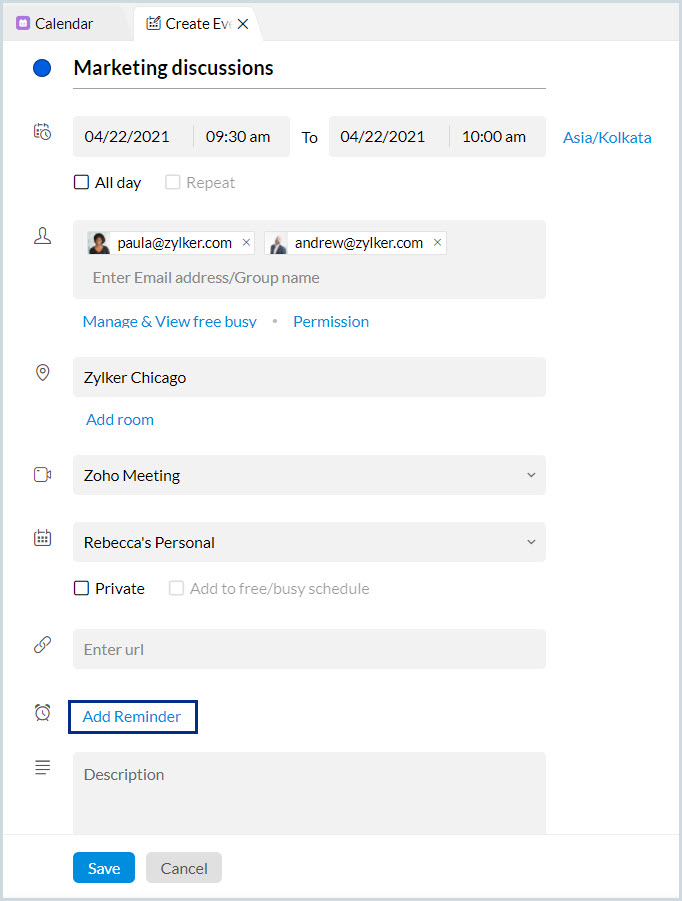
- Choose the preferred reminder option as Email, Pop-up, or Notification from the drop-down.
- Choose if you want to receive the reminder before or after the event.
- Choose the time before/ after which you want to receive the reminders from the drop-down
- Hover over a set reminder and click on the Delete icon to delete a reminder.
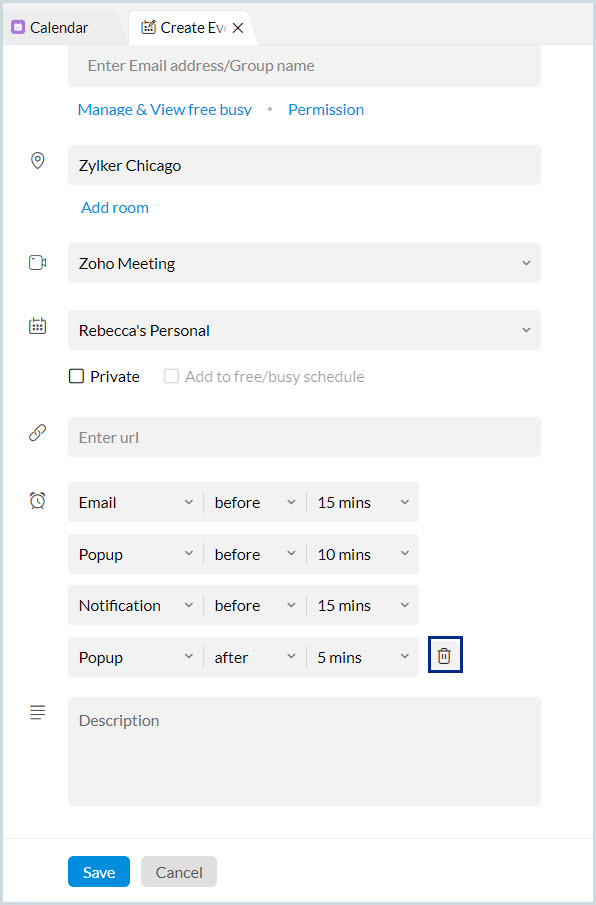
- Click Save.
Note:
- You can set a maximum of 4 reminders for an event.
- The reminders set for an event will override the reminder option set for the calendar in which the event is being created.
- For all-day events, reminder notifications will be sent based on the work hours set in your calendar.
For example, if you have set up a reminder notification for an all-day event before 10 minutes and as per your calendar settings your work hours in between 9 AM and 6 PM, you'll receive the reminder notification at 8:50 AM.
Notifications
You can customize the notifications you receive for the events and calendars. When an organizer for an event creates an event and adds you as an attendee you will be notified through the notification bell icon in the top right corner of your calendar. You will be notified when the particular event is edited or deleted. You can respond to the event invites from the notification centre itself. You will also receive notifications when someone shares their calendar with you.
Besides all these, you will also receive reminder notifications if you or the organizer for an event choose to remind through Notification while creating an event.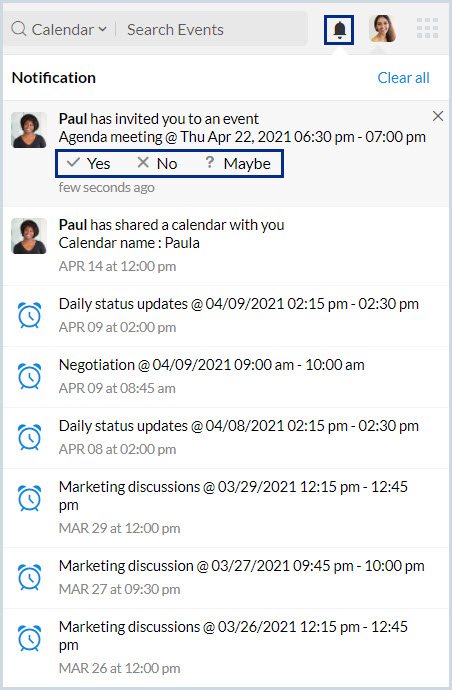
Reminder Notifications
If you are constantly receiving reminder notifications for events on the Zoho Calendar, you can turn off the notifications for some time using this option. You can enable them later when you are ready to receive them.
Steps to enable/ disable reminder notifications
- Log in to Zoho Calendar.
- Go to Settings > Calendar > Notifications > Reminder Notifications.
- Select the check box- 'Enable notifications for all reminder types' to enable the notifications.

Note:
You will not be receiving any reminder notifications until you enable this. This will not affect the notifications of event creation or event updates.
Email Notifications
In the Zoho Calendar, all notifications for communication, reminders, and event invitations are sent to the email address configured for email notification. By default, your primary email address is set as the email notification address. You can also change the email address if required.
Steps to change the notification email address
- Log in to Zoho Calendar.
- Go to Settings > Calendar > Email Notifications.
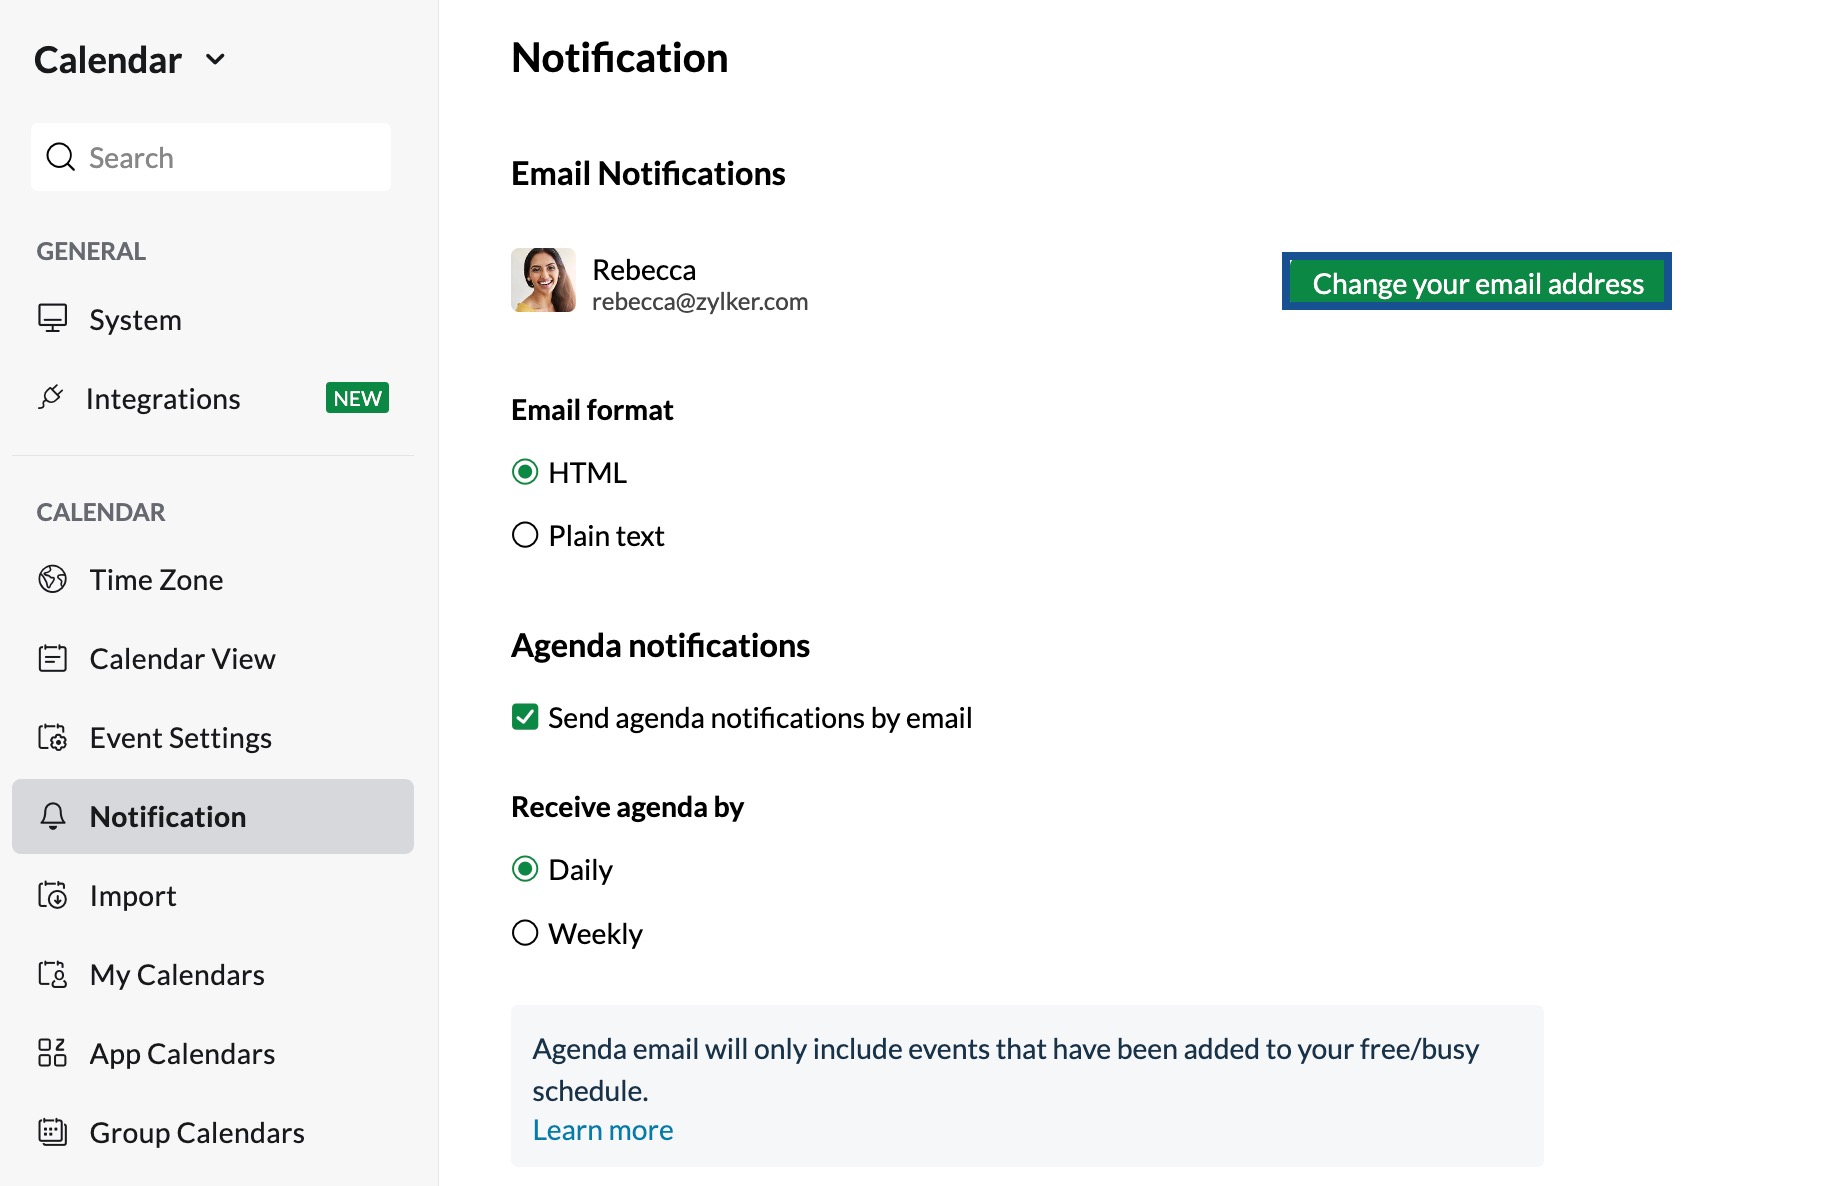
- To change the email address for notifications, click on the Change your email address icon.

- Enter the email address to which you want to receive the notifications and click Confirm.

- An email will be sent to the entered email address, asking you to verify and confirm the request. Once you confirm, your email address will be updated.

- Click Resend if you haven't received the confirmation mail and Revert if you want to cancel the process.
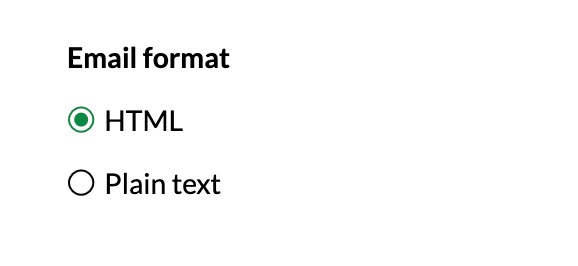
- Choose the email format for reminder mail as HTML or Plain Text by selecting As HTML or As Plain Text.
Agenda Notifications
Agenda refers to the list of events that have been scheduled for a specific period of time. In Zoho Calendar, you can receive Agenda notifications via email daily or weekly. Your schedule for the day of the week will be sent to the email ID that you have entered in the settings. You can also choose to receive the agenda in HTML format or Plain text.
Steps to enable/ disable agenda notifications
- Log in to Zoho Calendar.
- Go to Settings > Calendar > Notifications.
- The email ID to which your agenda notifications will be sent is configured by default. You can change the email address for agenda notifications if required by clicking the 'Change your email address option.
- Select the 'Send agenda notifications by email' check box, to receive agenda notifications to the given email address.
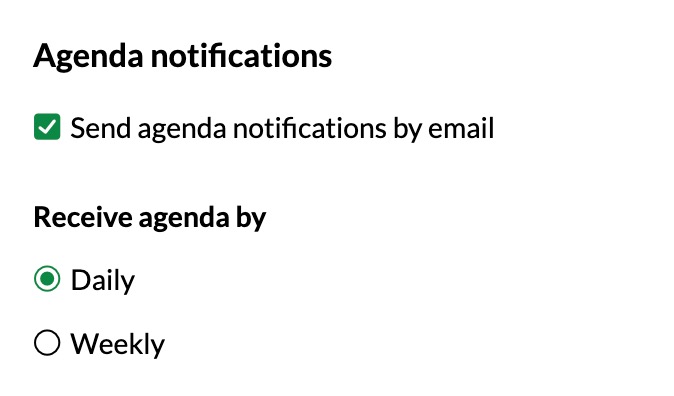
- Select the Frequency for Agenda notification as Daily or Weekly.
Note:
- Agenda notifications will be sent to your email address one hour before your work time starts.
- The agenda email will only include events that have been added to the free/busy schedule.
Desktop Notification
Browsers like Google Chrome, Firefox, Opera etc. support desktop notifications from websites and web applications. In case the browser you use supports the notification, you need to configure the browser to allow notifications from the current page/ application you use. Once you configure and enable it, you will receive new email notifications, even if the browser is minimized or not active.
When you configure the feature, you will have to add 'calendar.zoho.com' to the allowed entities to display desktop notifications. Refer to your browser's help documentation for more information on allowing notifications for specific websites.
Steps to enable/ disable desktop notification
- Log in to Zoho Calendar.
- Go to Settings > System > Desktop notification.
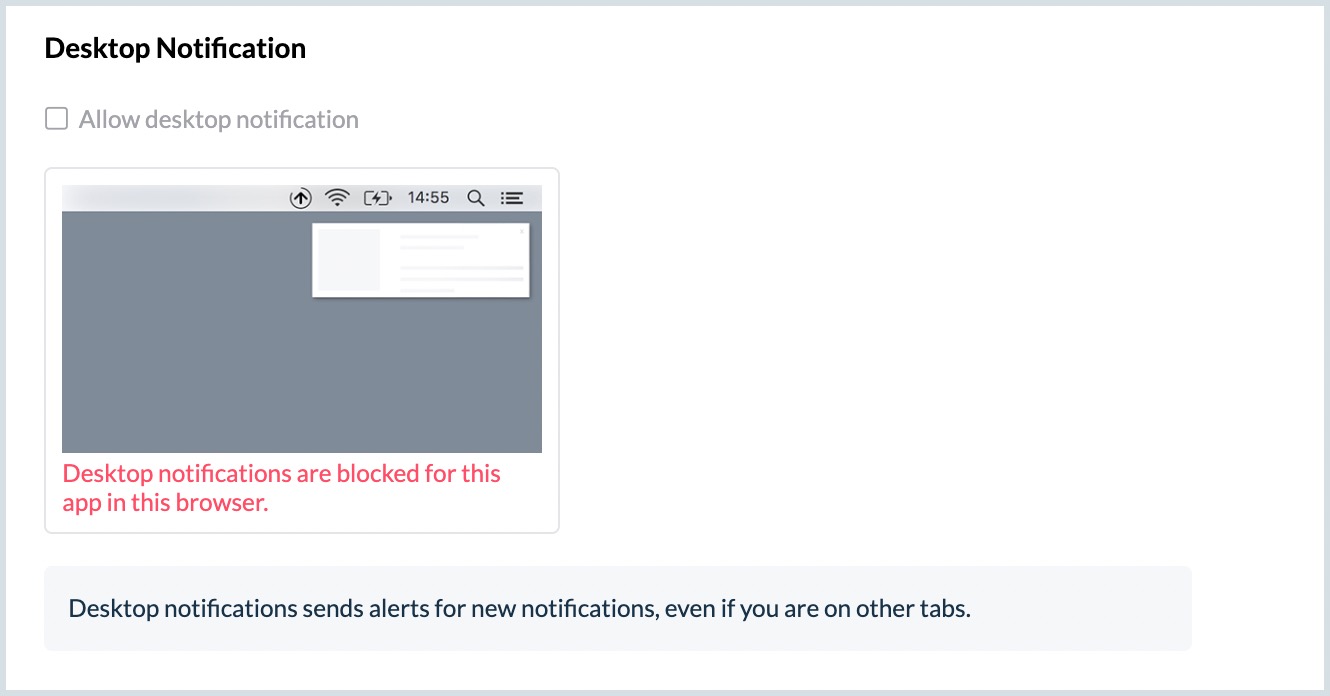
- Select the check box - 'Allow desktop notification' to receive notifications on your desktop.
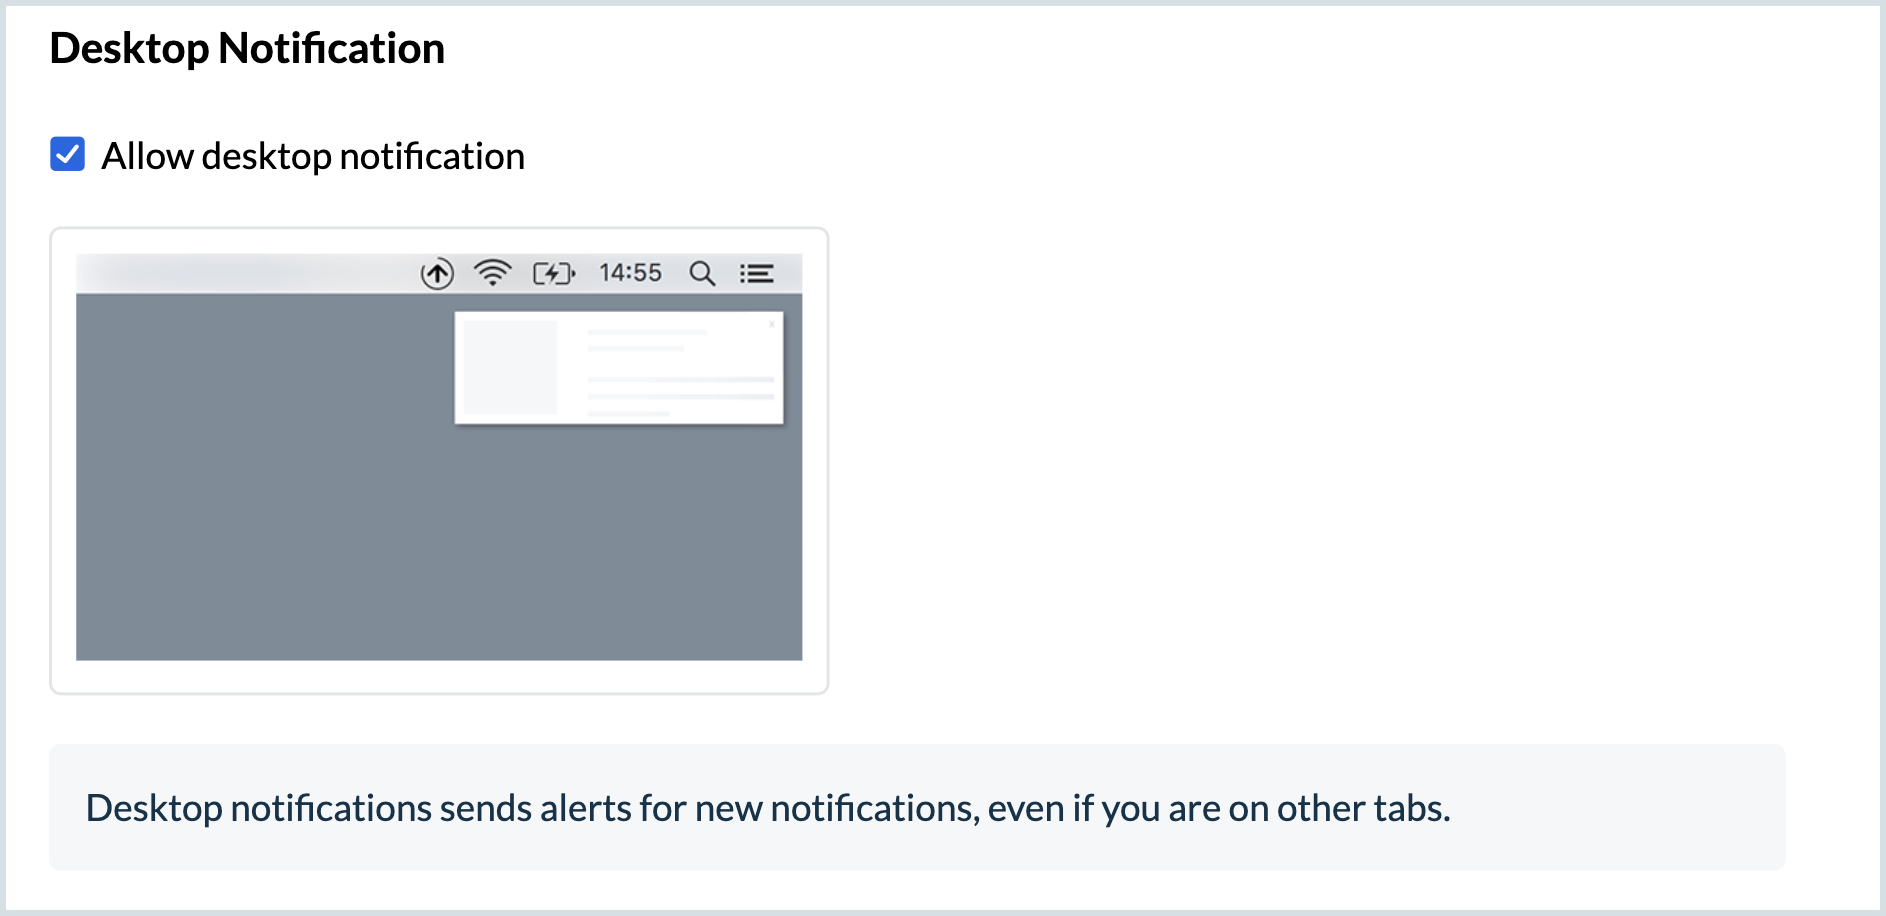
- If the desktop notifications are blocked in your browser, an error message is shown "Desktop notifications are blocked for this app in this browser". In that case, you need to configure your browser settings to allow notifications from calendar.zoho.com to enable desktop notifications from the calendar.
Note:
When desktop notifications are enabled, you will receive alerts for notifications even if you are in other tabs.


