Room Preferences
In Zoho Calendar, Resource Booking users can make changes to their location, booking views and more using the Room Preferences located in the user settings. Users can also choose to add their bookings to the calendar as events by enabling the option in the settings.
Default Location
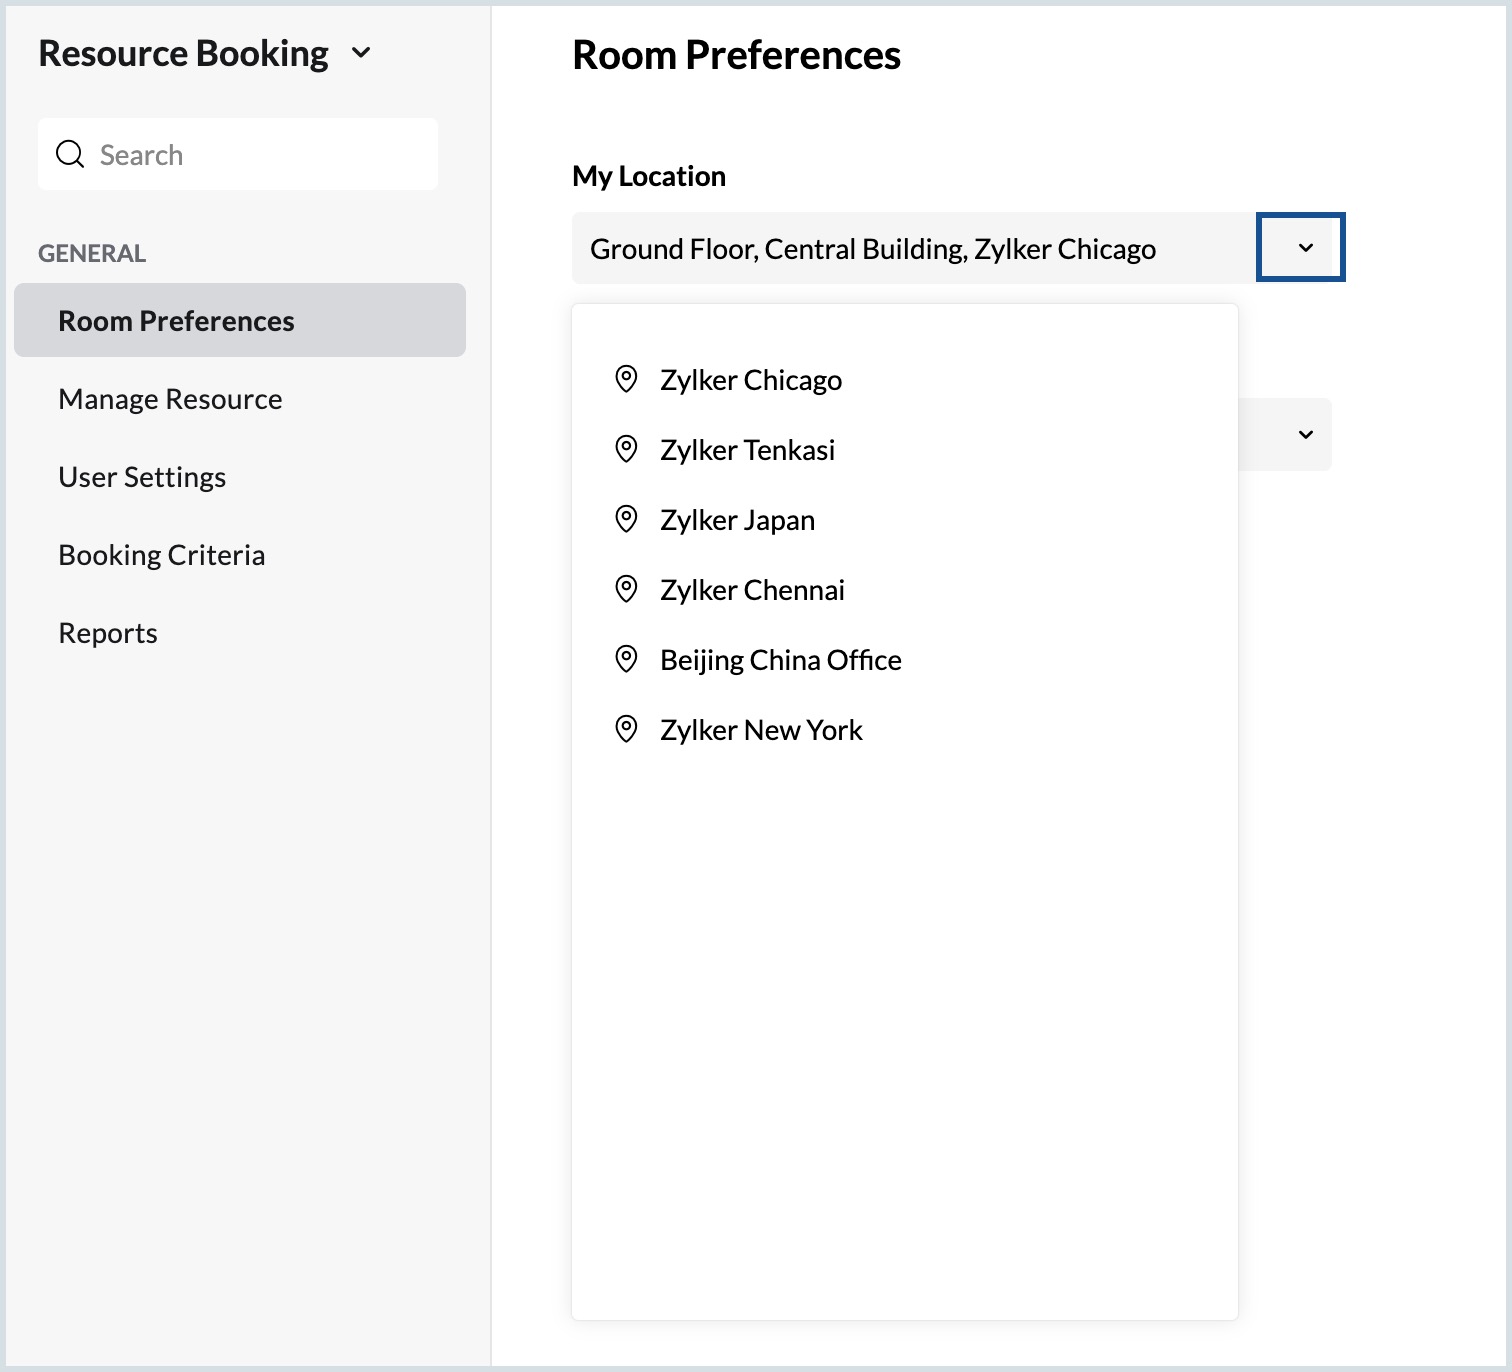
My location refers to the default location of the user. The rooms that are displayed in the grid are based on the location set in My Location. You can make changes to your default location by accessing it from the settings.
Steps to make changes to your default location
- Log in to Zoho Calendar and navigate to Resources.
- Go to Settings > General > Room preferences > My location under Resource Booking.
- Select your location from the drop-down of the list of locations for your organization.
Default View
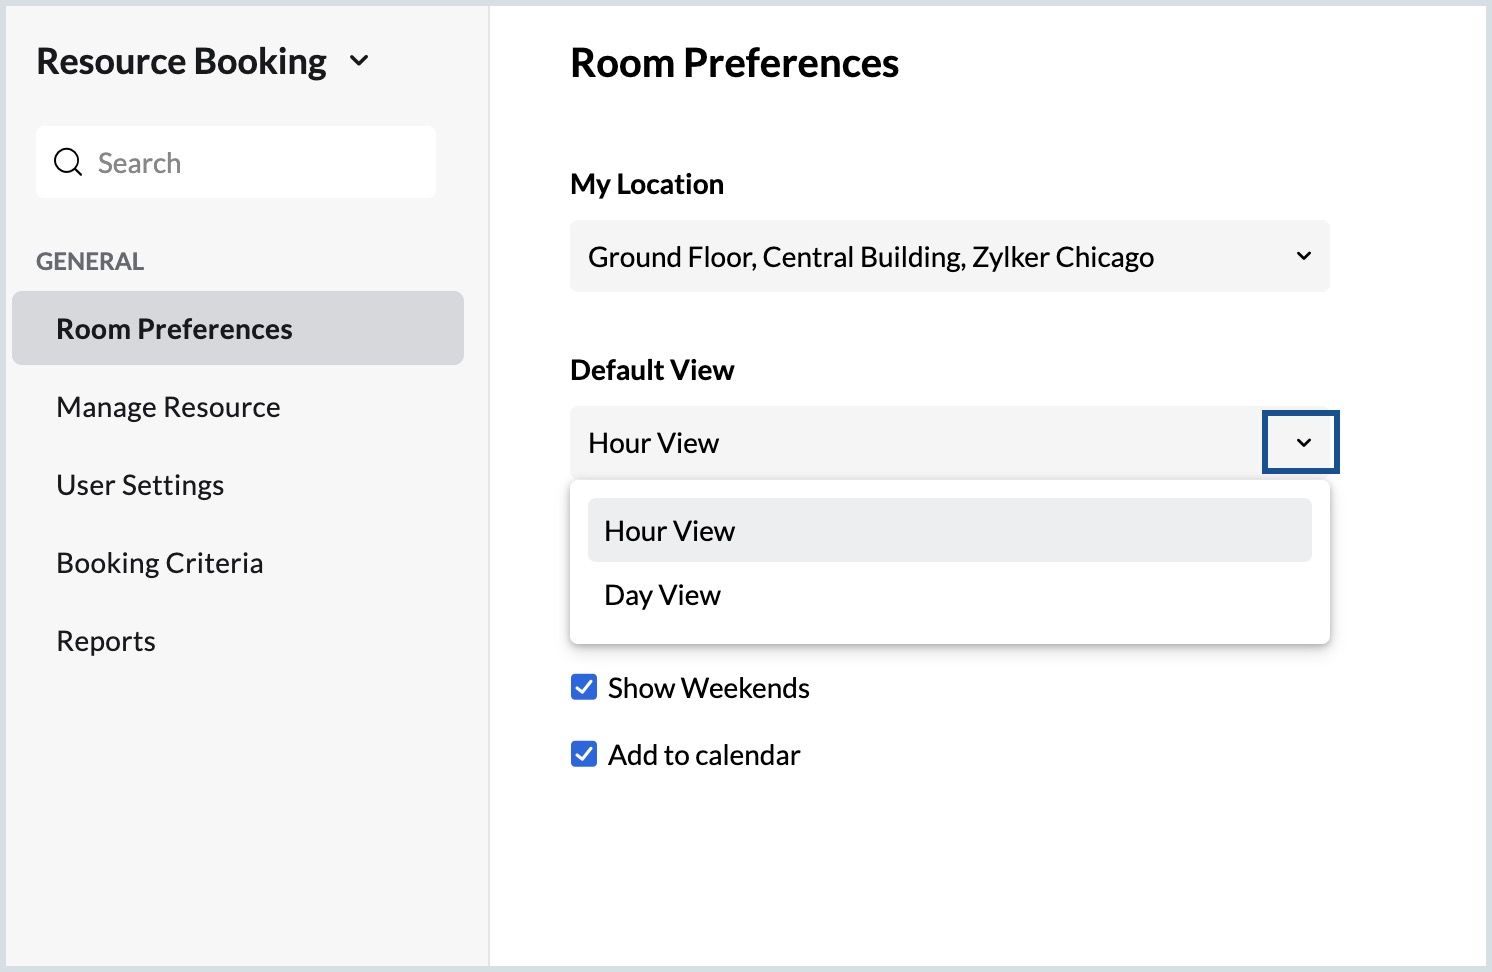
You can select the default view for your resource booking grid by setting it up in your room preferences. You can select from hour view, day view or room view.
- Hour view - The booking grid will be displayed in hours.
- Day view - The booking grid will be displayed in days.
Steps to make changes to your default view
- Log in to Zoho Calendar and navigate to Resource Booking.
- Go to Settings > General > Room preferences > Default view.
- Select your default view from the hour view or day view in the drop-down.
Grid Customization
The room booking grid can be customized per your requirements with options to enable/disable working hours and weekends from the grid.
Steps to customize your booking grid
- Log in to Zoho Calendar and navigate to Resource Booking.
- Go to Settings > General > Room preferences > My location.
- If you want only your working hours displayed in the booking grid, then enable the Working hours' option. If you disable this, your non-working hours will also be displayed.
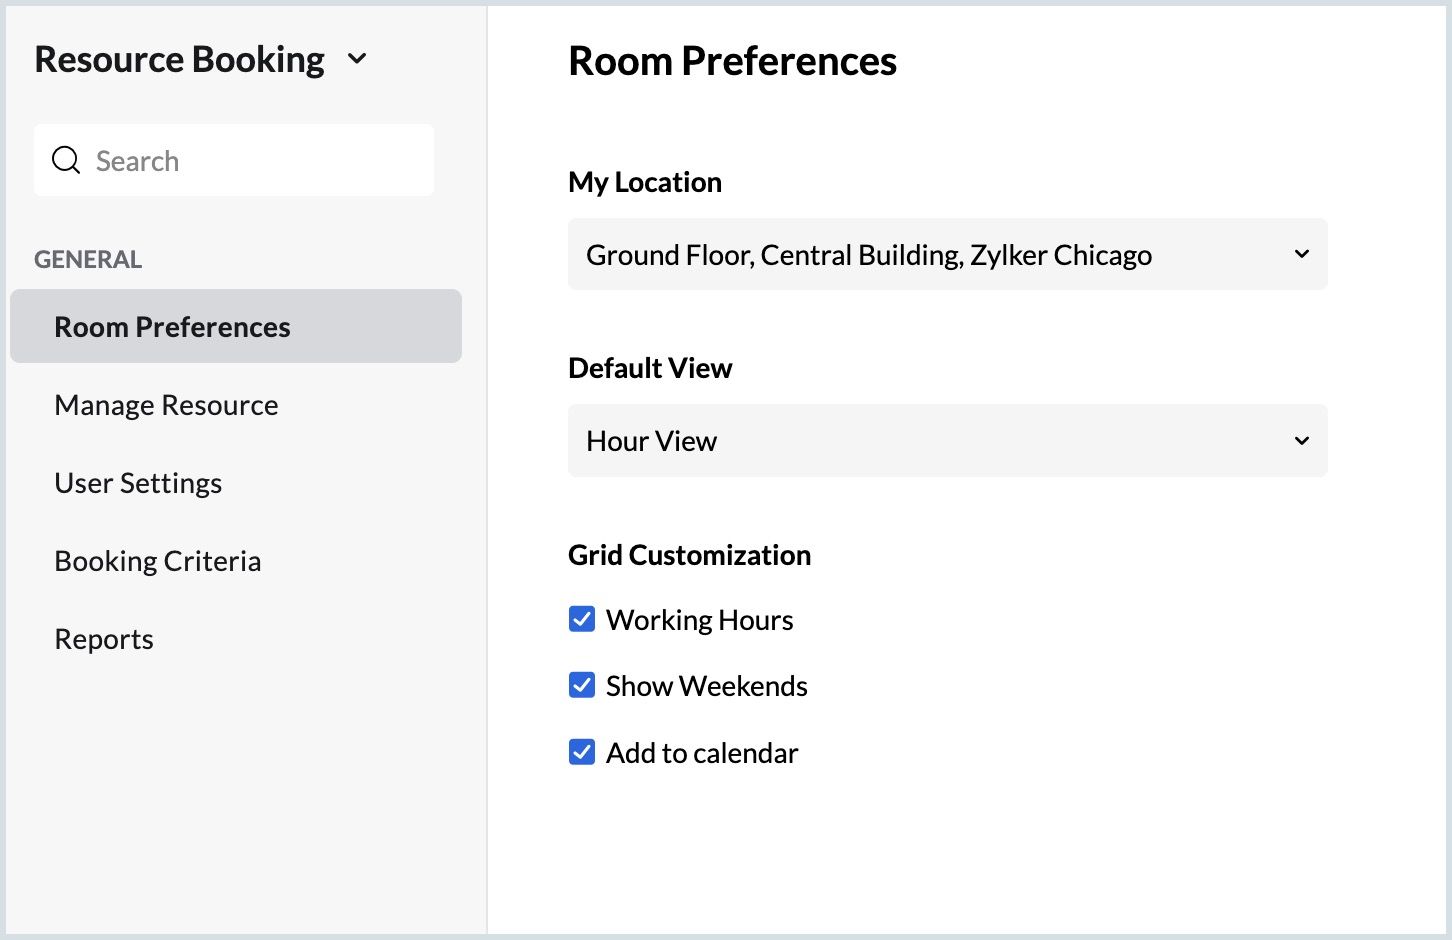
- If you want to display weekends in the booking grid, then enable the Show Weekends option. If you disable this, weekends will be removed from the grid.
Add to Calendar
The Add to Calendar option in Resource Booking allows you to create every booking as an event in Zoho Calendar. Once you enable the Add to Calendar option, all the bookings that you make will be added as events to the calendar you choose and your free/busy will be modified.
Steps to add your bookings to the calendar
- Log in to Zoho Calendar and navigate Resource Booking.
- Go to Settings > General > Room preferences > My location.
- Select the Add to Calendar option.
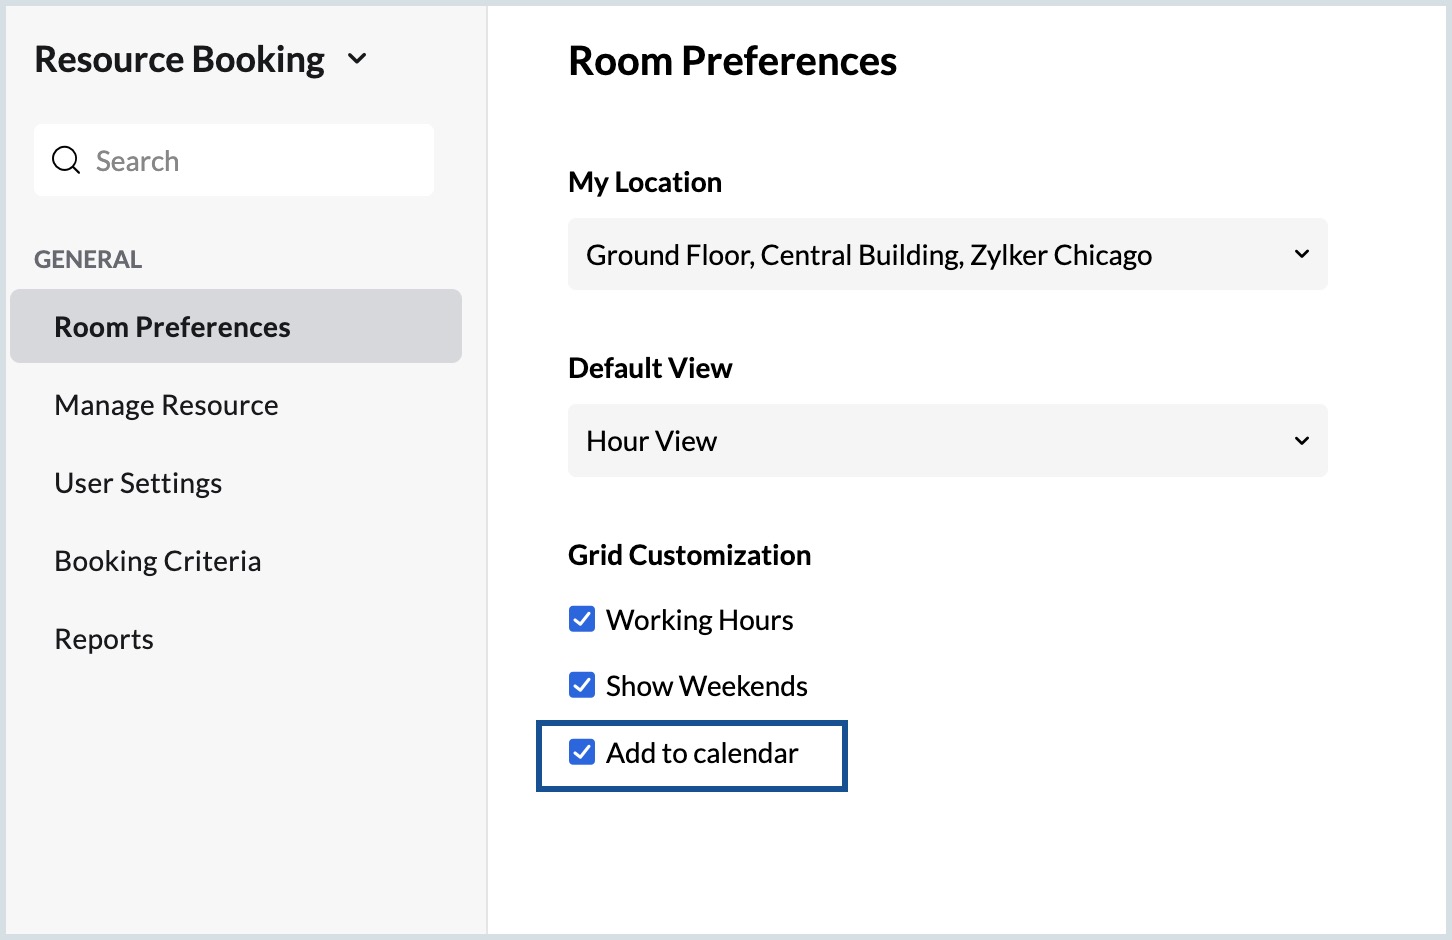
- Once you enable this option, go to the booking grid and create a new booking.
- Enter the Event Title and make changes to the date and time if required.
- The room will be auto-filled and you can change your room if you want to.
- Fill in the details for the link, and conferencing and select the calendar to which you want to add the booking as an event.
- Configure reminders for the event, add a description and associate this booking as an event with other Zoho apps.
- Add participants to this booking, by providing the email ID of the participant or picking from groups. You can also view the Free/Busy schedule of the participants and change the permission for each participant by clicking on the permission below the participant's name.
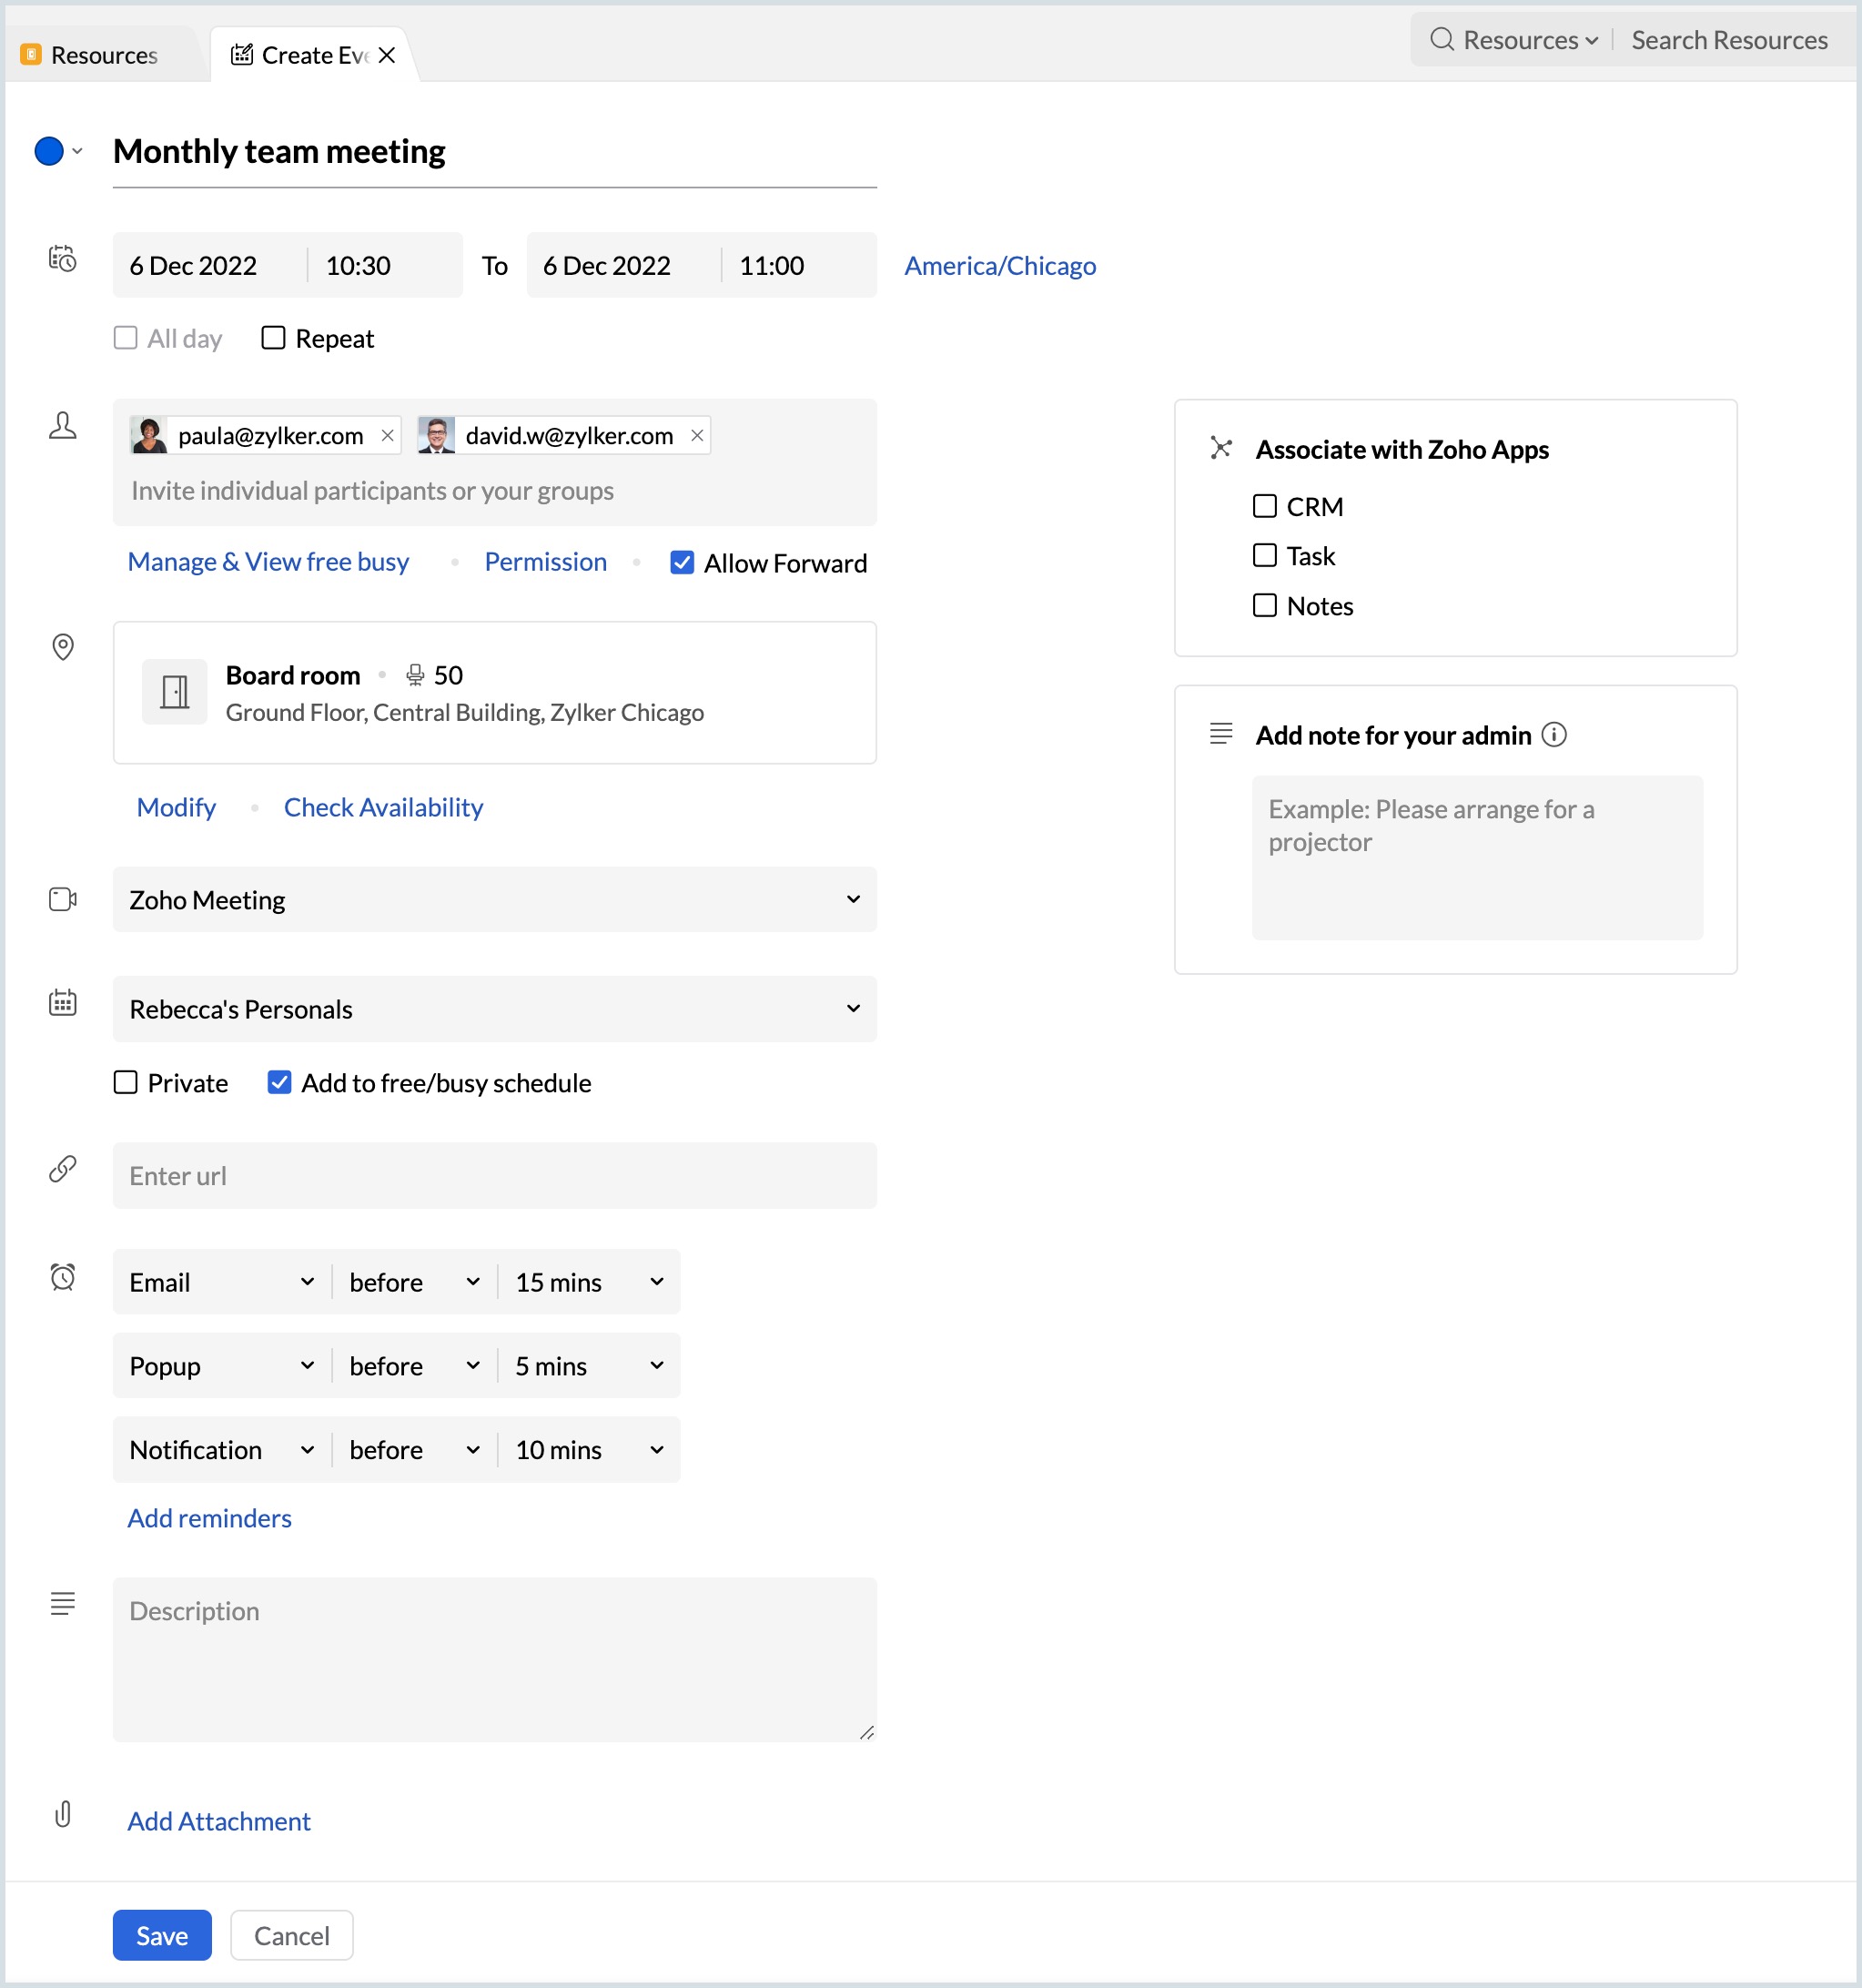
- To add non-participants to this booking, navigate to the Non-participant tab on the right pane and enter the email address of the non-participant.
- You can also add attachments to this booking and make this booking a private event.
- Click Save to add this booking to your calendar.
Note:
- Bookings that were made before enabling the "Add to Calendar" option will not be available in the calendar grid.
- Resource Booking feature is available only for users with one of the Zoho Mail paid plans.


