Autodiscovery Setting for CalDAV Sync
Autodiscovery service in Zoho Calendar facilitates easy configuration of CalDAV sync for your Zoho account. Once Autodiscovery is configured, you just have to enter the email address and password of your account to set up the sync. The server details, port number and other details required to configure the sync will be automatically fetched using the Autodiscovery settings.
Setting up Autodiscovery
To start with the Autodiscovery setup for CalDAV sync in Zoho Calendar, you need to add an SRV record in your DNS manager before configuring the setup in macOS calendar, eM Client, or CalDAV Synchronizer. After adding the SRV record, you can configure CalDAV sync directly using your email address and password as the server details will be auto-fetched.
Adding SRV record
- Log in to your DNS provider.
- Navigate to the DNS management page.
- To add a new SRV record, click Add.
- In the Type field, select SRV from the listed options.
- Enter the following details in the mentioned fields:
- Service: _caldavs
- Protocol: _tcp
- Name: @
- Target: calendar.zoho.com (The target address will vary for different Data Centers.)
- Priority: 0
- Weight: 1
- Port: 443
- TTL: Custom
- Seconds: 360
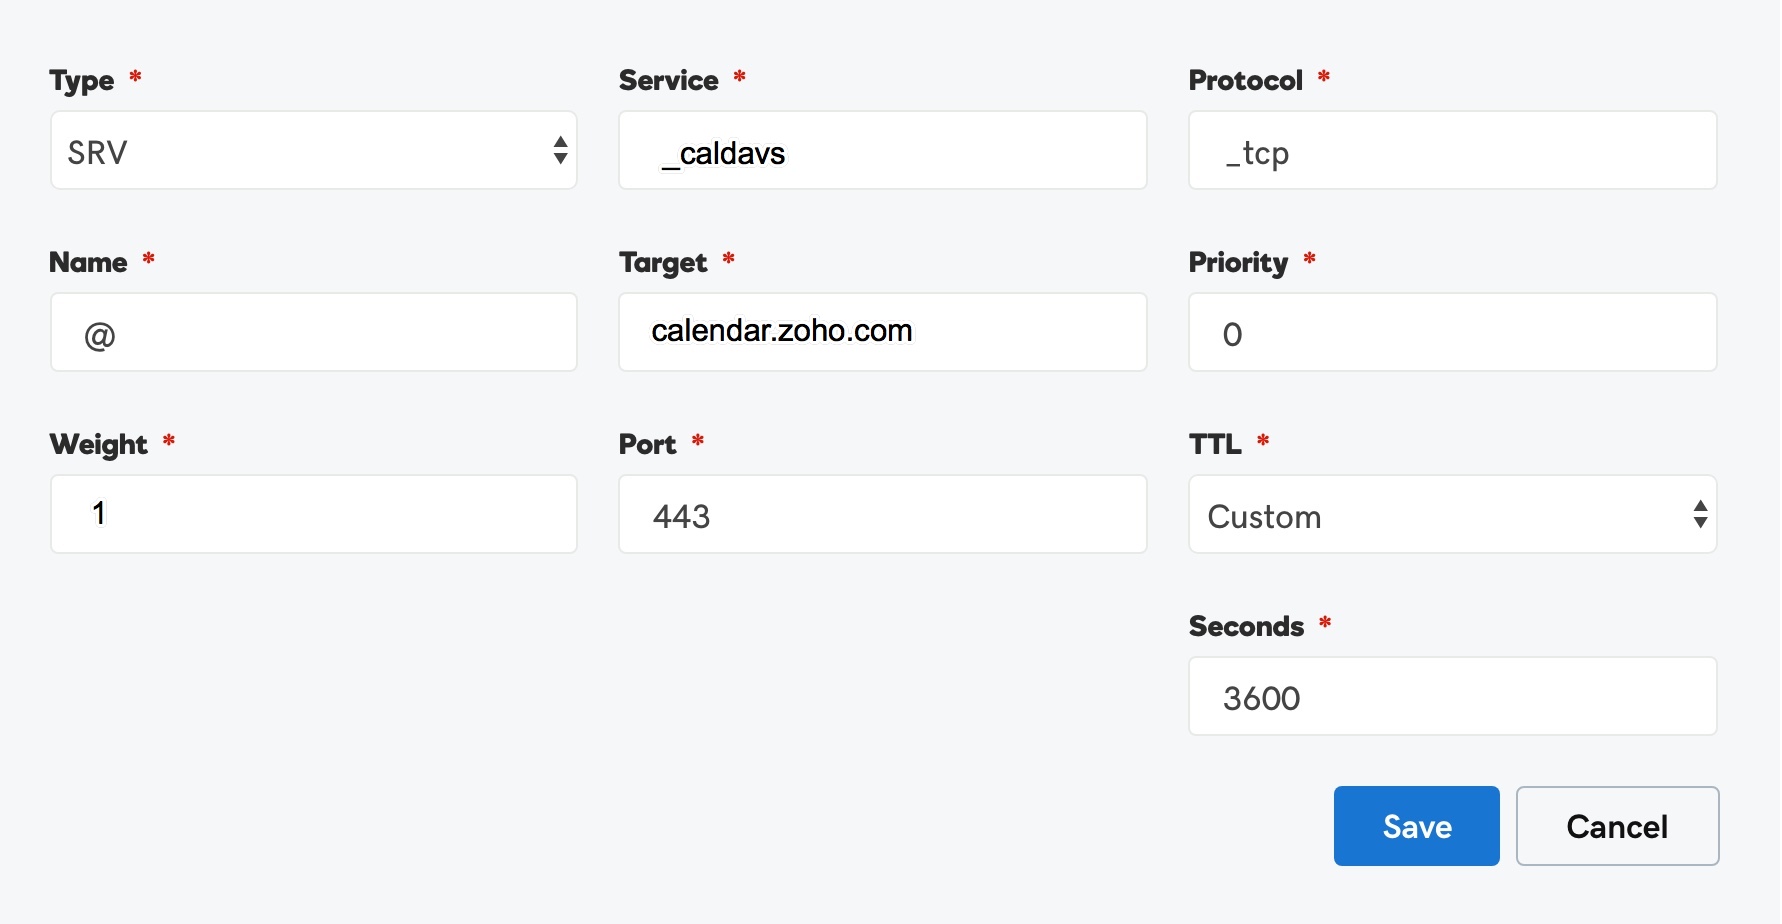
- After entering the details, click Save.

Once you have entered all the details and saved them, wait for the TTL value to propagate. You can check if you have configured the SRV record correctly by using this tool.
For the CalDAV synchronizer, the Service should be _caldav and the Port should be 80.
Configuration for CalDAV sync
After adding the SRV record for Autodiscovery, you can configure the CalDAV sync in macOS Calendar, eM Client, or CalDAV Synchronizer. The steps to add the SRV record for Autodiscovery is given above. The procedure to configure each sync will be different and you won't be asked to enter the server details or port number for configuration.
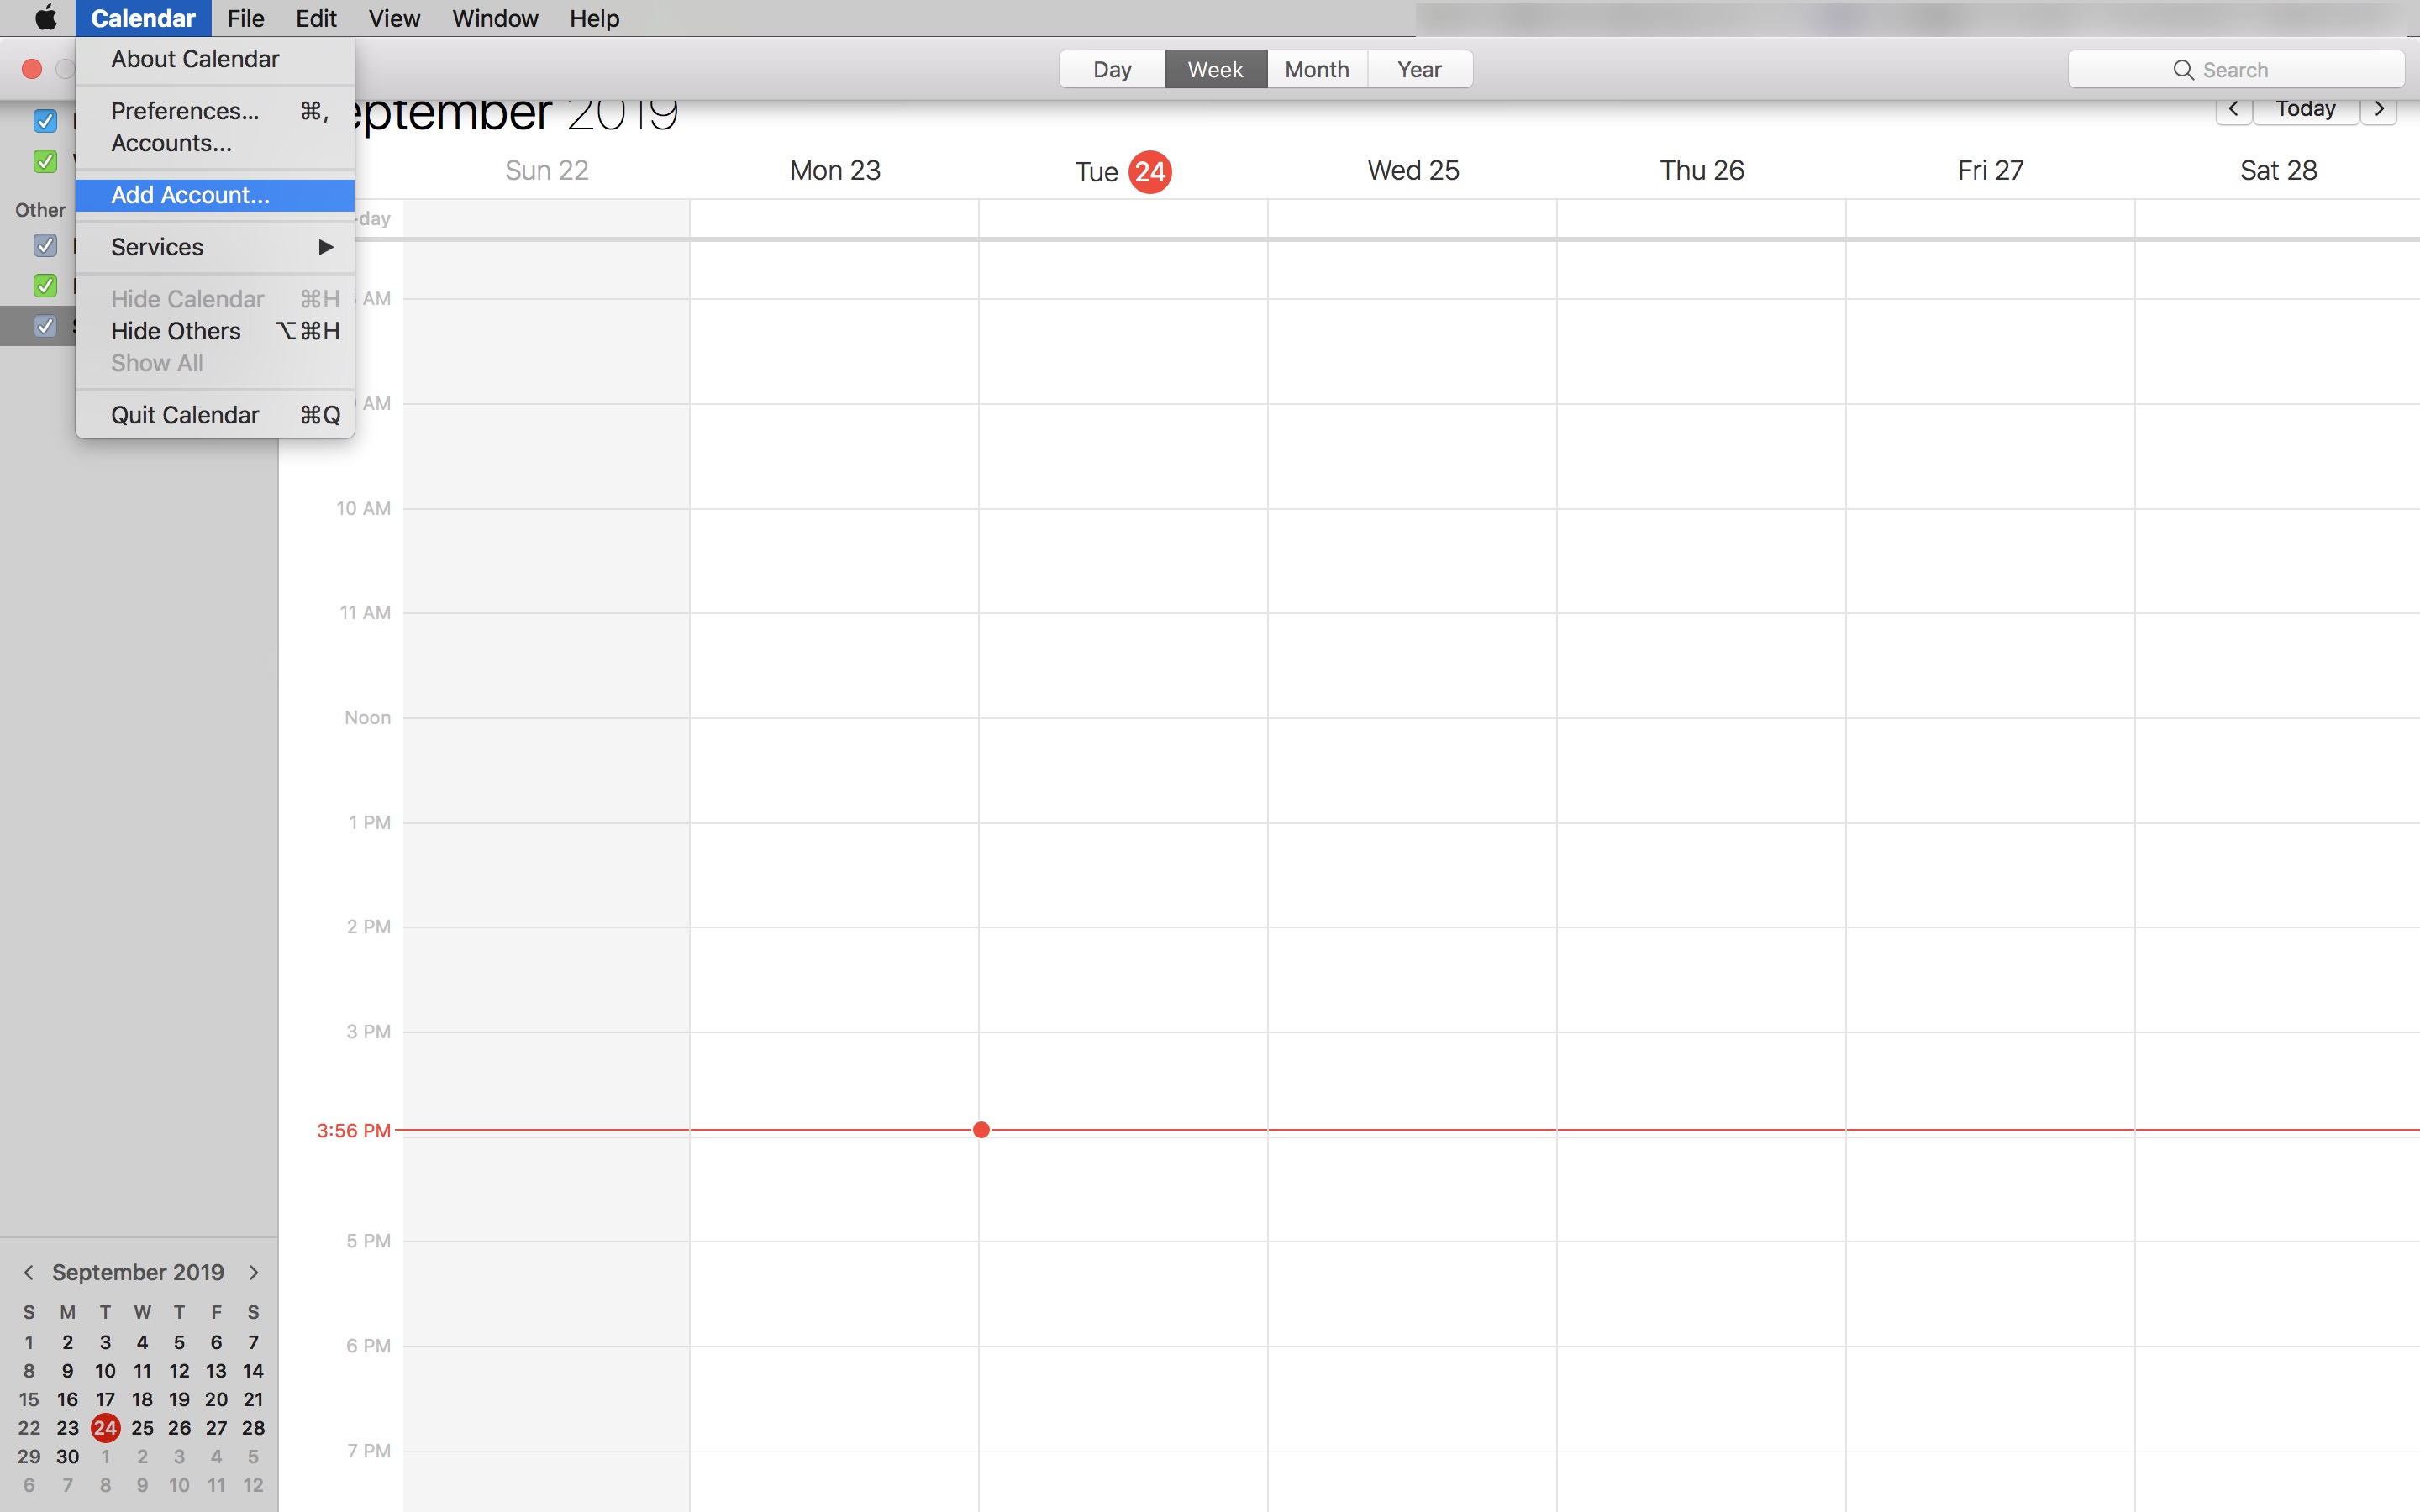
Configuration in macOS Calendar
- Open the default calendar on your MacBook.
- Go to Calendar > Add Account
- Click the Other CalDAV Account option and click Continue
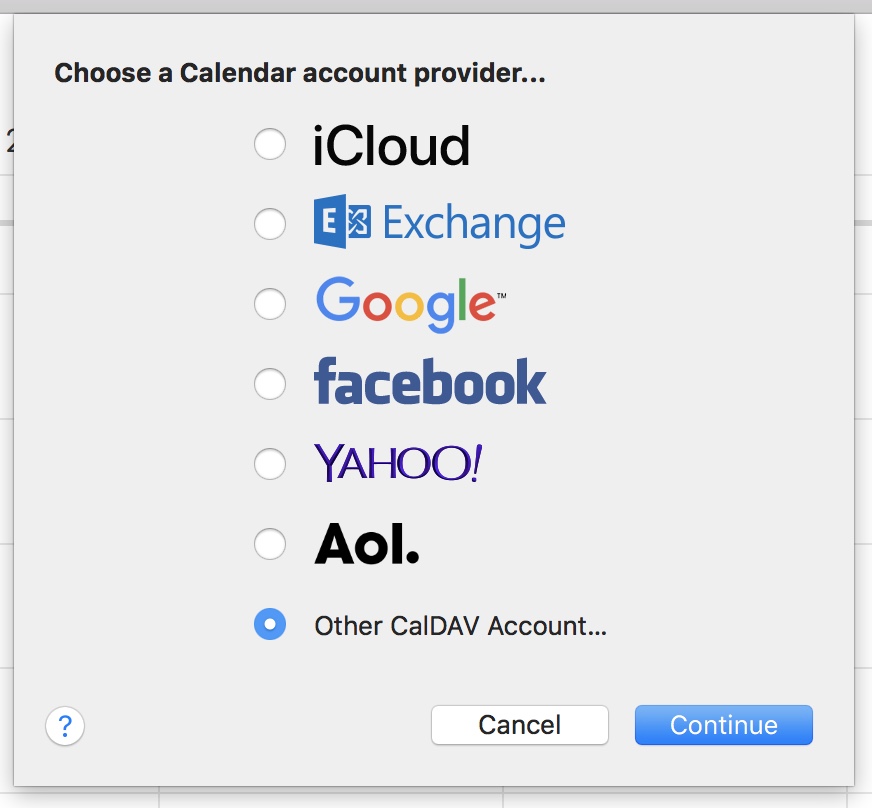
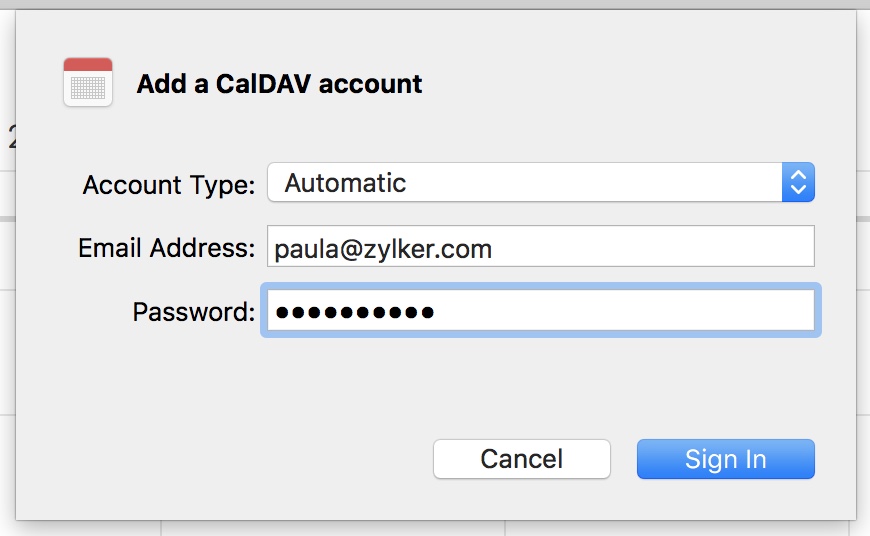
- Choose the Account Type as Automatic.
- Enter the email address and password of your Zoho account and click Sign in. If you have enabled Two-Factor Authentication (TFA) for your Zoho account, generate and use the Application-Specific Password
- The events will be automatically between both calendars.


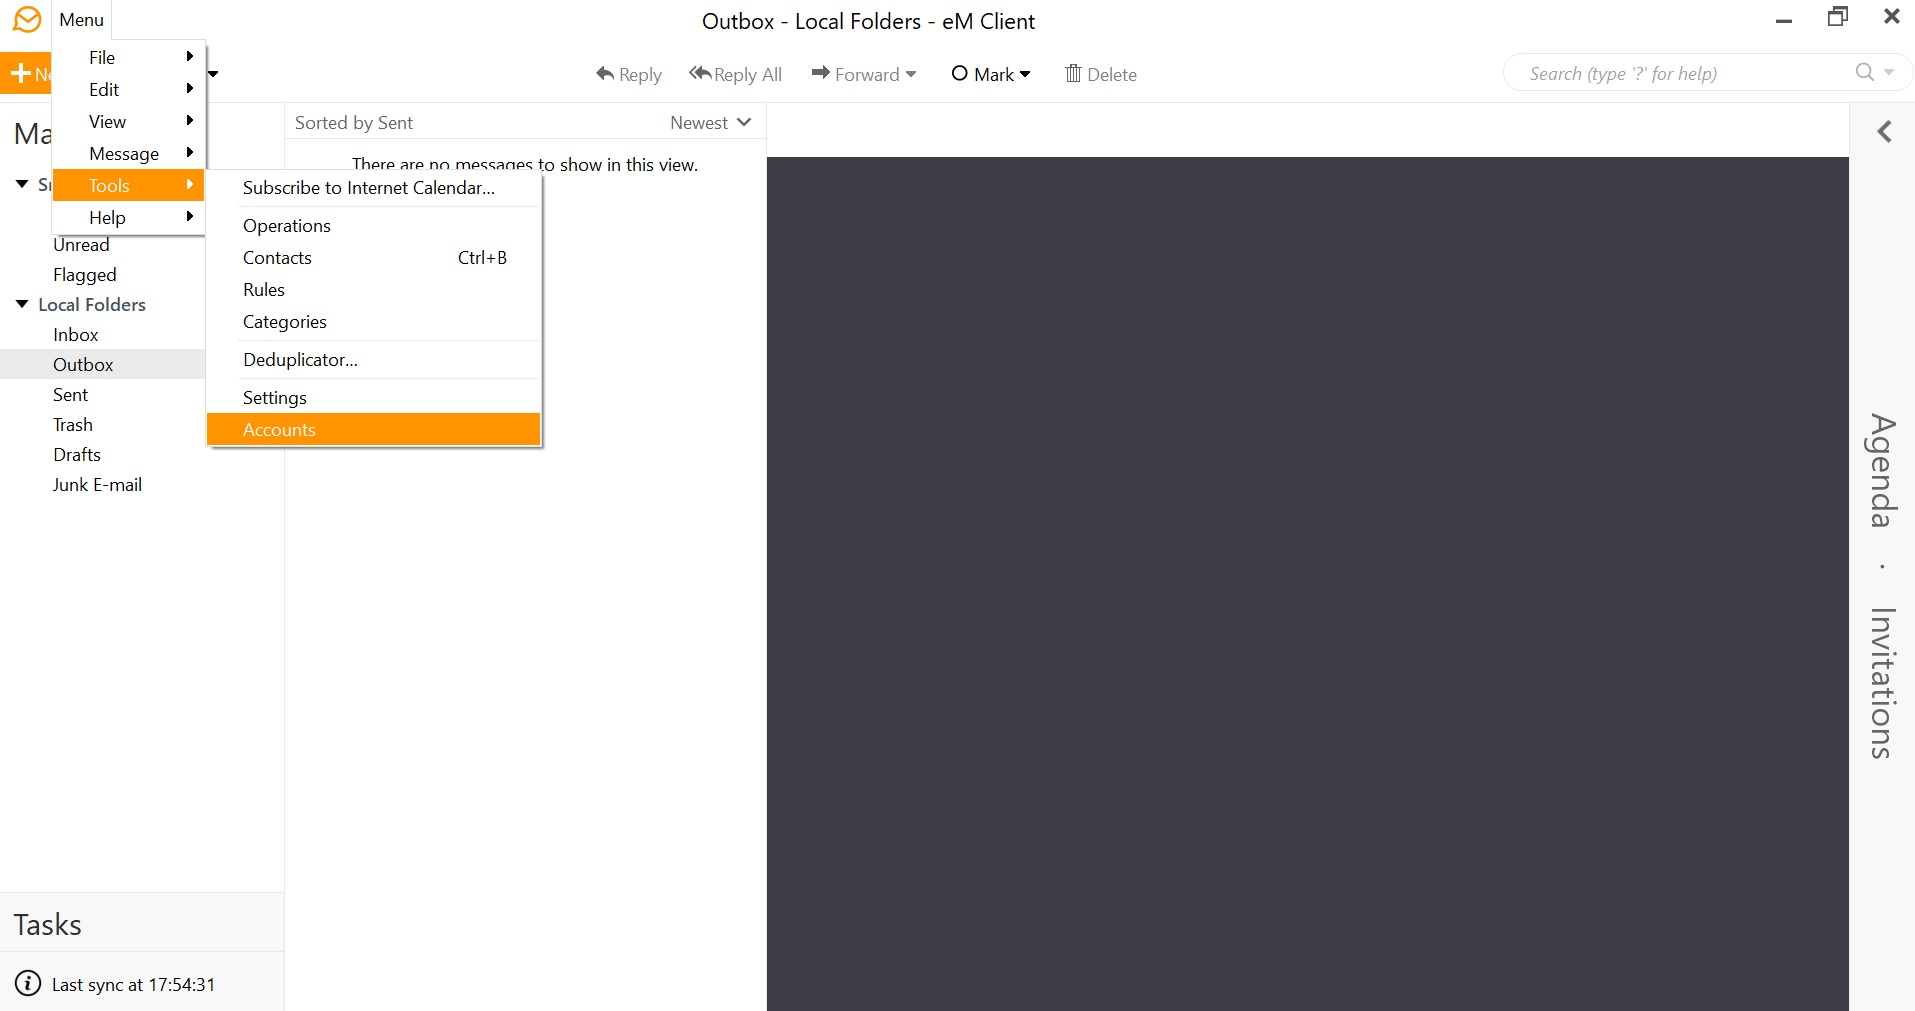
Configuration in eM Client
- Navigate to Menu > Tools > Accounts
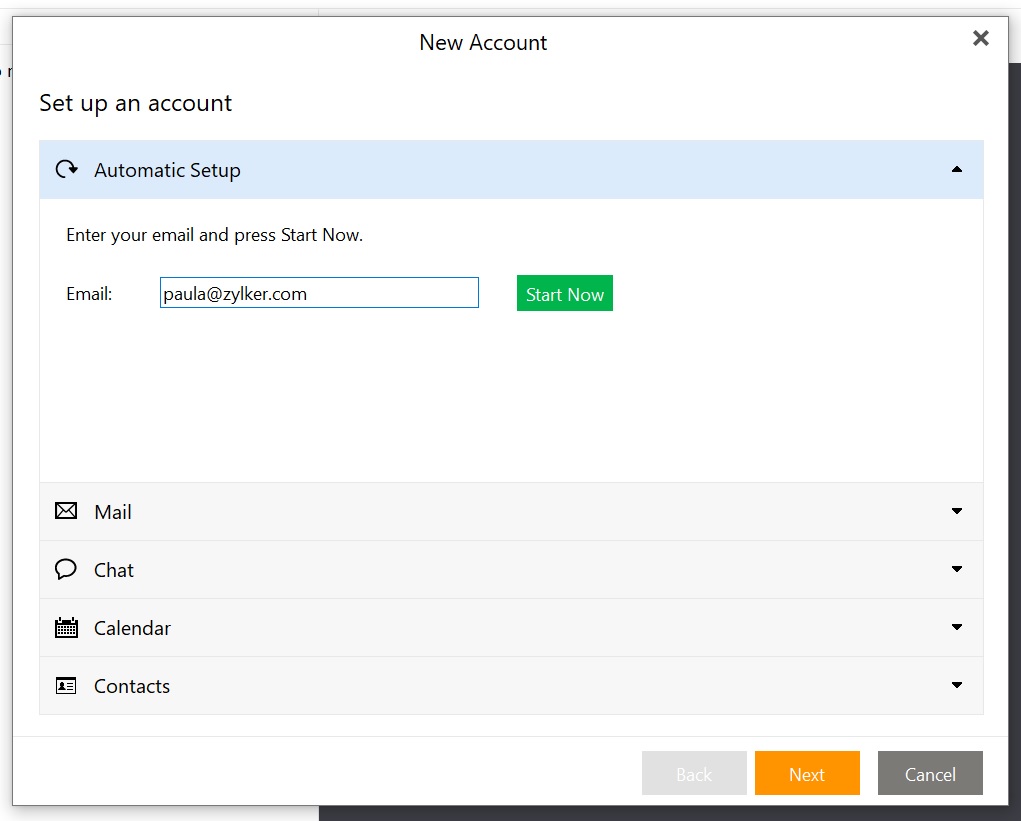
- Click on Automatic, enter the email address of your Zoho account and click Start now
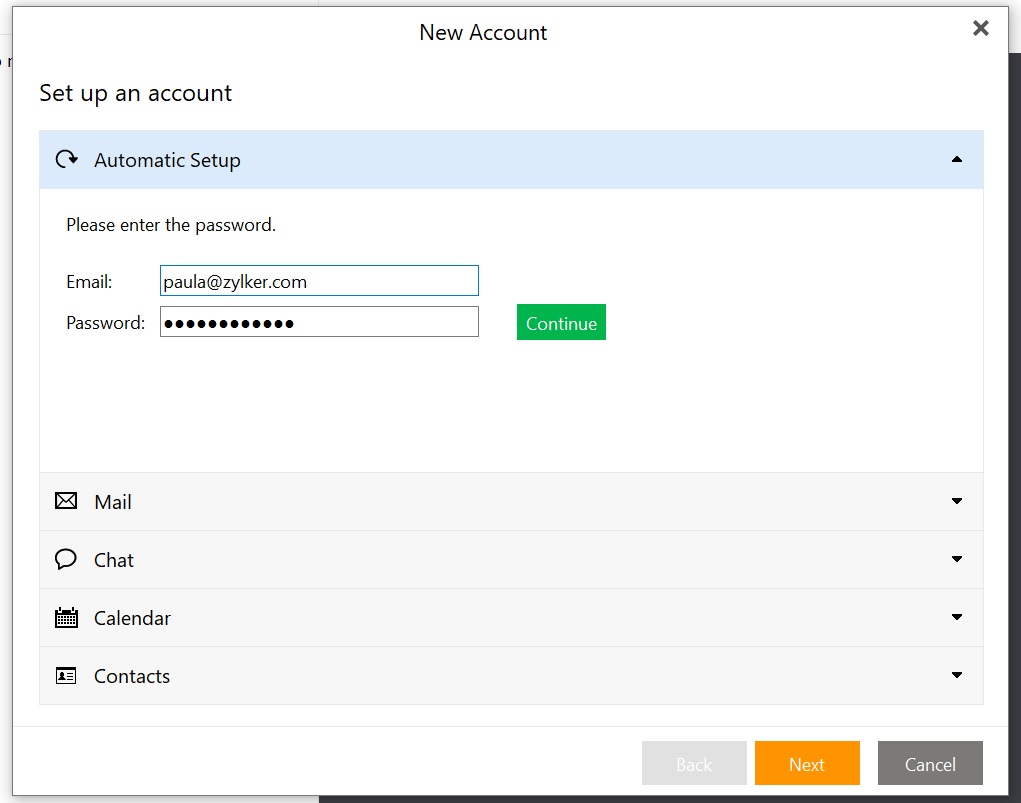
- Enter the password of the Zoho account in the password field and click Continue. If you have enabled Two-Factor Authentication (TFA) for your Zoho account, generate and use the Application-Specific Password
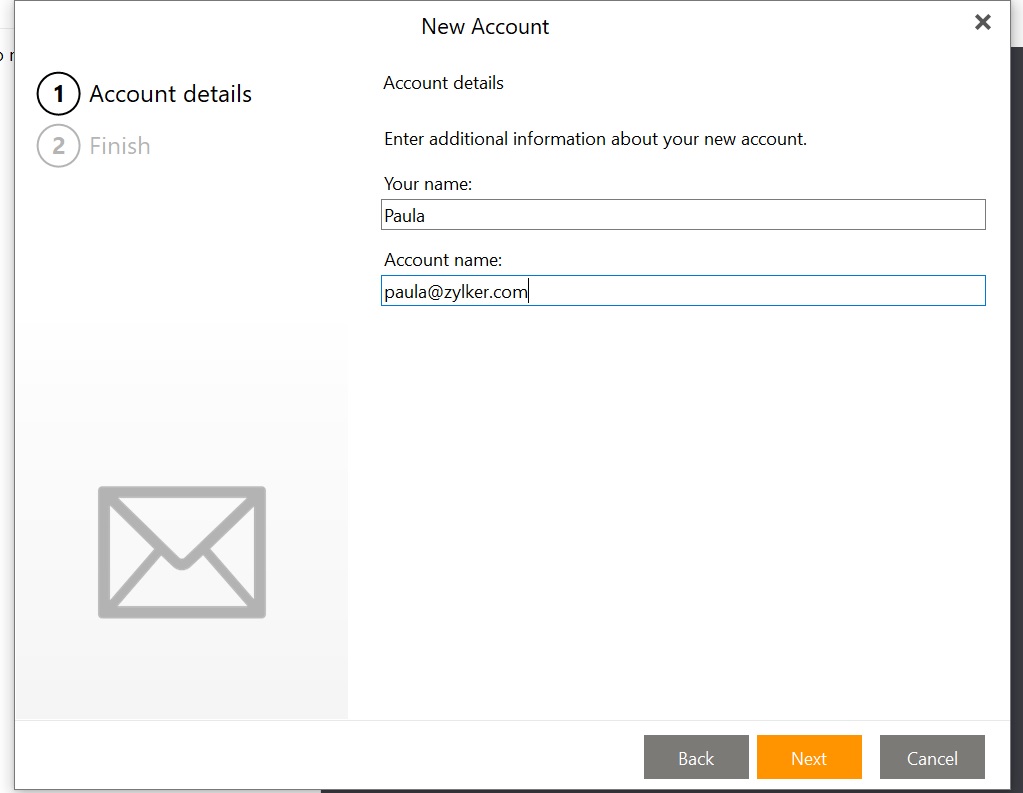
- In the Account Details, edit the name in the Your name field if required and click Next.
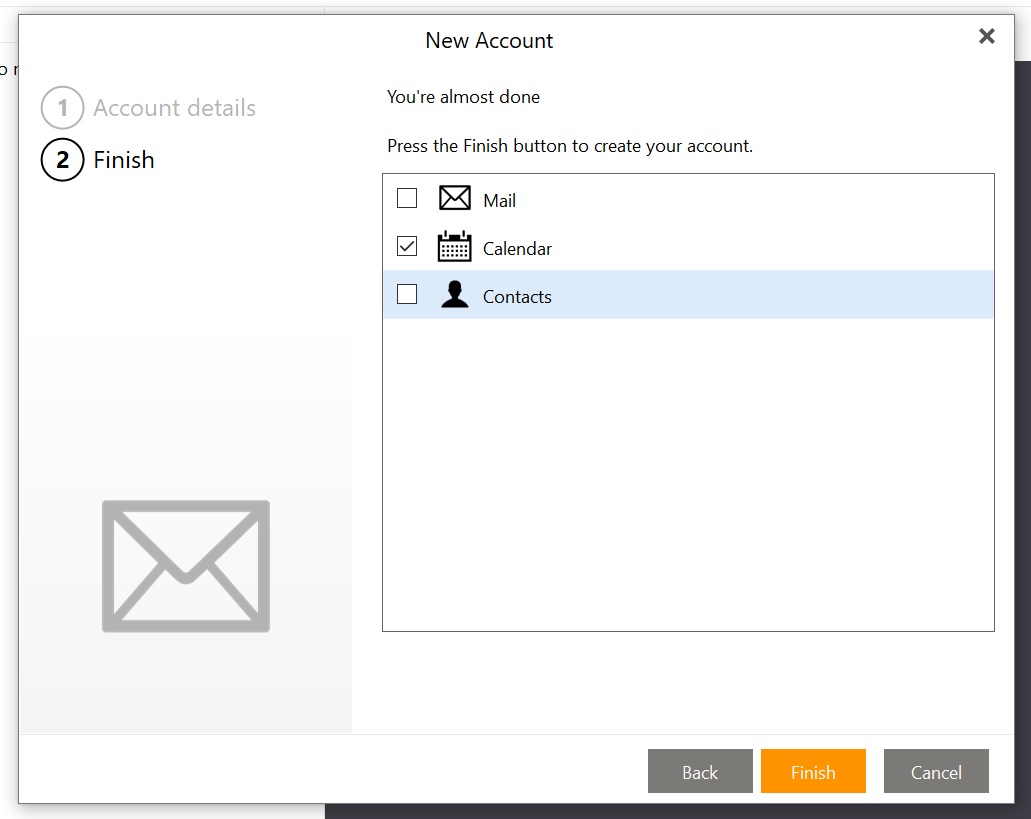
- Select the Calendar option and click Finish to add the account.
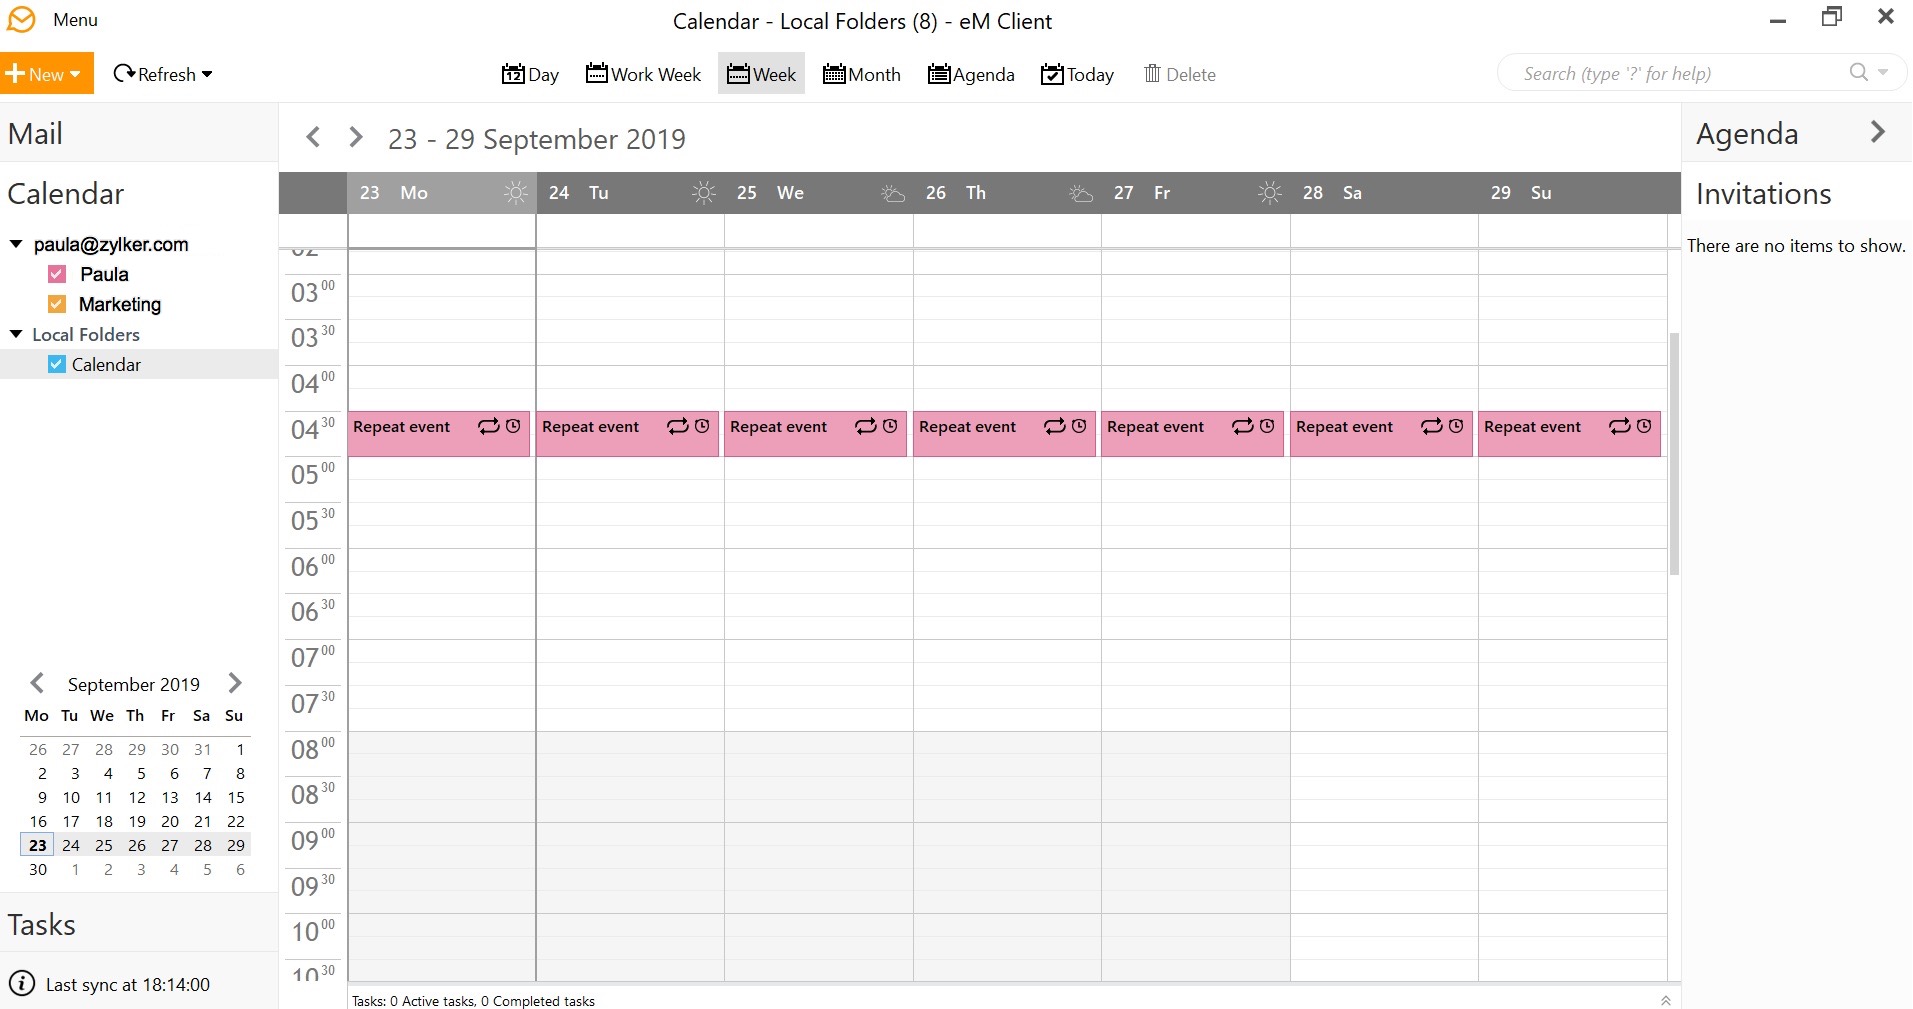
- Go to your calendar and refresh to view all the events from Zoho Calendar in eM Client.


Configuration in CalDAV Synchronizer
- Download and install the CalDAV Synchronizer Plugin for Microsoft Outlook.
- Log in to your Microsoft Outlook account and go to Calendar.
- Click on CalDAV Synchronizer from the menu bar and select Synchronization Profiles.

- Click on the Add icon (+) in the dialog box.

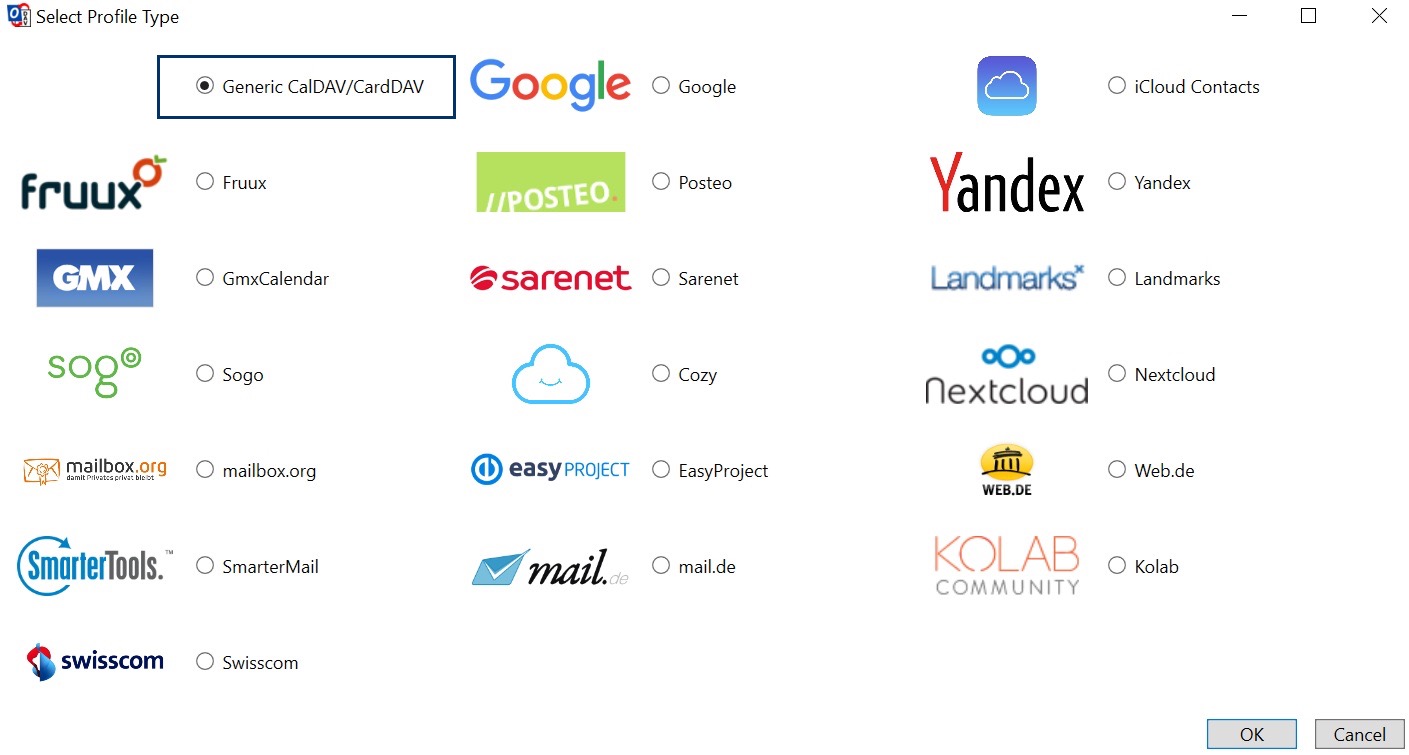
- Select the profile type as Generic CalDAV/ CardDAV and click Ok.
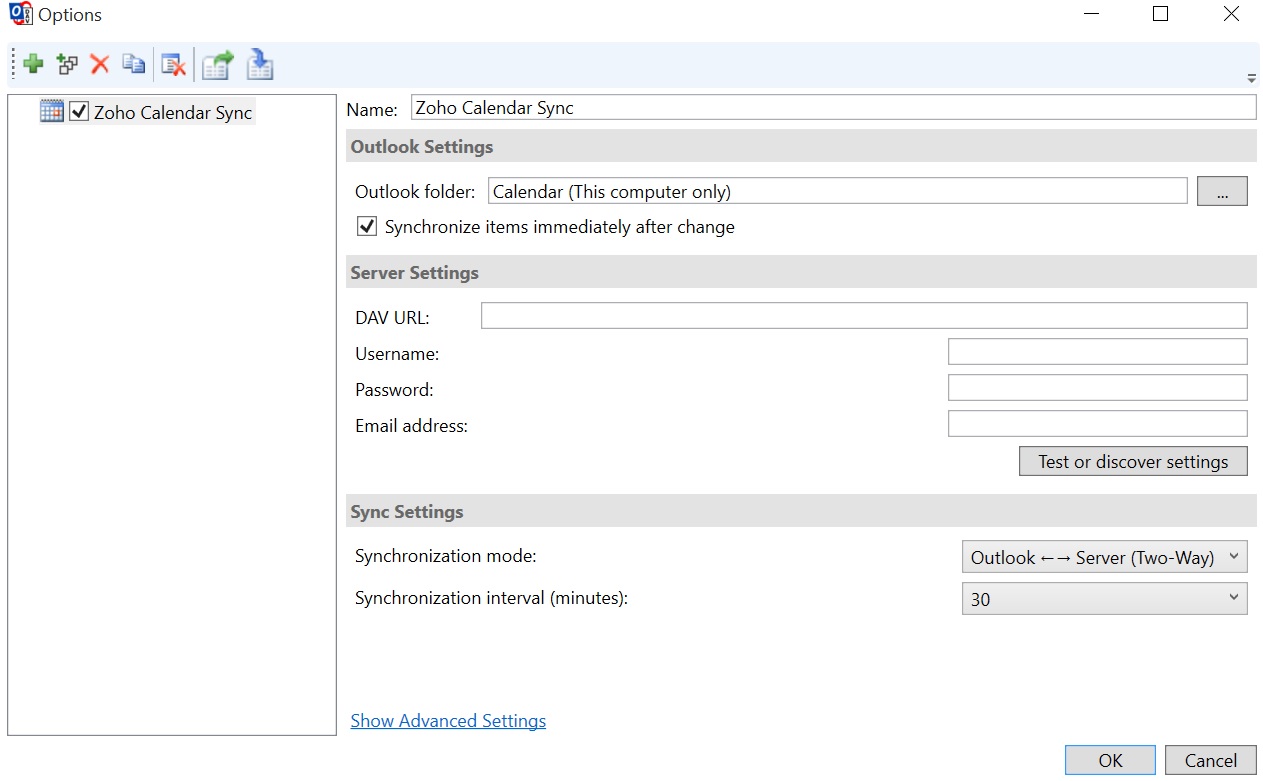
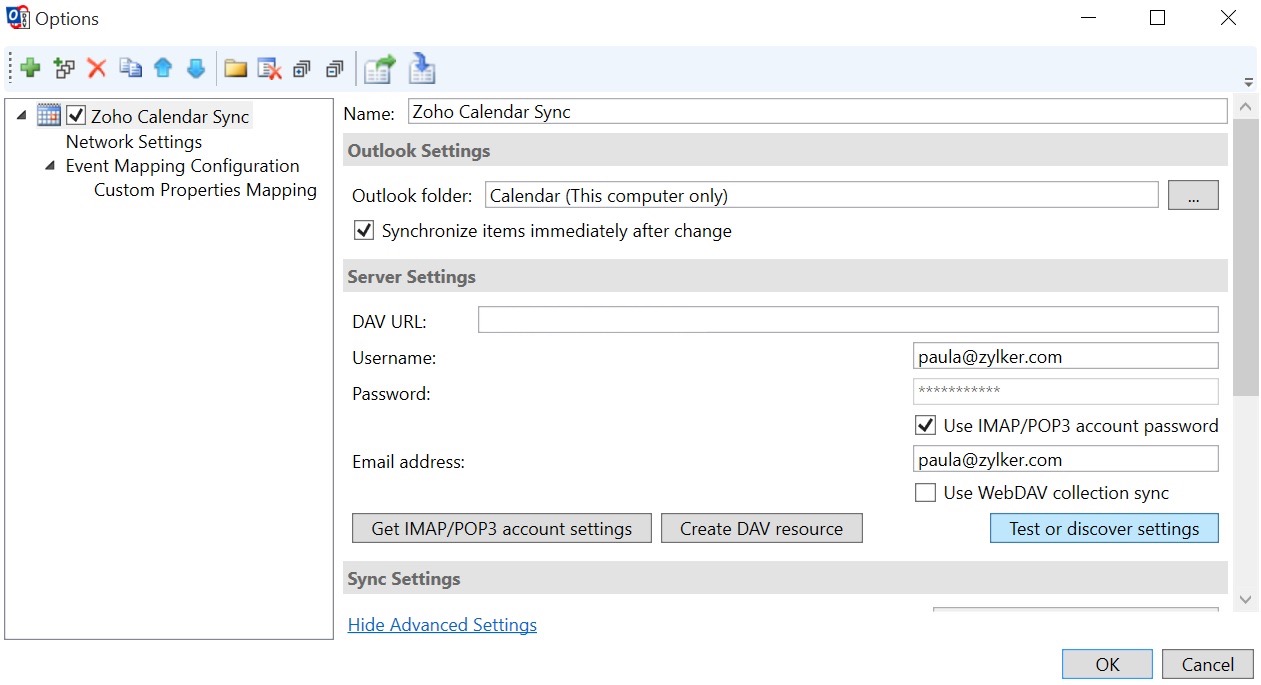
- In Outlook Settings, enter the name for the sync in the Name field.
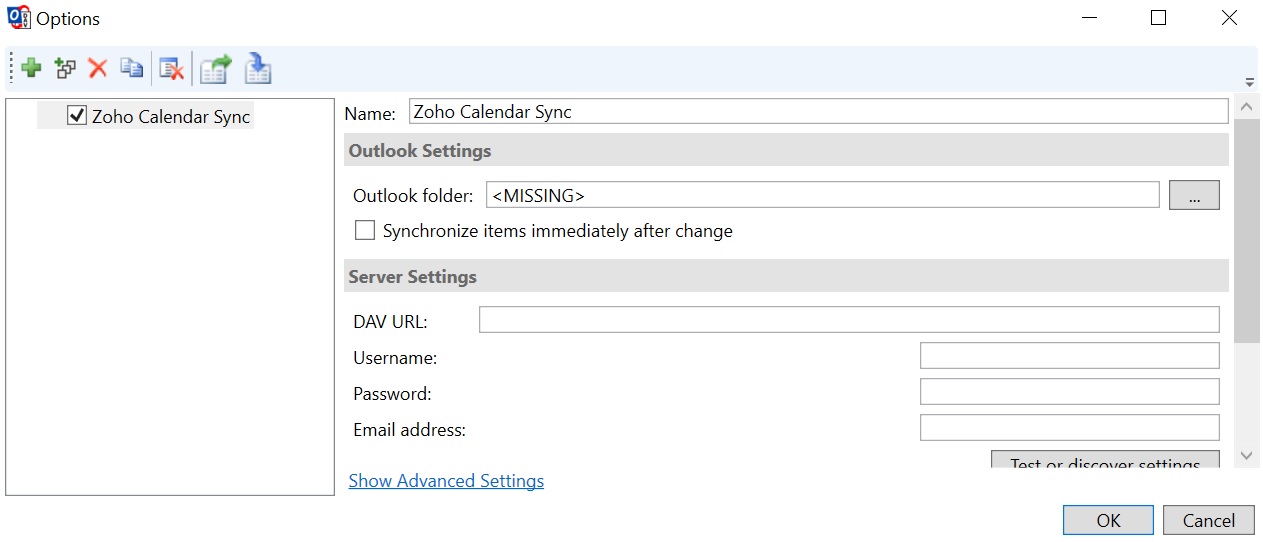
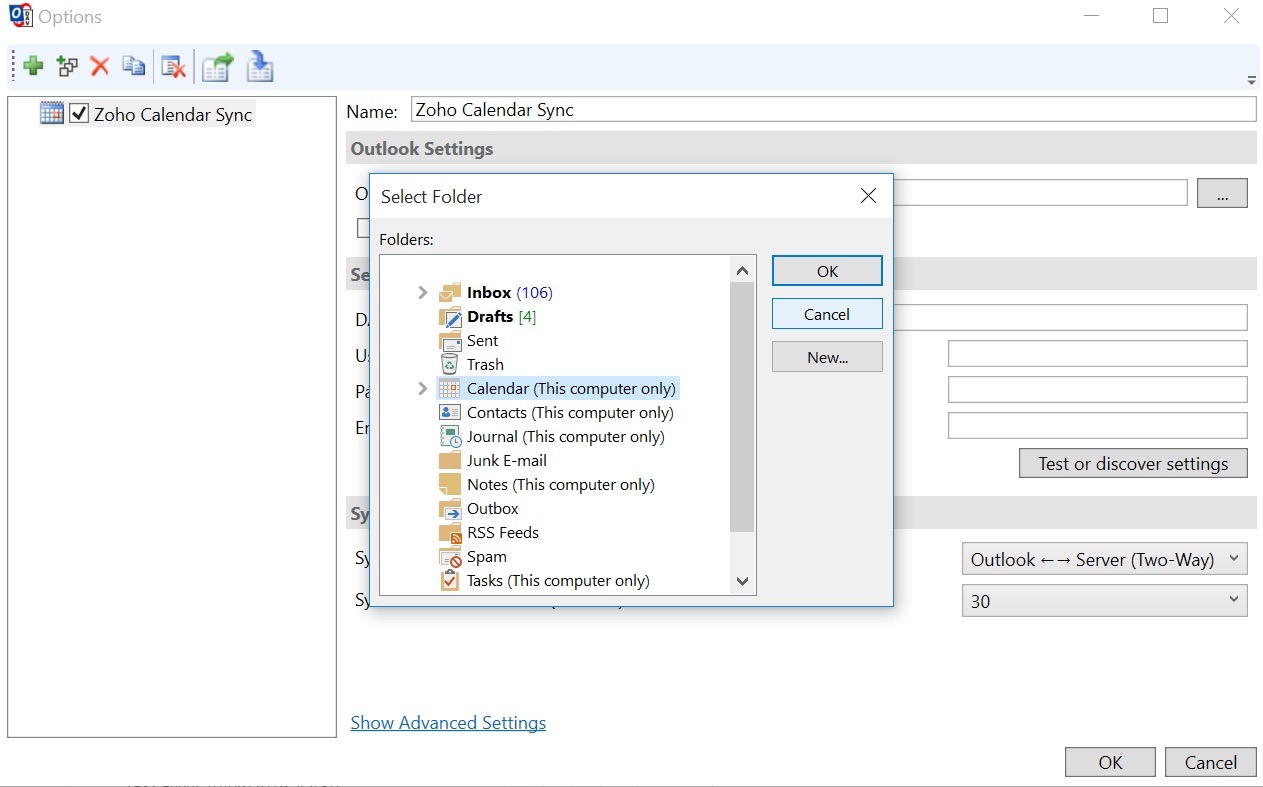
- In the Outlook Folder field, use the browse option to locate the folder name Calendar and click Ok.
- To enable auto-sync in CalDAV Synchronizer, select Synchronize items immediately after change.
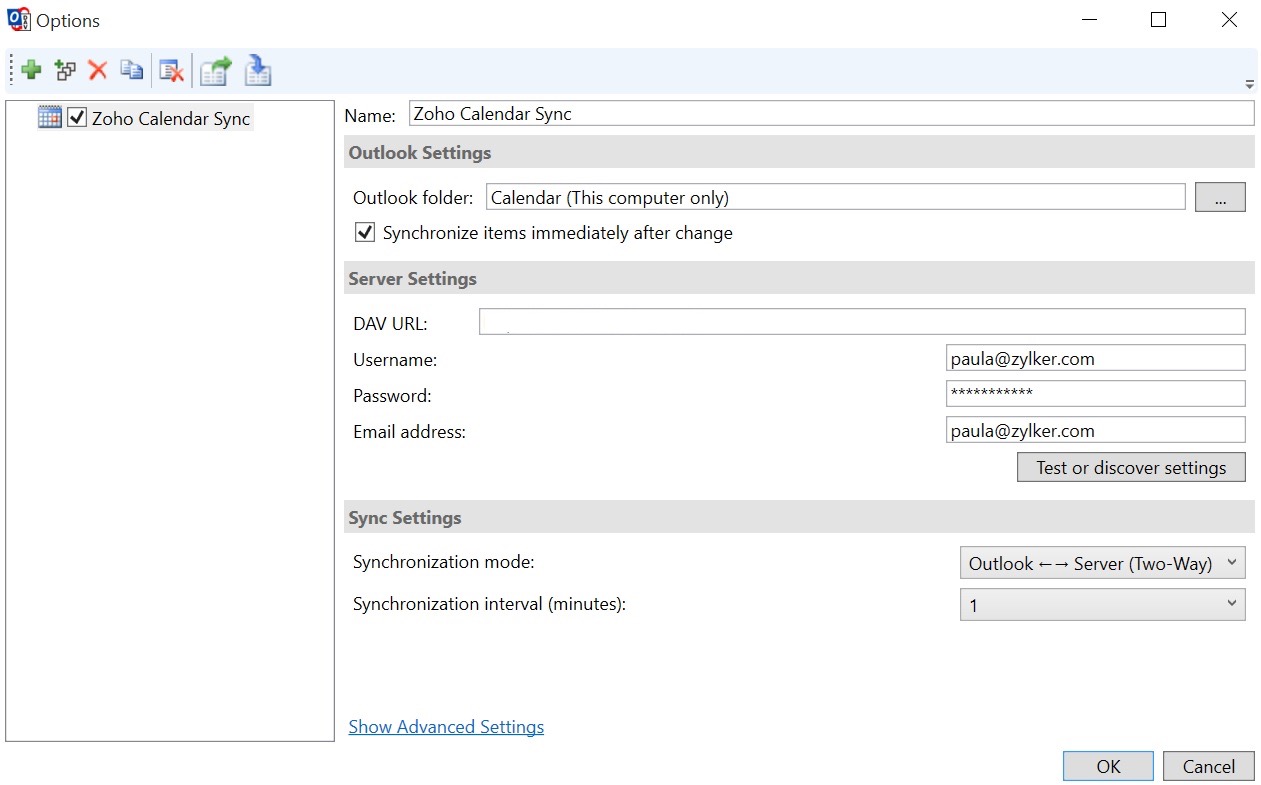
- In the Server Settings, enter the Username, Password, and Email Address of your Zoho account. If you have enabled Two-Factor Authentication (TFA) for your Zoho account, you need to enter the Application-Specific Password in the Password field.
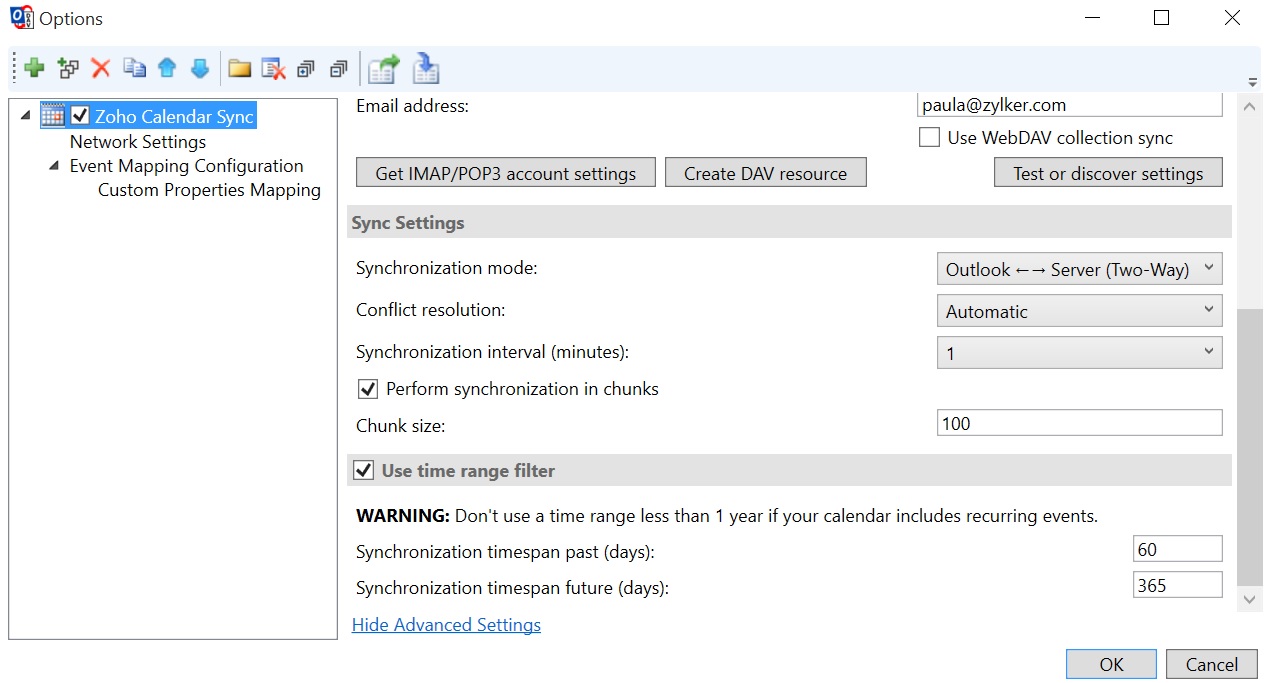
- Select the Synchronization Interval as 1 minute in the Sync Settings.
- Click on Show Advanced Settings.
- If you want to sign in to your account using the IMAP/POP3 password, select the option Use IMAP/POP3 account password.
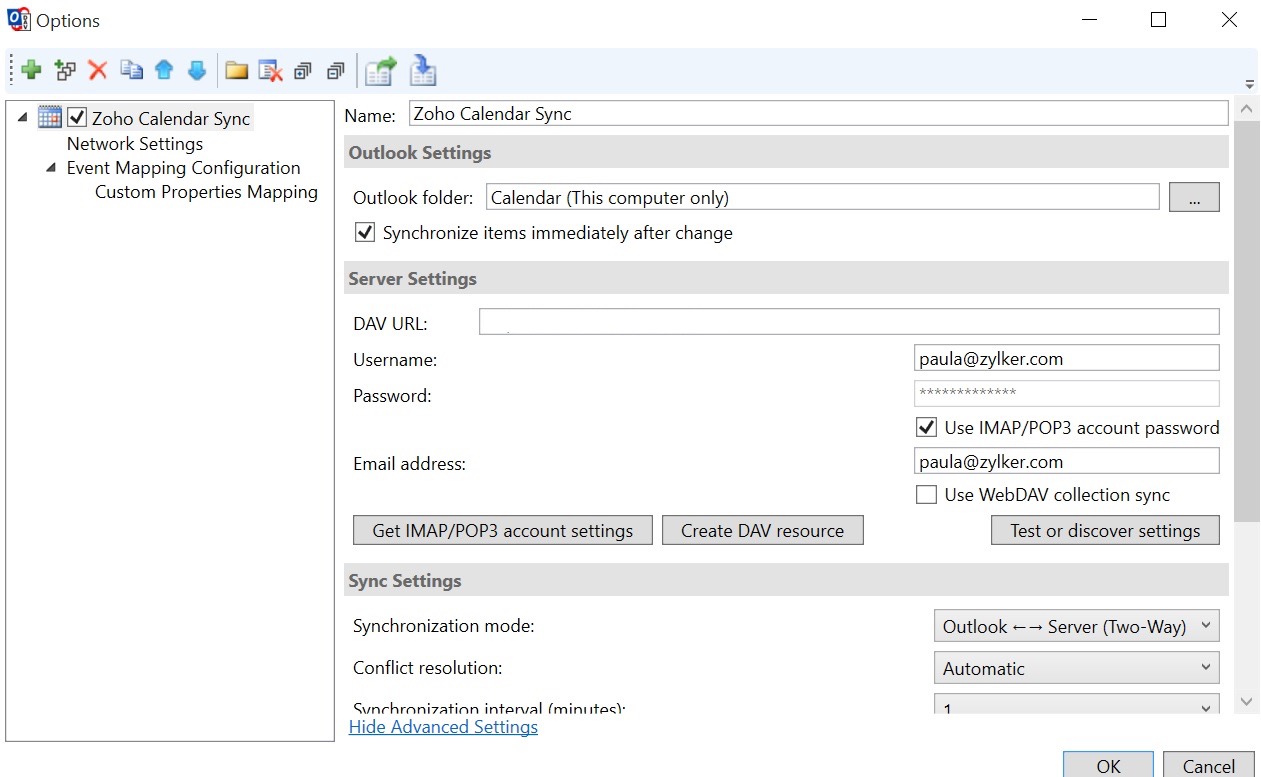
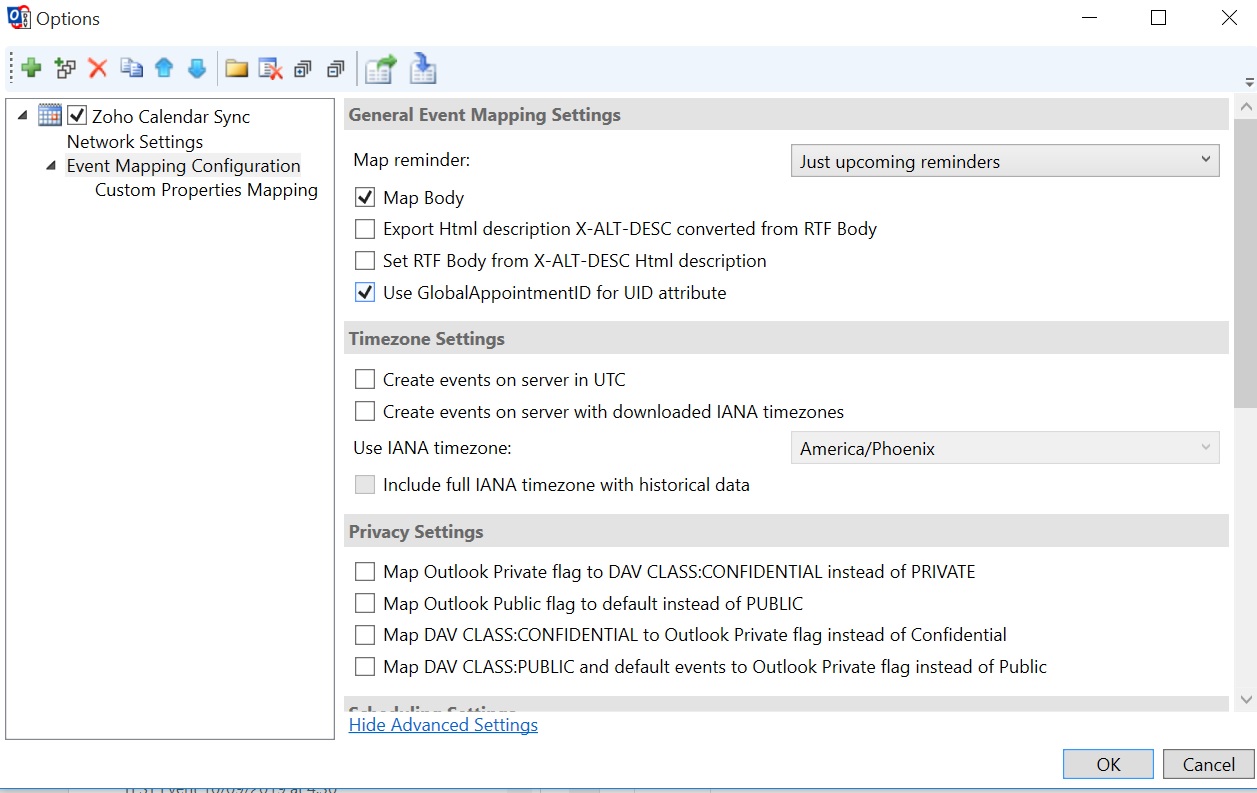
- Navigate to Event Mapping Configuration from the left menu in the window and select the Use Global Appointment ID for UID attribute option in the General Event Mapping Settings.
- Go back to Zoho Calendar Sync from the left menu and edit the number of days for the Synchronization timespan past and Synchronization timespan future if required.
- After entering all the details, click on Test or discover settings.
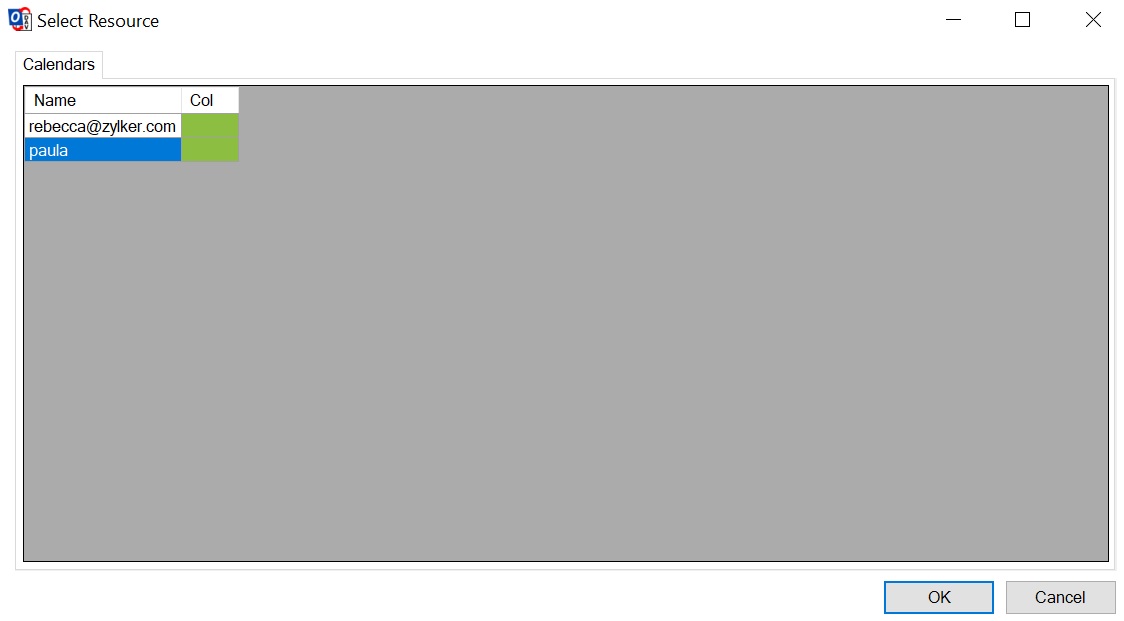
- Select the calendar from Zoho Calendar that you want to sync with your Outlook account and click Ok.
- The events will be automatically synced between both accounts.


Note:
Autodiscovery service is available only for org users and not for personal users.