Restrict Zoho Calendar access based on IP address
Zoho Calendar is a secure calendar service that offers an IP Restriction system with which you can restrict login access to users who are not part of the specified IP range. This is useful when an organization wants to provide secure controlled access to Zoho Calendar only from certain authorized locations. For example, if an organization wants its employees to access calendar only from the organization premises in their corporate network, then such organizations can add IP restrictions for their users.
You can restrict access to the whole organization, for specific users, or based on the user roles—Super Admin, Admin, and User. Once you define the allowed IP addresses, the respective users will not be able to access their calendar account from any other IP address other than the ones defined.
Note:
If you are a Zoho One user, you can define Allowed IPs via the Zoho One Admin Panel or Zoho Mail's Access Restriction under Email Policy
User-based IP Restriction
You can define a range of IP addresses for every single user added in the Admin Console in the Allowed IP section of a user's Security settings. To define allowed IP addresses for a specific user,
- Log in to the Zoho Admin Console
- Navigate to Users in the left pane and click on the user you want to restrict access based on IP addresses.
- On the Users page, click Security from the top menu.
- On the Security page, navigate to Allowed IP addresses.
- Enter the IP range you would like the user to have access to using the From IP Address and To IP Address section.
- Once done, click the Add button.

- You can delete a configured IP address by using the Delete icon on the right side of the configured IP addresses.

You can add multiple allowed IP addresses by following the same steps.
Role-based IP Restriction
You can define allowed IP addresses for users based on their role. For example, you might want all your admins and super-admins to operate only from your corporate network but don't want to restrict access to general users. In such cases, to configure role-based IP restriction,
- Login to Zoho Admin Console
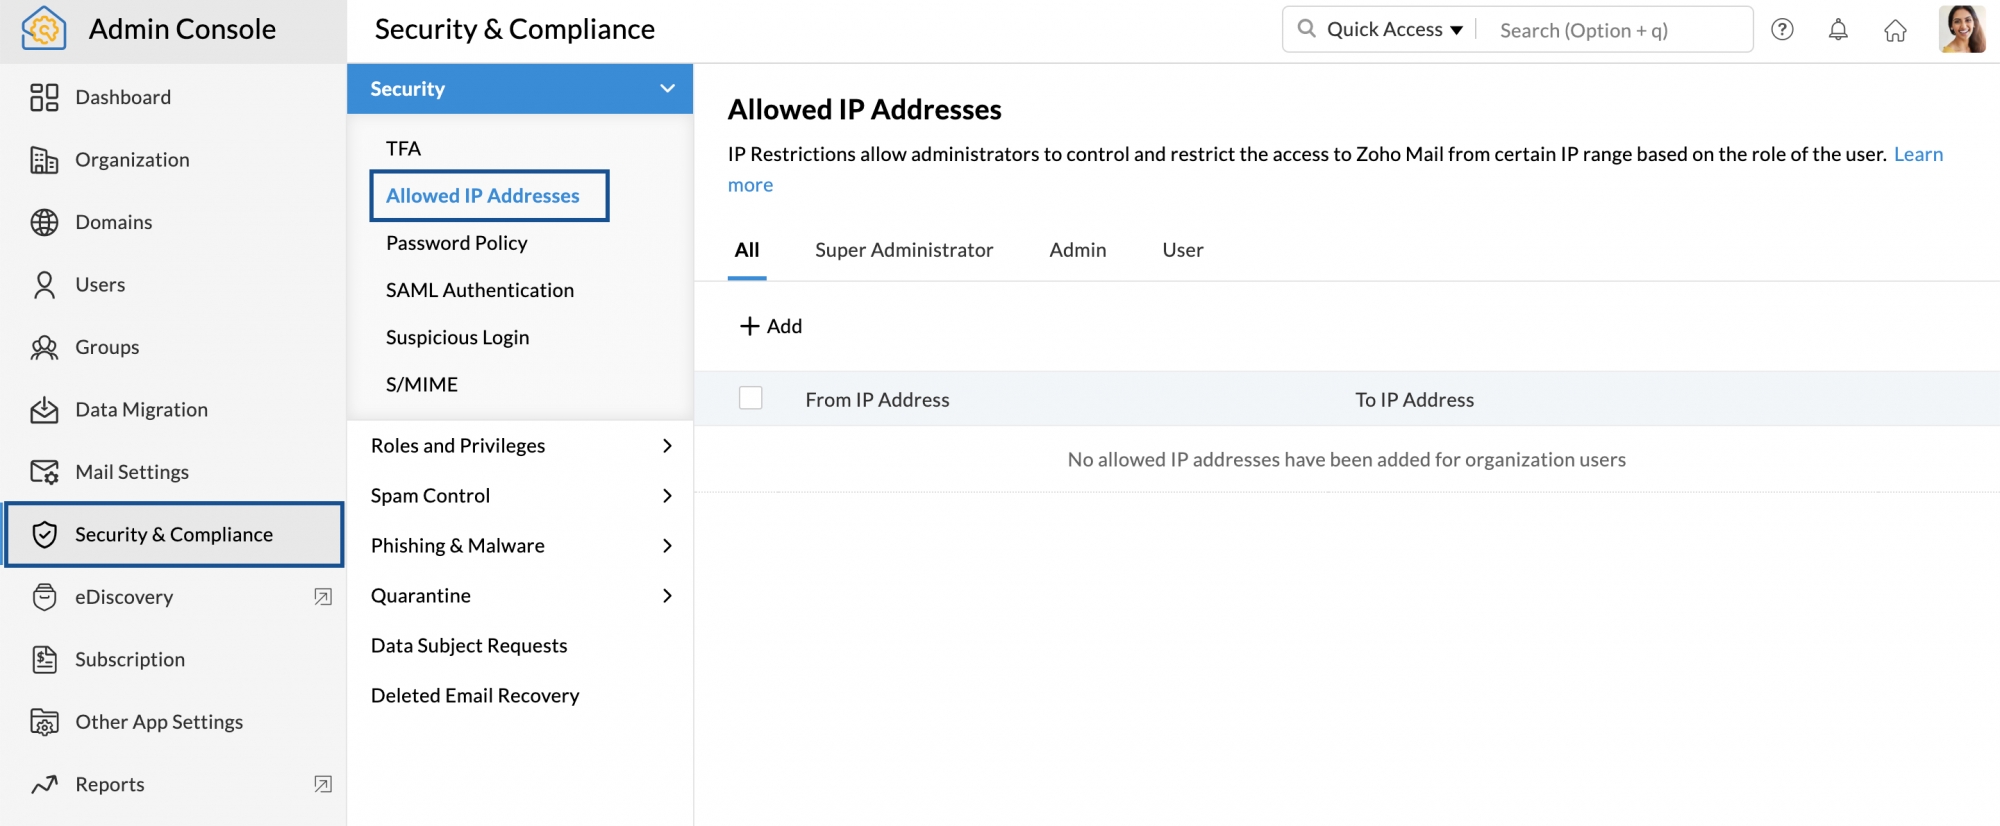
- Navigate to Security and Compliance in the left pane.
- Go to security and click Allowed IP Addresses

- Under the Allowed IP addresses section, navigate to the role for which you would like to restrict access from the top menu.
- All - The Allowed IP addresses will be applicable to all the users part of the organization.
- Super Admin - The Allowed IP addresses will be applicable only to the Super Admin of the organization.
- Admin - The Allowed IP addresses will be applicable only to the Admins of the organization.
- User - The Allowed IP addresses will be applicable to the Users (who are not Admins or Super Admins) of the organization.
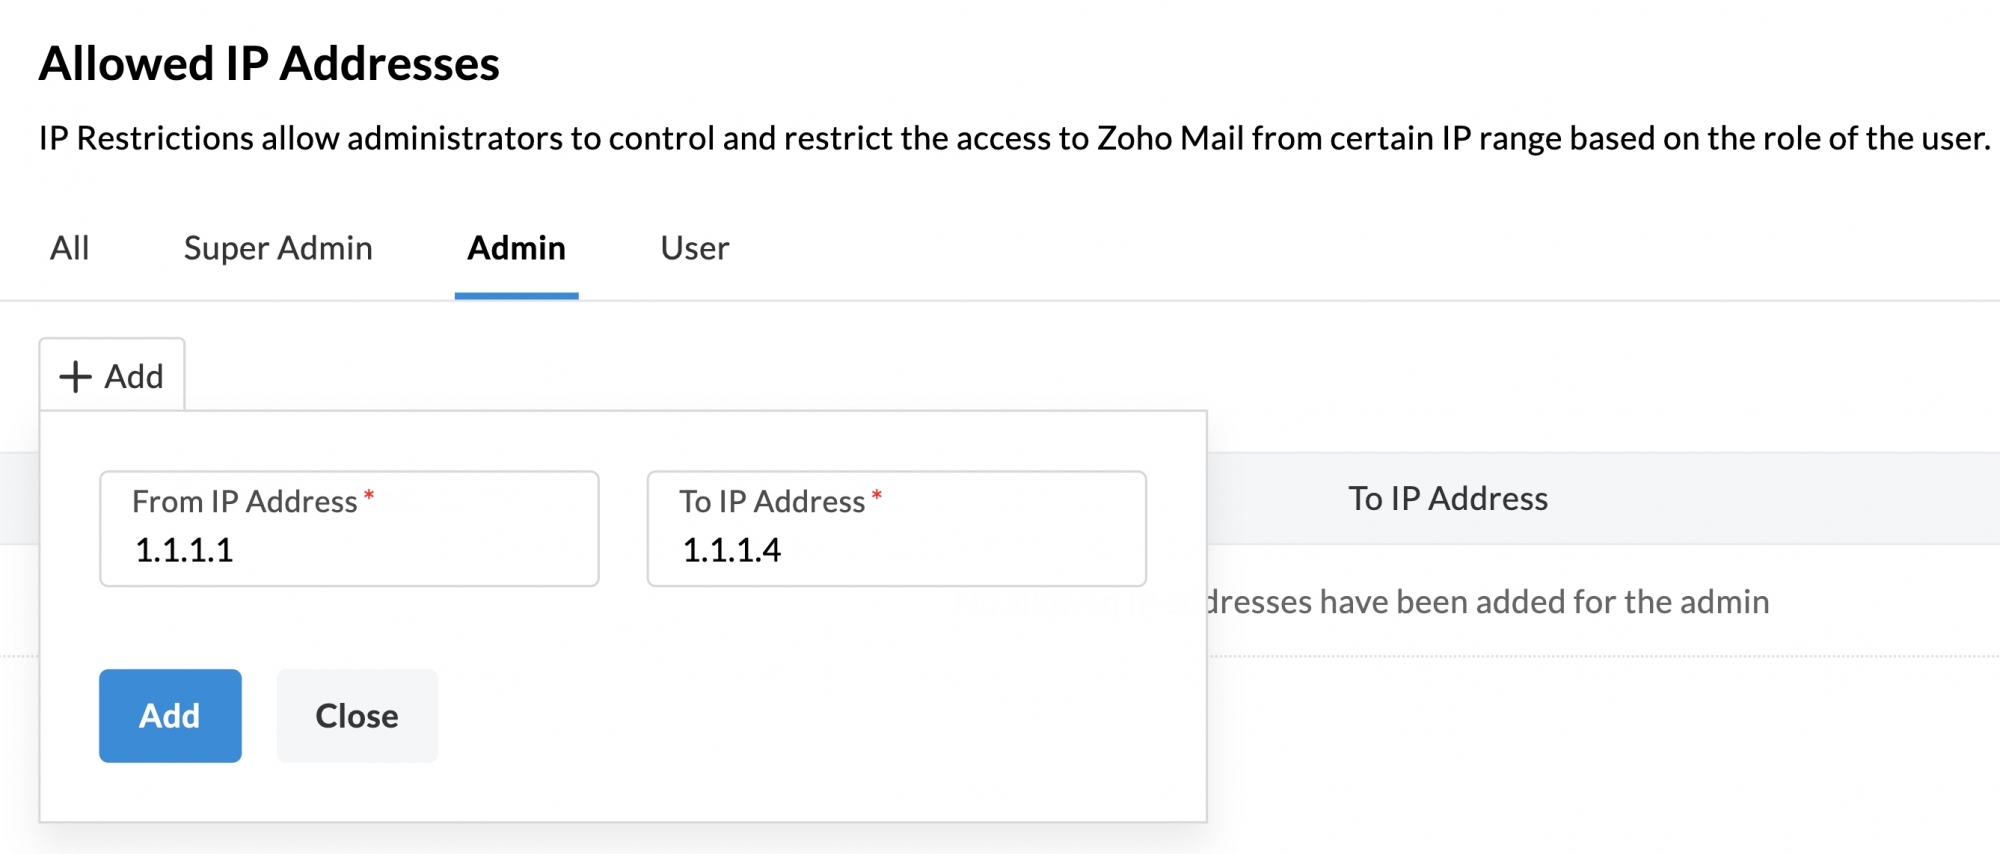
- Click the Add button and enter the From IP Address and To IP Address in the pop-up.
- Once done, click Add.

You can add multiple allowed IP addresses by following the same steps for users under different roles.
Policy-based IP Restriction
If you want to apply IP Restriction to a set of users who do not share the same role, you can do so with Access Restrictions under the Email Policy. To add allowed IP addresses for an Access Restriction,
- Login to Zoho Mail Admin Console
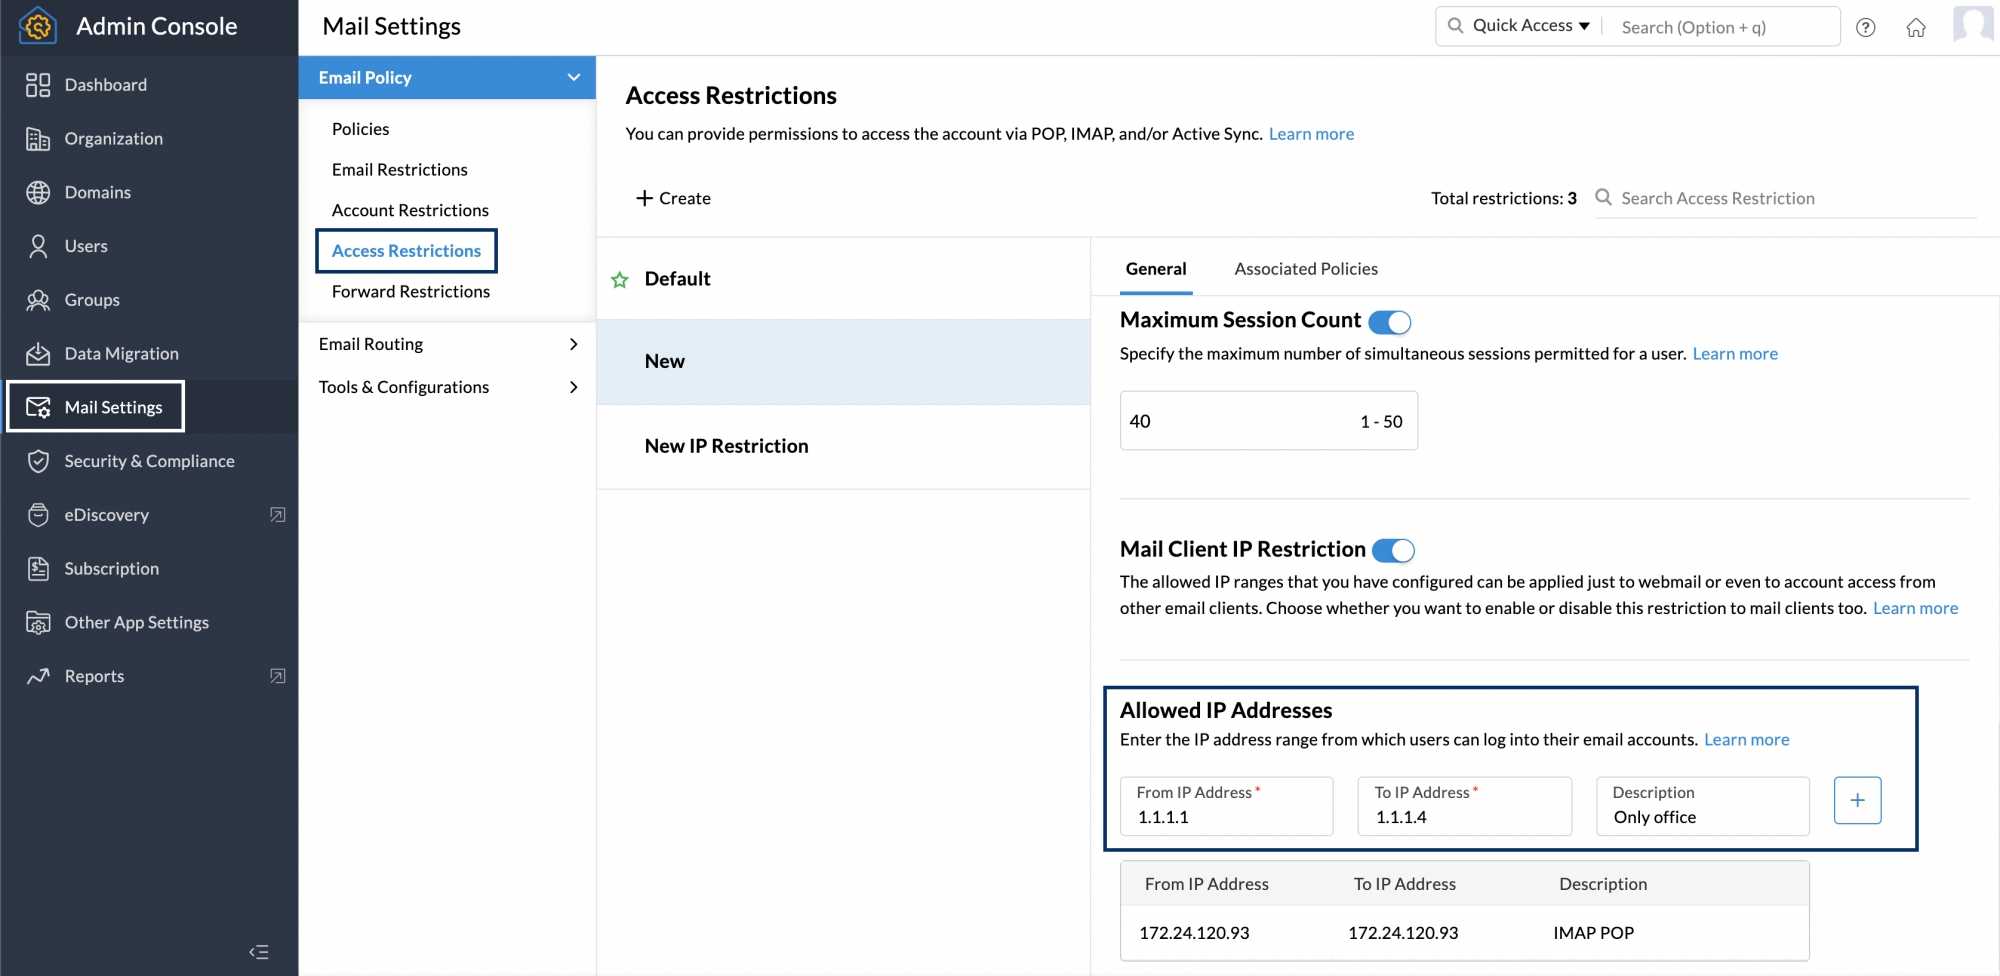
- Navigate to Mail Settings in the left pane.
- Under Email Policy, navigate to Access Restrictions.
- Select the Restriction you would like to edit and navigate to the Allowed IP Addresses section.
- Enter the From IP Address and To IP Address along with a description for future reference.
- Once done, click the icon.

You can add multiple allowed IP addresses by following the same steps for any existing or new Access Restriction.


