Adding email groups
Email groups let you distribute an email sent to a single address to multiple users. Direct these emails to TeamInbox easily to access them from here.
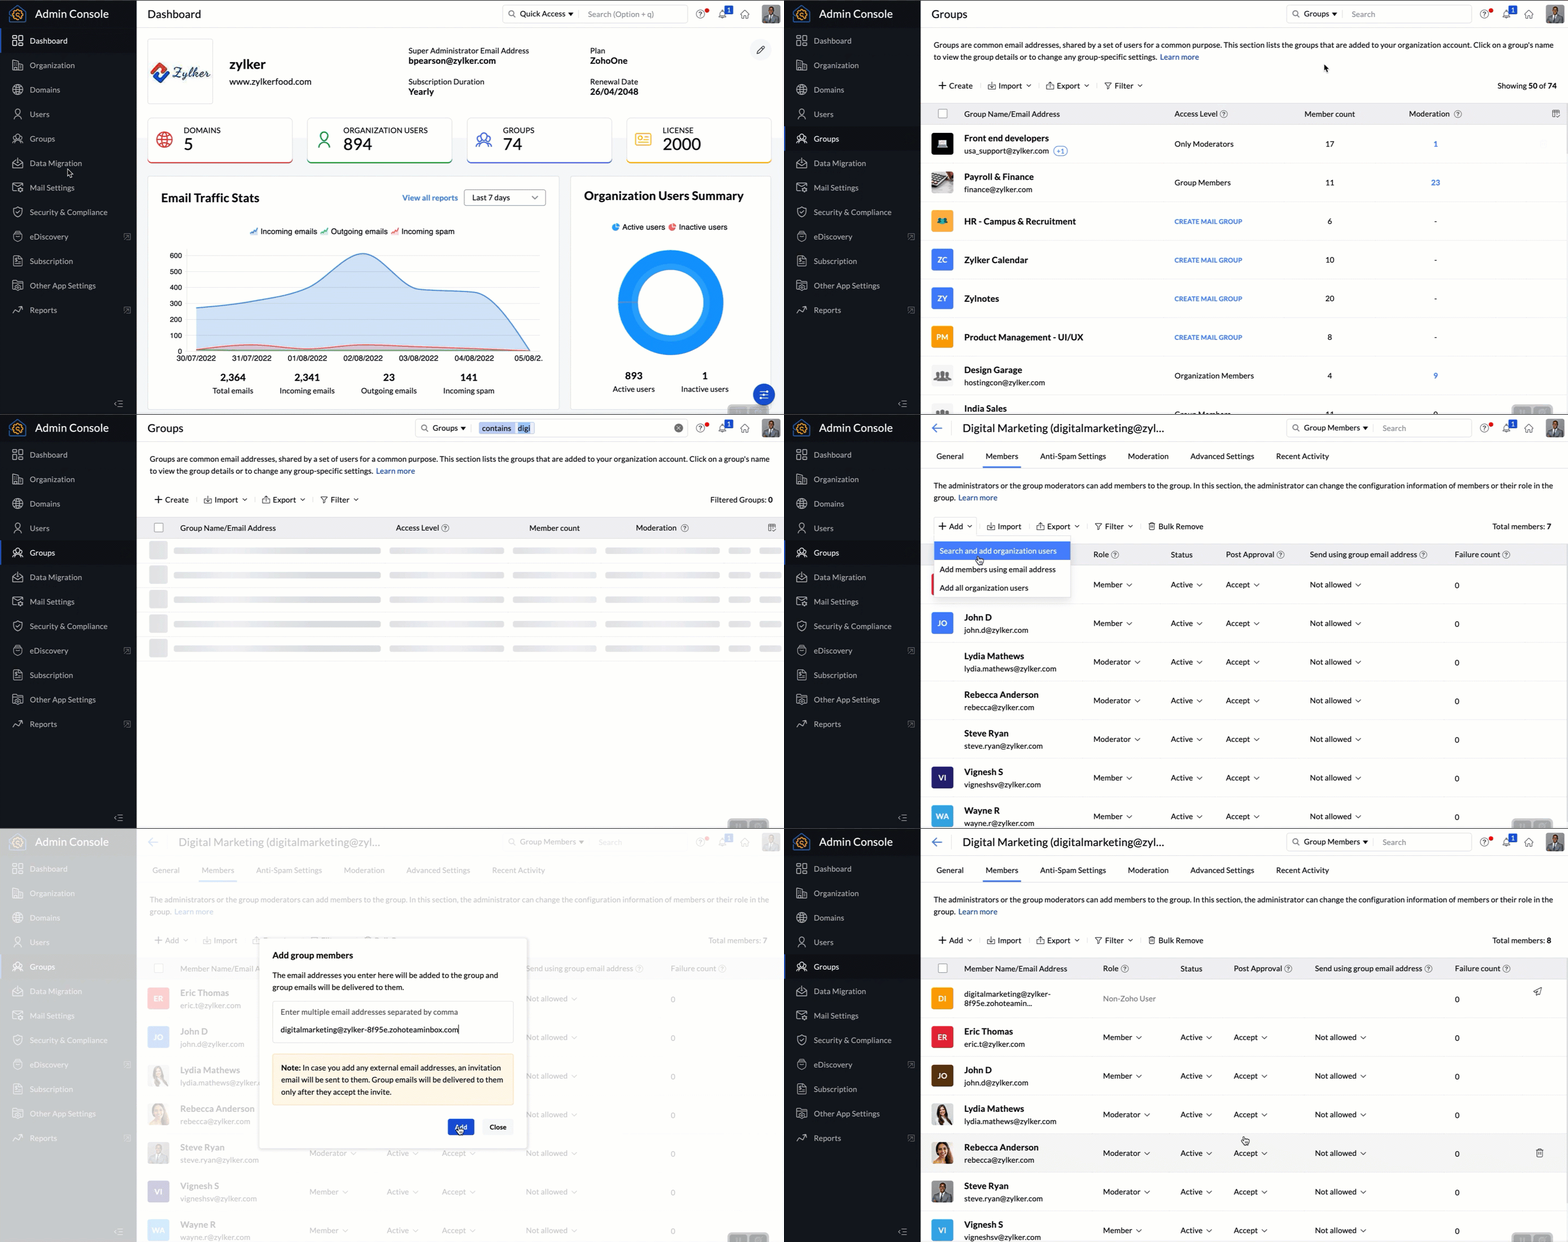
Adding Zoho Mail group

- Login to your Zoho TeamInbox account with your admin credentials.
- Create an inbox for your group email address.
- A unique forwarding address will be generated for this inbox. Copy the address.
- Login to Zoho Mail's control panel with the admin or group moderator credentials.
- Click Groups from the left pane, select Distribution List, and select the group you want to add.
- Select Members tab.
- Click Add and select Add members using email address.
- Paste the Zoho TeamInbox forwarding address. A confirmation email will be sent to this address.
- Go to your inbox in Zoho TeamInbox, find the confirmation email and confirm membership.
- Ensure if emails are properly received in Zoho TeamInbox, then remove other members from the group who will access Zoho TeamInbox to manage emails. They will then stop receiving these emails in their personal Zoho Mail inboxes.
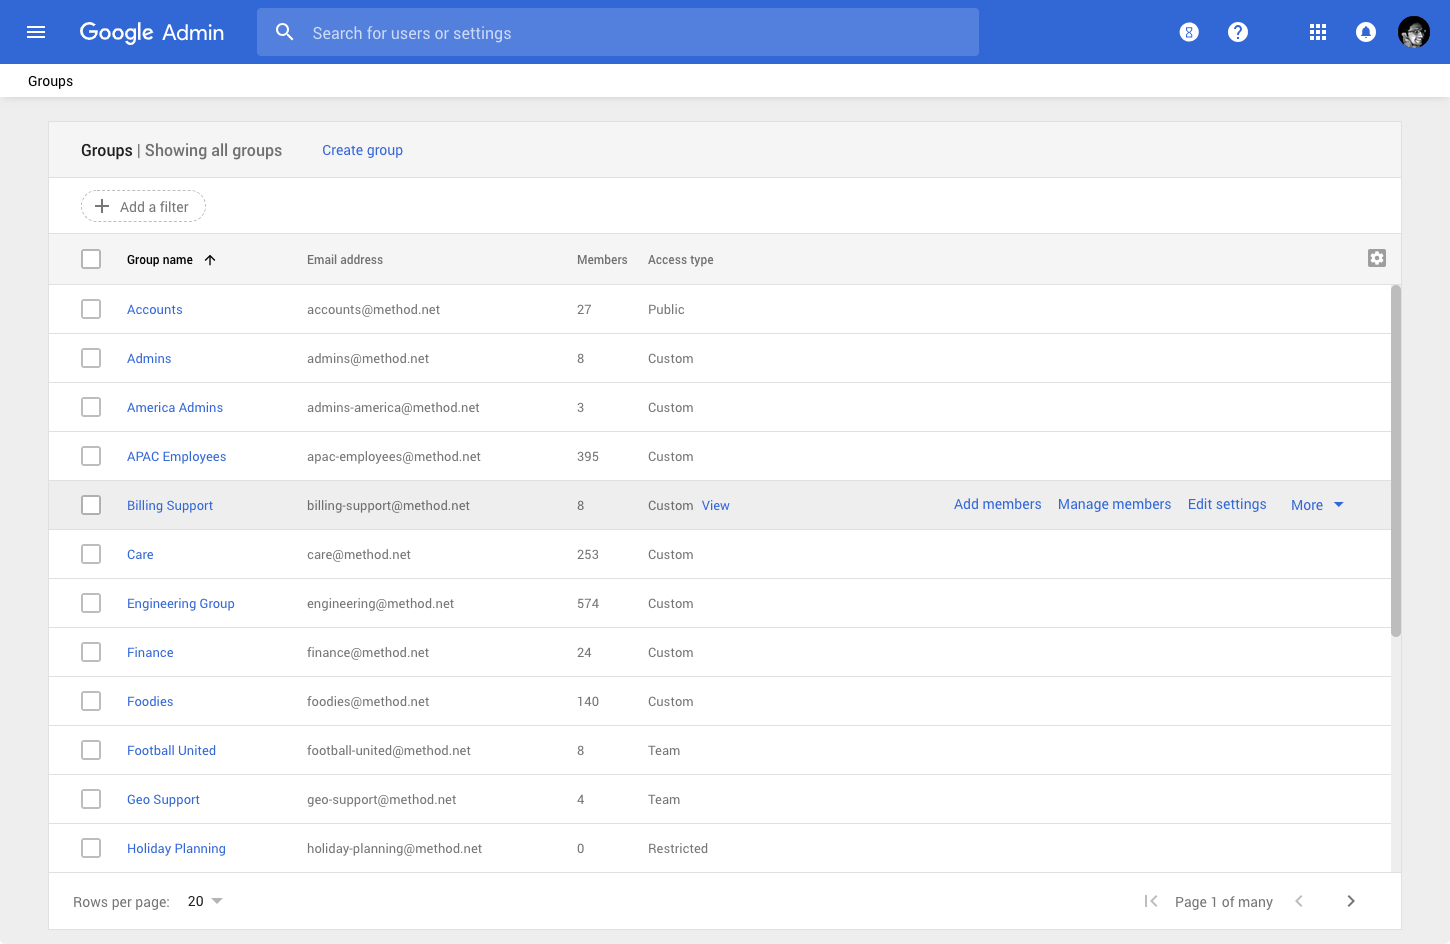
Adding Gmail group

- Login to Zoho TeamInbox with your admin credentials.
- Create an inbox for your group email address.
- A unique forwarding address will be generated for this inbox. Copy the address.
- Login to Google Admin Console. Select Groups.
- Select the group you want to add and add the Zoho TeamInbox forwarding address as a member. Make sure your group allows adding members outside your organization.
- Ensure if emails are properly received in Zoho TeamInbox, then remove other members from the group who will access Zoho TeamInbox to manage emails. They will then stop receiving these emails in their personal inboxes.
Microsoft 365
- Login to your Microsoft 365 account. In the new Exchange Admin Center, go to Recipients and click Contacts.
- Click Add a contact and configure the settings that are mandatory in the details pane. Click Add and then click Close.
- In the admin center, go to Groups and then to Groups page.
- Select the name of the group you want to add a contact to.
- On the Members tab, select View all and manage members.
- Select Add Members and select the user or contact you want to add to the distribution group.
- Click Save and then click Close.
- Ensure if emails are properly received in Zoho TeamInbox, then remove other members from the group who will access Zoho TeamInbox to manage emails. They will then stop receiving these emails in their personal inboxes.
Other Services
- Login to your Zoho TeamInbox account.
- Create an inbox with your group email address.
- A unique forwarding address will be generated for your inbox. Copy this address.
- Go to the group settings in your email service provider.
- Make sure your group allows adding members outside your organization.
- Select the option to add a member under the group. Paste the Zoho TeamInbox forwarding address there to add as a member.
- Ensure if emails are properly received in Zoho TeamInbox, then remove other members from the group who will access Zoho TeamInbox to manage emails. They will then stop receiving these emails in their personal inboxes.
Now you can access all your group emails from Zoho TeamInbox.


