


Understanding Shared Inboxes
With Zoho TeamInbox you can direct all your communication channels to the shared inbox you create here, and manage them from a single platform. This shared inbox serves as a hub that connects with different communication channels, bringing all conversations to one place regardless of the source.
Let's say, your organization uses a group email address Zylker@yourcompany.com for external communication and another group email address teamzylker@yourcompany.com for internal communication. You also have a Facebook page and Instagram professional account, where client interactions happen. Sometimes messages come through Business WhatsApp and Telegram accounts from existing clients.
Connect all your relevant communication channels to a single inbox, send and receive all messages along with your emails without switching to external platforms.
Creating shared inboxes
To create a shared inbox
- In your Zoho TeamInbox account, click the Plus icon from the top right corner.
- Select Inbox > Shared Inbox
- Enter a name for your inbox and select the team under which you want to create this inbox.
- Enable or disable the additional inbox settings as per your need, and click Create Inbox.

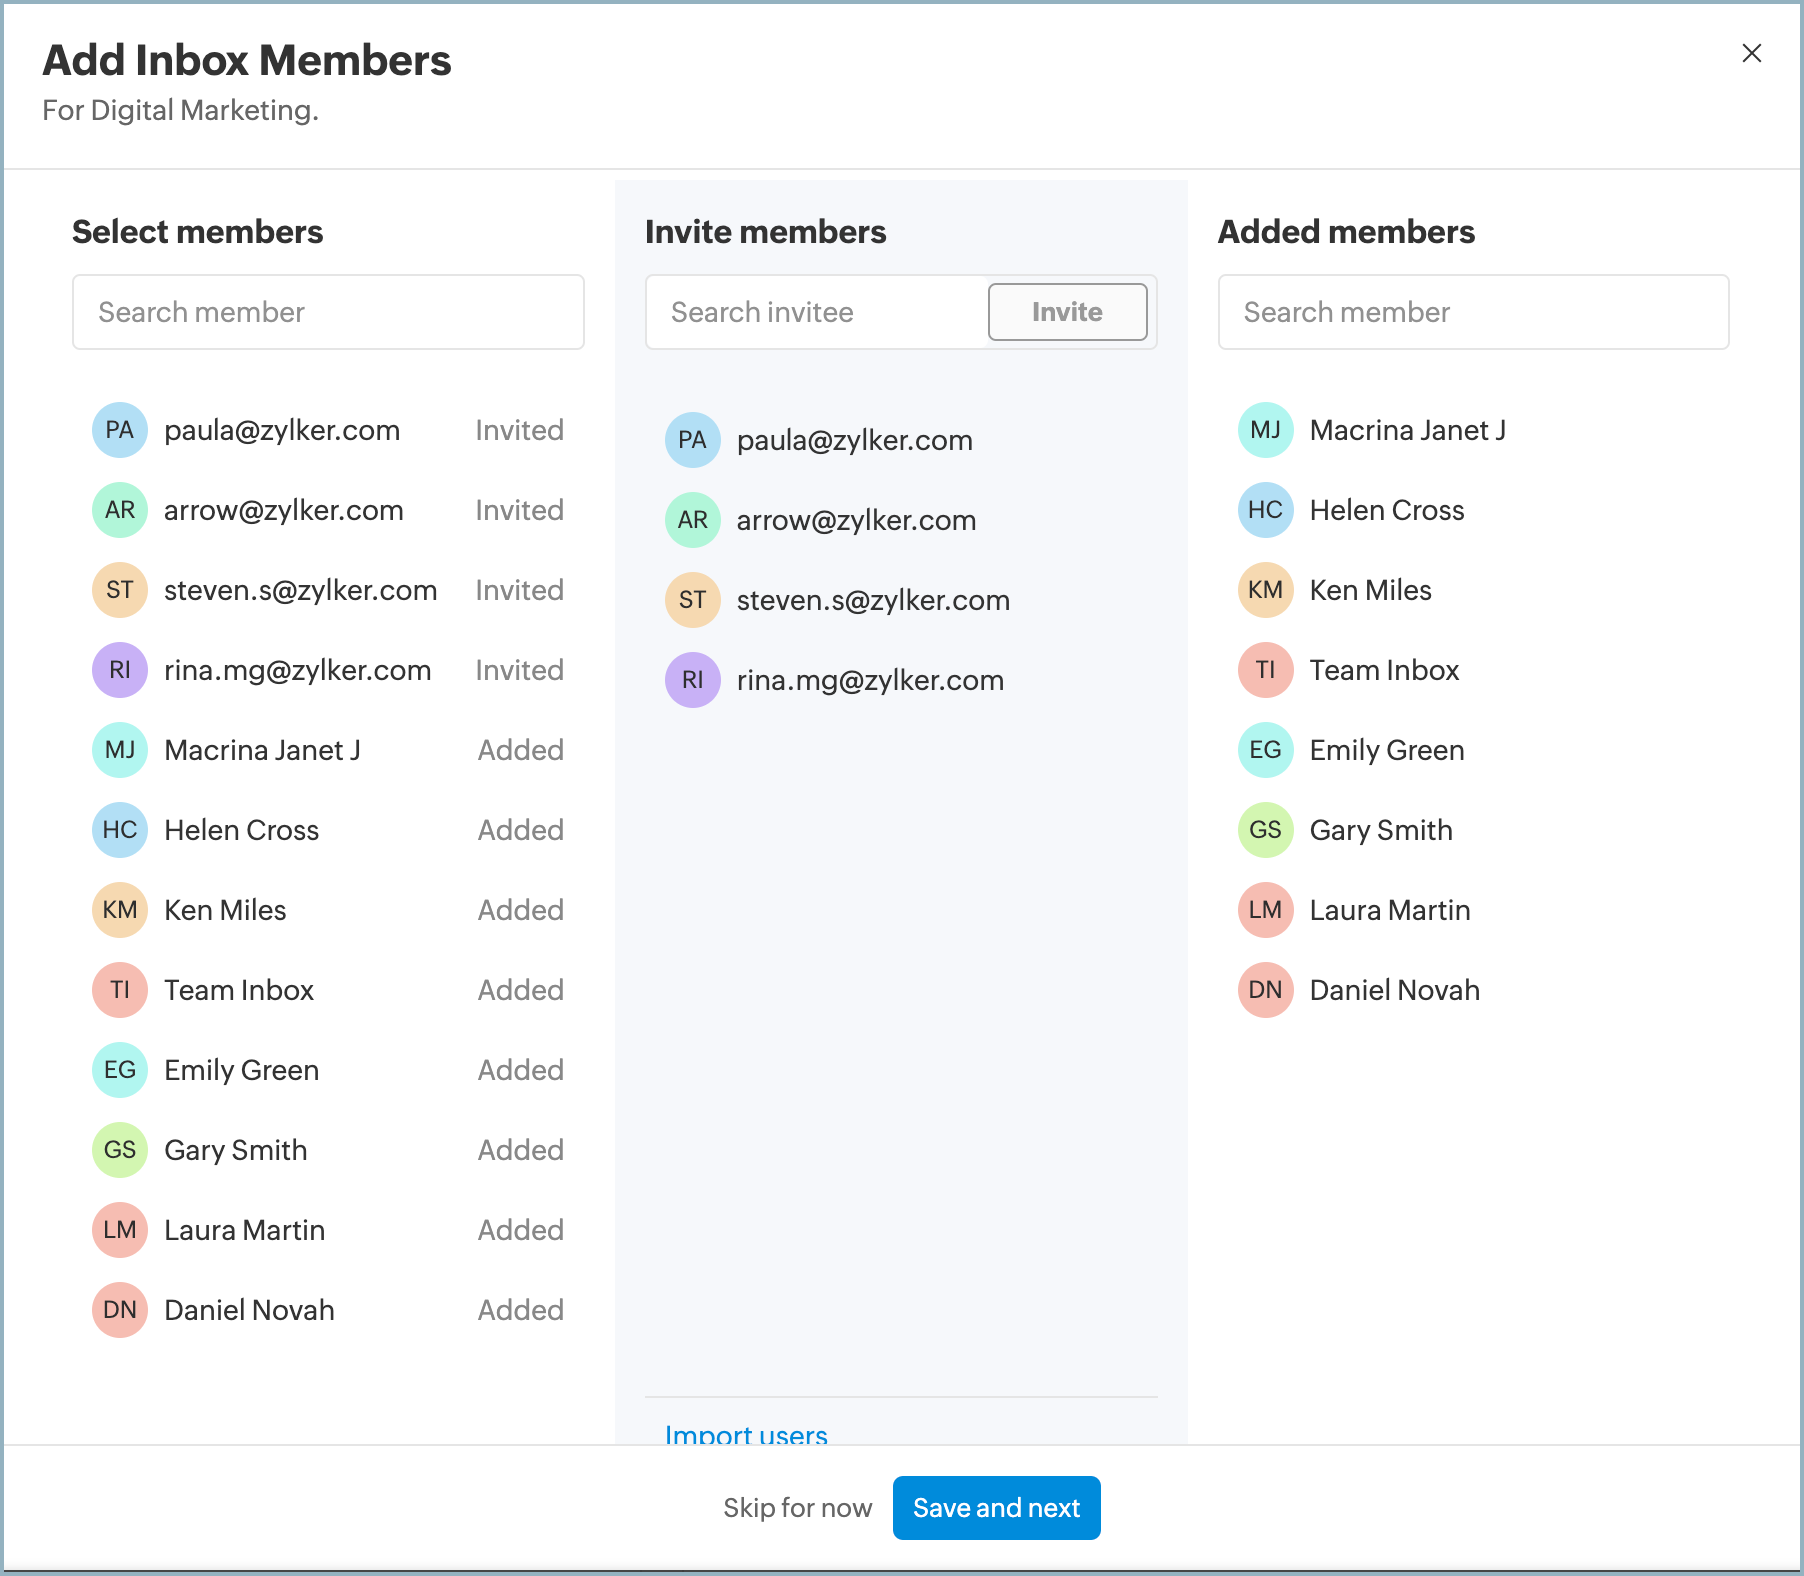
- You automatically add team members to this inbox or choose the option to manually add them .
- If you want to add members who are already added to the organization, you can just select them from the list of users. Members belonging to the team are selected by default. You can deselect them if needed.
- If you want to invite new users, enter their email addresses and click Invite. These users will be sent an invitation email and will be added to the inbox once they've accepted the invite. They will also be added as members to the team.
- You can also import users from other Zoho groups that you've created. Click Import users, and all the groups for which you have admin or moderator permission will be listed. Choose from the groups and click Import.
After you have added the members, click Save and Next.
Note-The users you've added will have the "Member" role for this inbox by default. You can change roles anytime from the inbox settings. You can also skip this step here and add members later from the inbox settings.
Now your shared inbox is ready, start associating channels to send and receive messages to this inbox. Alternatively, you can keep the inbox empty without connecting any channels.


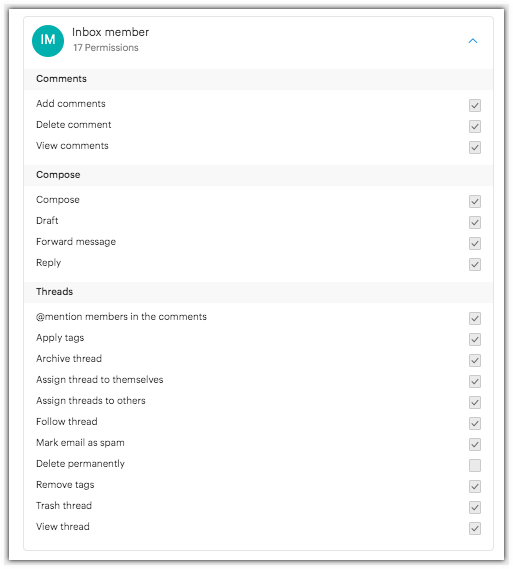
Assign roles for inbox members
There are three default user roles that an inbox admin can assign to the team members.
- Observer
- Member
- Admin
The permissions given to these roles are as follows:
For an Observer

For a Member
For an Admin
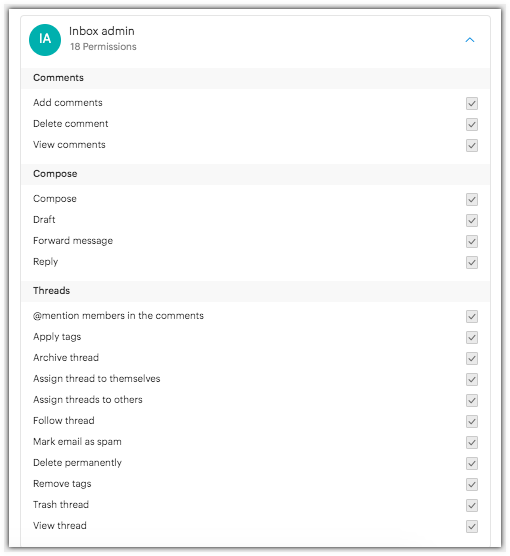
If you do not assign specific roles to users, they will be "Members" by default. You can change the role of users anytime from the inbox settings.