Webex extension in Zoho Mail
Webex is an all-in-one solution for seamless virtual team collaboration platform. Webex allows users to connect with each other from anywhere in the world and facilitates online meetings, video conference, webinars, whiteboard, screen sharing, and messaging.
Table of Contents
Webex extension in eWidget
Webex extension in Zoho Mail allows you to schedule meetings, view all you upcoming and completed meetings, invite users to your personal room to start a meeting without having to leave your mailbox.
Note:
The Webex extension is only available to organization users who have subscribed to one of our paid plans.
Authenticate Webex eWidget
To authenticate Webex eWidget using your Zoho Mail account, follow the steps mentioned below:
- Log into your Zoho Mail account.
- Navigate to mail Settings > Integrations > Extension.
Search and click on the Webex extension card.
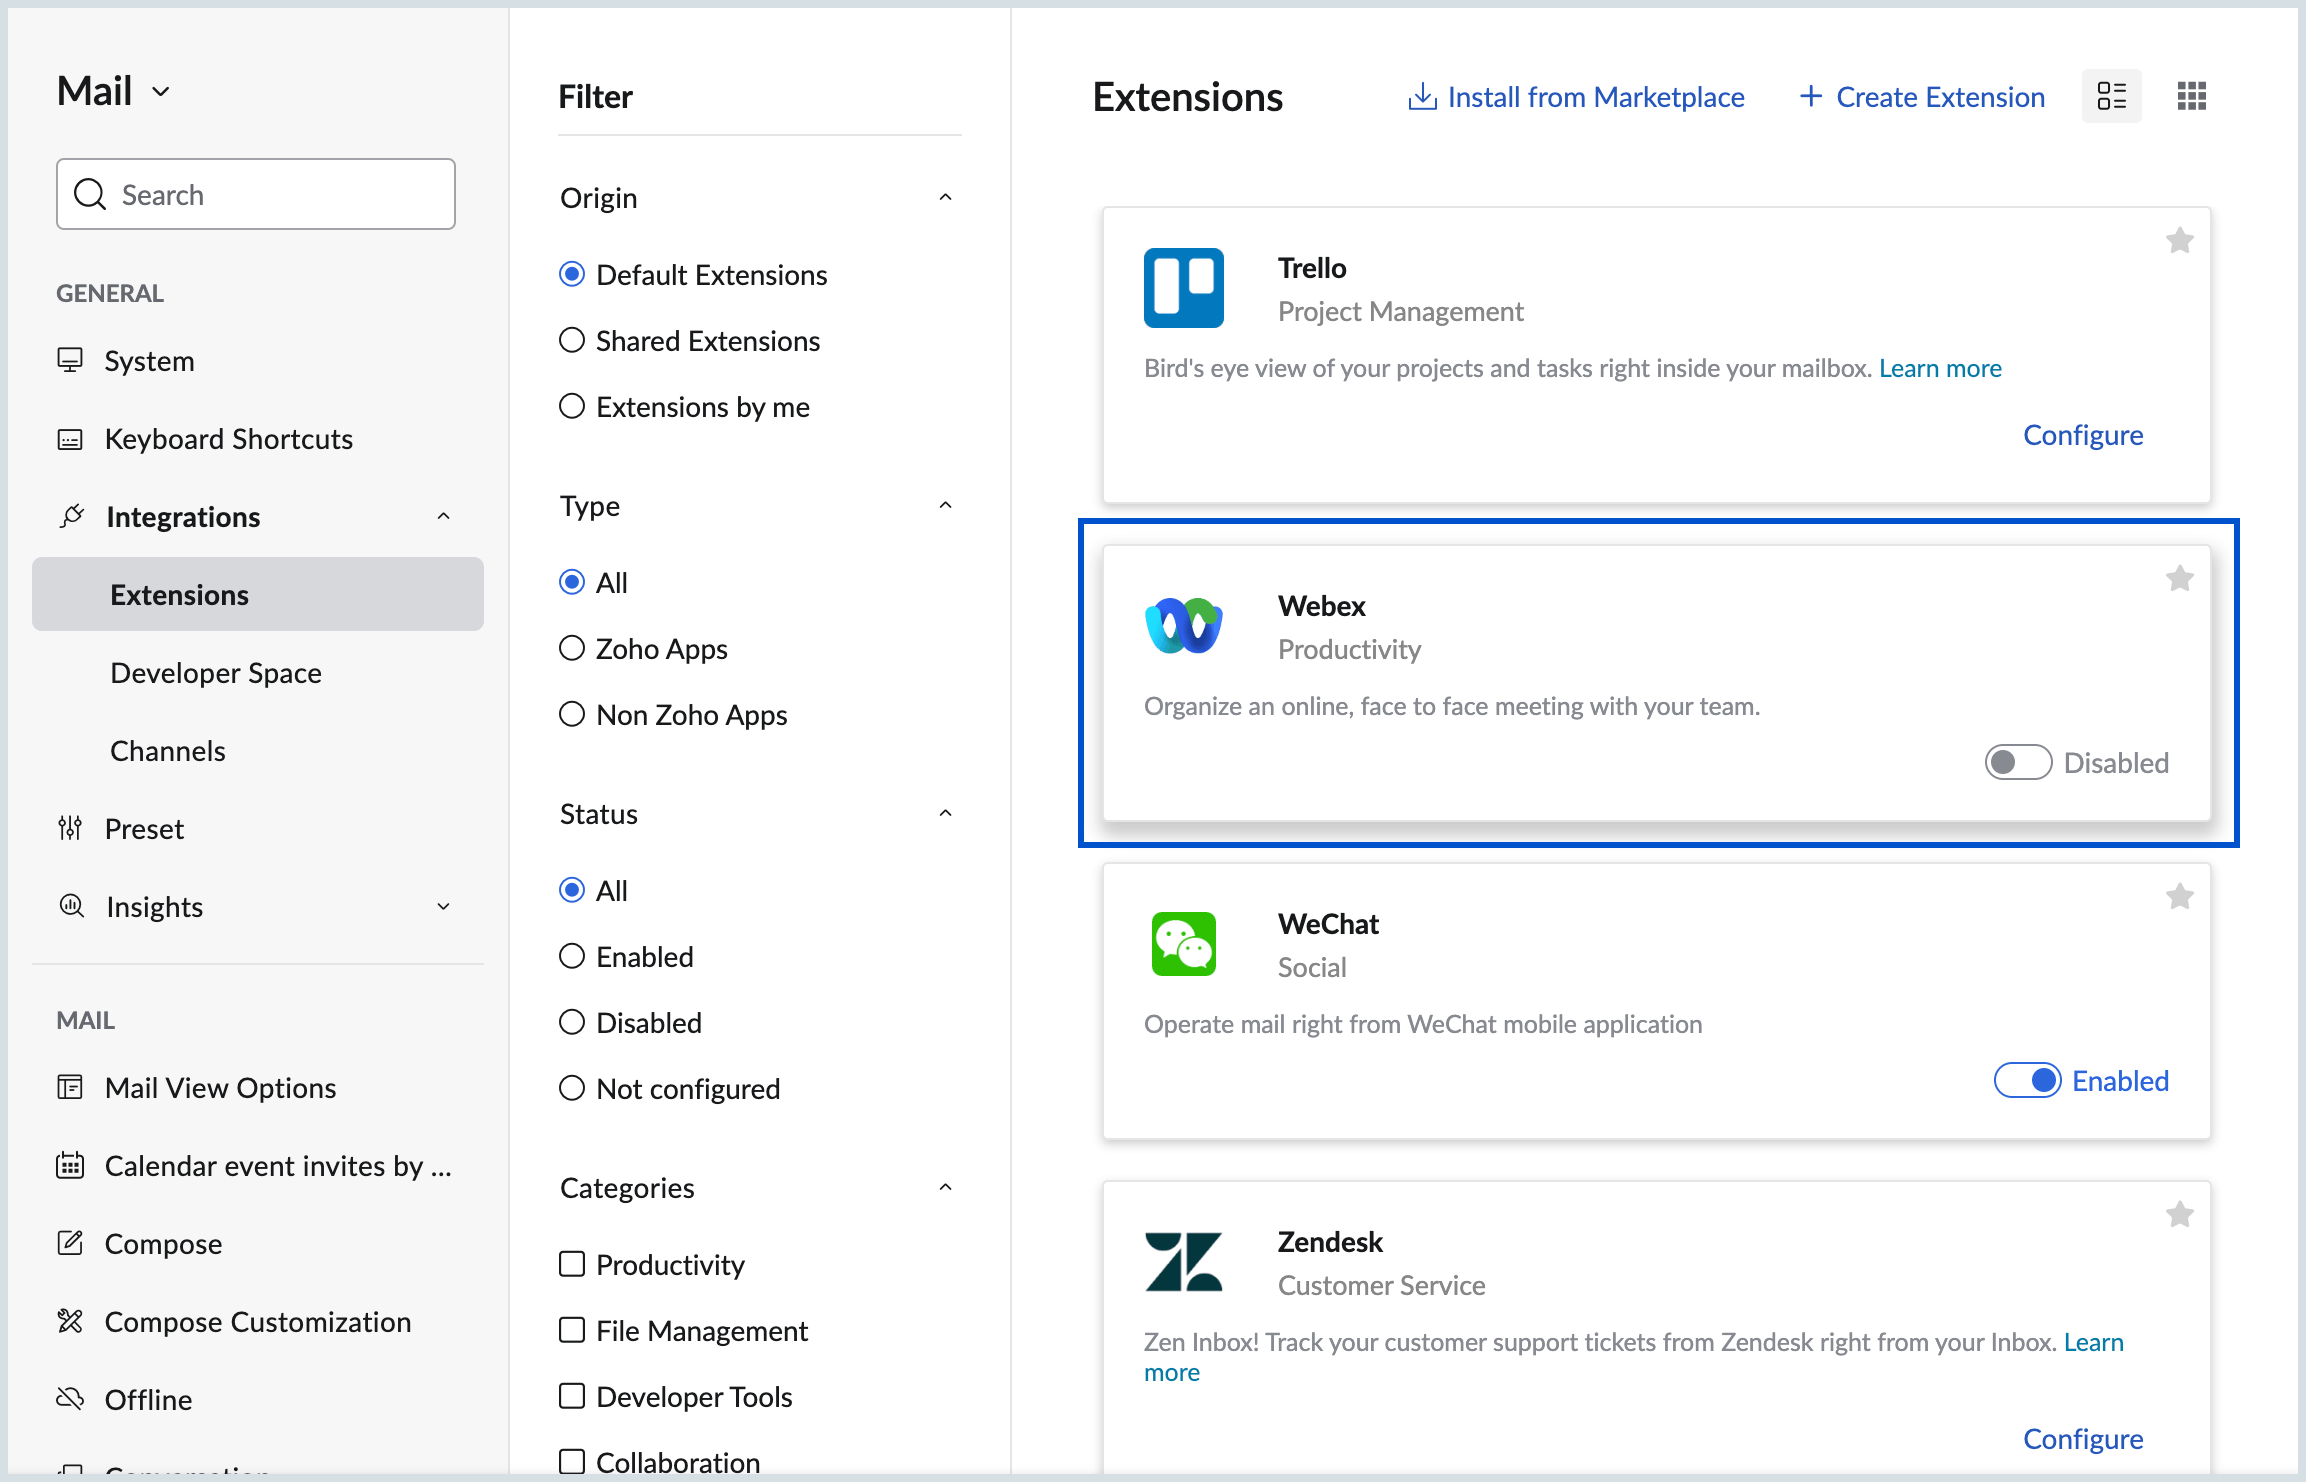
- Click on the Authenticate button.
- Using your Webex credentials, sign-in to your account.
- Click Accept to authorize Zoho Mail to access your Webex account in the pop-up window.
- After authentication, click on Access Webex to use Webex eWidget from your right pane.

The Webex extension will be enabled automatically once authentication is completed and will be available for use in your right extension pane.

Access Webex Extension
You can access the Webex extension directly from the eWidget pane on the right side of your mailbox. For easy access, you can pin the Webex extension and mark it as a favorite. Through the Webex extension, you'll be able to view all your scheduled meetings, check your upcoming events, and invite others to your personal room for seamless connections.

Webex Personal Room
Webex extension makes it easy to invite users to your personal room and start a meeting. To invite participants, you can either click the Copy Link icon at the top of the Webex eWidget page or use the Insert to Compose option to add the meeting link directly to your email draft. To begin a meeting right away, simply click the Start button at the top of the eWidget page.

Schedule Meeting
You can schedule a Webex meeting right from your mailbox. To schedule a meeting, follow the steps mentioned below:
- Log into your Zoho Mail account.
- Click on the eWidget icon available on your right pane.
- Search and click on the Webex extension.
- At the bottom of the page, Click on the Schedule a meeting option.
Provide the required details, including the Topic, Start time, Duration, Agenda and Invite the participants.
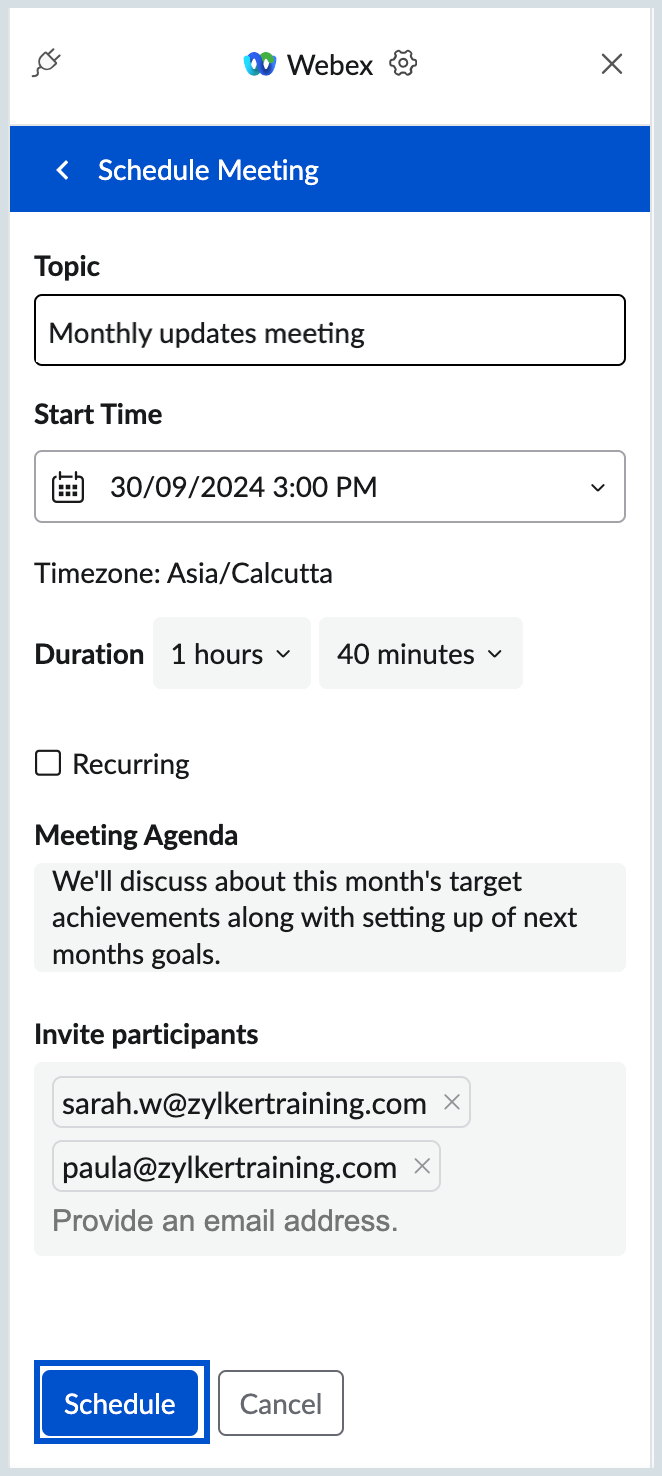
- Click on the Schedule option to save details and schedule the meeting.
Once meeting is scheduled, meeting details, system-generated password, meeting link and other details will be displayed. You can also invite other participants via Cliq or Mail.
In your list of upcoming meetings, you can use the Insert to compose option to add meeting details to your email draft or you can also copy the meeting link. To launch the meeting directly, click the Start icon.

Create Webex meeting from Mail content
You can also schedule a Webex meeting using the content of an email using the Webex extension. To schedule a meeting from mail content, follow the steps mentioned below:
- Log into your Zoho Mail account.
- Open the email containing the content you want to use for creating a meeting. Click on the Webex eWidget icon available on your right pane.
- In the Schedule meeting tab, the meeting title and description will be auto-populated from the email's subject and content. The sender and recipient email addresses will be automatically filled in the Invite Participants field. Additionally, you can modify these details as needed and enter any other required information.

The meetings will be associated with the email and you can access the meeting details by clicking on the Webex icon available at the top right corner of the email.

Recurring Meeting
Recurring meeting allows you to schedule meetings that take place at regular intervals such as daily, weekly or monthly. This ensures consistence and eliminates the need to create the meeting multiple times with the same content. To create a recurring meeting, follow the steps mentioned below:
- Log into your Zoho Mail account.
- click on the Webex eWidget icon available on your right pane.
- Enter the required details such as Title, start time, duration, agenda and invite participants.
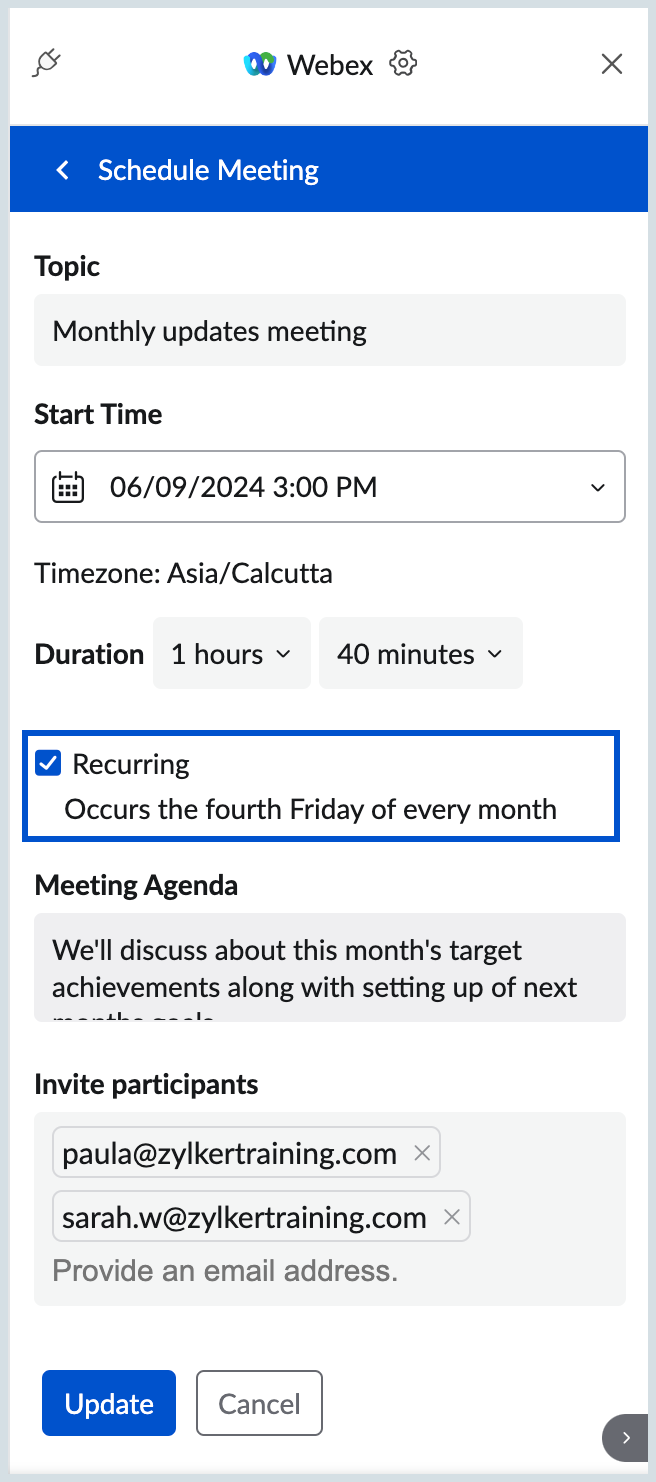
- Under specifying duration, check the Recurring meeting box.
Enter the required details, including the recurrence pattern, start and end duration, and click on the Select button to save details.
Start a meeting
You can immediately start a Webex meeting from the eWidget, enabling you to launch a meeting without leaving your mailbox. To start a meeting, follow the steps mentioned below:
- Log into your Zoho Mail account.
- click on the Webex eWidget icon available on your right pane.
On the bottom down, click on the Start a meeting button.
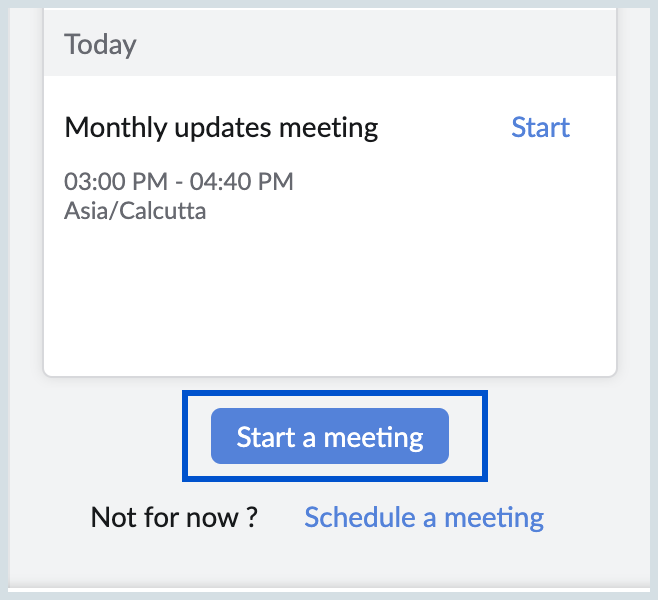
A pop-up window will appear displaying meeting title, meeting link and options to invite participants via Cliq or Mail.
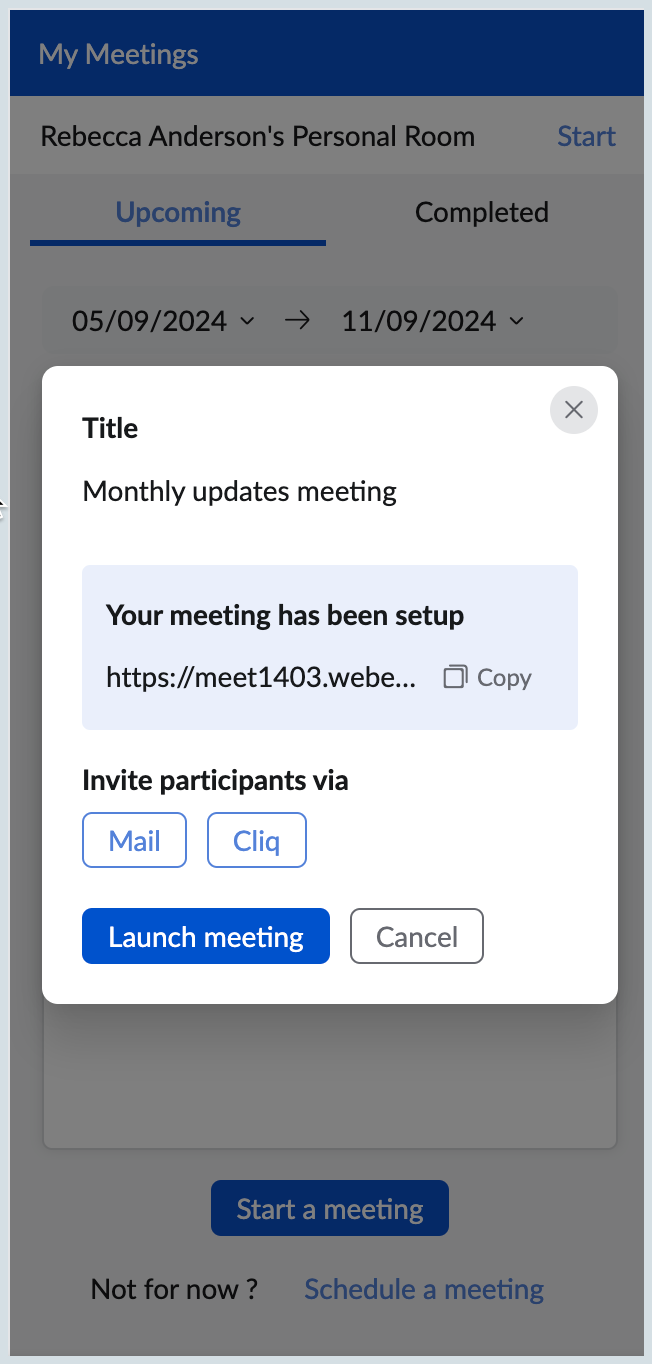
- You can start the meeting directly by clicking on the Launch meeting option from the pop-up window.
Open meeting in Webex
You can open the meeting directly in Webex to easily access meeting details or join the meeting. By doing so, you will be able to quickly check the agenda, participants list, and other relevant details, or jump right into the meeting. To open the meeting in Webex, follow the steps mentioned below:
- Log into your Zoho Mail account.
- click on the Webex eWidget icon available on your right pane.
- From the list of upcoming meetings, select the meeting which you would like to open in Webex.
- On the top right corner, click on the open in Webex icon to view the meeting.
- You will be redirected to the Webex page, where you will need to enter the meeting password.
- Meeting details will be displayed, you can join the meeting directly from there.

Edit meeting
If you need to modify or update meeting details in Webex, simply access the meeting from your list of upcoming meetings and select the option to edit. This allows you to adjust the information as needed. Follow the steps below to edit your meeting details:
- Log into your Zoho Mail account.
- click on the Webex eWidget icon available on your right pane.
- From the list of upcoming meetings, select the meeting which you would like to modify.
- On the top right corner, click on the Edit icon to modify the details.
- Make the required changes and click on the Update button on the bottom.

Delete meeting
You can delete a meeting if no longer required which you have scheduled using the Webex extension. To delete a meeting, follow the steps mentioned below:
- Log into your Zoho Mail account.
- click on the Webex eWidget icon available on your right pane.
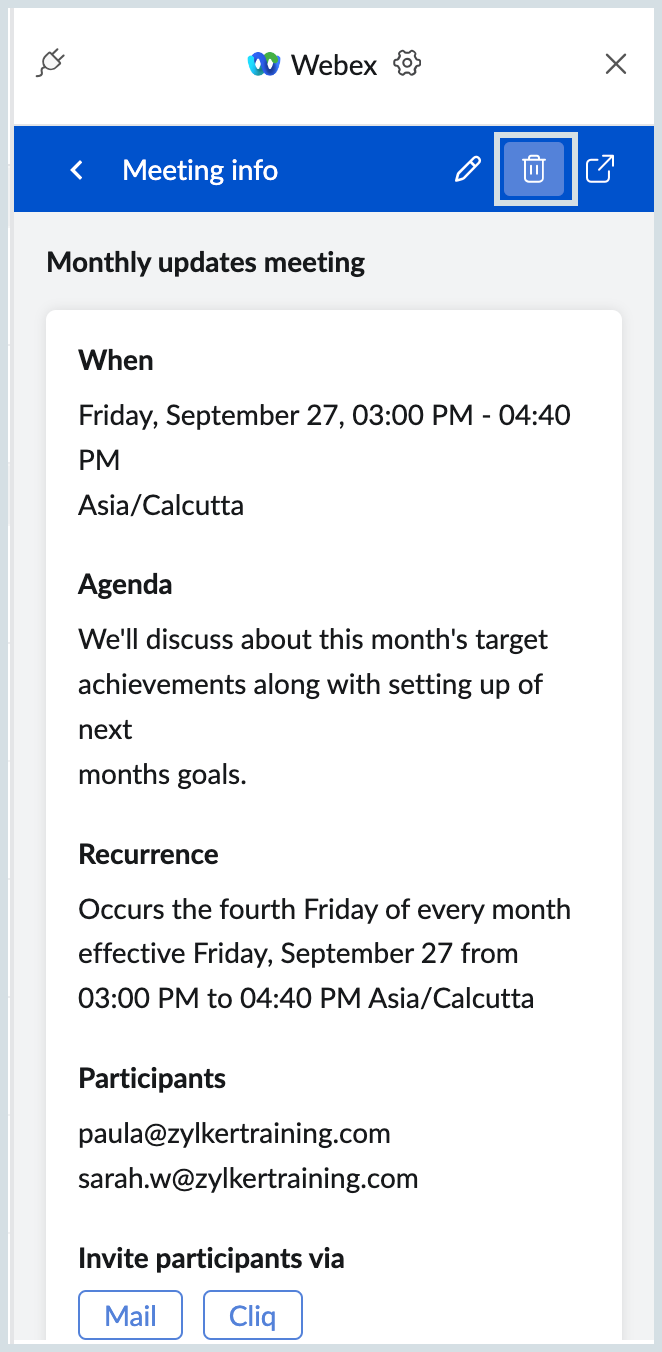
- From the list of upcoming meetings, select the meeting which you would like to delete.
- On the top right corner of the meeting info, click on the Delete icon.
- A confirmation pop-up will appear when you attempt to delete a meeting.
Click on the Yes option in the pop-up window to delete the meeting.
Note:
Please note that once meeting you have created is deleted, you will no longer be able to host it.


