Zoho Projects Integration
Zoho Projects is a project management software that enables you to create, assign, and manage tasks and collaborate with your team to achieve your goals.
Using the Zoho Projects Integration in Zoho Mail, you can conveniently view and manage tasks, bugs, issues, task lists, and forums in the Zoho Mail email preview when you receive Zoho Project and Bugtracker email notifications.
Table of Contents
Configure Zoho Projects
By default, the Zoho Projects Integration is not configured; you have to enable the Zoho Projects Integration in the Zoho Mail Integration settings.
To Configure Zoho Projects Integration:
- Log into your Zoho Mail account.
- Go to Mail settings.
- Navigate to Integration and search for Zoho Projects Integration.
Click on the Configure button in the Zoho Projects Integration card.

- Turn on the Toggle button to enable Zoho Projects.

After enabling, click the Access Zoho Projects button to open the Zoho Projects eWidget pane.
Zoho Projects Preview in Mail
When you receive notifications from Zoho Projects on tasks, updates, issues or forum posts, you can view and edit those in the mail preview in Zoho Projects format rather than switching between multiple apps to manage.
To view Zoho Projects notifications in the Mail preview pane:
- Log into your Zoho Mail account.
- Select the email notification from Zoho Projects.
- On the top right corner of the email preview pane, click on the Projects/ BugTracker icon to view the email in Zoho Projects format.

Zoho BugTracker Preview in Mail
Zoho Bugtracker allows you to report bugs and issues in your project to enhance your product. You can add issues with deadlines, assign users to resolve the problems and carry out other tasks. Additionally, through Zoho Projects Integration, you can receive bug/forum detail notifications from Zoho Bugtracker in the mail preview in Zoho Bugtracker format.
When using Zoho Projects integrations, you can view notification emails from Bugtracker in Zoho Bugtracker format. There is no separate integration for Zoho Bugtracker. When you add or report issues/bugs in BugTracker, they are also listed in Zoho Projects under issues associated with the specific project.
![]()
Edit Details
You can edit project details directly from the email preview. You can add a description, assign it to other users, set the due date, or change the status by clicking on the relevant field and making the necessary adjustments. The updated details will also be reflected in your Zoho Projects application.

Zoho Projects Extension
Zoho Projects extension in eWidget in Zoho Mail enables you to view, add, and manage tasks and issues directly from the mailbox, as well as access your projects without leaving the mailbox.
Access Zoho Projects Extension
Once you have enabled the Zoho Projects extension from the Zoho Mail settings page, you can access the Zoho Projects extension directly from the eWidget pane available on the right side of your mailbox. Through the Zoho Projects extension, you can easily view all your tasks with status and other info, issues and bugs and all of your Zoho Projects list.

When accessing the Zoho Projects extension, you will land on the My Tasks page by default. You can further switch to the My Issues page under Home View or view your projects.

The Create New Project option will still be available, but instead of creating a new project in the extension itself, you will be directed to the Zoho Projects application.
Add Tasks/ Issues
You can create tasks or add issues to your projects directly from your mailbox. To add a task/issue, follow the steps mentioned below:
- Log into your Zoho Mail account.
- Click on the eWidget icon available on your right pane.
- Search and click on the Zoho Projects extension.
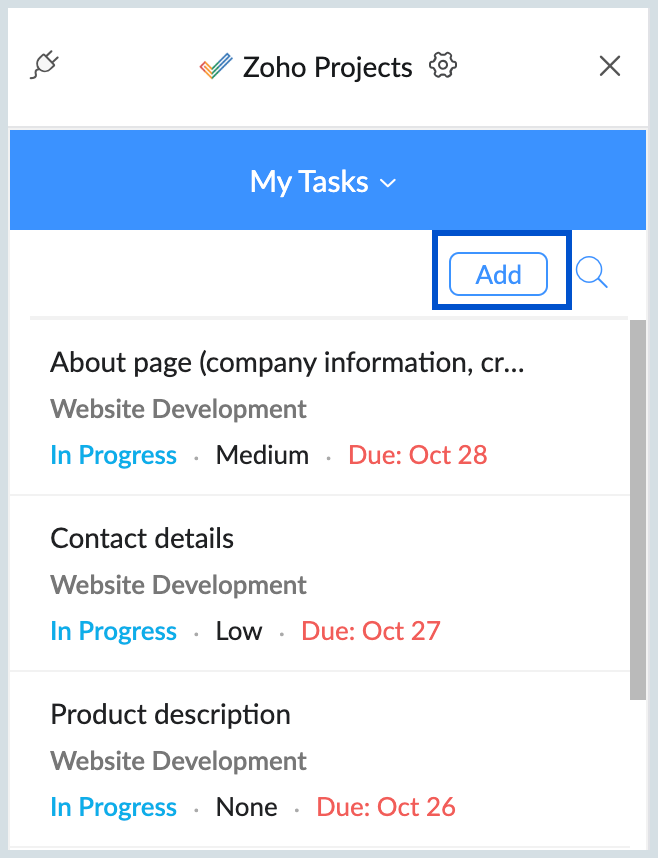
Click the Add button at the top right of the My Tasks or My Issues page to add a task or an issue.

- Enter the required details and click Done to save the details.

Add Tasks/Issues from Mail content
You can also add a Task/Issue using the content of mail using the Zoho Projects extension. To add a task/ issue from mail content, follow the steps mentioned below:
- Log into your Zoho Mail account.
- Open the email containing the content you would like to add as a task or an issue. Click on the eWidget icon available on your right pane.
- In the Add Task/ Issue tab, title and description details will be auto-populated from the mail subject and content. Additionally, you can modify these details as required and enter other necessary details.

The Task/Issue created will be associated with the email. When you open the email and click on the Zoho Projects eWidget, the Task/Issue will be automatically displayed.
Search
When you need to find a Task or Issue, you don't have to scroll through everything manually. Instead, you can use the search option in Zoho Projects eWidget to quickly find what you're looking for. You can also search for projects that you have created.

View in Zoho Projects
You have the option to open a Task/Issue or a project directly in Zoho Projects to either edit or view details. To view in Zoho Projects, follow the steps mentioned outlined below:
- Log in to your Zoho Mail account.
- Click on the eWidget icon available on your right pane.
- Navigate to the specific Task/Issue or project that you want to view in Zoho Projects.
- In the top right corner, click on the View in Zoho Projects icon.
- You will be redirected to the Zoho Projects page. You can also make edits to the Task/Issue or project directly from this view if needed.

Edit
If you need to modify or update details, you can easily do so using the Zoho Projects eWidget, without switching to the Zoho Projects application. To edit details, follow the steps below:
- Log in to your Zoho Mail account.
- Click on the eWidget icon available on your right pane.
- Navigate to the specific Task/Issue or project that you want to edit.
- In the top right corner, click on the Edit icon.
- Make the required details and click on Done to save the details.

Add Comments/ Attachments
You can add comments to tasks/issues if you need to provide feedback or additional details. You can also attach files from your desktop or drag and drop them as needed. To Add Comments or Attachments, follow the steps mentioned below:
- Log in to your Zoho Mail account.
- Click on the eWidget icon available on your right pane.
- Navigate to the specific Task/Issue where you want to add a comment or insert an attachment.
- Scroll down and choose either Comments or Attachments to proceed.

Views
You can efficiently manage and gain a clear picture of your projects using the various views offered by Zoho Projects eWidget. You can select from predefined views such as open, closed, unassigned tasks/bugs, and many more. Additionally, custom views that you create in Zoho Projects will be displayed, allowing you to tailor your needs. You can access different views by choosing the project you want to open and clicking on the views icon at the top left corner of the eWidget. Then, select your preferred view from the drop-down menu.

Zoho Projects Tasks
Tasks created in Zoho Projects can be viewed in the Zoho Mail Tasks app. Moreover, you can manage, edit and update Zoho Projects tasks directly within the Zoho Mail Tasks app, and changes will be reflected accordingly.
To View Zoho Projects Tasks:
- Log into your Zoho Mail account.
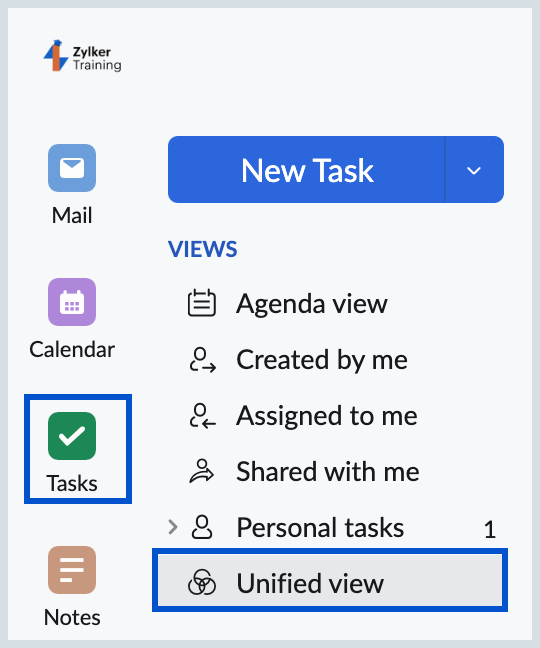
- Navigate to the Tasks app from the left pane.
Click on Unified View to access tasks from all Zoho applications in a single location.

- Tasks from Projects will be listed under Zoho Projects.

To Add Tasks
You can view the tasks created in Zoho Projects as well as create Zoho Projects Tasks through the Zoho Mail Tasks app. To add tasks, follow the steps mentioned below:
- Log into your Zoho Mail account.
- Navigate to the Tasks app from the left pane.
- Click on Unified View to access tasks from all Zoho applications in a single location.
- Under the Zoho Projects tasks, click on the + icon to create a task.
- Enter the required details and save them to add a task.

To Edit Tasks
- Log into your Zoho Mail account.
- Navigate to the Tasks app from the left pane.
- Click on Unified View to access tasks from all Zoho applications in a single location.
- Under Zoho Projects tasks, select the task you want to edit.
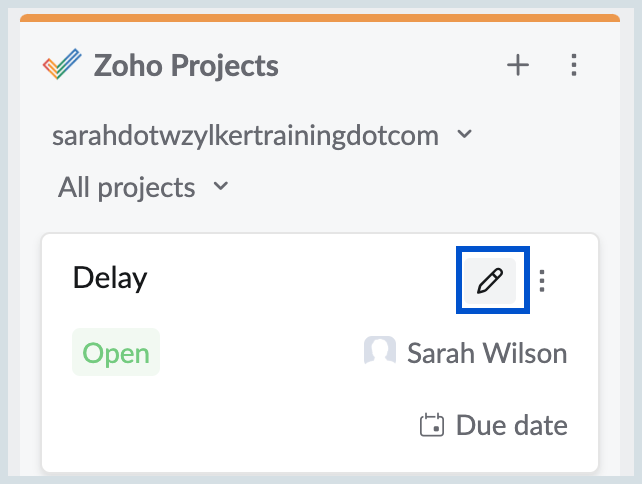
Hover over the task and click on the edit icon.

- Make the required changes and save them to edit a task
More options
More Options in Zoho Projects tasks provides a dropdown menu with additional actions for tasks. It allows you to directly open the task in Zoho Projects for detailed editing and management. Additionally, you can also delete the task using the Delete Task option from the dropdown menu.


