Mail Merge Extension
Overview
Mail Merge is the method of collecting data from one source (spreadsheet or form) and inserting that data into a document—in this case, an email template—in order to customize and send it as an email to multiple recipients at once.
For example, sending an email template to people with their names mentioned in the email. In the spreadsheet or form, along with the 'To' column containing email addresses, you can create another column for 'Name' and associate the values entered in that column to the email addresses in the 'To' column.
Note:
- Mail merge is enabled by default and can be used from eWidget in Zoho Mail.
- This feature is available in all our paid plans.
- Recipient limits based on plans:
- The users subscribed to the Mail Lite (5GB/ 10GB per user) plan can send emails to up to 250 recipients per day,
- Mail Premium, Workplace Standard, and Workplace Professional users can send emails to up to 500 recipients per day using Mail Merge.
Pre-requisites:
- A document - In this case, an email template.
- Source file - A data file with variable values like spreadsheet or forms.
The source file should contain a field or column named 'To' with email addresses of the recipients in it. In case you want to add more customizations in the email, you need to add columns/ fields in your source file with the relevant title(s) and its corresponding details. After that is done, edit the template to insert these fields by entering the field title within two sets of braces {{title}} in the appropriate places in the template.
For example, when sending bulk emails, if you want to address each recipient by their names in it, you can add another column or field titled 'Name' in your source data file and add the recipients' names next to the respective email addresses. In the Template, enter {{Name}} in the appropriate location to insert the names of recipients in its place when you send the email.
Note:
You can also add Cc to the emails that you send via Mail Merge by including the Cc email address in the email template. The Cc email address added to the email template will be common to all the emails sent via Mail Merge.
Using Mail Merge in Zoho Mail
- Log in to your Zoho Mail account.
- Navigate to the eWidget icon and select Mail Merge from the app menu
- Click Insert Template and choose your desired template. (You can also create a new template by clicking the Create template option)
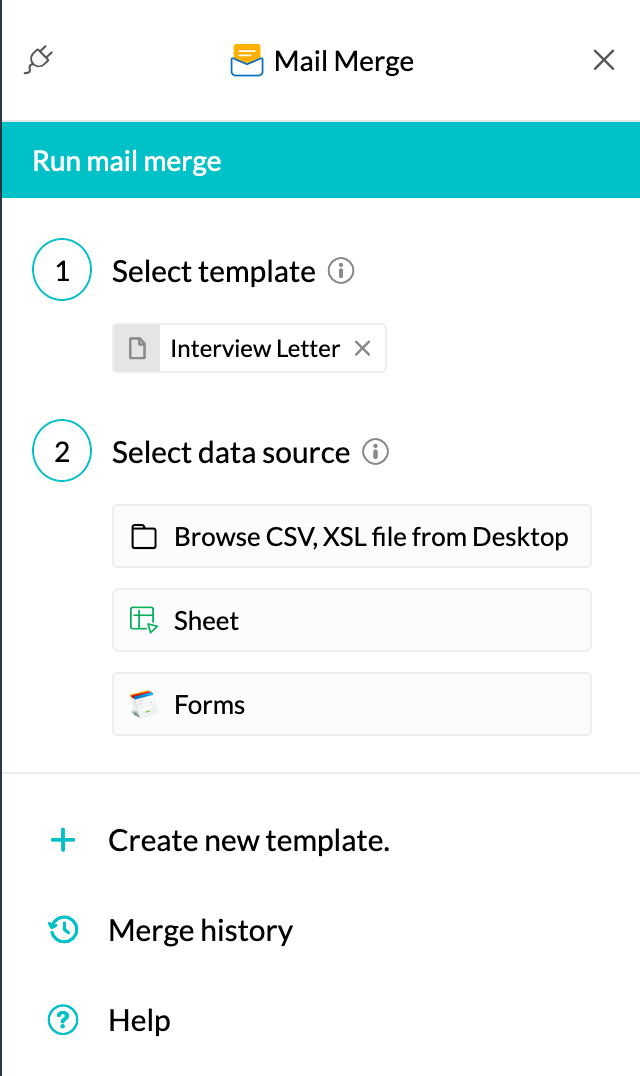
- Choose your Data Source. You can use Zoho Sheet or Zoho Forms or upload CSV, XLS files from your device.
- Pick the appropriate file from the options listed. You can also preview the file by hovering over it.
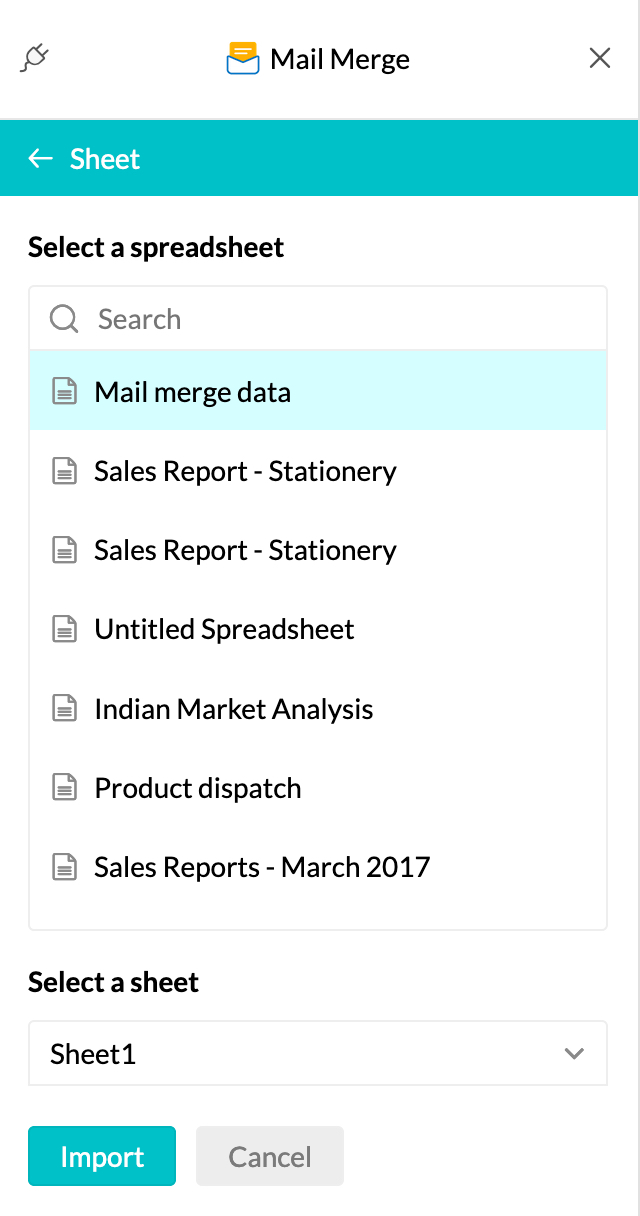
- Once file is selected, click Import.
- Your email template preview is displayed. (Preview option shows the first record available and not individual emails of all other recipients).
- You can edit the template using the Edit template option. You can insert other fields if any from your data file to the template using the insert field option.
- You have the option to select an alternative email alias for the From Address when sending an email directly from the preview page. You can also enter the group email address in the From field to send bulk emails from that specific Group email address.
- Click Run Mail Merge to start sending the bulk emails from Zoho Mail.
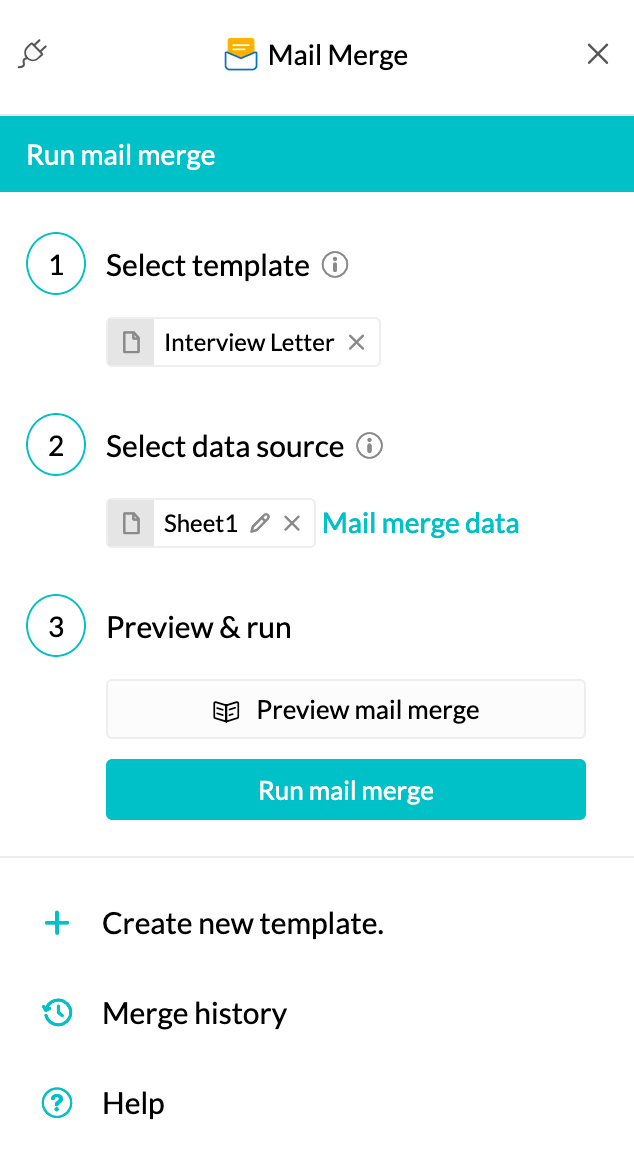


You can also send a test email to yourself or send the emails to recipients from the mail merge preview window. Click on the Preview mail merge option to open the preview window.
Note:
When incorrect information is displayed (e.g., an incorrect email address or unsupported characters), you can use the Skip and Proceed option within the Skip Records pop-up to continue with the Mail Merge process, ensuring that emails are sent only to accurately entered data in the sheet.
Mail Merge history:
You can view the report summary of the bulk emails you've sent using the Mail Merge from the Mail Merge history option. The Report title is the subject of your email. Click on the relevant one to view the report summary statistics including Subject, Number of recipients, Number of emails Sent, In queue and Failed. You can also use filters to view Sent, delayed and failed emails. All the emails Sent using Mail merge are listed in the Sent folder in your Mailbox.