Table of Contents
Zoho Cliq Integration in Zoho Mail
Zoho Mail's integration with Zoho Cliq helps you chat with your contacts directly from the Zoho Mail interface in different ways. This integration helps you stay connected with your colleagues without having to leave your mailbox.
Smart Chat
You can access your Zoho Cliq Contacts, Chats, and Channels from the Smart chat bar at the bottom of your Mailbox. Click on the Chats, Contacts, or Channels icons on the bottom for a quick search in the relevant tabs.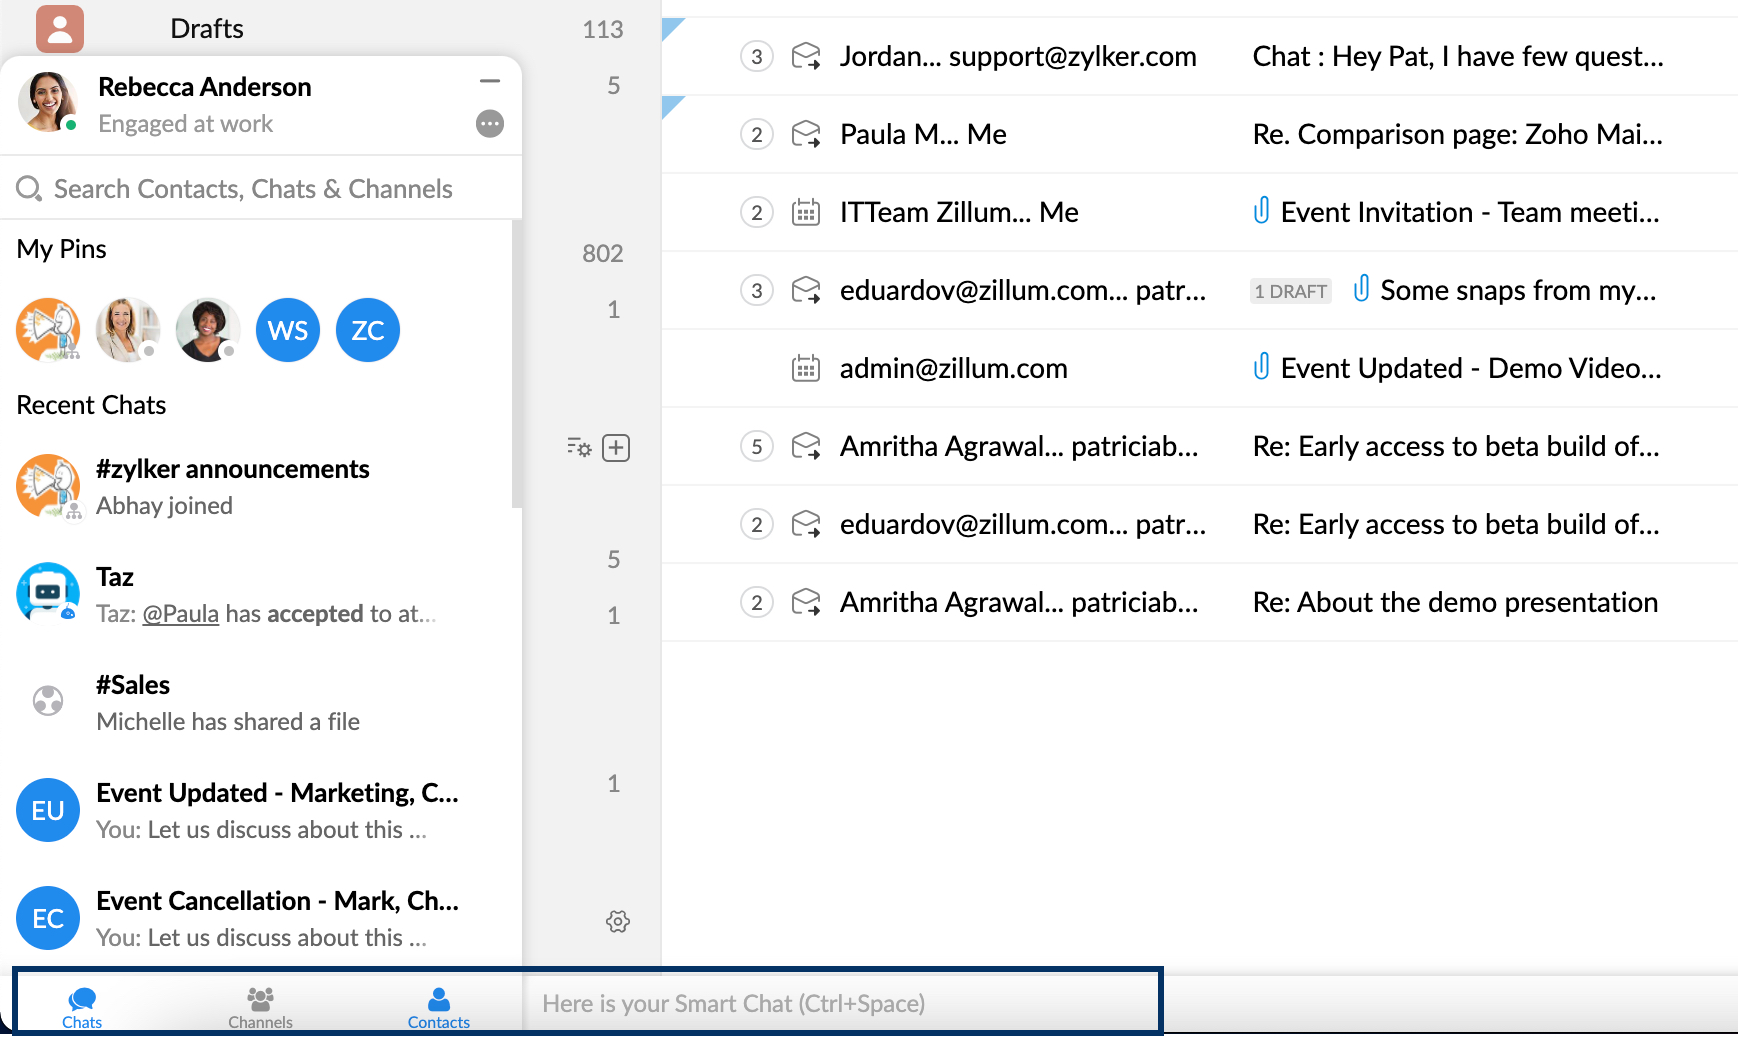
For a more extensive and easy search, you can also click on the Smart chat bar or use Ctrl + Space command. This will display a pop-up window with a search bar and list of your contacts, direct/group chats, and Channels. @mention the contact you want to start a chat with and enter the message that needs to be sent. Press Enter to begin the chat.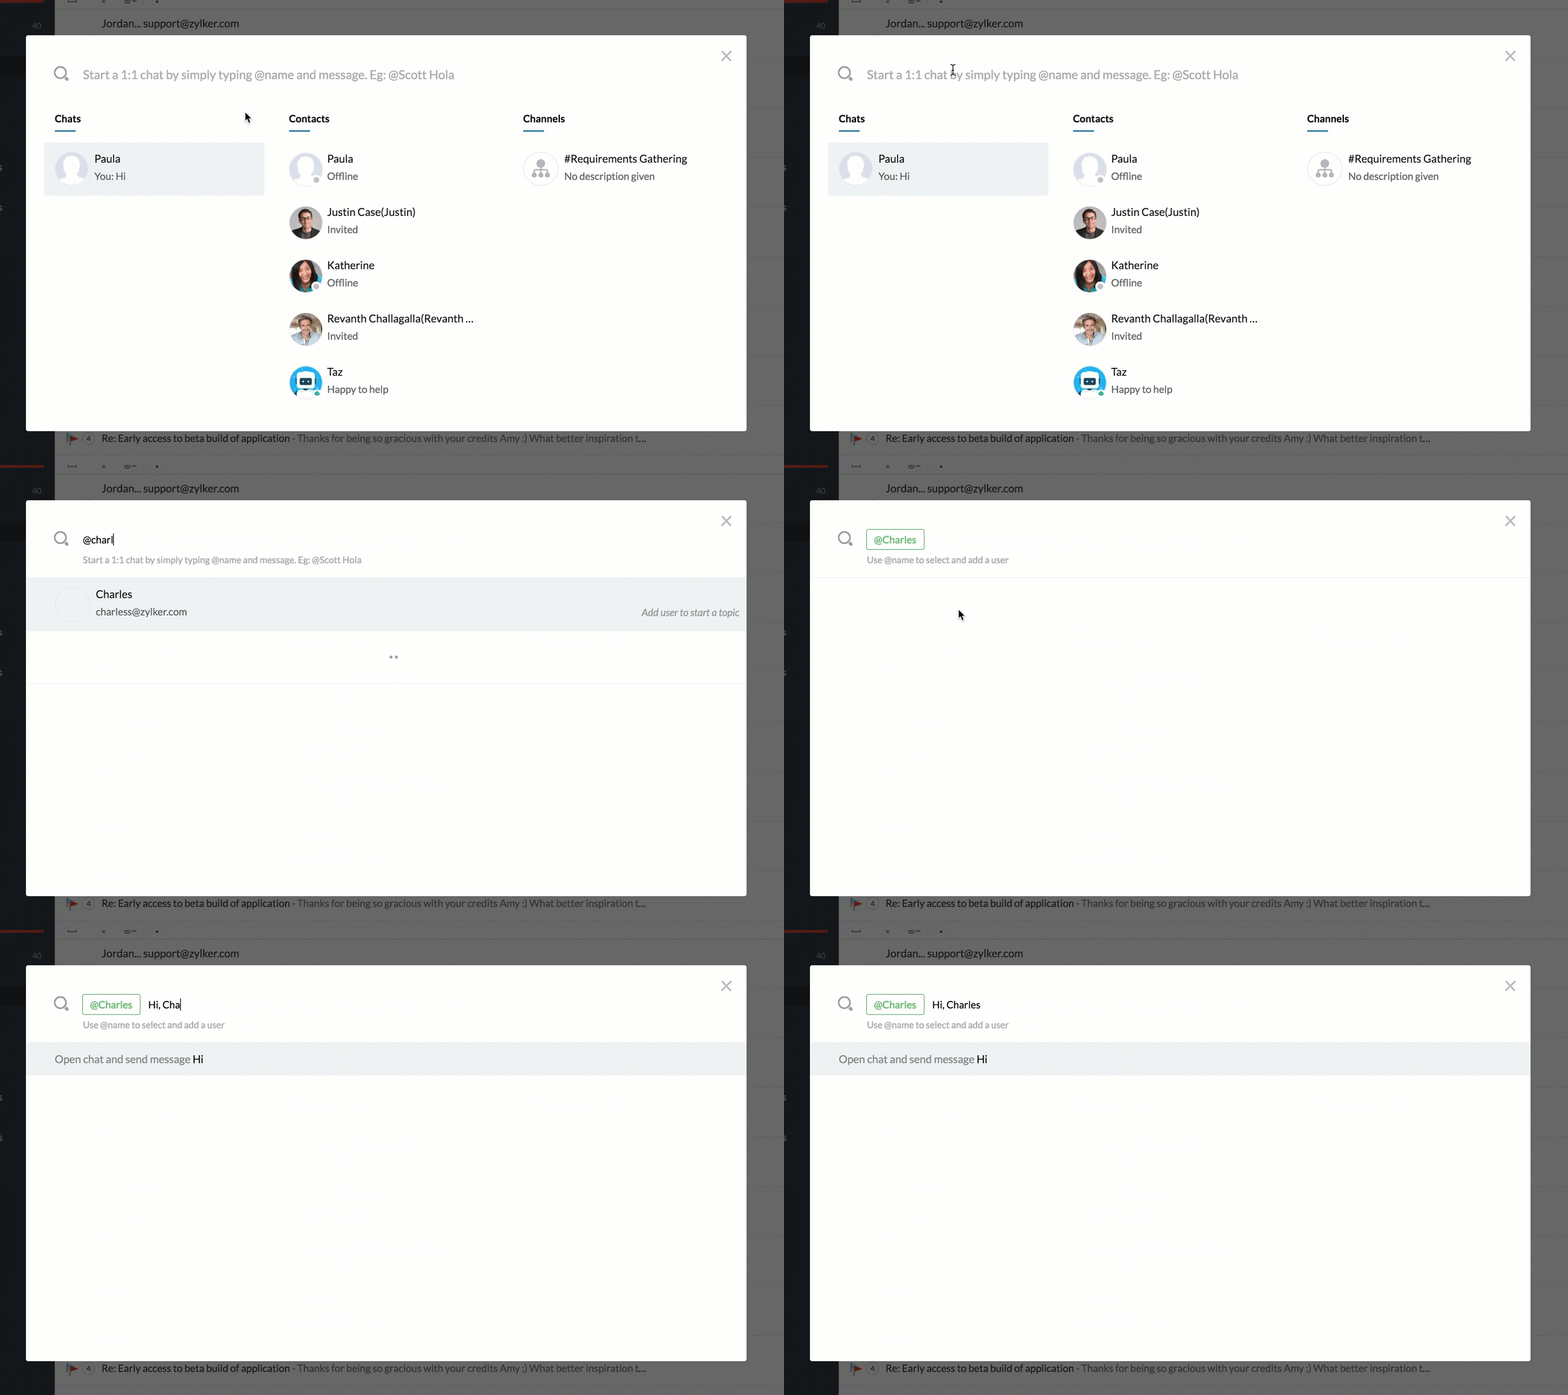
Chat and Call options in Emails
You can start a chat with the sender of an email or call the. (Audio / Video) via this integration in Mail. These options are available next to the Sender's email address in an email.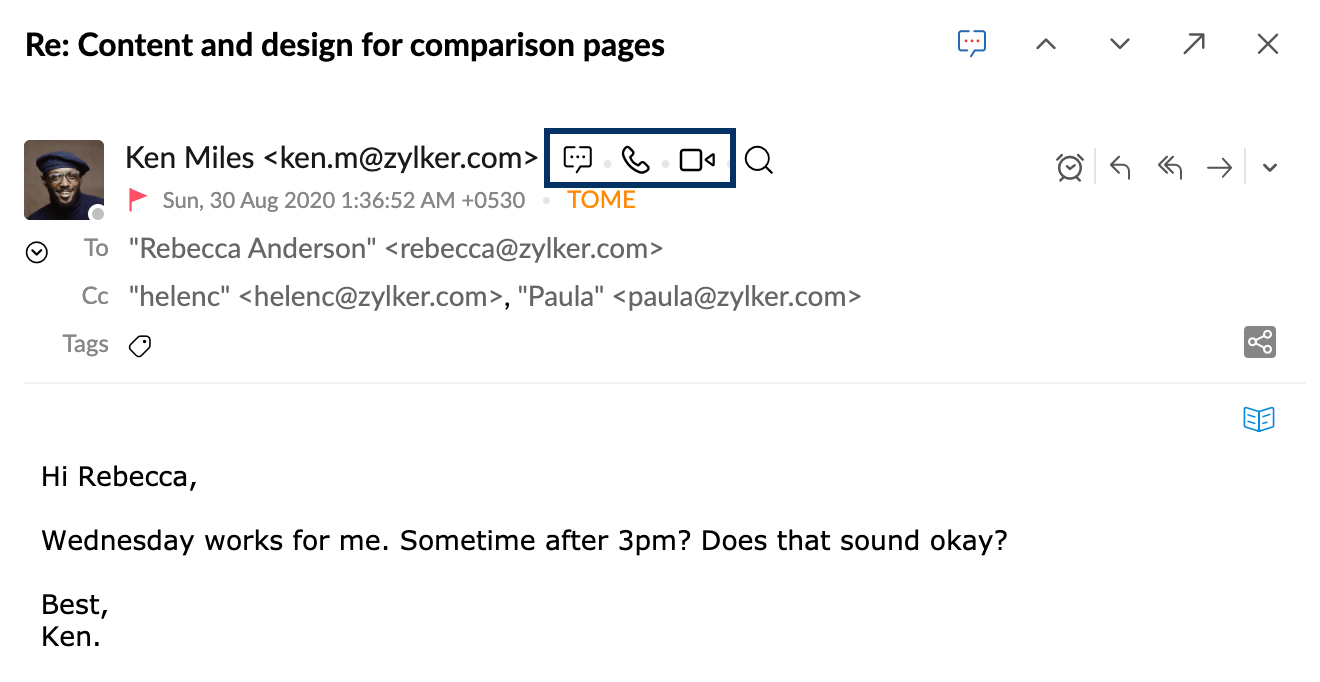
Availability Status
You can add or change your Cliq availability status from Zoho Mail. Click on your Avatar (profile picture) and change your Cliq status from the drop-down box.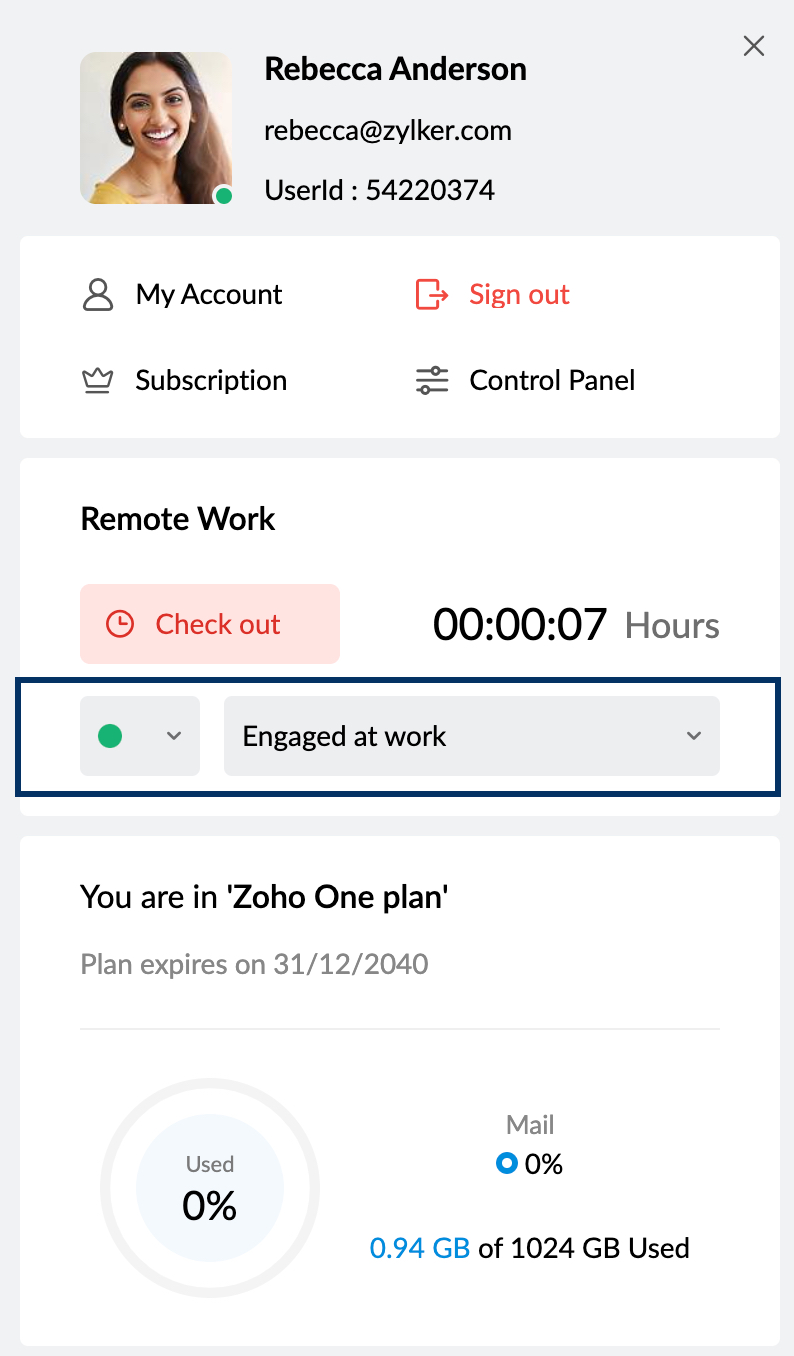
Streams Group Chat
You can start a chat for all the members of any Streams group from the Streams Group listing in the left pane. Right-click on the Streams group you want to start a chat for and choose Chat with this Group. A chat window with all the group members is launched.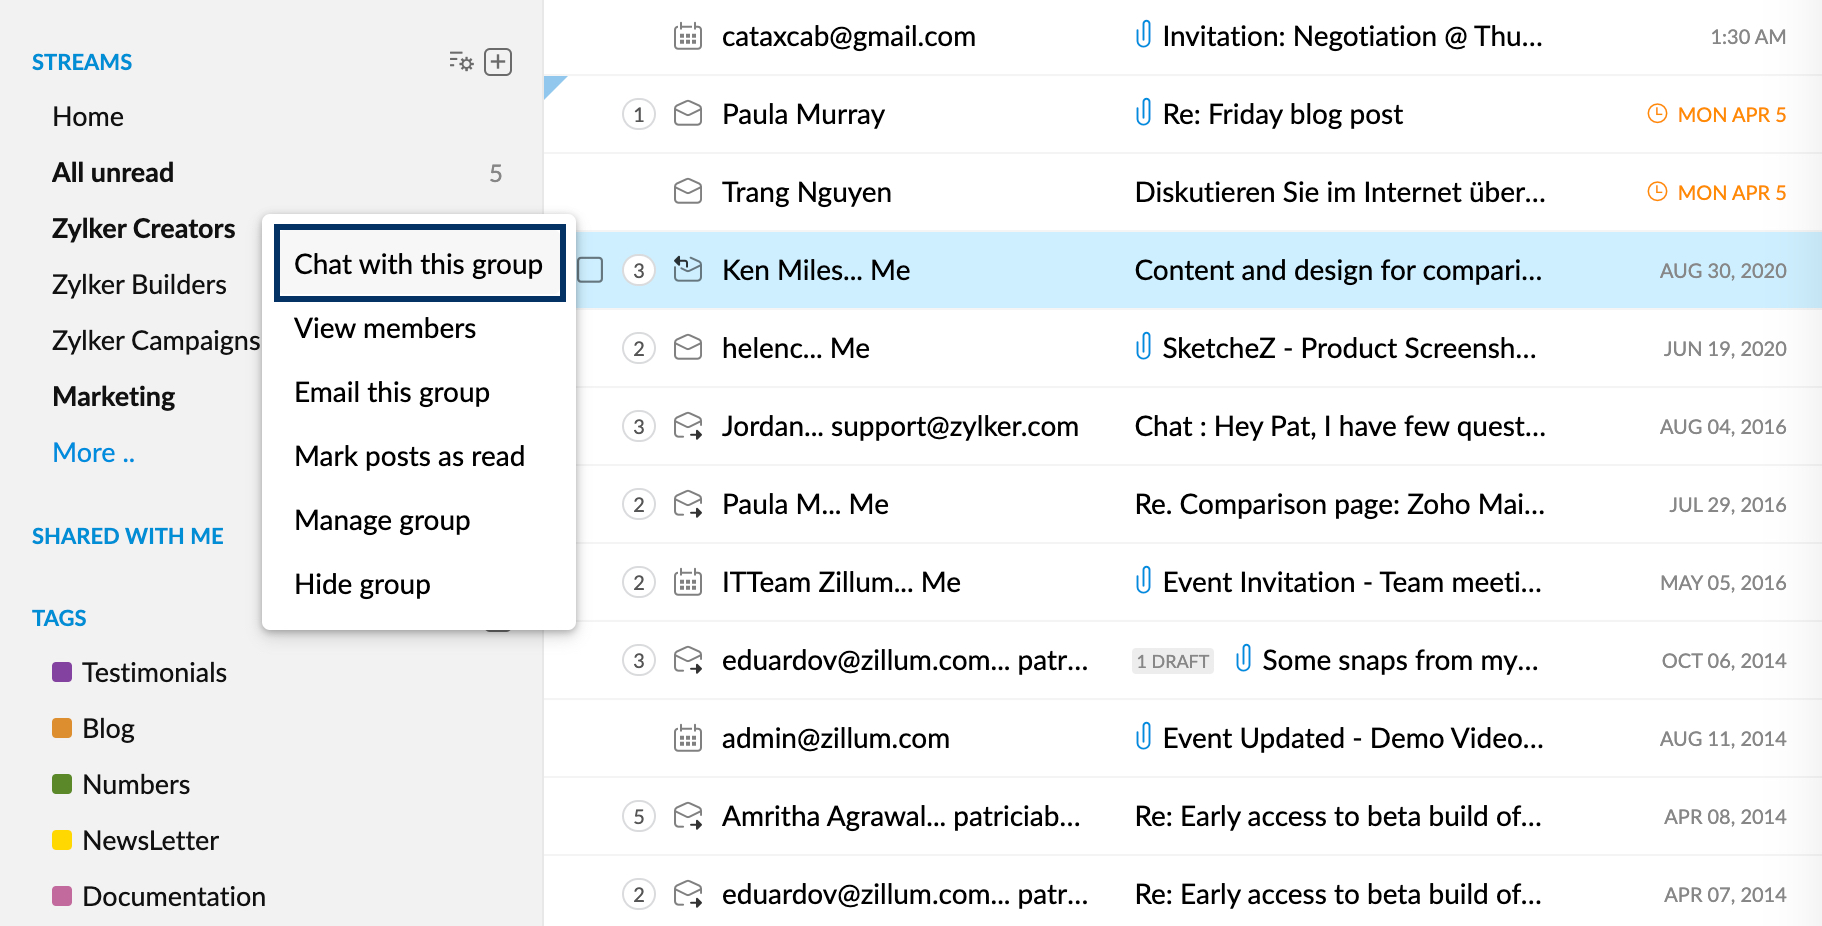
You can share a Streams post's permalink as a message in Zoho Cliq, using the Share via Cliq option in the More Options menu of a post.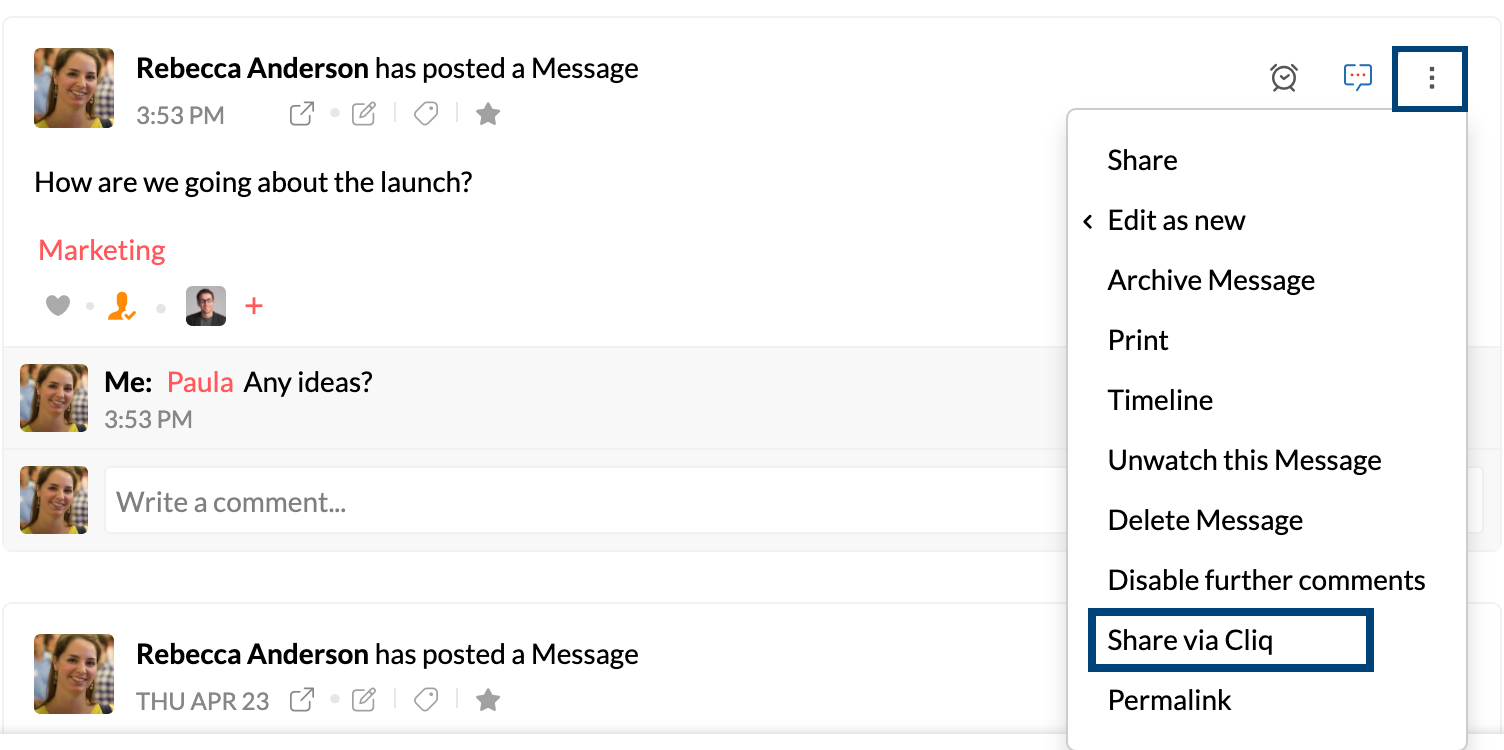
Attachments
You can drag and drop the attachments in an email to a Cliq window open in Zoho Mail. You can also select and share multiple email attachments from Zoho Mail to your Zoho Cliq contacts/chats/channels by using the Add to Cliq message option in the More options menu.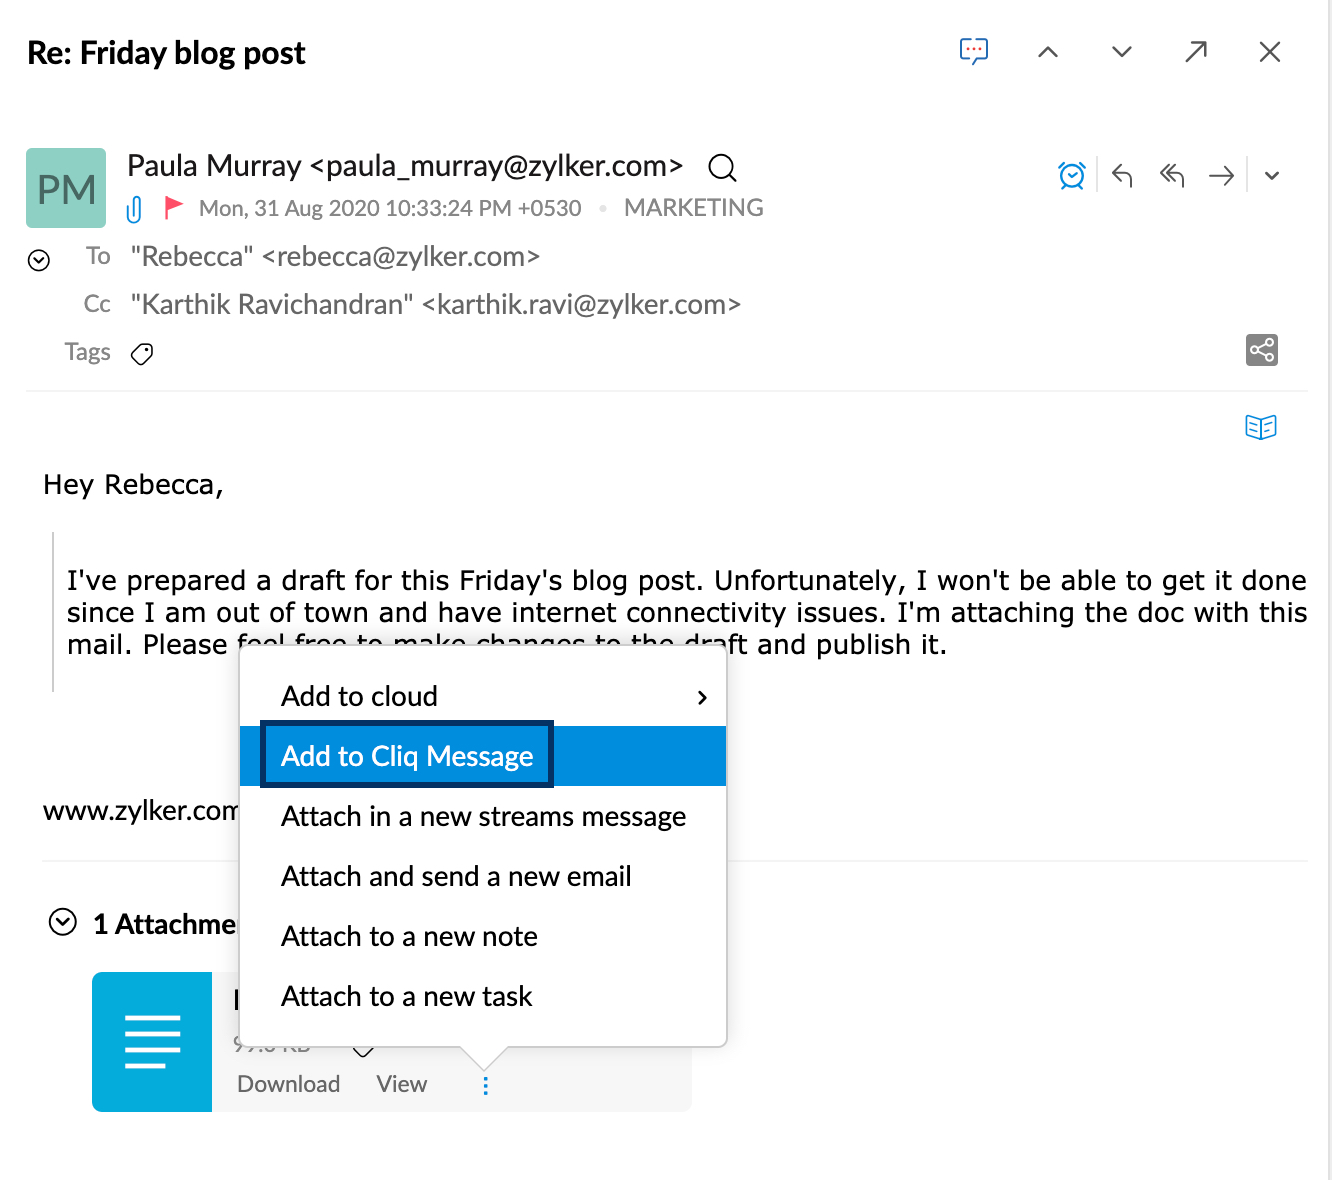
Bookmarks
You can share your Bookmarks in the Zoho Mail Bookmarks app with your contacts in Cliq.
- Login to your Zoho Mail account
- Open Bookmarks app
- Hover over a bookmark.
- Click the Share icon and choose the Share via Cliq option.
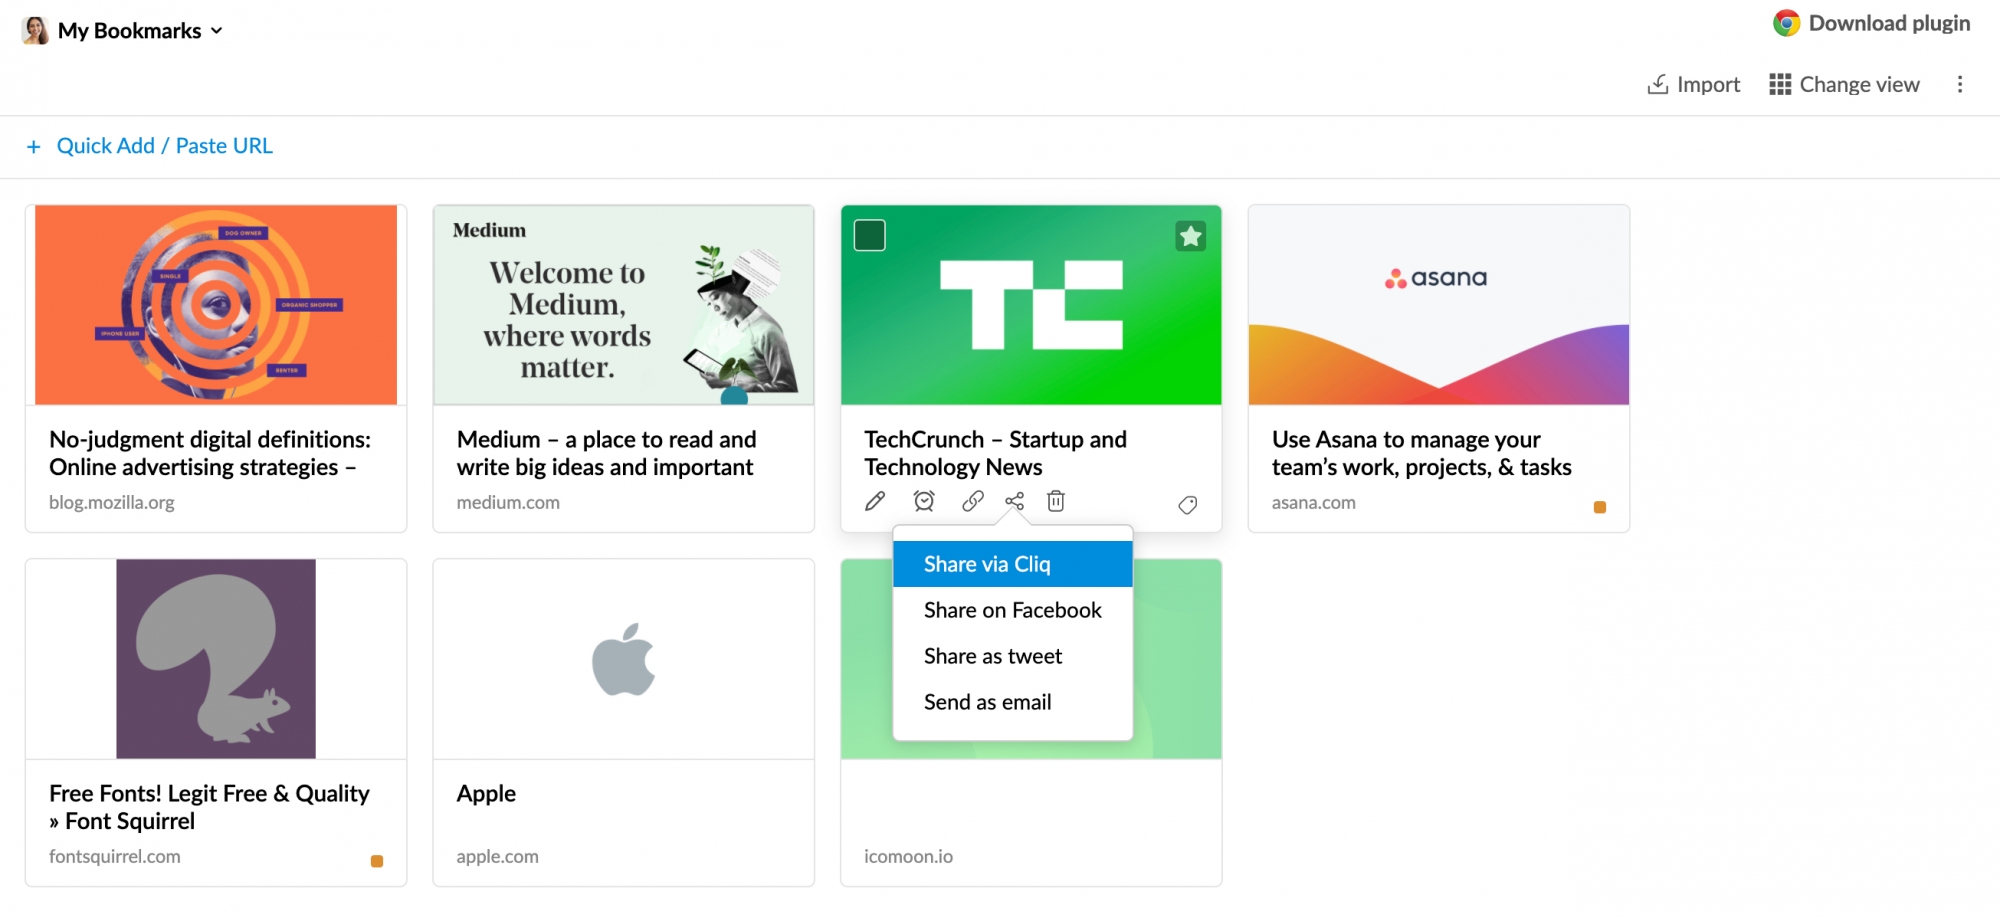
- Select your contact(s) to whom you wish to share the Bookmark.
- Click Continue to send the bookmark as a Cliq message.
Contact Card
Contact card for any contact is displayed if you hover over the name of the user in a Streams post or click on the contact in an email. You can initiate a Chat, Video or Audio call with the contact directly from the Contact card. Click on the Start Chat, Start Audio Call or Start Video Call icons below the email address to do so.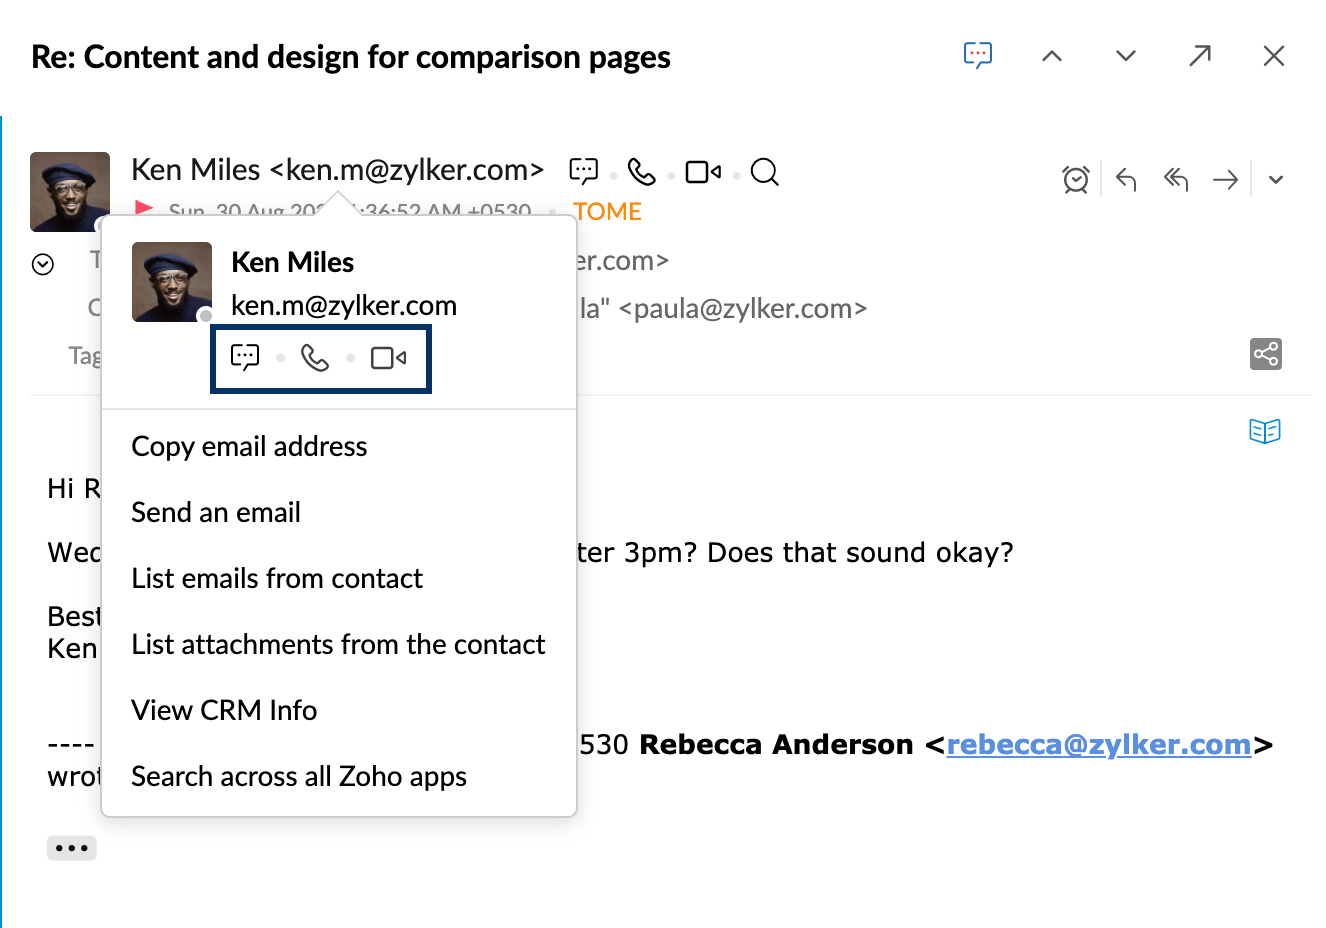
Chatlet
The Chatlet option allows you to start a chat with the participants of any Streams post or email. To open a chat from an email, click on the Chat about this email icon displayed on the header of the email. Once you click the icon, a Start Chat pop-up appears with the title of the chat and participants. You can edit the title and remove/add the participants as per your requirement.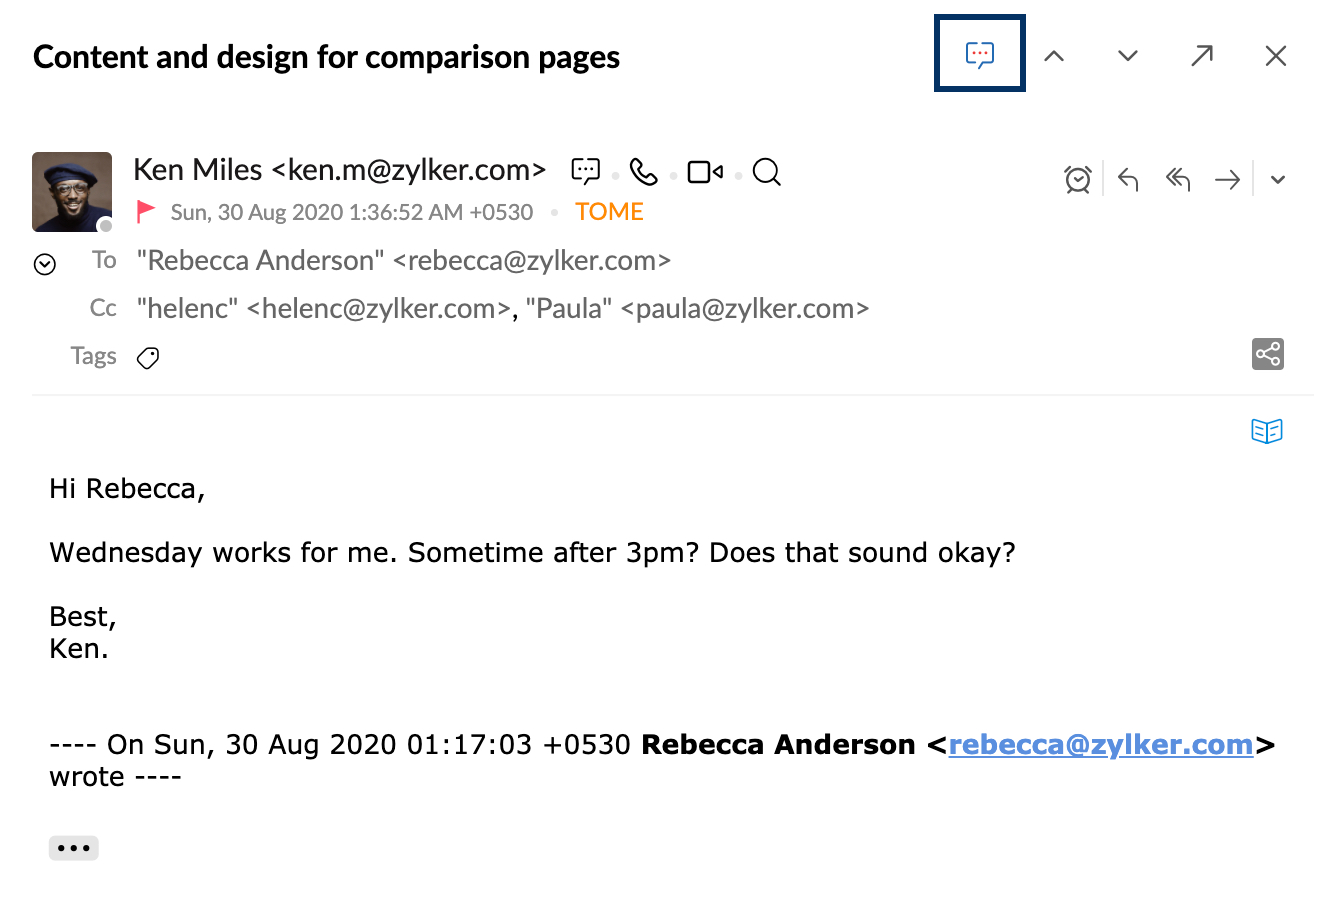
You can also click on the same icon present at the top right corner of any streams group post to start a chat with the involved group members.
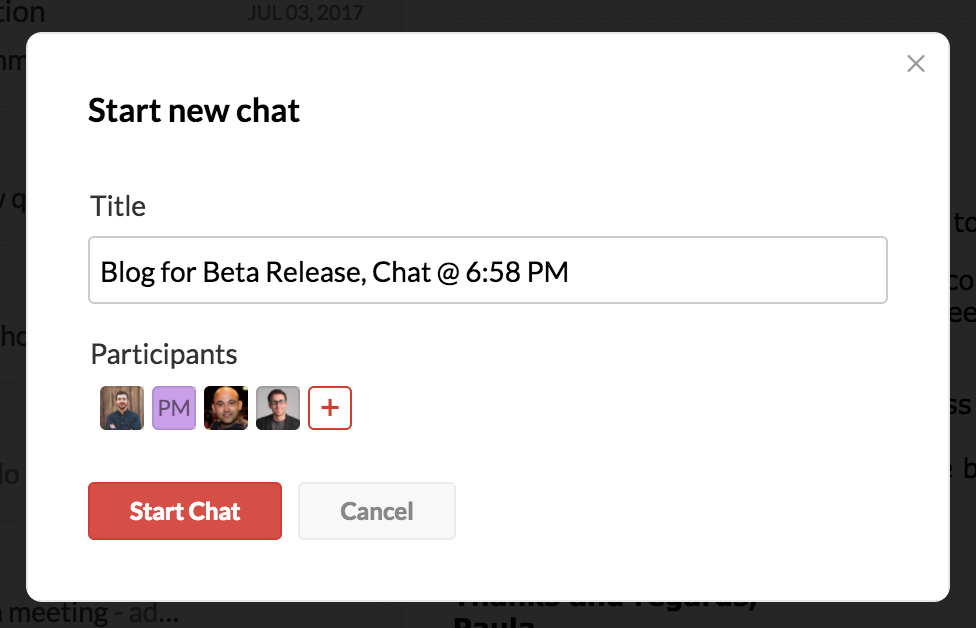
Click Start Chat with the desired title and users. If there are existing chats for the email or post, the group chat names will be displayed as a drop-down when you click on the Chatlet icon. You can choose to continue in one of the previous chats or start a new chat based on your preference.
Note:
Chatlet is available exclusively for Organization Users only.
Post to Cliq Channel
Automate the process of posting either the entire email as a link or only the attachment(s)in an email to a Zoho Cliq channel by selecting the "Post to Cliq Channel" option in filters. This feature allows you to conveniently share emails or their attachments directly to channels that you are a member of.
- Log into your Zoho Mail account.
- Go to settings and click on 'Filters'.
- Click on create 'New Filter' and enter the filter name, condition type and the conditions.
In the actions drop-down menu, choose 'Post to Cliq Channel' and choose whether to send the email as a link or just the attachments in the email.
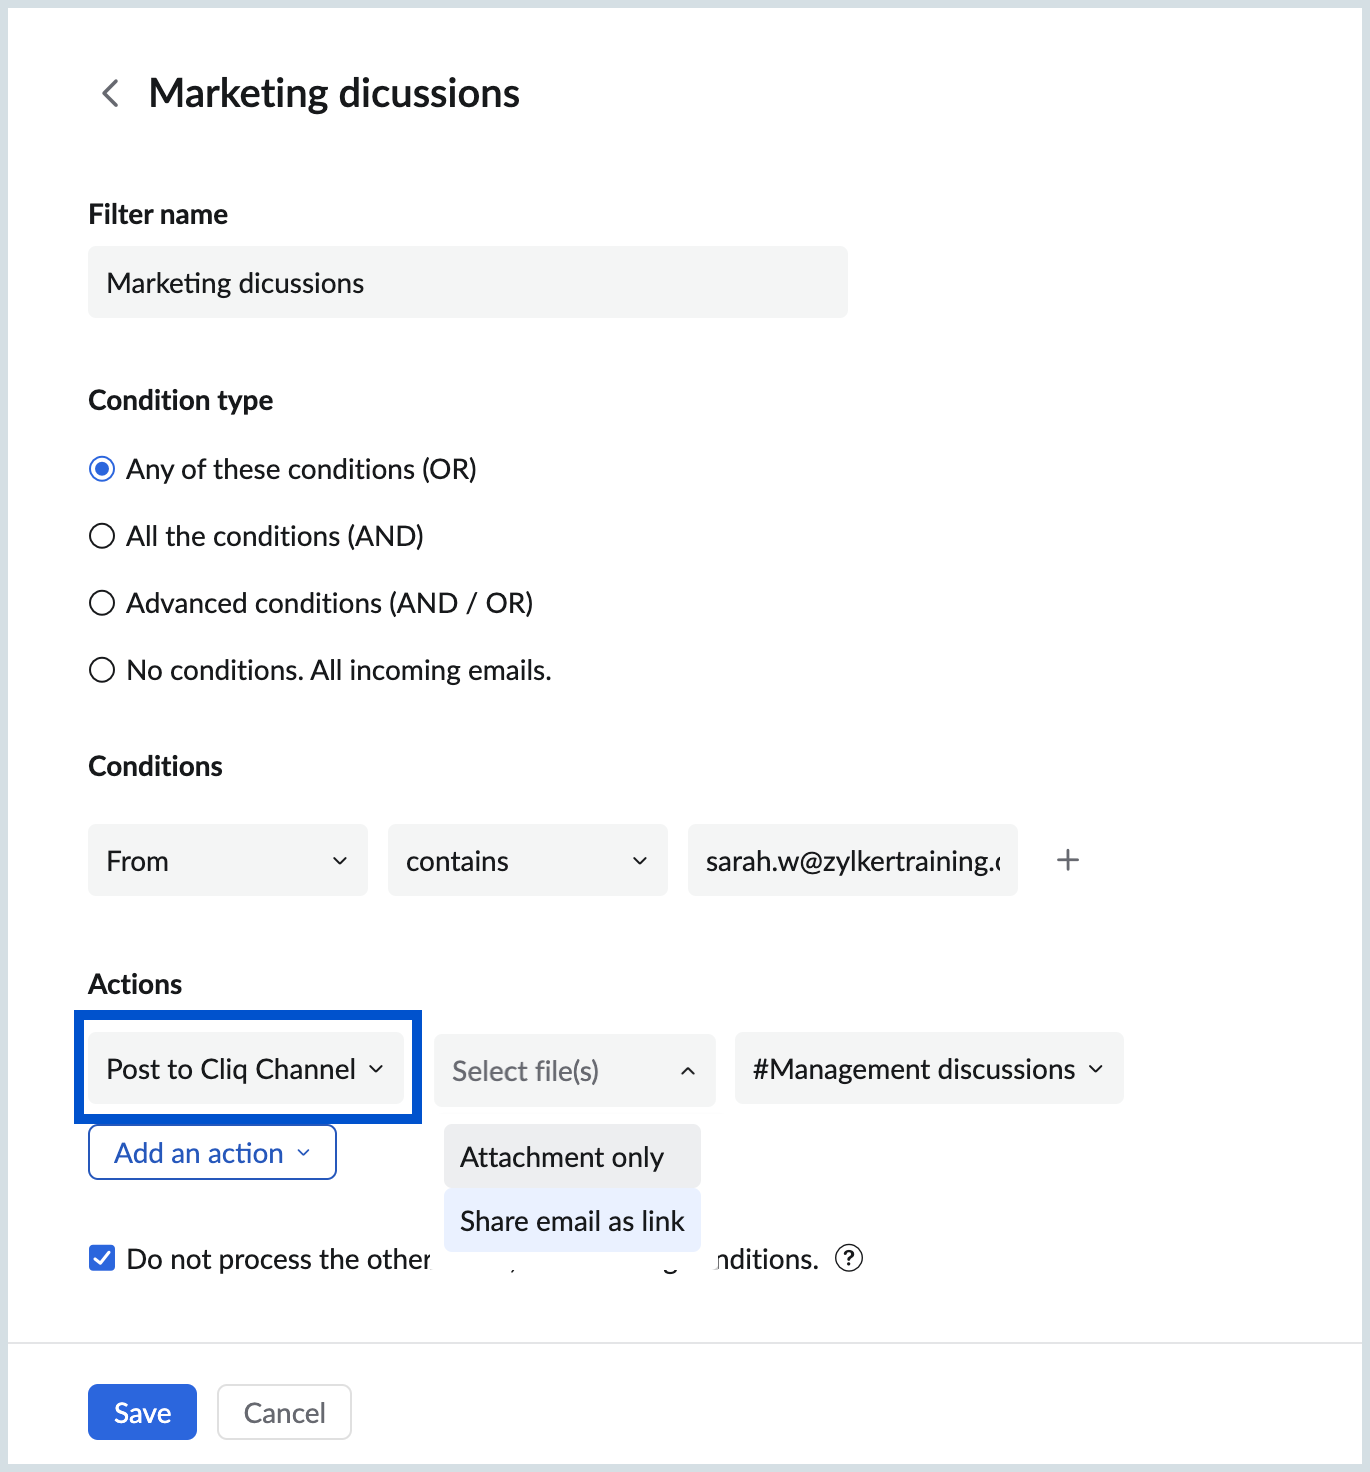
- Select the Do not process other filters, for matching conditions to avoid execution of other filters and only this filter's intended effect in applied on emails.
- Click on 'Save' to add the filter.
Zoho Mail for Zoho Cliq
Zoho Mail for Zoho Cliq is a Cliq extension that lets you add messages as Tasks, Notes, Bookmarks, and Streams posts to your Zoho Mail account.
Installing Zoho Mail for Zoho Cliq extension:
Zoho Mail for Zoho Cliq extension can be installed from the Zoho Marketplace or from your Zoho Cliq account.
To install the extension from your Zoho Cliq account:
- Log into your Zoho Cliq account.
- Click the Extensions icon near your Avatar.
- In Marketplace, search for Zoho Mail for Zoho Cliq and click Install.
- Agree to the terms and conditions and click Install
- Choose if this extension is to be installed for the entire organization or only for a specific team (Choose the appropriate team in this case).
- Select the checkbox to Subscribe team members to this bot.
- Click Install.
- Select Allow Access when prompted
- Click Accept to install the extension in Zoho Cliq
Adding from Zoho Cliq:
You can add a Cliq message as a Note, a task, a Streams post, or a link as Bookmarks in Zoho Mail.
- Login to your Zoho Cliq Account
- Locate the message you want to add from Zoho Cliq and click the message menu.
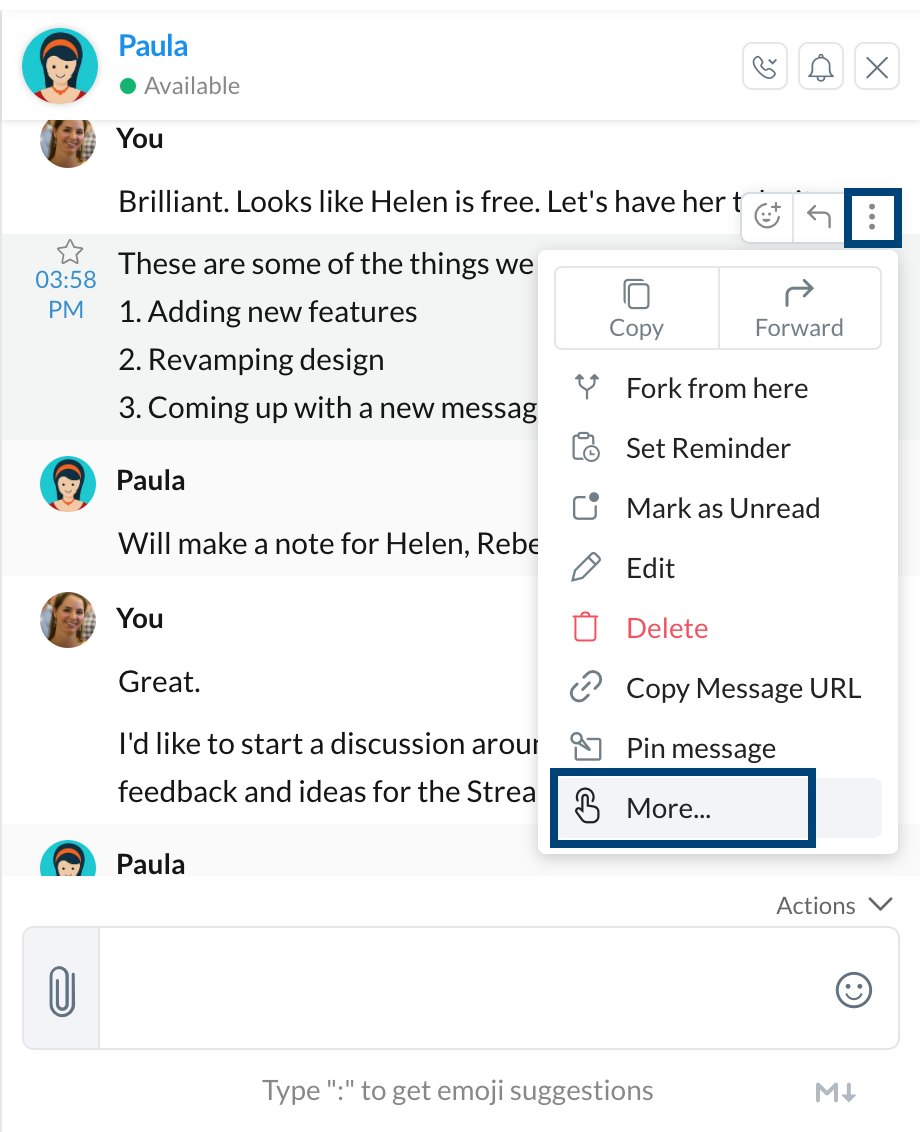
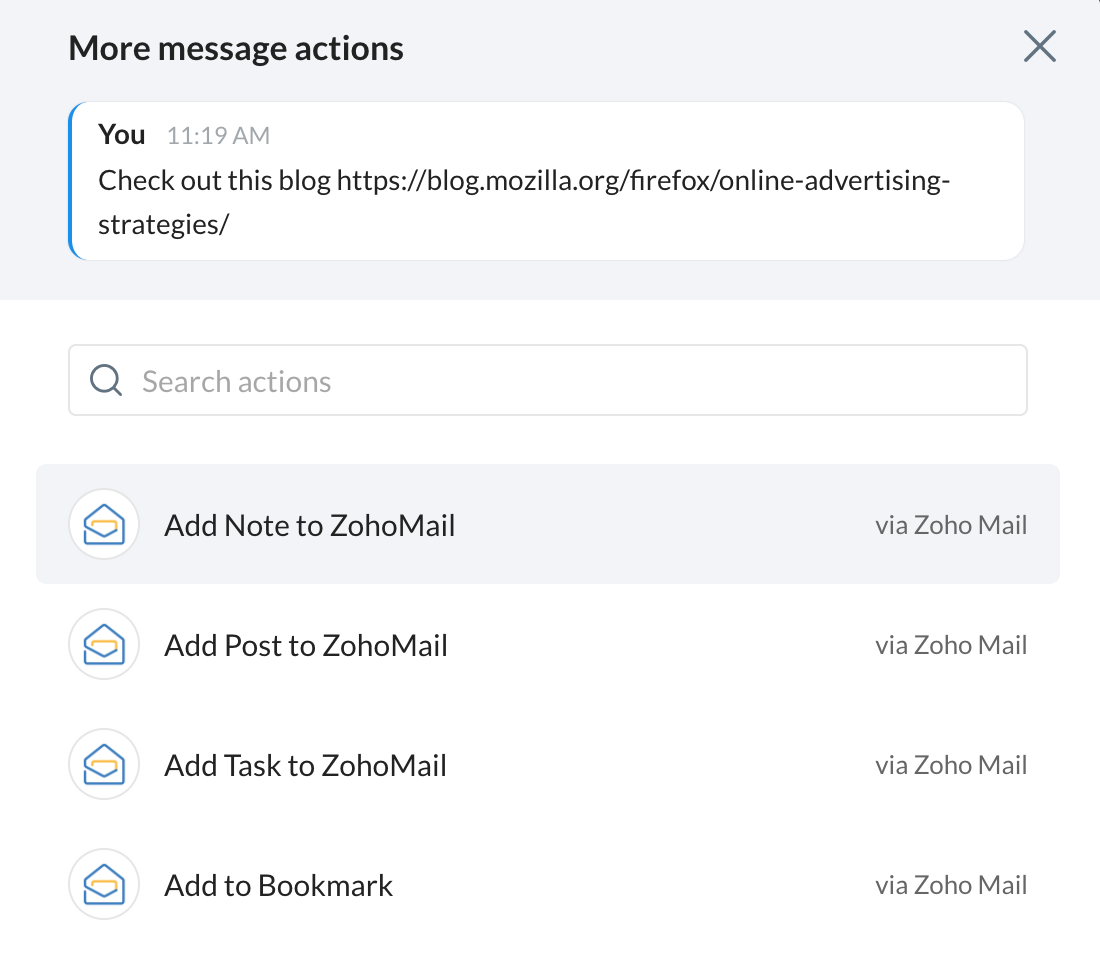
- Click More >> Add Note to ZohoMail
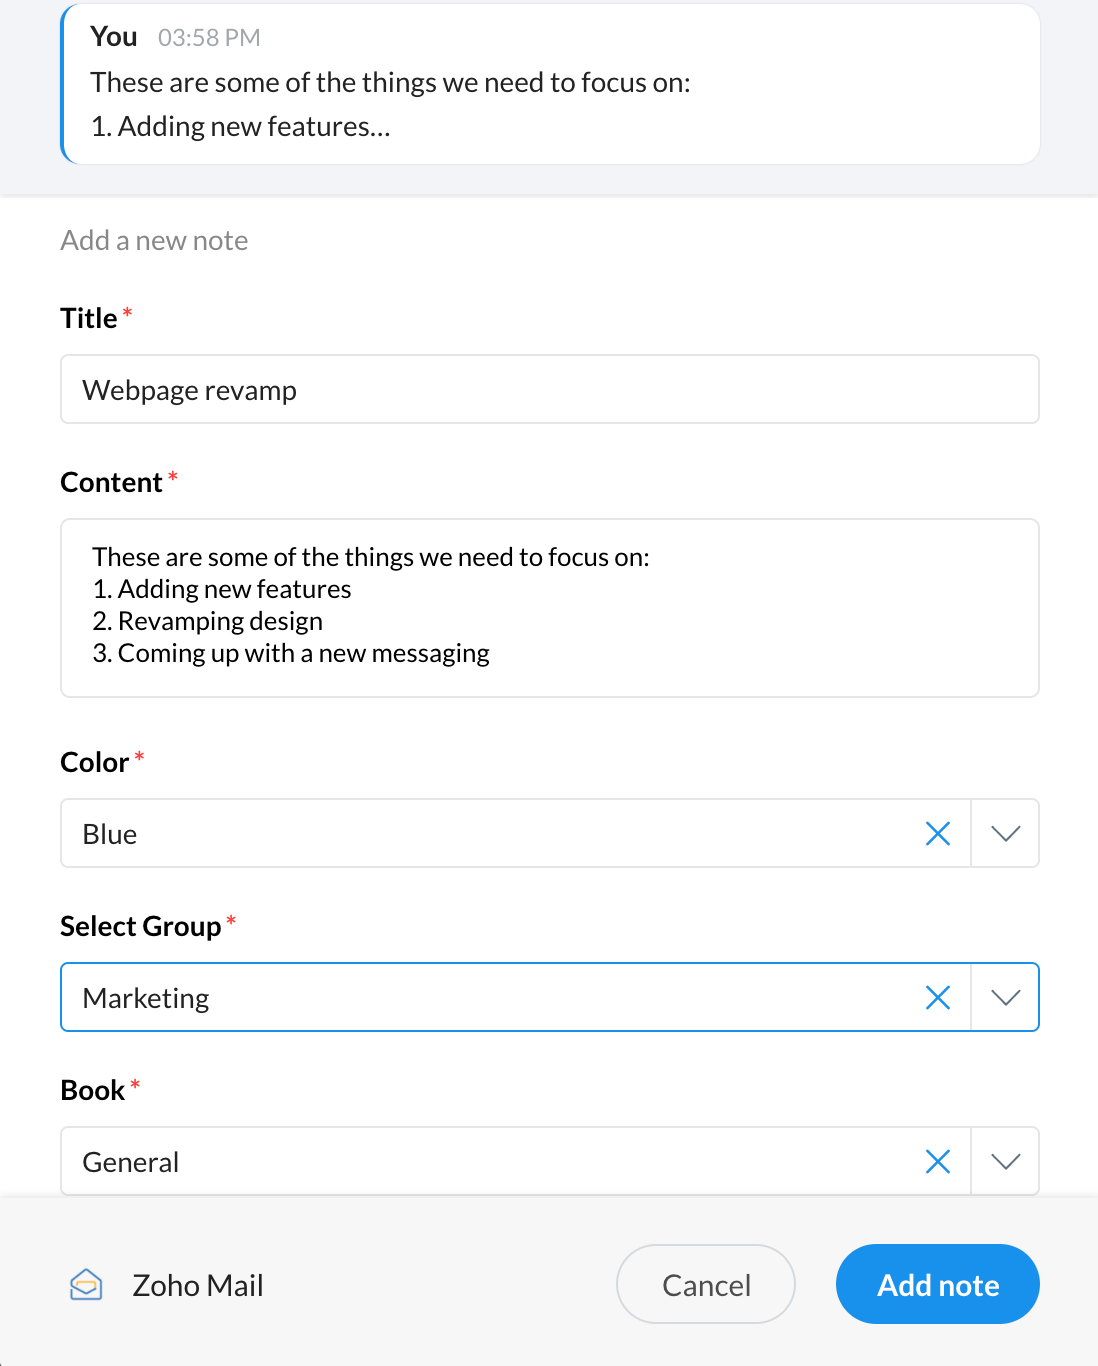
- Enter the appropriate details like Title of the Note, and choose the Color, Group, and Notebook the note should be saved in and click Add Note.
Zoho Mail Tasks command in Zoho Cliq:
You can use the slash command /taskapp in Zoho Cliq to add a task in Zoho Mail or to take a quick look at the tasks assigned to you, to get an overview about it when having a chat conversation.
You can now use these commands in Zoho Cliq or in the chat window in Zoho Mail or on our mobile app.
- /taskapp: This will display all the tasks assigned to you across all groups.
- /taskapp -group "<groupname>": This will display the tasks from the specified group.
- /taskapp -add "<title>": This will create a personal task with the title given.
- /taskapp -add "<title>" -group "<groupname>": This will add a task in the specified group.
- /taskapp -add "<title>" -group "<groupname>" @mentioneduser: This will assign a task to @mentioned user in the specified group.
- /taskapp add "<title>" @mentioneduser - This will assign a task to the @mentioned user in My Tasks (Personal).
Please note that these tasks will only be visible to you in the chat. However, you can choose to make it visible to others in the chat using the Post here option.


