Zoho Mail Plugin for Magento
Magento (Adobe Commerce) is a B2C and B2B e-commerce solution that businesses to sell online by building an online store based on their requirement.
The Zoho Mail plugin for Magento will help you send out business emails from your online store built on Magento using your Zoho Mail account. The use of an authorized server configuration is recommended to make sure that emails sent out from your Magento Store are considered valid and authentic by the receiver's server.
Table of Contents
Installation of Zoho Mail Plugin for Magento
Follow the steps below to download and install Zoho Mail Plugin for Magento:
- Go to the Magento root directory on your server and enter the following commands:
- composer require zohomail/magento2-zohomail:^1.0
- php bin/magento module:enable Zoho_ZohoMail.
- php bin/magento setup:upgrade
- php bin/magento setup:static-content:deploy
- php bin/magento cache:clean
- Login to your Magento admin panel.
- You will find Zoho Mail listed on the left pane.
You should configure Zoho Mail Plugin in Magento to start using it to send business emails. The configuration of the Zoho Mail Plugin for each of your online stores should be done separately.
Configuration of Zoho Mail Plugin
- Log in to your Magento Admin Account
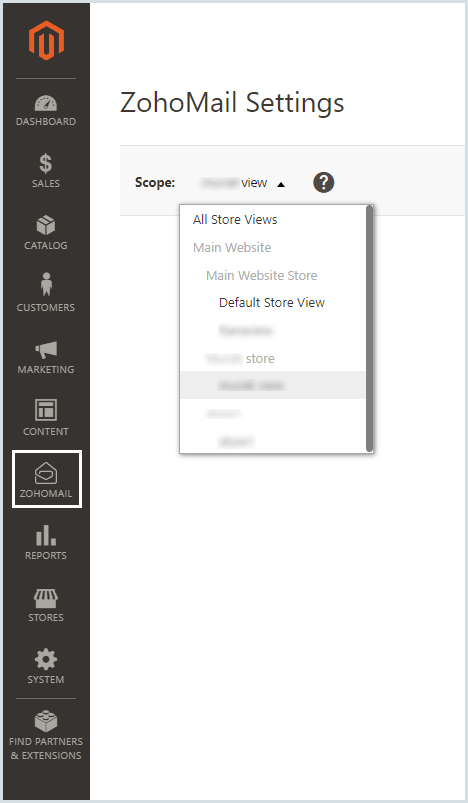
- Select Zoho Mail from the left pane.
- From the top pane, select the store for which you wish to configure Zoho Mail Plugin for. The configuration for each store should be done separately.

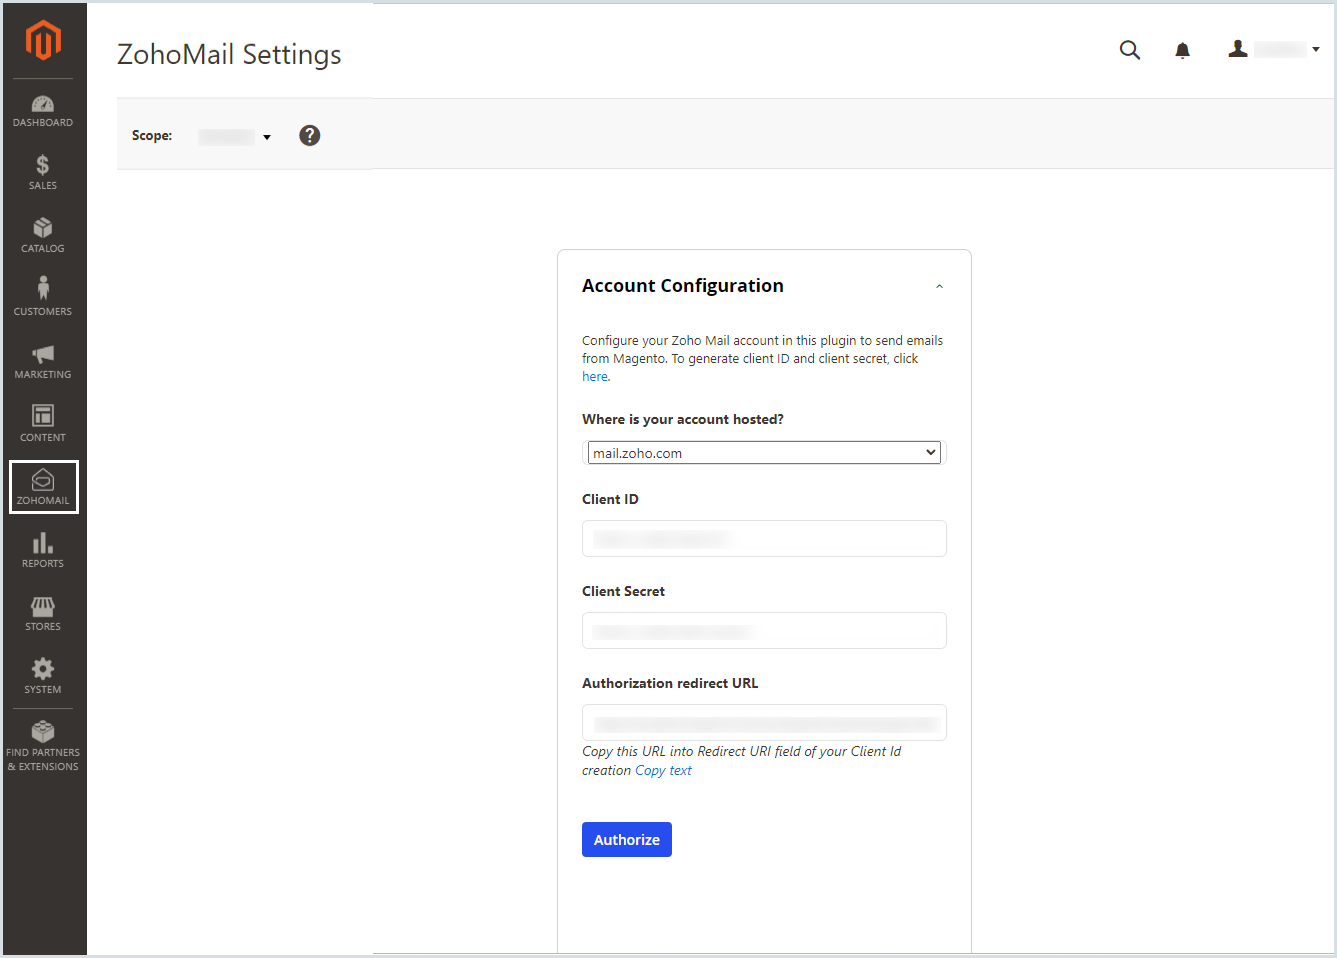
- In the configuration window, choose the region in which your Zoho Account Data resides. (One of the valid domains hosted with Zoho)

- Copy the Authorized Redirection URL from the configuration page.
- Log in to your Zoho Mail account, and access the Zoho Developer Console to create a new Client ID and Client Secret to access Zoho Mail API.
- Click on Get Started if you have no existing Client. If you have an existing client, click on Add Client in the top-right corner.
- Select Server-based Applications in the Client Type window.
- Provide the appropriate Client Name and your domain in Homepage URL along with the Authorized Redirect URL copied from your Magento account.
- Click Create to generate the Client ID and Client Secret.
- Navigate to the Zoho Mail configuration page in Magento Admin Account.
- Enter the obtained Client ID, and Client Secret on this page.

- Click Authorize.
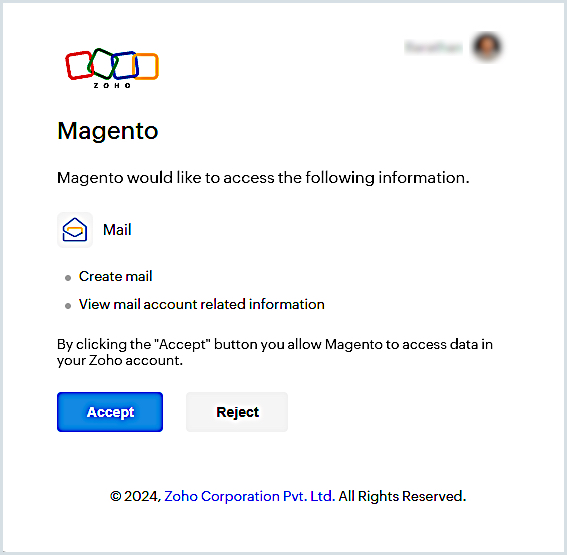
- You will be taken to the Zoho Mail account authorization window. Enter your email account credentials and click Accept.

- Magento allows the configuration of following types of email addresses to interact with your customers:
- General contact - Email address for your store, used for all general queries.
- Customer support - All customer support requests will be handled through this email address.
- Sales representative - The sales-related activities can be handled using this email address.
- Custom email 1 & 2 - Apart from the above presets, you can choose to have different email addresses based on the nature of your business using the Custom email options.
- Add the email address that will be used to send emails from each category. If you use an email address apart from the ones you mention, the General contact email address will be used by default.
- Note: The email addresses shown here will be the alias/ external addresses in addition to the primary email address of the account used to authorize the use of Zoho Mail plugin.
- Click Save.
The configuration will be successfully saved. The emails will be sent from these accounts.
You can also send test emails to check your configuration.
Note:
- Sending emails through Zoho Mail is subject to our Usage Policy restrictions. Please refer to our Usage Policy page for details.
Troubleshooting
Invalid Client Secret
- While configuring your plugin, ensure you have entered the correct information in the Domain field. Select the region in which your Zoho account is hosted (.in, .com, etc).
- Verify if the Client ID and Client Secret used in the configuration page match with the Client created for the plugin in Zoho Developer Console.
If the above-given troubleshooting method does not resolve the issue, reach out to our Customer support (support@zohomail.com) with the screenshot of the configuration settings page for a solution.


