Contextual Integrations in Zoho Mail
Zoho Mail provides integrations with other Mail Suite applications like Notes/ Tasks/ Calendar etc and also with other Zoho Apps like CRM, Projects and so on. You can directly access Calendar, Tasks, Notes and Bookmarks from your Inbox in Zoho Mail. The integrations of the applications in Zoho Mail is smooth and help the users to be more productive.
Table of Contents
Pin a Note to Email
Zoho Mail allows you to add a note corresponding to the email. You can add the entire email as a note, along with any other information you want to add up to it.
Add a Note from Listing
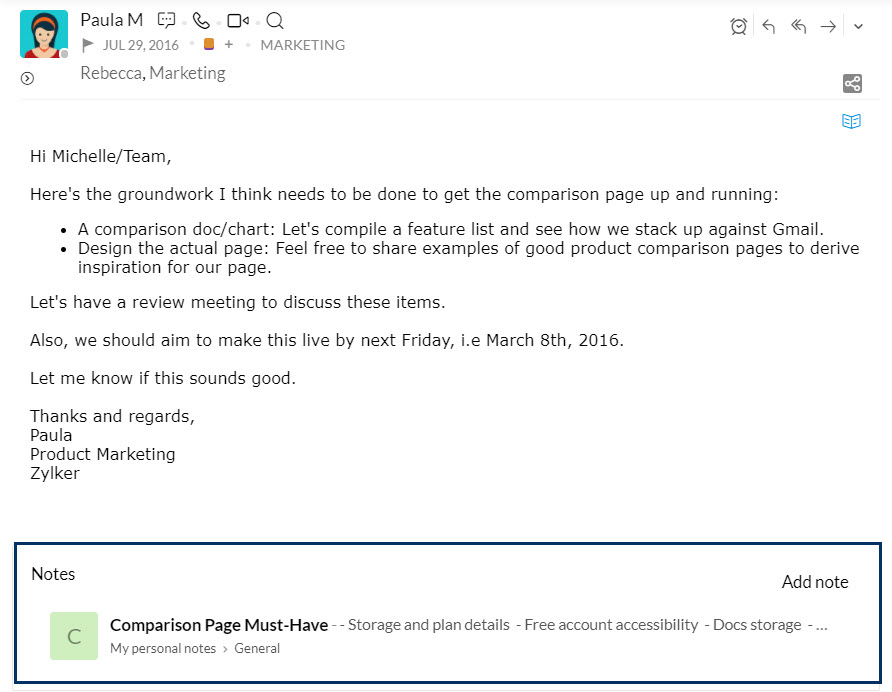
In the Email Listing, right click on the email to which you want to add the Note. In the menu, select 'Add to Notes' from the list to add the email as a note. The Subject of the email will be added as the Note Title and the contents of the email will be added as the Note Content. You can also view the note right below the email.
To add a note based on from the preview pane, you can also go to the More Actions button in the mail preview pane, choose Add to, and select Notes.

The Notes that are added from emails will be listed below the original email in the mail preview pane. You can edit these Notes or add more Notes related to this email from this view.
Create a note from Selected Text
You can create a note with a specific content from the email you are currently reading.
- In the email you are currently reading, highlight a section of the content.
- Once you highlight the text by selecting, Smart create menu pops up.
- Click on the Create Note icon, to create a note with highlighted text.
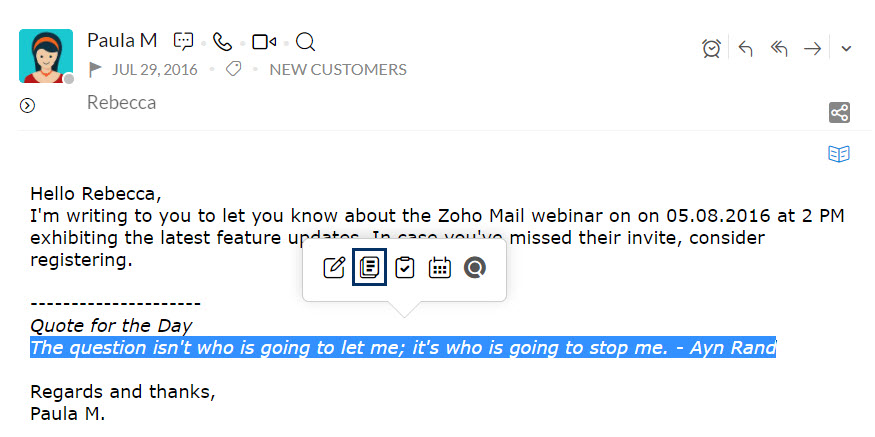
- A new note gets created with the selected text.
Add Note from Comment box
You can create a note associated to an email from the Comment box. Click on the Add a related note icon on the right end of the comment box. A note is opened in place of the comment box. Enter the content and click Add Note. A note will be created and associated with the particular email.
Associate Emails with Tasks
You can add tasks from emails in multiple ways. When you receive an email, about a pending task that you have, you can directly add the entire email as a Task or even create a Task based on a particular content on the email.
Create Task from an Email
Most often, we receive our tasks via email. It may be an email from our Boss or an email from a client regarding a new work item or a pending to-do item. In these cases, you can directly associate a task with that email. In the listing, right click on the email and select 'Add as Task'.
A new Task gets created with the Subject as Title and the email content as Description.
- Click the More Actions button on the top right corner of the screen in the mail view pane.
- Select Add To, and choose Tasks.
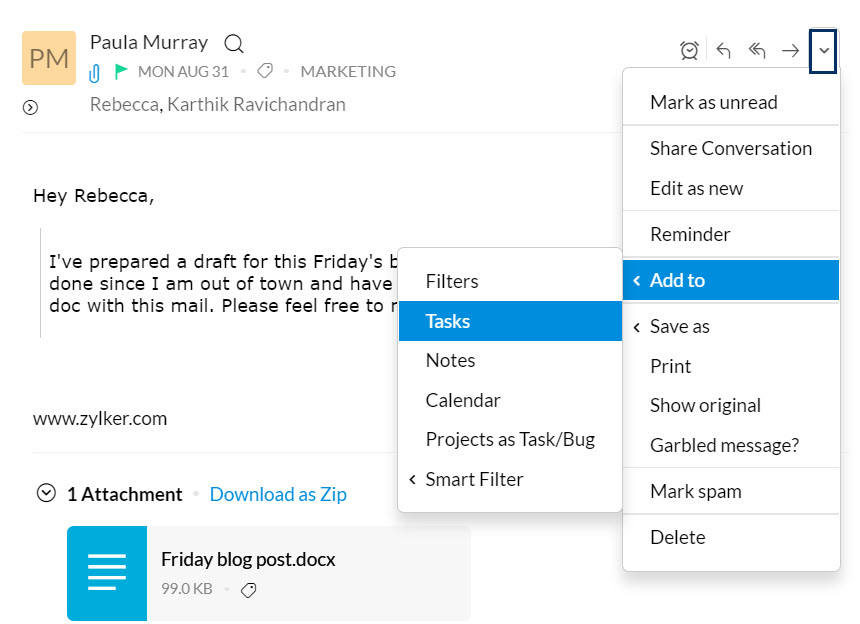
- A task with the subject of the email as the Task Title and the message content as the Description gets added.
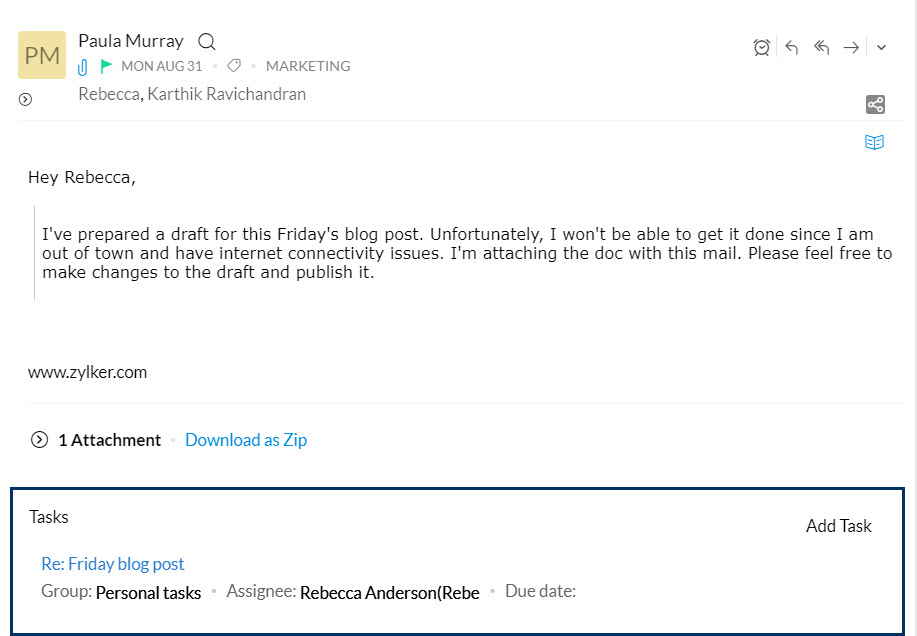
Tasks which you create from emails can be viewed in the email preview pane, below the original email. You can further edit them or add new Tasks from this view.
Create a Task from selected Text
You can also create a task from specific content in the email.
- In the email you are reading, highlight a particular content.
- Once you select the required text, Smart create menu appears.
- Click the Create Task icon.
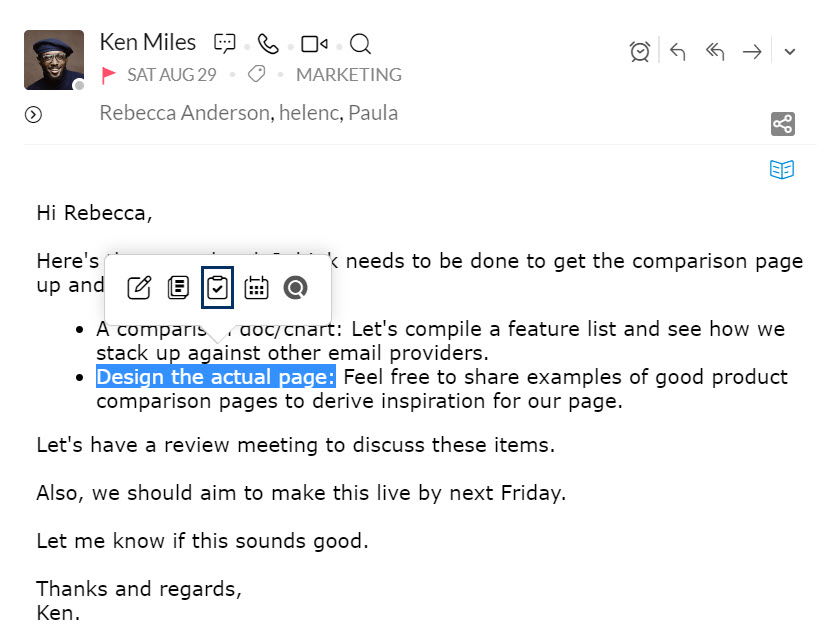
- The Add task dialog box pops up.
- The selected text gets added as the task description.
When you add a Task or Note from an email, the email will be earmarked in the listing pane. There will be a highlighted triangle in the top left corner of the email. You can also click the marking, to view the Notes/ Tasks related to the email.
Associate task from Comment box
You can create a task associated to an email from the Comment box. Click on the Add a related task icon on the right end of the comment box. A task is opened in place of the comment box. Enter the content and click Add Task. A task will be created and associated with the particular email.

Creating Events from emails
- Select a part of your message.
- On selection, five icons pop up.
- Click the Create Event icon.
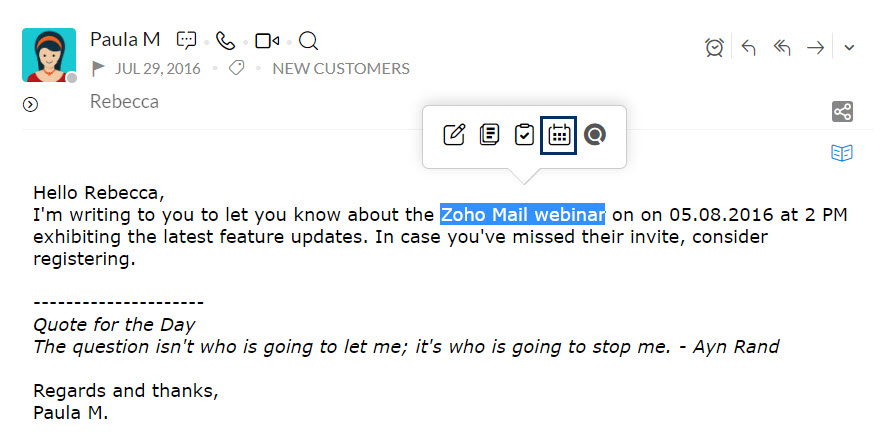
- The Create Event dialog box appears on the screen.
- The selected text gets added as the event name.
Share in Streams
You can select a portion of email and share the content as a 'Message' in streams to any of your Groups.
- In the email you are reading, select the specific content of the email, which you want to post in Streams.
- On selection, the Smart create menu pops up.
- Click the Create Post icon from the icons.
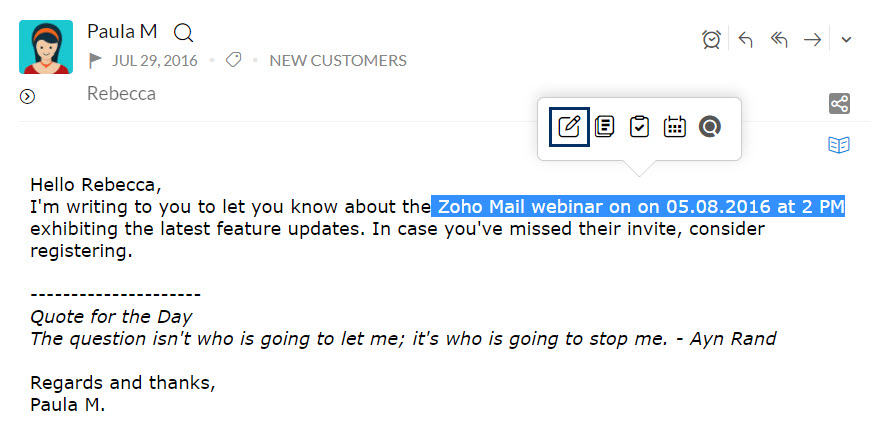
- The Add Post dialog box appears on screen.
- You can choose the Group to which you want to post in the Streams.
By default, the option 'My Streams' is selected in the list of streams.
Create and Manage Contacts
You can perform Contacts based actions on the From, To or CC email addresses by clicking the Contact email address from the header area in the Preview pane.
Add to Contacts
If the email address is not available in your Contacts already, you can add them as a Contact directly from the Contact Management Card popup.
- Click ton any of the recipient email address or sender email address.
- The Contact Management card pops up.
- Select Add to Contacts from the list of options.
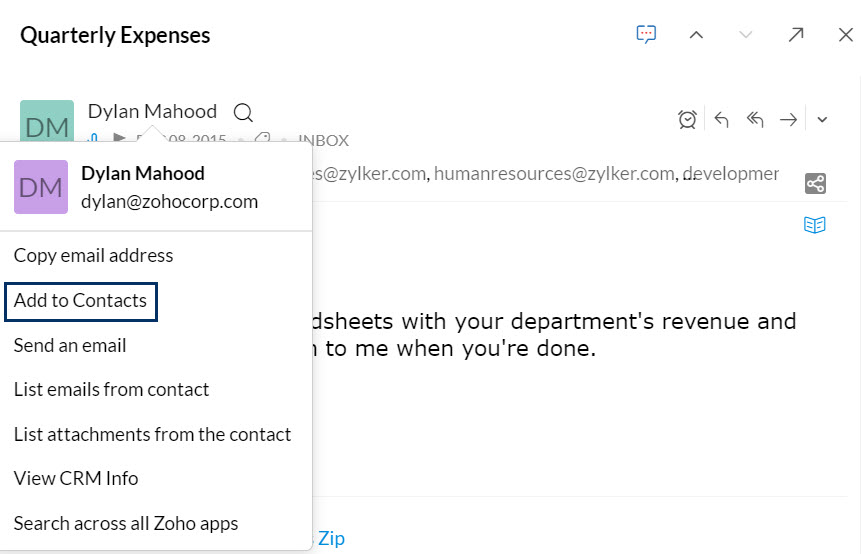
- The email address gets added to your address book along with the name available in that email.
To learn more about Contacts based action, refer to the video below.
Chat directly with Contact
If the particular email address is already available in your Chat contacts, you can click on the Start chat icon to start a chat with the particular contact.
- Click on any of the sender or recipient email addresses.
- The Contact Management Card appears.
- Select Start Chat icon present below the email address.
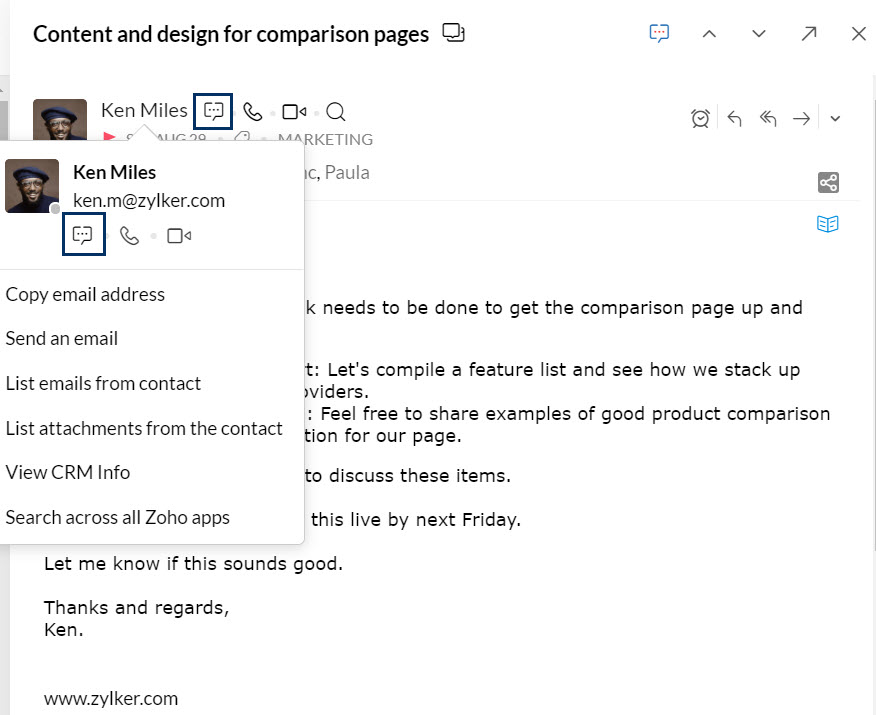
- Your chat box with that contact opens in the Zoho Mail tab.
Contact's online availability:
Apart from chat, you can also view whether the particular contact is online and available in messenger.

Contacts Integration in Streams
While viewing a post in streams, the tagged contacts appear highlighted. On hovering over these tagged contacts, a contact card pops up. This card allows you to perform five actions.
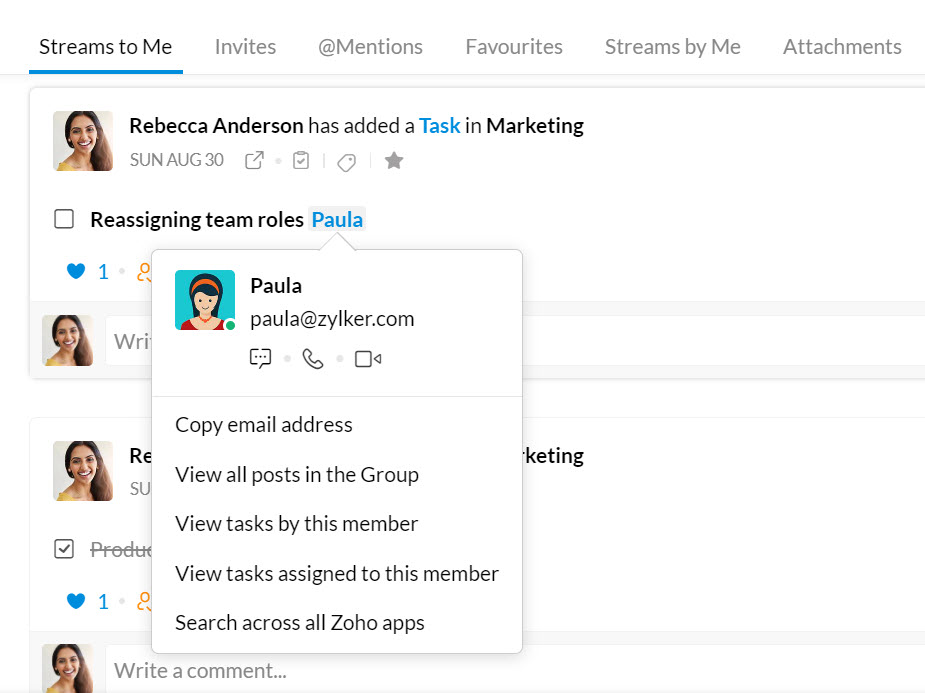
- Copy email address - You can copy the contact's email address.
- View all posts in the Group - This option lets you view the posts that this contact has added in that particular Streams group. This option will not be enabled if the tagged contact is an invitee, and is not a part of that group.
- View tasks by this member - You can view the tasks created by the particular contact.
- View tasks assigned to this member - Using this option you can view the tasks assigned by others to the contact.
- Search across all Zoho apps - You can search for the contact and their actions across all the Zoho apps using this option.
Related Pages
Tasks - Zoho Projects Integrations | Streams | Using Tasks | Using Notes


