Employee Portal Preferences
The Employee Portal is a dedicated space for your employees to view their compensation details and access pay stubs. Once you enable the Employee Portal for your organization, you can:
- Configure portal access for your employees individually
- Display the contact information of your payroll team on the Employee Portal
- Display important messages to your employees via the portal
Enable Employee Portal for your Organization
The Employee Portal for your organization will be enabled by default. If it is not enabled, you can enable it in the Settings.
To enable the Employee Portal:
- Go to Settings and click Employee Portal.
- Toggle the Enable Portal Access option.
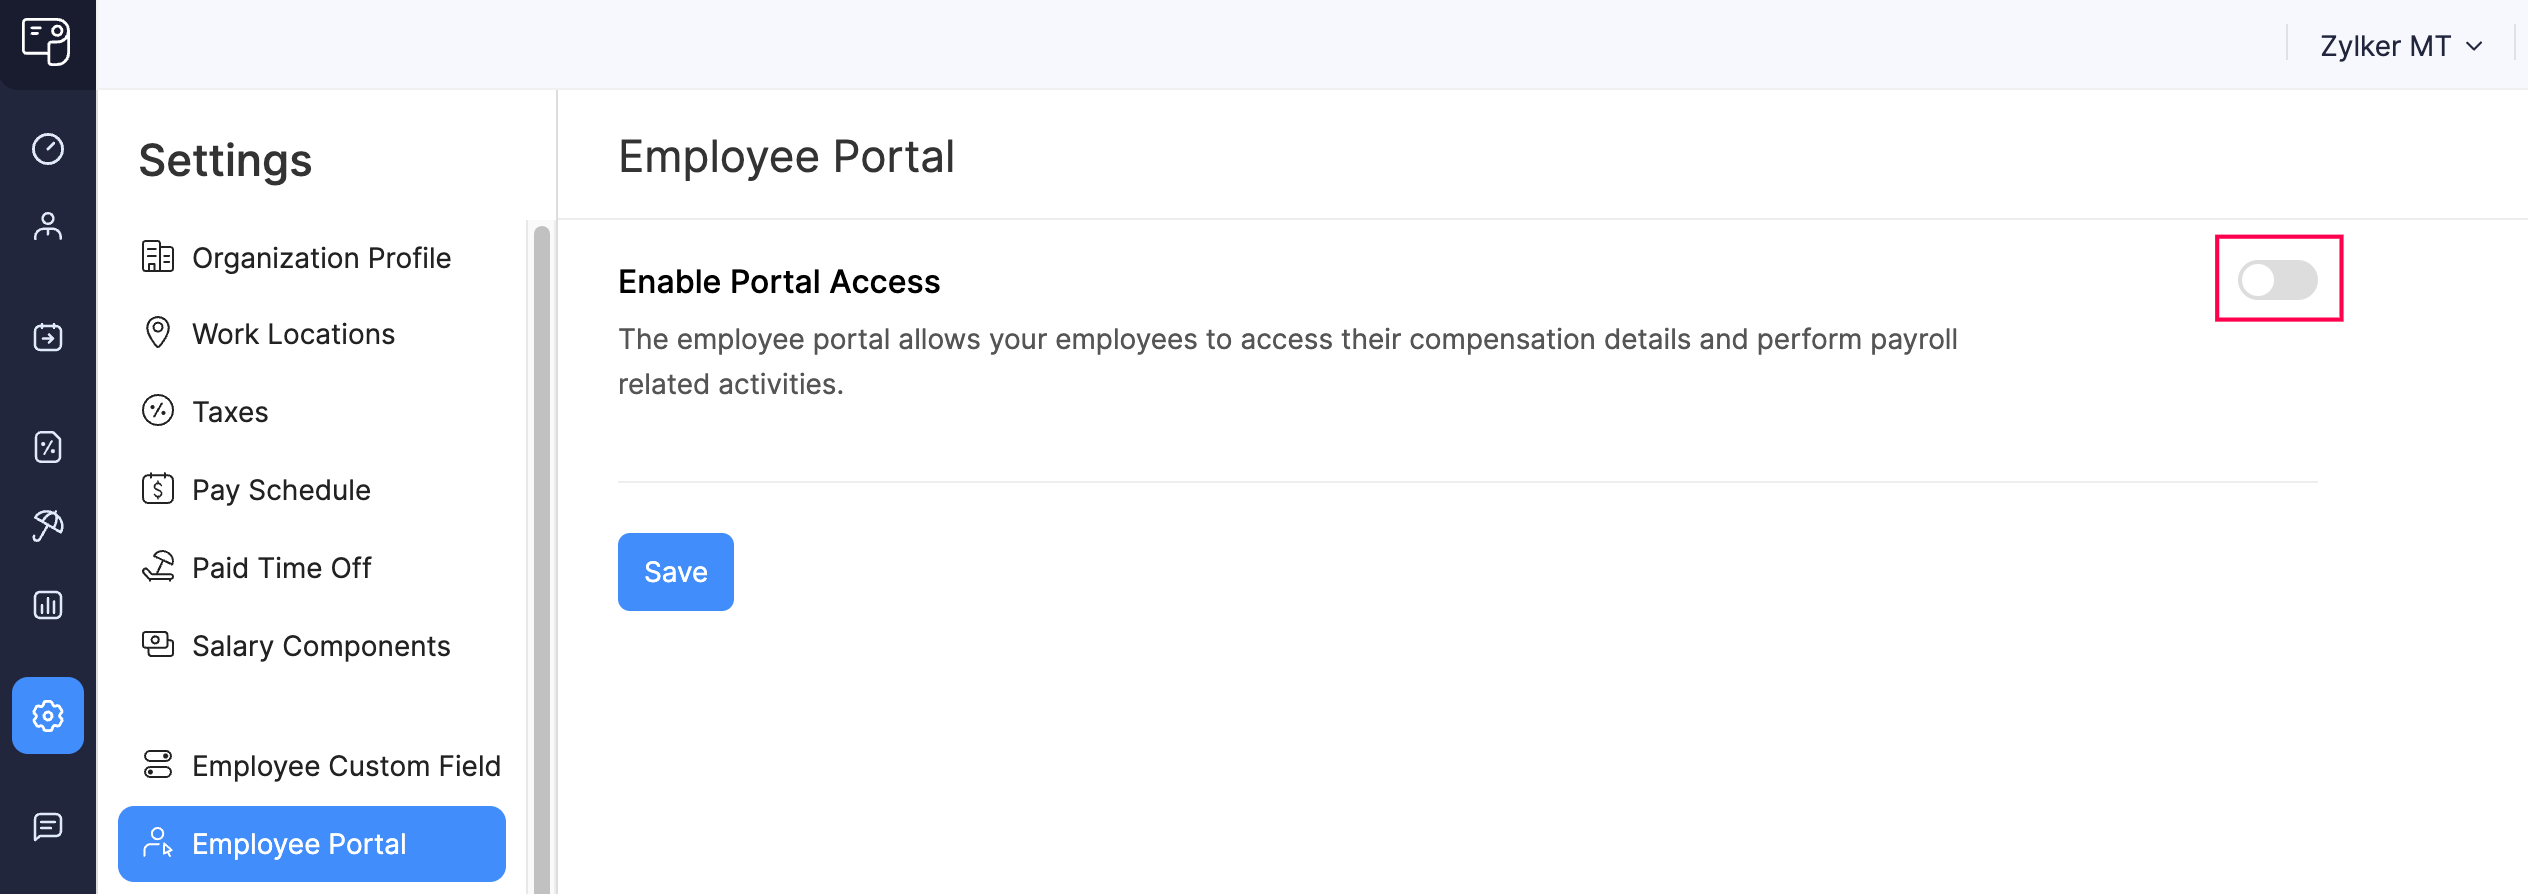
- Configure Portal Contact Information and Banner Message, if required.
- Click Save.
The Employee Portal will now be enabled for your organization.
Configure Portal Access for Employees
NOTE You need to enable Employee Portal at the organization level in Settings before you can configure portal access for employees individually.
Enable/Disable Employee Portal During Employee Creation
While creating a new employee in the Employees module, you can enable or disable portal access for that employee. To enable, select the Enable Portal Access checkbox on the Basics page.
Enable Employee Portal for an Existing Employee
To enable portal access for an existing employee:
- Click Employees on the sidebar.
- Click the employee to whom you want to give portal access.
- Click Enable under Basic Information.
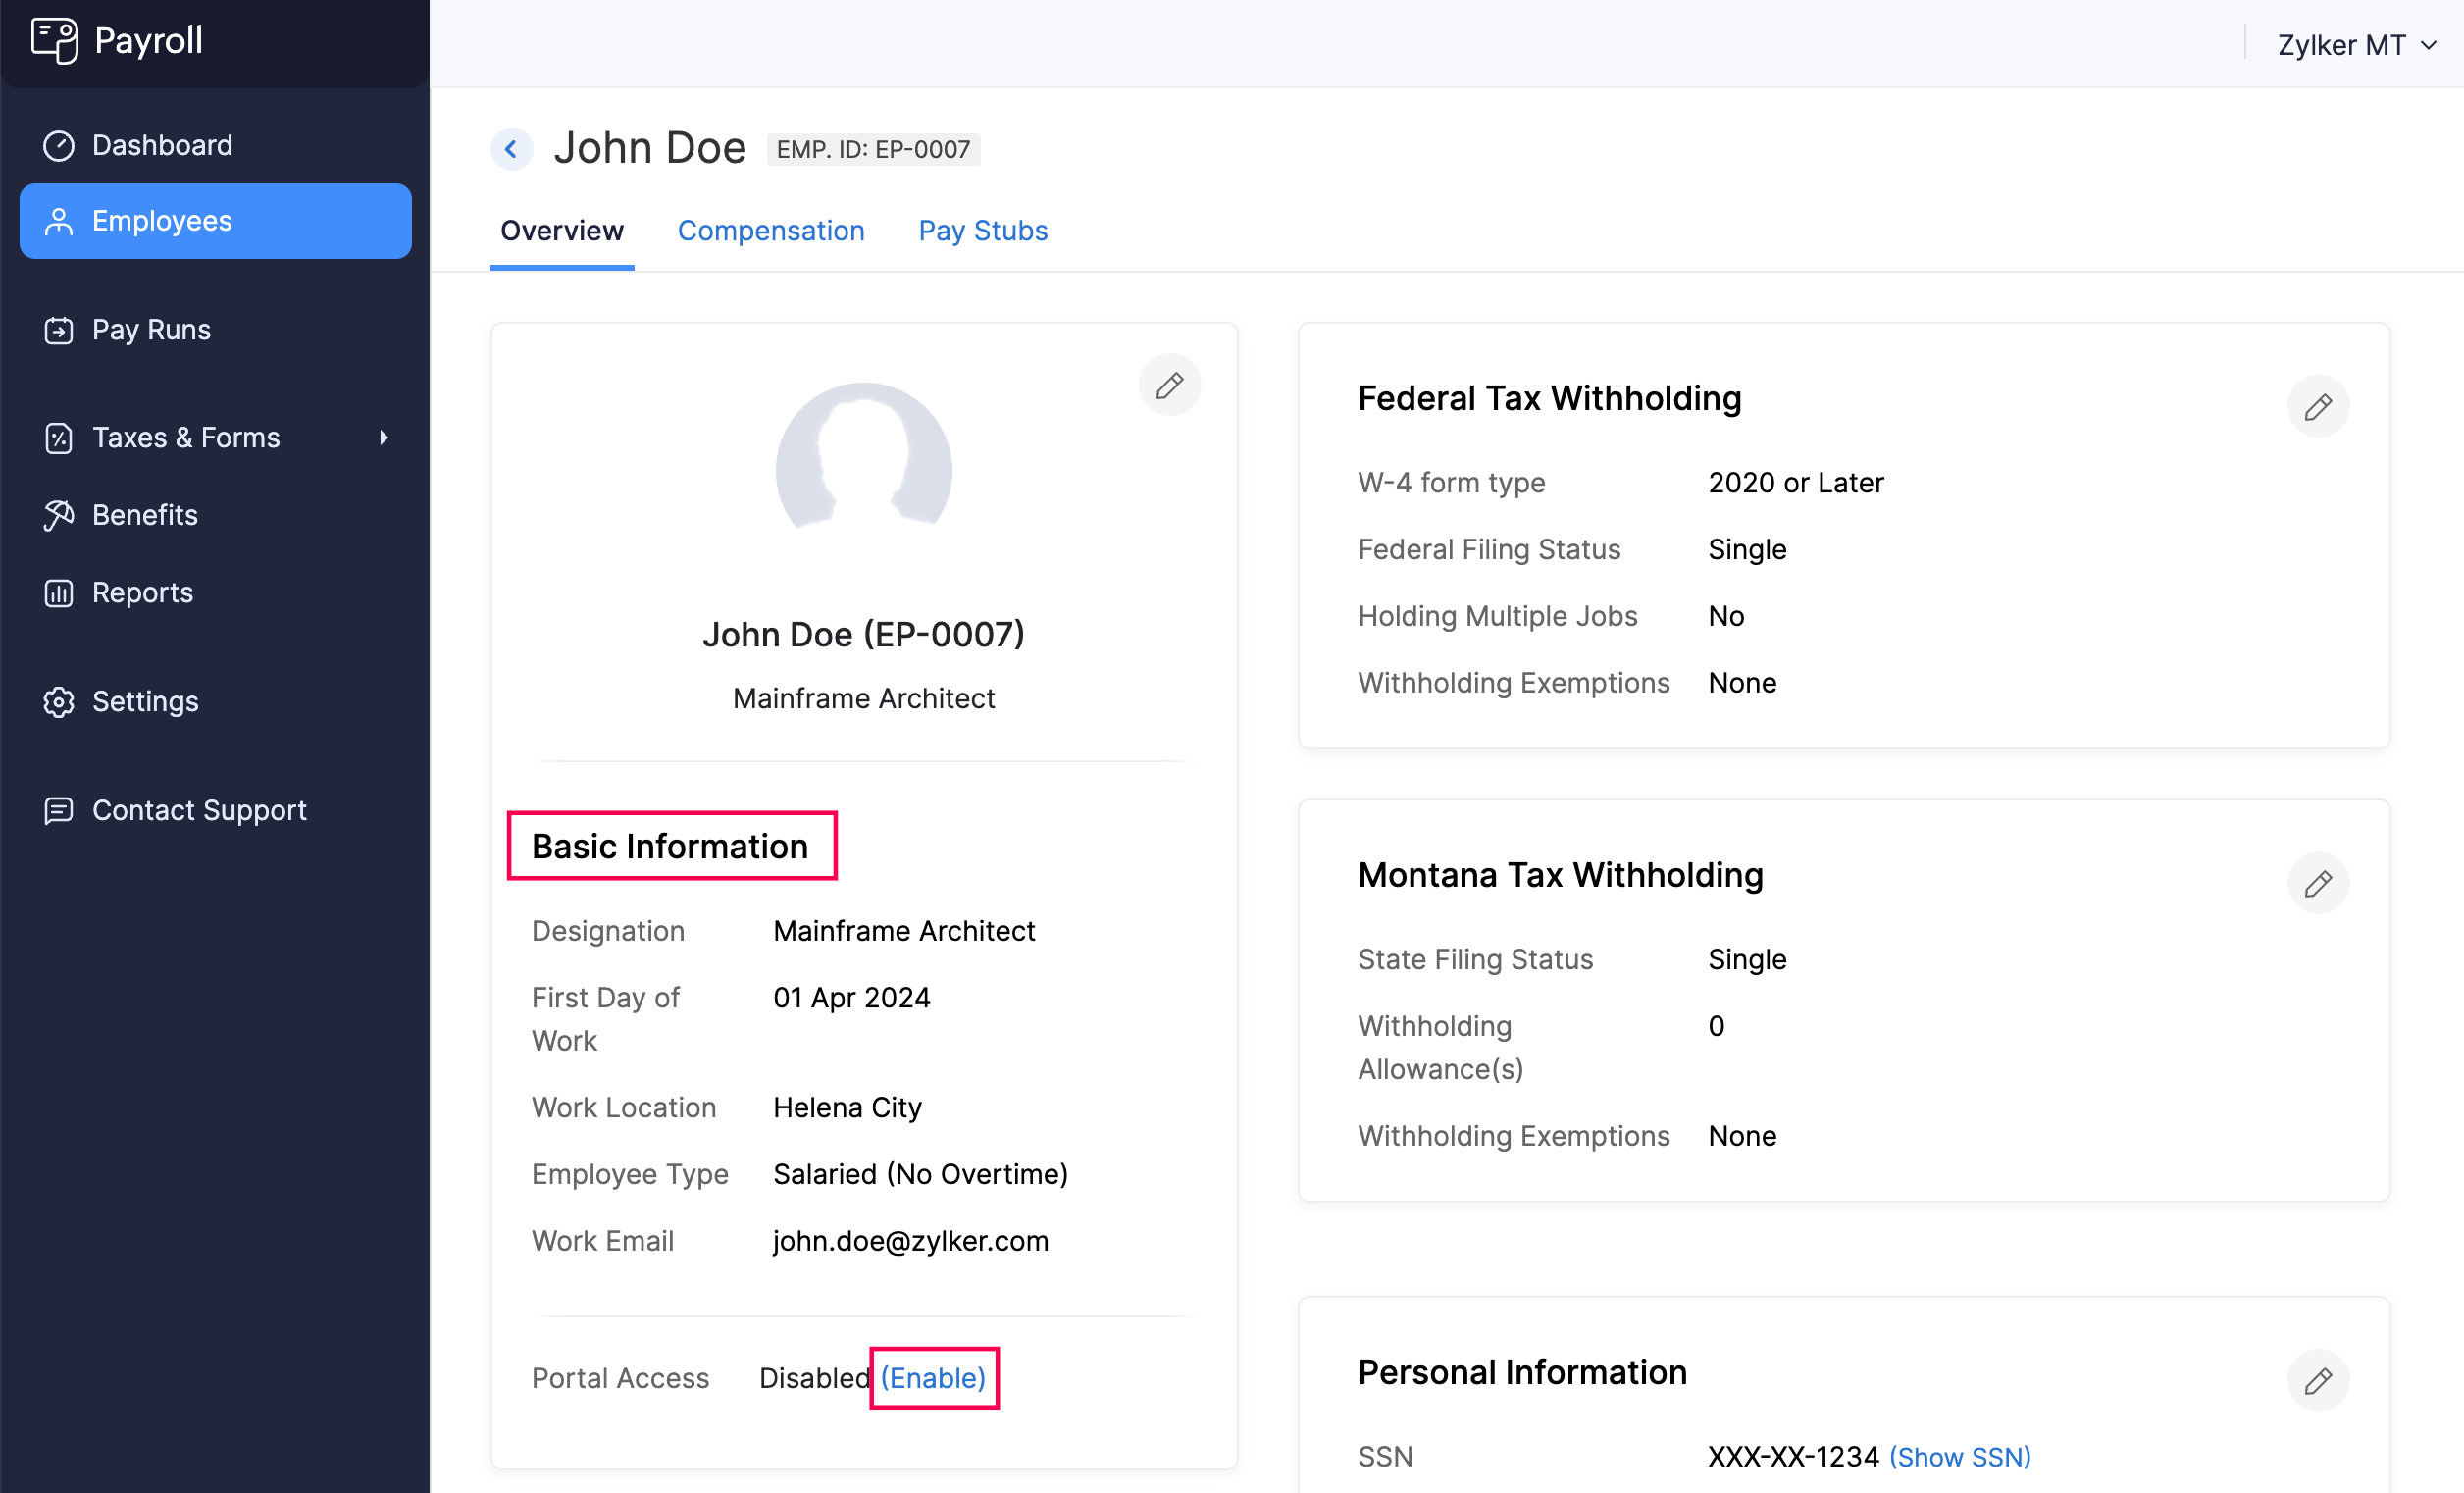
- In the popup that appears, click Yes.
An email invitation will be sent to the employee’s email address. Once the employee accepts the invite, they can access the Employee Portal.
PRO TIP You can resend the invite email to the employee by clicking Reinvite.
Disable Employee Portal for an Existing Employee
To disable portal access for an existing employee:
- Click Employees on the sidebar.
- Click the employee for whom you want to disable portal access.
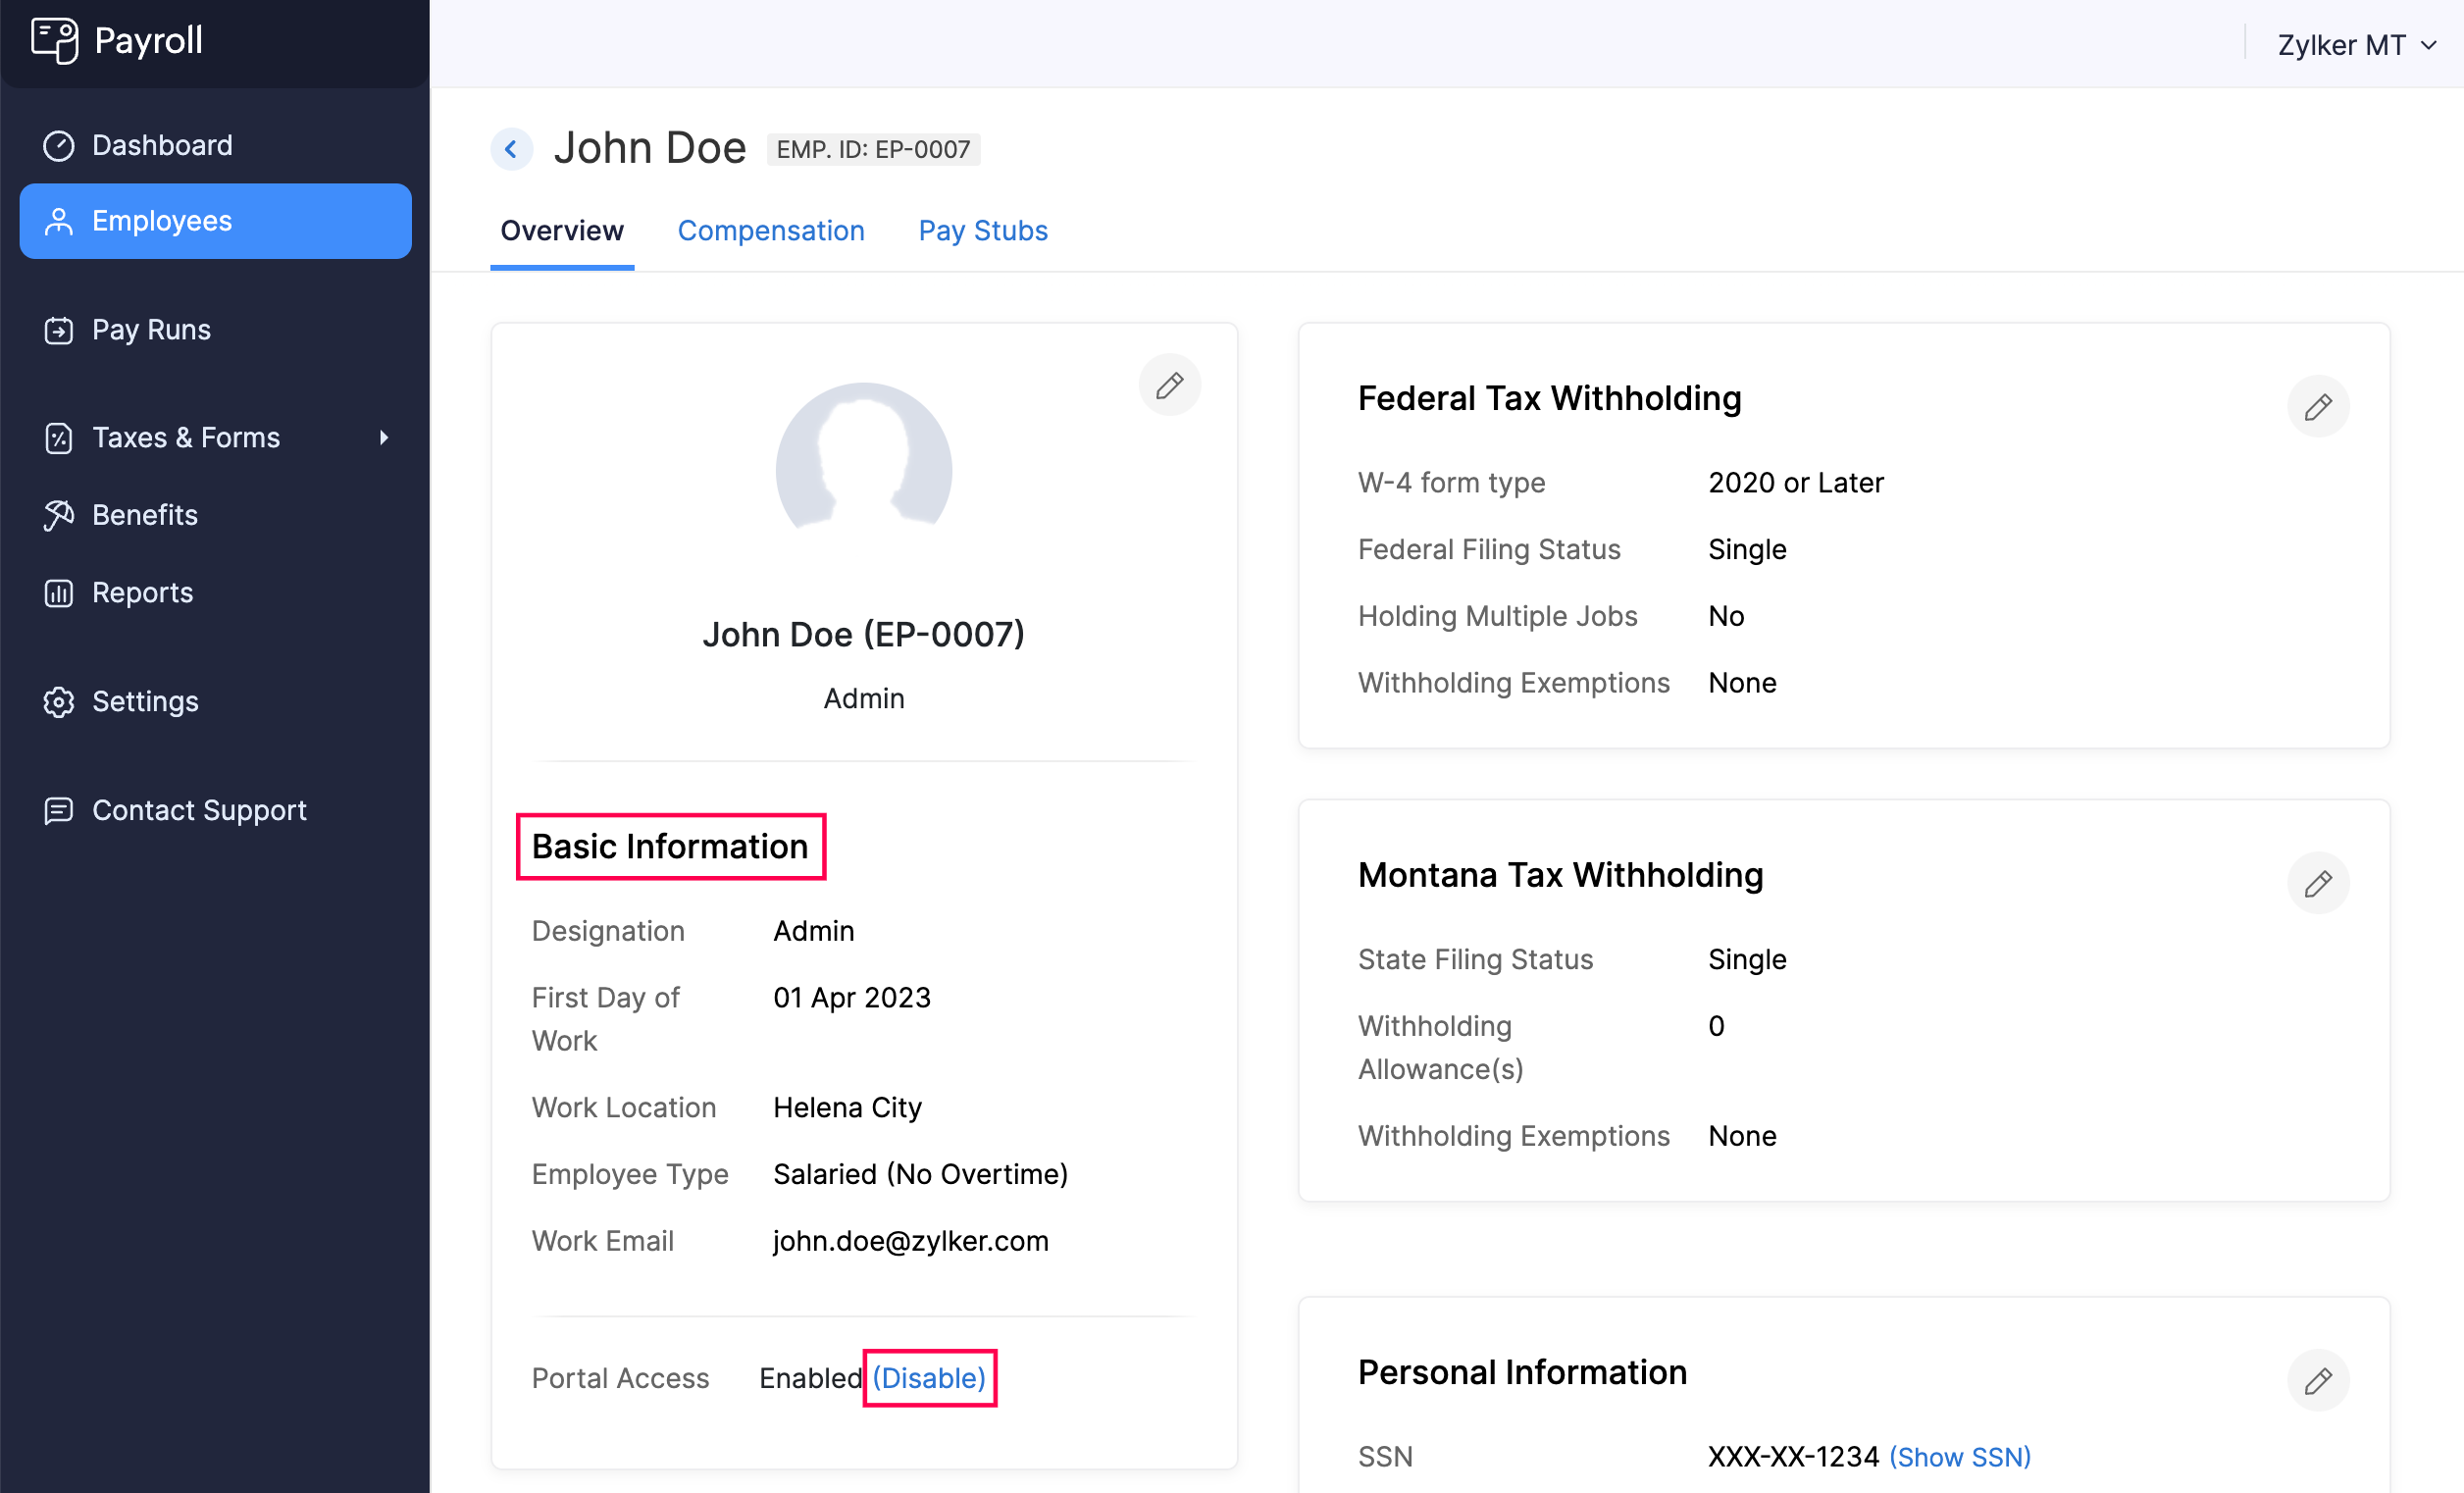
- Click Disable under Basic Information.
- In the popup that appears, click Yes.
The Employee Portal will be disabled for the employee.
Portal Contact Information
Employees will benefit from easy access to the contact information of your organization’s payroll team. This allows them to reach out with payroll-related questions or issues.
By default, the contact information of your organization’s super admin is displayed on the Employee Portal. Zoho Payroll allows you to add multiple contacts, but only one contact can be displayed at a time.
In this section, let us explore how to:
Display Contact in Portal
Displaying a contact information in the Employee Portal involves 3 main steps:
Add New Contact Information
WARNING Once you add the contact information, you cannot edit the email address later.
To add a new portal contact:
- Go to Settings and click Employee Portal.
- Click Manage Contacts under Portal Contact Information.
- Click + Add Contact.
- Enter the name and email of the new contact.
- Click Save.
The contact information will be added to your organization.
Verify Email Address
After adding a portal contact, you must verify the email address to display it in the Employee Portal.
To verify an email address:
- Zoho Payroll will send a verification link to the provided email address.
- Ask the owner of that email address to forward the email with the verification link to you.
- Once you receive the email, click the verification link. You’ll be redirected to the verification page.
- Click Confirm.
The email will be added as a portal contact to your organization.
Mark Contact as Primary
WARNING Marking a contact as primary will update the email address where you receive notifications from Zoho Payroll.
To display a contact in the Employee Portal:
- Go to Settings and click Organization Profile.
- Click Manage Contacts under Contact Information.
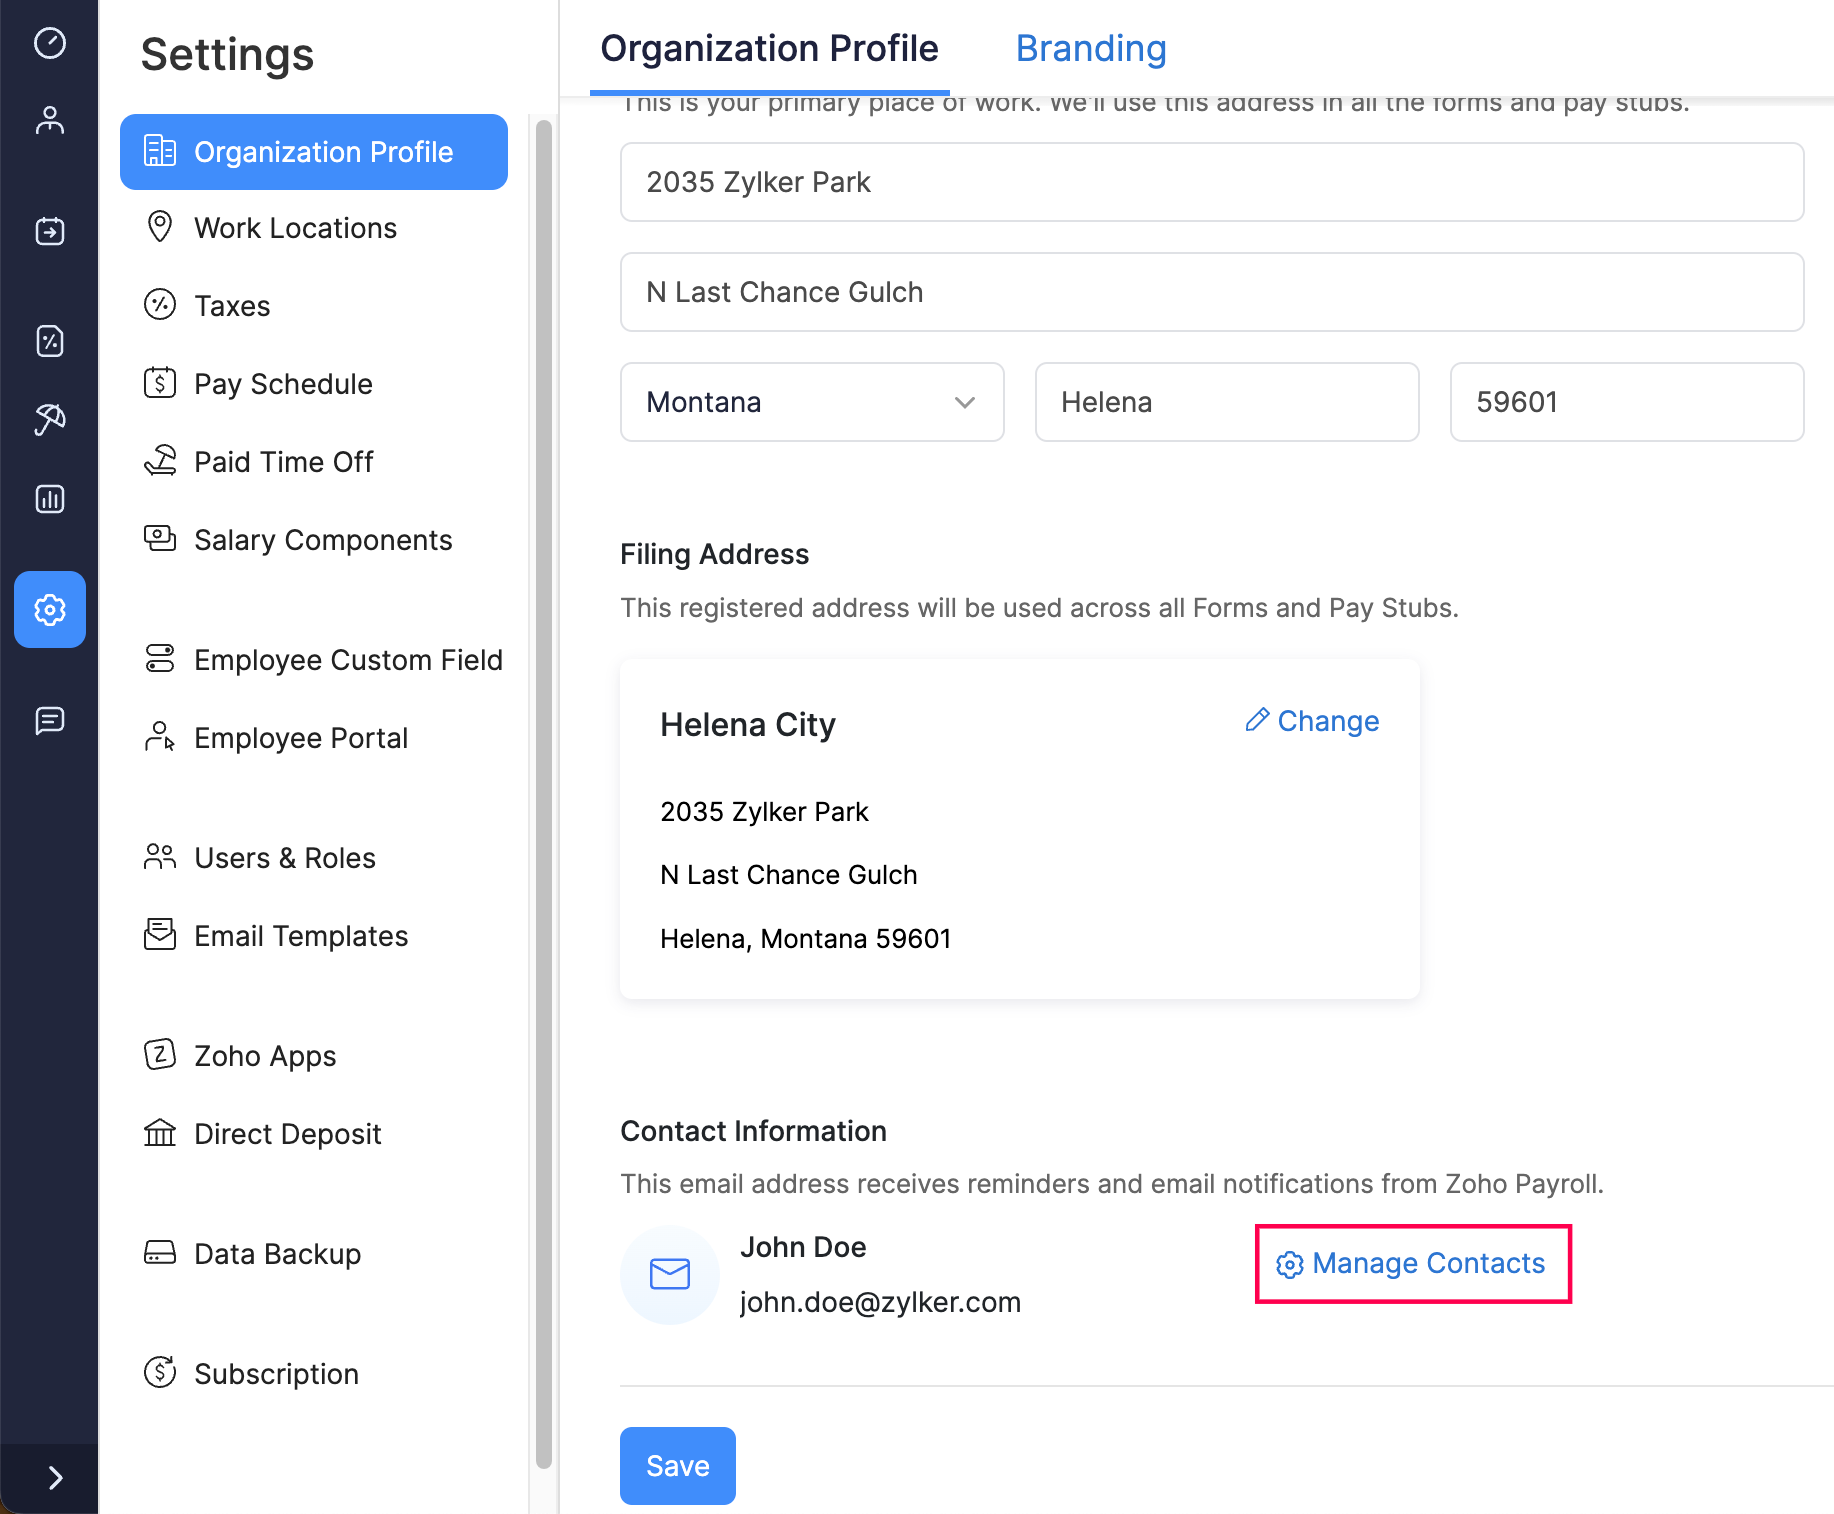
- Hover over the contact that must be displayed on the employee portal and click Mark as Primary.
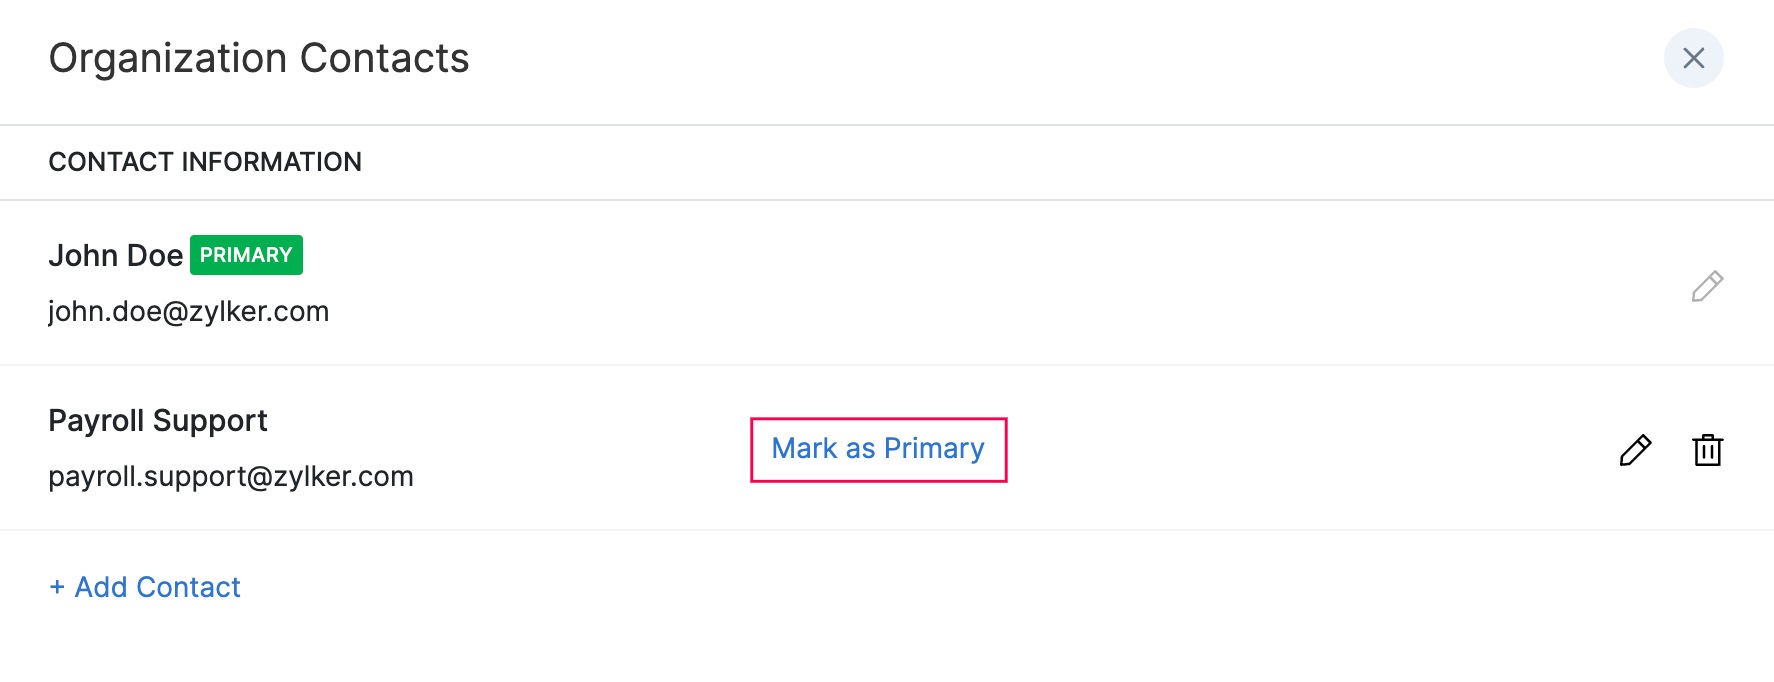
The selected contact will be marked as the primary contact and displayed as the payroll contact in the Employee Portal.
Edit Contact Information
NOTE You can edit only the contact name, not the email address. If you wish to edit the email address, add it as a new contact.
To edit the contact name:
- Go to Settings and click Employee Portal.
- Click Manage Contacts under Portal Contact Information.
- Click the Edit icon next to the contact you wish to edit.
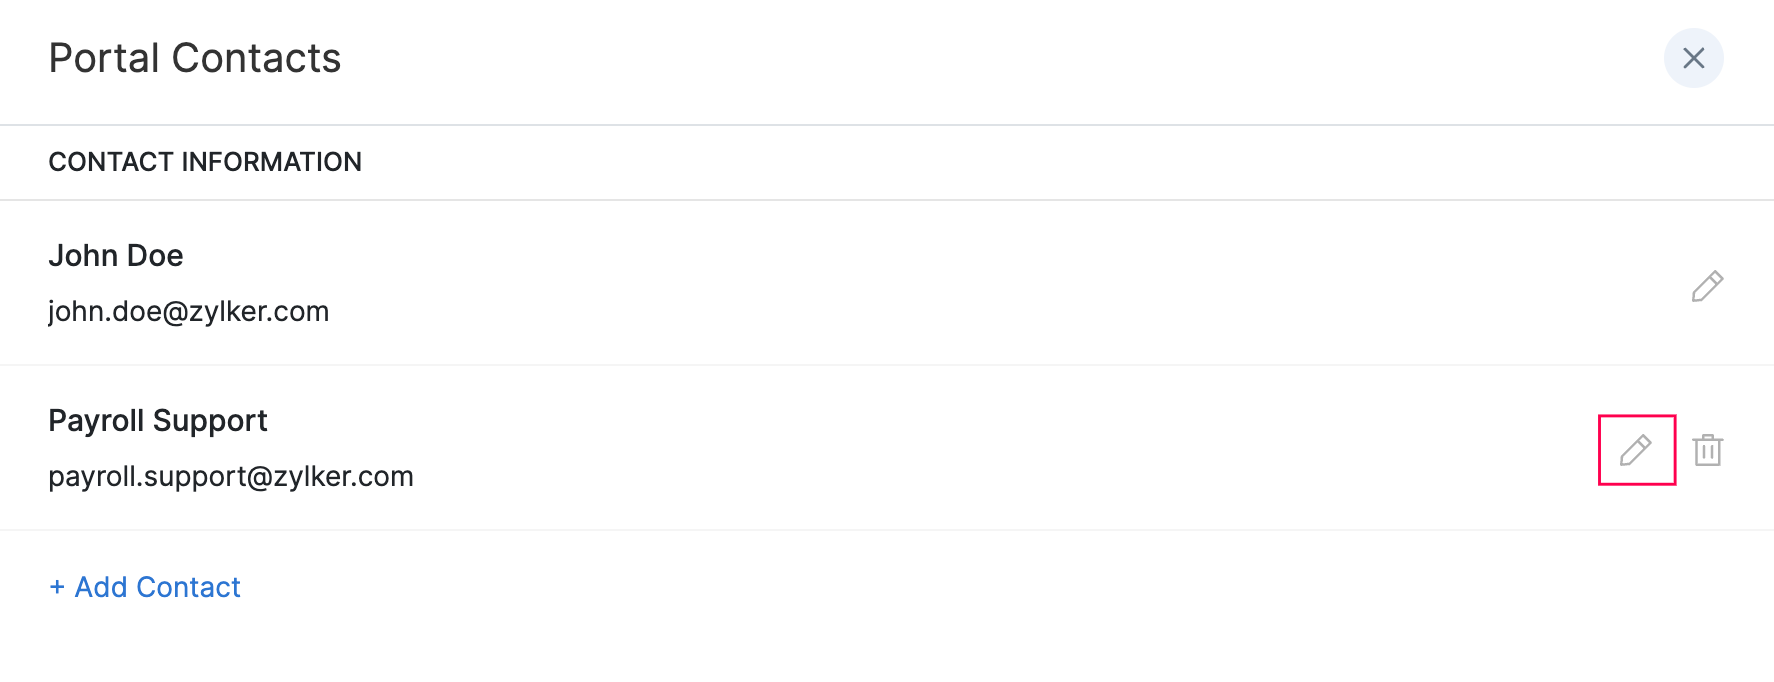
- Edit the name and click Save.
The contact name will be updated.
Delete Contact Information
If you no longer need a contact to be present in your organization, you can delete it.
PREREQUISITE The contact you wish to delete must not be marked as the primary contact in the Organization Profile section. Learn how to change the primary contact.
To delete a contact information:
- Go to Settings and click Employee Portal.
- Click Manage Contacts under Portal Contact Information.
- Click the Delete icon.
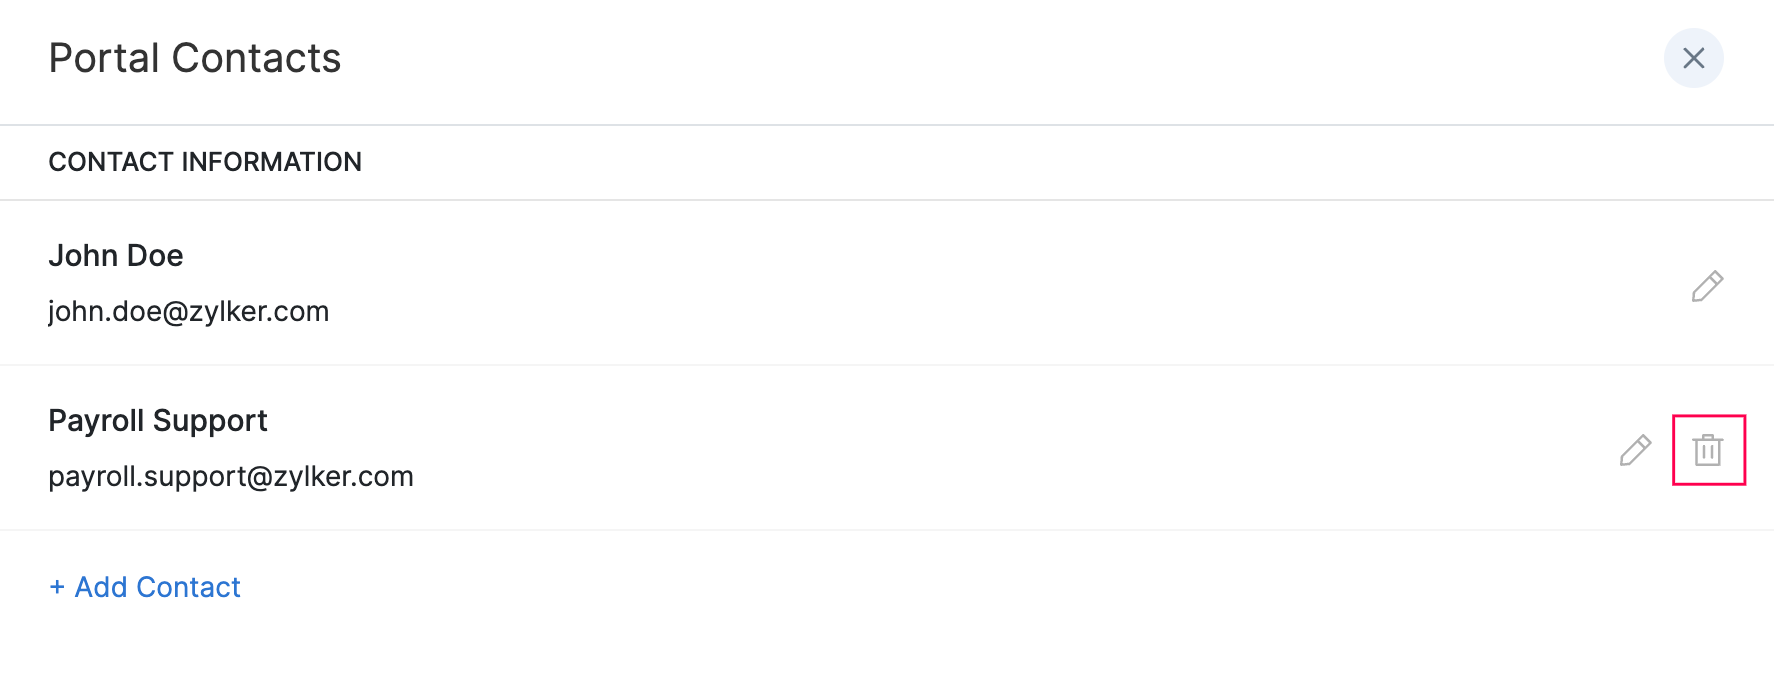
- Click Confirm.
The contact information will be deleted from your organization.
Banner Message
Use banner messages to inform employees about important updates and changes regarding payroll.
SCENARIO Zylker has revised the salaries for all its employees and wants to inform them. The HR department creates a banner message in Zoho Payroll that includes information about the salary revision. This banner message is prominently displayed on the Employee Portal’s homepage, ensuring all employees see it when they log in.
To display a banner message:
- Go to Settings and click Employee Portal.
- Enter the message in the Enter Banner Message field under Banner Message.
- Select a date until which this message must be displayed.
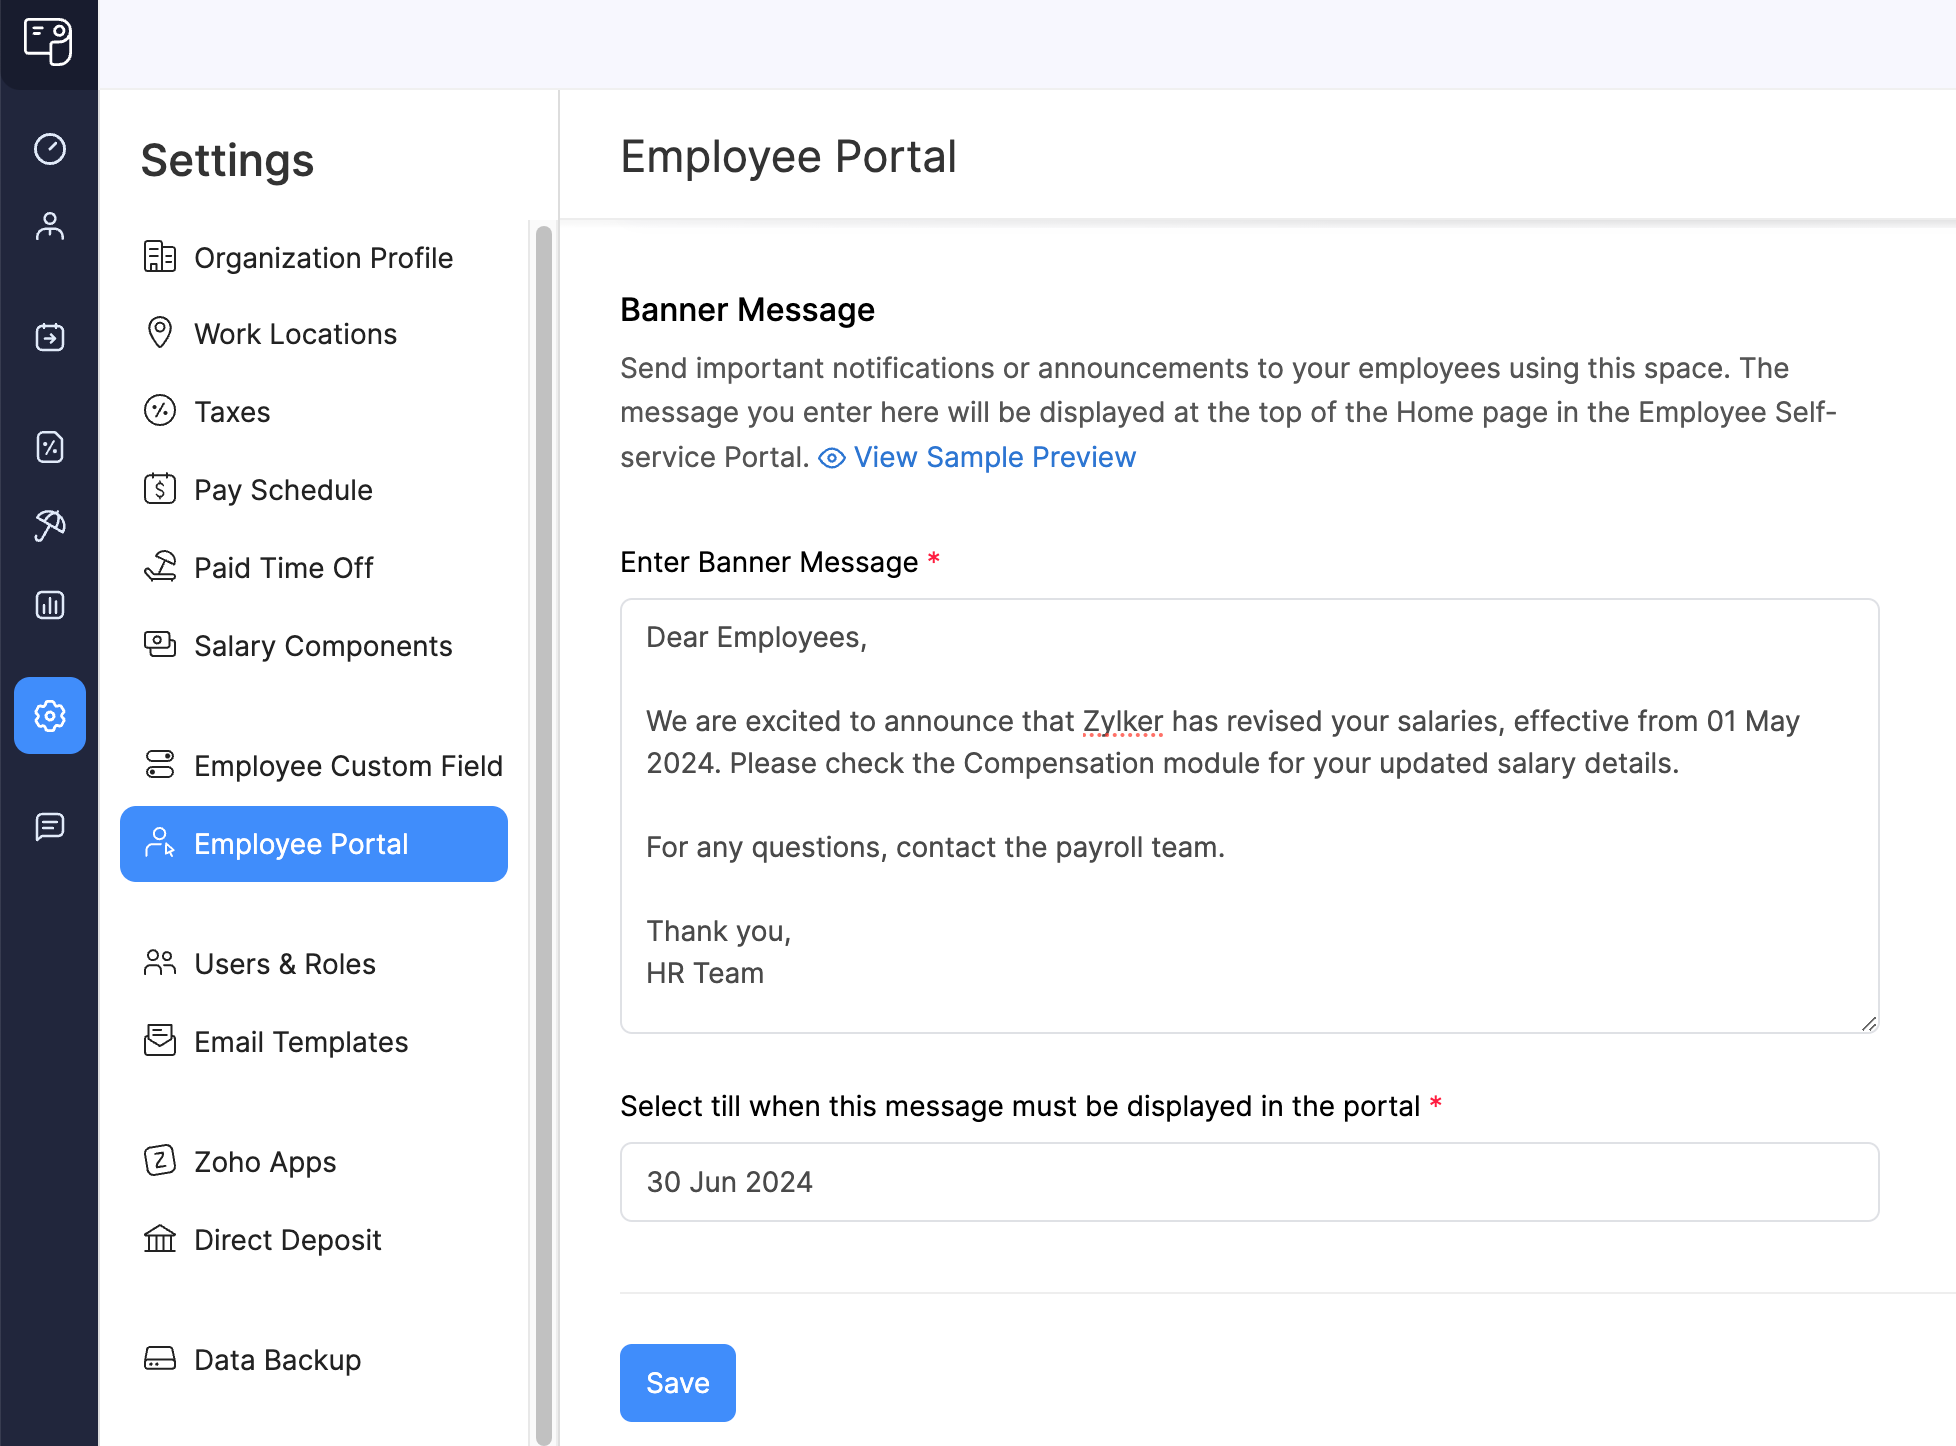
- Click Save.
The banner message will be displayed in the portal until the selected date.
Disable Employee Portal
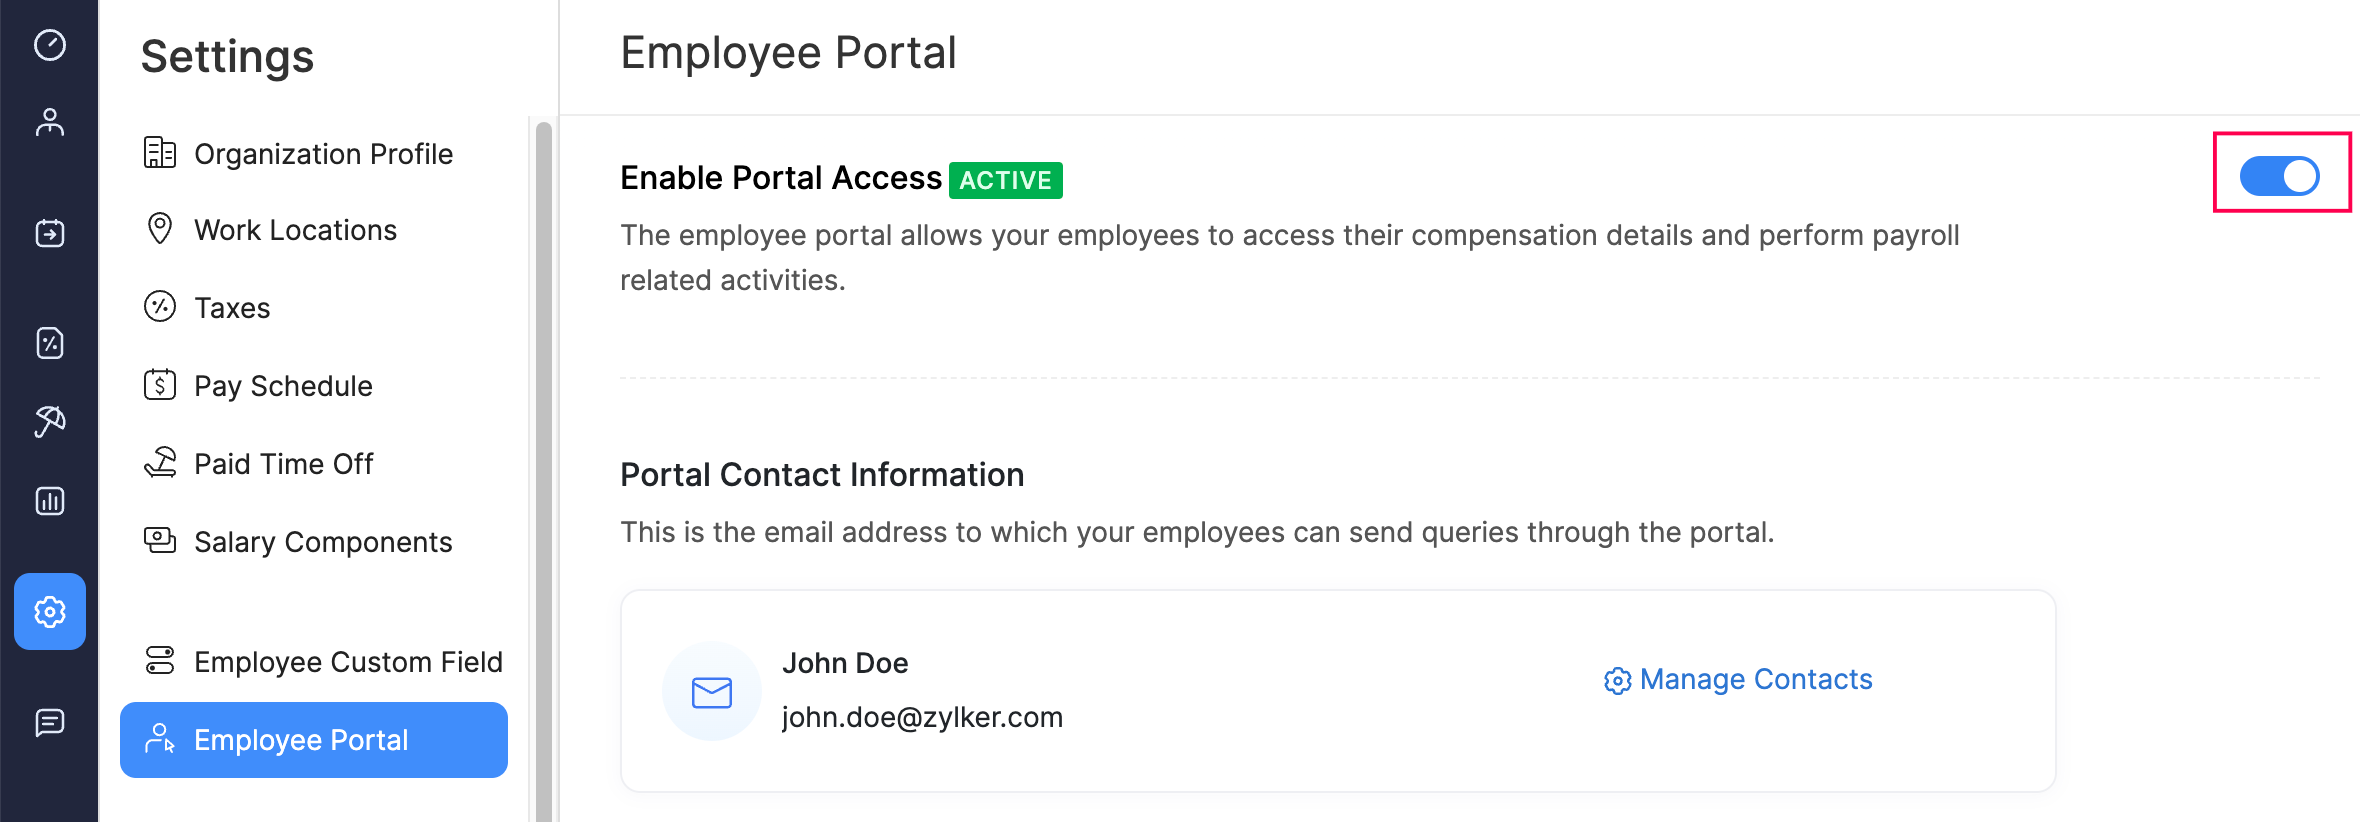
To disable the Employee Portal:
- Go to Settings and click Employee Portal.
- Toggle the Enable Portal Access option.
- Click Save.
- In the popup that appears, click Disable.
The Employee Portal will be disabled for all your employees regardless of individual preferences configured in their profiles. You can re-enable the Employee Portal at any time.
