Email account export/backup, recovery and retry emails
Zoho Mail provides options to export or backup users' emails, recover any deleted emails and also retry sending emails that have failed delivery. These options are available in the Admin console's Mail Settings menu.
Email Export
The super administrators or administrators can export the email accounts of their organization users either to comply with backup policies or to backup an account before an employee leaves the organization. In certain cases, when the mail account's storage gets utilized, the admins can backup emails from that account based on a specific period of time before deleting older emails to free up space in that account.
The Email Account export can be done for entire accounts or based on a specific period of time. The exported emails will be available in ZIP/PST format in the Admin Console for a period of 30 days from the date of export.
Export email accounts - Administrators
The entire account is generally exported when an employee leaves the organization, and the administrator has to backup the account before deleting the account or clearing the emails. The exported ZIP/PST files will have the exact folder structure that was available in the user account.
Only the emails that are available in that account at the time of export will be exported. The emails in the Spam/ Trash will not be included in the backup.
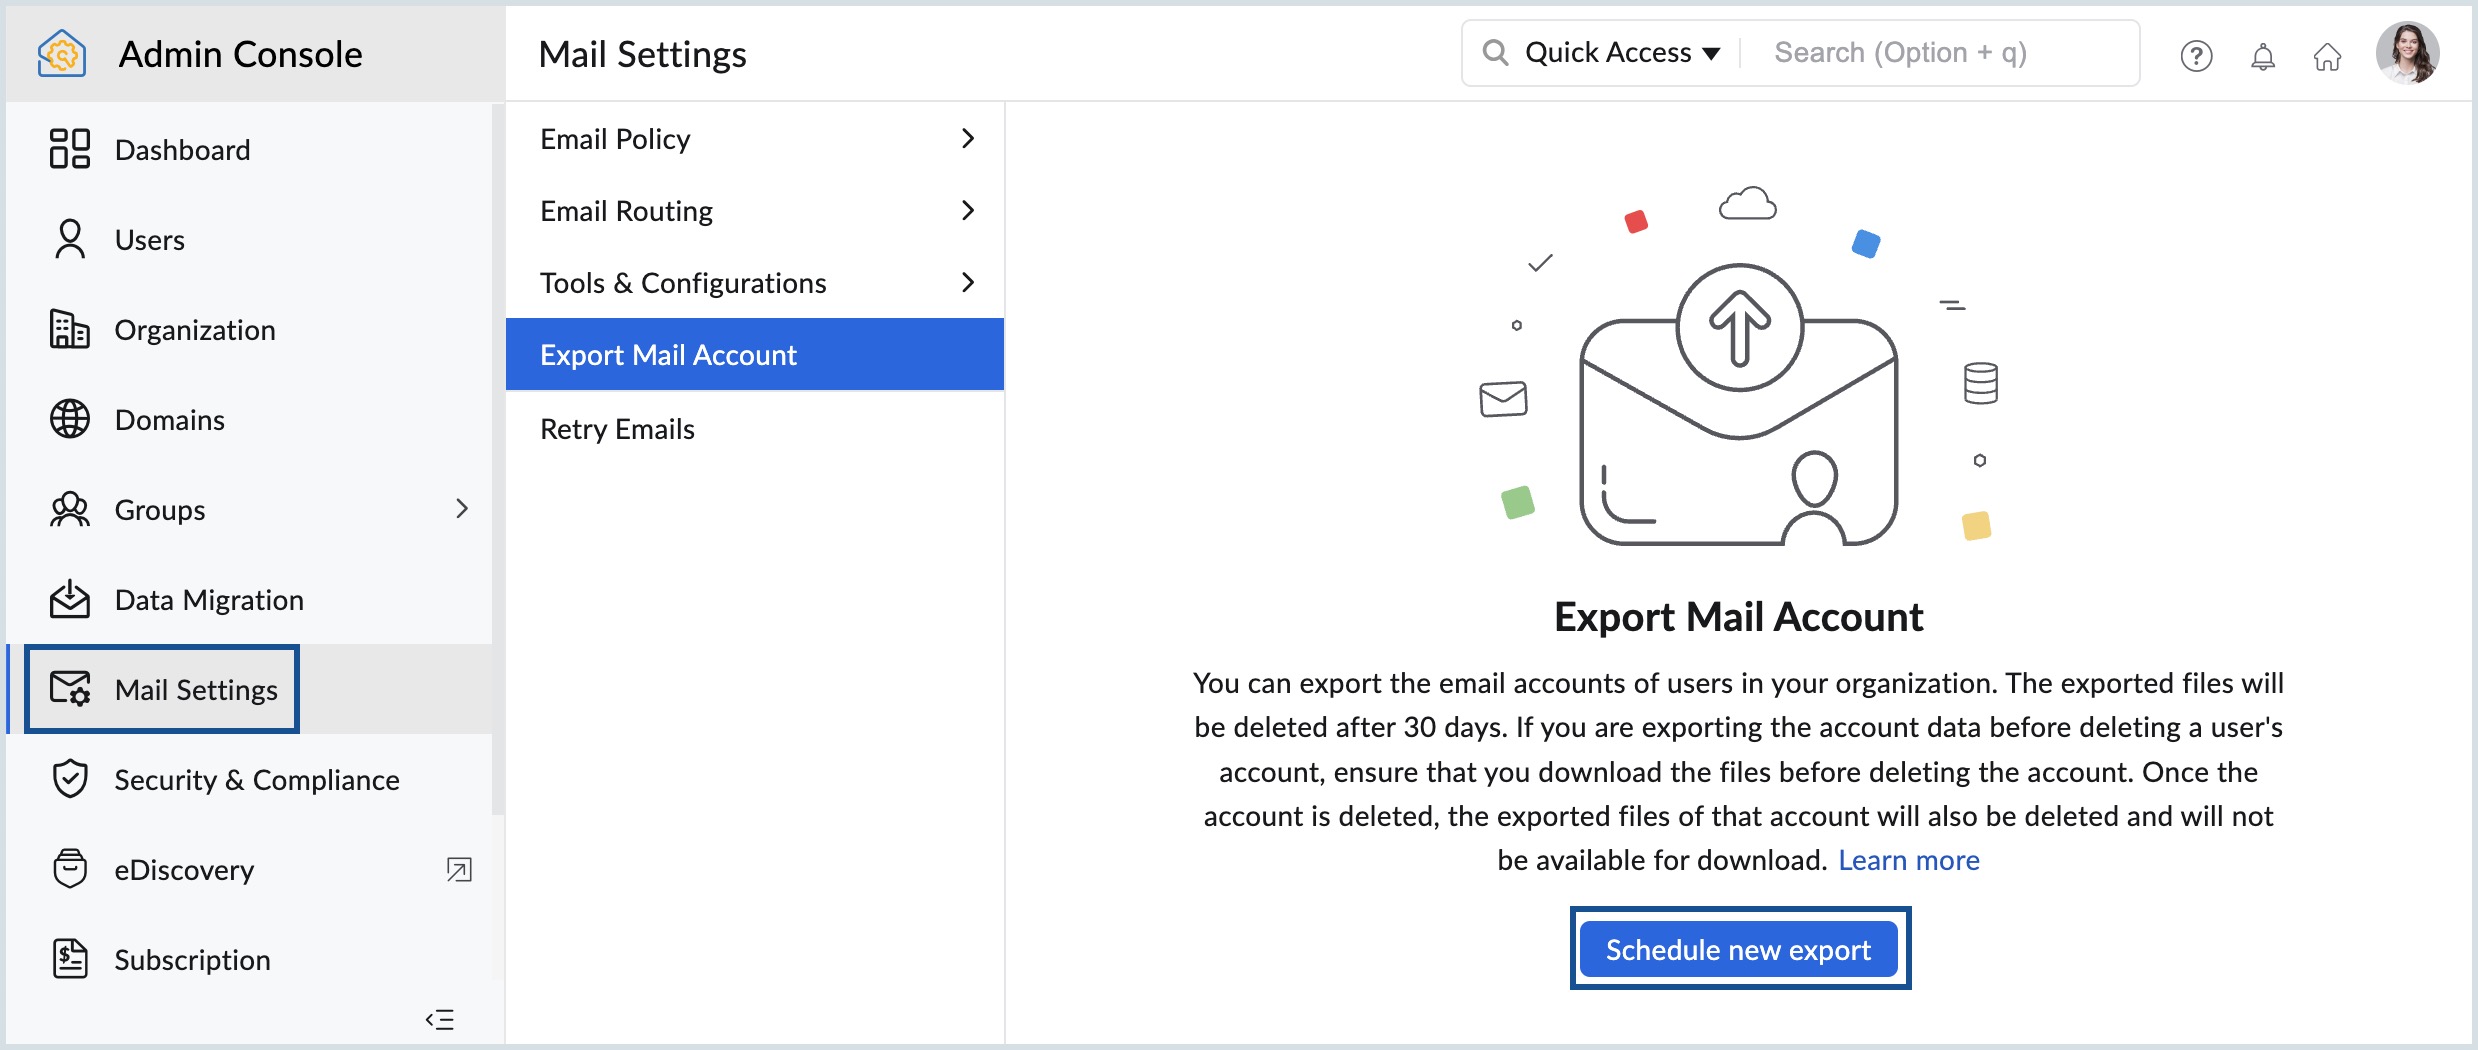
- Log in to Zoho Mail Admin Console.
- Navigate to Mail Settings and select Export Mail Account.
- Click Schedule New Export when you are scheduling exports for the first time. If not Click Add.
- Select the desired option to export the user account:
- Search and select users - Choose this option to add users manually.
- Add users via CSV - Choose this option to add bulk users via CSV to export their accounts. You can also add shared mailbox addresses in the CSV file and attach it here, to export the shared mailbox data.
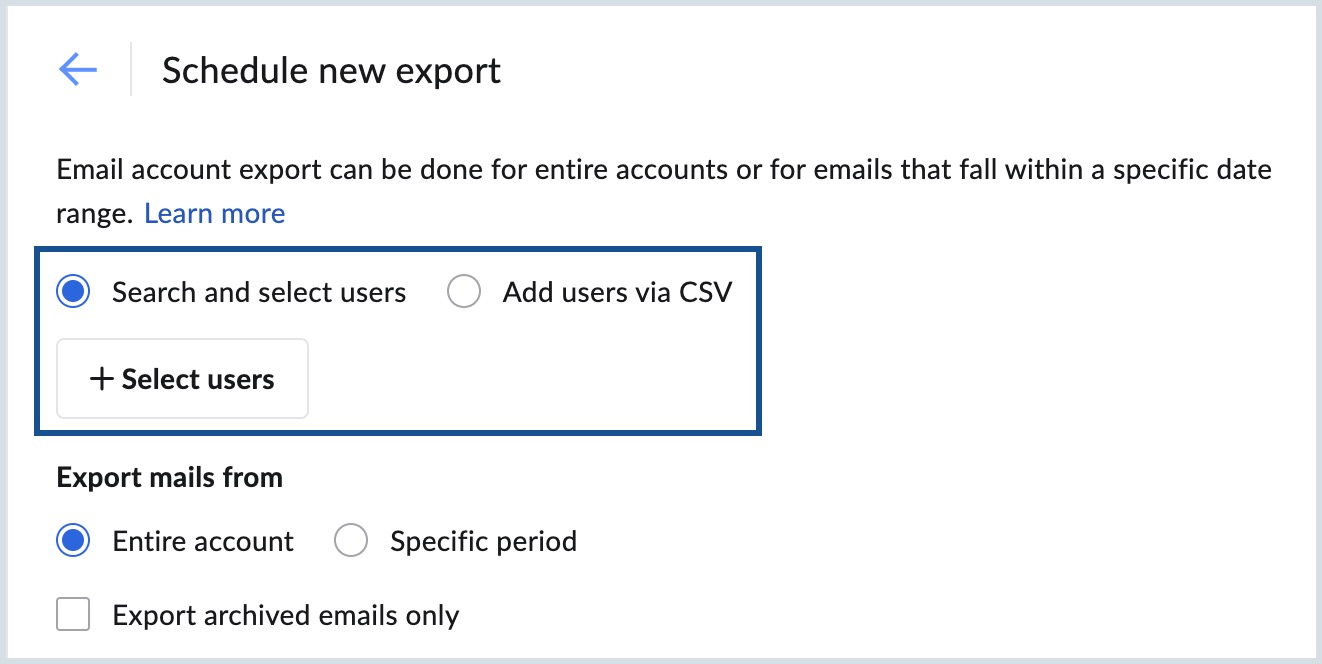
- If you selected Search and select users, click the Select users button to add the user mailboxes that you want to export.
- Click the add icon in the Add users dialog and click Submit.
If you selected Add users via CSV, click Choose file and upload the CSV file from your computer with the user/ shared mailbox addresses.
Note: You can download the sample CSV file from the pop-up dialog.- Select if you want to export the entire account, or emails that fall in a specific time period.
- Select Entire Account in the Export mails from field if you want all of the user's emails to be exported.
- Select Specific Period, and enter the time period for period-based export. All the emails that were sent or received during this time period will be exported.
- Select Export archive emails only if you want only the archived emails of the selected users to be exported.
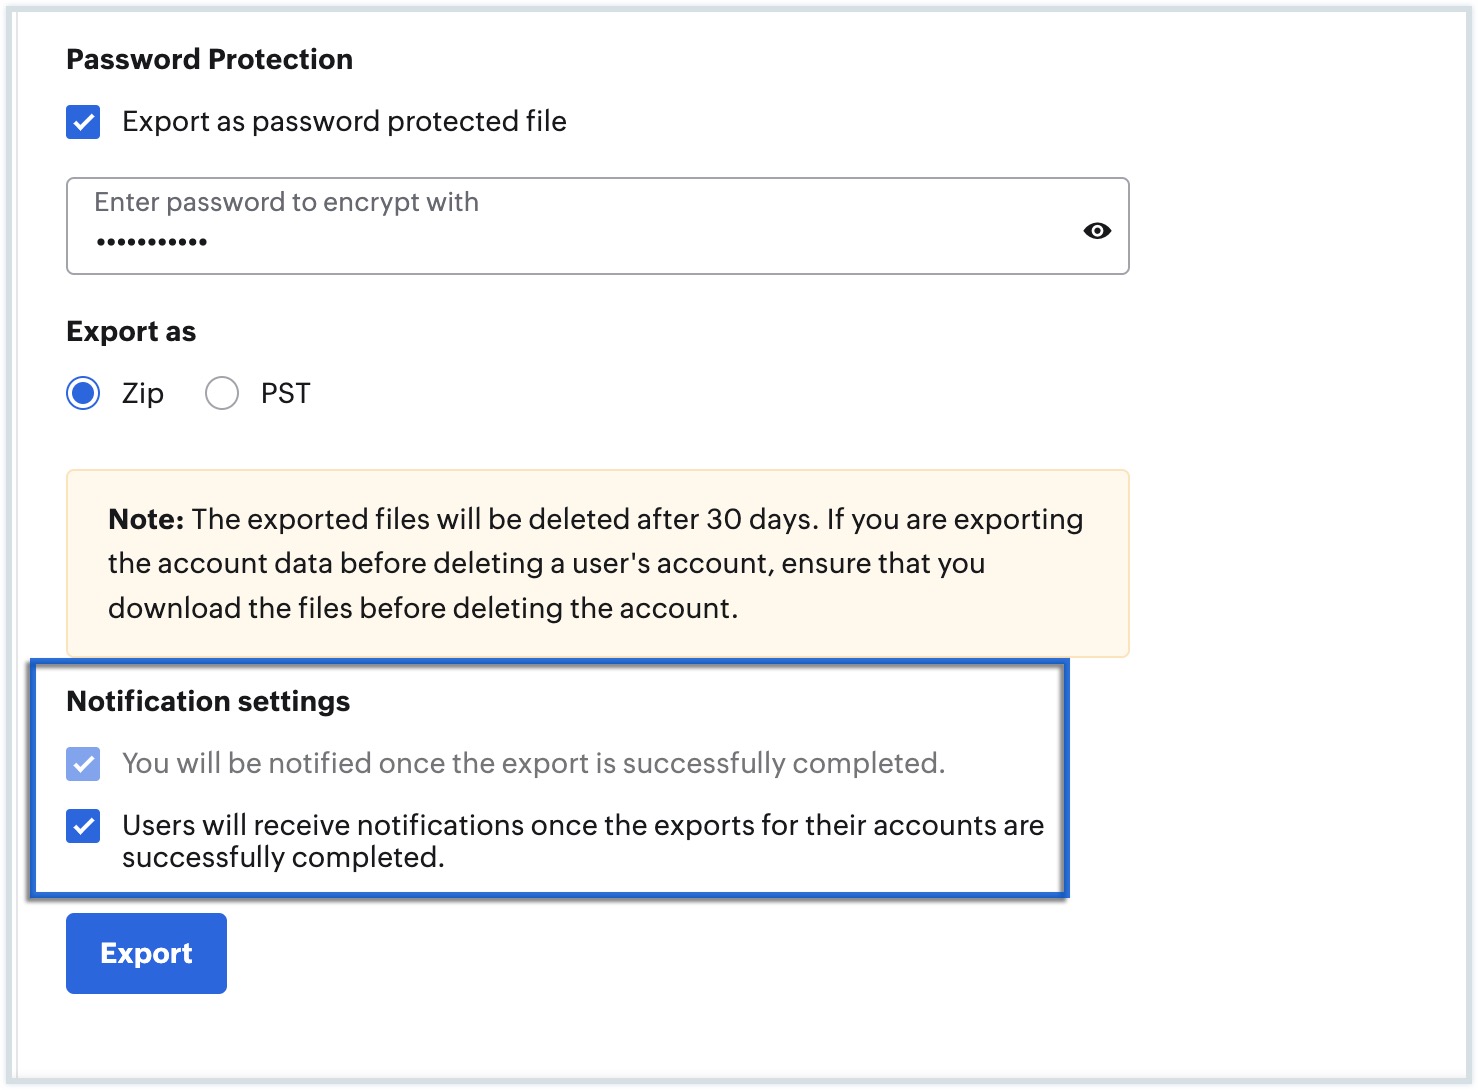
- Select Export as password protected file checkbox to secure the exported file, and enter the password for the file. This is an optional step and you can leave this checkbox unselected if you do not want password protection for your files.
Choose whether you want to export the data as a ZIP file or a PST file under the Export as option.
Note:
- The option to export data in PST format will be available only to select paid plans.
- If you want the option enabled for your organization account, please reach out to us at support@zohomail.com.
- Select the notification settings according to your preferences to get notified once the export is complete.
- Admin notification: By default, an email notification will be sent to the admin's Inbox with links to download the exported files. This default setting is in place to keep the admin informed promptly when the export is completed.
- User notification: Select this checkbox to send notifications to the users whose accounts the admin is exporting. The users will receive an email notification containing the export details along with links to download the exported files in the Notification folder of their inbox.
- Finally, click on Export to export the data of the selected users.
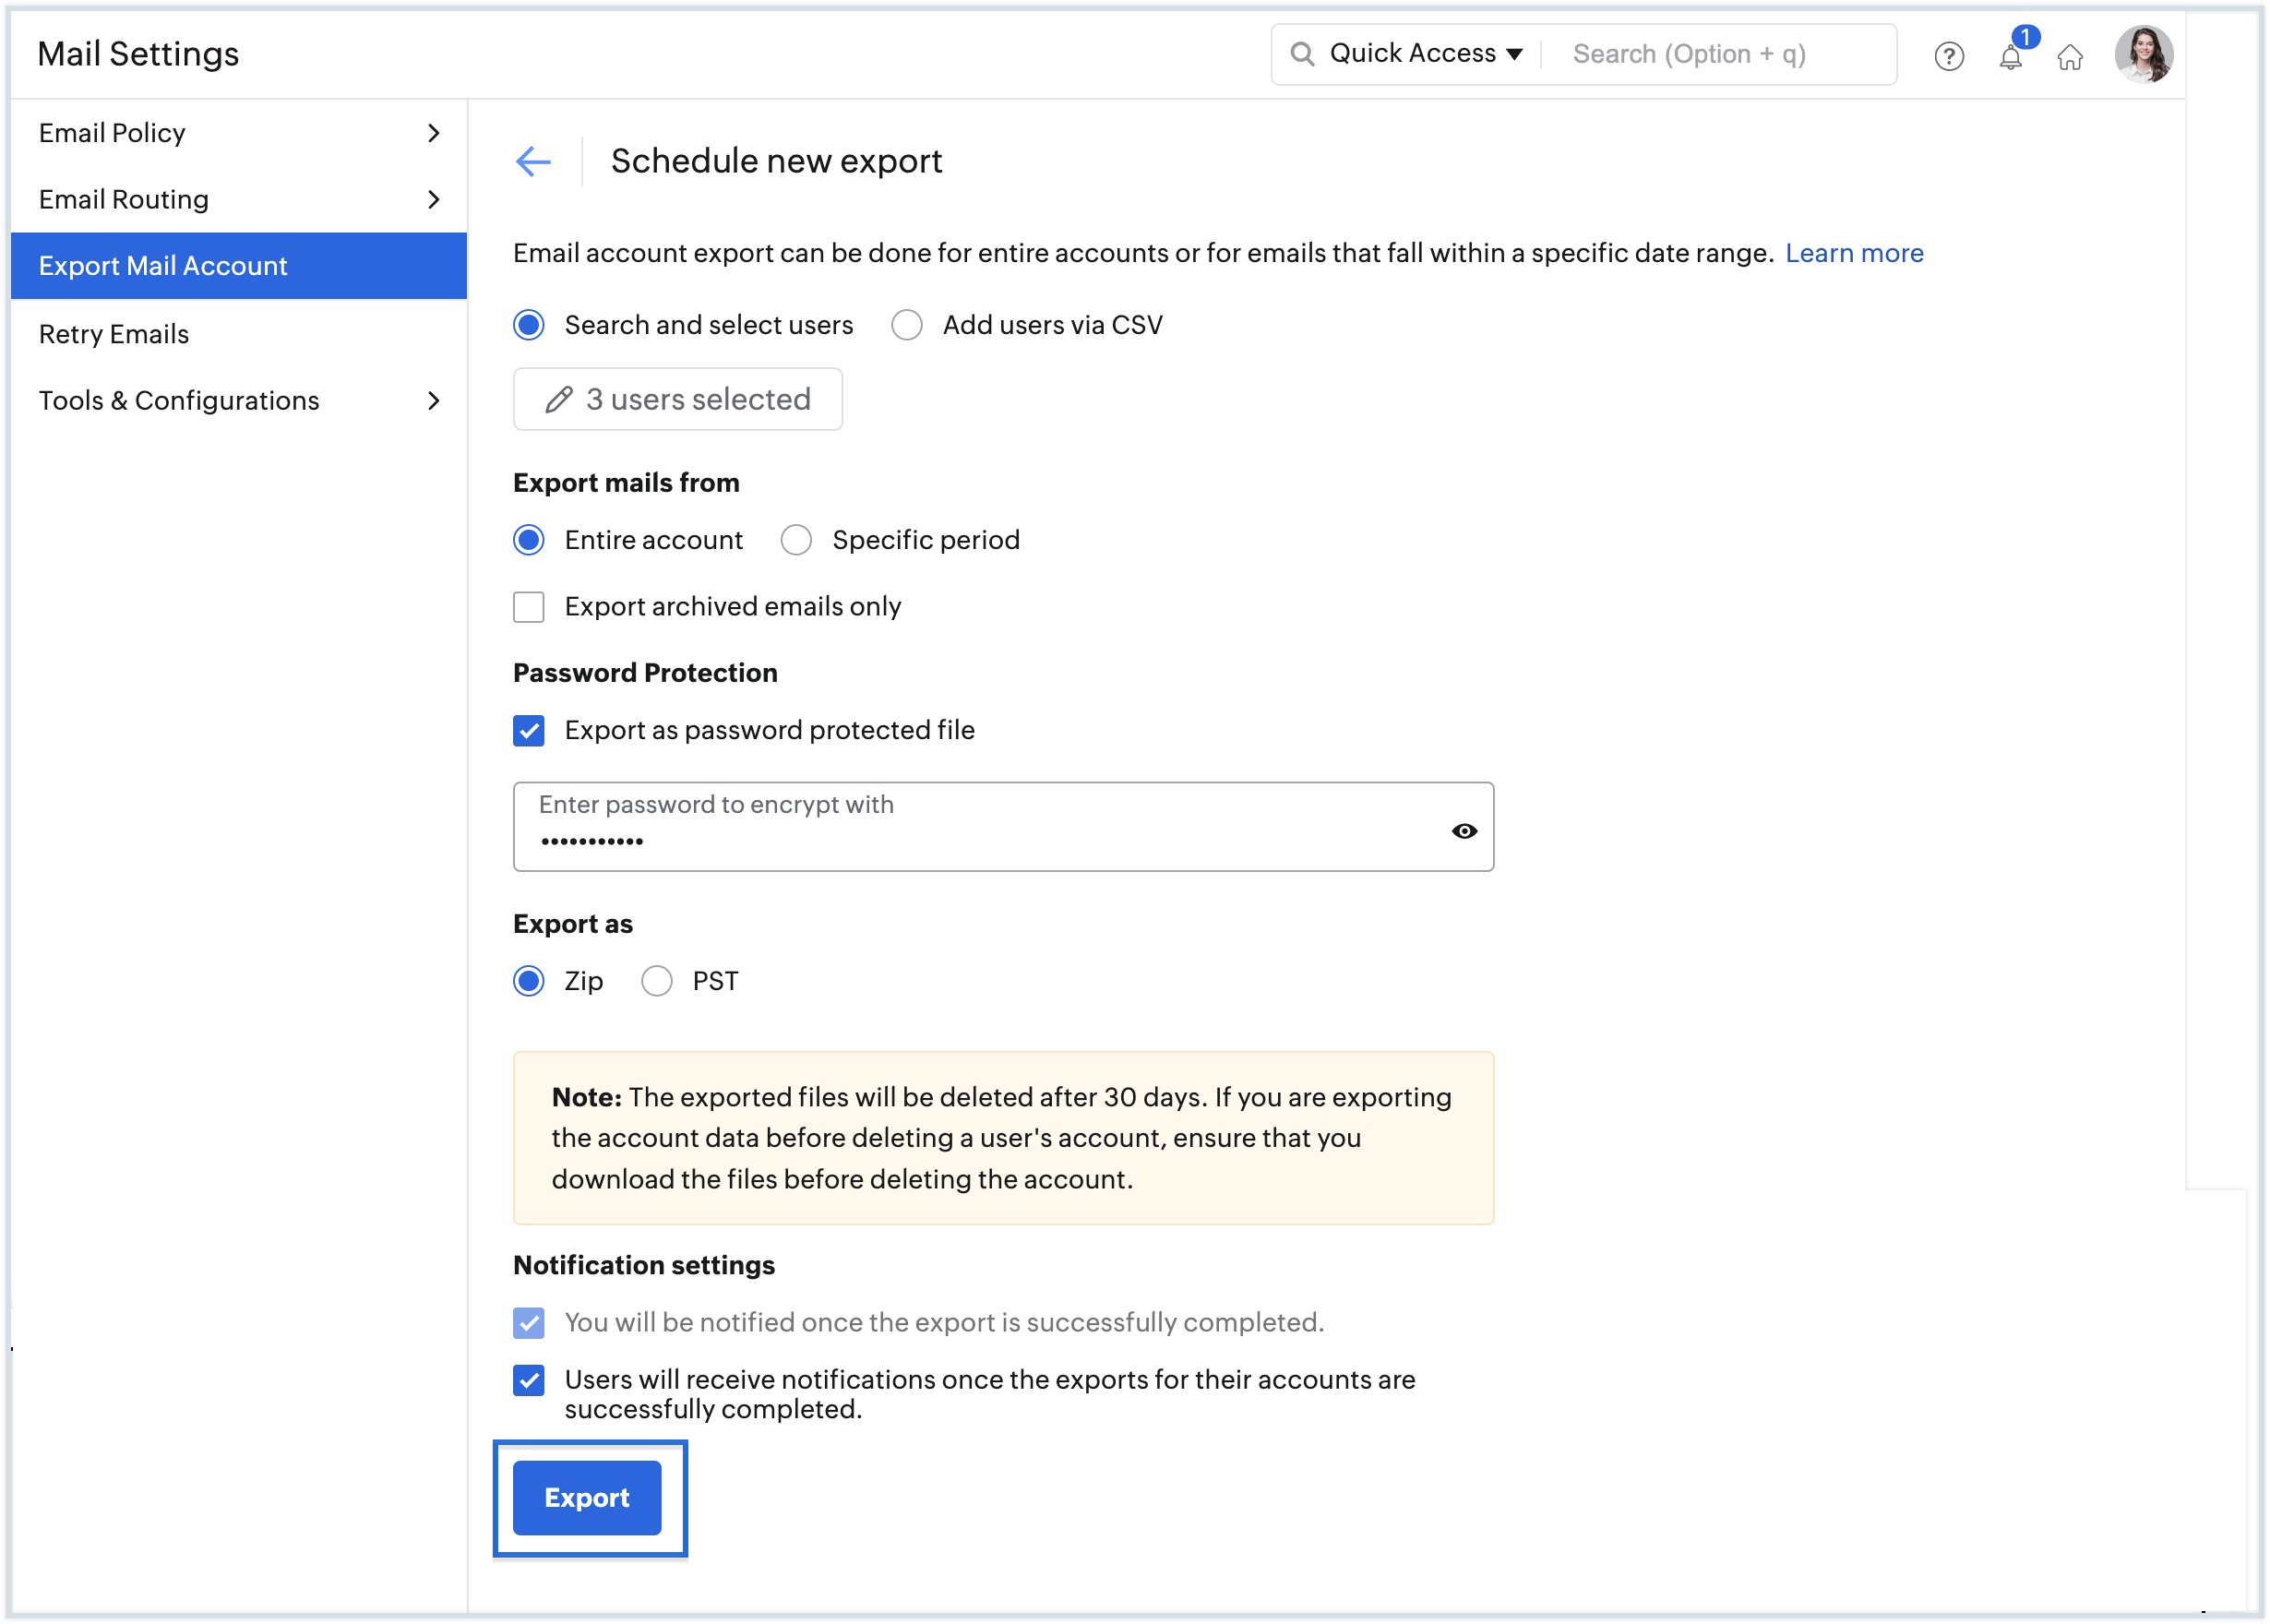
- Once you add the export, you will be taken to a listing where all the scheduled exports will be listed. Hover over the export and click the refresh icon to check the status of the export.
- Once the export process is completed, you will see a download link in the Status.
- Click the download link to view the list of files available for download for each account.

- To delete an export, hover over the preferred export and click the delete icon.
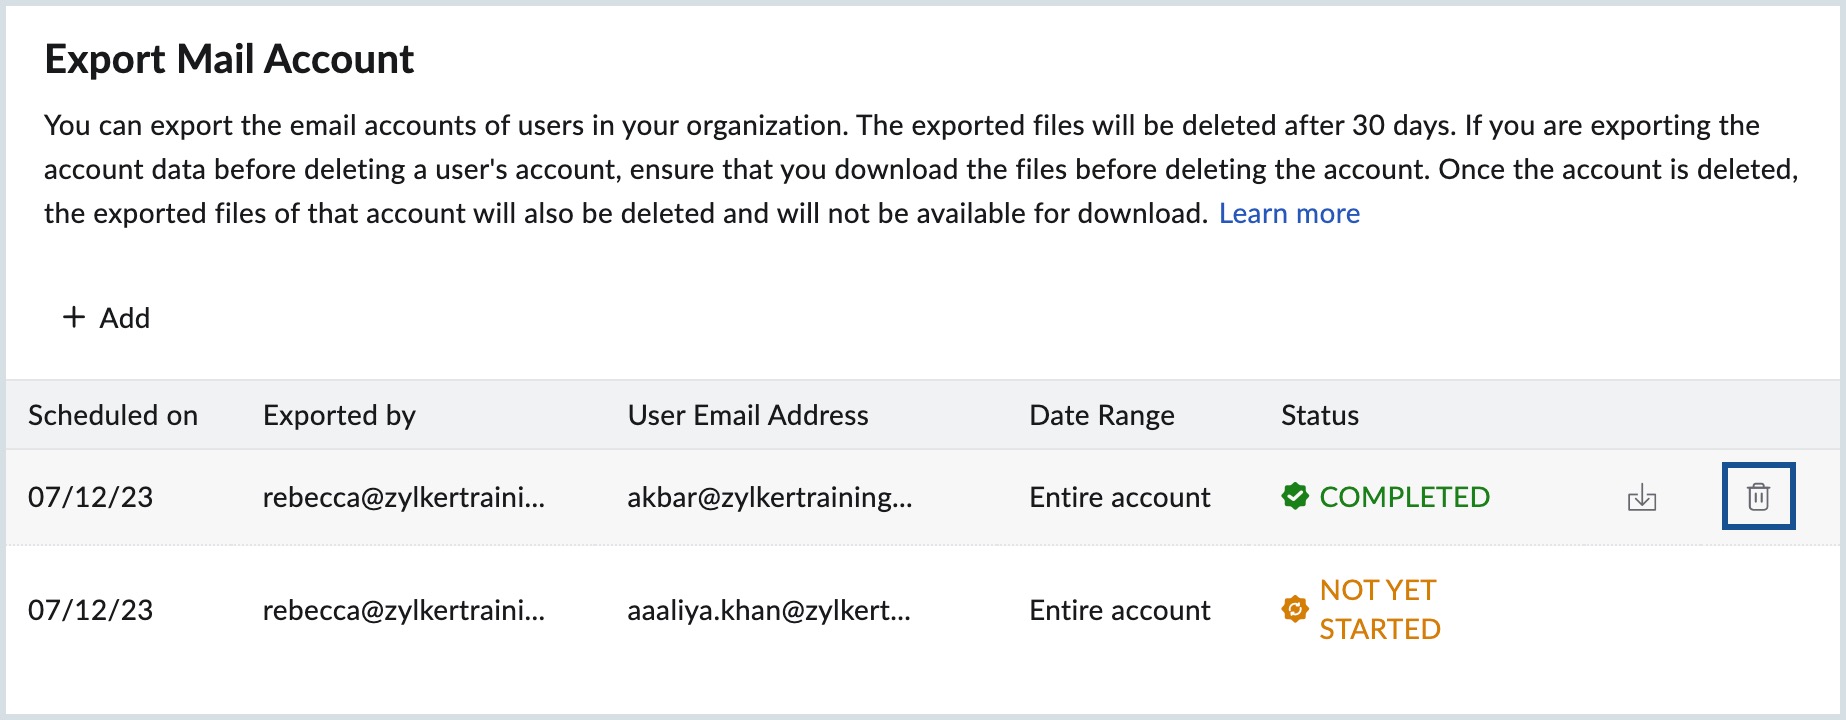
Note:
- Make sure to download the exported file before deleting the export from the admin console. Once the export is deleted from the list, the user or the admin won't be able to download the exported file from the email sent to them.
- Also ensure that the exported ZIP/PST files are downloaded before deleting the user accounts. It is always advisable to download the exported file before deleting the user account to avoid data loss.
- The exported data will only be available for 30 days from the date of export.
- A maximum of only 50 users can be exported at once in the ZIP file format. Similarly, you can only export a maximum of 10 users at a time in the PST file format.
- The export data will be split into multiples of 500MB for ZIP files and 2GB for PST files when the data is large.
Folder-specific export - User Backup
Users can log in to their own accounts at mail.zoho.com to export emails in a particular folder or a set of folders. The options to export the emails in their account are available under the Import/ Export section in the Settings. However, the administrator can restrict the email export by specific users using the Access Restrictions section of Email Policy.
Backup via Email Forwarding
You can use Incoming Email Forwarding and Outgoing Email Forwarding to save a copy of the email that arrives to the account and the emails that are sent from the account. You need to create two user accounts in your organization exclusively for this purpose. Ex: backup.in@yourdomain.com and backup.out@yourdomain.com.
You can forward all incoming emails to the backup.in account by configuring Email Forwarding from the Admin Console.
The outgoing forward is mainly based on the outgoing forward policy. You can create an outgoing forward policy and configure backup.out@yourdomain.com as the account to be used to maintain a copy of outbound emails. Then you need to apply the policy to the users, for whom you want to have a backup of the outbound emails. For more details, refer to our Forwarding Restrictions help section.
When you configure multiple accounts to be forwarded to a single account, make sure that the 'Backup' accounts have sufficient storage to handle the volume of emails.
Email Recovery
The email recovery option lets you recover emails that have previously been deleted by users from their respective email accounts. This feature is especially useful in cases where an employee has left the company, and the emails have been deleted by them, but they need to be viewed for some reason by the org admin. The admin can choose to recover all the deleted emails for a selected employee, in the specified period. Follow the steps below to recover the required emails:
- Log in to Zoho Mail Admin Console.
- Go to the Security & Compliance menu, and select Deleted Email Recovery.
- Click Add Recovery for the first time and Add for subsequent email recovery.
- Click Select users and choose one or more users whose emails you'd like to recover.
- In the Select recovery duration dropdown, choose the time period within which emails need to be recovered from the specified accounts.
- In the Recovery destination folder option,
- Select the Same folder if the emails need to be recovered to the folder(s) in which they were previously present.
- Select New folder if they need to be recovered to a new folder, and enter a name for this folder.
- Select the Recover deleted spam folder emails also checkbox if you want spam emails that were received in the specified duration to be recovered too.
- Now, click Add Recovery.
- Once you schedule the recovery, you will be taken to a listing where all the scheduled recoveries will be listed. You can check the status of any email recovery here.
- Click the Recover deleted emails option.
Email recovery is applicable to both the received and sent emails. The status of completion, the size of recovered emails and other such details can be viewed in the email recovery listing. You can also use the Filter option provided to view email recoveries based on the completion status.
Retry Mails
When emails are sent from your account, in case the recipient server does not accept the emails due to temporary errors, such emails will be moved to Retry queues. The emails will not be bounced back to senders for temporary errors (451.x.x). The mails sent from the domain to external mail servers may sometimes be bounced due to some temporary errors in the recipient servers. Such emails will not be bounced to senders but will queue up in the Retry Mail list. The sender will receive an email with the reason, after 4 hours.
"Message sending has temporarily failed and would be tried for another x days. Message will be permanently failed if all the attempts are unsuccessful."
The emails will be automatically tried at a predefined interval automatically.
The administrator can view such emails in the retry queue, validate the headers and also remove the retries if required. The list will have the information of the sender, recipient, Last retry time, Reason for delivery delay and also header information. The administrator can manually retry sending by selecting the messages and using the Retry option.
The option is useful when emails to a particular valid domain get bounced due to a temporary server issue at the recipient end. In such a case, the administrator can select all the emails addressed to that domain and Select Retry Sending, which would avoid emails bounced back to the senders.
- Log in to Zoho Mail Admin Console.
- Go to the Mail Settings menu, and select Retry Emails.
- All the emails that are awaiting retry will be listed here, along with the recipient address, last retry time, pending retries, and the reason for failure.
- Click on any email in the listing to view the email's headers.
- Select the emails in the retry queue on which you'd like to perform an action.
- You can choose to either Send or Delete the emails.


