


Logs
With a lot of sensitive data involved in emails, it is essential to track the events that occur in your organization. Using Zoho Mail's Admin Report Logs, you can track events based on categories, admin, user, or the operation performed. The logs section is split into the Mail logs and Audit logs.
Mail Logs
The reports available under Mail logs are as follows:
Delivery Logs
The Delivery logs report displays the log of emails on a particular date or date range as per your request. To view the email delivery logs, follow these steps:
- Log in to Zoho Mail Admin Console and select Reports on the left pane. The Admin Reports page opens in a new tab.
- Select Logs on the left pane of Admin Reports and choose Mail logs. The Delivery logs page appears.
- Choose a date range and select a desired condition from the below options:
- From address - You can choose this option if you want to fetch the logs of emails sent from a particular account.
- Recipient - You can choose this option if you want to fetch the logs of emails received by a particular account.
- MessageID - You can choose this option if you want to fetch the log of a particular message.
- Enter the email address or the MessageID in the search bar and hit enter to complete the query. The email delivery logs for the selected conditions appear.
- From - Mentions the "from address" of the respective email.
- Recipient(s) - Mentions the "Recipient(s) email address" of the respective email.
- Subject - Mentions the subject line of the respective email.
- Sent time - Mentions the time the email was sent or received.
- Email size - Mentions the size of the respective email.
- Status - Mentions whether the email was successfully delivered or not.
- Attachment - Mentions the number of attachments in the email.

- Click any record to view more details about the delivery log.
- Select Manage Columns from the upper right corner and select the preferred columns to be displayed:
- From
- Recipient(s)
- Subject
- Sent time
- Email size
- Status
- Sender IP
- Original sender
- Authenticated
- MessageID
- Spam
- Attachments

- Drag and drop the columns to view the report in the preferred order. Select Reset column list to view the default columns.
- To download the report as a CSV file to your local device for analysis or share it via Zoho Cliq or Zoho WorkDrive, click the Share option in the top pane. You can also encrypt the file with a password to prevent unauthorized access to your data. Click here to learn more about sharing reports.

- Click the Schedule export button. The export runs in the background.


Follow the steps given in Schedule Exports help section to view and download your exported data.
Rejection Logs
The Rejection logs section lists the incoming emails sent to your organization's domain that failed to get delivered to the intended recipients. This will impact the email deliverability rate of your domain, if emails sent to your domain are frequently rejected. To avoid such scenarios, the rejection logs report allows you to monitor the rejected emails and make appropriate configurations.
You can use the date filter and the search bar to narrow down the rejection log results based on your requirements.
Note:
- The Rejection logs feature will be rolled out in a phased manner and be available only for organizations that use one of our paid plans.
- If you want the option enabled for your organization, please reach out to us at support@zohomail.com.
Follow the below steps to access Rejection logs:
- Log in to Zoho Mail Admin Console and select Reports on the left pane. The Admin Reports page opens in a new tab.
- Navigate to Logs and select Mail logs.
- Select Rejection logs and choose the duration for which you want to view the report.
- If required, use the search bar to narrow down the result based on the available criteria:
- from
- to/cc
- from does not contain
- to/cc does not contain
- subject
- message ID
- original sender
- original receiver
- sender IP
- failure reason
Rejection logs appear with the From address, Recipients, Sent time, Email size and Status of the message. You can customize the columns as per your preference.
Note: Logs will be available only from the date the feature is enabled for your organization.
- Click on a row to view the rejection details such as:
- Message ID
- User authentication
- Subject of the email
- Sender IP
- Relay address
- Reason for rejection
- Use the navigation keys on the top menu to view the Previous or Next rejection log.
- To download the report as a CSV file to your local device for analysis or share it via Zoho Cliq or Zoho WorkDrive, click the Share option in the top pane. You can also encrypt the file with a password to prevent unauthorized access to your data. Click here to learn more about sharing reports.
Audit Logs
The reports available under Audit logs are as follows:
Admin Activity
The Admin activity report helps you to track all the events performed by an admin. The report displays the admin's email address along with the event category, event description, date and time of the event, and IP address of the client from which the event was performed. To access Admin activity, follow these steps:
- Log in to Zoho Mail Admin Console and select Reports on the left pane. The Admin Reports page opens in a new tab.
- Navigate to Logs and select Audit logs. The Admin activity section under Audit logs appears.
- Each event is listed with a color code to facilitate quick identification of the actions performed. The color codes are as follows:
- Green - Add
- Yellow - Update
- Red - Delete
- Blue - Download
- Violet - Read
- Click on the Date filter to select the duration for which you want to see the logs.

With the filter options, you can filter the audit logs by the following options:
- Event Category - Choose a specific category of event from the dropdown, such as Users, Security, or Email policy, for which you want to view the logs. The logs pertaining to the selected event category will only be displayed. If required, select the Event Type and choose the appropriate type of event for which you wish to view the logs. Event type is a sub-category which appears only upon selection of an event category.
For example, select Users in the event category dropdown and choose event type as Signature. All the changes made in the Admin Console's Signature section will be displayed.
- Operation is - This filter allows you to specify the type of operation performed.
- Performed by - Use the Performed by filter in the Admin Activity section to display events made by a specific administrator.
- Performed for - Enter the username or email address of a user to view administrative changes performed on a user by administrators.
- Client IP address - This filter allows you to narrow down the displayed events based on the IP address of the client.
Note:
Alternatively, you can also type your required query and select from the list of options from the drop-down. For example, if you type forwarding in the search bar, the categories that contain the keyword forwarding appears. Select the desired event category.

- Event Category - Choose a specific category of event from the dropdown, such as Users, Security, or Email policy, for which you want to view the logs. The logs pertaining to the selected event category will only be displayed. If required, select the Event Type and choose the appropriate type of event for which you wish to view the logs. Event type is a sub-category which appears only upon selection of an event category.
- To download the report as a CSV file to your local device for analysis or share it via Zoho Cliq, click the Share option in the top pane. Click here to learn more about sharing reports.

- Click the Share button from the top right corner of the page and select either Download or Zoho Cliq.
- Choose the desired option in the Admin activity dialog.
- Export all data
- Export loaded (xxx) data
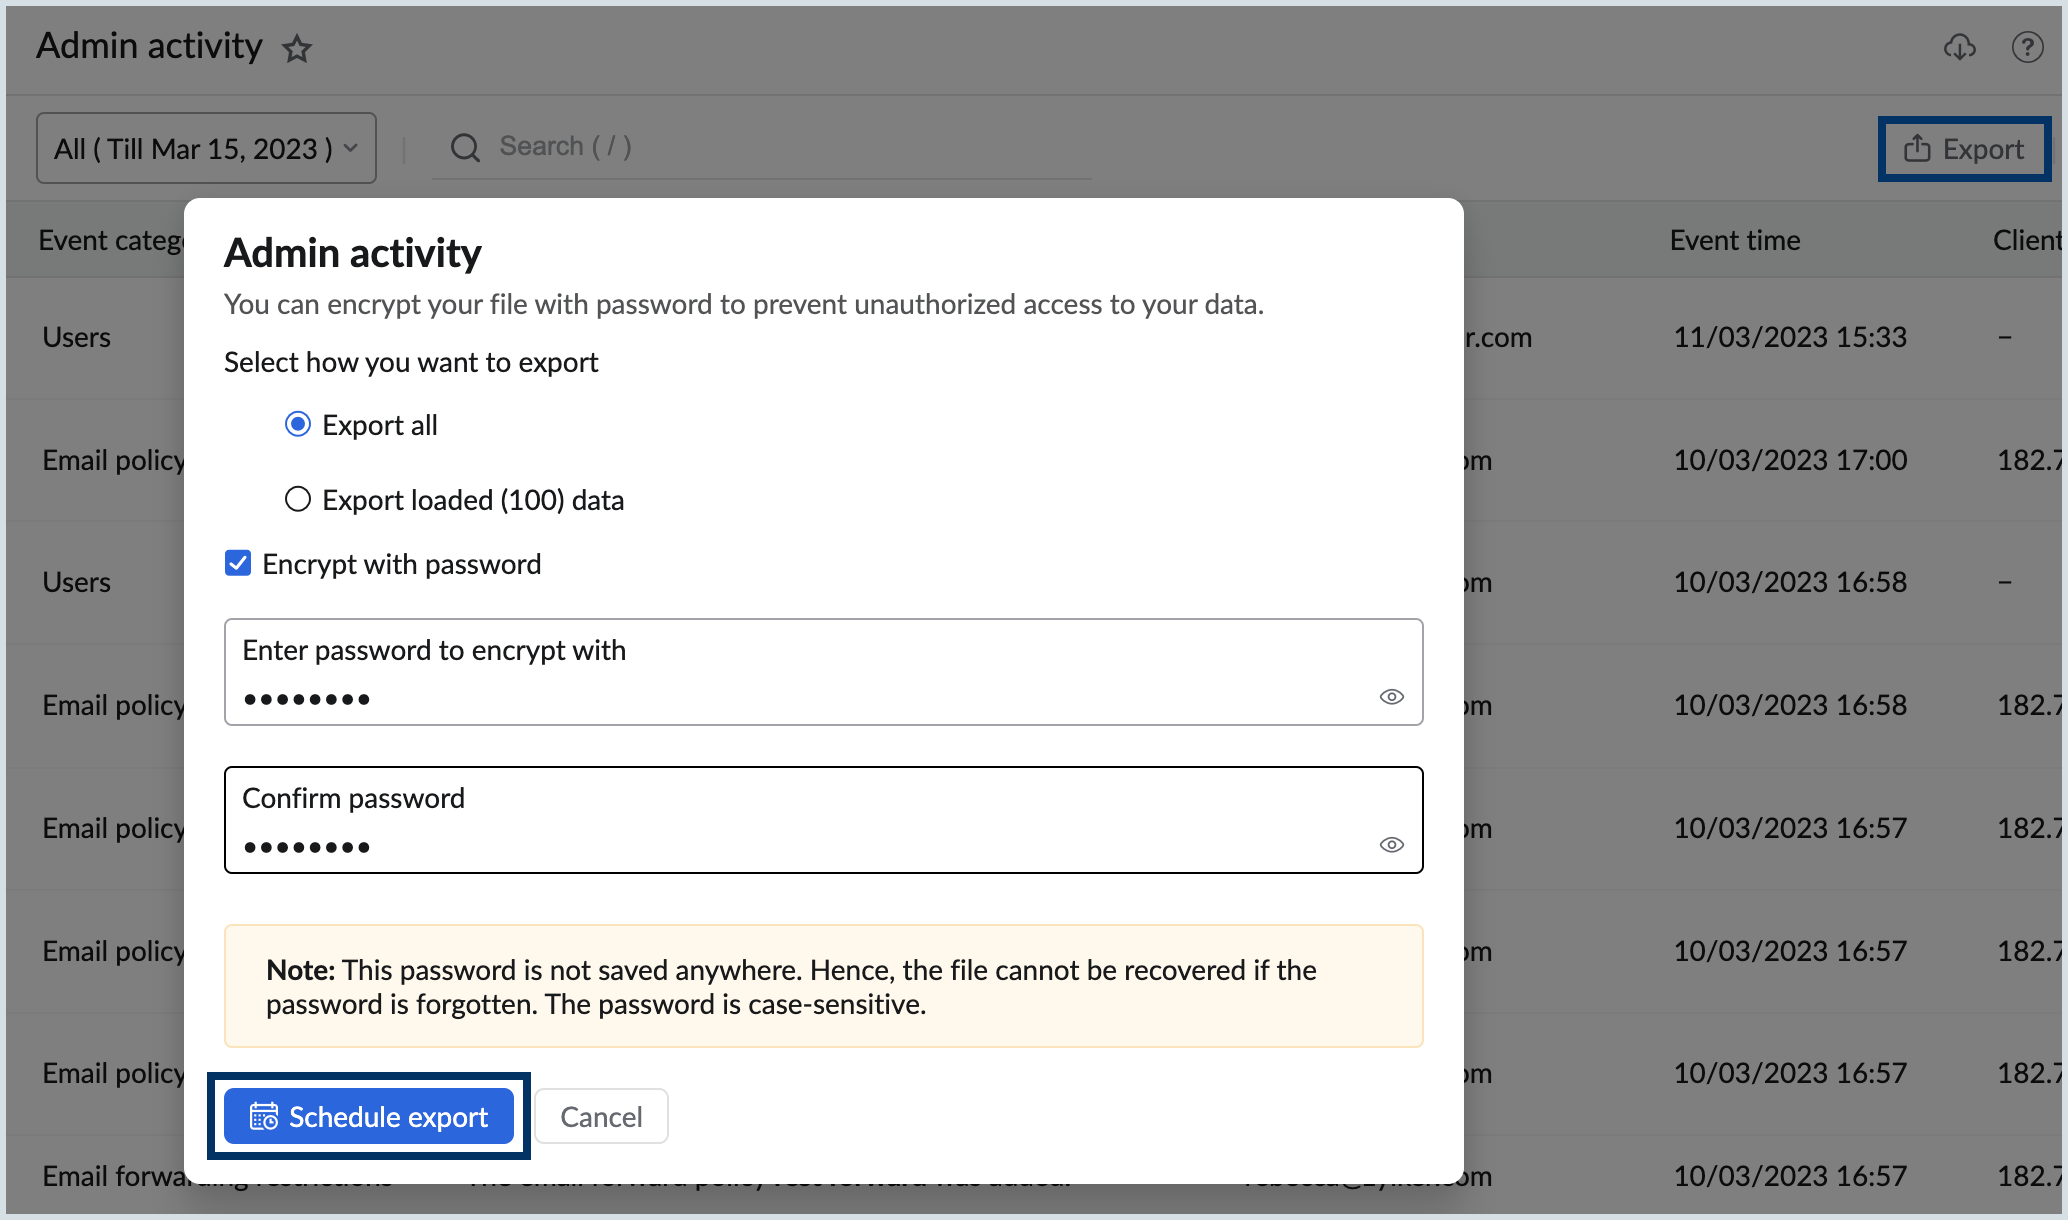
- Select Encrypt with password to prevent unauthorized access to your data and click the Schedule export button.


Follow the steps given in Schedule Exports help section to view and download your exported data.
Calendar Activity
The Calendar activity report helps you to track all the actions performed in the Calendar by admins. The report displays the admin's email address along with the event description, date and time of the event, and IP address of the client from which the event was performed. To access Calendar activity, follow these steps:
- Log in to Zoho Mail Admin Console and select Reports on the left pane. The Admin Reports page opens in a new tab.
- Navigate to Logs and select Audit logs.
Select Calendar activity. The Calendar activity page displays the below information:
Calendar Activity Event category Mentions the Category in which the change was performed. Event description The details of the event and the changes made are displayed. Performed by Mentions which admin made the respective changes in the events. Event time Mentions when-the date and time, the event was performed. Client IP address The IP address of the mail client from which the actions have been performed will be displayed. - Each event is listed with a color code based on the operation performed to facilitate quick identification of event logs. The color codes are as follows:
- Green - Add
- Yellow - Update
- Red - Delete
- Blue - Download
- Violet - Read
- Click on the Date filter to select the time period for which you want to see the report.
Note:
By default, the audit logs (admin activity and calendar activity) are retained for a period of one year.