


Migration from Lotus Notes to Zoho Mail
Zoho Mail provides flexible options to migrate from Lotus Notes. Lotus Notes files in the NSF format can be migrated to Zoho Mail using this wizard. Emails, Contacts and Calendars can be migrated from Lotus Notes to Zoho Mail using this method.
System Requirements
The Migration Wizard can be installed only on a Windows system with the version Windows 7 or above, with an 8 GB RAM or above, that has .NET Framework 4.6 runtime installed. Some of the recent 64 bit Windows OS systems, come pre-installed with this version of .NET Framework. In case, Microsoft .NET Framework 4.6 is not installed in your system, you can download it from this link. Additionally, the Lotus Notes client that you are migrating from should be of version 6.5 or above.
Installation Process
- After you have downloaded the installer, double click the downloaded file
- The step by step process for installation can be followed from the onscreen instructions.
- You can find a shortcut to 'ZohoMailLotusNotesMigration' in the Start menu for easier access.
Note:
- Access to the Lotus Notes Migration Tool will be given on request. Get in touch with our support team at support(at)zohomail(dot)com for more details.
- Choose the 32-bit or 64-bit migration tool based on the version of your Lotus Notes client. If you are unsure about which one to use, proceed with the 32-bit version of the migration tool.
Prerequisites to run the wizard
- To perform the migration for multiple accounts, the Super Administrator / Administrator credentials of your Zoho organization will be required.
- While performing the migration for Single user / personal account, the user can sign in with their Zoho Credentials and follow the migration procedure. The admin credentials are not required.
- Ensure that you have a free space that is approximately twice the size of your data, on the drive where the tool is installed.
- Make sure that you have the permission to read the NSF file from the Lotus client. Preferably, you can create a backup of the relevant NSF files, and use it for migration.
Note:
The tool only initiates the migration process and uploads the data to the Zoho servers. Further processing is done in the servers. The duration of the migration will be dependent on various factors:
- Network connectivity
- Performance of the user machine
Preparatory Steps - Text File
You need to create a text file with the details of the accounts to be migrated and also arrange the folders as mentioned in the steps below.
- Create a new migration folder in the system for multiple user migration.
- Create a new text file in the folder, with the list of accounts to be migrated, with each accounts email address in a new line (one below the other).
- The accounts should already be created in Zoho under the organization setup, and listed in the User Details section.
- Create subfolders under the migration folder in the format, user1@yourdomain.com, user2@yourdomain.com etc. with each account mentioned in the text file being created as a subfolder under the migration folder.
- Place the NSF file(s) of each user, under the respective subfolders created.
- Cross verify the text file content with the subfolder details.
Note:
Sometimes, Lotus Notes files that are in the Rich Text format are converted to the Plain Text format after migration due to some constraints in Lotus Notes API.
Folder names - Best Practices
Non-English and Special Characters:
- We recommend folder names in English for better results during Migration. In case you have non-English folder names, make sure that the local system in which you install and execute the Wizard supports the languages in use by the NSF files.
- Special characters are not supported in the folder names. Any special characters will be removed from the folder name.
- In case you have trouble in non-English folder names, you can temporarily have folder names in English only during the migration and then rename it back to the desired name in the web interface after migration in your preferred language.
Folders with System Folder names:
When you have folder names at the root level that match the system folders (Inbox/ Drafts/ Outbox/ Sent), the emails will be migrated to the respective folders. However, such system names are not supported for subfolders.
Similarly, except Inbox, other such folders should not have any subfolders. In case you have folders that have such reserved names, you may rename the folders for better results.
| Incorrect folder names | Suggested changes in folder names |
Inbox/Drafts Drafts Templates $revenue$and%income% おはようございます Drafts/reference | Inbox/myDrafts myDrafts myTemplates RevenueAndIncome GoodMorning myDrafts/References |
Steps to migrate NSF files:
If the emails of many users in the organization are available in the NSF format, the administrator can migrate them to the respective user accounts after creating NSF files for each user.
- Launch the Wizard using the shortcut in Start menu or execute the file 'ZohoMailLotusNotesMigration.exe'.
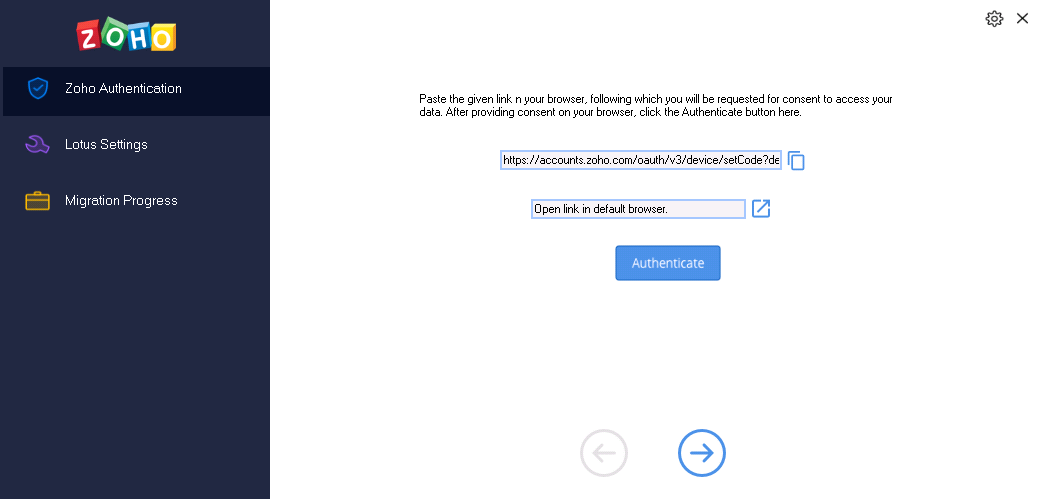
- You will land on the Zoho Authentication page. Enter your Zoho credentials here and click Authenticate.
In some cases, you will have to follow a slightly different process to log in. In this method, you will see a link. Copy the link, paste it into your browser window, and give the required consent. Once you have given the consent, click the Authenticate button on the migration wizard, and click Next.
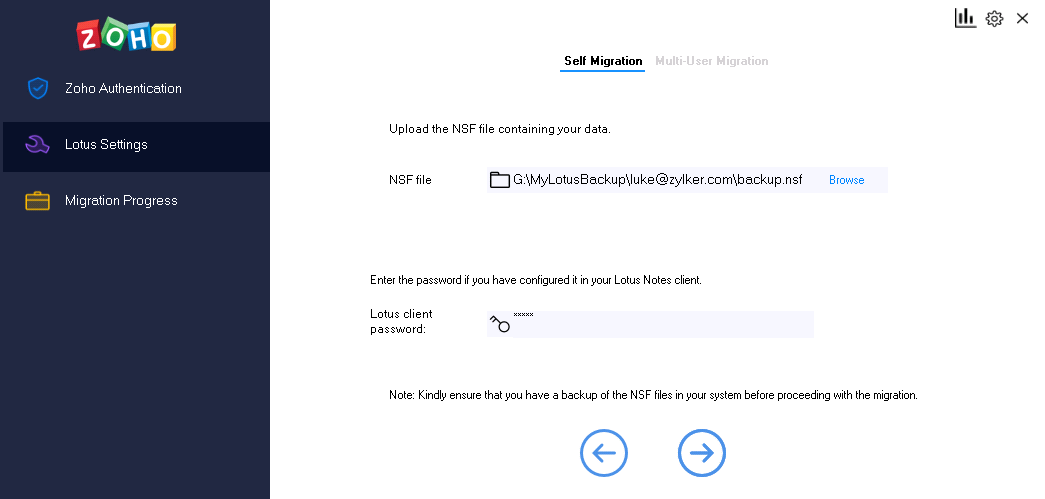
- In the Lotus Settings page, select whether you want to migrate just your own data, or migrate for multiple users in your organization.
- If you pick Self Migration,
- Click Browse and select the NSF file that has all your data
- Enter the Lotus client password if you have configured it in your client, and click Next.
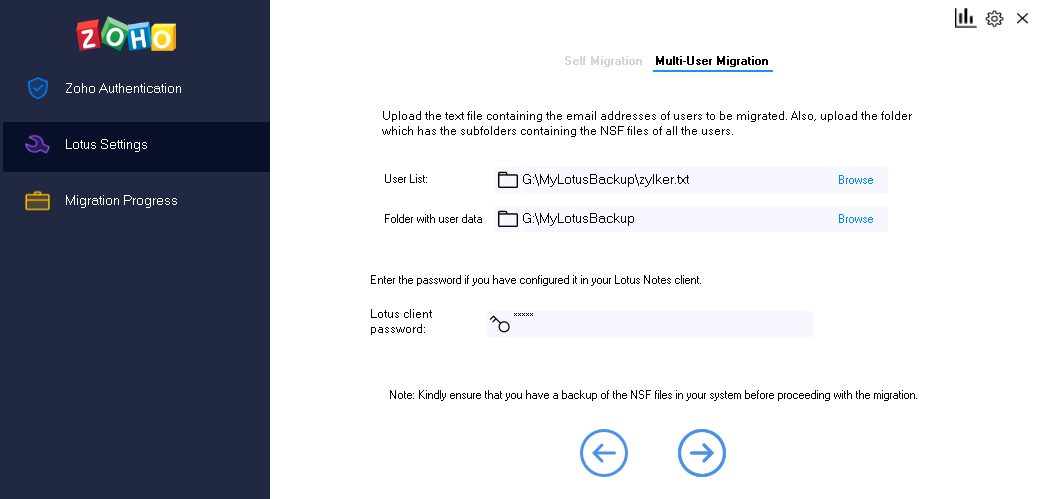
- If you pick Multi-user Migration,
- Across the User list field, click Browse and pick the TXT file that contains the list of users that need to be migrated.
- Across the Folder with user data field, click Browse and choose the folder with the NSF files of all the users.
- Now, enter the Lotus client password if you have configured it in your client, and click Next.
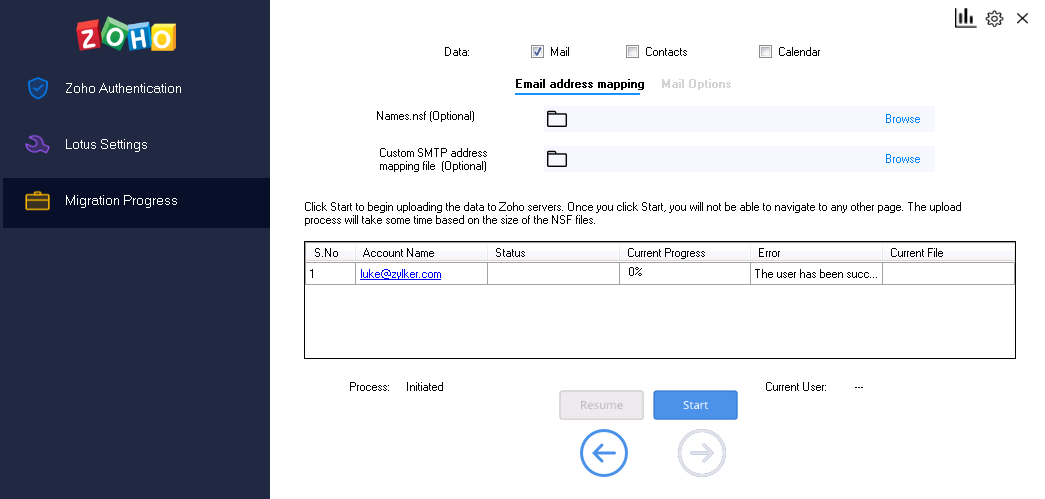
- Next, you will land in the Migration Progress screen. Here you can choose the data that you want to migrate and configure various other options.
- In the Data field, select the checkboxes across the data that you would like to migrate. You can pick from Mail, Contacts and Calendar.
- In the Address Mapping tab, you can select how you would like to resolve the email address details given by Lotus Notes.
When migrating emails, the email address fields are sometimes in the canonical format. To resolve them to a proper SMTP format, we will be using either of the two below mentioned methods. If we cannot find the Names.nsf file in the default address book, we will be using either of the below mentioned options to resolve the email addresses.- The Names.nsf file contains the details related to personal address book. If you have a separate Names.nsf file, you can upload it in the Names.nsf file field to resolve the address book details.
- Instead, if you want to resolve the email addresses manually, you can create a CSV file, with details in the format <SourceAddress>,<DestinationAddress> and upload it in the Custom SMTP address mapping file field.
- Next, in the Mail Options tab, you can select whether you want to include the folders that are empty. By default, empty folders are skipped.
In case you would like to migrate specific folders, select the Migrate Specific Folders checkbox, and enter the names of the folders that you'd like to migrate. Find the detailed naming convention for folders below:- In case you want to mention a specific parent folder (E.g. Reports), enter it as "Reports".
- In case there are multiple subfolders under Reports and you want to mention all the subfolders, enter it as "Reports/*"
- In case there exists a subfolder under Reports named 2016, and you want to mention this particular subfolder, enter it like this - "Reports/2016".
- If you want to mention all the subfolders under Inbox, only the Marketing folder without the subfolders, and a specific subfolder, 2012, alone under the Sales Reports folder to be mentioned, you will have to type the Folder List like this - "Inbox/*", "Marketing", "Sales Reports/2012".

- Once you have made the necessary selections, click Start.
- You can view the progress of the migration in the wizard.
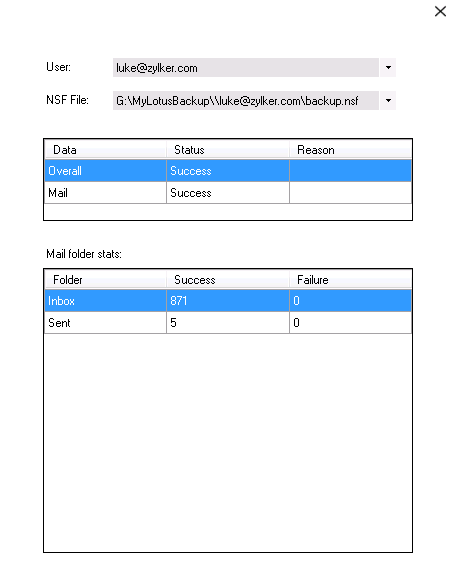
Sometimes, the migration might get paused in case there is a network connectivity issue, or if there are any server errors. Once the issue is resolved, click Resume to proceed with the migration. - Once the migration is over, click on Get Stats to view the detailed migration reports.


Note:
Access to the Lotus Notes Migration Tool will be given on request. Get in touch with our support team for more details.