DNS Record Configuration for Squarespace
Zoho Mail provides multiple options to verify your domain ownership and configure email delivery in Squarespace.
Add TXT Records for Verification - Squarespace
If your domain is hosted with Squarespace, follow the below steps to add a TXT and verify your domain.
- Login to your DNS Manager account at Squarespace.
- Click Settings and then choose Domains from the top links.
- Select the respective domain from the listing, and choose Advanced Settings.
- Scroll down to Custom Records and choose TXT from the drop-down menu.
- Enter the details for your TXT record.
- In the Host field, enter @
- In the Record field, type TXT or TXT record.
- In the Required data field, enter the TXT value generated in the Zoho Mail Admin Console.
- In the TTL field, enter 3600 seconds
- Save the record.
- Now come back to mailadmin.zoho.com page and click 'Verify by TXT'.
- If the DNS information is correctly propagated, the domain will be verified. You can check the status of this using the DNS checker and proceed with the next steps to create user accounts.
Add CNAME Records for Verification - Squarespace
If your domain is hosted with Squarespace, follow the below steps to add a CNAME and verify your domain.
- Login to your DNS Manager account at Squarespace.
- Click Settings and then choose Domains from the top links.
- Select the respective domain from the listing, and choose Advanced Settings.
- Scroll down to Custom Records and choose CNAME from the drop-down menu.
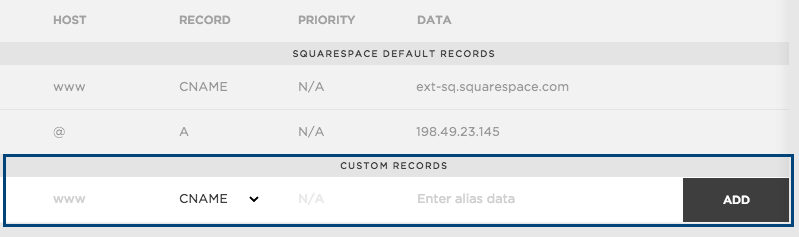
- In the Host field, enter the zb******** code generated in Zoho.
- In the Data field, enter the value from the CNAME Value/ Points To/ Destination field of your Zoho Mail Admin Console..

- Click the Add button to add this CNAME record.
- Click Save on the top of the page.


You have now added the CNAME successfully. You may have to wait for at least an hour for the changes to take effect in the DNS Servers. After an hour or two, log in to your Zoho Mail control panel and click Verify CNAME. Once your domain is verified, you can start adding users and creating email accounts.
Update MX Records to receive emails - Squarespace
If you have your DNS hosted in Squarespace, follow the below instructions to change the MX Records of your domain to receive emails.
- Login to your DNS Manager account at Squarespace.
- Click Settings and then choose Domains from the top links.
- Select the respective domain from the listing, and choose Advanced Settings.
- Locate the Add Presets drop-down menu, and choose Zoho Mail from the listing.
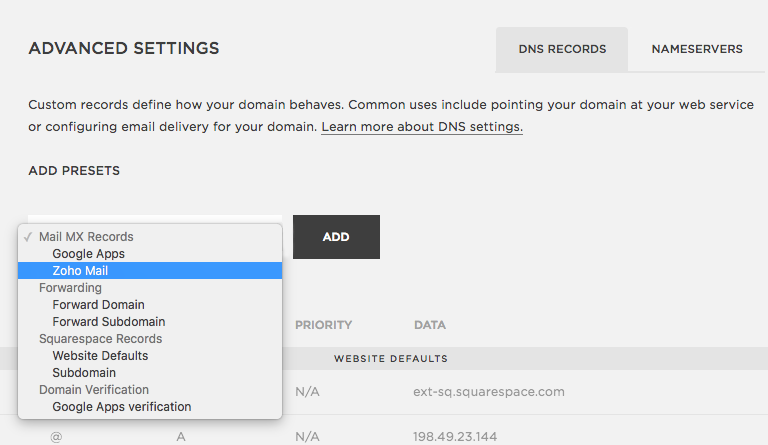
- Zoho's MX records will get populated in the respective fields.

The MX values given above are based on the generic configuration information. For more specific configuration particular for your domain refer this section in the Admin Control Panel.


You have now added the MX records for your domain. You can check the MX records of your domain from Zoho's MX record checking tool to check if the results reflect the correct MX details.
Important Points:
- Ensure that you have deleted all the MX records related to your previous email provider. Any other existing MX record will conflict with Zoho Mail, affect email delivery, and result in permanent loss of emails delivered.
- The MX records that should be returned when you check in the MX Lookup tool should be
- mx.zoho.com
- mx2.zoho.com
- mx3.zoho.com
Note:
Squarespace provides these presets for a general configuration. For MX configurations specific to your domain, click here.