LMS Course Settings
Course Settings refers to the settings that you can define for each course. This section covers the settings for self-paced courses, blended learning courses and e-materials.
The first common step is to create a new course:
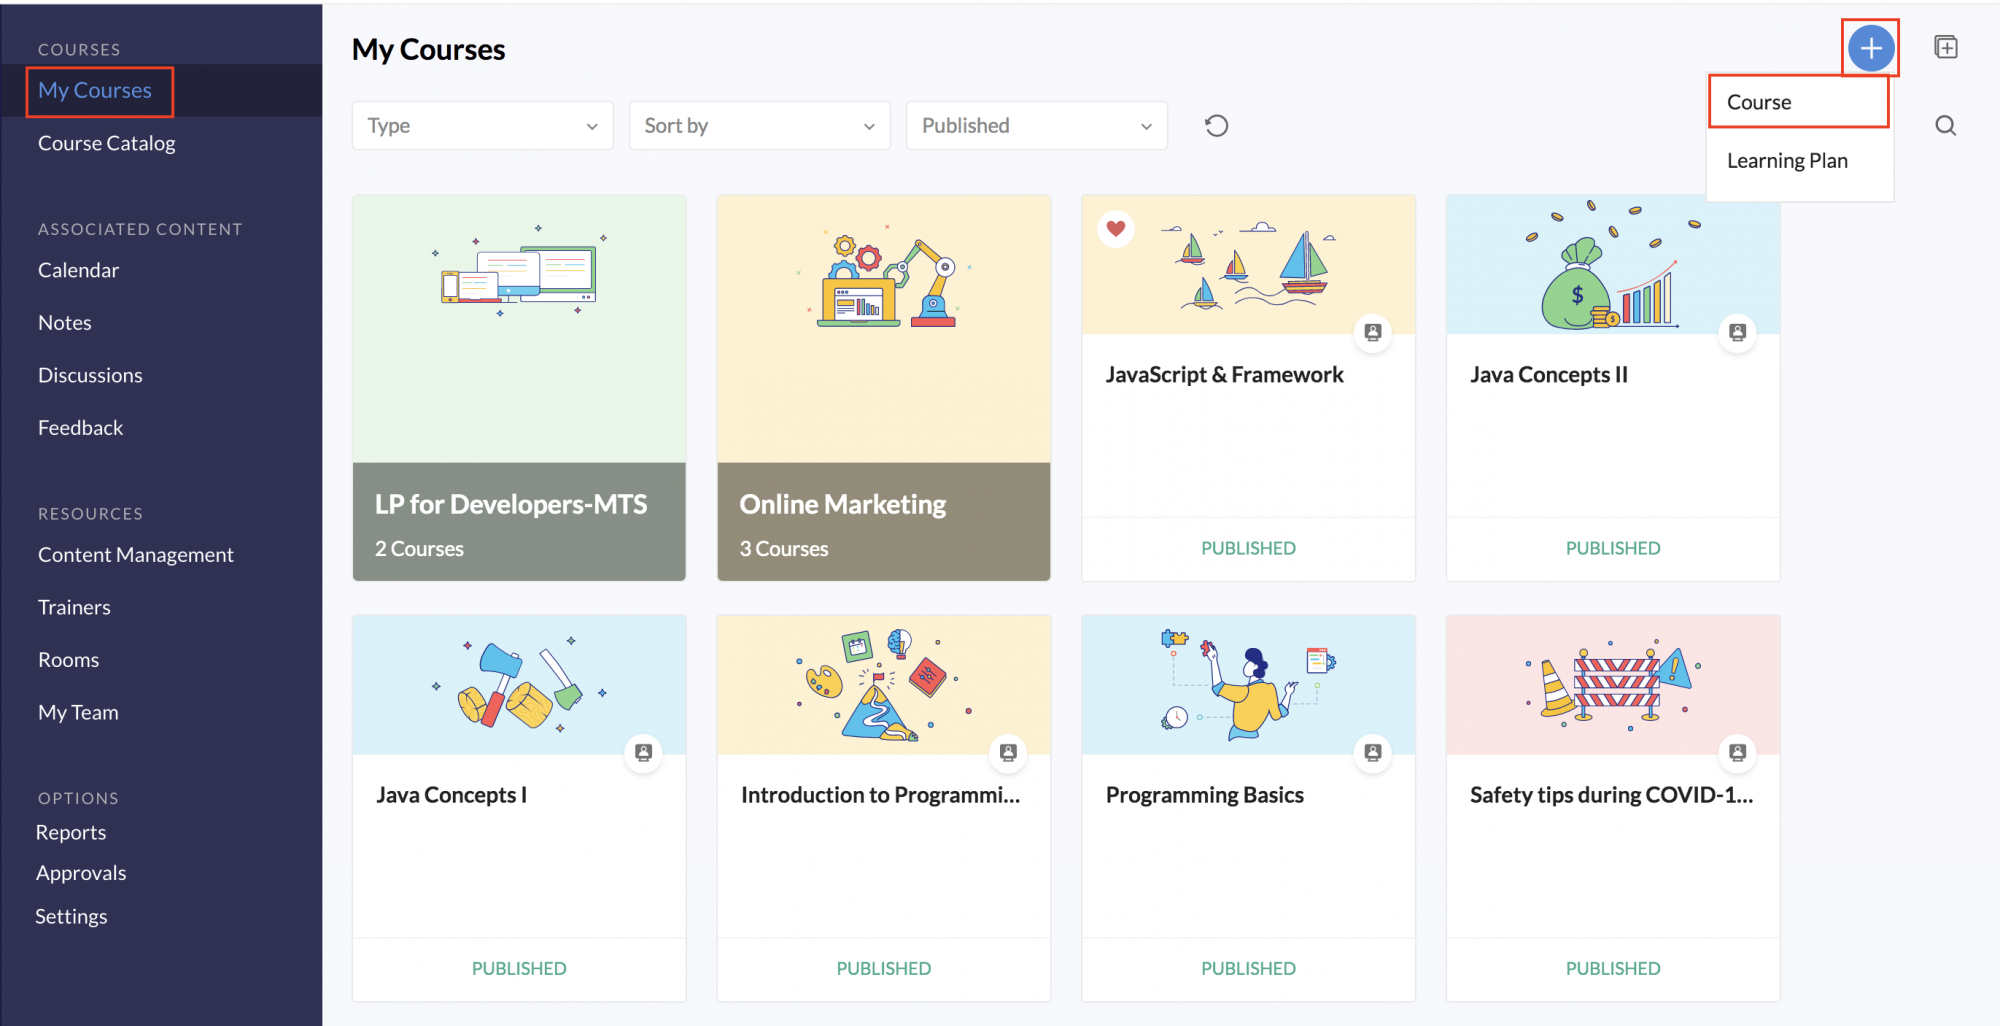
- Click on My Courses from your dashboard.
- Click the + icon and select Course from the dropdown.
- Enter a name for the course.
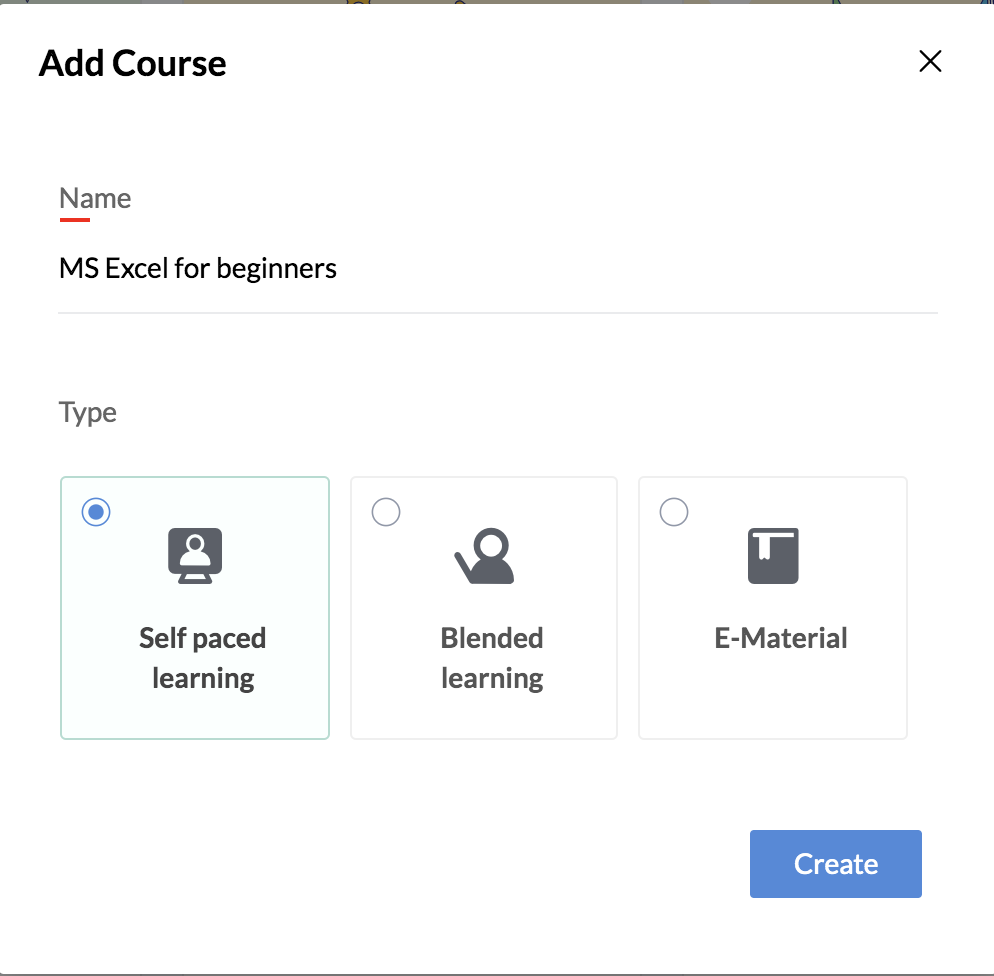
- Select the type of course: Self-paced learning ,Blended learning or E-Material.
- Click Create.
Course settings for self-paced, blended learning courses and e-materials
The next important step is to access and define the settings of a particular course:
- Go to Course Catalog.
- Click on the ellipsis icon of the course.
- Click Settings.
Self-paced learning courses
- Basics
- Learning Objectives
- Applicable To
- Branding
- Permissions
- Reminders
- Grade Configuration
- Certificates
- Pre Learning Activities
- Post Learning Activities
- Feedback
- Course Cost
- Manager Evaluation
- Course Admin
Blended learning courses
- Basics
- Learning Objectives
- Manage Batches
- Applicable to
- Branding
- Permissions
- Reminders
- Grade Configuration
- Certificates
- Pre Learning Activities
- Post Learning Activities
- Feedback
- Course Cost
- Manager Evaluation
- Course Admin
E-materials
Basics for self-paced courses
All the basic details of the course—name, duration, course admin, and more, can be configured here.
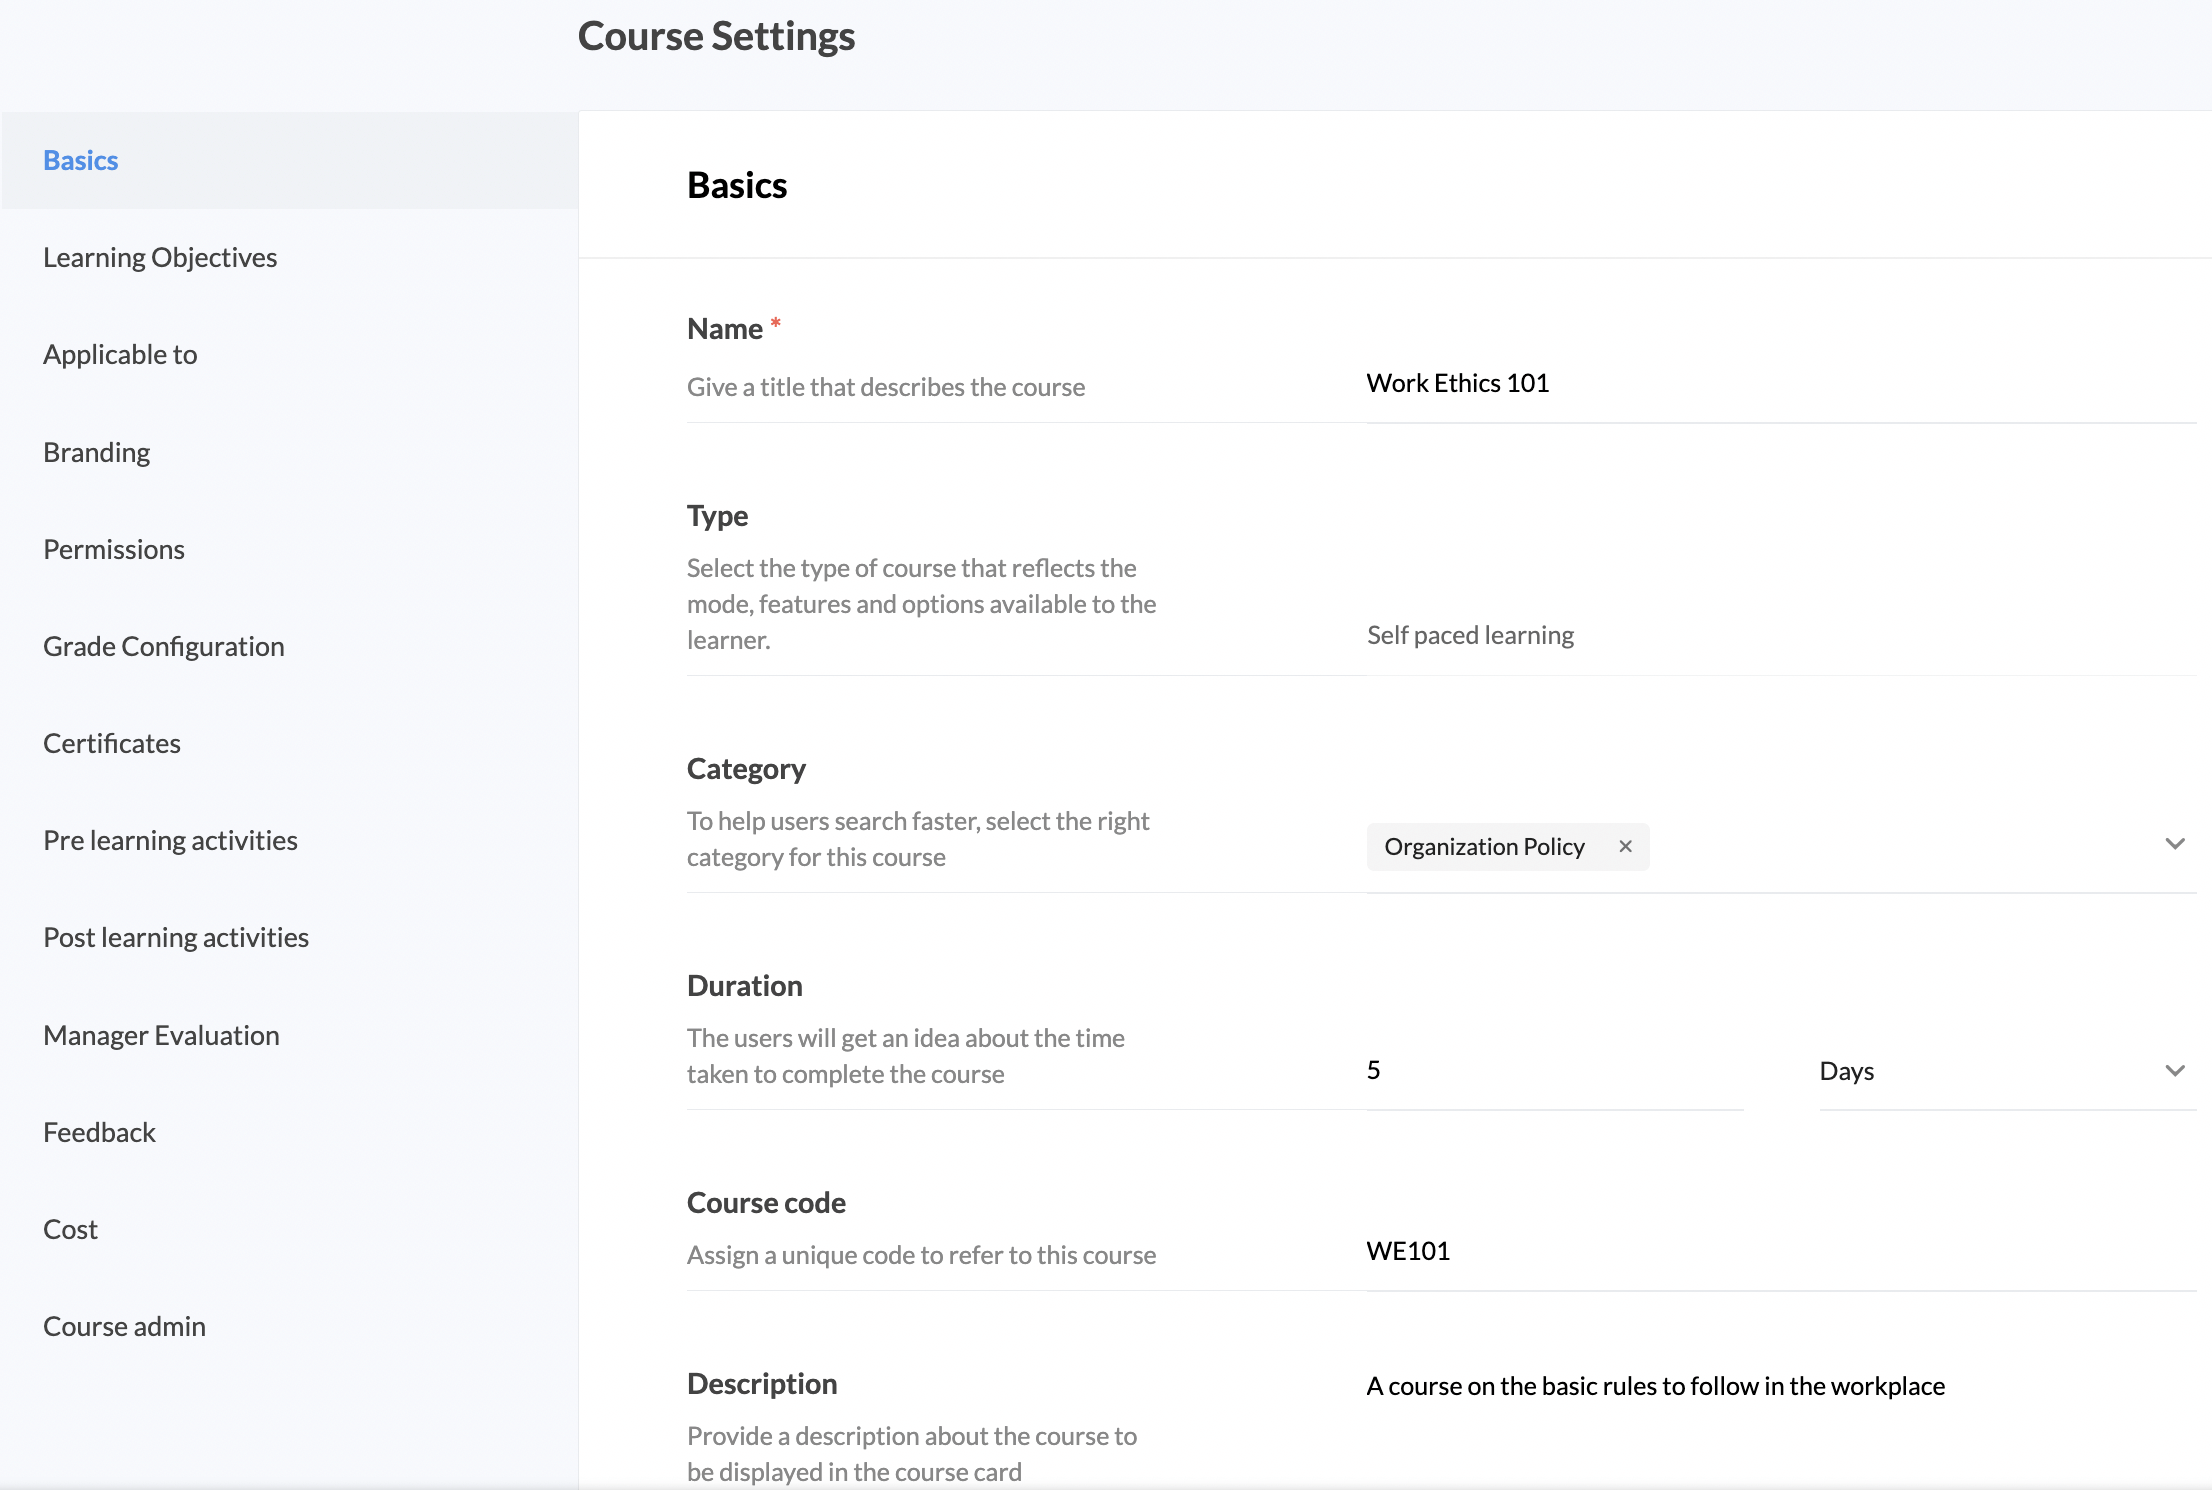
Name — Give an appropriate name for the course that gives a clear notion about the subject covered.
Type — The selected type of course (Self-paced or Blended) will be auto-filled here.
Category — Select a relevant category that will make it easy for the learner to search for the course.
Duration — Give the approximate time taken to complete the course.
Course code — Provide a unique code that is representative of the course.
Description — Give details on the course, which will be displayed in the course card.
Course admin — Assign a course admin who will manage this course.
Basics for Blended learning courses
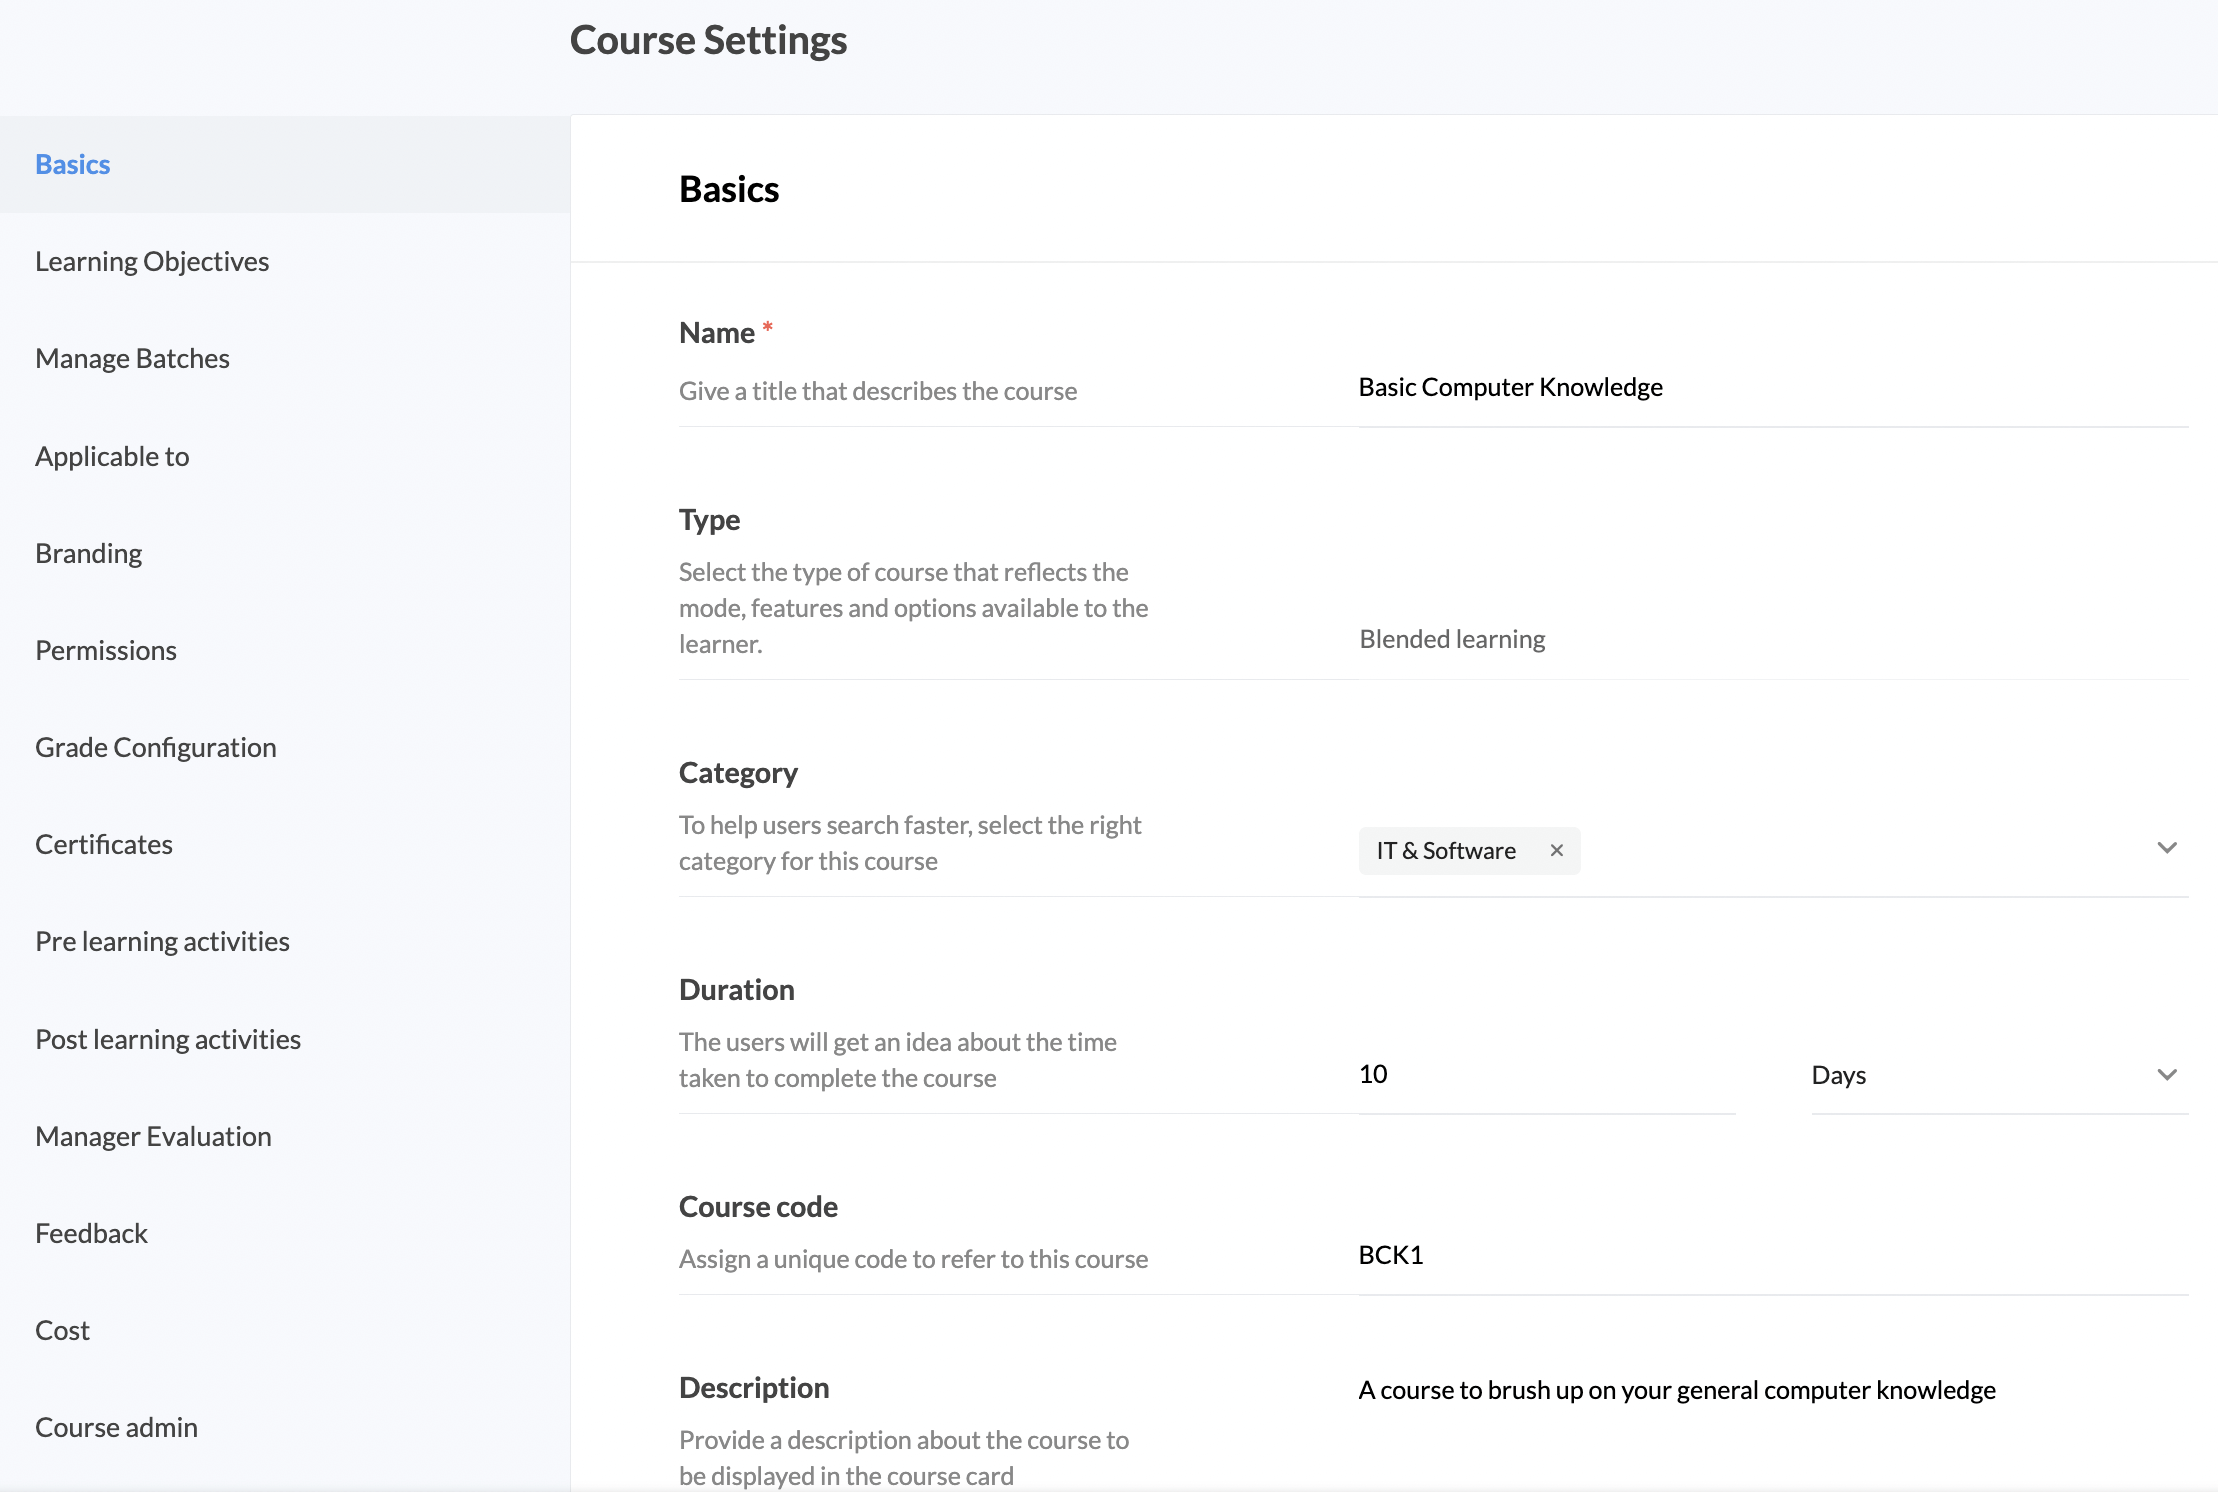
Name — Give an appropriate name for the course that gives a clear notion about the subject covered.
Type — blended learning will be auto-filled as the course type here.
Category — Select a relevant category that will make it easy for the learner to search for the course.
Duration — Give the approximate time taken to complete the course.
Course code — Provide a unique code that is representative of the course.
Description — Give details on the course, which will be displayed in the course card.
Course admin — Assign a course admin who will manage this course.
Basics for e-materials
All the basic details of the course—name, duration, course admin, and more can be configured here.
Name — Give an appropriate name for the course that gives a clear notion about the subject covered.
Type — The selected type of course (Self-paced or Blended) will be auto-filled here.
Category — Select a relevant category that will make it easy for the learner to search for the course.
Duration — Give the approximate time taken to complete the course.
Description — Give details on the course, which will be displayed in the course card.
Manage Batches
At least one batch must be created for a course to get published. You can create a batch that occurs once or create multiple batches using the batch scheduler.
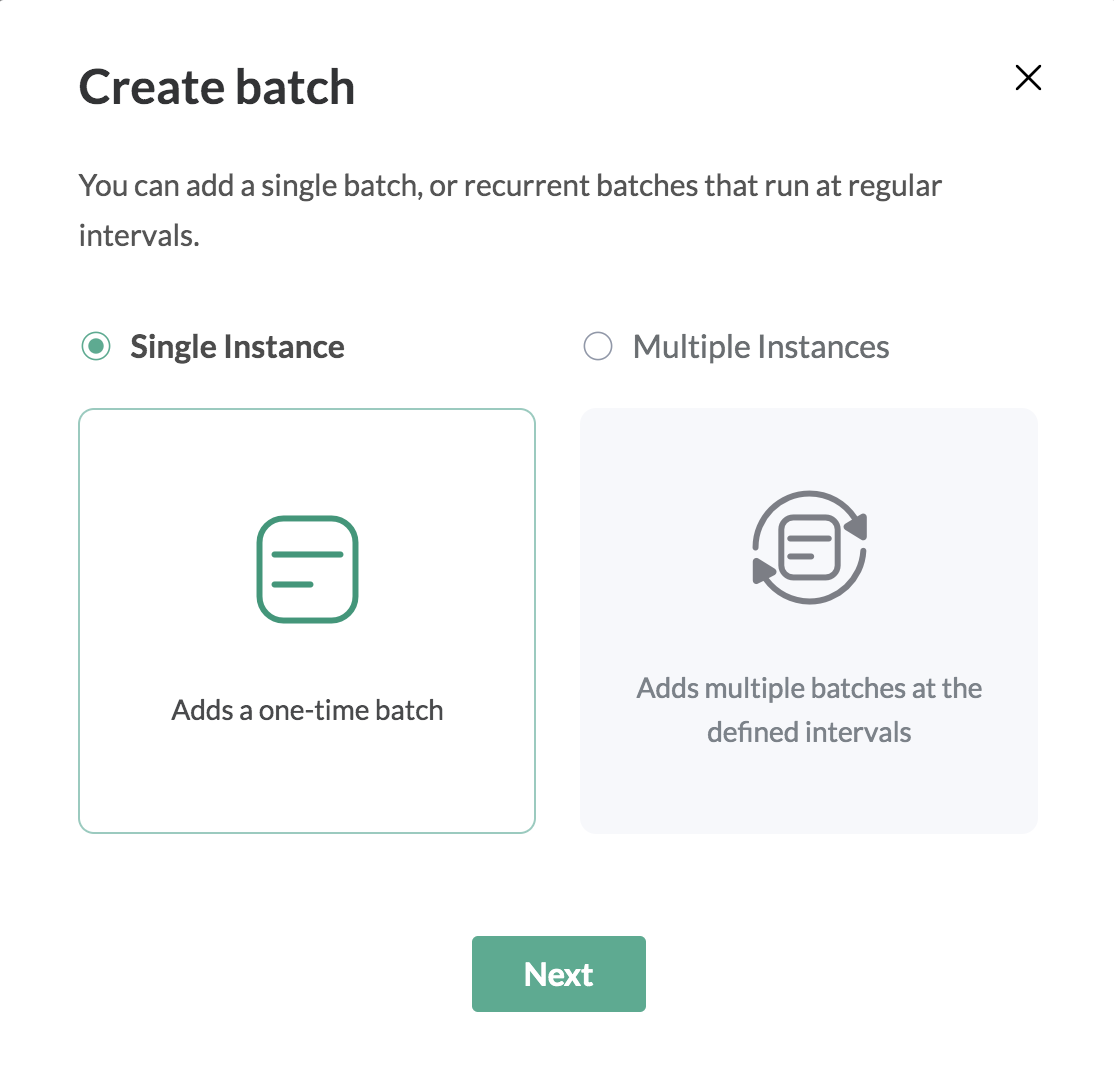
If you want to create a one-time batch, select Single Instance.
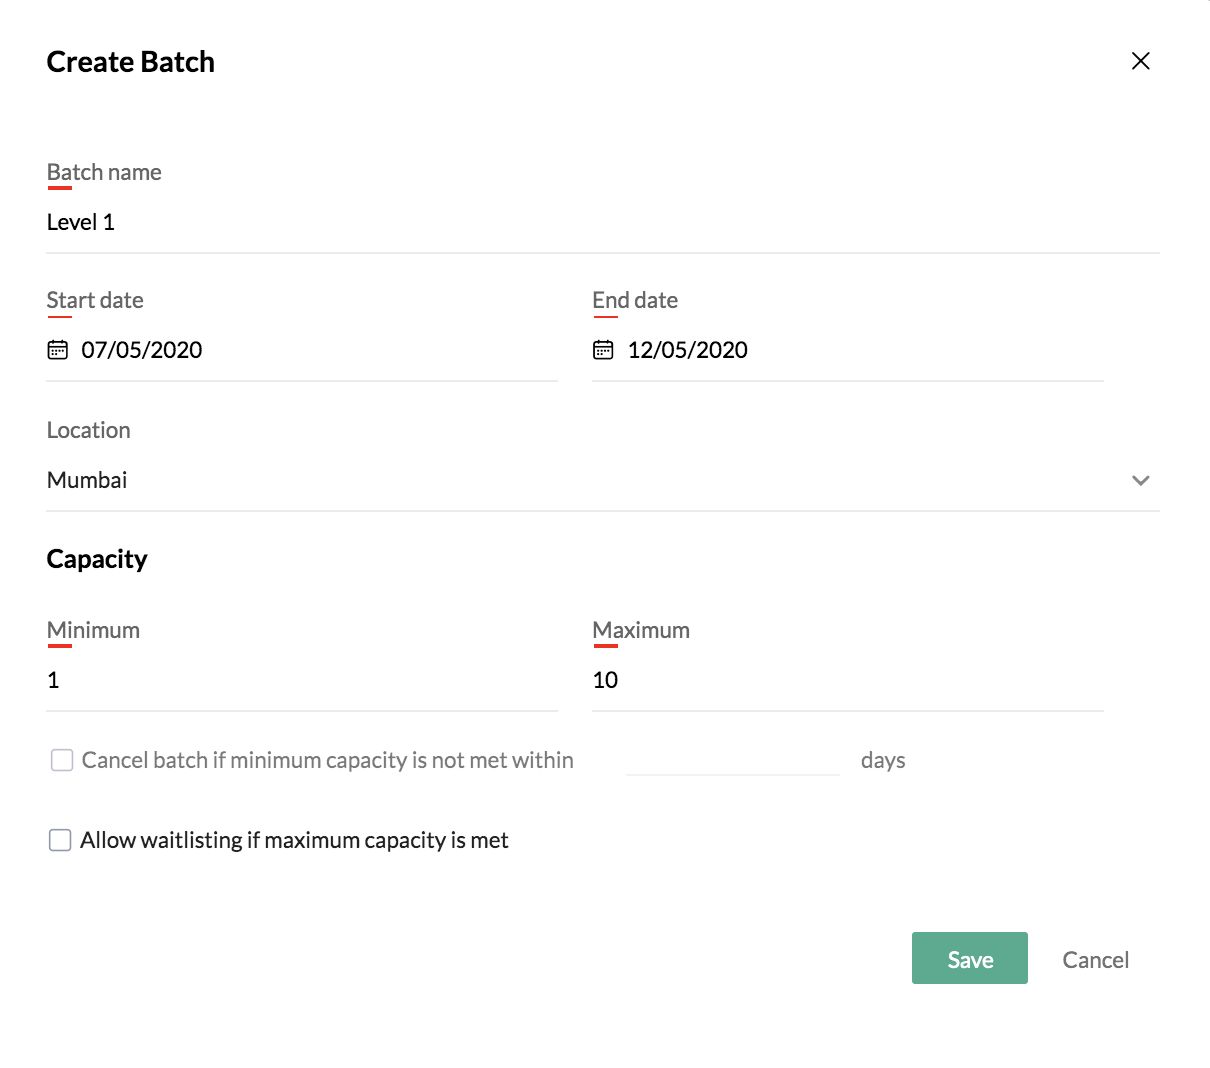
- Enter the name of the batch.
- Select the start and end date of the batch.
- Select the location.
- Enter the minimum and maximum capacity of the batch.
- If you want to cancel the batch if the minimum capacity is not met within a certain number of days, enable the option and enter the number of days.
- If you want to Allow waitlisting if maximum capacity is met, enable it.
- Click Save.
Batch Scheduler
To create multiple batches that run at defined intervals using a batch scheduler, select Multiple Instances.
The batch scheduler helps you facilitate the courses that you want to run on a periodical basis without having to create every batch manually.
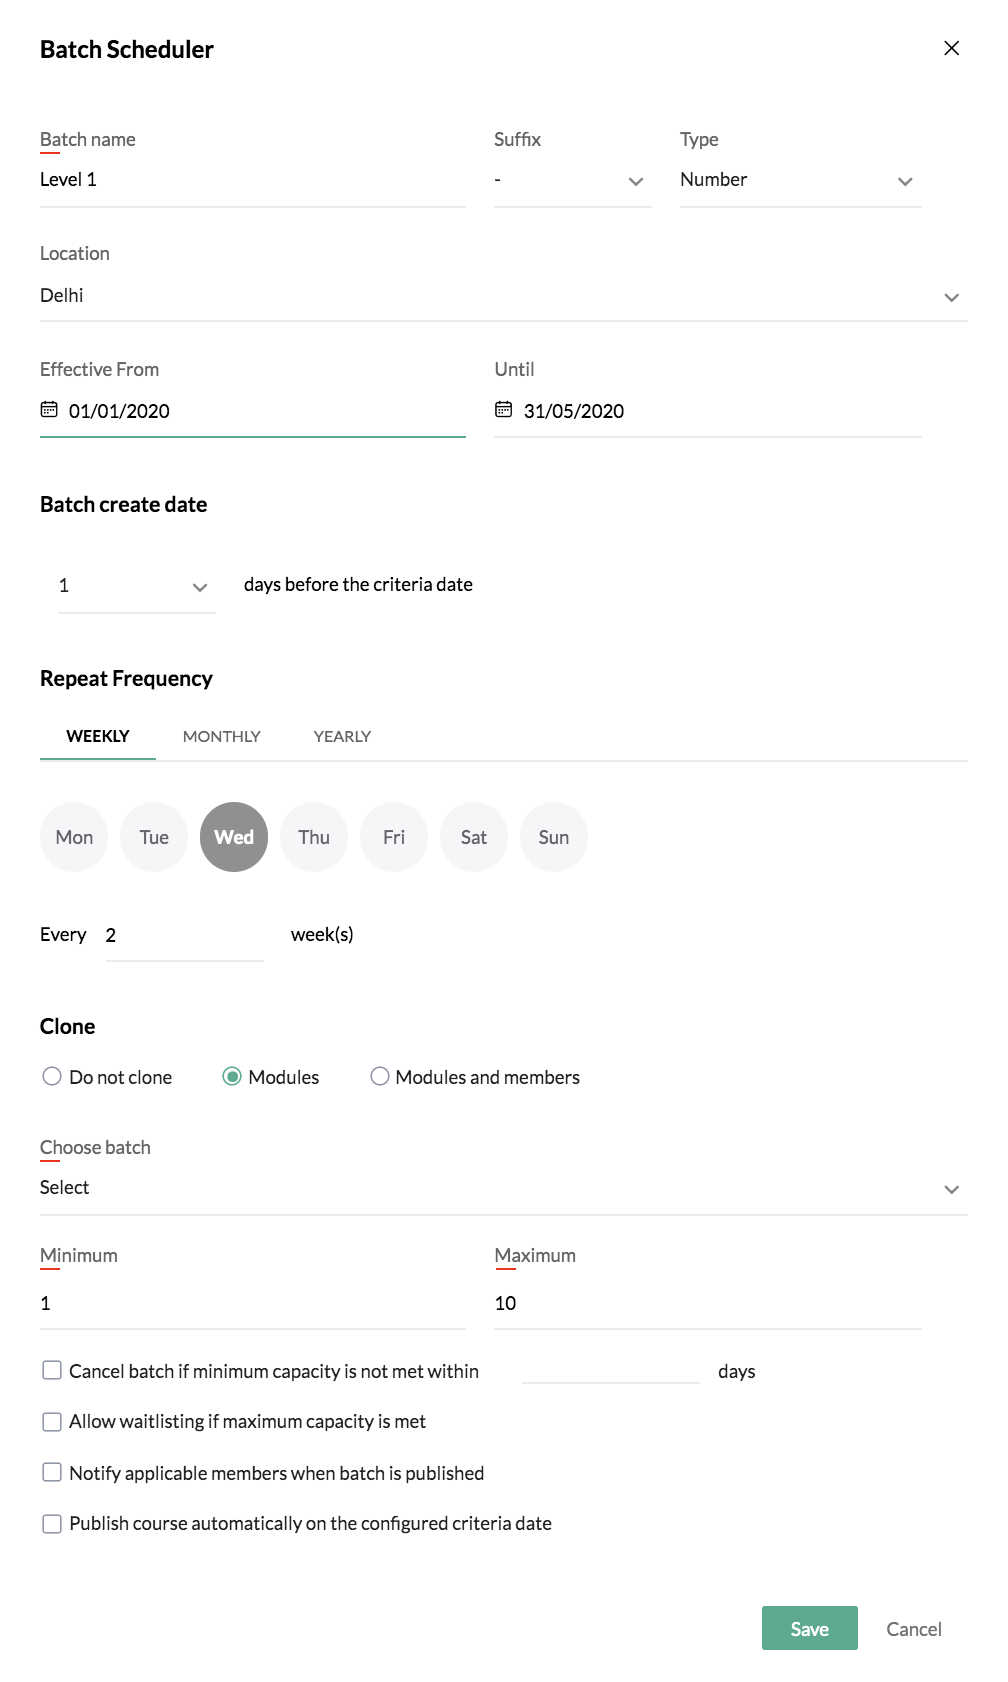
- Enter the batch name, suffix and sequential reference of the batch. If you want the batches to be labeled 1, 2, 3, and so on, select Numbers from the drop-down. If you want it to be date specific, select the applicable format.
- Select the location.
- Select the start and end date under Effective From and Until.
- Enter how many days in advance the batch should be created, under Batch create date. Criteria date refers to the days selected under Repeat Frequency.
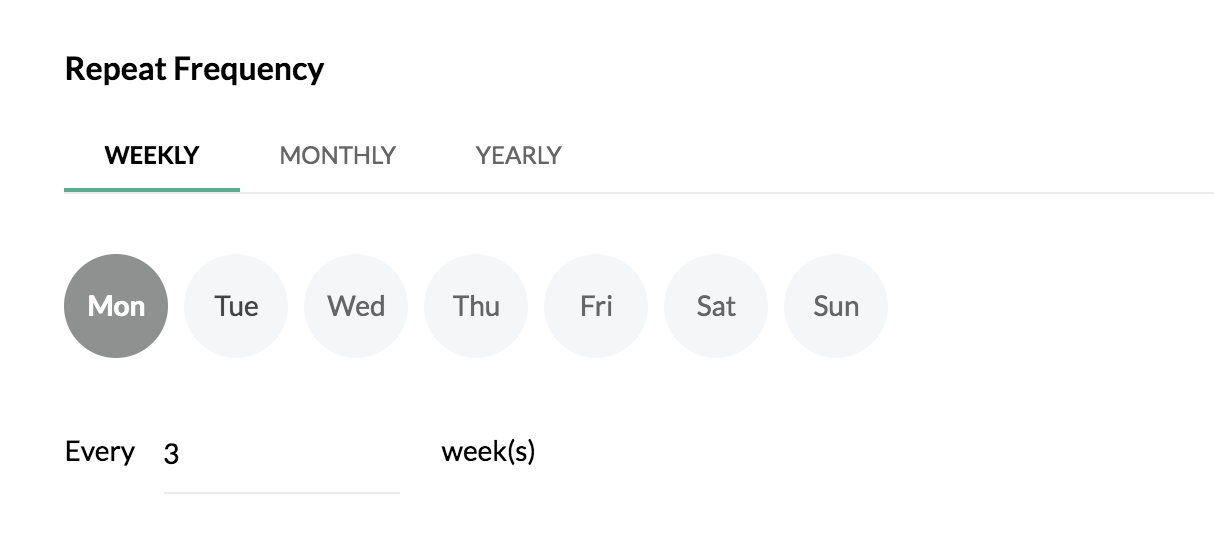
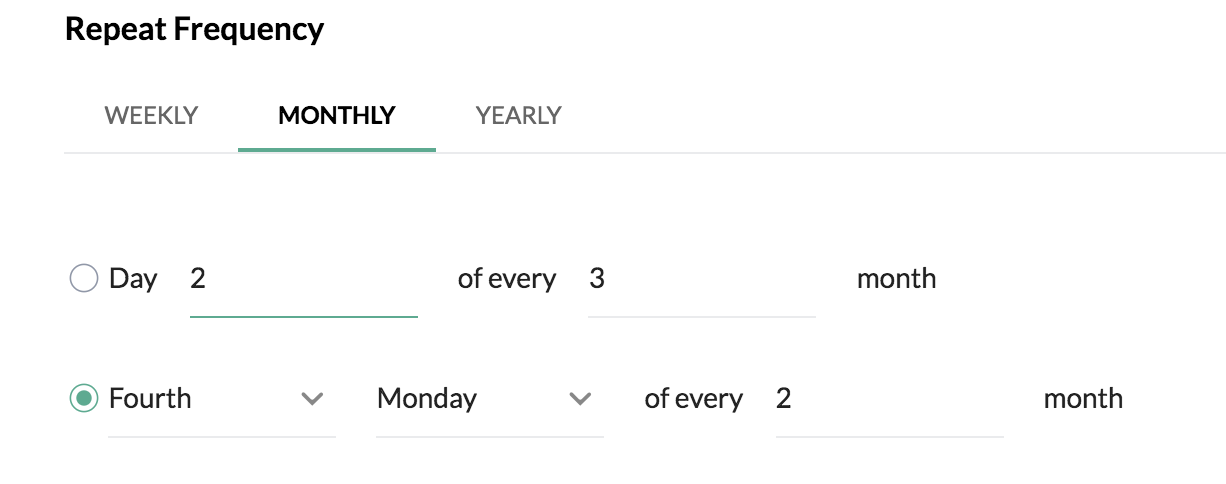
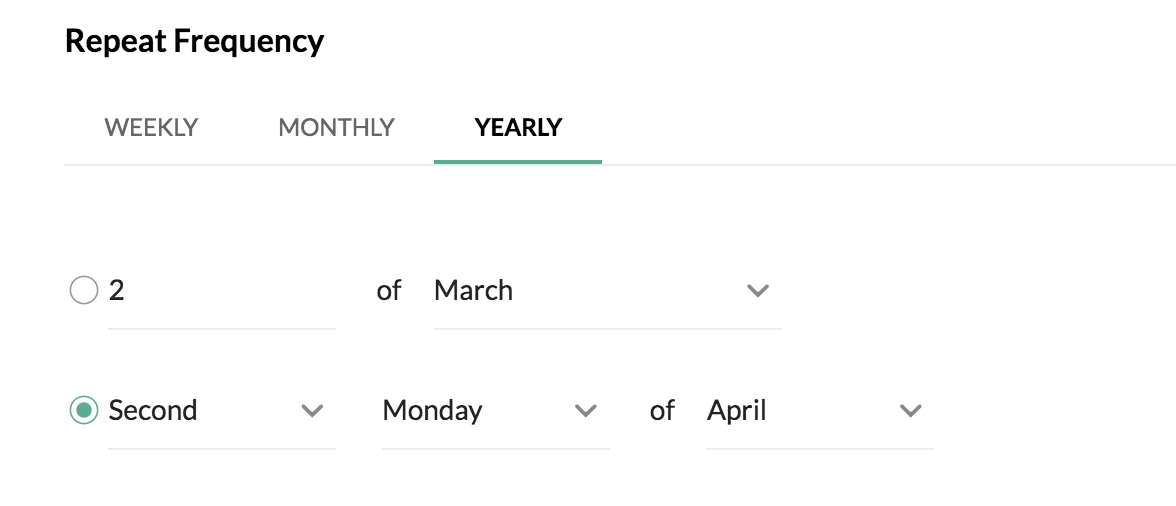
- Under Repeat Frequency, select Weekly, Monthly or Yearly , then enter the required details under the selected option.
- Under Clone, select Do not clone, Modules or Modules and Members, then enter the corresponding details for the selected option.
- Click Save.
Use Case
Let's say you are conducting a company-wide course on professional etiquette every alternate Wednesdays starting in the month of January until end of May. You will need to run the course in batches to accommodate all the employees in your organization. Let's take a look at how to configure this using the batch scheduler, without having to create multiple batches manually.

Batches recur based on the criteria set under repeat frequency. Under each option, the criteria you can apply will vary.
Weekly
Monthly
Yearly
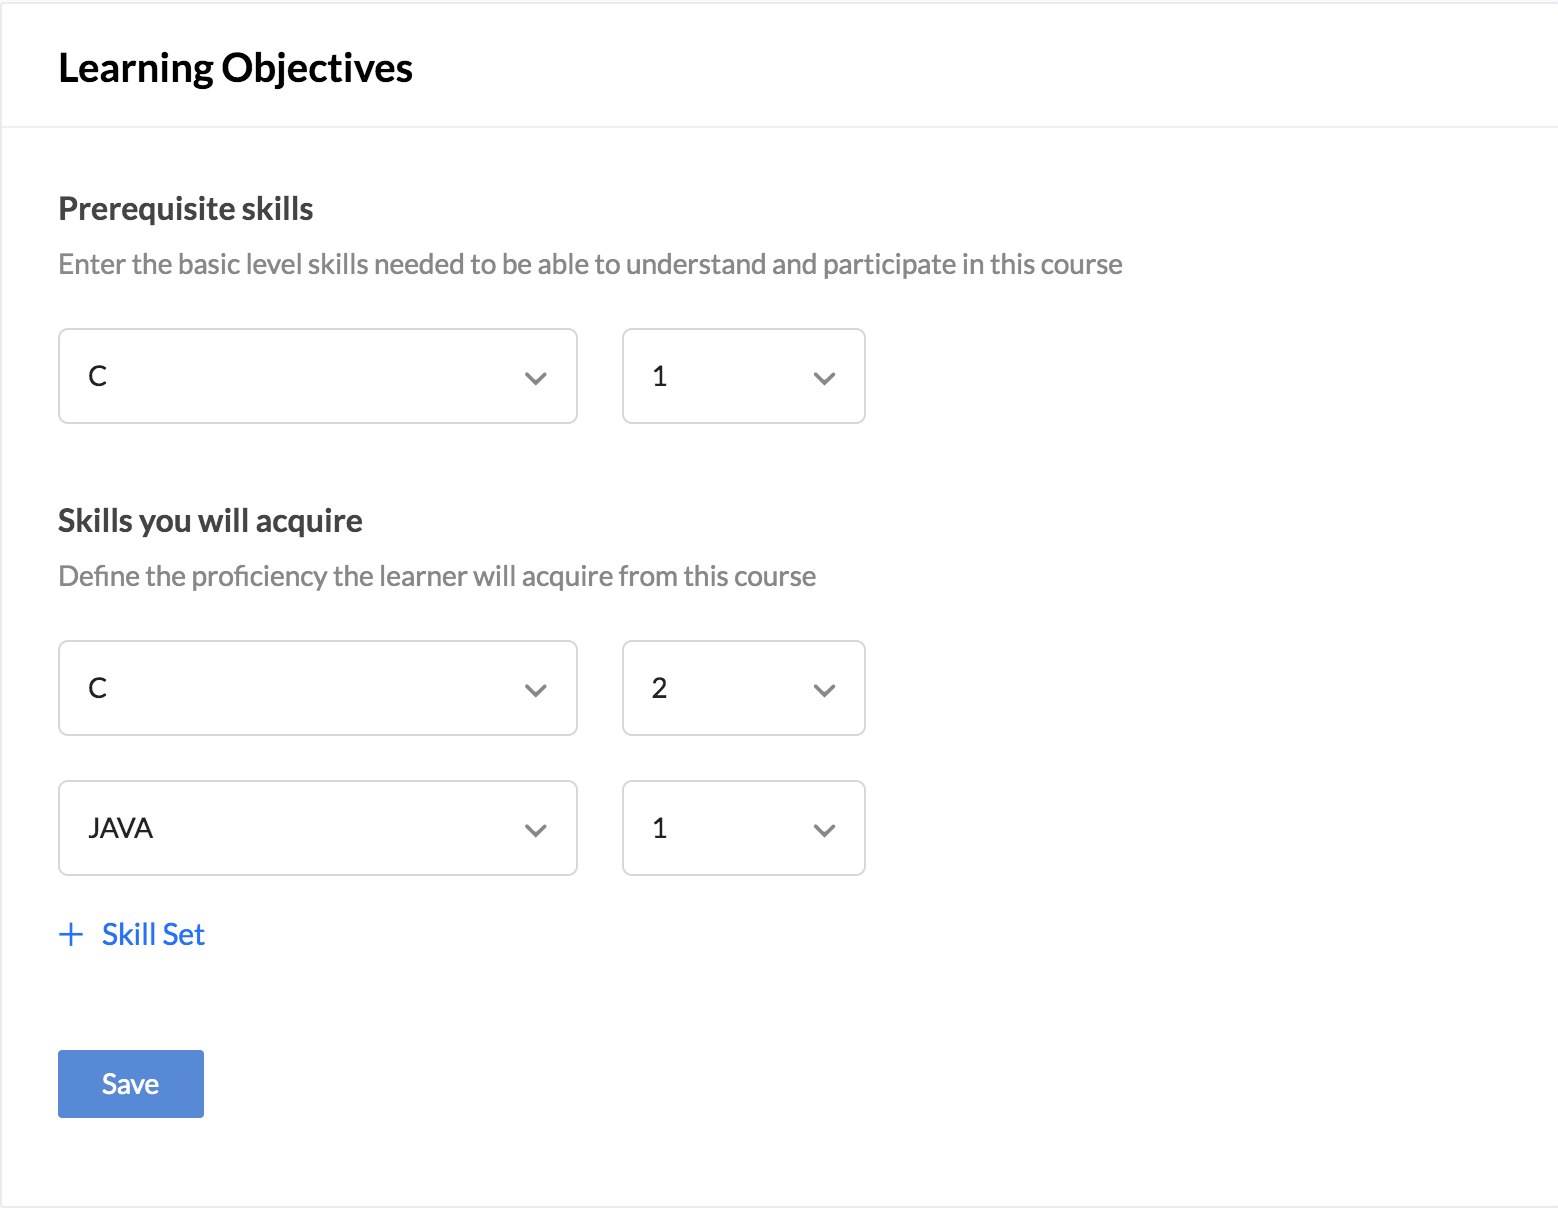
Learning Objectives
These settings clarify at whom this course is aimed — the level at which the learner must be to enroll in the course (Prerequisite skills), the proficiency level that they will gain once they have completed the course (Skills you will acquire). More than one skill set can be added by clicking + Skill Set.
Applicable to
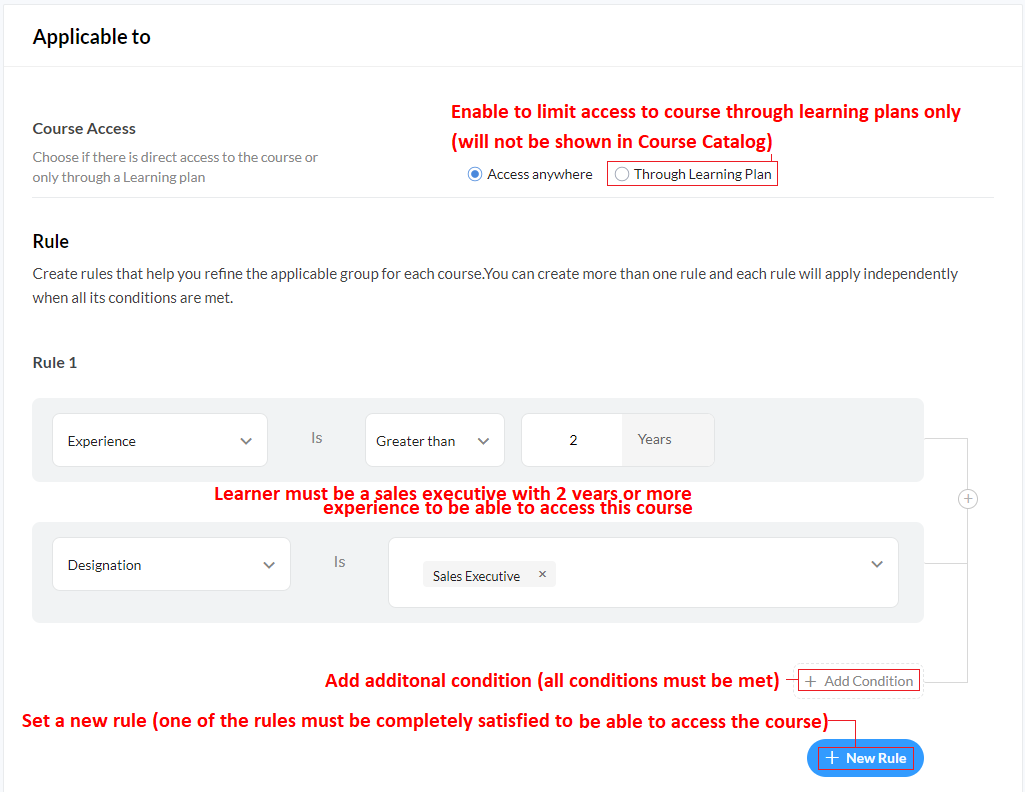
In this section, you can define who has access to a course. Access can be limited either using rules or by limiting course access through Learning Plans only. If Through Learning Plan option is enabled the courses will not be displayed in Course Catalog. Instead, access is only though the Learning Plan of which the course is a part of. Access Anywhere is enabled by default and allows access to the course through the Course Catalog.
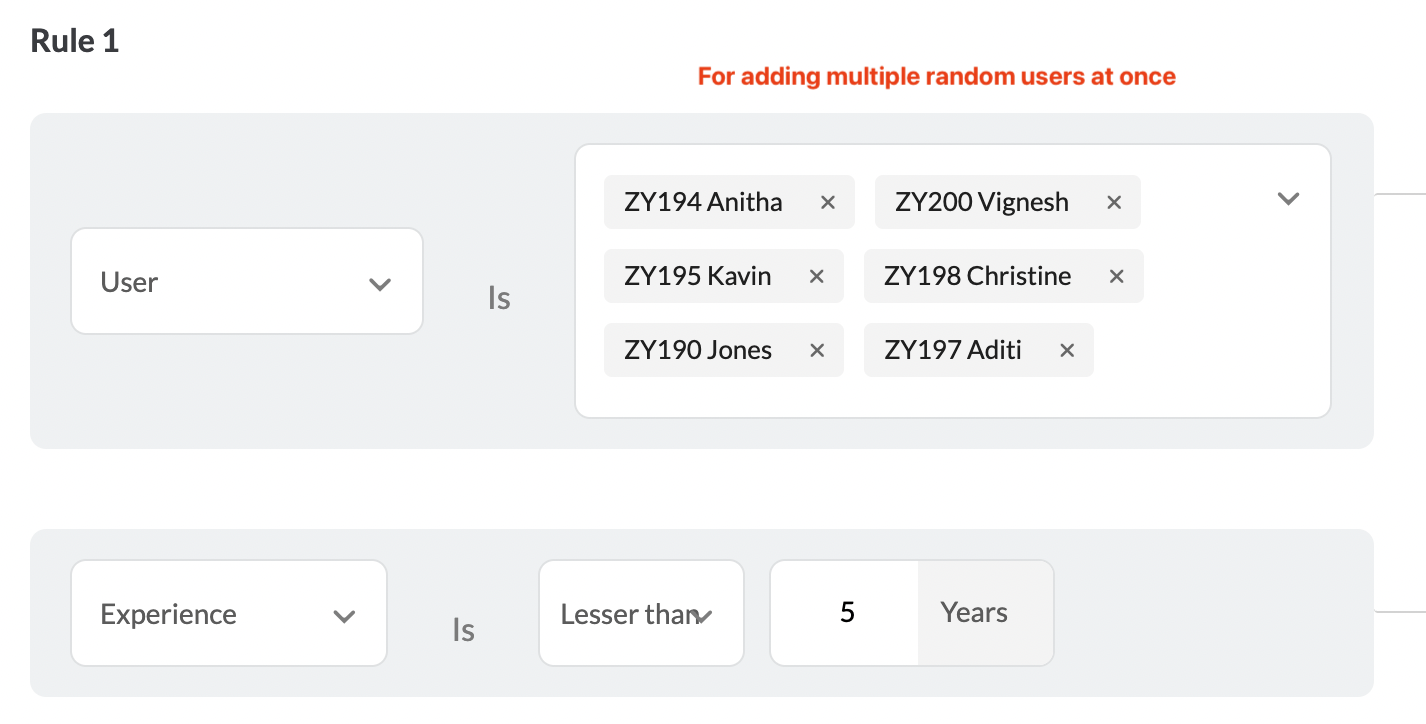
Rules helps in fine tuning access to courses. Learners who satisfy the requirements in a rule will be able to join the course. Having multiple conditions in the same rule would mean that all conditions have to be met. Having two or more rules configured would mean that learners have to satisfy all conditions in at least one rule to be eligible.
The applicable group can be defined based on the following criteria: Role, Location, Department, Designation, User, Group and Experience.
If you want to add users in bulk manually, Select user in a specific criteria and start typing to search for and select the users you want to add in the text box provided.
Use case
You have created a course on employee retention strategies, due to rising attrition rates in the Delhi office of your organization. You would like the course to be attended by both, experienced HR professionals, and managers in the Delhi office who are facing this issue.
Let us see how to configure our applicable group:
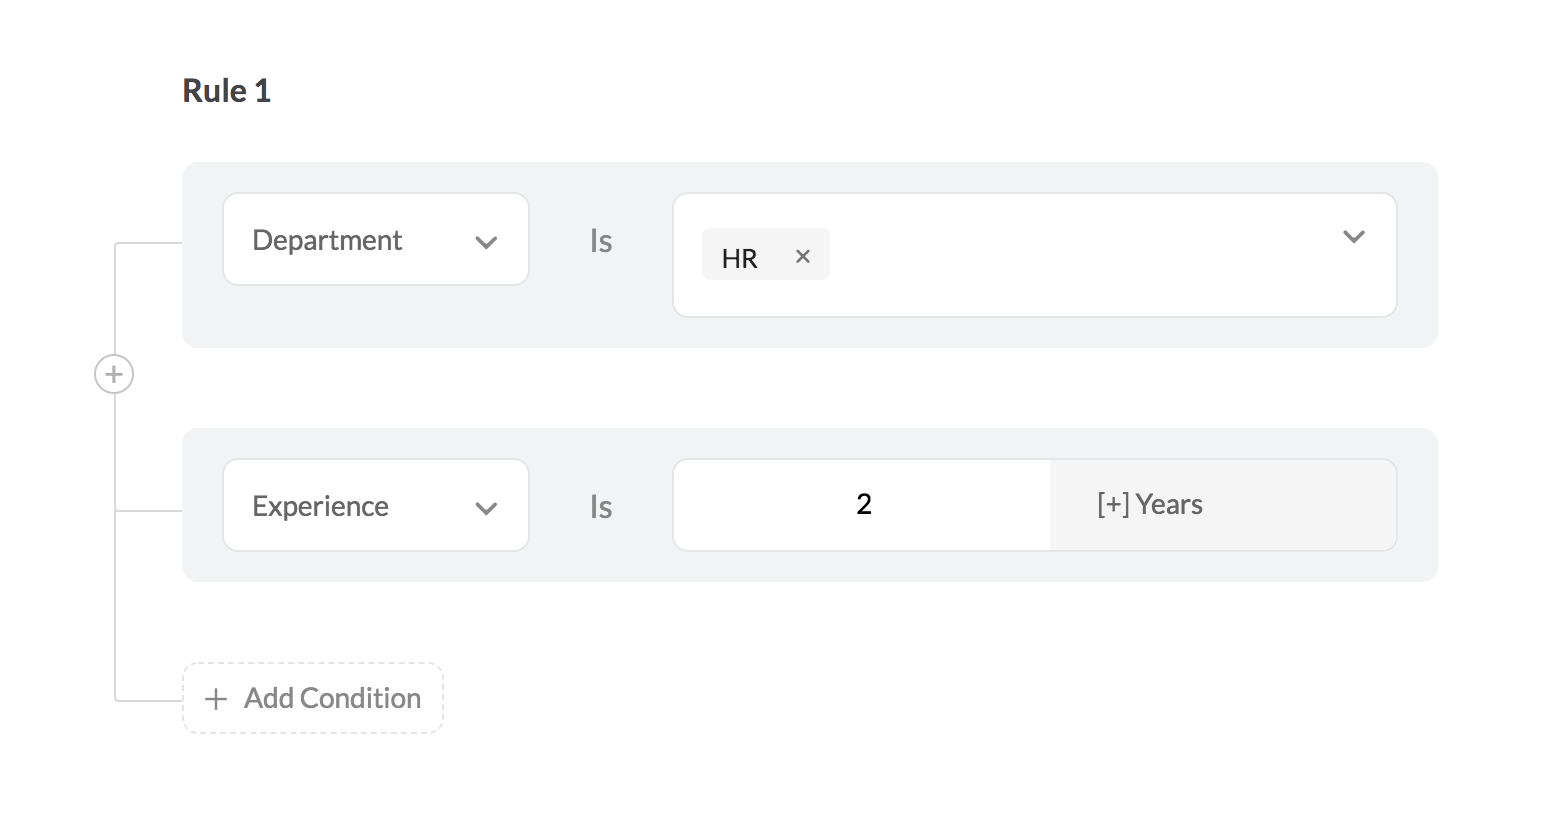
Rule 1: All employees in the HR department with 2 or more years of experience.
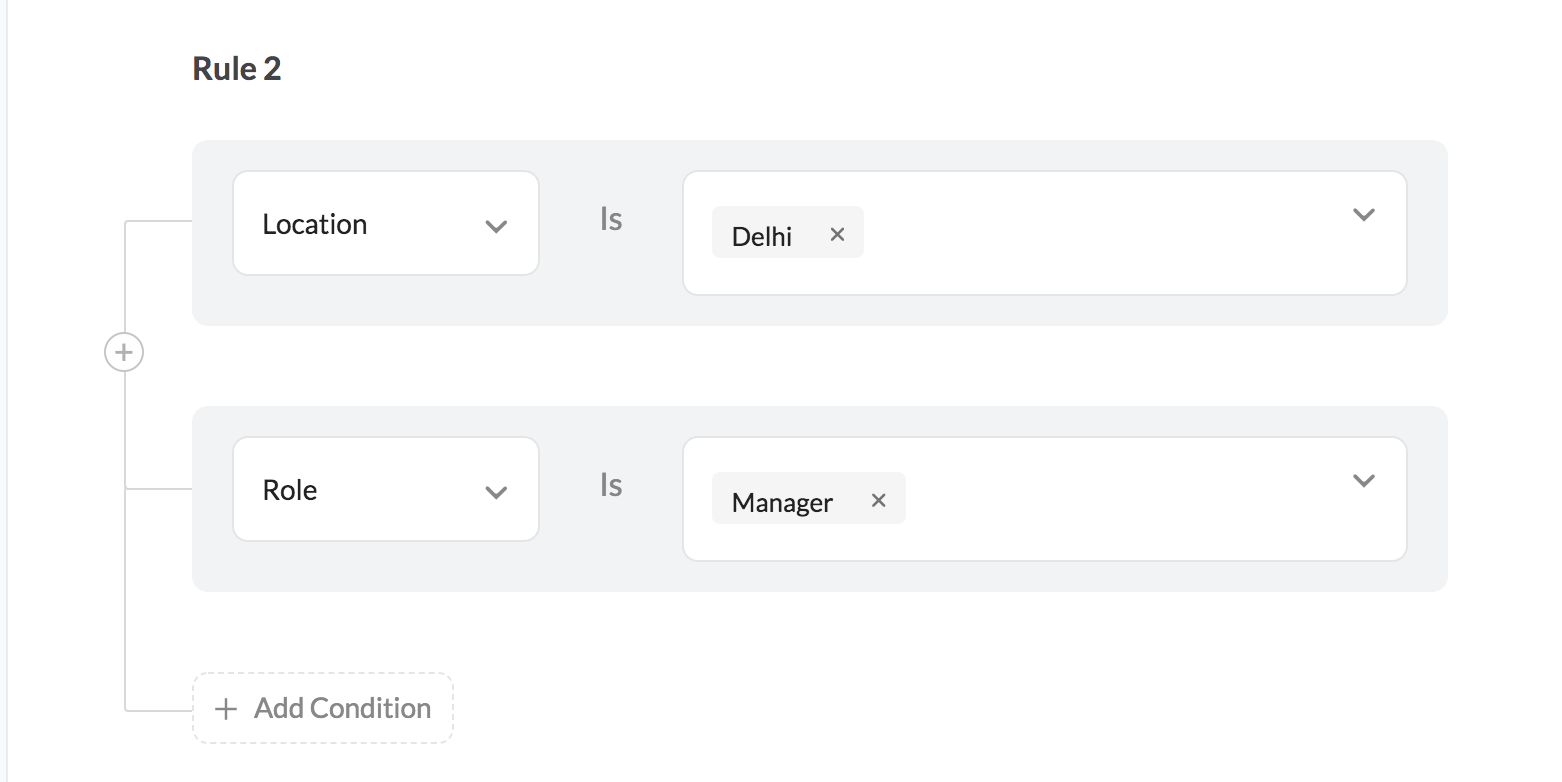
Rule 2: All employees with the Manager role in the Delhi location.
Put together, the course will apply to all HR employees with 2 or more years of experience and to all managers in Delhi. Both the required criteria are satisfied.
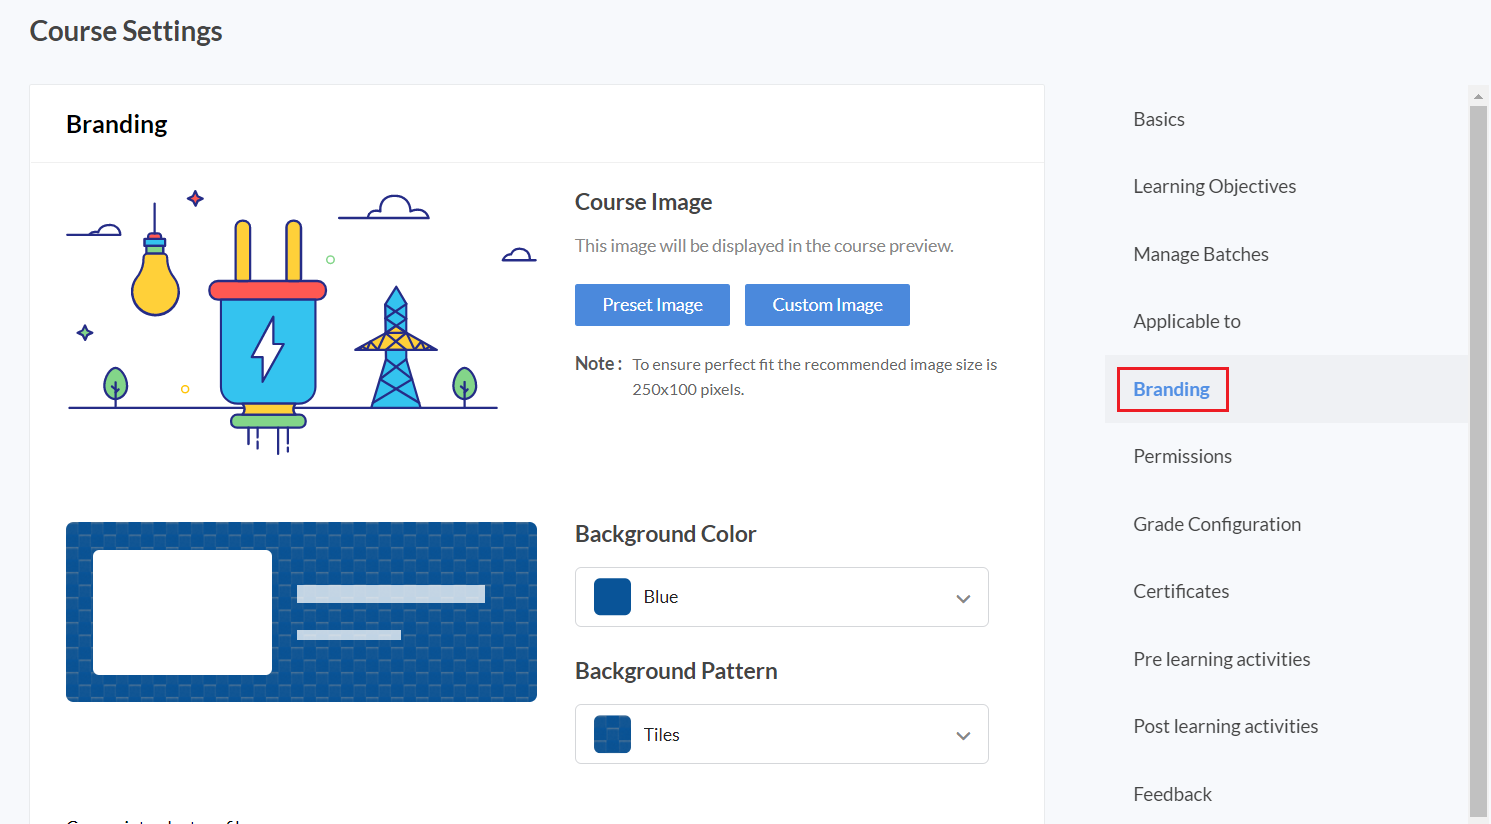
Branding
Use the Branding tab to customize course image, banner background color and background pattern. Additionally you can upload related introductory files here.
Course Image can be an image that visually represents the course. Select an image from a host of preset images or upload an image using the Custom Image button (250x400 resolution).
Use the Background Color and Background Pattern drop-down to add a touch of color and style to your course.
Course Image can be seen in the My Courses & Course Catalog space. Background Color & Pattern are visible when you access a course.
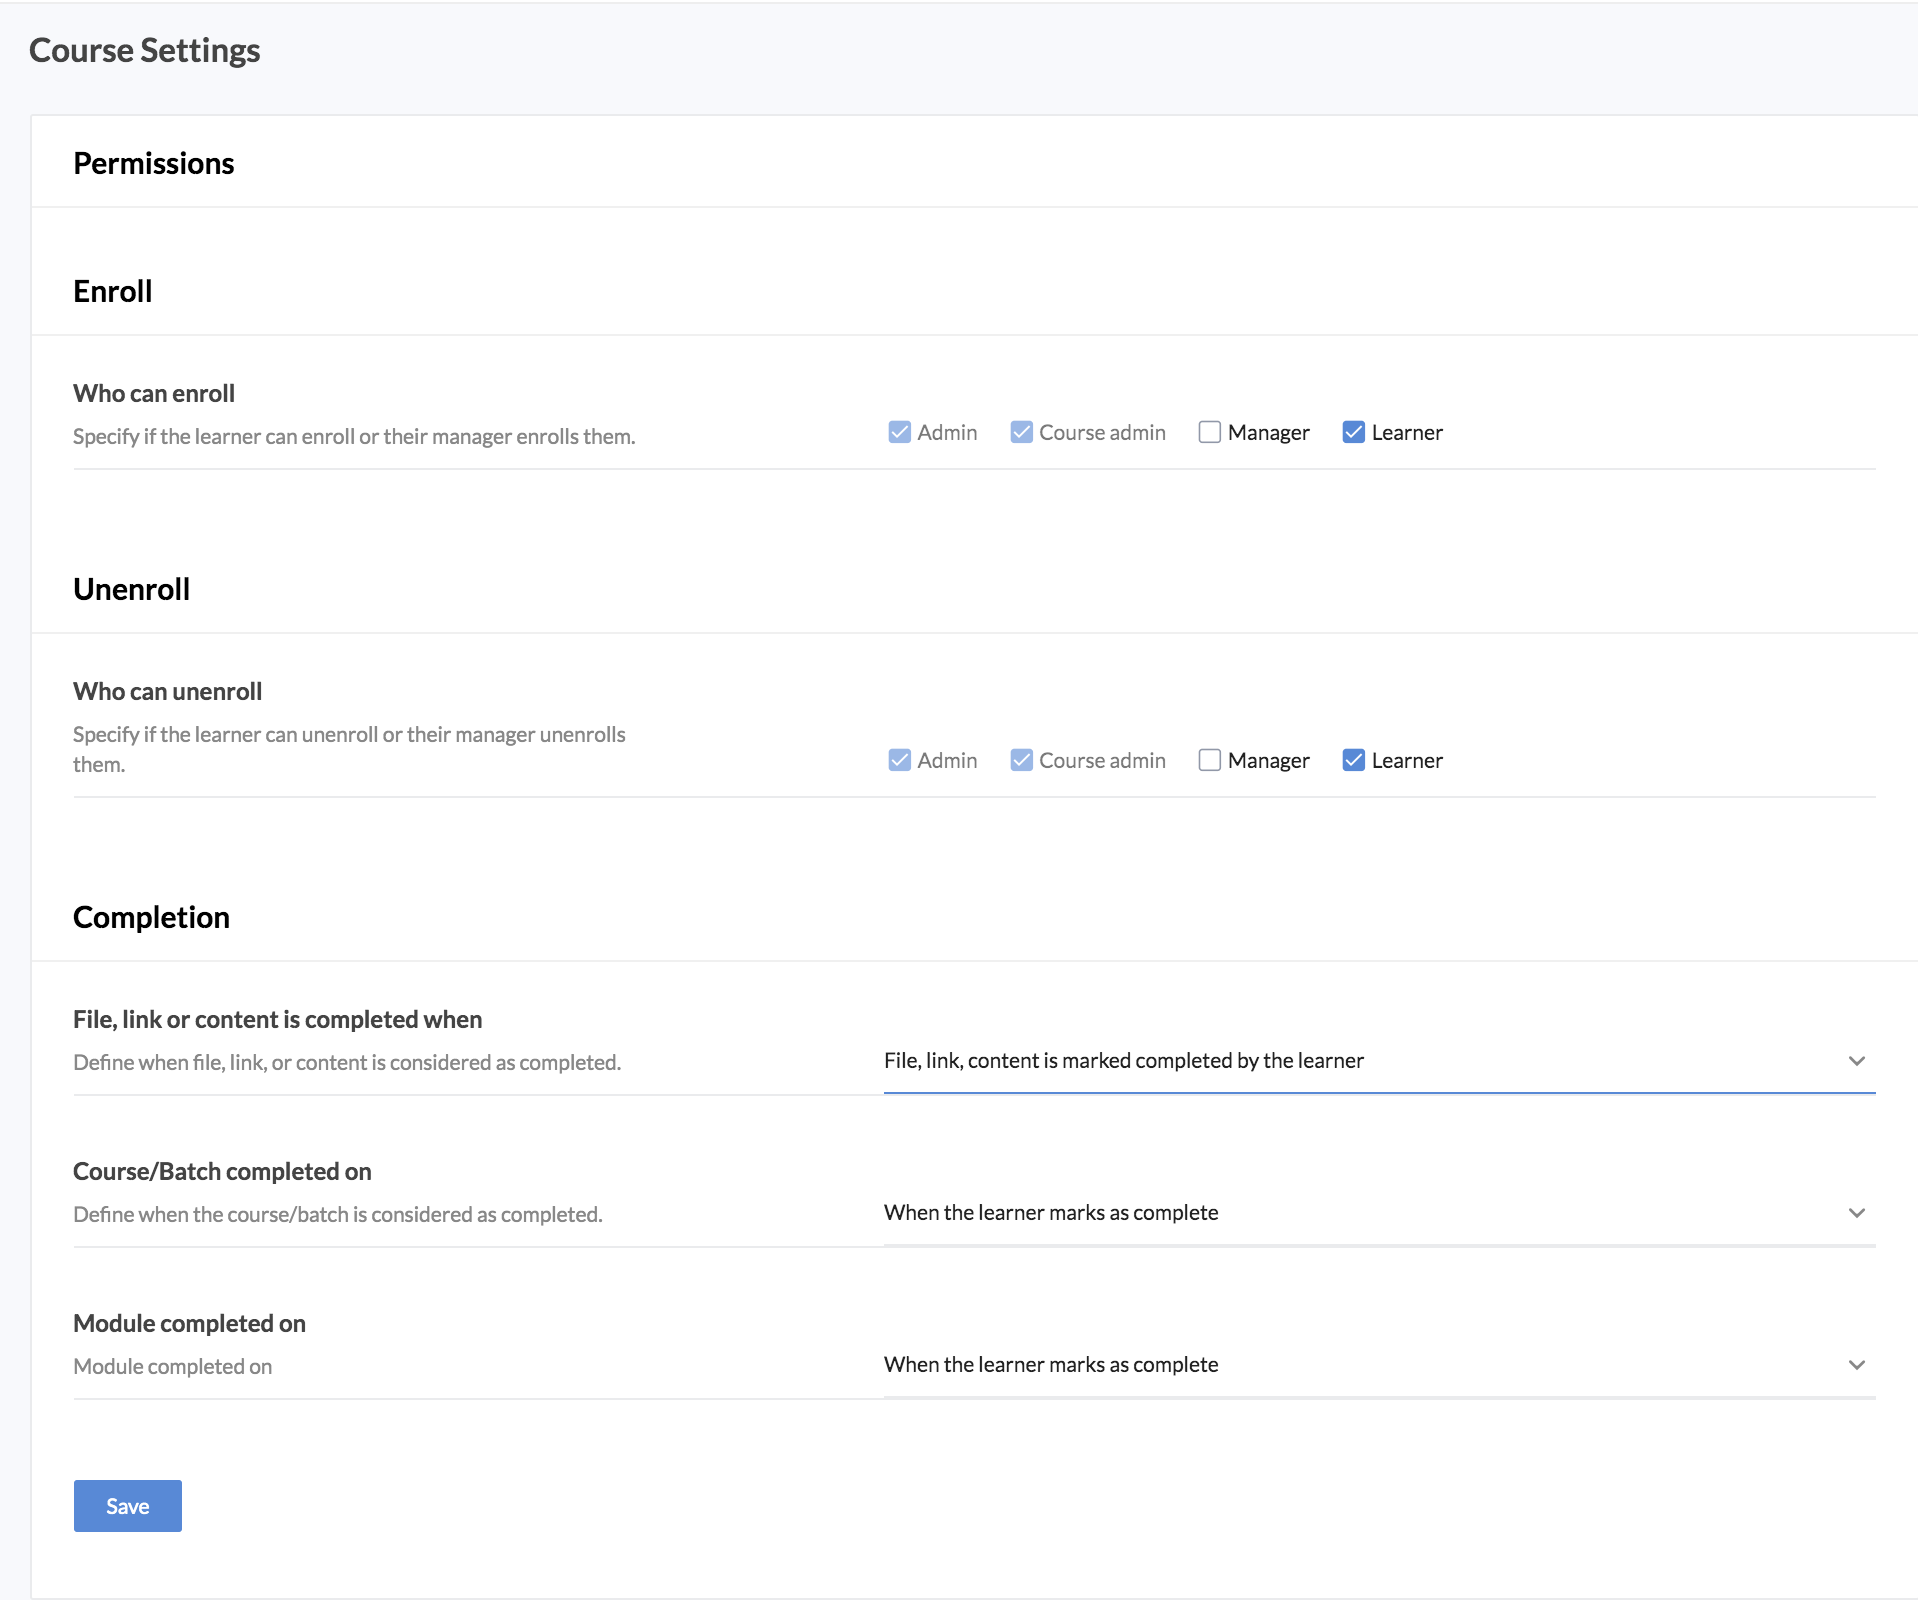
Permissions
Set the required permissions for enrollment, unenrollment and for completion.
Reminders
Within course settings, you have the option to enable and use reminders. Reminders will be automatically sent to applicable members when specific course-related events occur, such as when a batch is published or when a learner can provide feedback on a course.
To access and configure these reminders, select a course and click on the top-right Ellipses icon > Course Settings > Reminders
Here are some points to note about this feature:
- Within each reminder option, a maximum of 3 reminders can be configured at once.
- The available reminder options vary based on course type.
- The notifications option must be enabled in Settings > LMS > Conifugration > General > Additional Options > Notifications for this feature to work.
- Click the edit (pencil icon) to add, edit, or remove reminders.
- When adding reminders you can specify when the notification will be sent.
- Applicable members will be notified via email and feed updates.

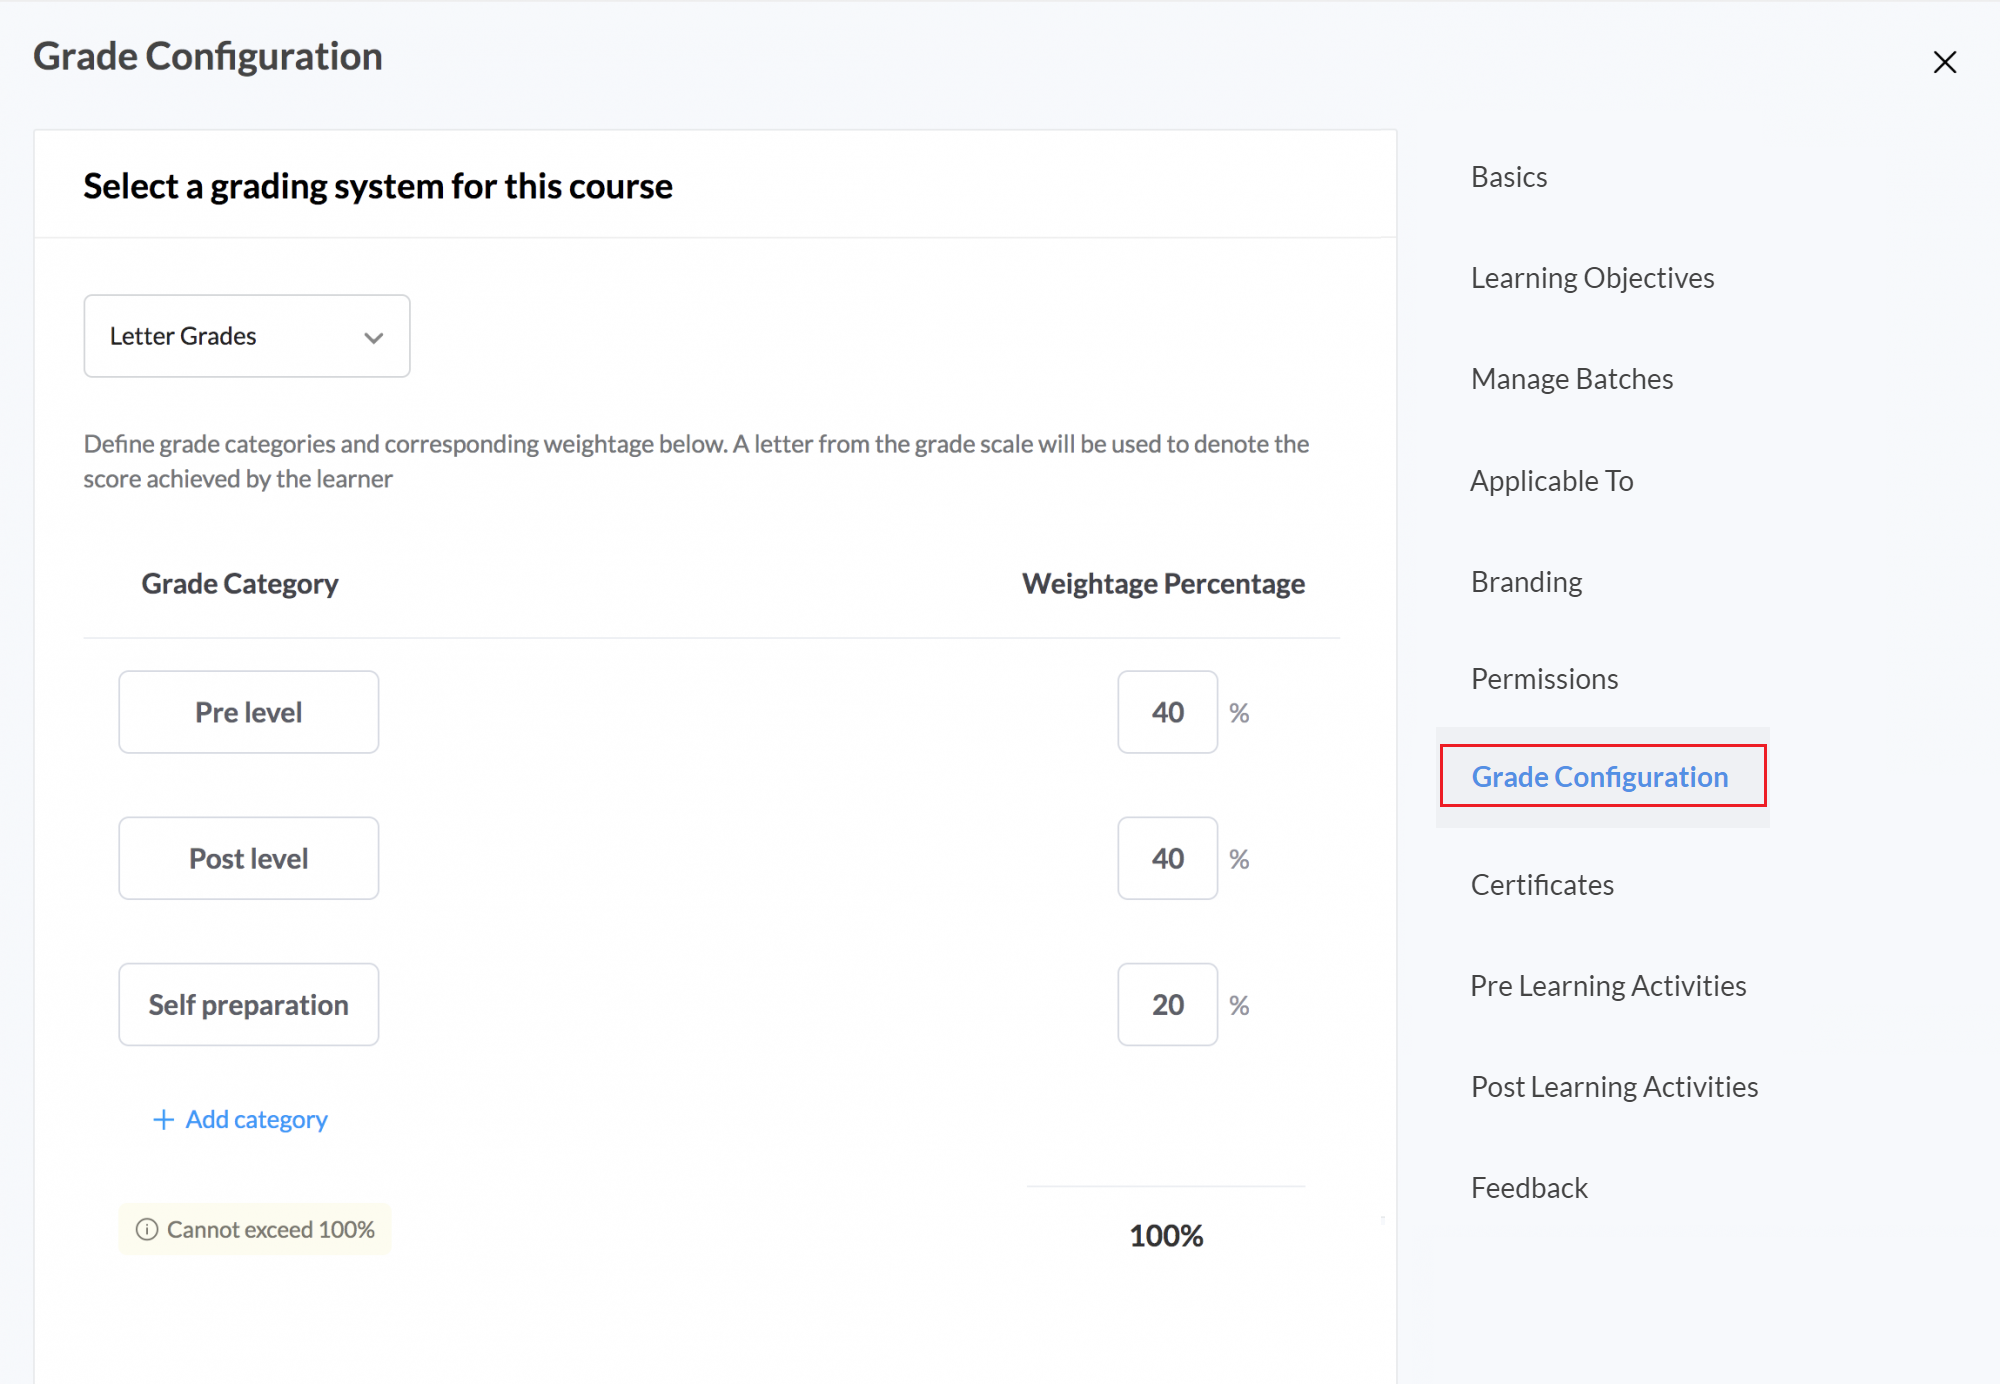
Grade configuration
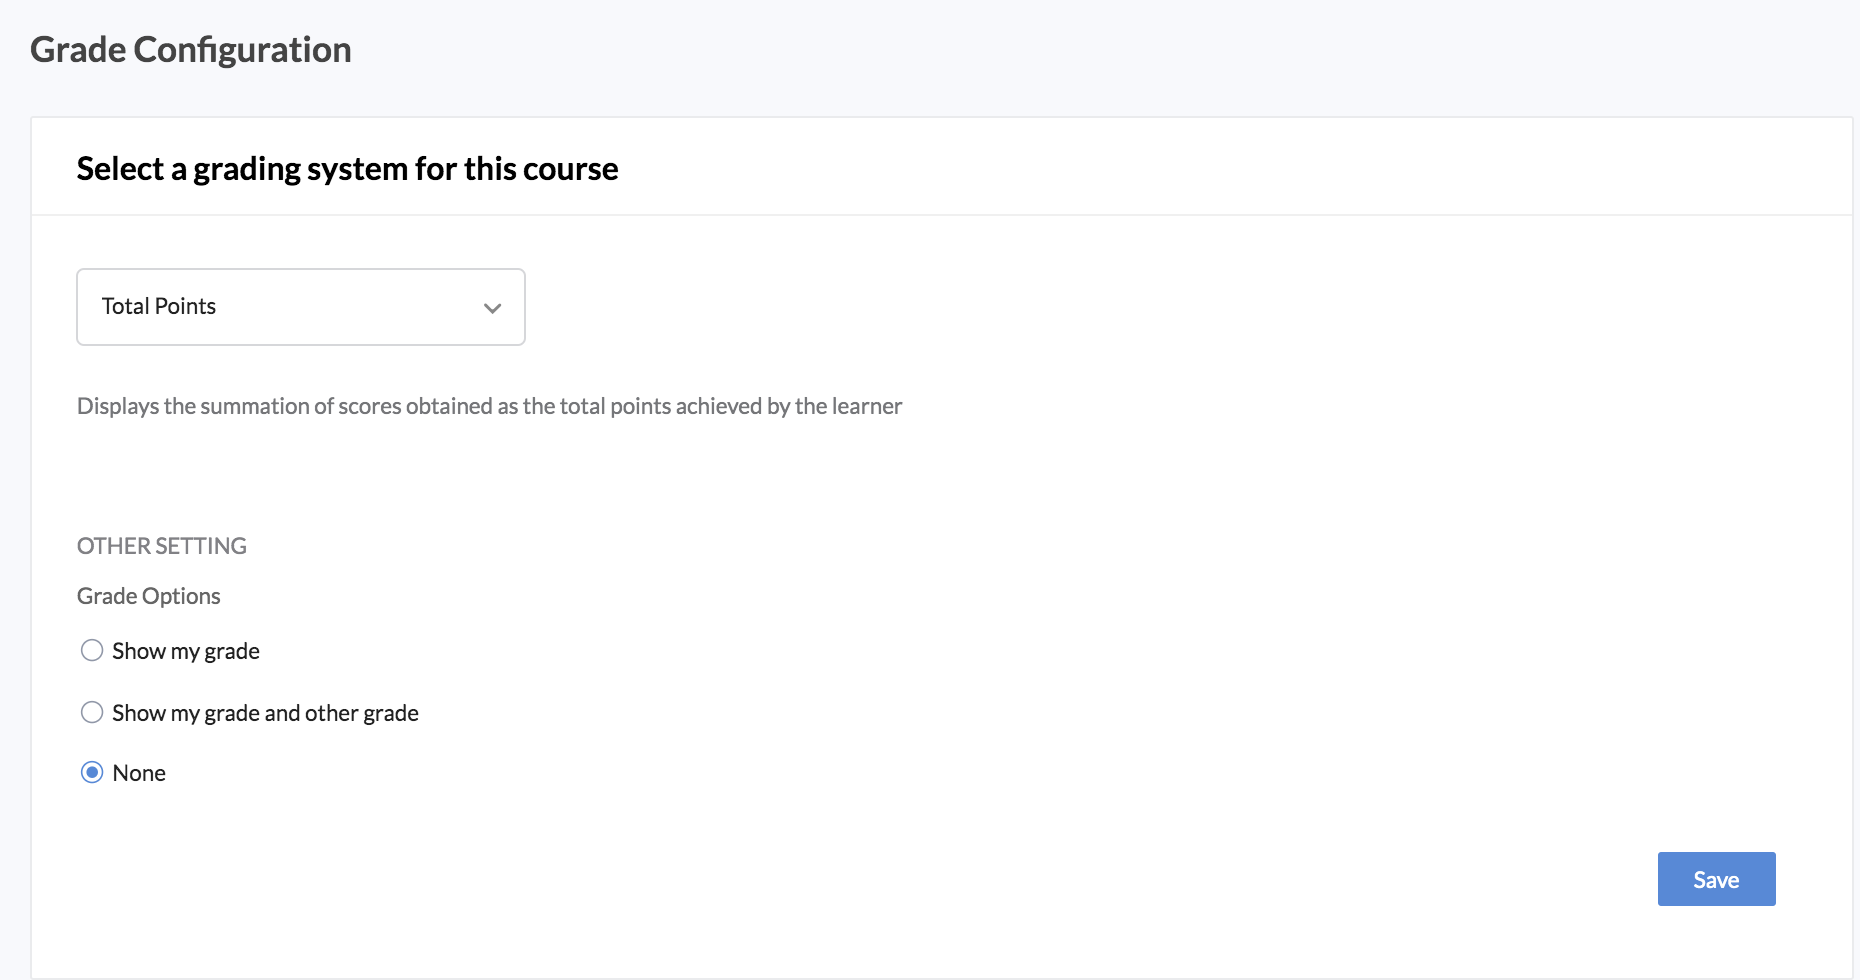
Select the grading system you want to apply for the course and select other related settings for it.
Certificates
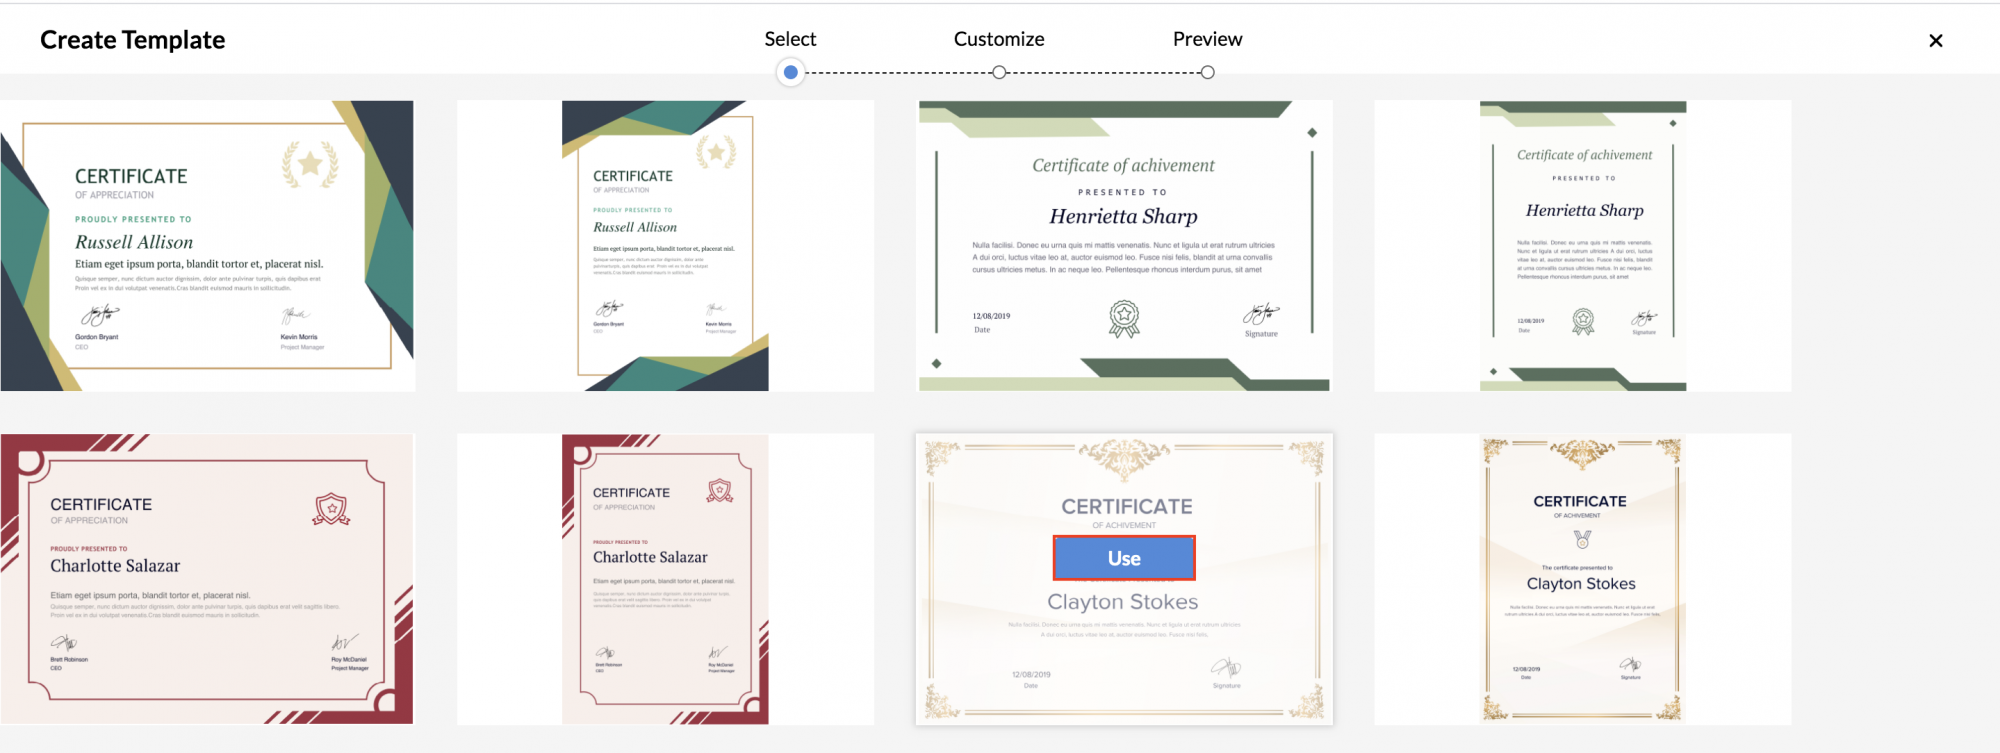
Course Certificates can be created and used to reward learners who complete a course. In Zoho People's LMS, you can create and customize certificates from a variety of pre-designed templates and grant them to the members of the course after successful completion.
To create a certificate for a course,
- Go to Course Settings of the specific course, and then to the Certificates tab.
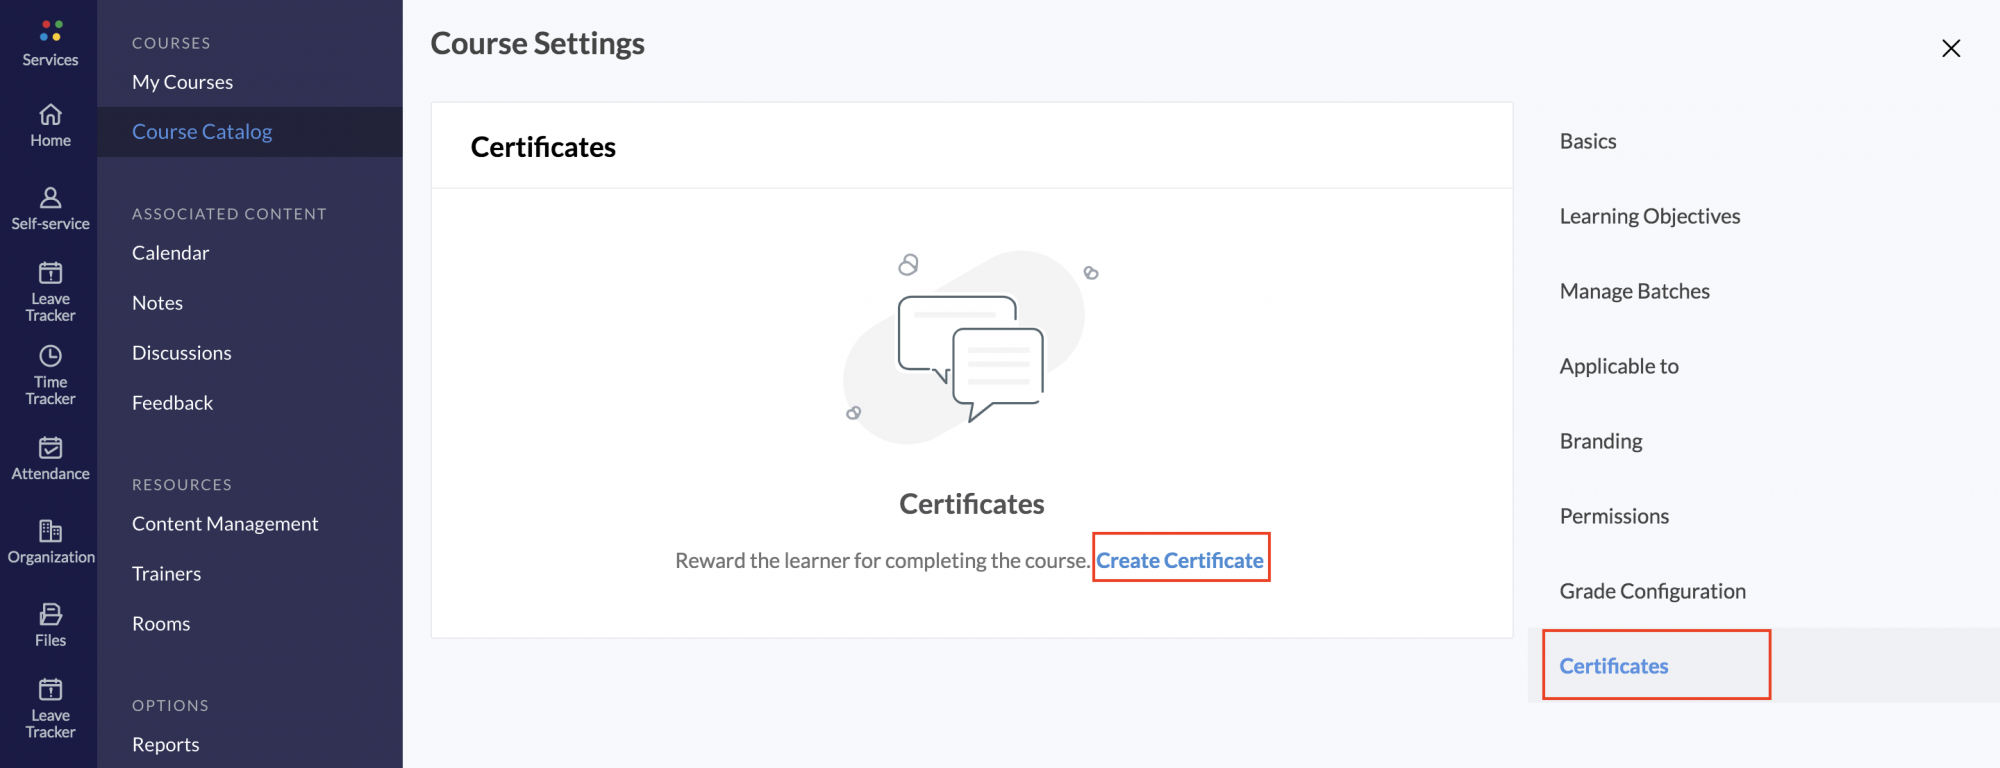
- Click Create Certificate.
- Select the template you want to use.
- Drag and drop fields to customize the certificate.
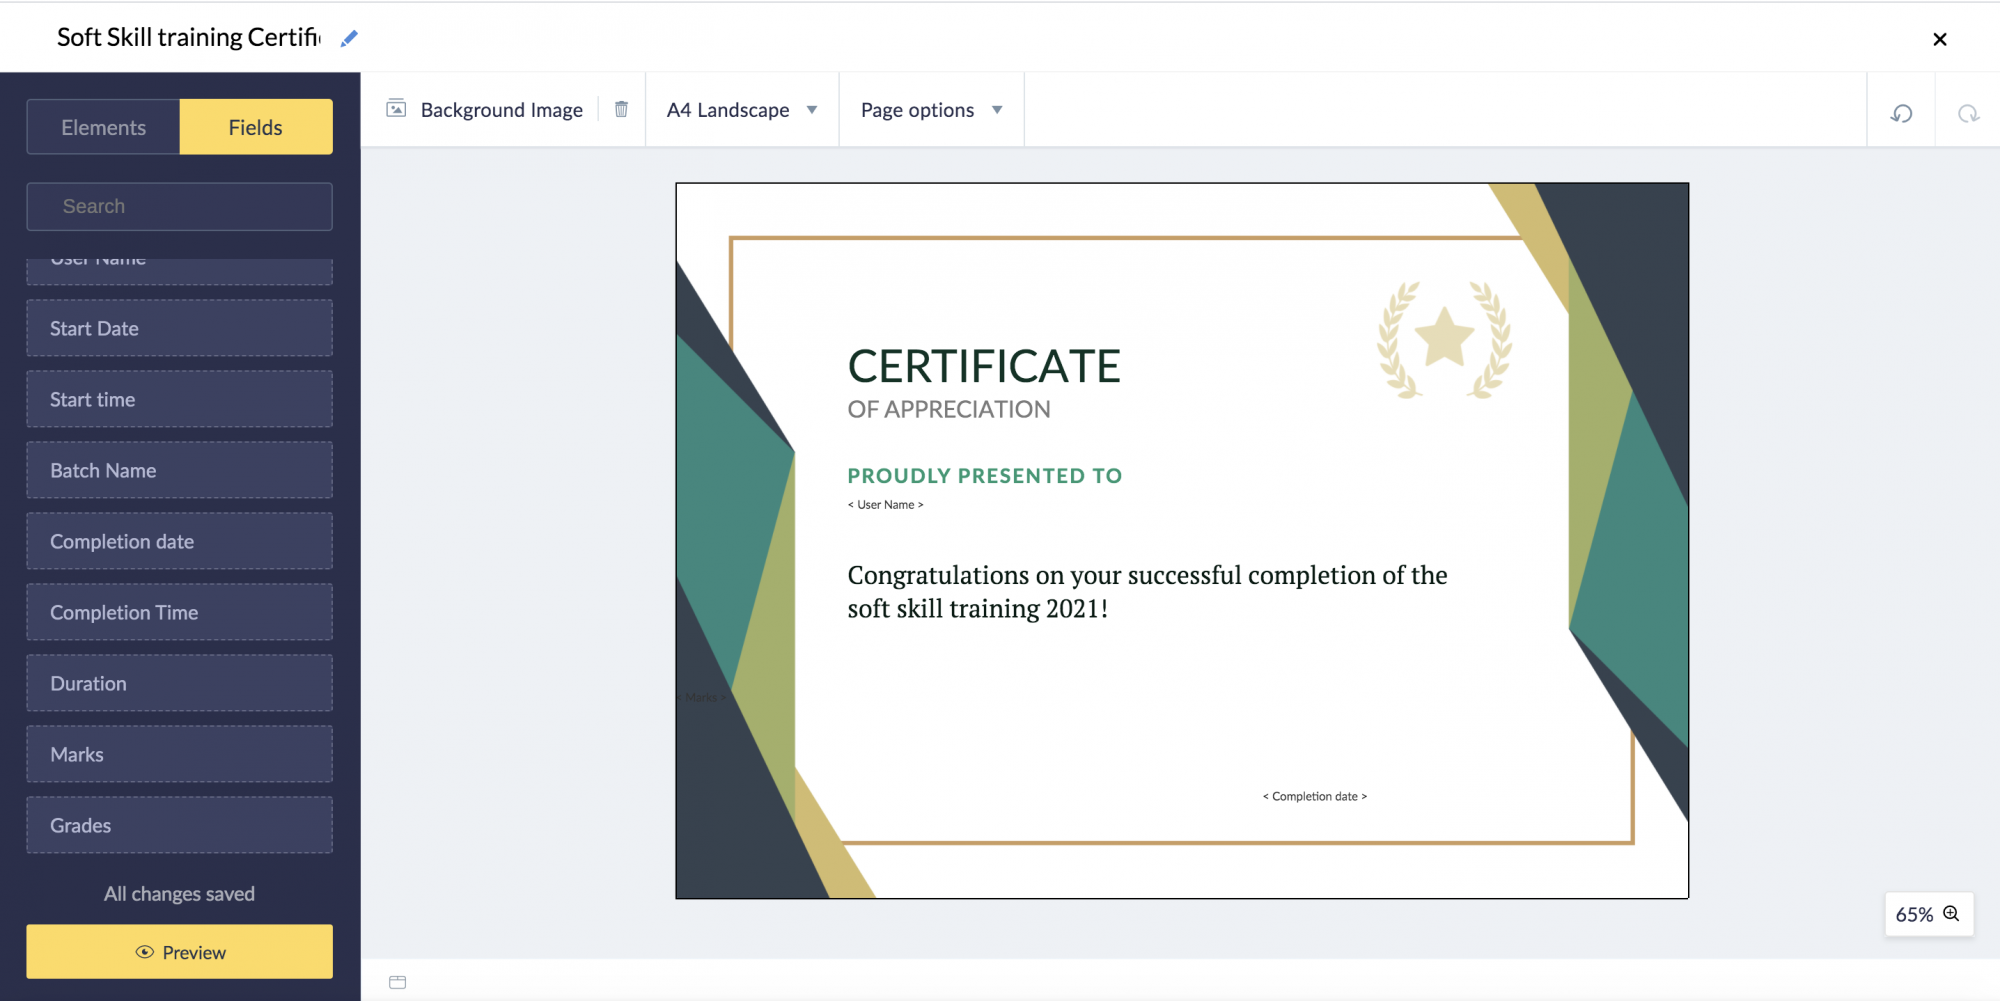
- Click Preview to view before sharing and make any changes if required.
- Click Proceed.
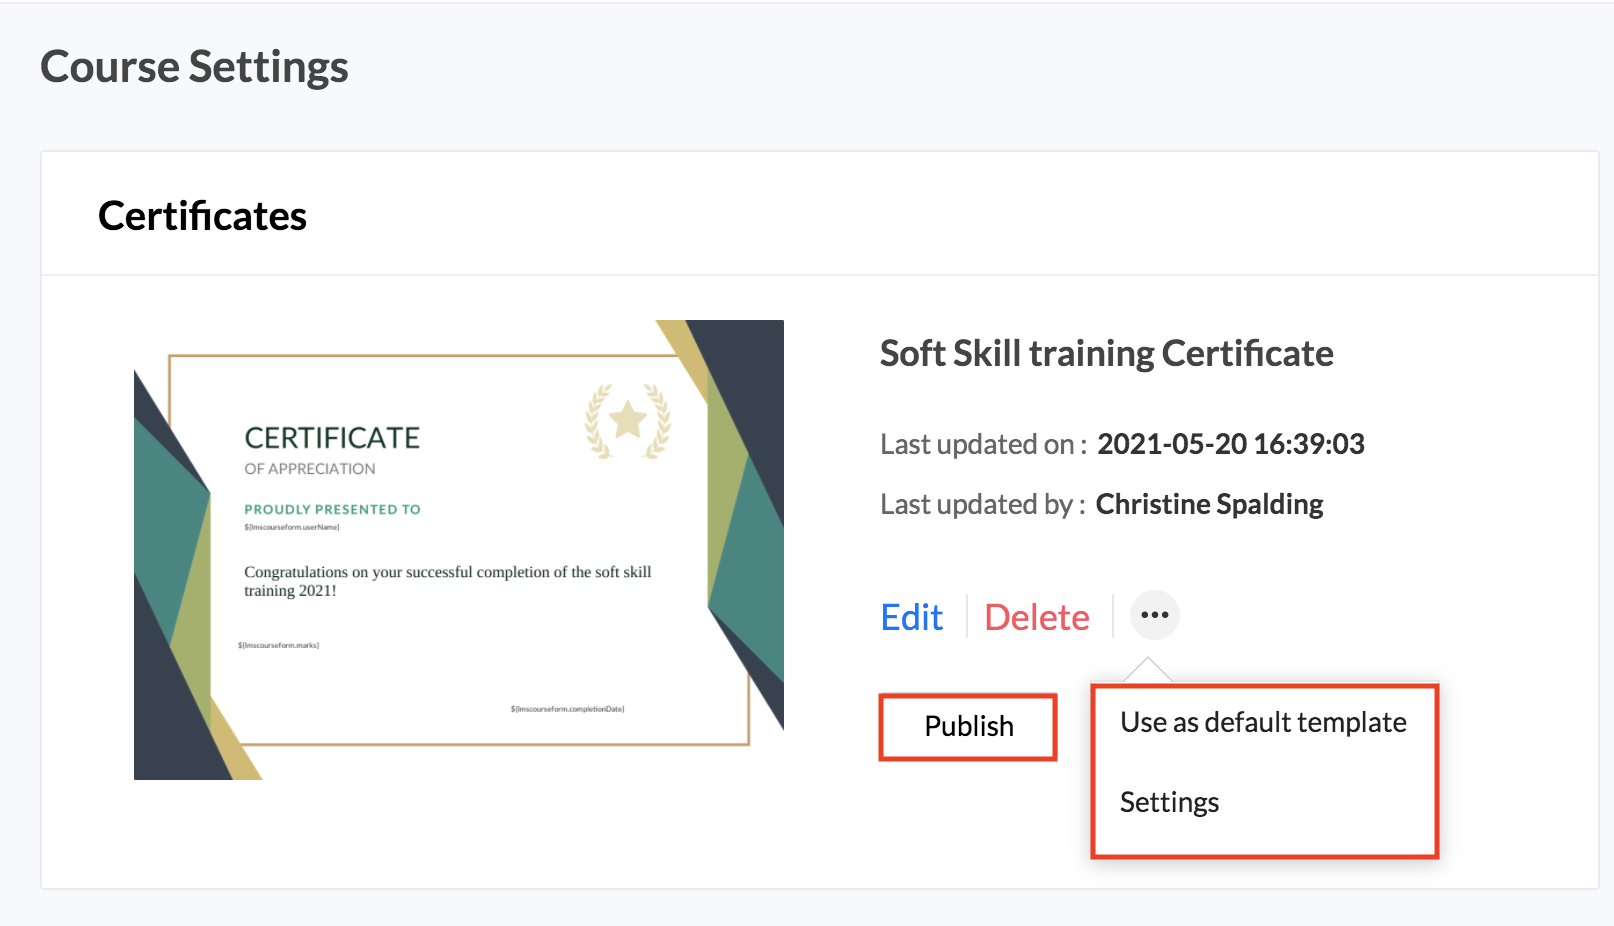
- Click Use as default template under the ellipsis icon, if you want this template to be applied as the default template for all self paced courses.
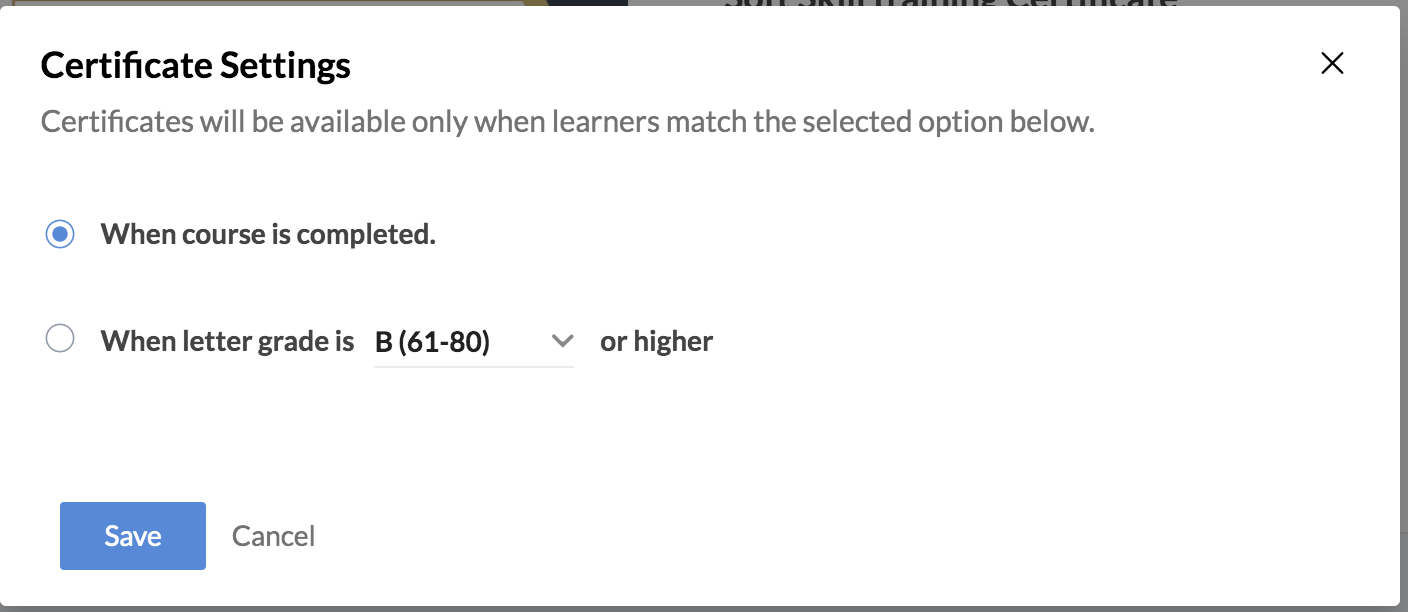
- Click Settings, and select who can view and download the certificate, by selecting one of the options shown in the popup. The options shown is based on the selected grade configuration.
- Click Publish to make the certificate viewable to all applicable learners once they have completed the course.
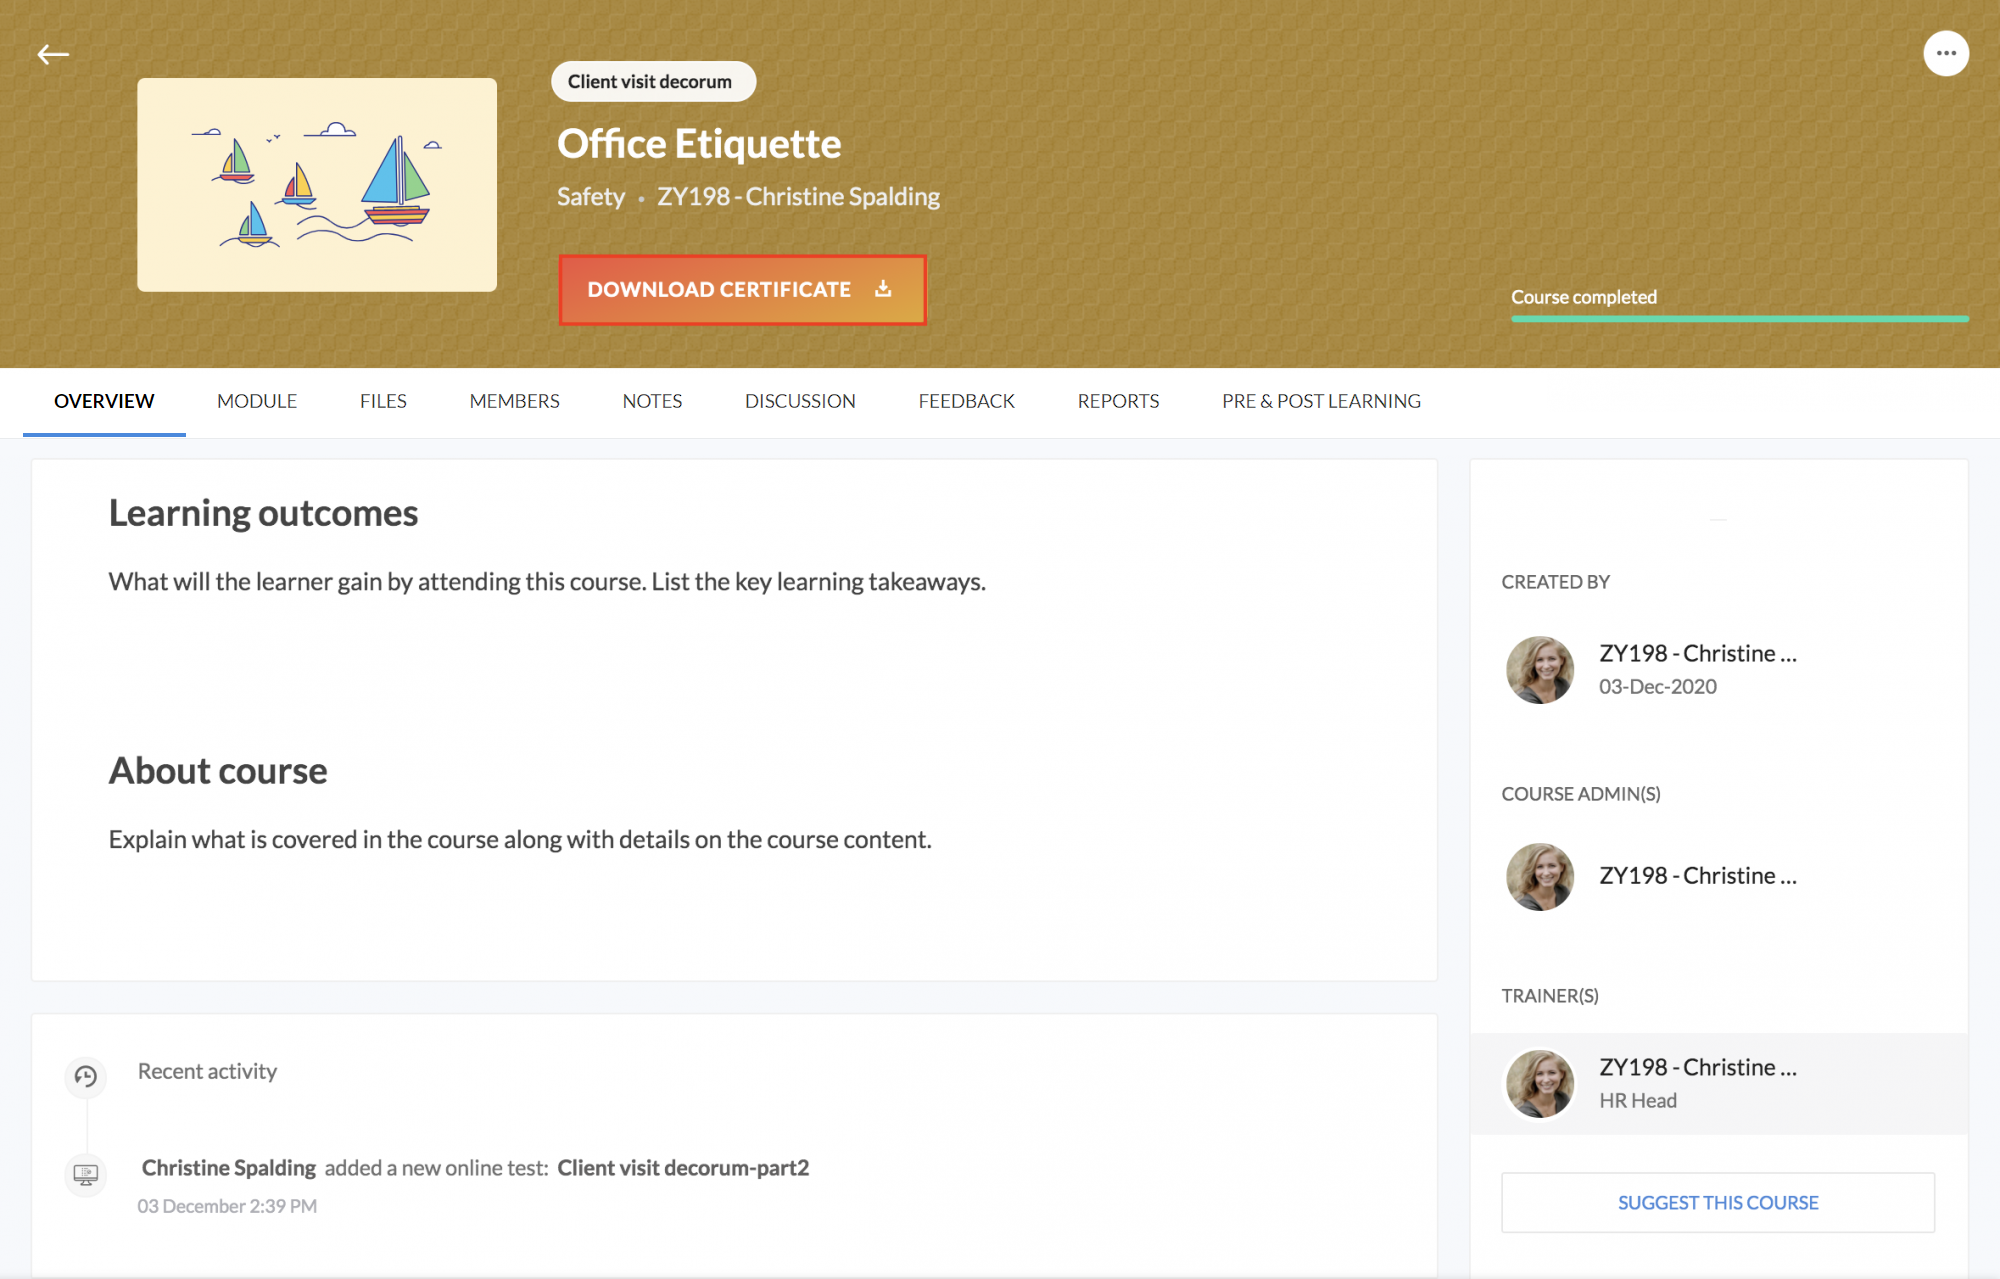
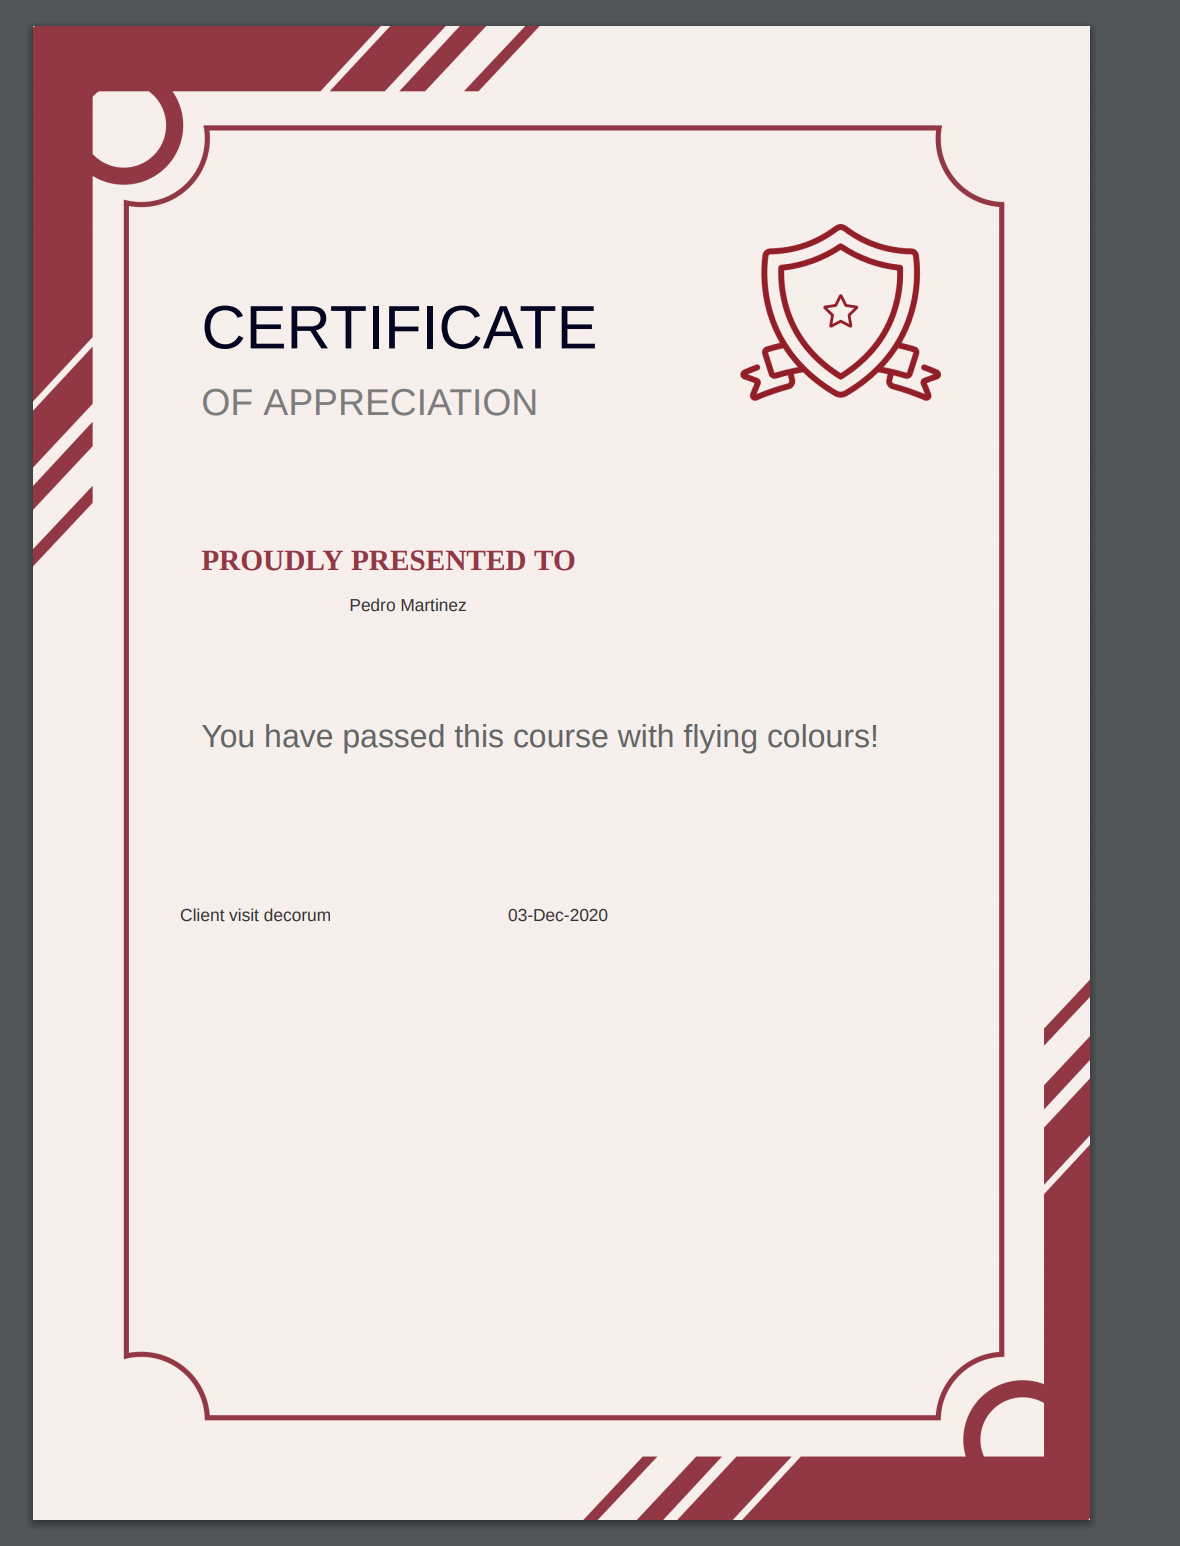
Once the learner completes the course, they will be able to download the certificate from the course overview.
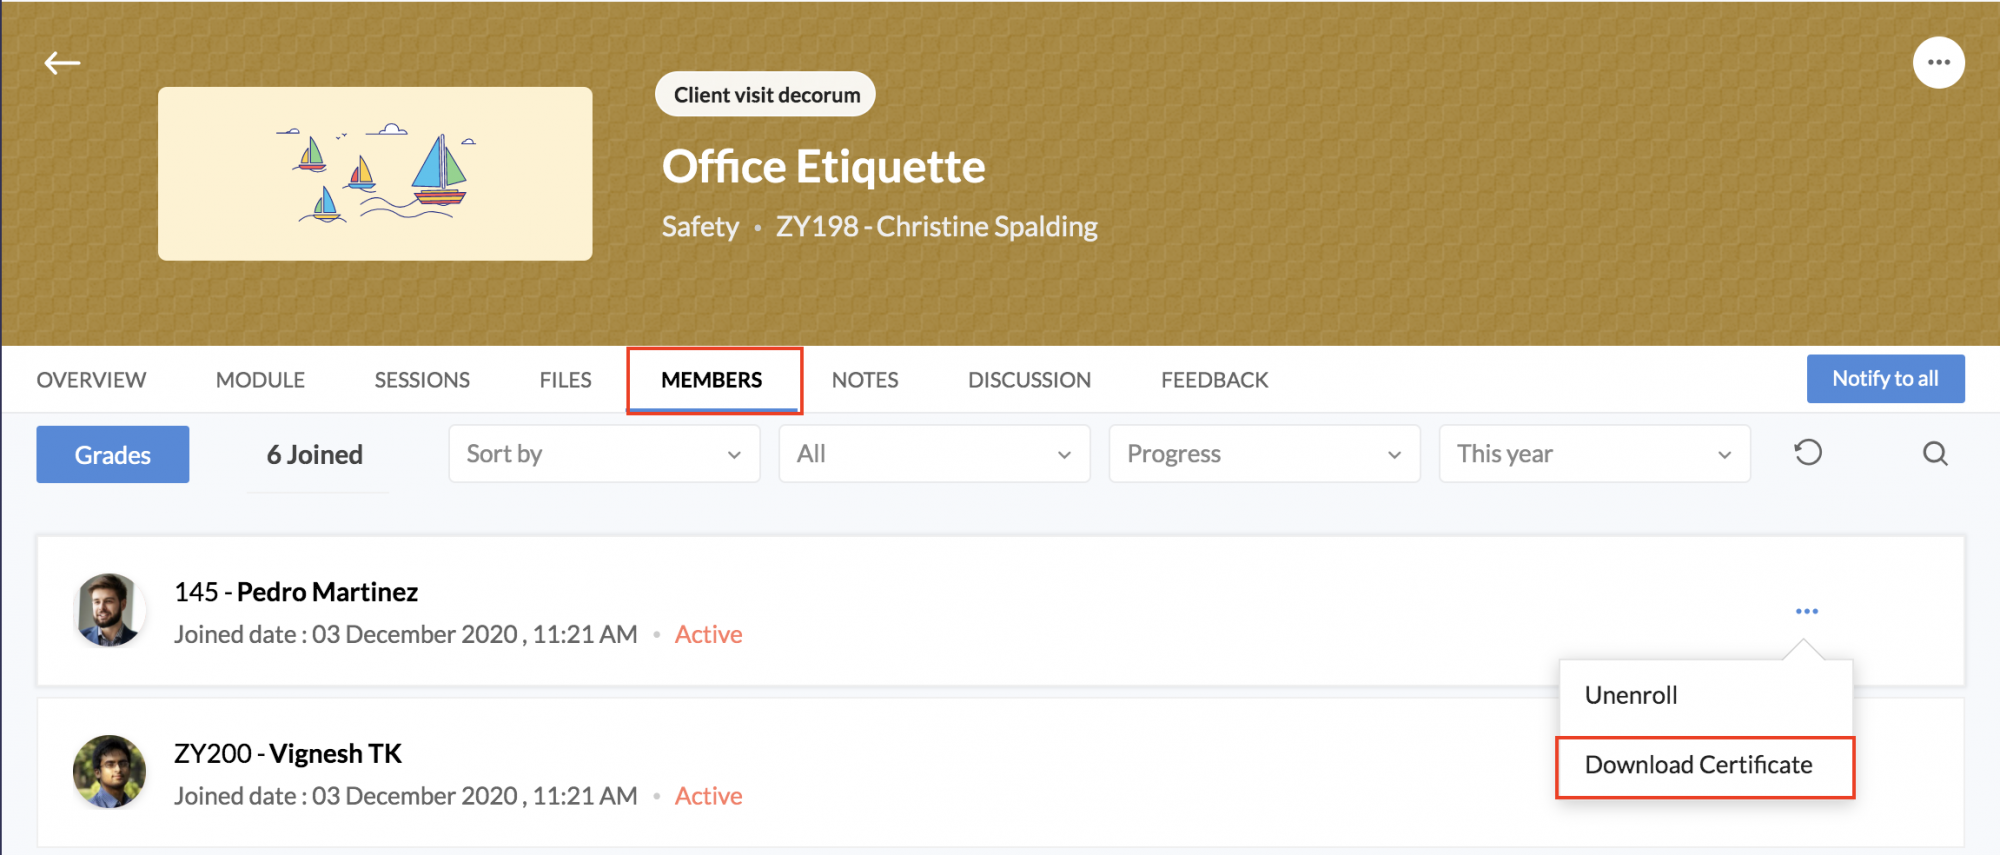
Admins can also download the learner's certificate, under the Members tab. To download the certificate of a learner, click the ellipsis icon beside the learner's name, and click Download Certificate.
Pre Learning Activities
..
What are pre learning activities?
These are a set of activities that are given to the learner before beginning a course.
..
Why is it useful?
These activities, help the trainer and learner understand the current proficiency level of the learner. They also prepare the learner for what to expect in the course.
Pre learning test
A preliminary test can be held before the start of a course. Individual tests can be tailored for each specific course.
The test can be included within the grade calculation of the course or be given independently. If included within the overall grade calculation, the test becomes mandatory.
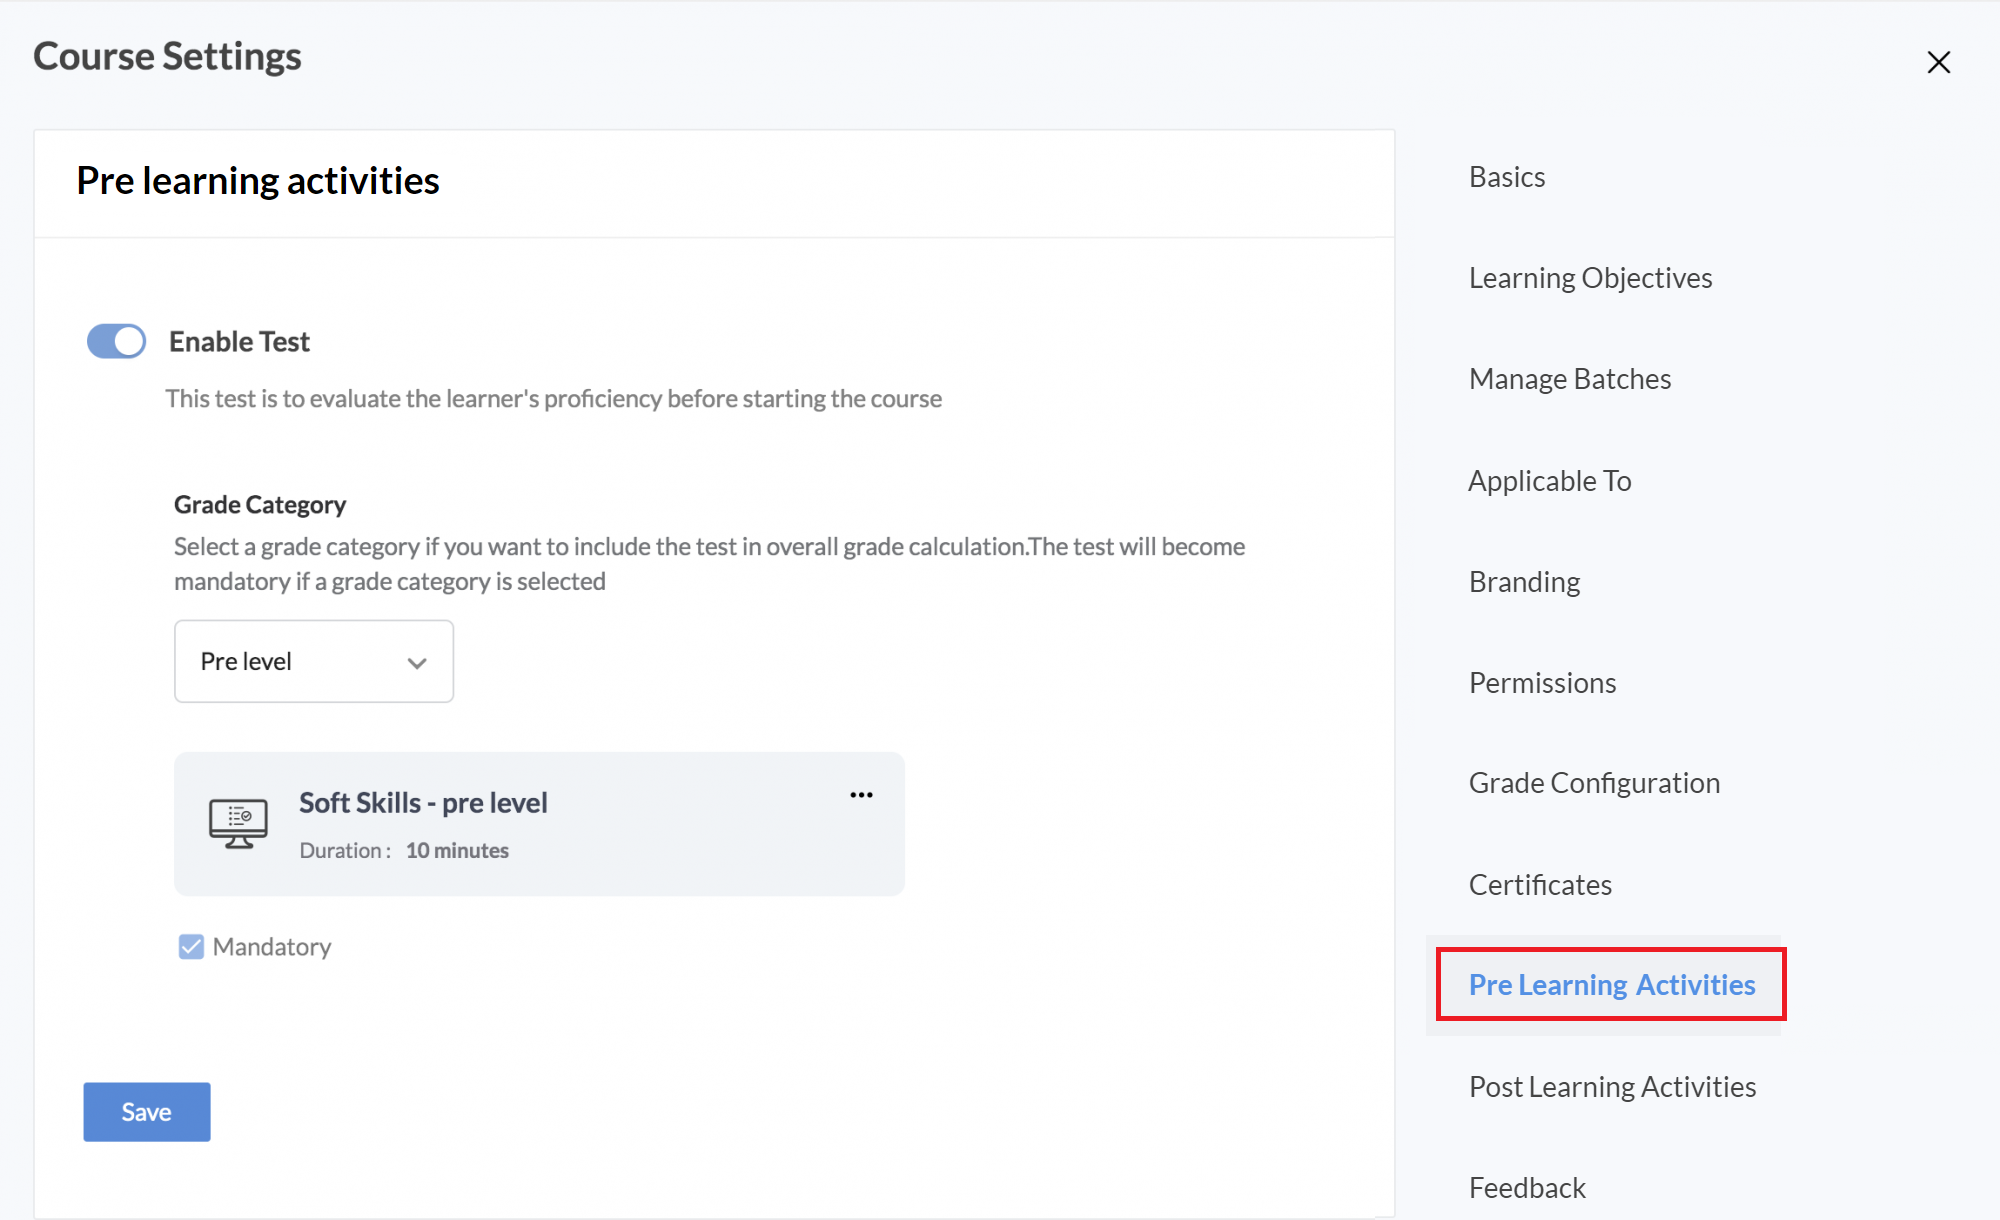
To include a test as part of the course, go to the course settings of the specific course.
- Go to the Pre Learning Activities tab.

- Enable Test.
- Select a category if you want to include the test as part of the overall grade calculation. If a category is selected, then the test becomes mandatory.
- If you do not want to make the test mandatory, then no category needs to be selected.
- Add a test.
- Click Save.
Once a learner completes this test, they will be able to access the course. Learn more from the employee's perspective.
Post Learning Activities
..
What are post learning activities?
These are a set of activities that are given to the learner after they complete learning through a course.
..
Why is it useful?
These activities help the trainer and learner understand the proficiency level of the learner after completing the course.
Post learning test
A test can be held after completing a course. Individual tests can be tailored for each specific course.
The test can be included within the grade calculation of the course or be given independently. If included within the overall grade calculation, the test becomes mandatory.
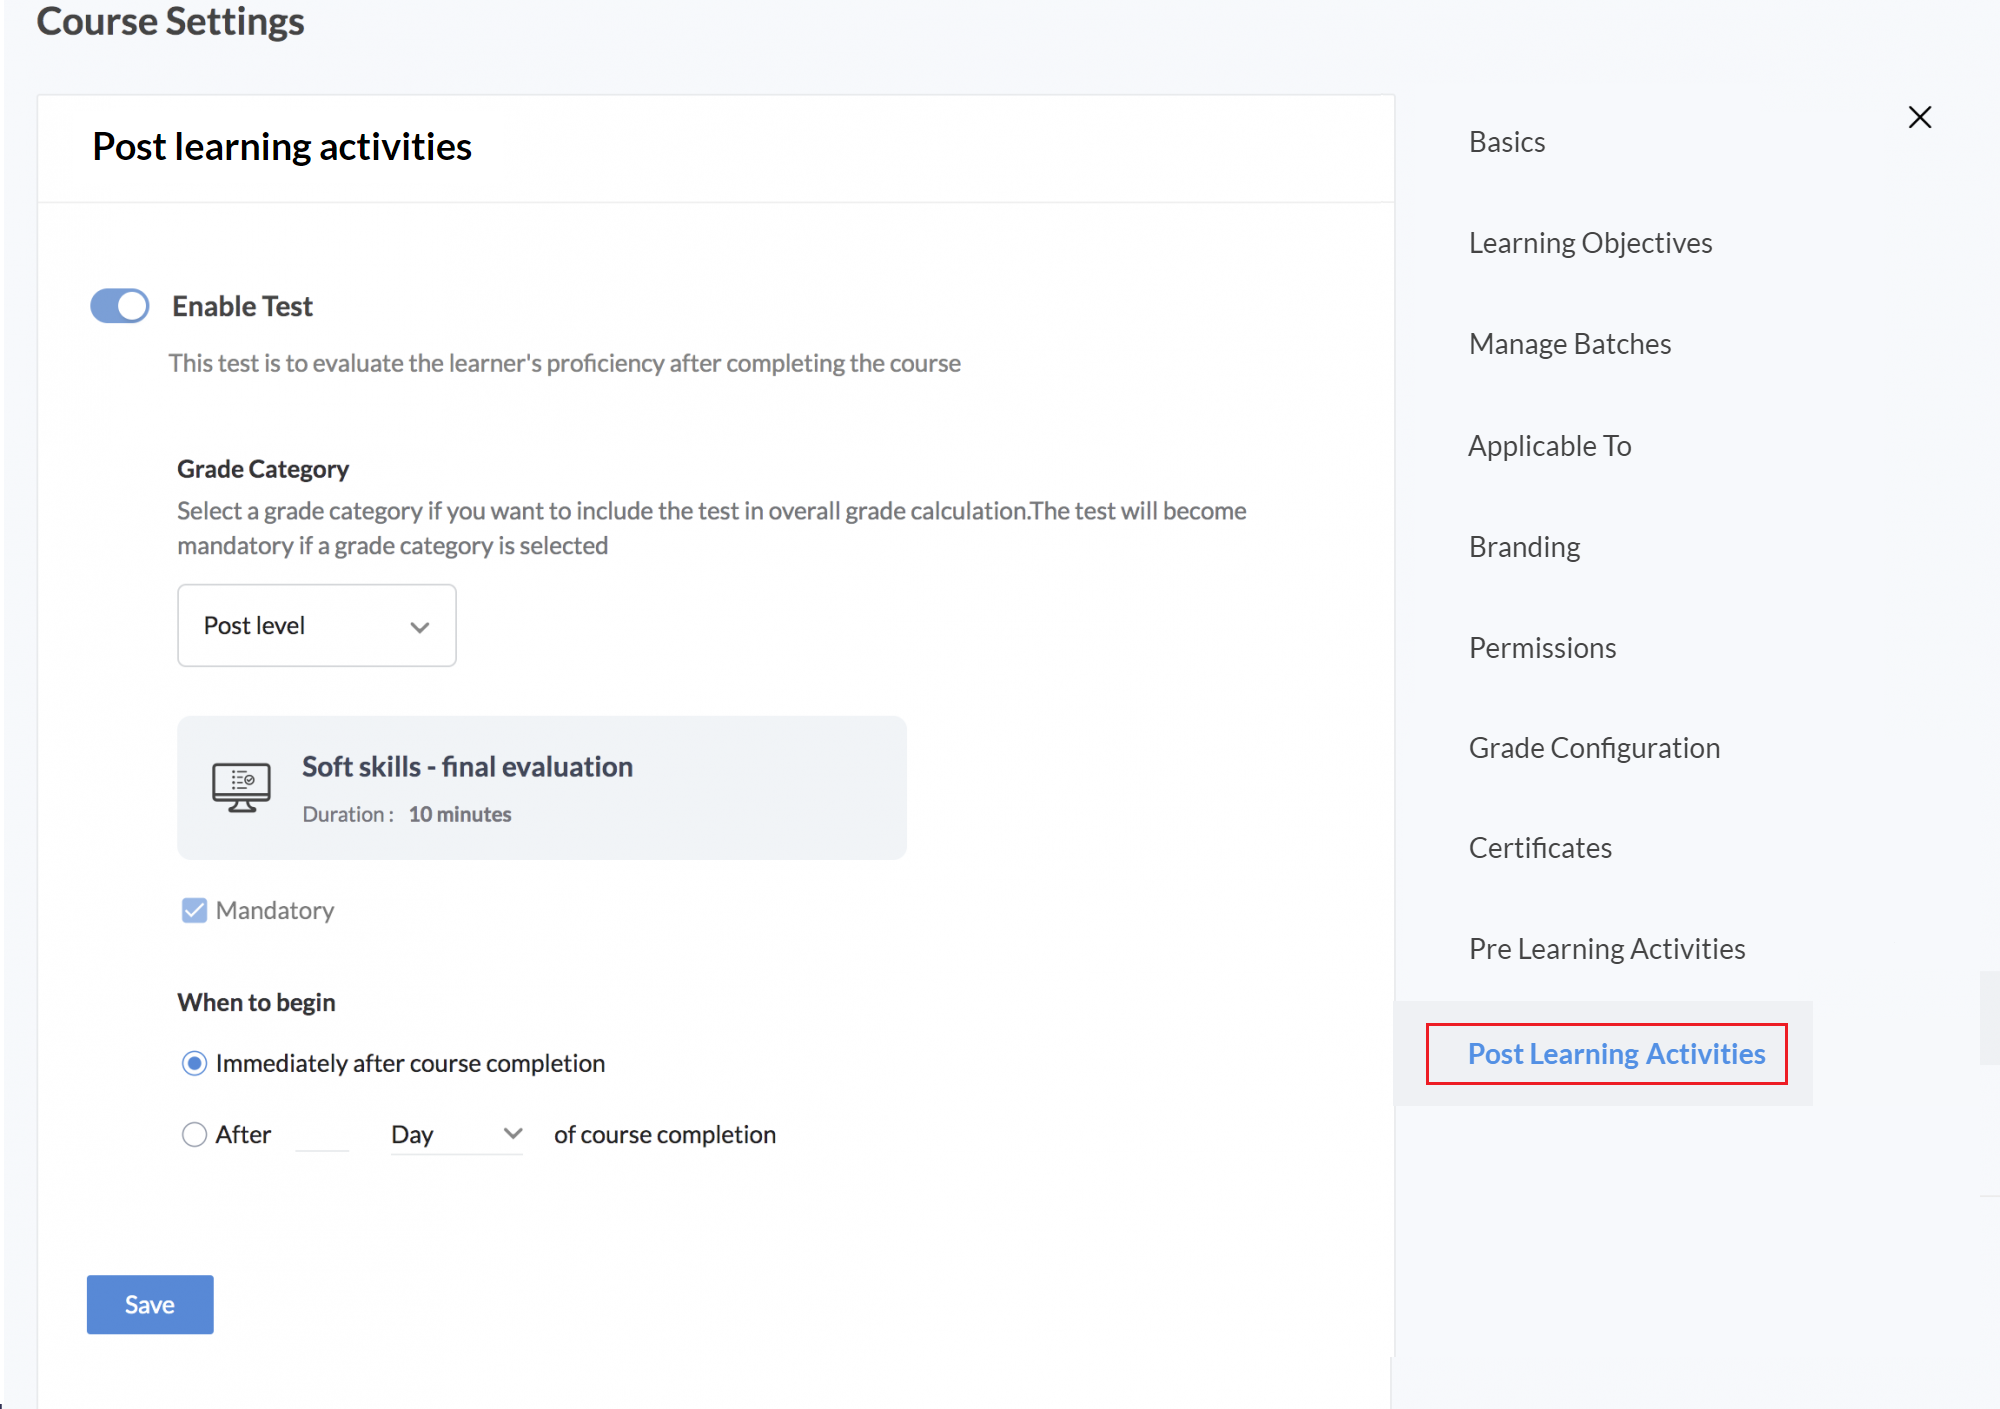
To include a test as part of the course, go to the course settings of the specific course.
- Go to the Post Learning Activities tab.
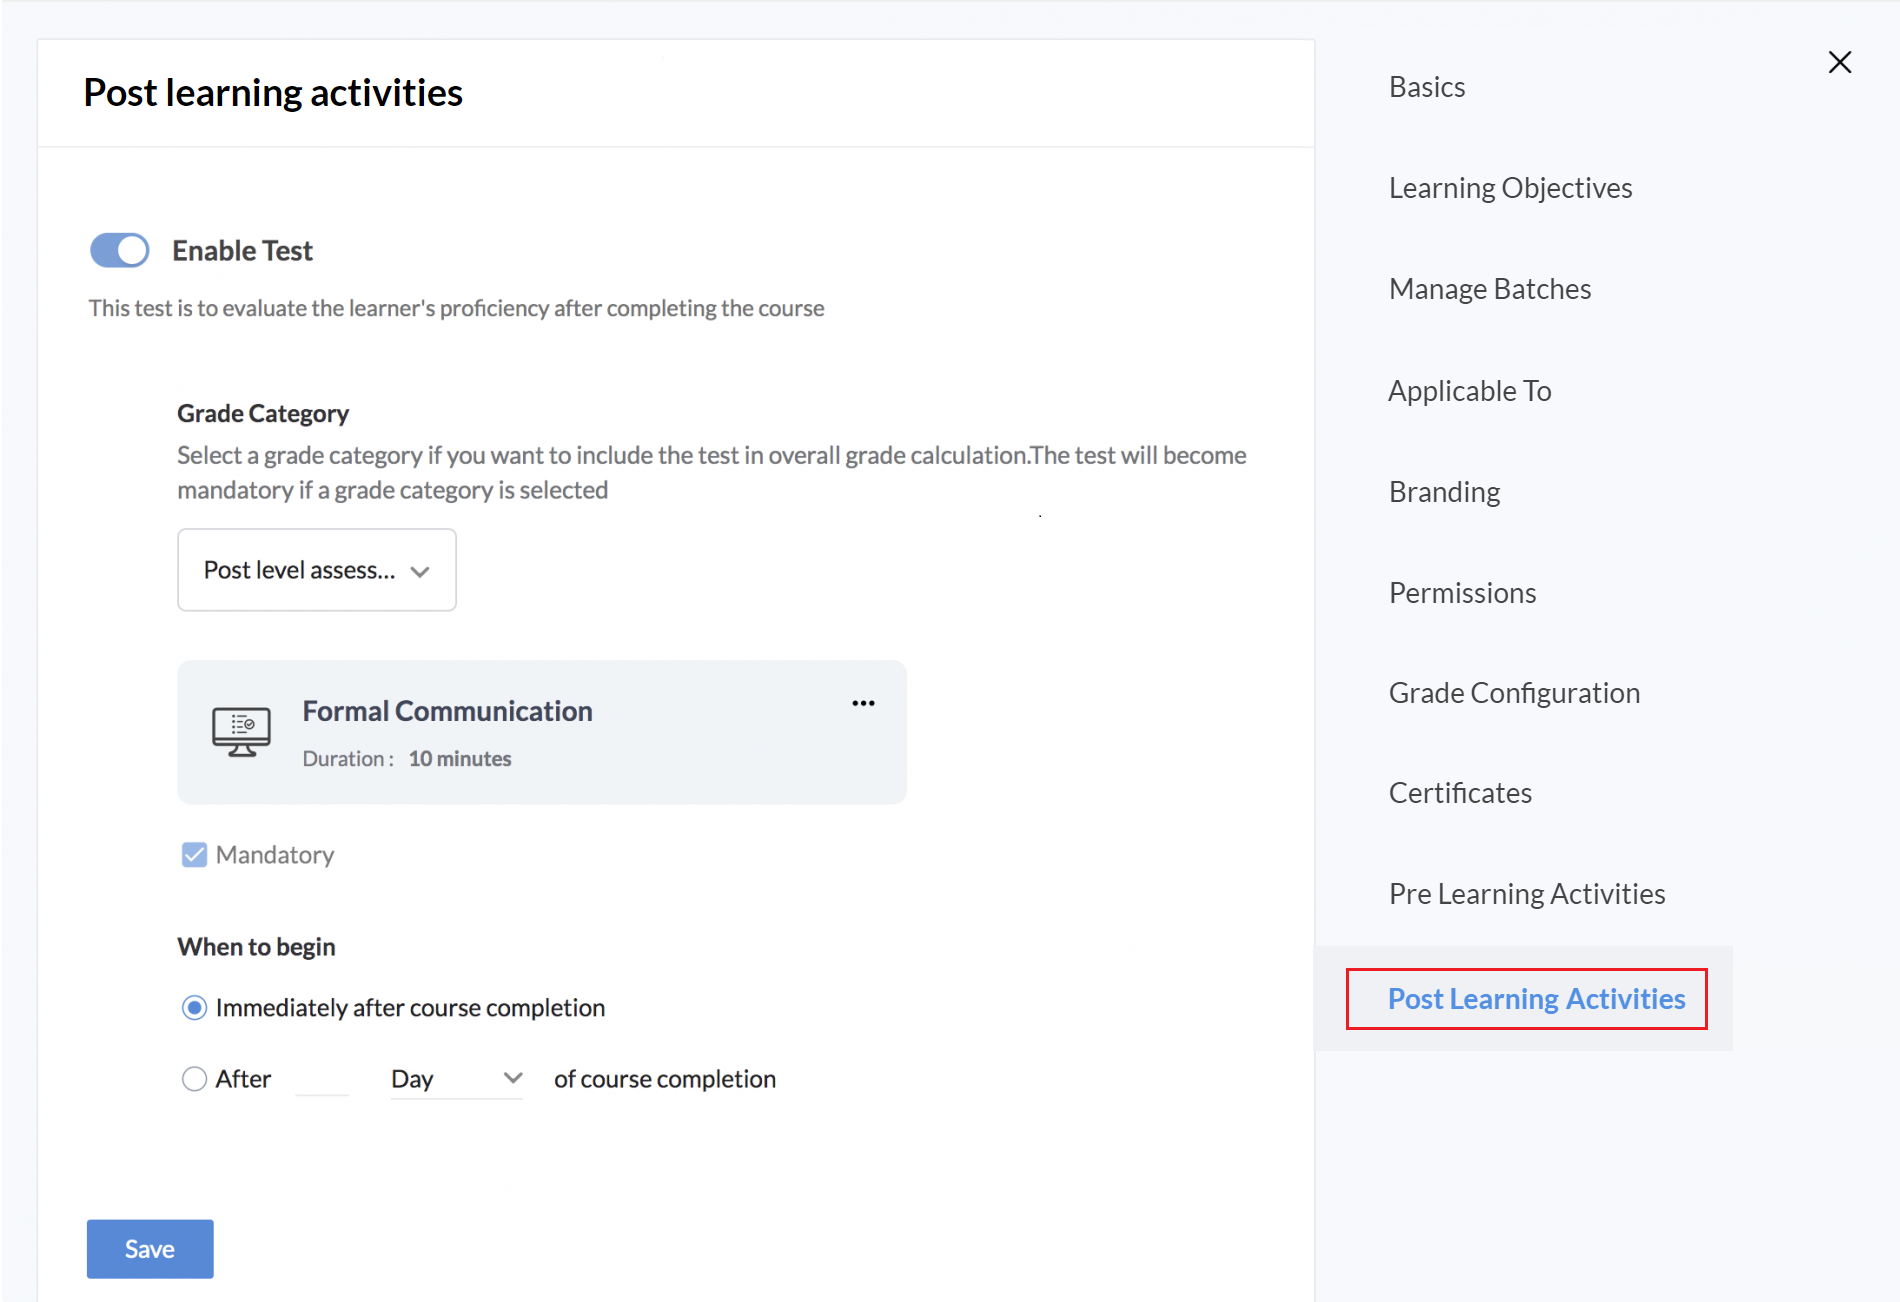
- Enable Test.
- Select a category if you want to include the test as part of the overall grade calculation. If a category is selected, then the test becomes mandatory.
- If you do not want to make the test mandatory, then no category needs to be selected.
- Add the test.
- Select when to begin the test.
- Click Save.
Note: Grade configuration must be selected for grade category to be included in pre learning and post learning tests.
Once the learner completes the course, they will be able to view this test. Learn more from the employee's perspective.
..
Usecase Soft Skill training for employees
An organization wants to conduct a soft skill training course for employees. They want to evaluate the employees in three phases - based on current proficiency, during course, and based on learning from the course. The overall score is derived from the individual weightage assigned to each category.
The first step is to add the course and enable grade configuration. The grade configuration can be done as follows:
After adding the course,
In the course settings section, go to the Pre Learning Activities tab.
- Enable Test.
- Select the appropriate grade category for this test. The course will automatically become mandatory.
- Add a test.
- Click Save.
- Next, go to Post Learning Activities tab.
- Enable Test .
- Select the appropriate grade category for this test. The course will automatically become mandatory.
- Add a test.
- Select when the test is to begin.
- Click Save.
After completing all 3 phases, the overall grade will be calculated for each learner.
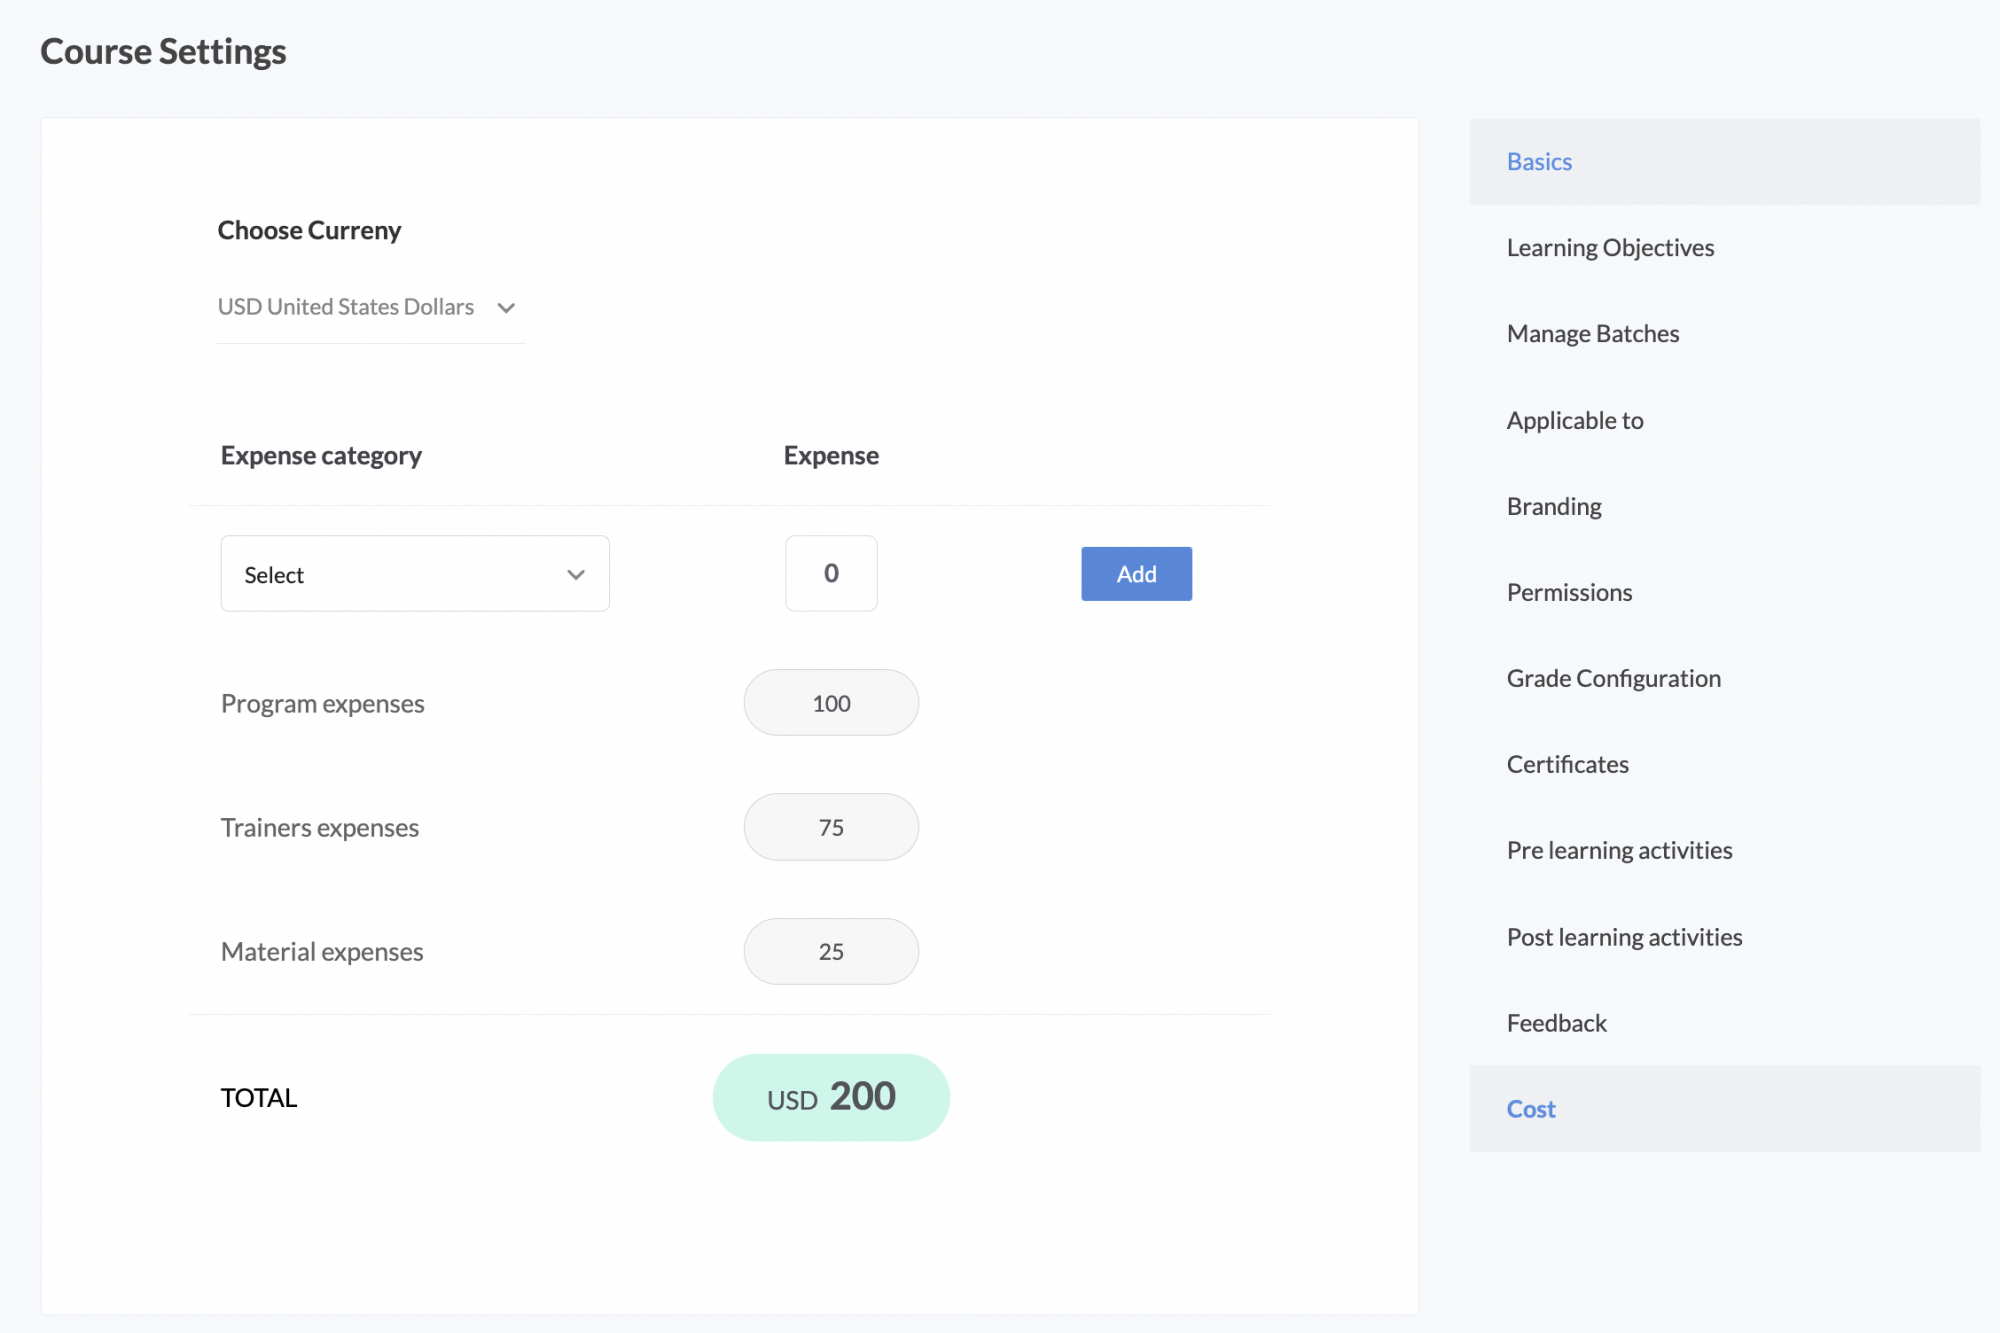
Course Cost
Using the course cost feature, we can add the various expenses associated with a course such as training expenses, program expenses, etc. To do this go to Cost tab and click Add Expense. Select a Currency and begin adding expenses based on expense category. Total will be calculated and displayed at the bottom section.
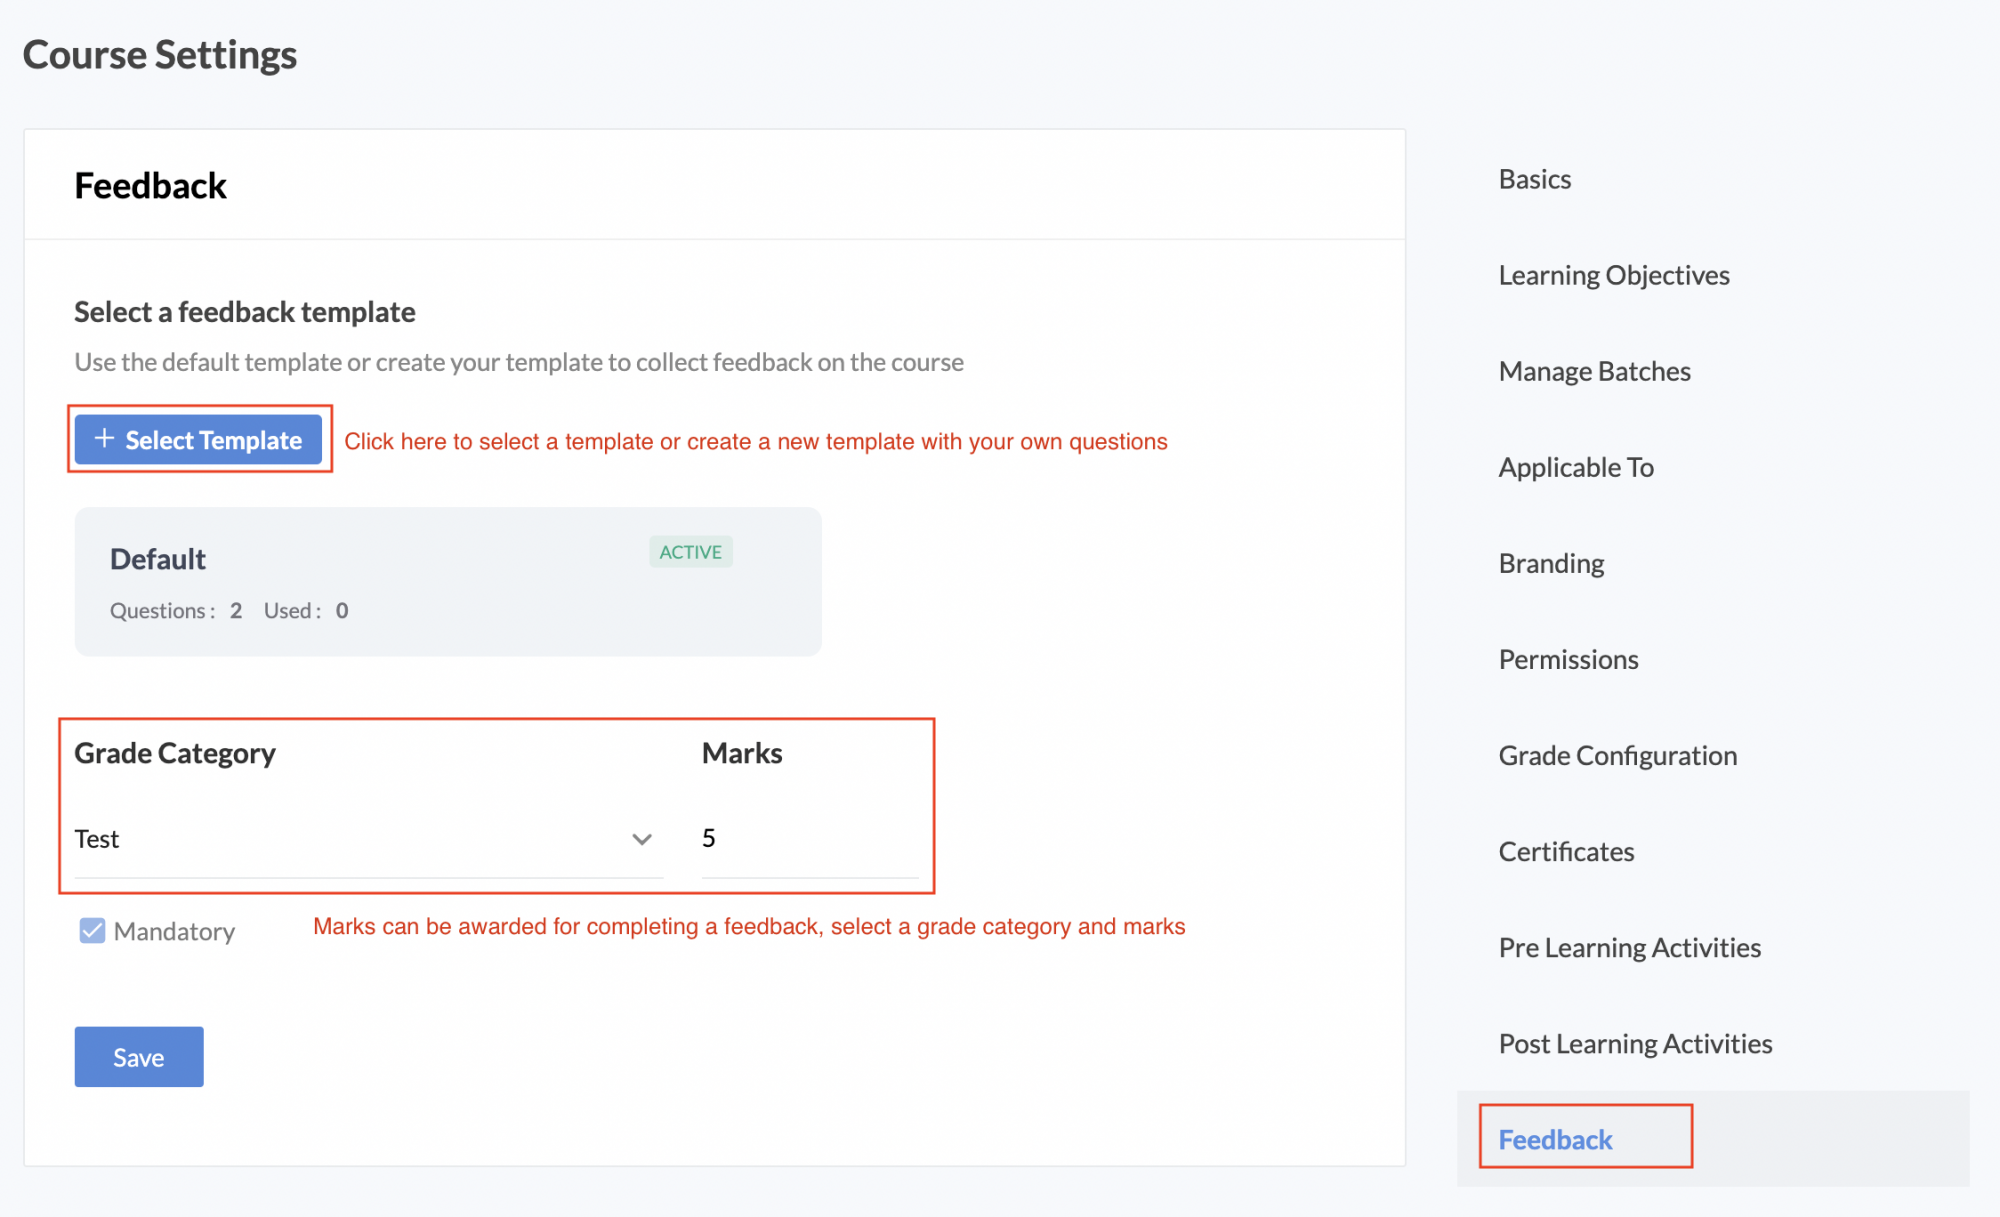
Feedback
Feedback as the name suggests is used to collect feedback and the learner's rating of a particular course. The collected feedback can then be used to improve the course or to understand the learner's perspective in order to create better courses in the future.
To configure feedback for a course:
- Open a course and go to More (ellipsis icon) > Settings > Feedback tab.
- Feedback has a default template comprising of two basic questions that asks a learner what they feel about the course and their course rating. However, custom templates can be created, comprising of questions that the course administrator or trainer wishes to ask the learner as part of collecting course feedback. (Read the next topic for detailed steps on configuring a custom template).
- Enter the marks that is to be awarded to learners who complete the feedback.
- Mark feedback as Mandatory if required.Feedback can be made available immediately on course completion or after a specific amount of time after course completion.
- Click Save.
Note 1: On completing the course, learner can submit feedback from the course overview page (Write feedback option) or through the feedback email notification they receive.
Note 2: Trainers and administrators can view the feedback report using the feedback tab in a course. (select any course, go to Feedback taba
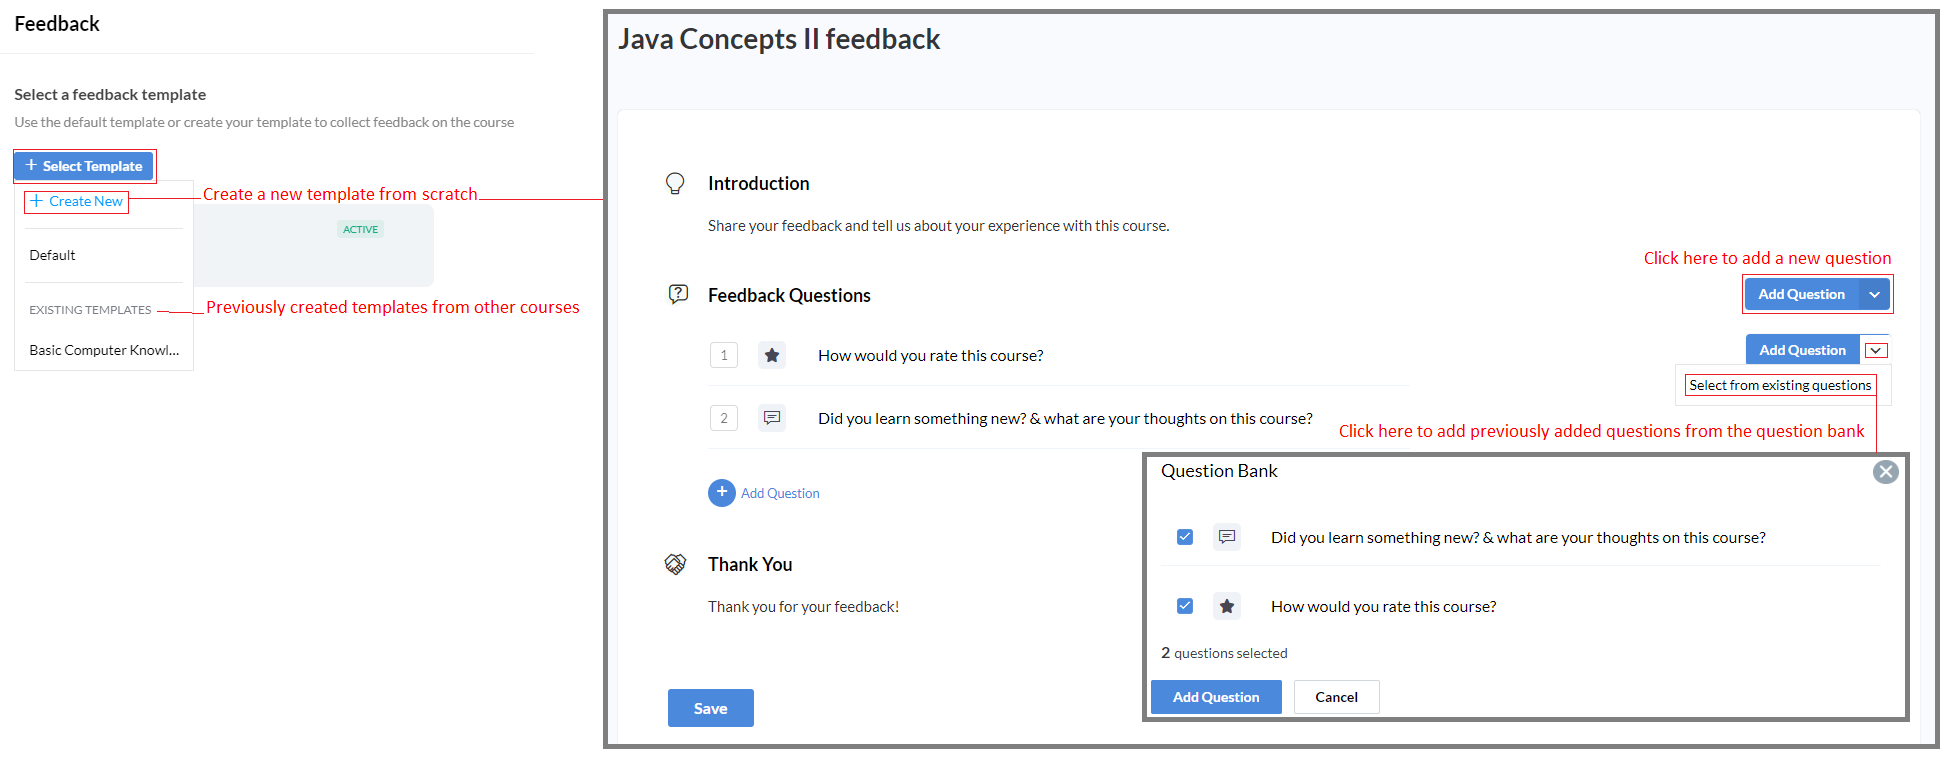
Creating a Custom Feedback Template
To create a custom feedback template:
- Select a particular course, navigate to More (ellipsis icon) and click Course Settings.
- Now go to the Feedback tab and Click + Select Template.
- Click + Create New to create a new template.
- Hover pointer over introduction or Thank you section to edit content using the edit (pencil icon).
- Click Add Questions to add a new question or click the drop-down and click Select from existing questions to access the question bank.
- Several type of questions can be added. You can choose to disable comments or add multiple choices (single and multiple question types). Comment can be marked mandatory in case of scale type question. The screenshot below shows an example of how the question types can be configured.
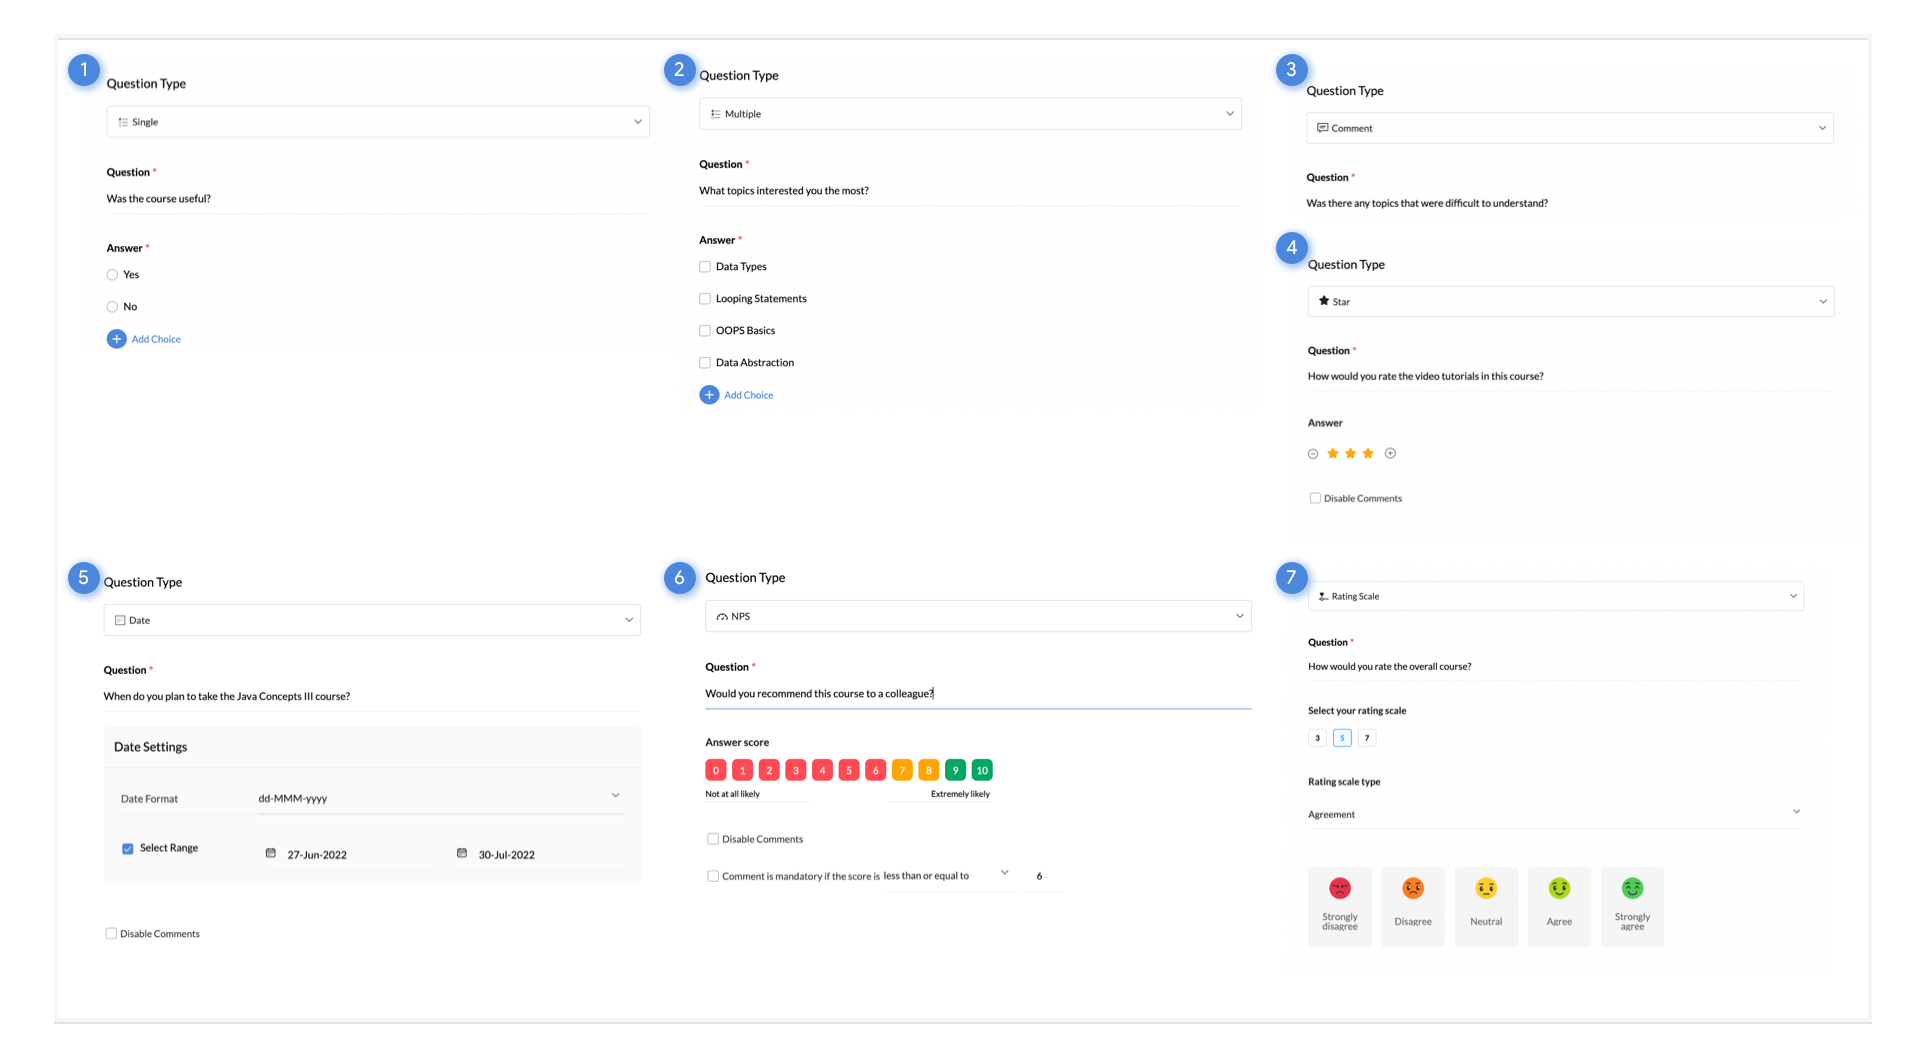
- To make the question you are adding a mandatory one, use the Mark as mandatory option.
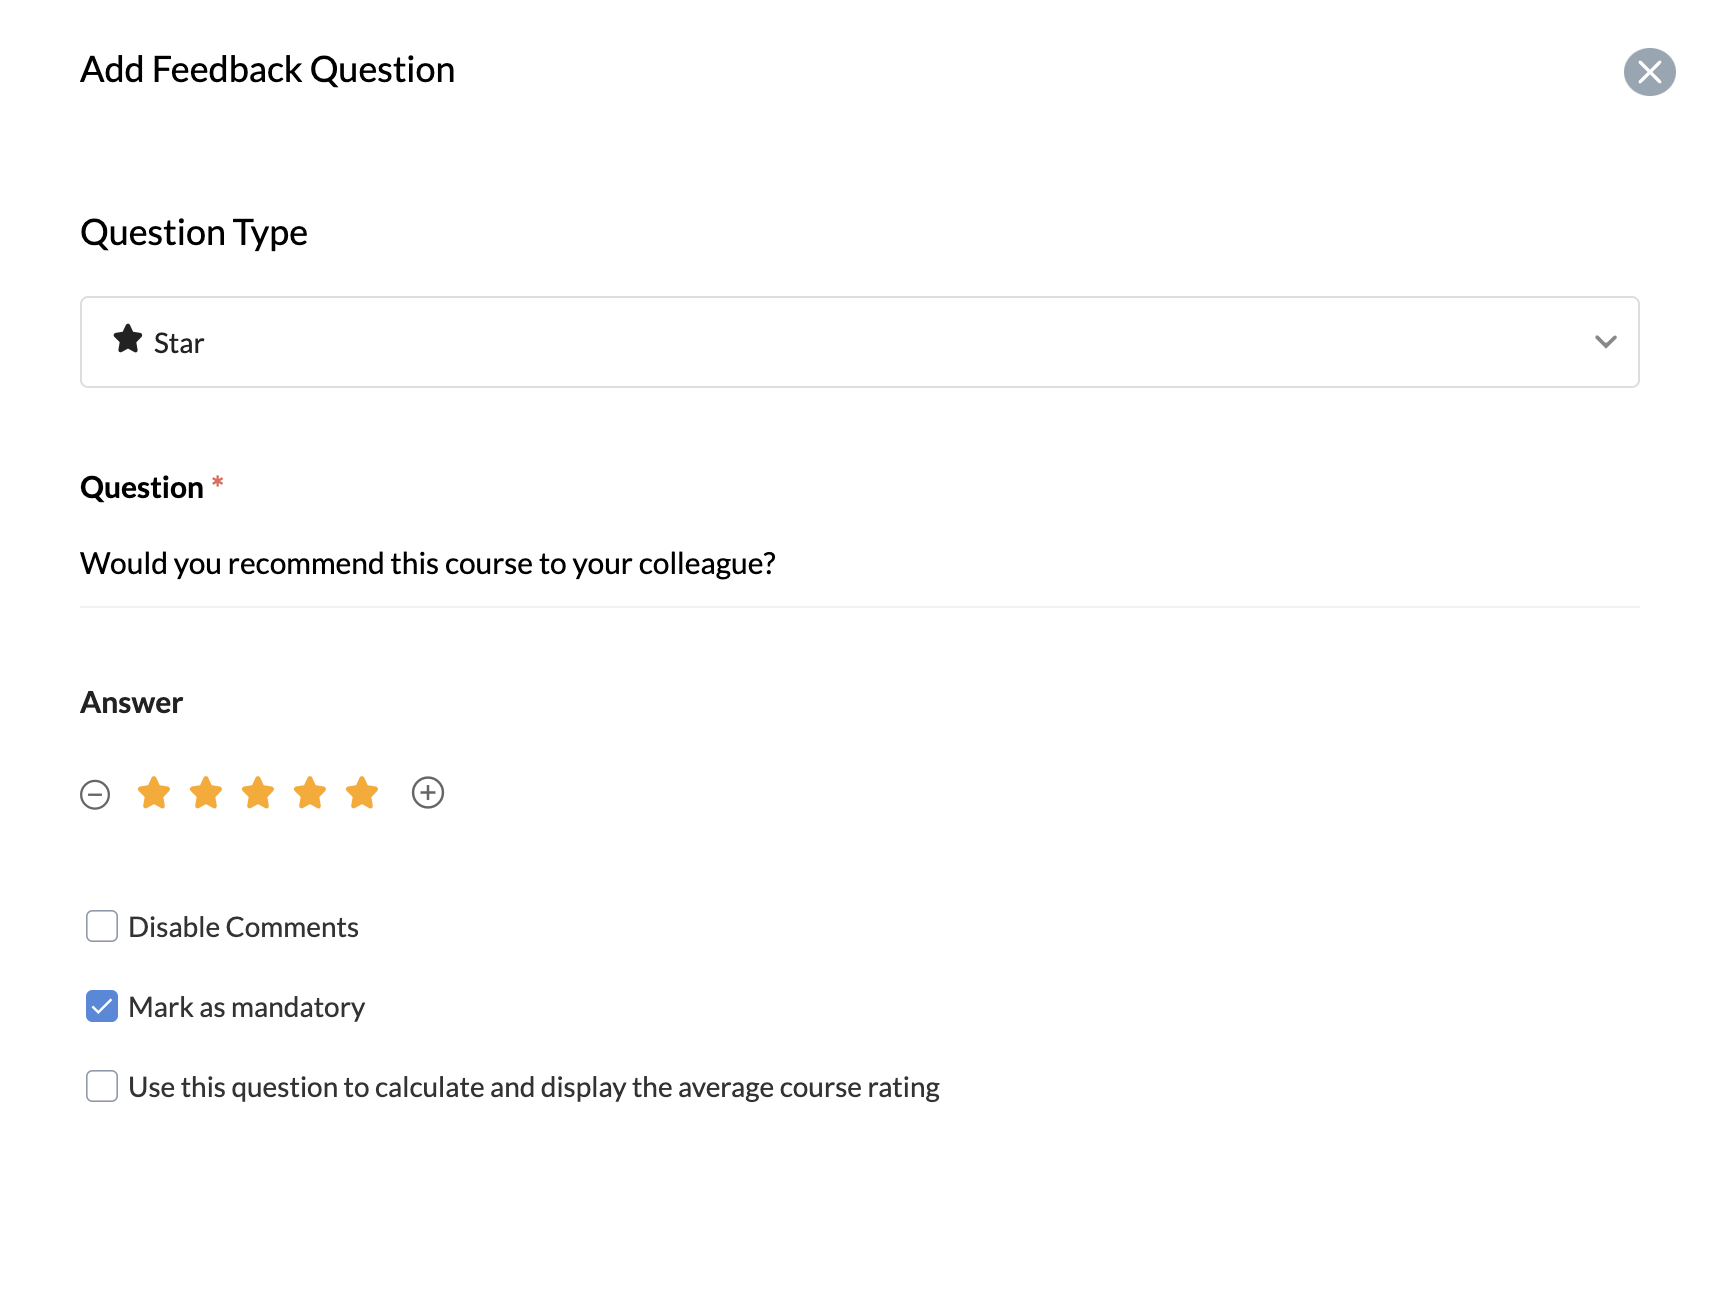
Responses to the default star rating question given while adding a new template is used to calculate the average rating of the course.
- To change the question used for average rating, you can add another 5 star rating question, and check Use this question to calculate and display the average course rating option. Alternatively, you can also assign other 5 star rating questions you have added from the list view by clicking the anchor icon beside the question.
- Once the needed questions are added, click on Save. You can also click on Preview if you would like to see how your feedback form would appear to the learner.
- The feedback form is now ready and learners can submit feedback after course is published and the learner has completed the course.
Submitting Feedback
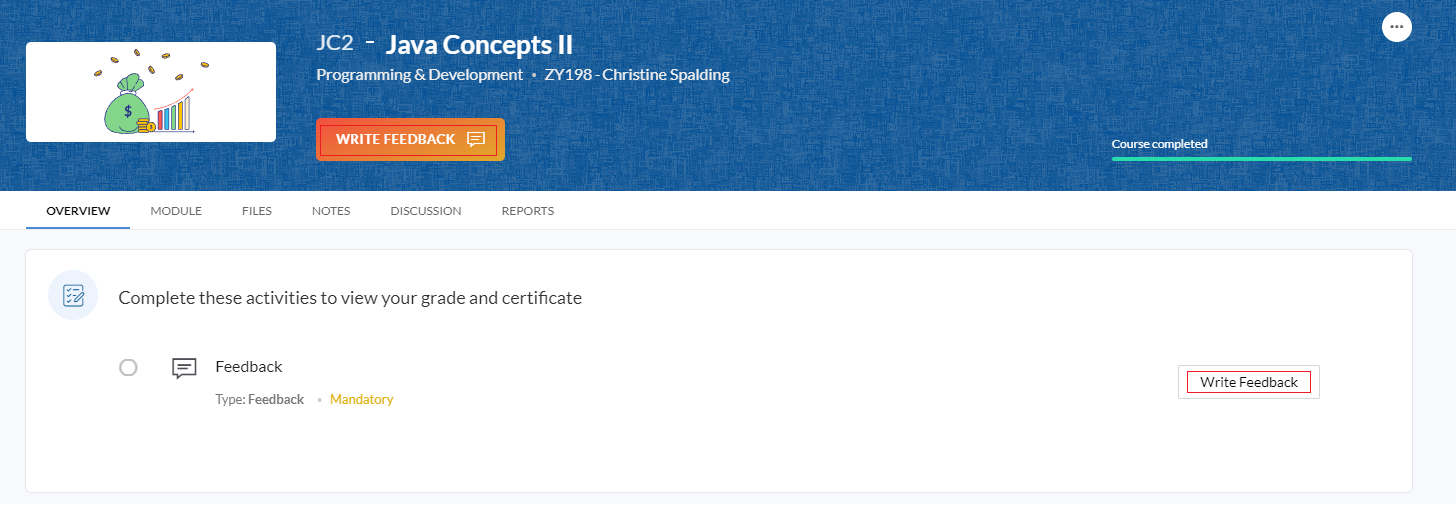
Once a course is completed, the applicable learners will be able to submit their feedback on the course. To do this the learner must open a completed course and click on Write Feedback). They will also receive email reminders for the same.
In the example shown below, the course was marked as mandatory, meaning the learner would need to submit feedback before he can view their grades or download the course certificate.
Viewing Collected Feedback
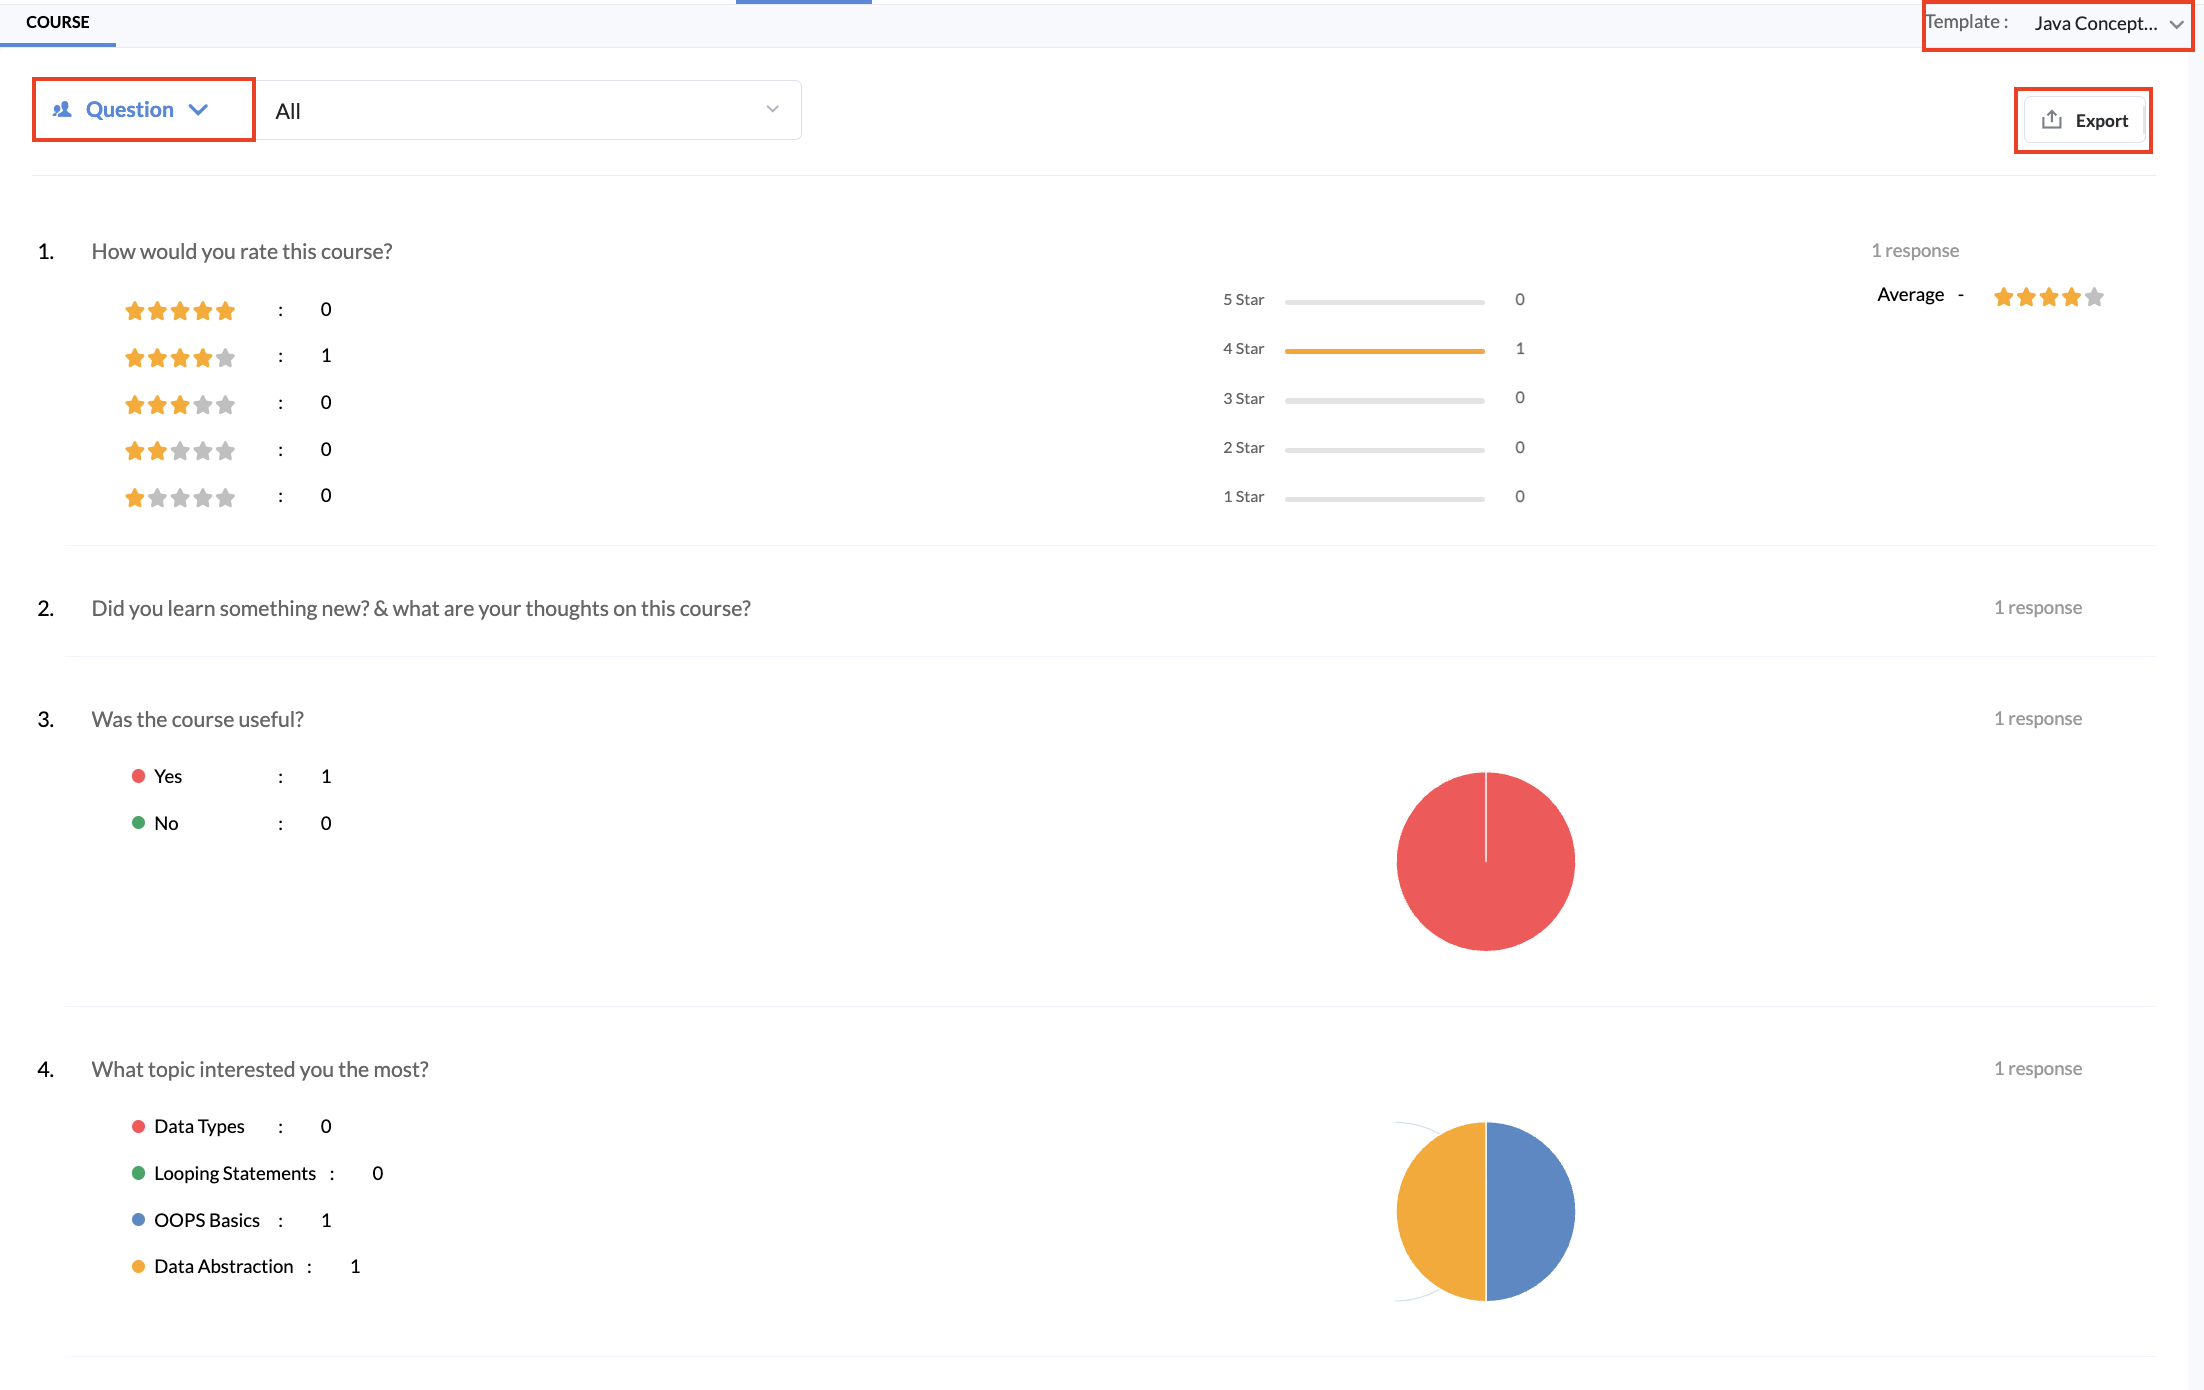
To view the feedback report, the trainer or course administrator can open the corresponding course and go the Feedback tab. Use the drop down to choose a template (active template will be shown). Feedback can be viewed question-wise (collectively) or learner wise (individually). User feedback collected through custom feedback templates can be exported as well.
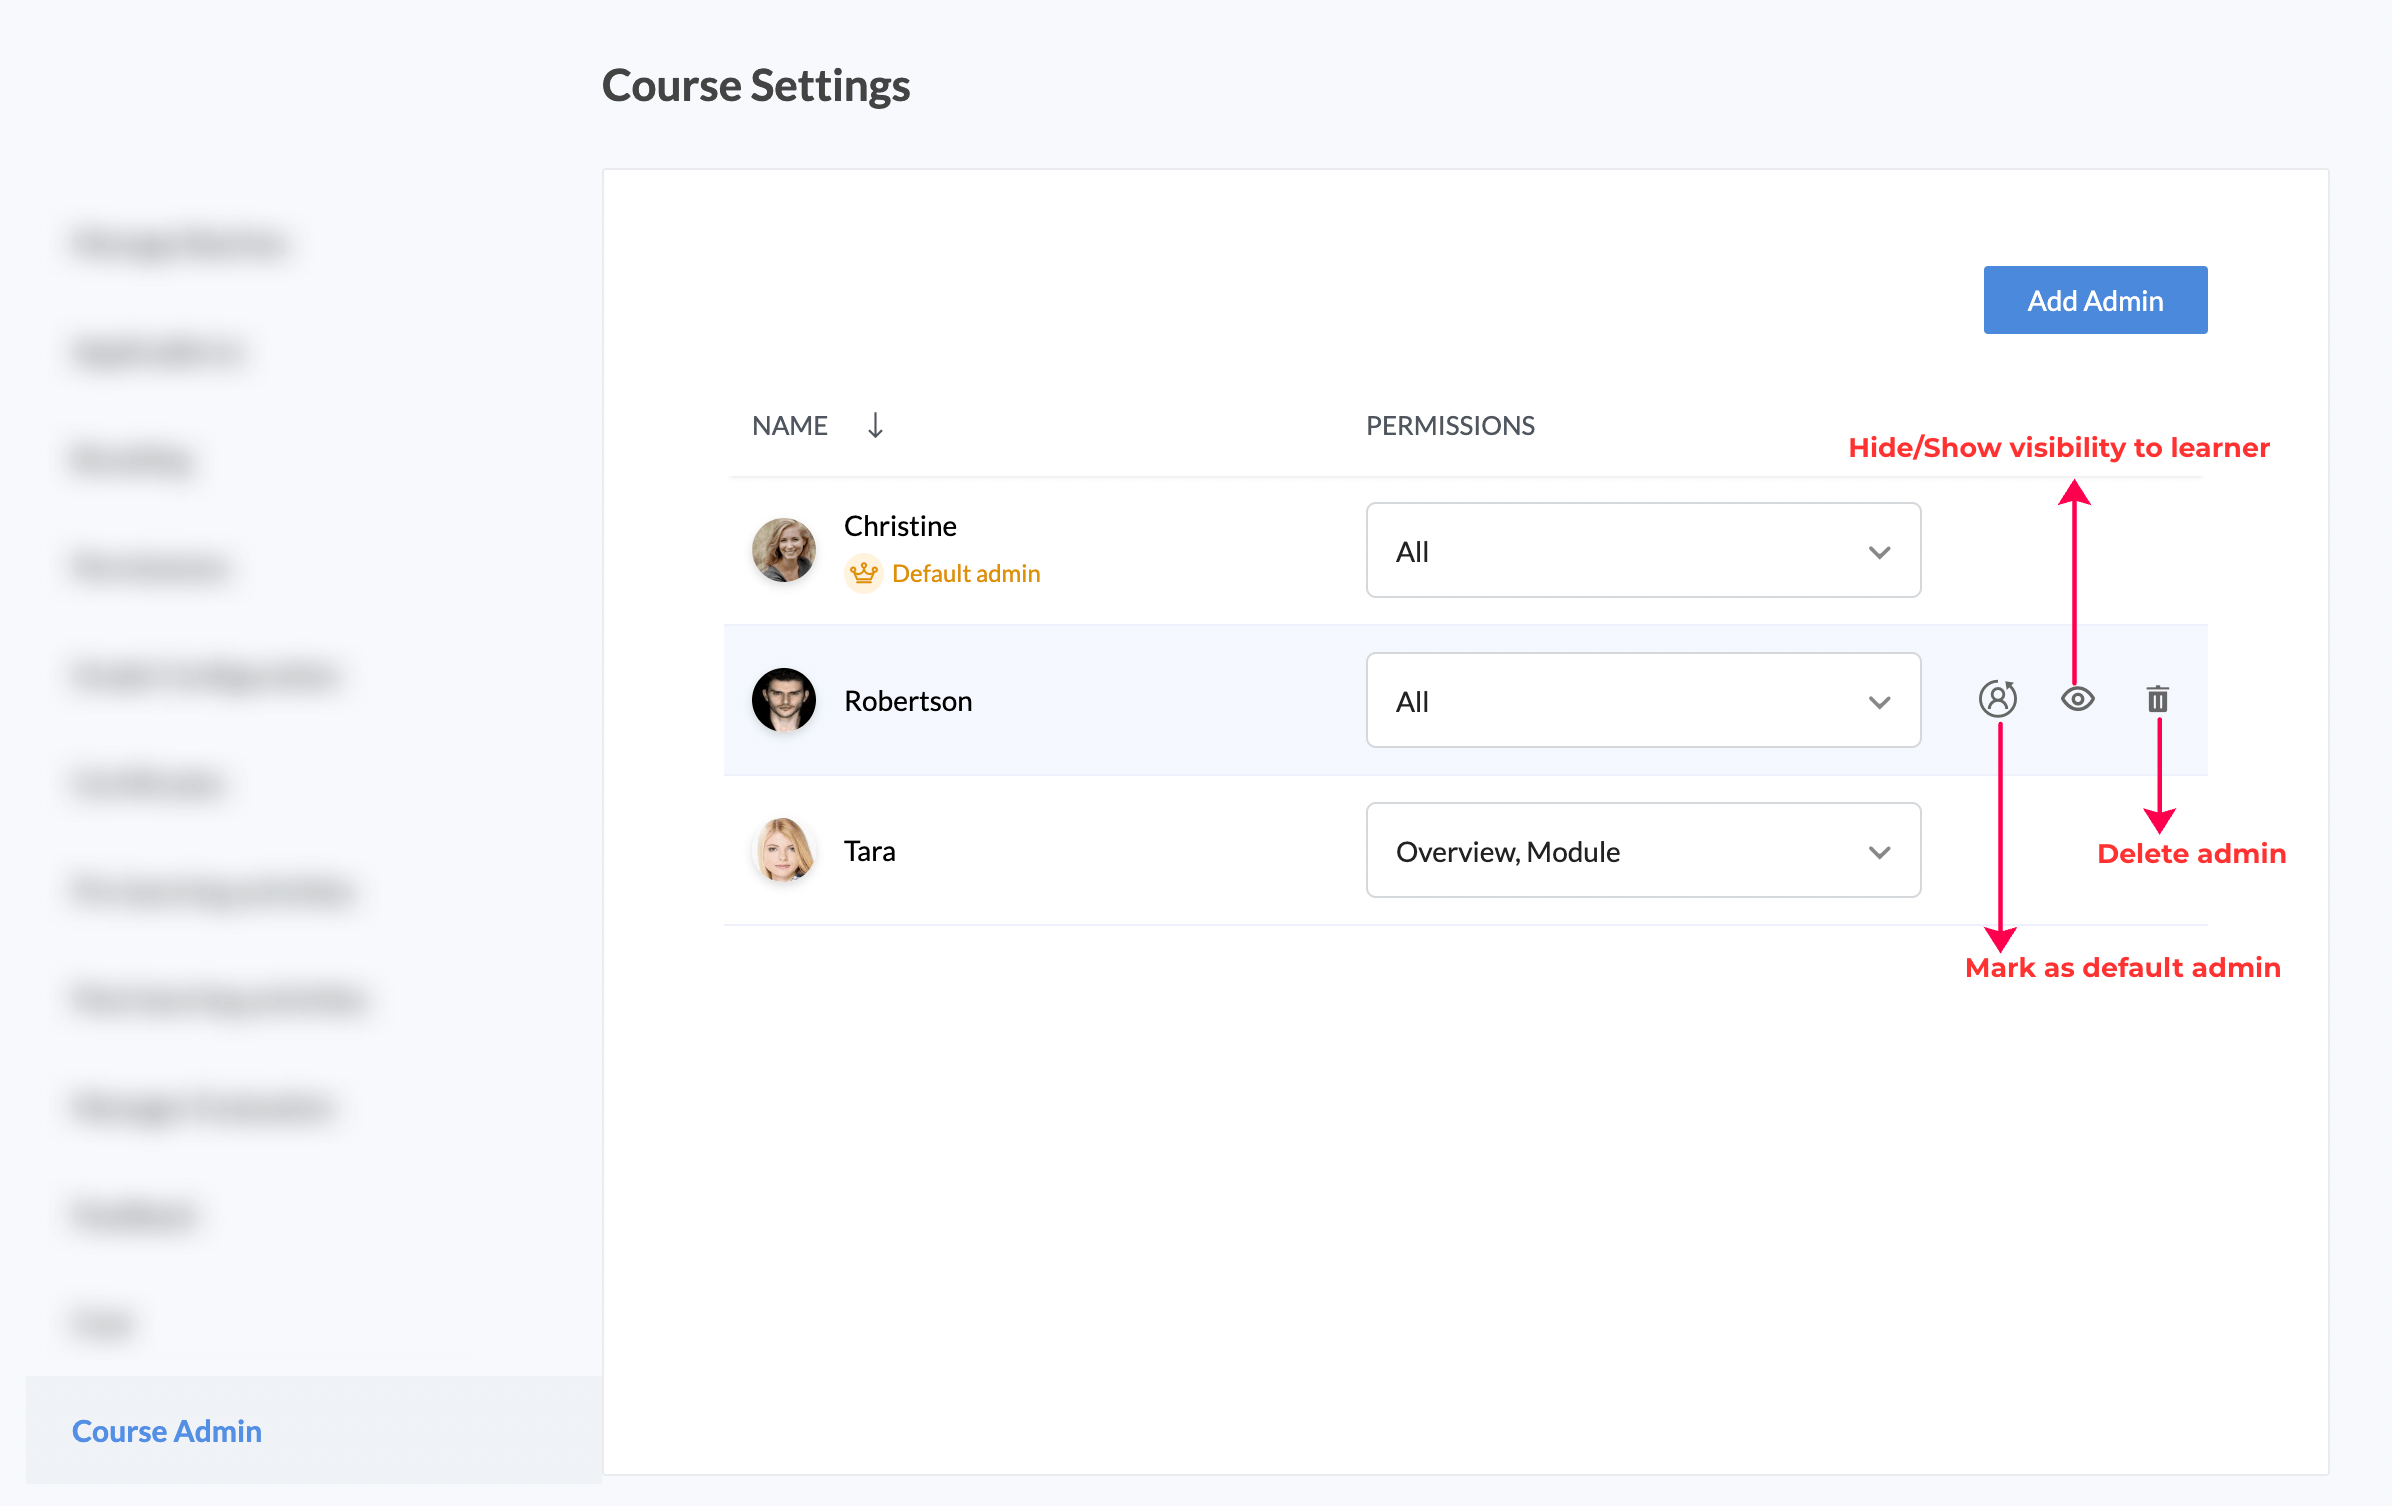
Course Administrator
By default, the person who created the course is the course administrator (super administrator also has administrative privileges). Additionally, you can add other users as administrators and customize their permissions. To do this, access Course Settings of a specific course and go to Course Admin tab. Click on Add Admin to add new administrators. Customize permission as required by enabling/disabling the corresponding checkboxes. If you wish to hide visibility of a course administrator from learners, use the visibility icon (eye-icon). A course can have multiple course administrators. You can set one of the added course administrators as the default course admin (identified by the crown icon), which can be changed by using the Mark as default admin button. The default course admin acts as the course owner and cannot be removed.