Zoho Payroll - HSBC Integration
With this integration you can directly deposit your employees’ salaries into their accounts, using your HSBC corporate account. This integration serves as a simple and an efficient way of paying your employee salaries without any hassle.
Set Up the HSBC Integration
To connect your HSBC corporate account to Zoho Payroll:
- Log in to your Zoho Payroll account.
- Click the Settings icon on the top right corner.
- Click Direct Deposit.
- Click the Set Up Now button next to HSBC.

- If you don’t have the credentials to integrate Zoho Payroll with HSBC, click the Request for a New Account link to create a new account.
The link will open in a new tab where you can enter your organisation and contact details. The HSBC team will get in touch with you and help you create a new HSBC corporate account.
If you have the credentials to integrate Zoho Payroll with HSBC, you can use them to fill in the following information:
| Field | Description |
|---|---|
| Profile ID | The HSBC team would have sent you the Profile ID via email. |
| Client ID | The HSBC team would have sent you this Client ID via email. |
| Client Secret | The HSBC team would have sent you this Client Secret via email. |
| HSBC Public Key | The HSBC team would have shared this file with you via email and you will have to upload it. This field will only support formats such as pem, crt, txt, doc, and docx. |
| HSBC Account | You can select one of the bank accounts you have already created, or add a new bank account and select it. |
| Secret PIN | Set a secure PIN that you will remember as you will use it to initiate payments in Zoho Payroll. |
- Agree to the Terms and Conditions and click Save.
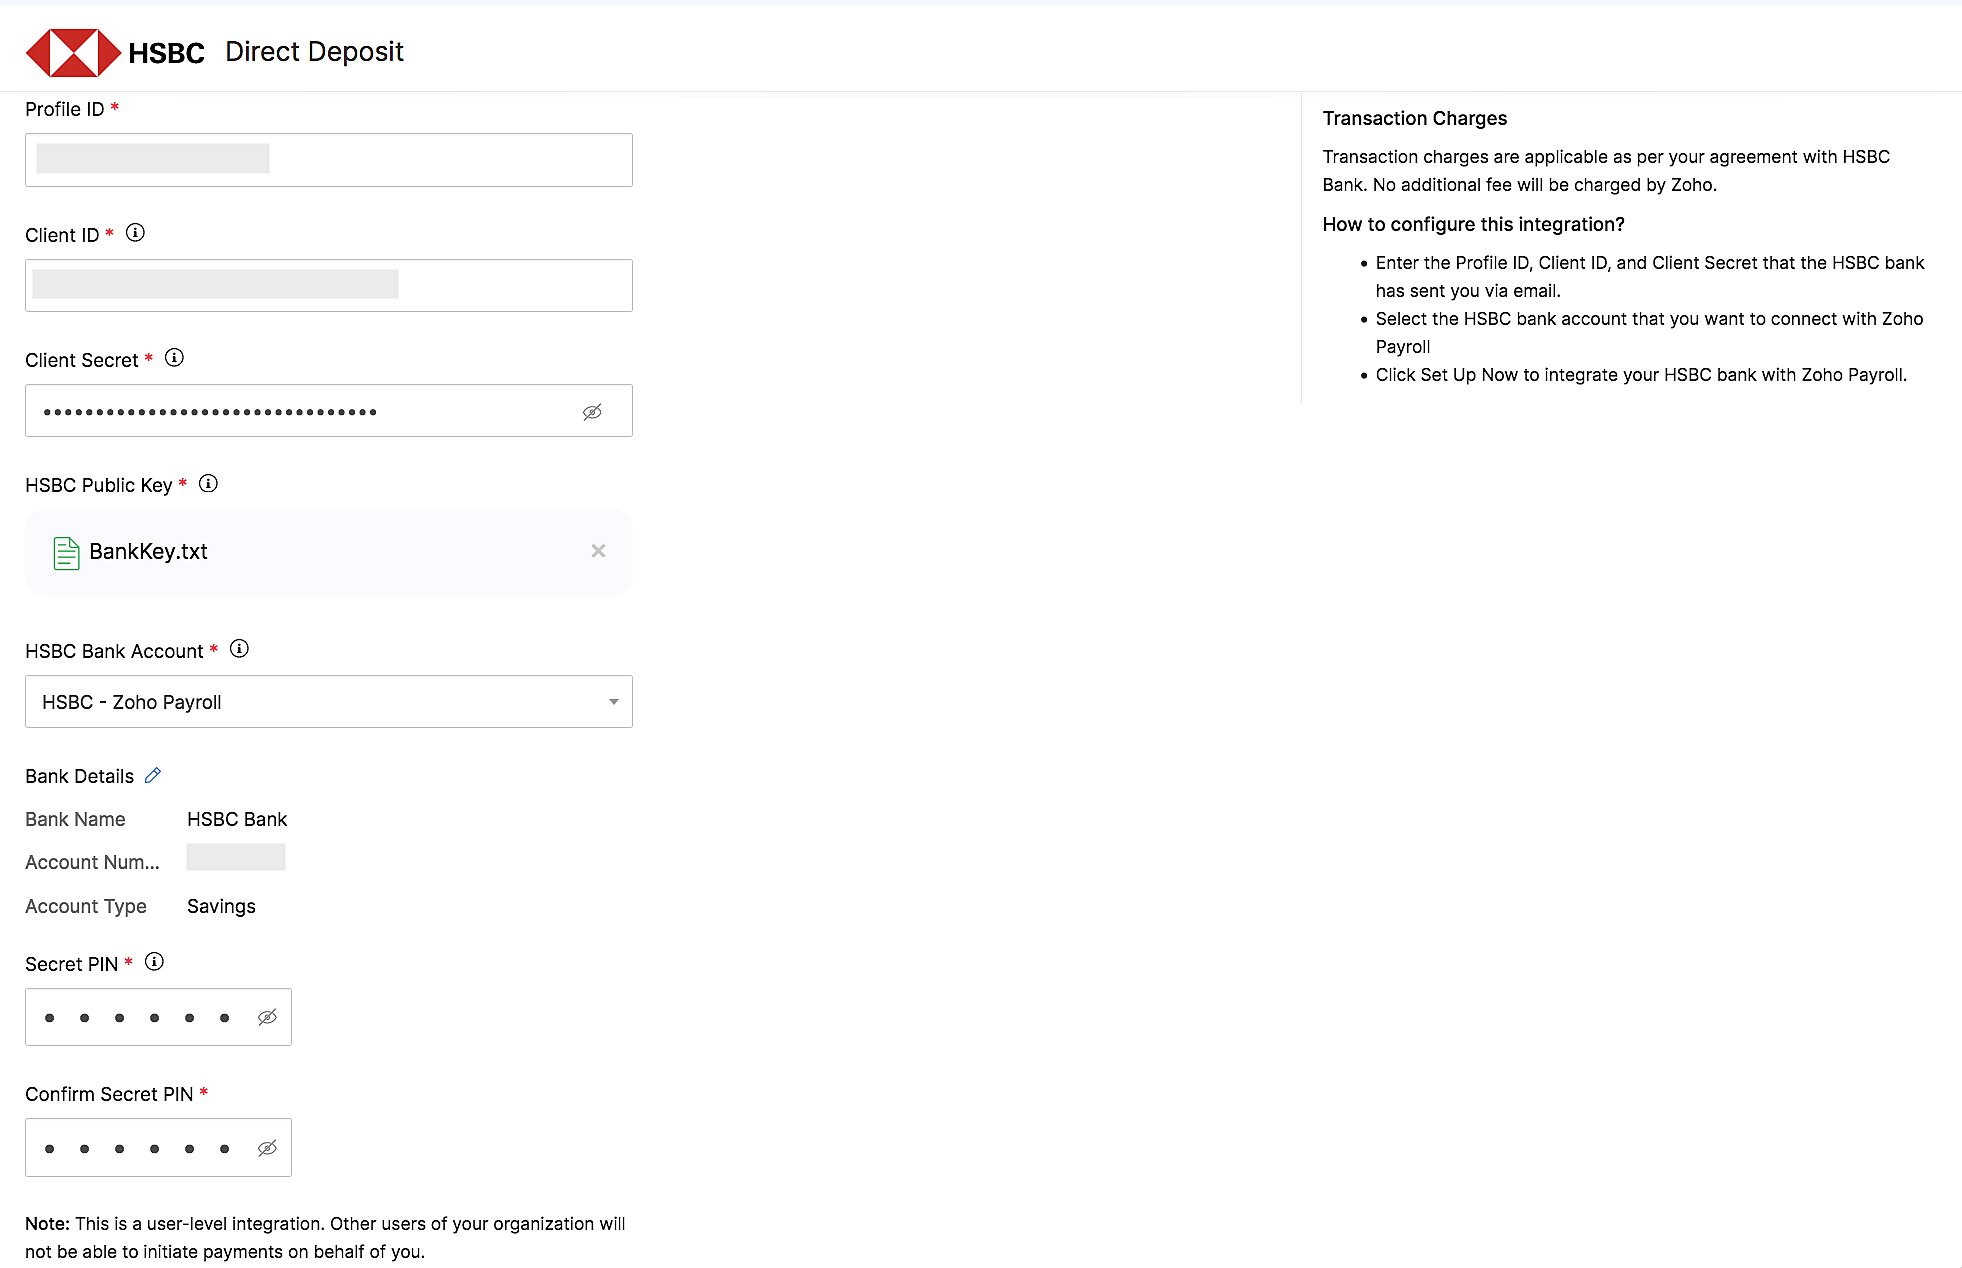
Your account is now set up to initiate direct deposit of salaries from Zoho Payroll.
NOTE You will not be able to edit your credentials in Zoho Payroll once you’ve set up the integration. You must delete the integration and set it up once again with the new credentials.
INSIGHT This is a user-level integration and other users cannot initiate payments on your behalf.
Add Employee’s Bank Account Details
Once you have integrated your HSBC corporate account, you can start making payments from Zoho Payroll. Before that, ensure that you’ve added all the payment related details to the employee profiles. To do this:
- Navigate to the Employees module on the left sidebar. Select an employee or create a new employee for whom you want to deposit the salary directly.
- In case of a new employee, enter all the details in the employee profile such as Basics, Salary Details, Personal Info and mark the payment mode as Direct Deposit in the Payment Info section. Enter the bank account details and click Save and Continue.
- In case of an existing employee, edit and update the payment mode to Direct Deposit.
Make Payments via Zoho Payroll
Once you have added your employees’ bank account details, you can start crediting salaries to their accounts. Here’s how:
- Navigate to the Pay Runs module on the left sidebar.
- Generate a new pay run for the particular period and approve it.
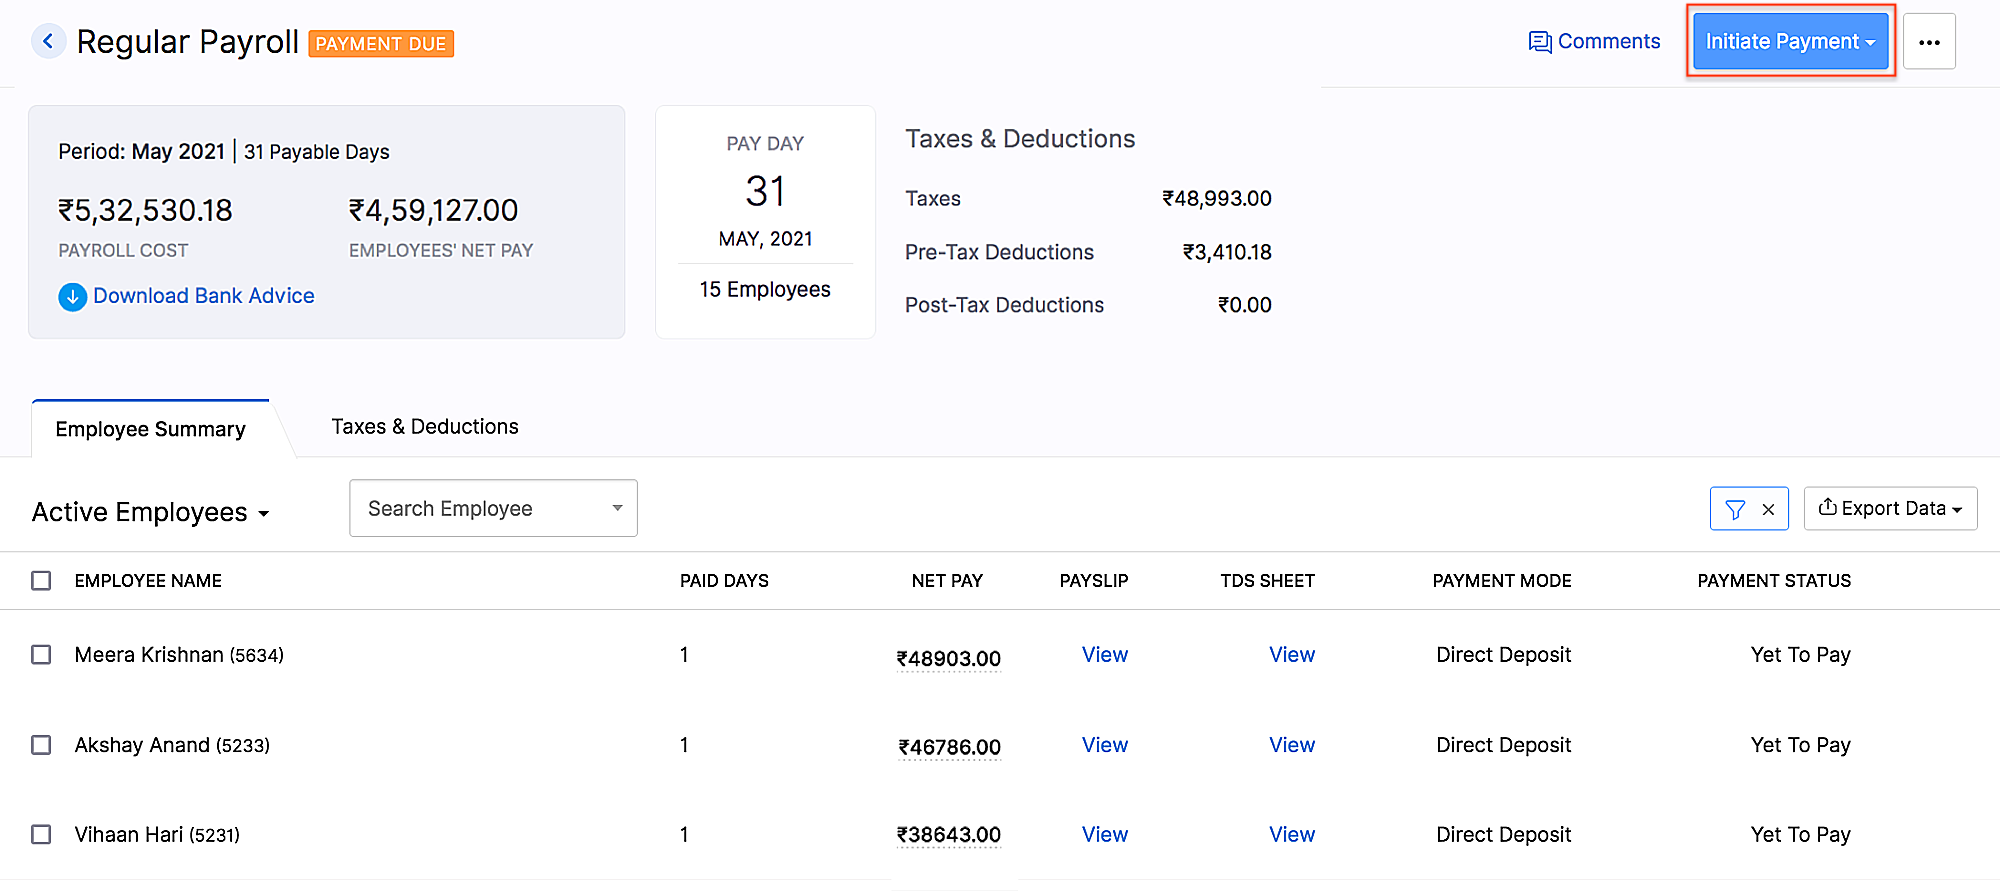
- Click Initiate Payment on the top right side of the page. The Payment Status of the employees will be Yet to Pay. The payment will be initiated only for the employees for whom the payment mode is selected as Direct Deposit.
- Enter the Secret PIN.
NOTE You will have 5 attempts to enter the correct PIN. If you fail to enter the correct PIN in 5 attempts, the integration will be marked inactive and you will have to delete the integration and set it up again.
- The payment will be initiated in Zoho Payroll and you will have to authorise the payment in HSBCnet.
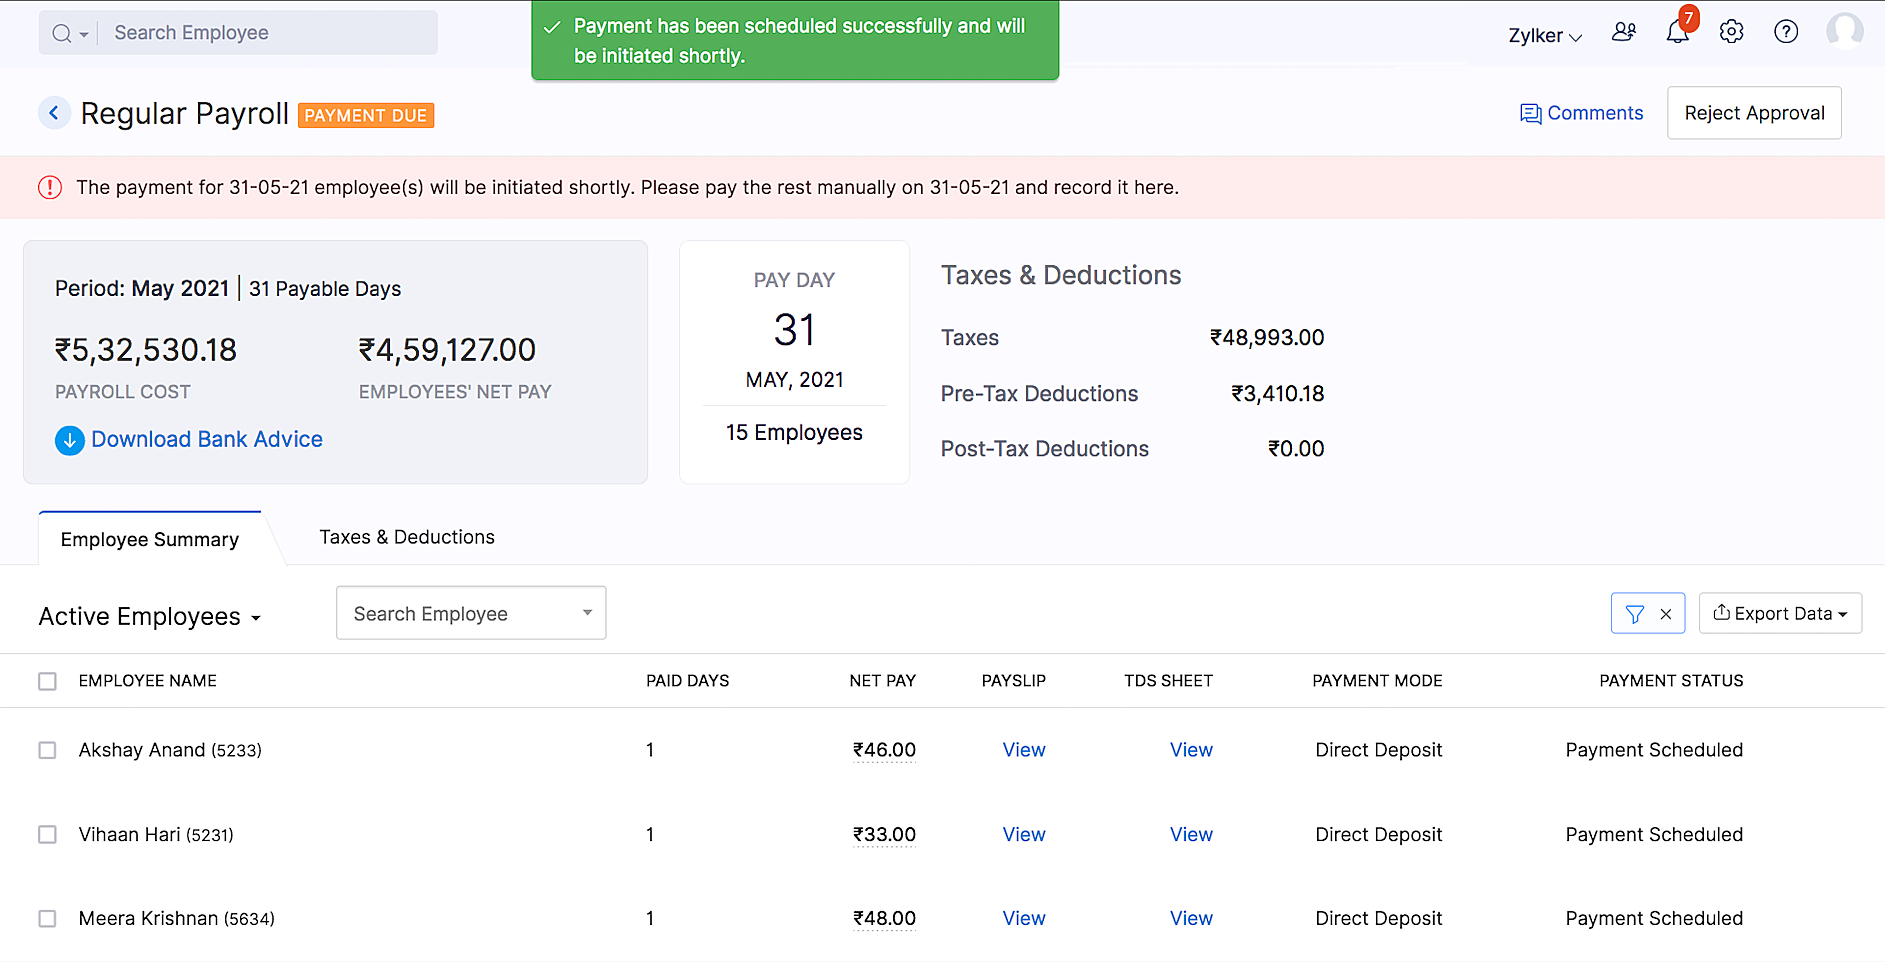
NOTE The default payment mode for the payments initiated from Zoho Payroll using the HSBC integration will be NEFT. If payments are initiated* during *non-business hours, the payments will be processed only on the next business day.
Authorise Payment in HSBCnet
You will have to authorise the NEFT payment that you’ve initiated from Zoho Payroll using File Level Authorisation (FLA). In FLA, you will have to authorise or reject a file which may contain one or multiple payments.
To authorise the payment from HSBCnet:
- Log in to HSBCnet using your credentials.
- Navigate to the Menu and select Payments and transfers.
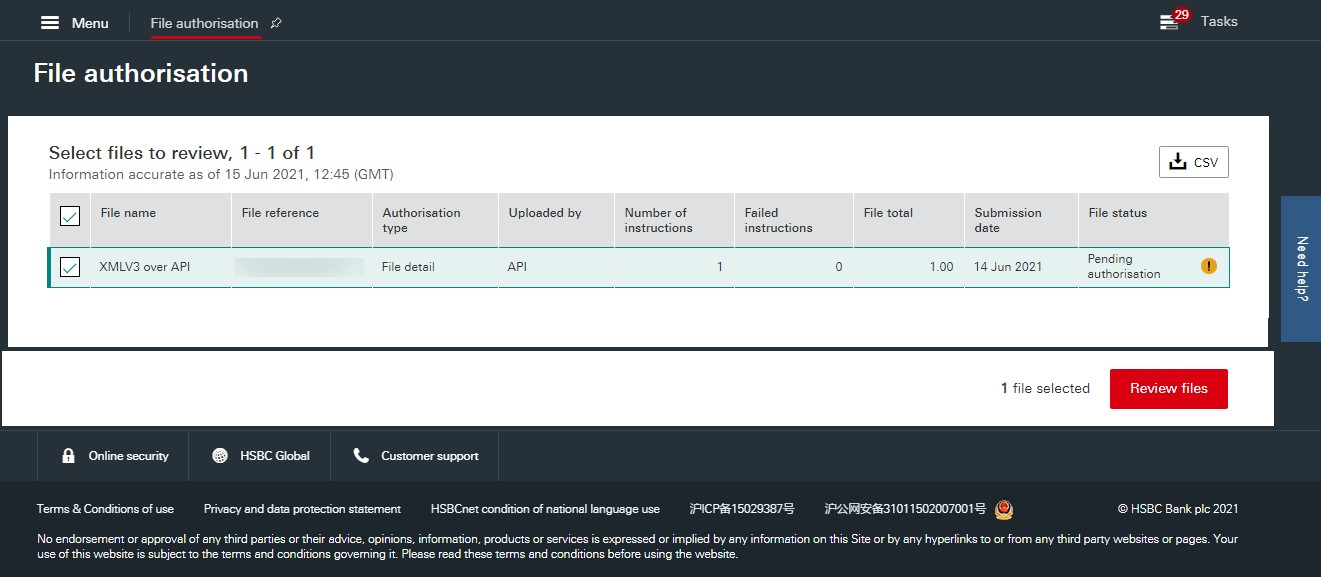
- Click File authorisation. In the following screen, you will see the files of the NEFT payments that you had initiated from Zoho Payroll.
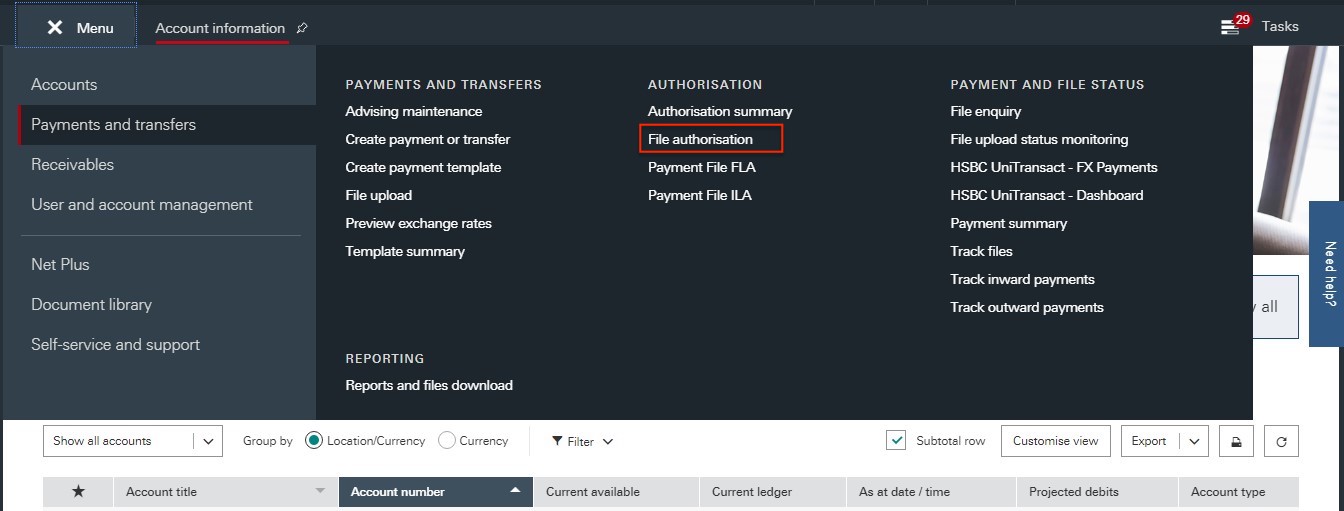
- Select the file and click Review files.
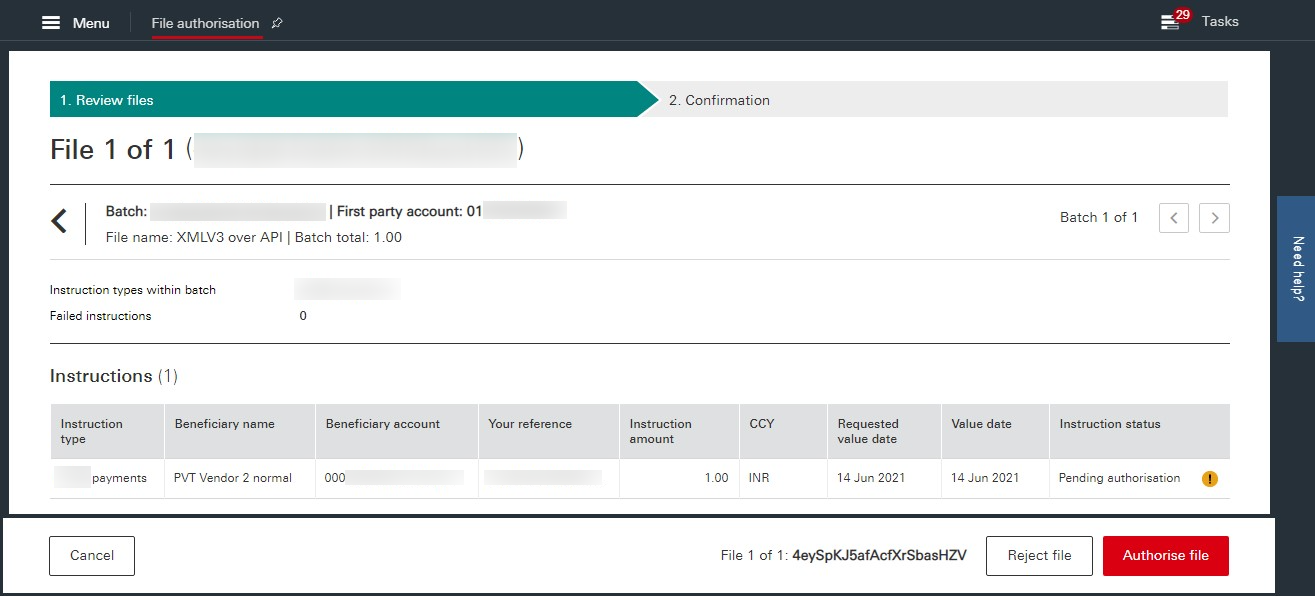
- Click Authorise file to authorise the payment. Or, you can click Reject file to reject the payment.
Once you authorise the file, you’ll see a confirmation screen with the payment status and the details. This payment may be sent for further authorisations based on the authorisation structure that is configured at HSBCnet for the account. Once the payment is completed successfully, the corresponding pay run’s status in Zoho Payroll will be updated to Paid automatically.
If the payment fails, you can reinitiate the payment from within the Pay Runs page in Zoho Payroll.
INSIGHT It will take up to one hour for the payment process to start once the payments are authorised in HSBCnet, and it may take up to 5 to 7 hours for the status to get reflected in the Pay Runs page.
Delete the Integration
If you want to stop making payments via your HSBC corporate account or change your account details, you can delete the integration.
WARNINGS
- If you delete the integration with HSBC in Zoho Payroll, the integration will be deleted in all the other integrated Zoho Finance (Zoho Books, Zoho Expense, etc) applications.
- Once you delete the integration, you will not be able to track the status of any of the transactions you’ve initiated.
To delete:
- Click the Settings icon on the top right corner of the homepage.
- Click Direct Deposit.
- Click Delete Integration next to HSBC.
- In the popup that opens, click Yes to confirm the action.

The integration will be deleted. You can set up a new HSBC account integration, if needed.


 Zoho Payroll's support is always there to lend a hand. A well-deserved five-star rating!


