Suppression Lists
The suppression list contains those addresses for which you no longer wish to send any emails and those that you do not wish to track anymore. In ZeptoMail, you can manually or automatically add those addresses which you want to suppress. A total of 50 addresses can be added to the list in one go.
Steps to Add Suppression List
- Login to ZeptoMail.
- Click on the Suppression list from the left pane. Click the add email button on the right-hand side.

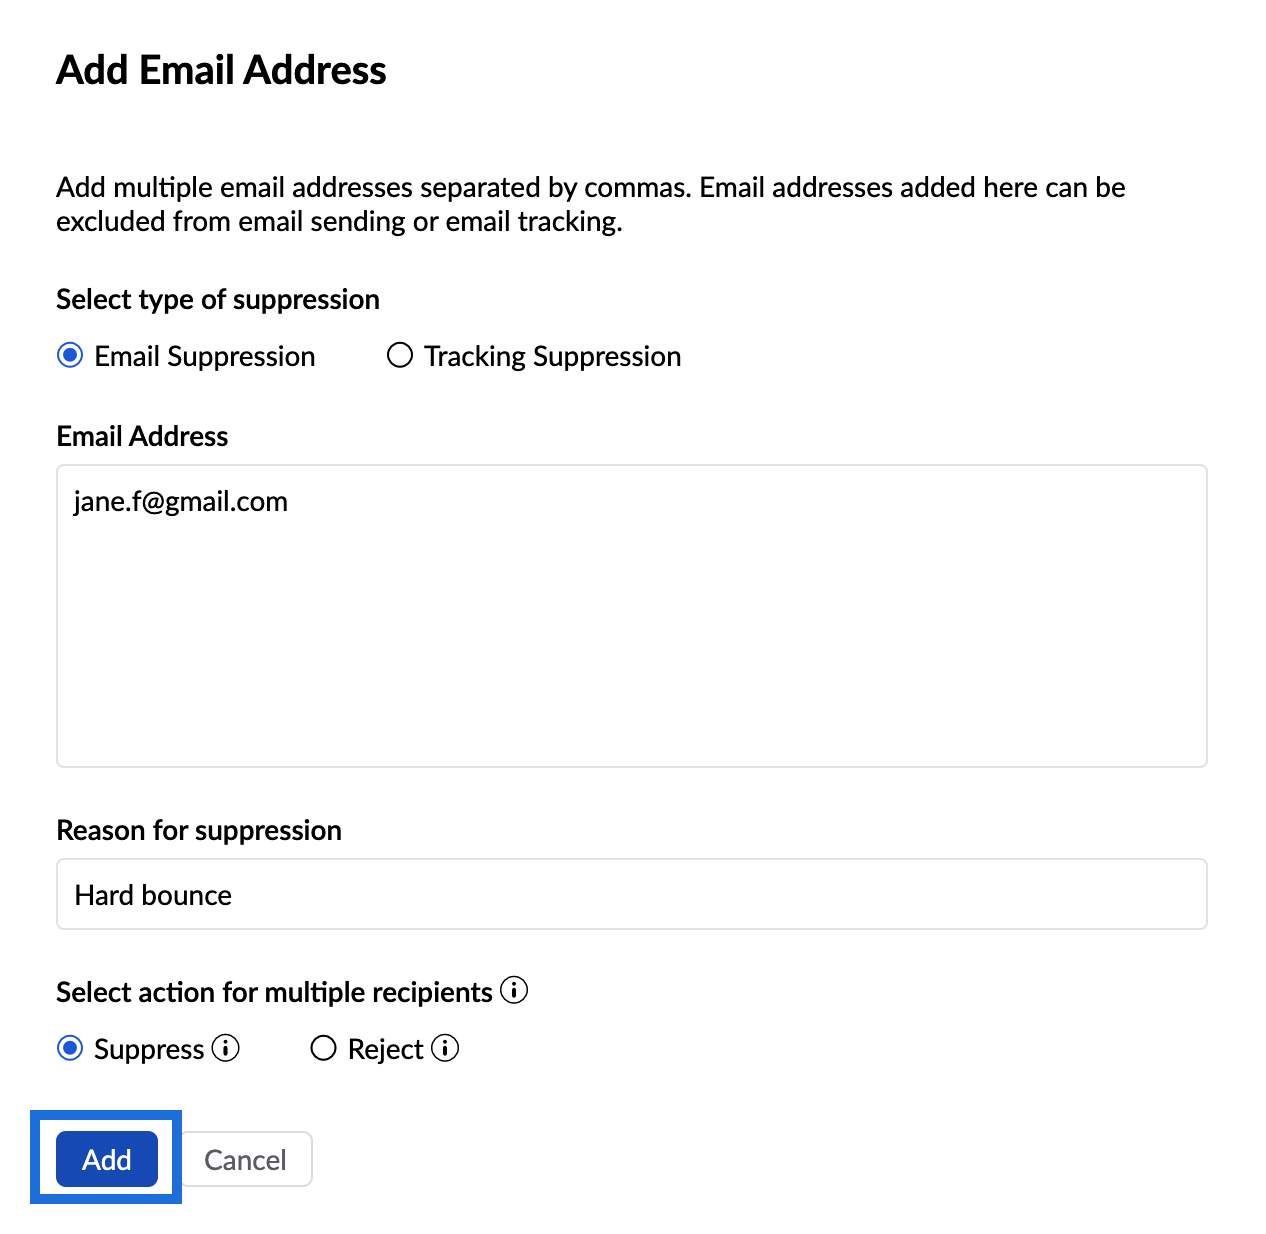
- The add email address popup appears.
- Select the type of suppression:
- Email suppression: This type includes those email addresses for which the emails need not be sent.
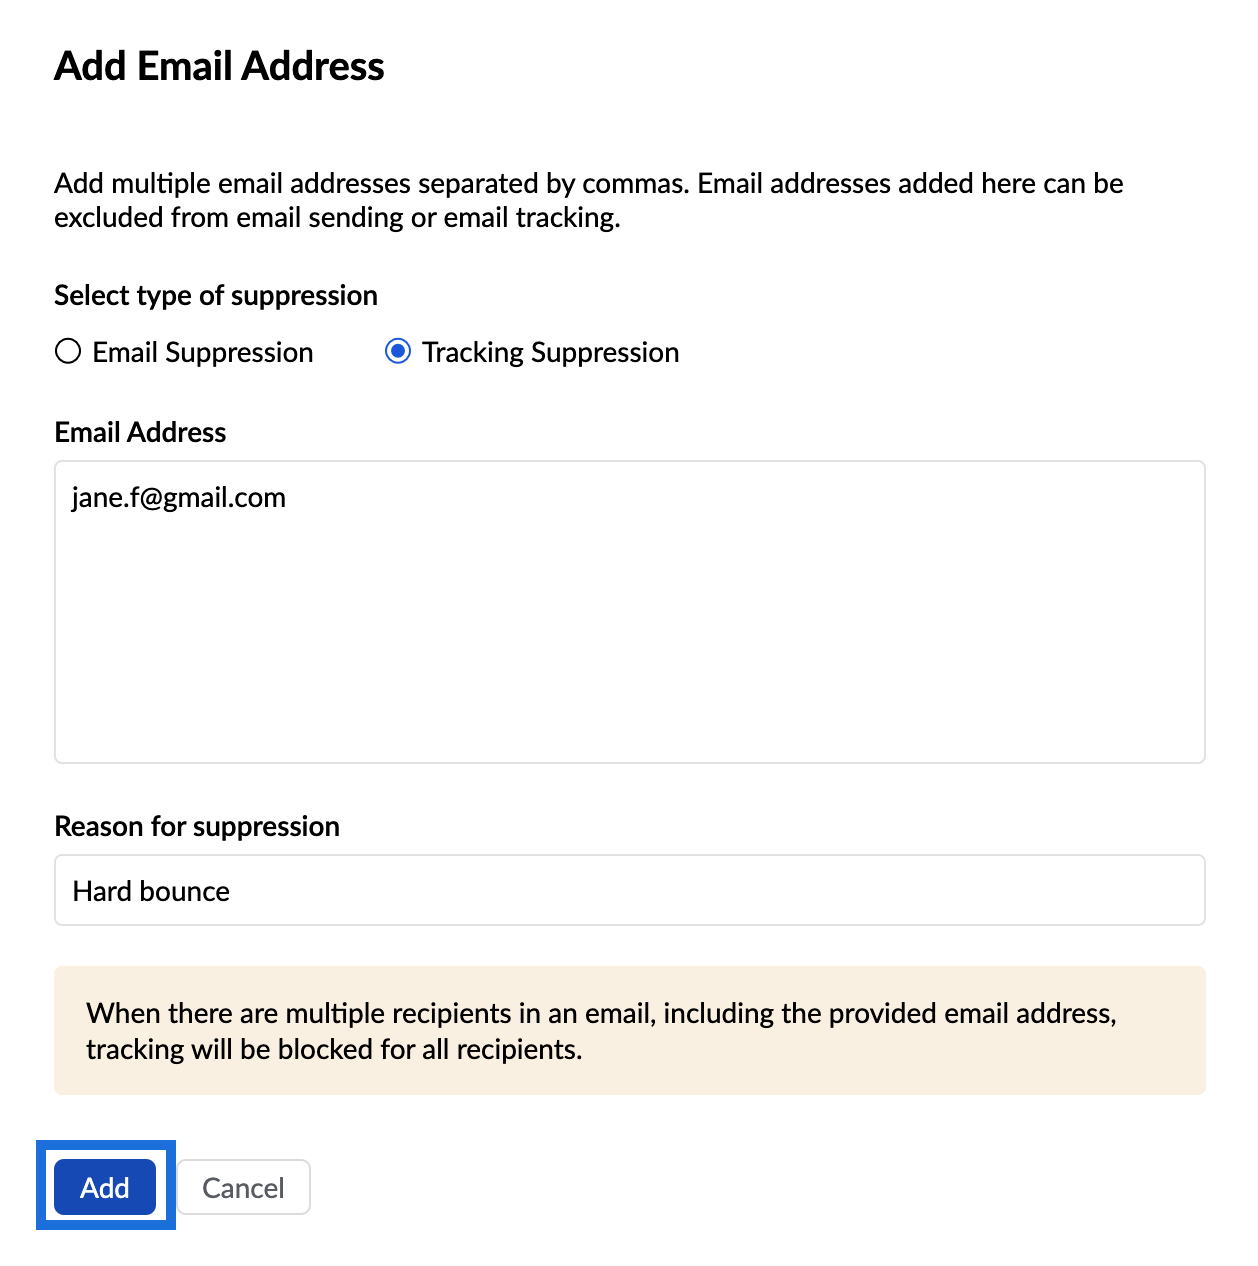
- Tracking suppression: This type includes the email addresses that need not be tracked.
- Choose the appropriate type according to your preference.
Email Suppression :
- Enter the email address(es) you wish to add and the reason for blocking.

- When your mailing list has multiple recipients, you can select either one of the following options based on your necessity :
- Suppress: If this option is selected, the email addresses which have been added to the suppression list alone will not receive the emails.
- Reject: If this option is chosen, emails will not be delivered to all the recipients present along with the addresses which have been added.
- Enter the email ids and choose whether you want to suppress or reject that particular id.
- Click Add.
Note:
- Examples of suppress and reject options while using multiple recipients :
- Suppress: Say a company has four recipients namely a1@zylker.com, a2@zylker.com, a3@zylker.com and a4@zylker.com. If a1@zylker.com is suppressed, emails will not be sent to that particular email address alone.
- Reject: In the above case, If a1@zylker.com is rejected, emails will not be sent to all four addresses in the list.
Tracking Suppression:
- Enter the email address(es) that you do not wish to track anymore.

- Enter the reason for suppression
- Click Add.
Editing entries : You can further edit the entries in your suppression list by hovering over the respective email address.

- Click on the edit icon on the right. The edit email address pop-up opens.
- You can change the reason for the bounce along with the actions to be performed.
- Click save to confirm the changes.
Deleting an entry : To delete a suppressed email address added to the list, click the delete icon near the corresponding email address. Confirm the deletion.
Note:
No credits will be consumed for emails sent to the recipients added in the Suppression List.
Domain suppression
Domain suppression allows you to add those domains whose email addresses that you do not want to send any emails to. You can add multiple domains to the list.
- Navigate to the Domains tab in the Suppression list section.
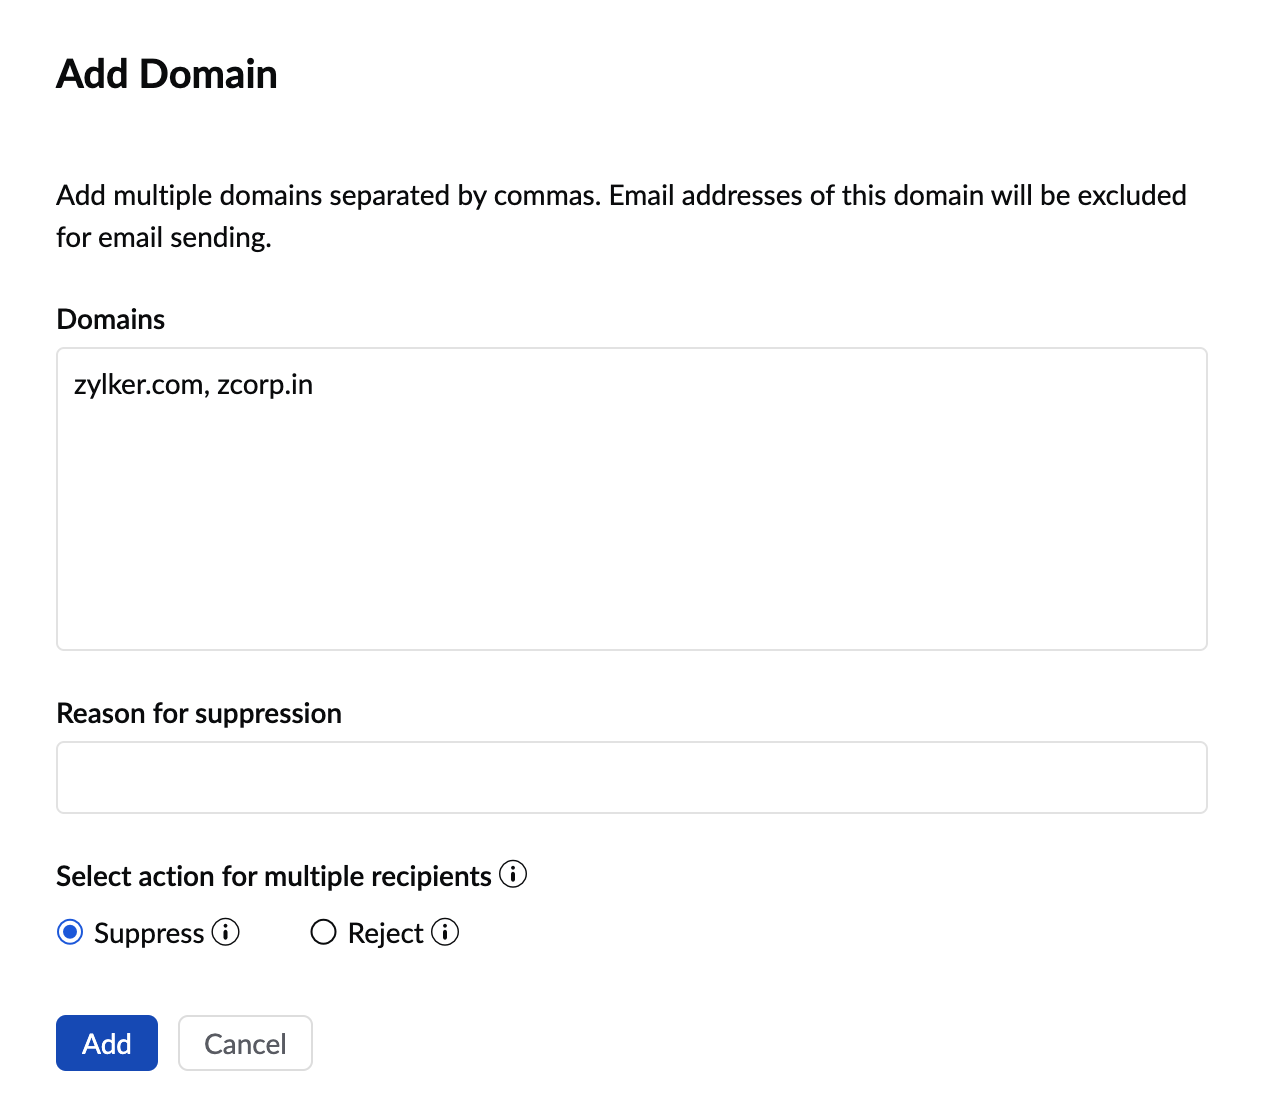
- Click Add domain. The Add domain pop-up appears.
- Enter the domains that you wish to suppress. For example, zylker.com or zcorp.in. All the email addresses associated with these domains will not be receiving any transactional emails.
- Enter the reason for suppression. Select the relevant action for multiple recipients, whether suppress or reject.
- Click Add.

- The domain(s) will be added to the list.
Auto-suppression
Auto-suppression gives you the option to automatically add the hard-bounced email addresses to the suppression list. You can enable / disable this option in the Suppression list section.

Auto-suppression can be enabled only for individual email addresses. You will not be able to add domains to the suppression list using the auto-suppress option.
Export logs
Using the Export button, you can export and download the last 60 days' data in the suppression list.
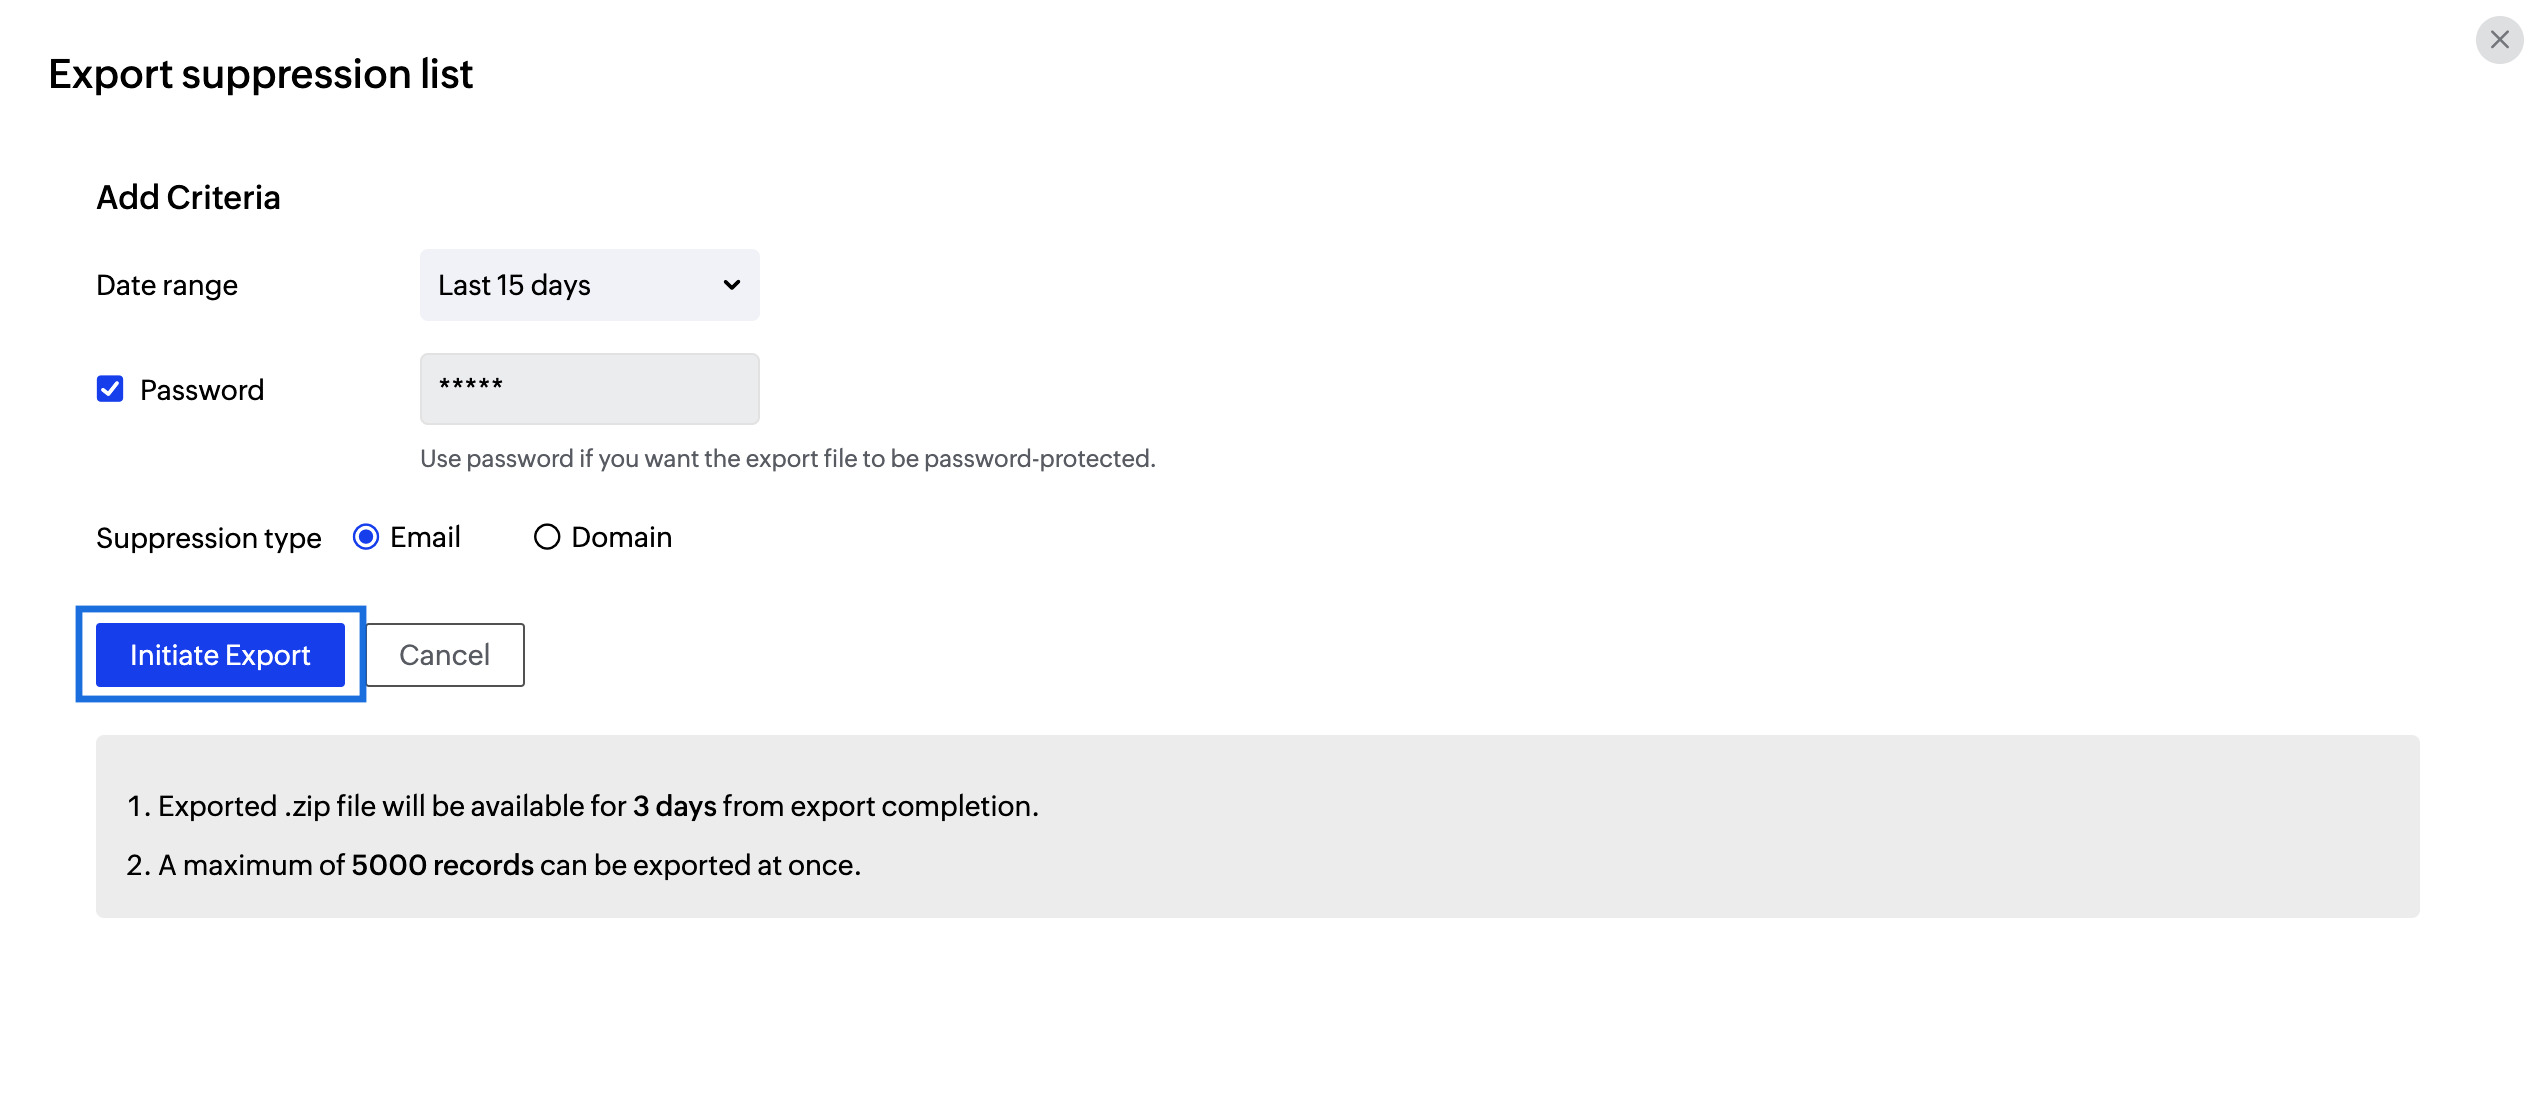
- Click on the Export button.

- Select the date range and the type of suppression you would like to export.
- If you wish to password protect the exported file, you can do so by selecting the password checkbox. Enter the password using which you want to protect your file in the textbox.
- Select Initiate export to export the file.

- The exported files can be viewed under the suppression list tab in the activity logs section.
Note:
- Only the user with Postmaster access can add to the suppression list.


