Setting up Microsoft 365 in Zoho eProtect
If your email service is hosted in Microsoft 365, Zoho eProtect simplifies the setting up process. If you have queries related to the product, contact presales@zohoeprotect.com.
Sign Up with Zoho eProtect
If you wish to sign up with an existing Zoho account, log in to Zoho eProtect with your credentials. Organizations new to Zoho can follow these steps to sign up with Zoho eProtect.
- Open a web browser and type www.zoho.com/eprotect.
- Click GET STARTED from the top right corner.
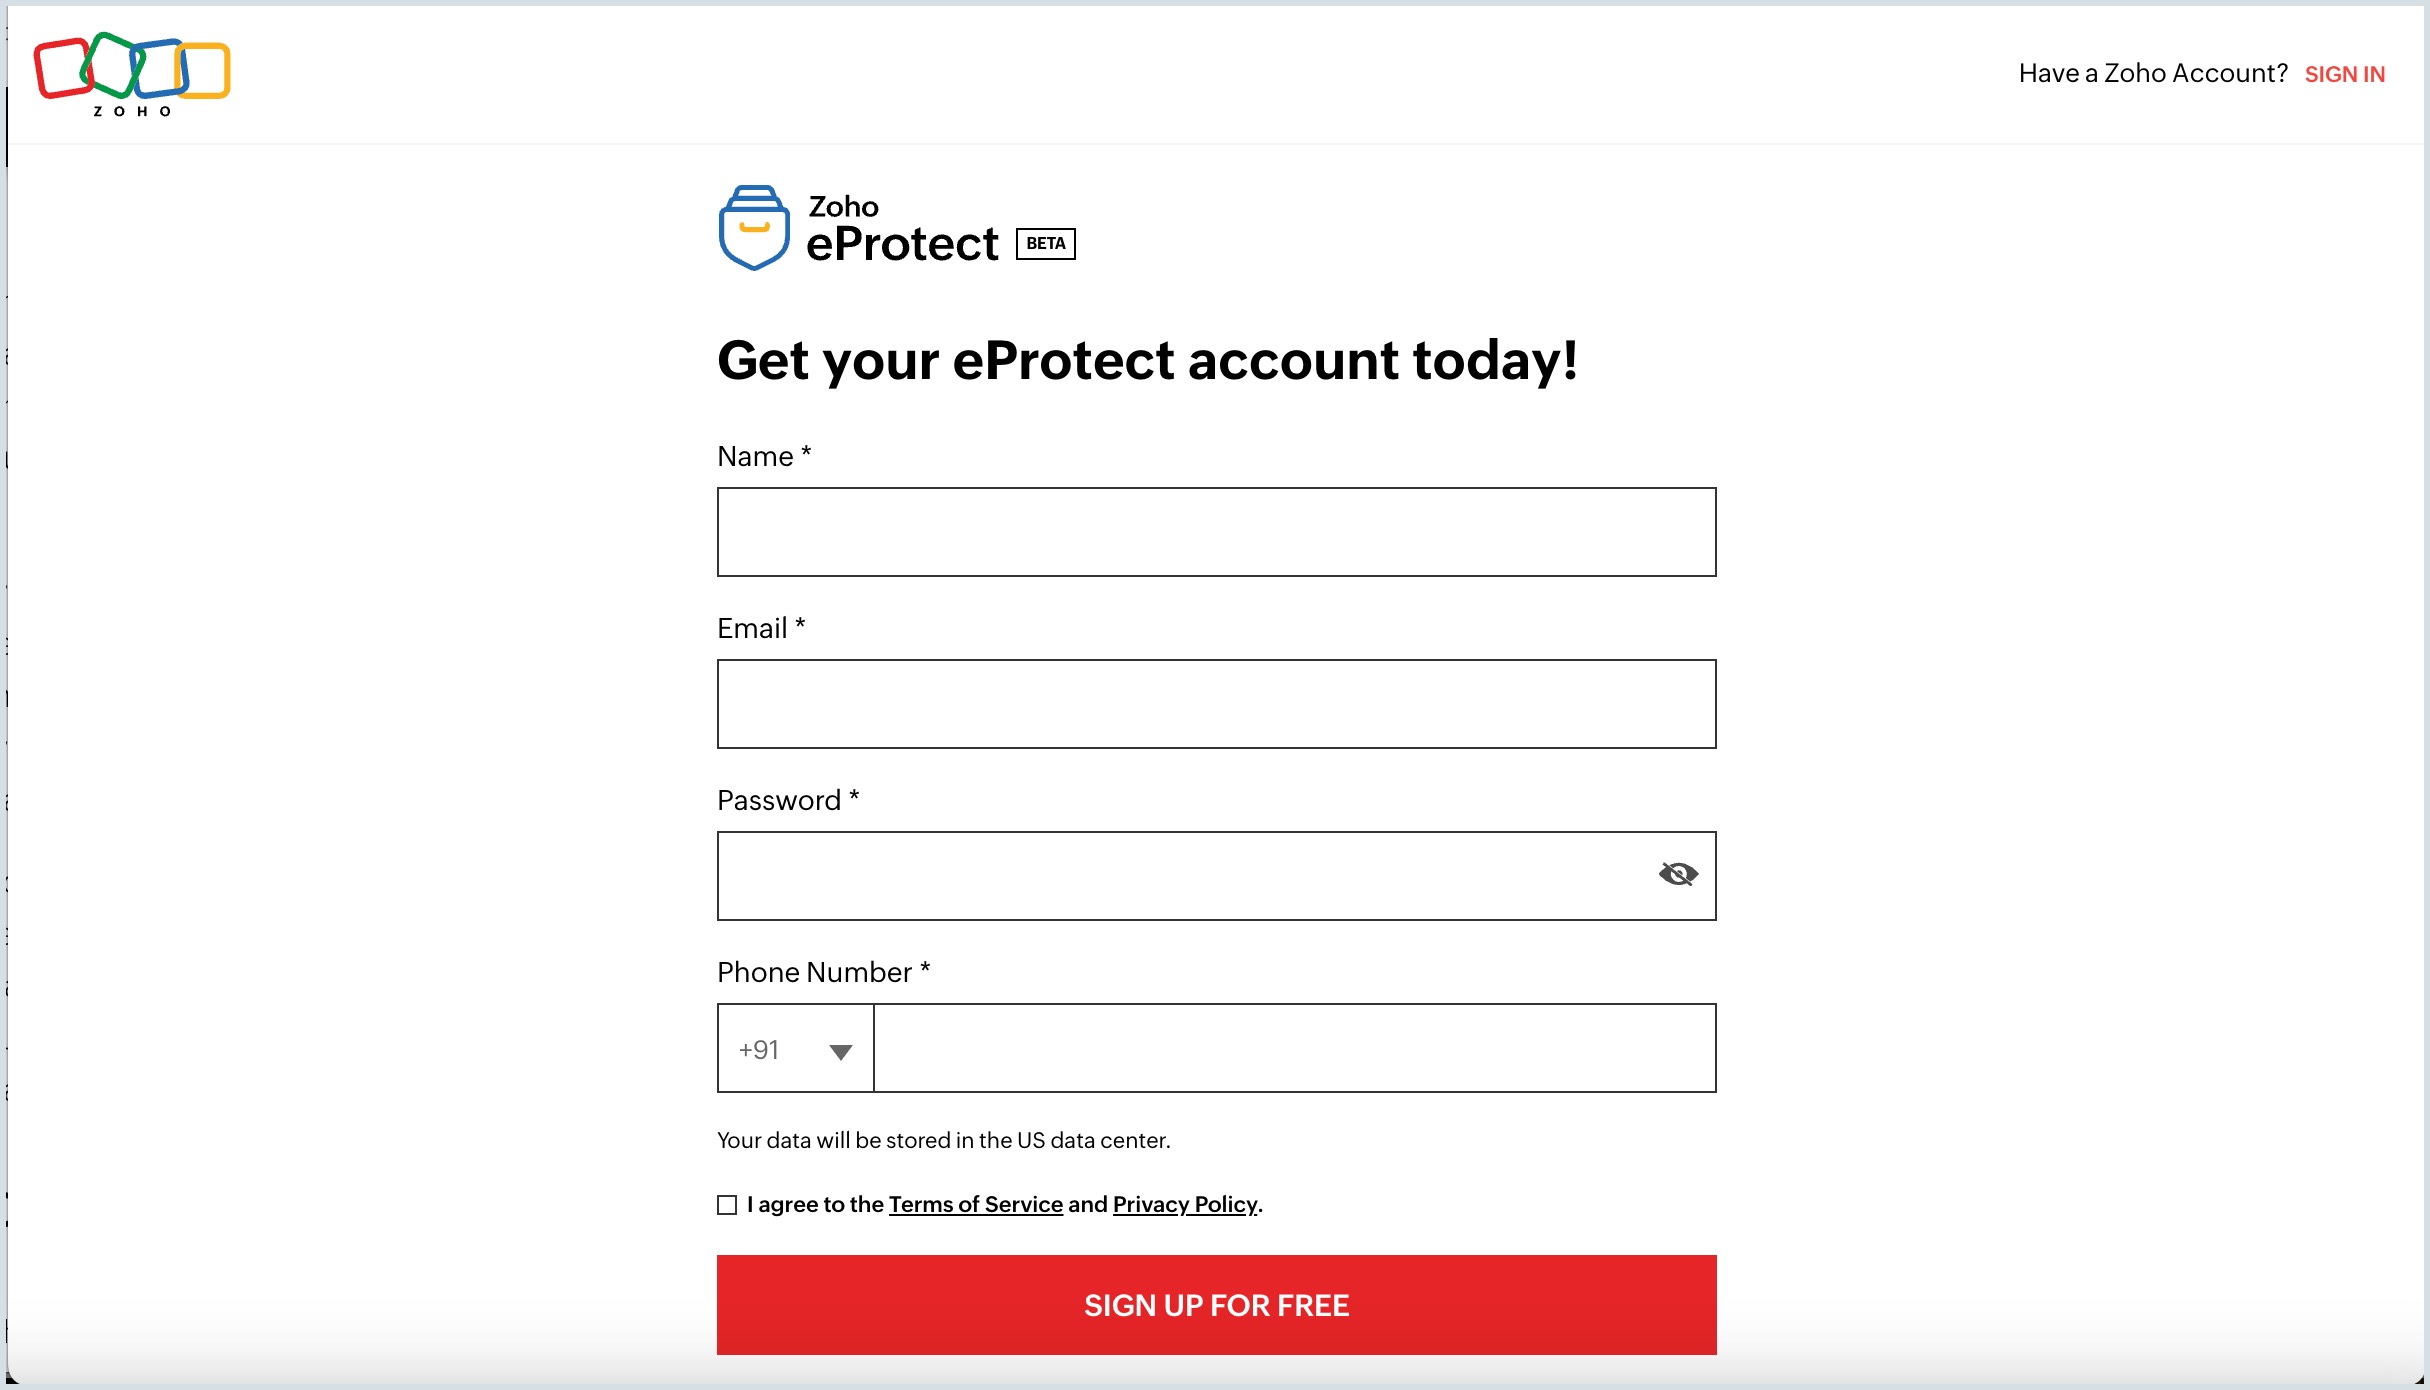
- Enter your Name, Email Address, Mobile Number, and Password.
- Select I agree to the Terms of Service and Privacy Policy.
- Click SIGN UP FOR FREE. Zoho eProtect's Welcome page appears.
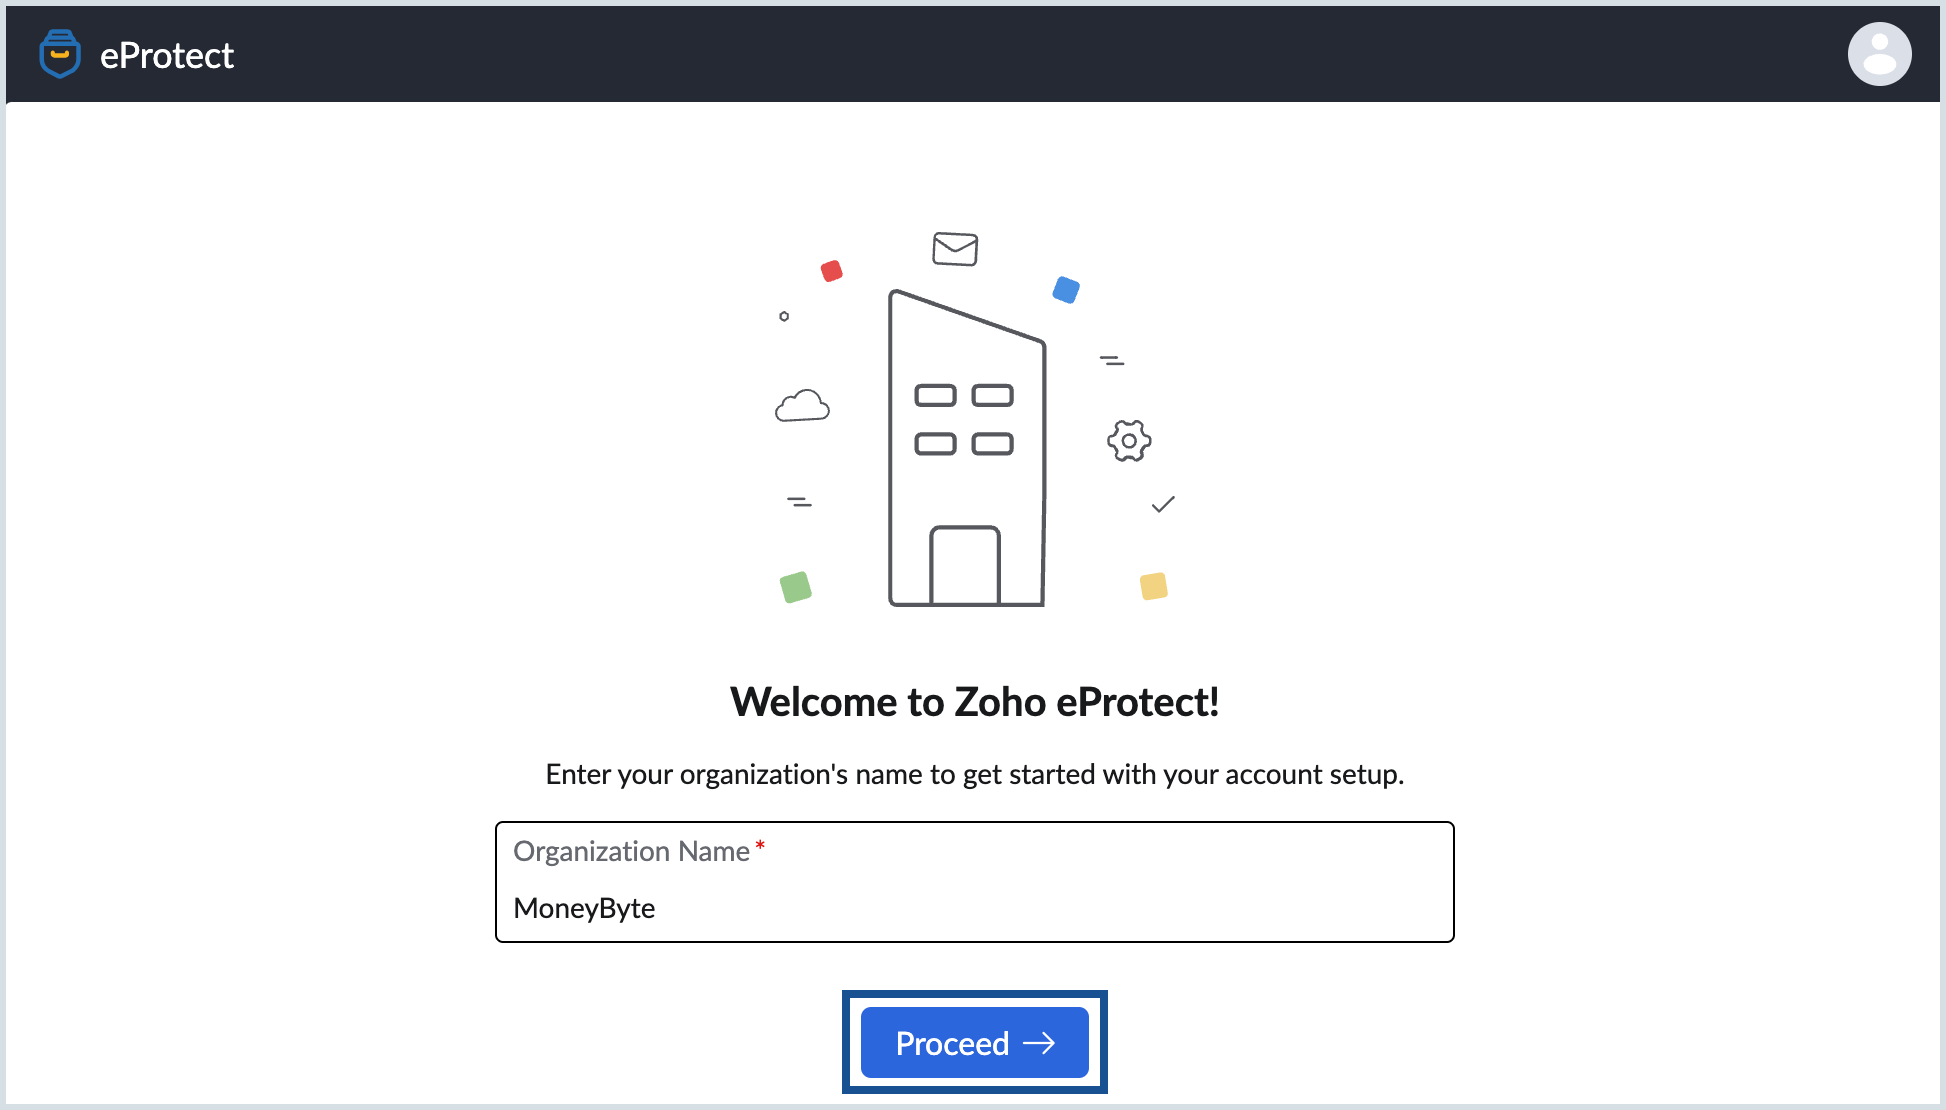
- Enter your organization name and click Proceed. Add Domain page appears.
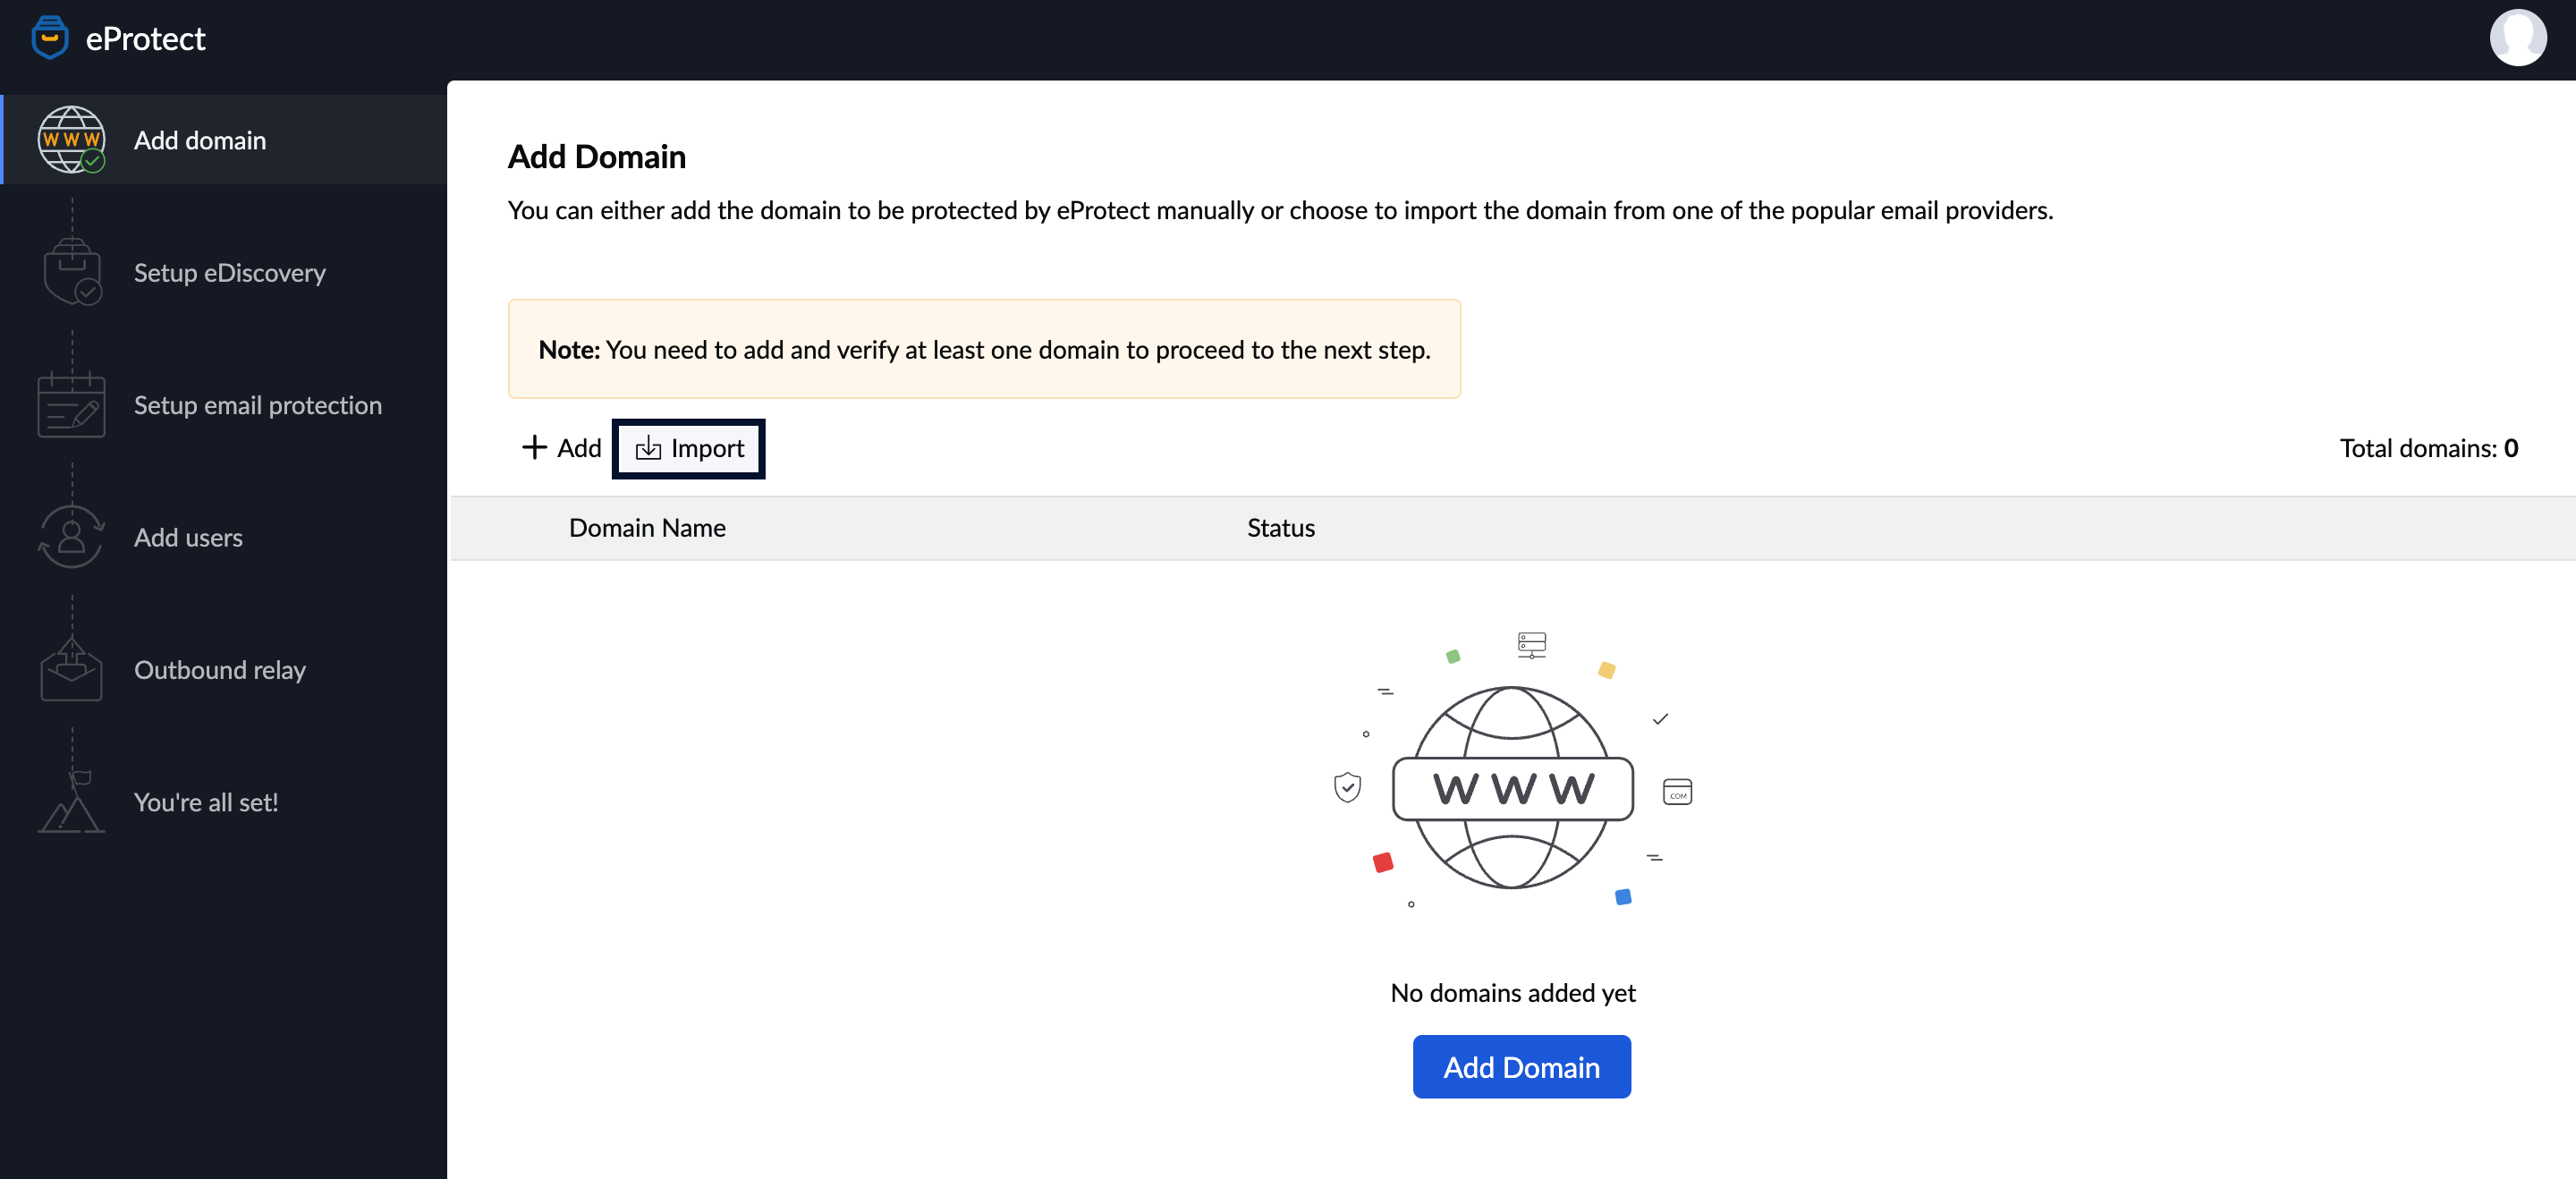
Import domains from Microsoft 365 to Zoho eProtect
To start using Zoho eProtect, you can import your organization's domain which are already verified with your email provider. In order to access your organization's existing domains and user details, you must authenticate with your Microsoft 365 admin credentials.
Follow these steps to import a Microsoft 365 account to Zoho eProtect:
- Navigate to the Zoho eProtect's setup page and select Import from Microsoft 365.
- Enter the suitable name for the configuration. Click Authorize.
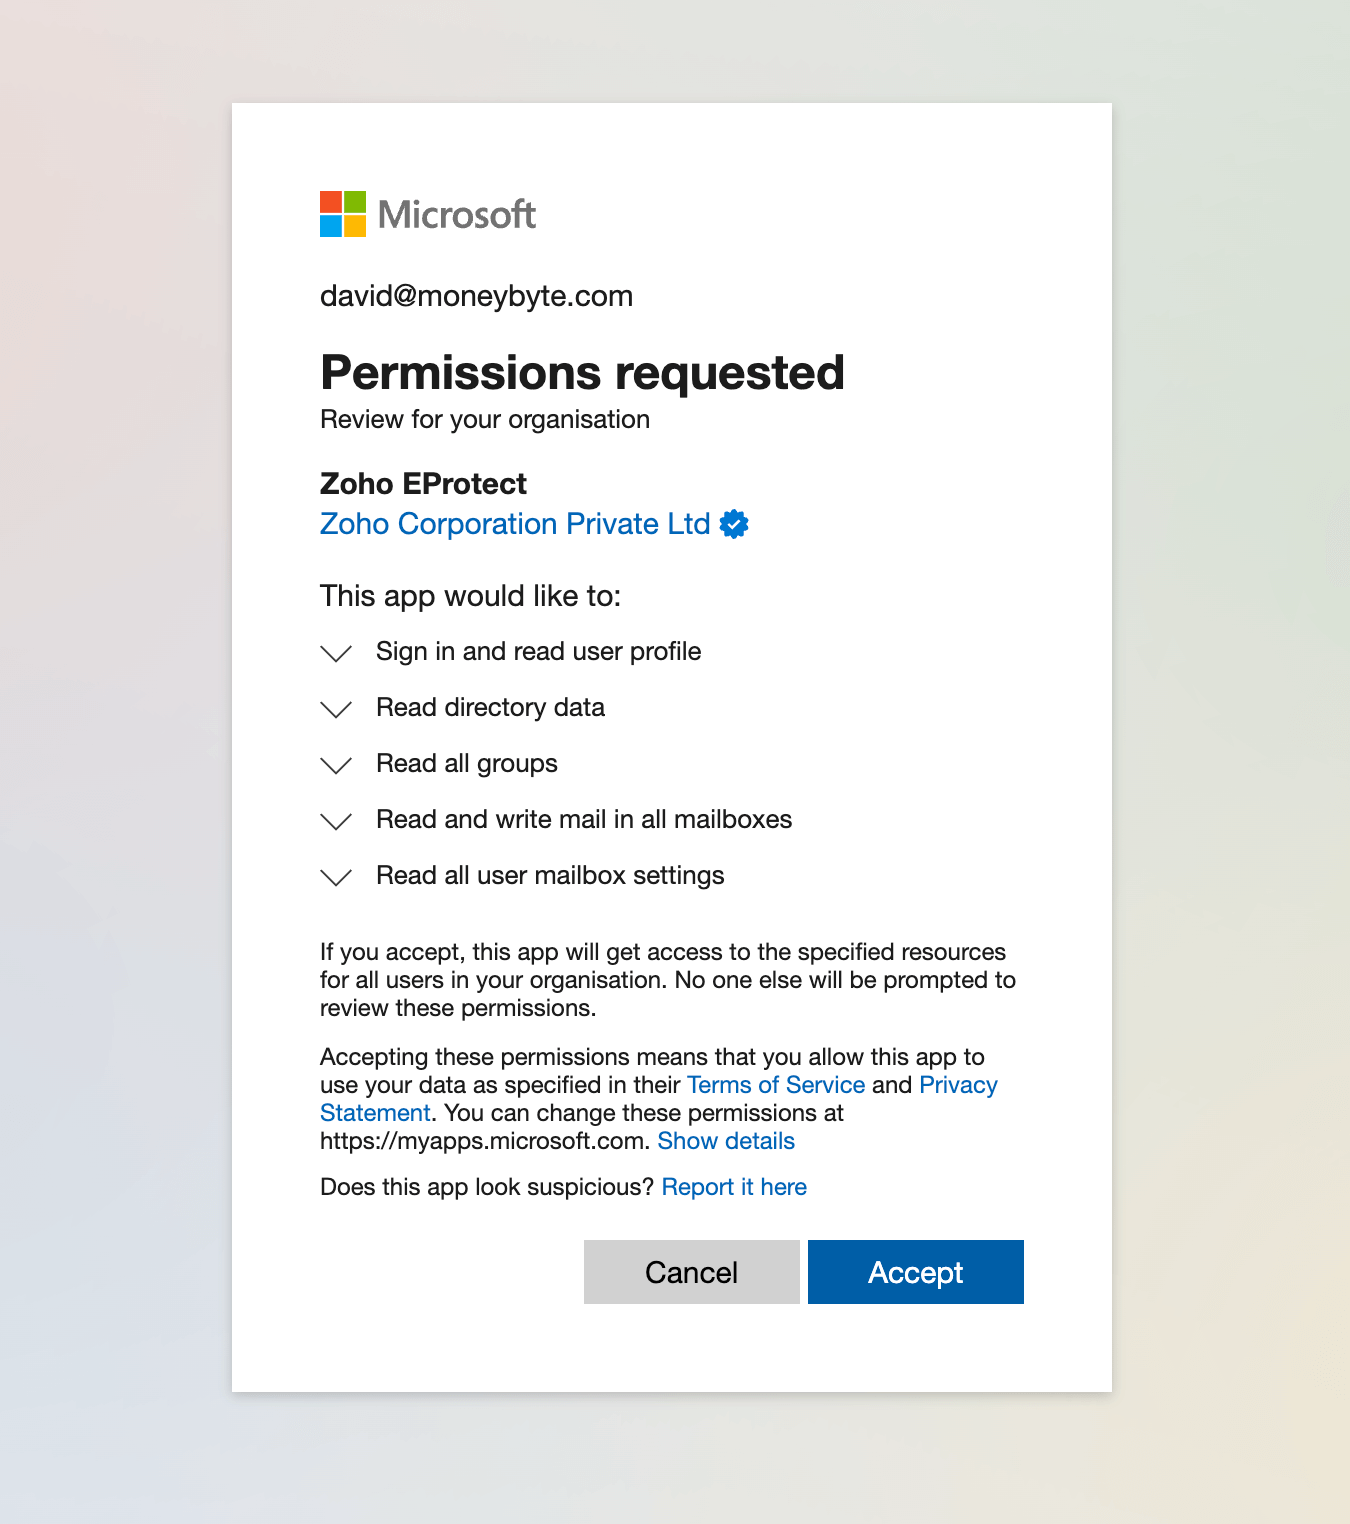
- You will be redirected to the Microsoft admin account.
- Authorize eProtect to access your information.
- Once done, you will be prompted to select the domains you wish to import. If you choose more than one domain, select the primary domain by clicking on the star icon.
- Click Import and proceed to the Add Users section.
Setup Email Archival
Note: The steps that follow are applicable only for organizations that have opted for EARCHIVE or PROFESSIONAL plans.
Zoho eProtect archives your organization's emails based on the mail-receiving type that you select. Follow these steps to setup email archival:
- Select the preferred option to receive emails for archival:
- Journaling - Add eProtect's journal mailbox address in the Third-party email archiving section in the Microsoft 365 admin console. Follow the steps given in this help page.
- API - Ensure you have completed the authorization process in Microsoft 365 to archive a copy of your emails using the API method.
- MX - MX method is recommended if you enable Email Protection for your organization.
Click the Advanced Settings drop-down and choose the Default retention policy.
Note: If required, you can configure the default retention rule in the Retentions section after completing the setup.
- You can either select Retain forever or enter the number of days in the Retain for field.
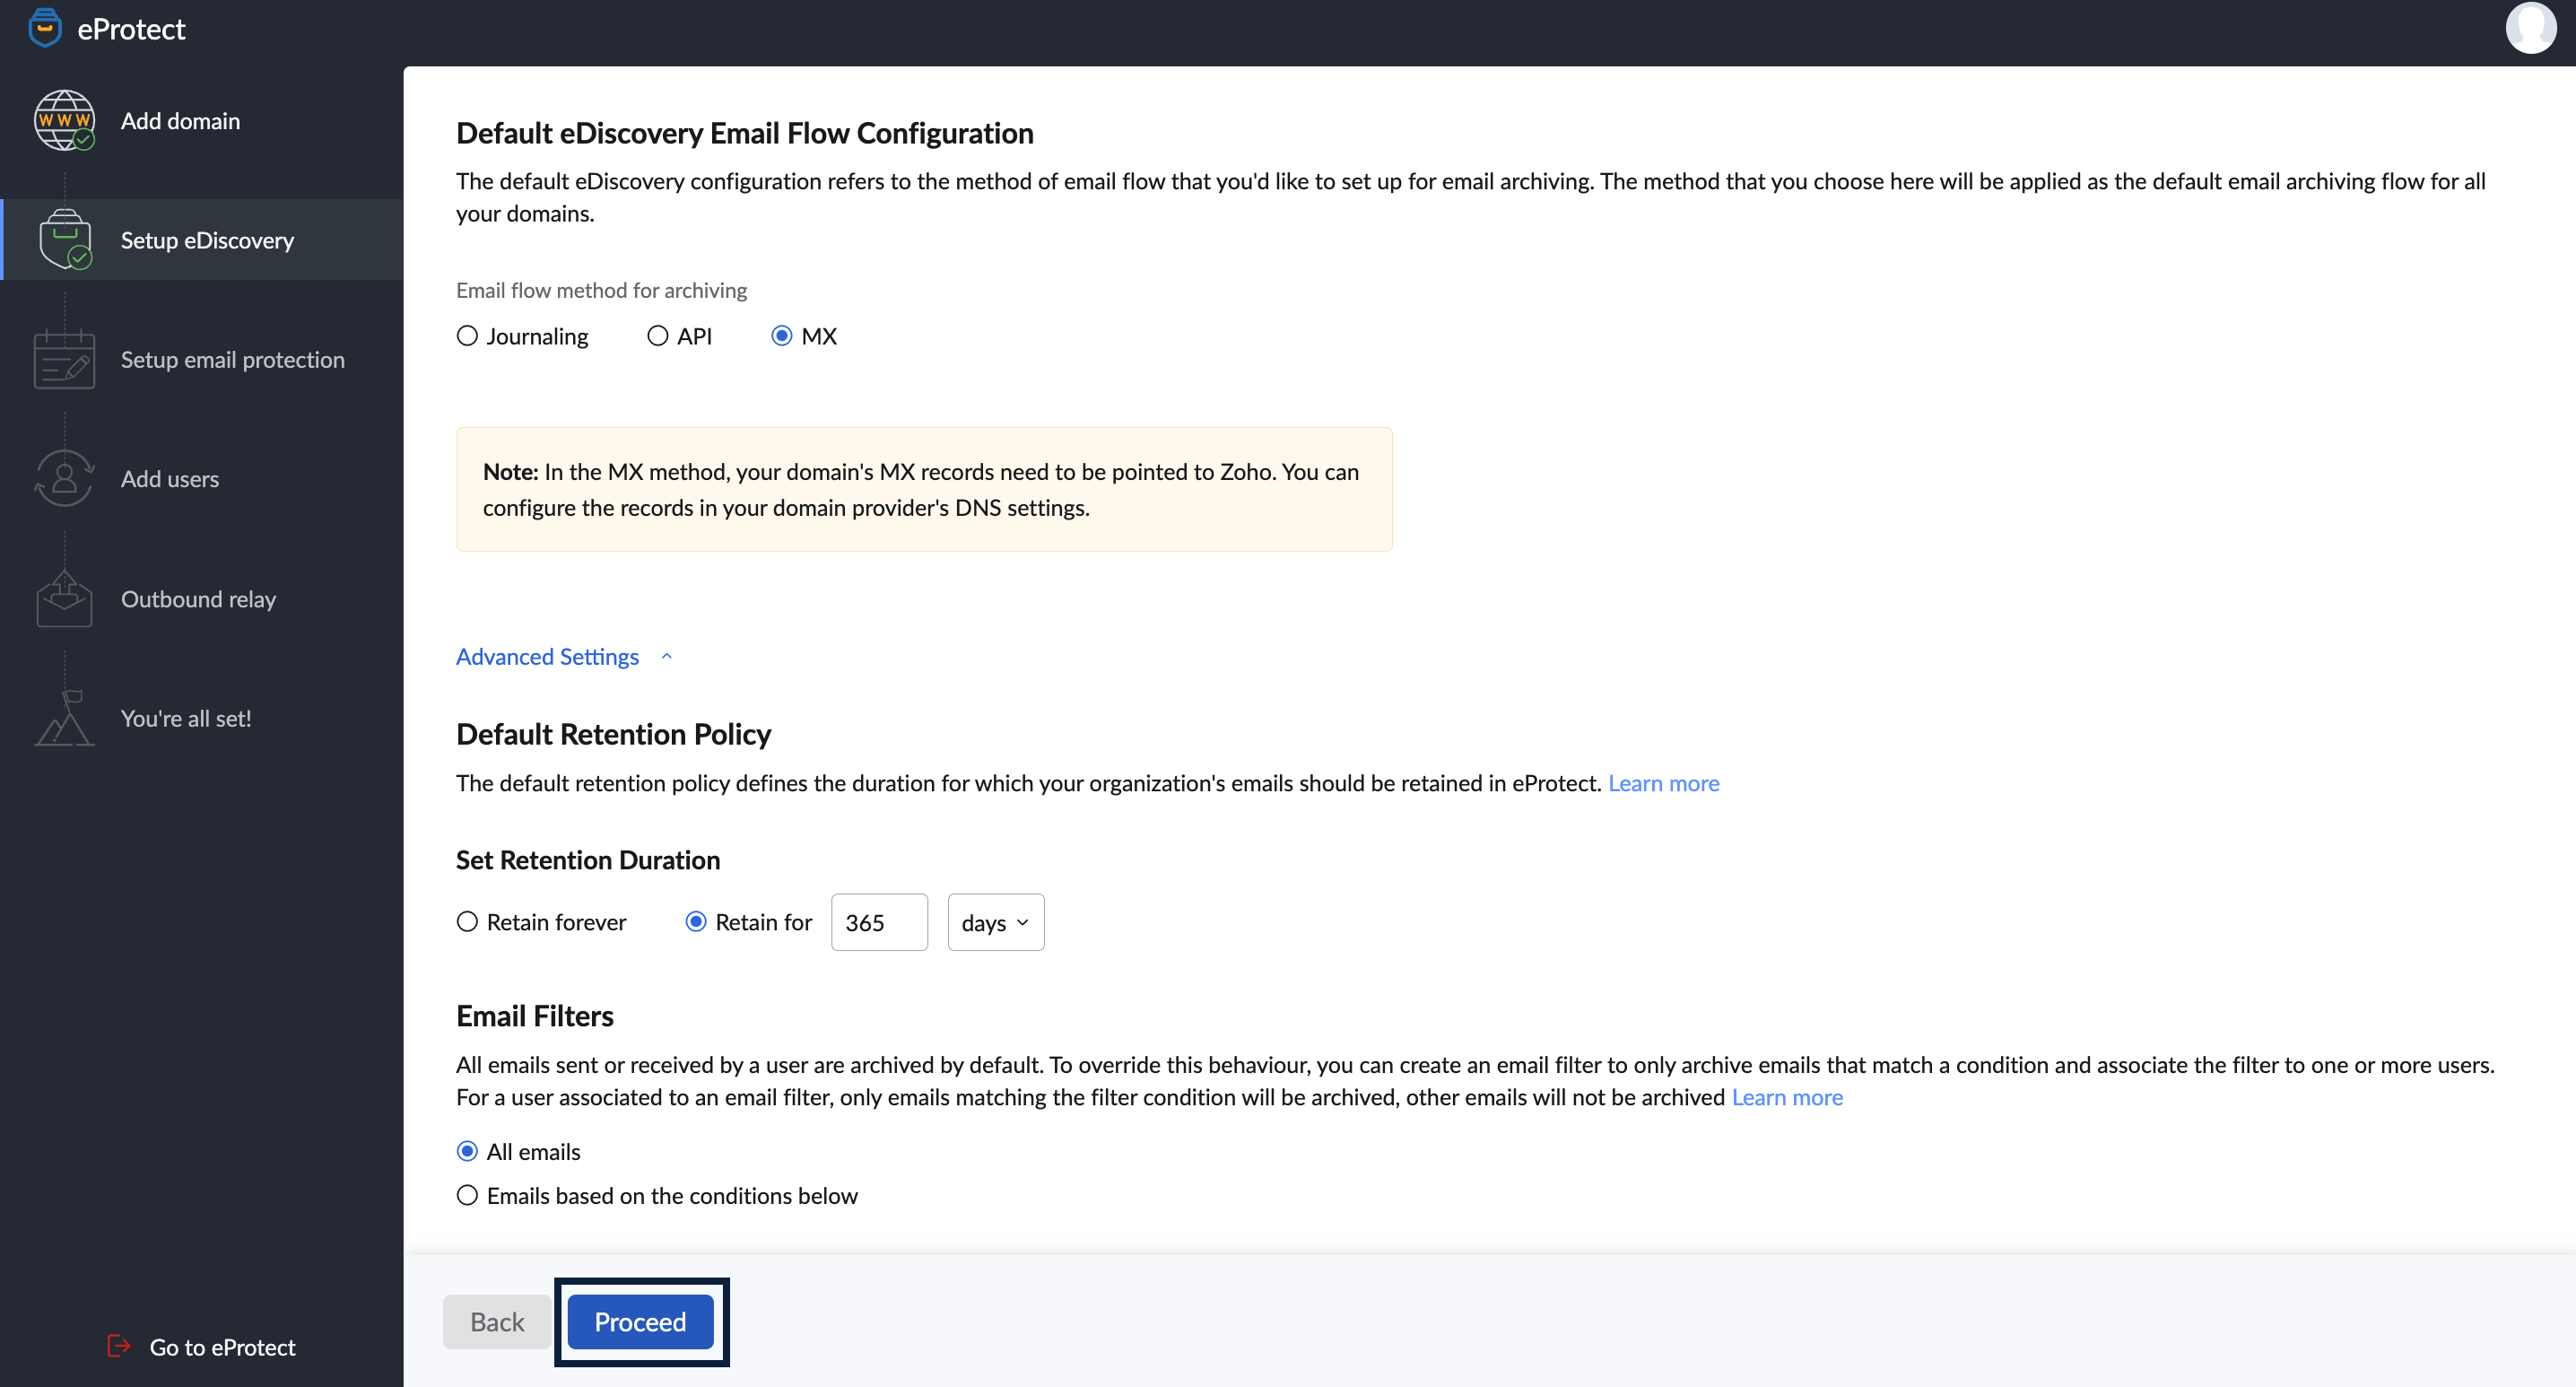
- Configure the Email Filters. The filter you configure here will get saved as the default EDISCOVERY_FILTER in the Email Filters section under eDiscovery.
- Choose either All emails or Emails based on the conditions below.
If you selected Emails based on the conditions below, set the ingestion rule conditions from the below list:
Note: You can configure the eDiscovery ingestion filter in the Filter Rules section after completing the setup.
- Retain all sent emails
- Retain all sent emails - outside the organization
- Retain emails sent - only within the organization
- Alternatively, you can specify selected domains and choose to retain the emails that are sent only to those domains.
- Retain all received emails
- Retain emails received - only within the organization
- Retain emails received from external organization accounts
- Alternatively, you can specify selected domains and choose to retain the emails that are received from those domains.
- Exclude spam emails.
- Click Proceed.
The Journal Mailbox Address for your organization appears. You must add this journal mailbox address in the Third-party email archiving section in your Microsoft 365 admin console.
Setup email protection
Note:
- The steps that follow apply only to organizations that have opted for eProtect's ESECURE or PROFESSIONAL plans.
- If your organization requires only the eProtect's EARCHIVE plan, navigate to the Setup email archival section.
Once you complete the add/import users, the Spam Processing page appears. You can Setup email protection for your organization on this page by following these steps:
- Select the Spam Processing type that suits your requirements:
- Add header and forward - eProtect updates the email header with the content provided by admins and then forwards the email to the intended recipient.
- Add subject tag and forward - eProtect appends the subject with the content provided by admins and then forwards the email to the intended recipient.
- Quarantine - eProtect quarantines the email which can then be scrutinized by admins.
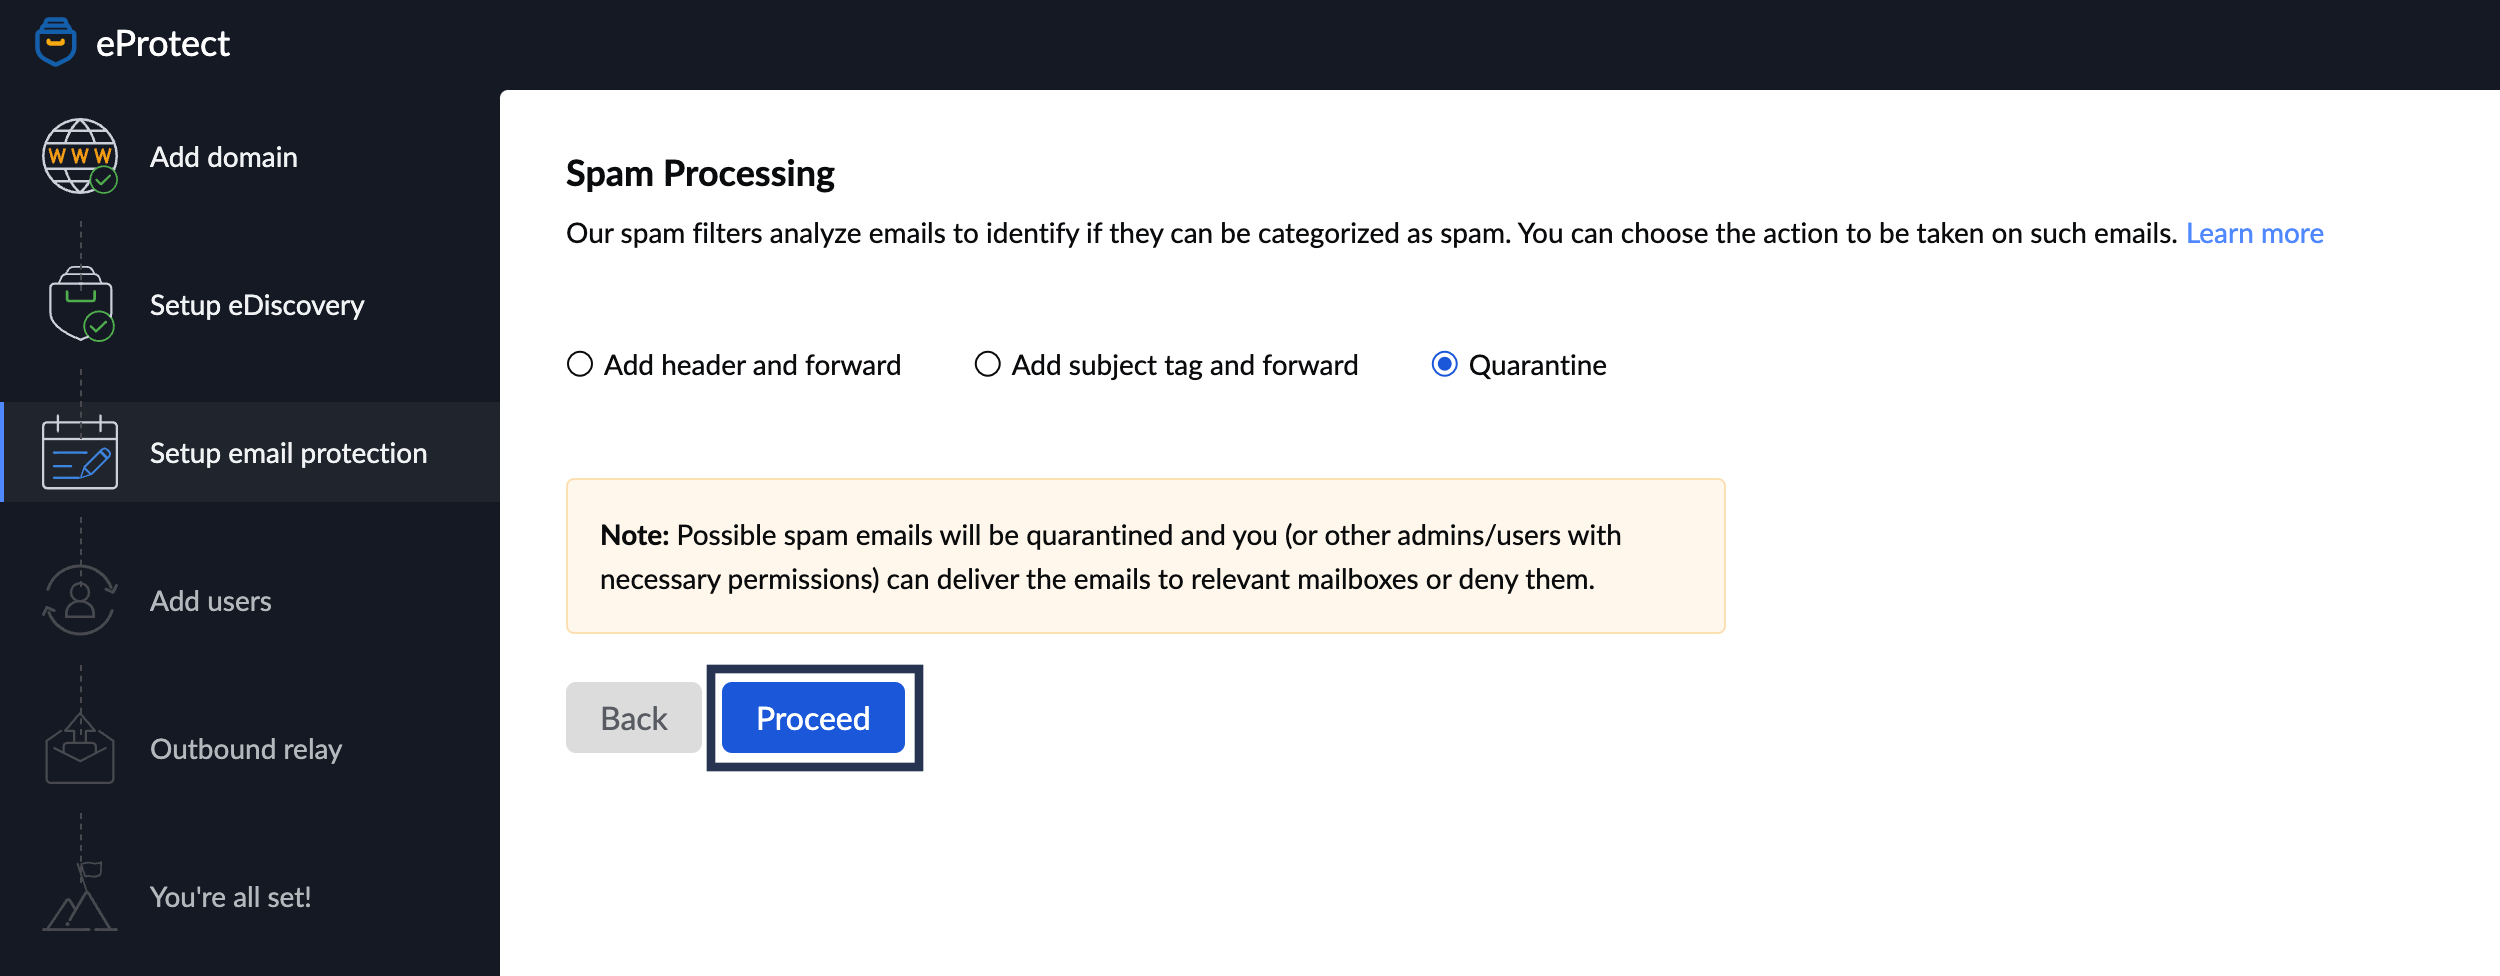
- If you choose Add header and forward, follow these sub-steps:
- Enter a Header Name and Header Value.
- Click the + icon to add multiple headers as per your requirements.
- To delete a header row, click the delete icon.
- If you select Add subject tag and forward, enter a Subject Tag.
- If you choose Quarantine, admins can moderate the quarantined emails from the Quarantine section.
- Click Proceed to Setup eDiscovery for your organization.
Import Users from Microsoft 365 to Zoho eProtect
Upon successful addition of your domain, the Add users page appears. By default, the user who creates the account will be added as a Super Administrator in eProtect. Below are the steps involved to import users:
- Select email provider details (If multiple email providers have been added)
- Select domains
- Select users
- Start import
Follow these steps to import users from Microsoft 365
- Select Import in the add users page and choose Microsoft 365 from the drop-down.
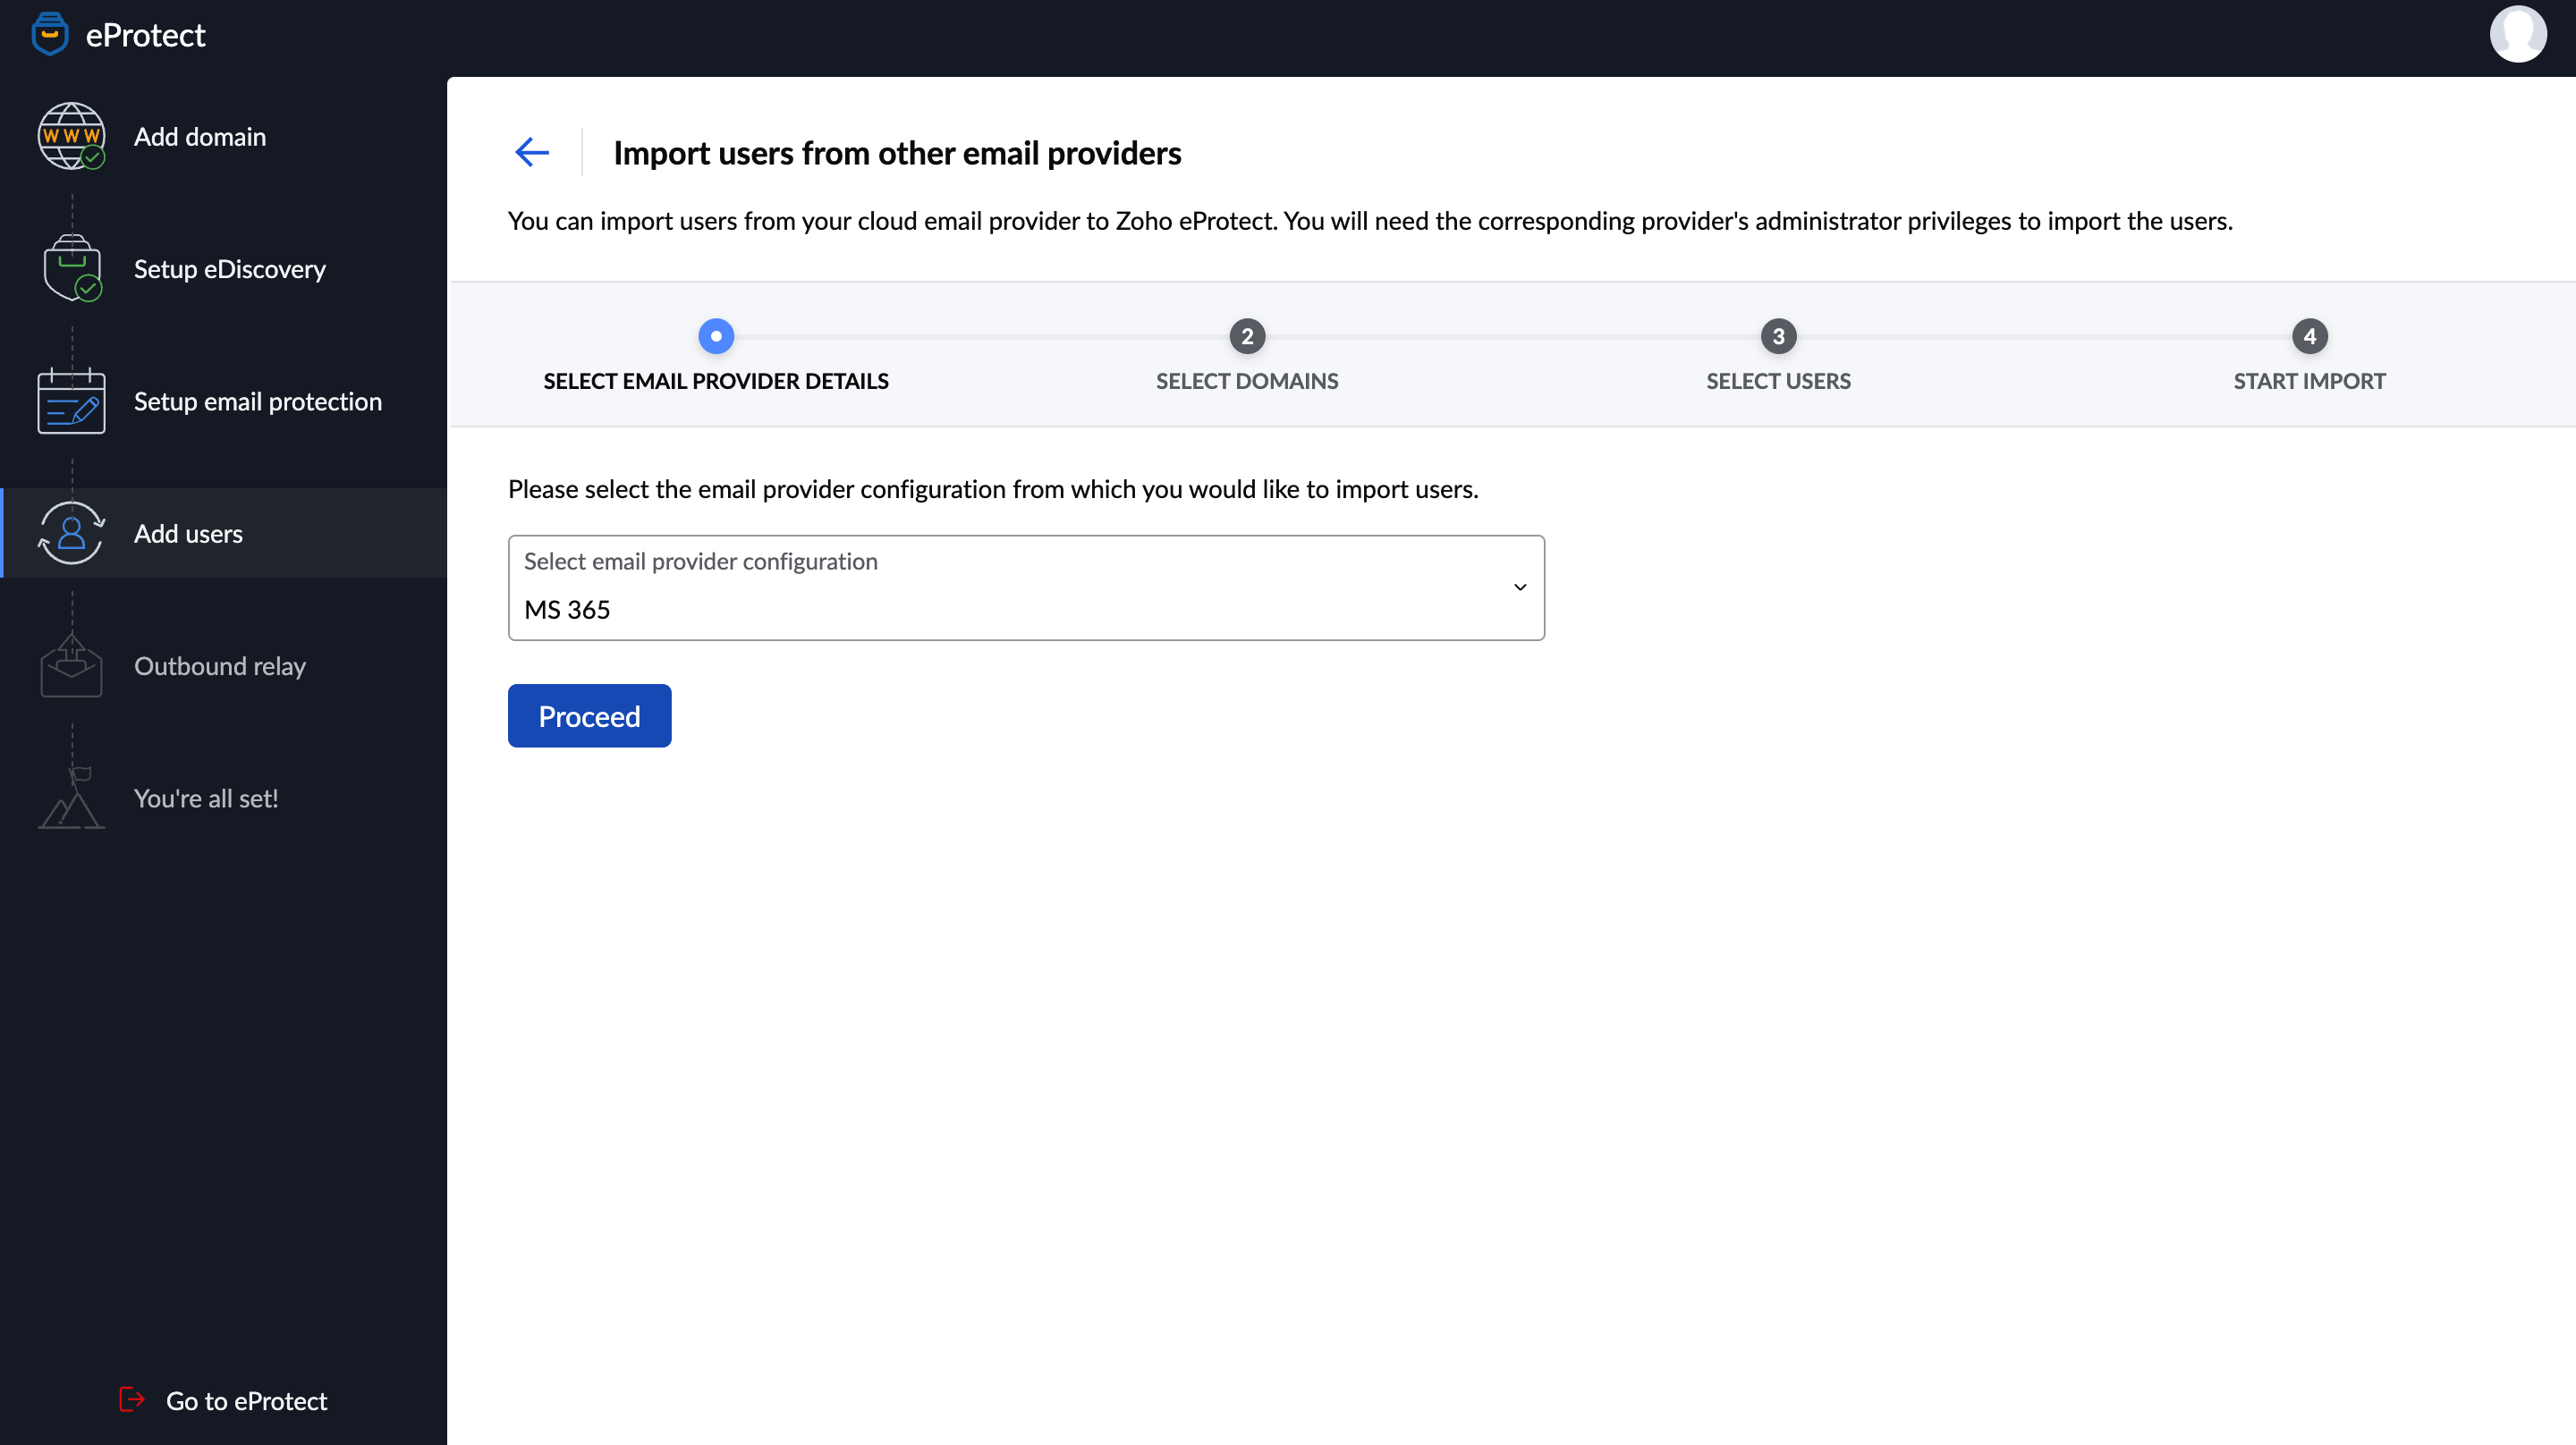
- Choose the desired email service provider from the list. Click Proceed.
- Select the hosted domains that you wish to import. Click Proceed.
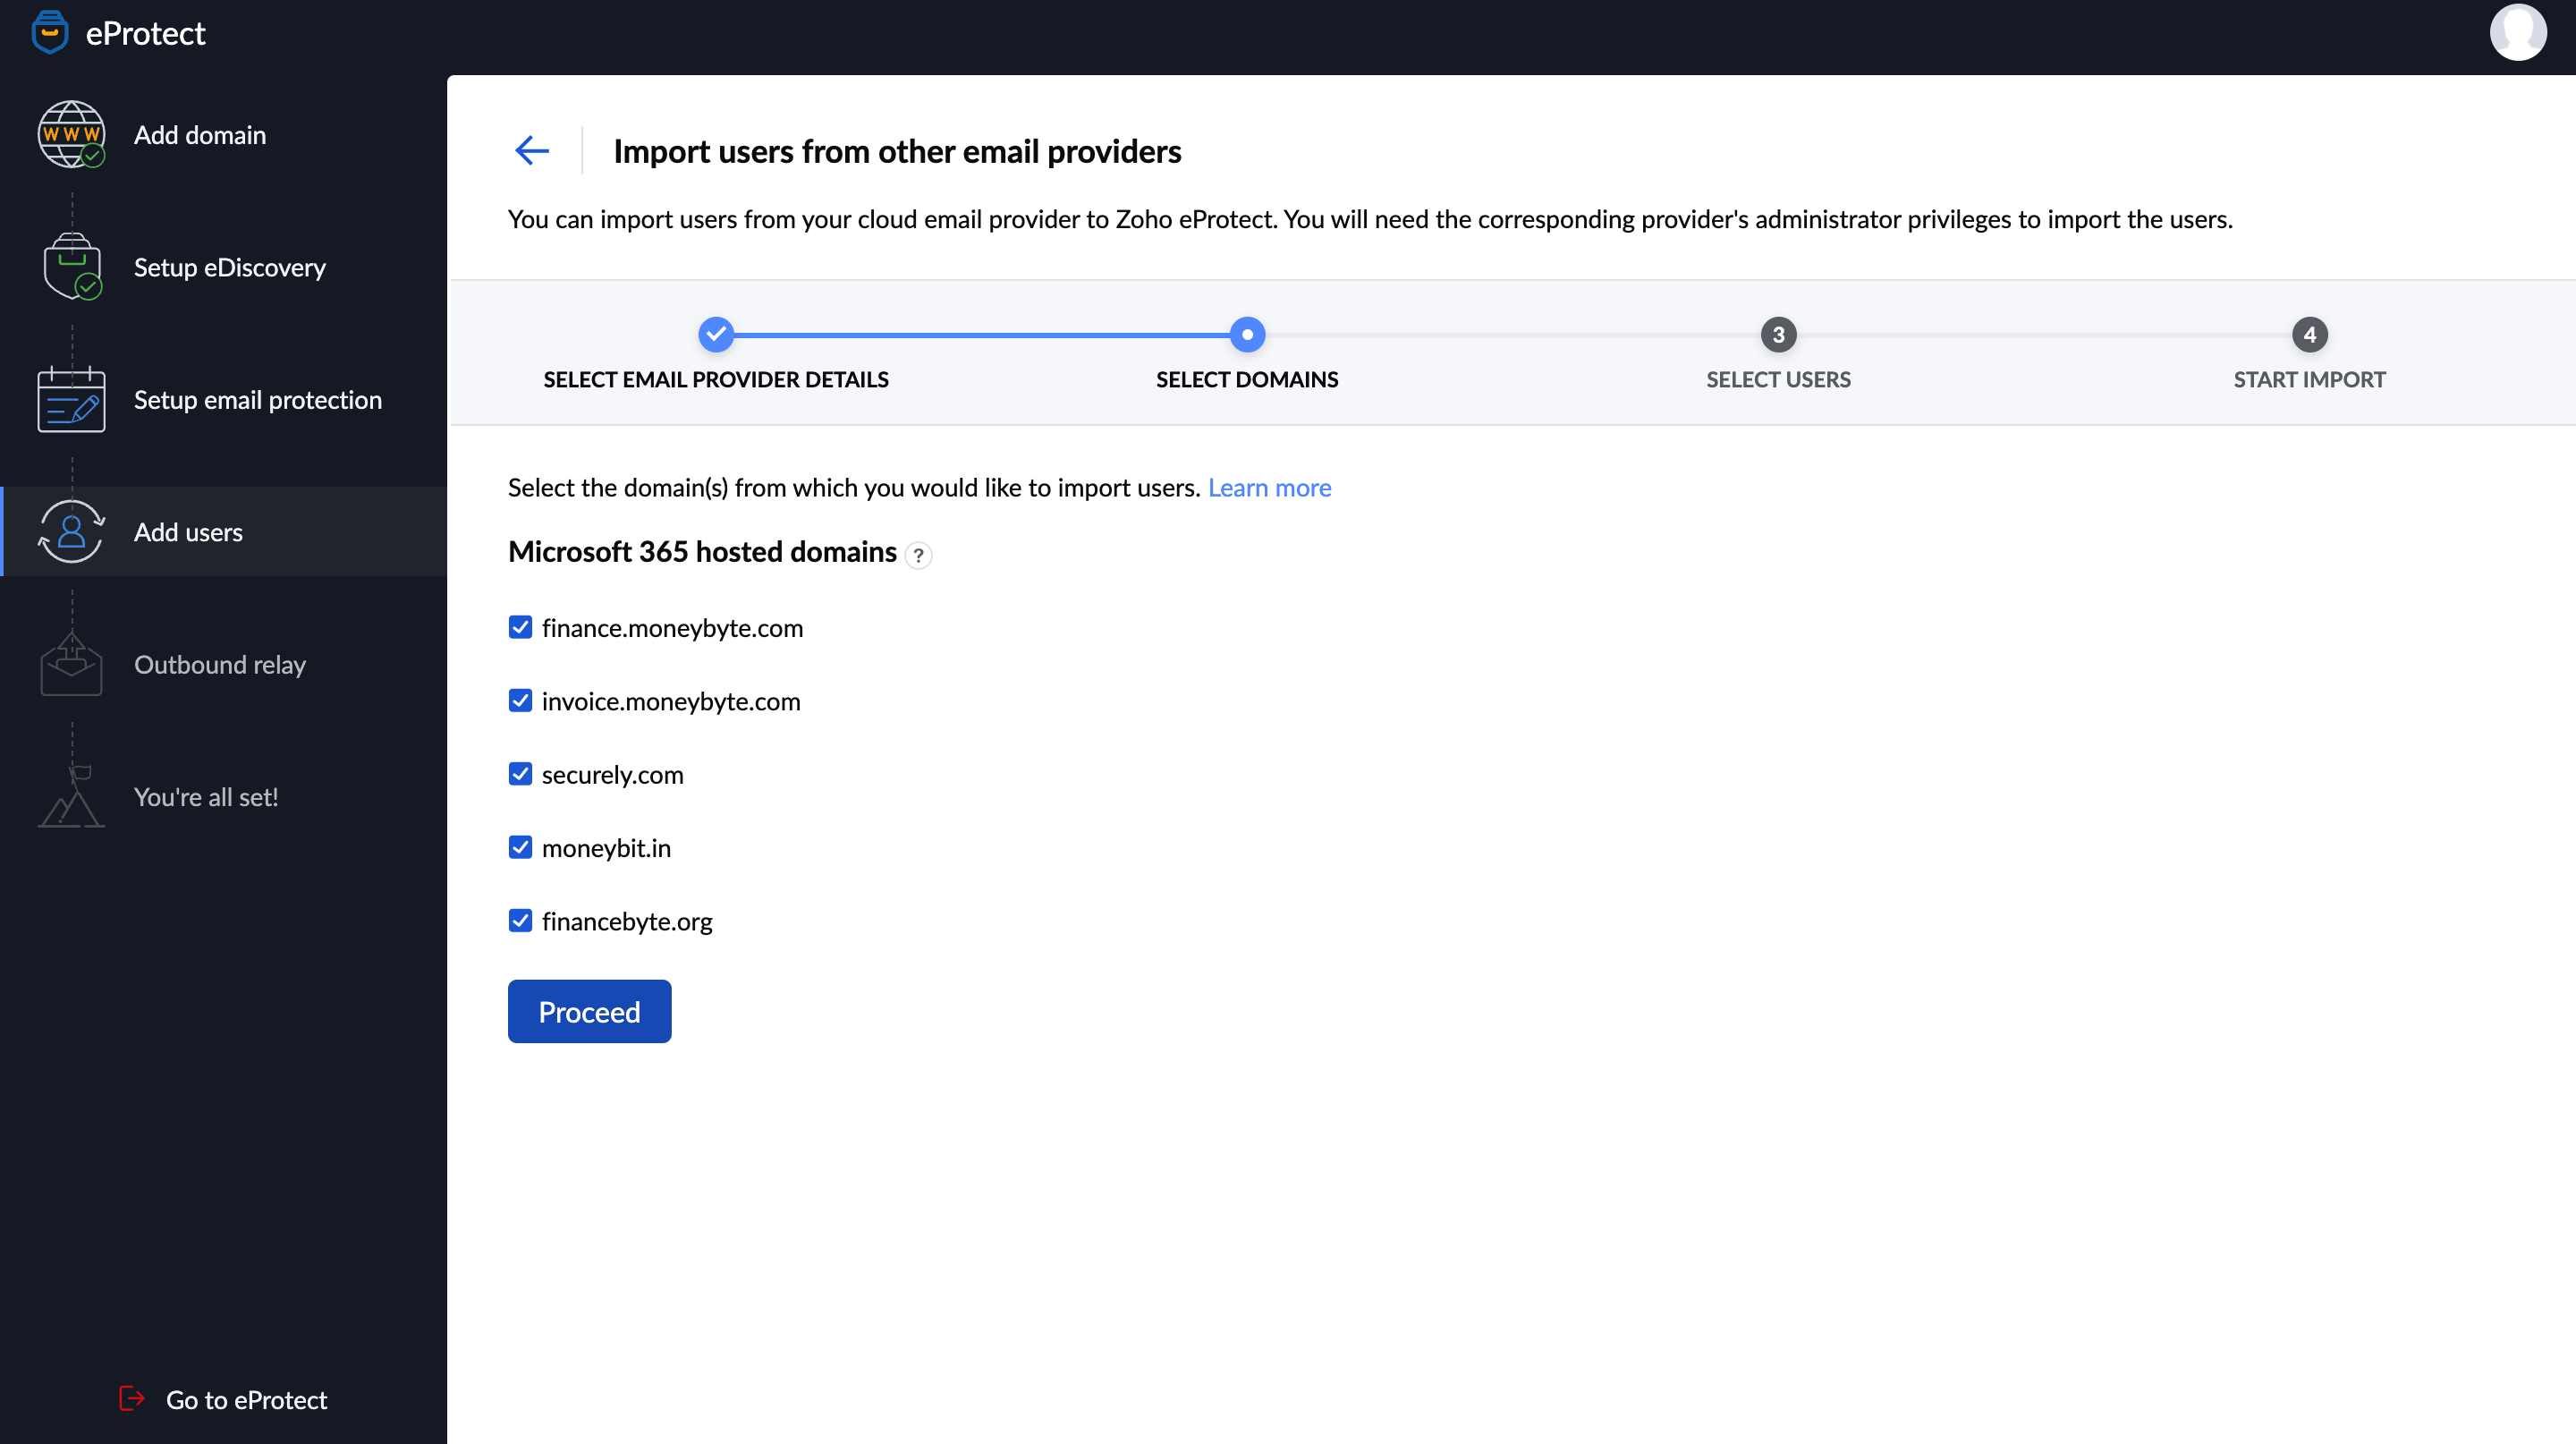
- Select Import in the Add Users page. The domains you added in eProtect will get selected automatically.
- The Select users page displays an overview of the total users in the selected domains, users selected to import and the license count available for your account.
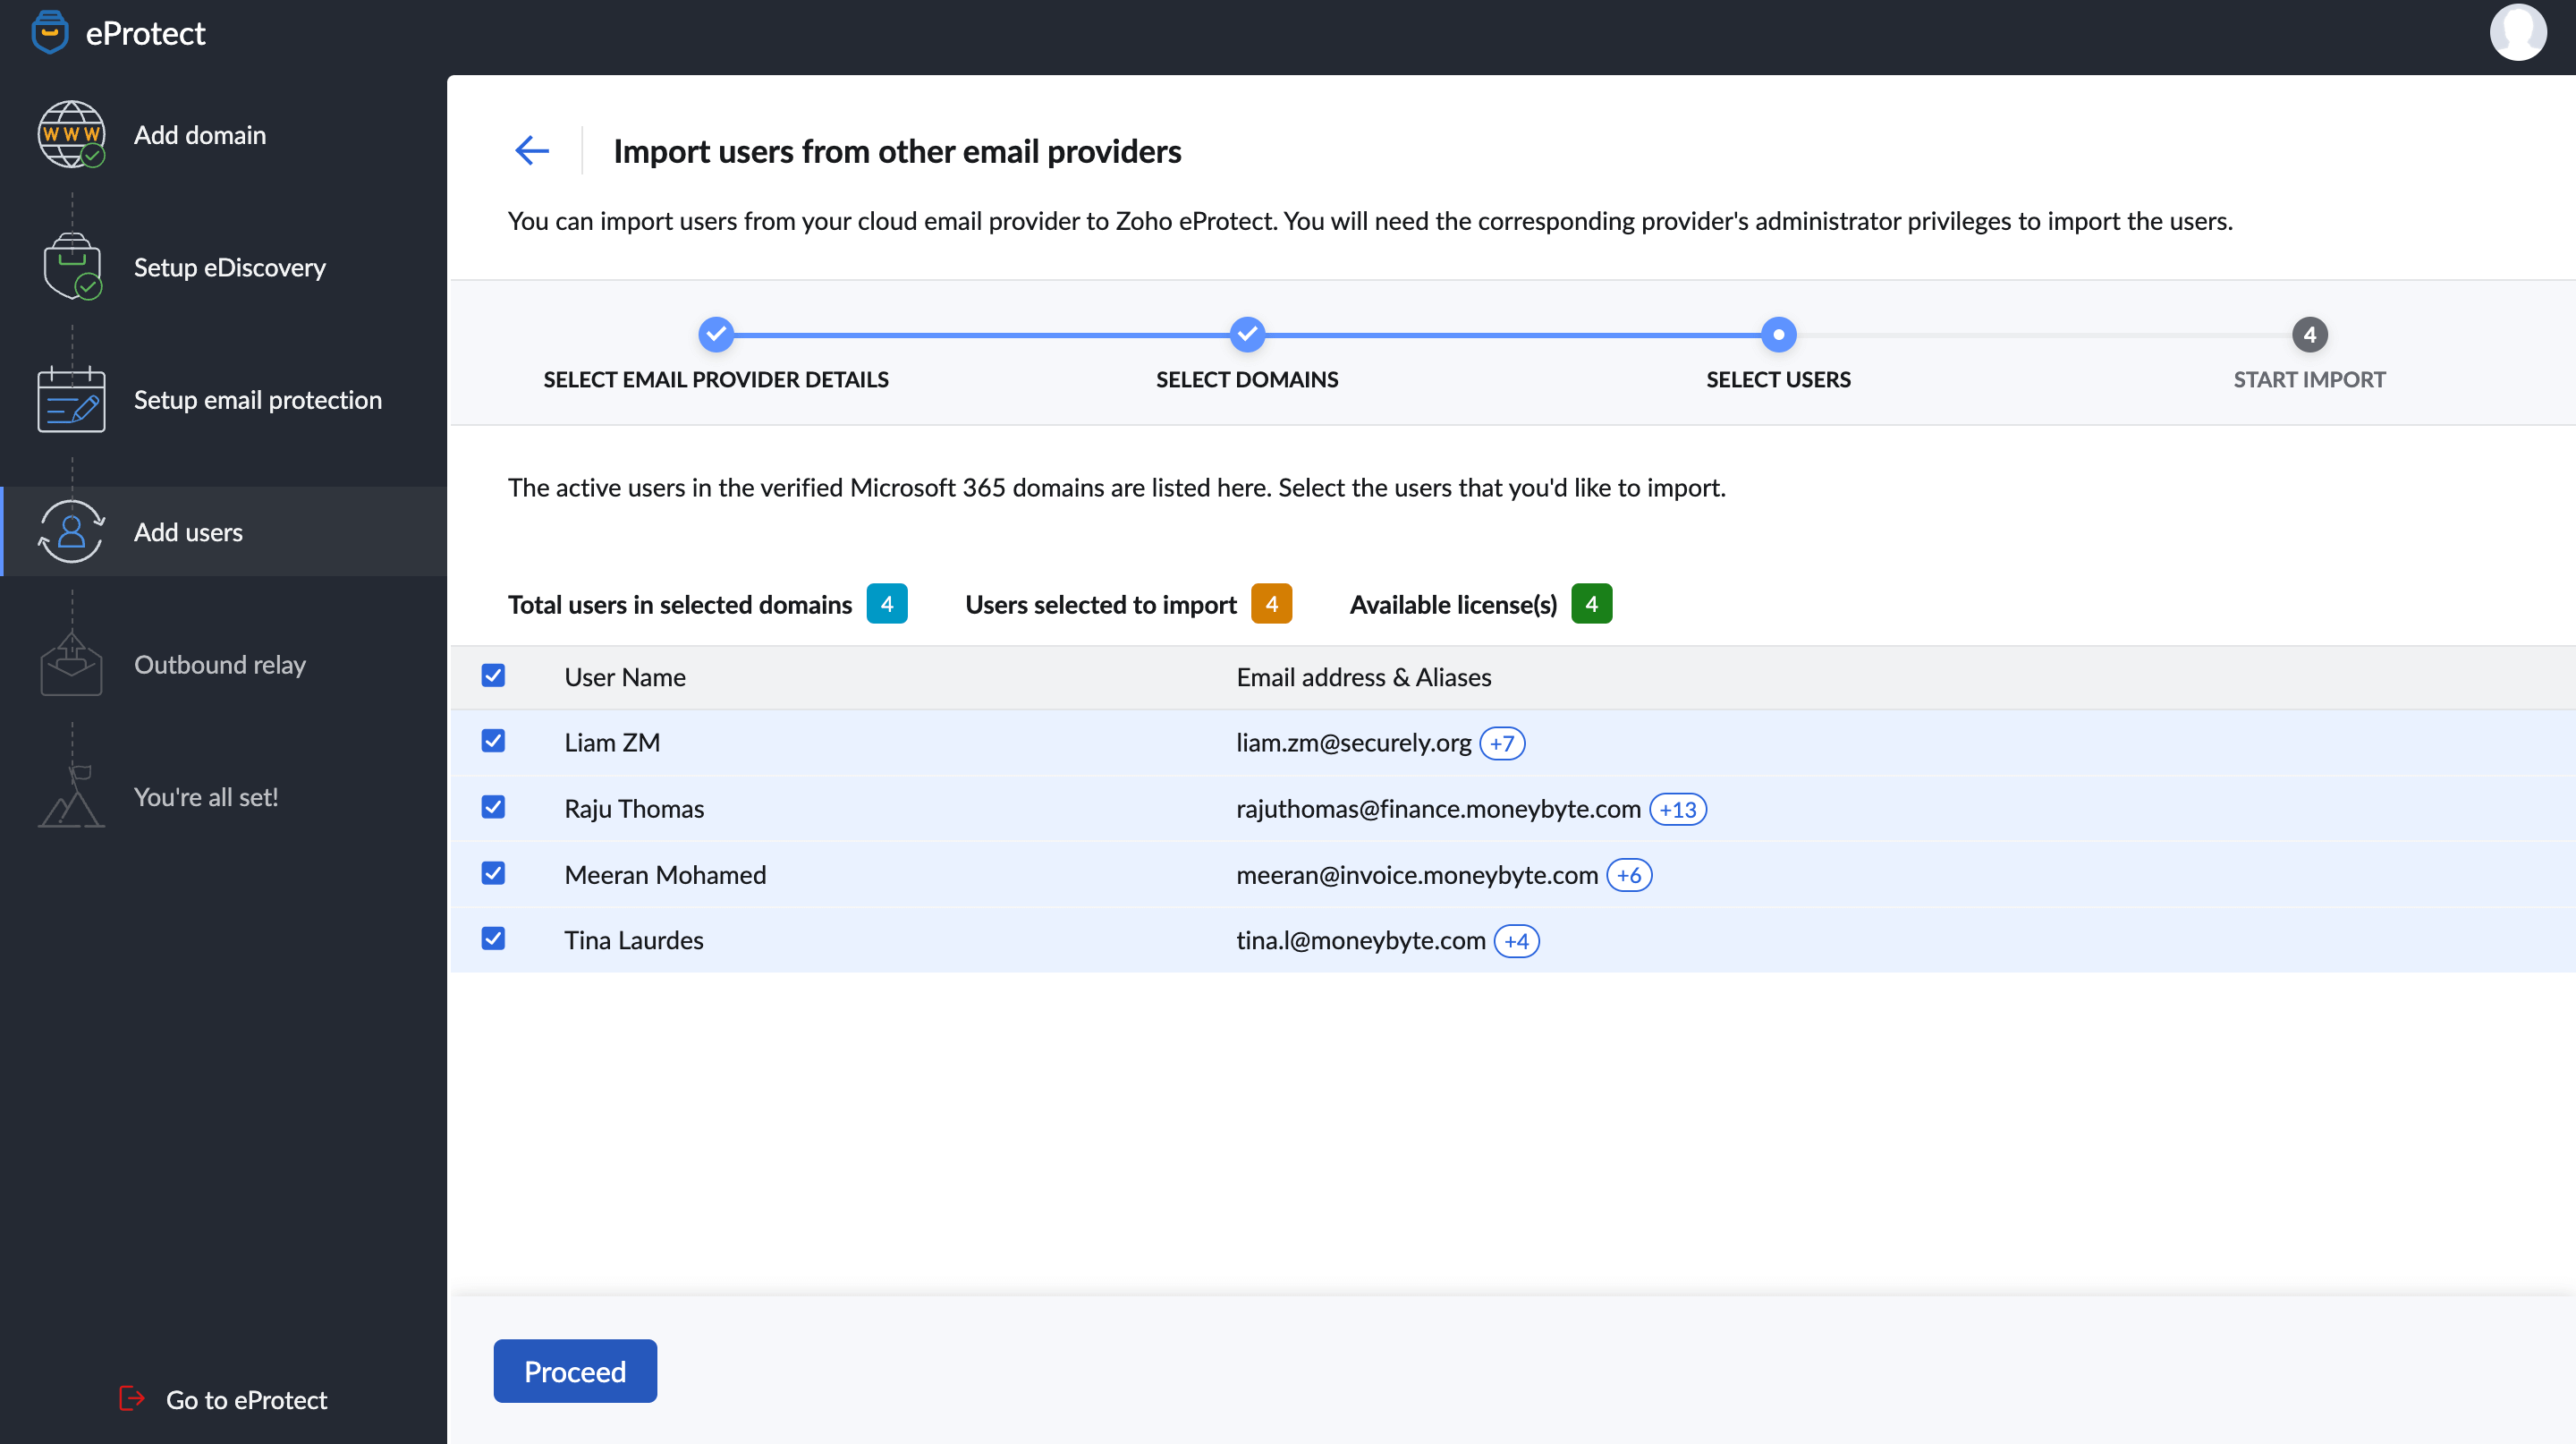
- Select the desired users and click the Proceed button.
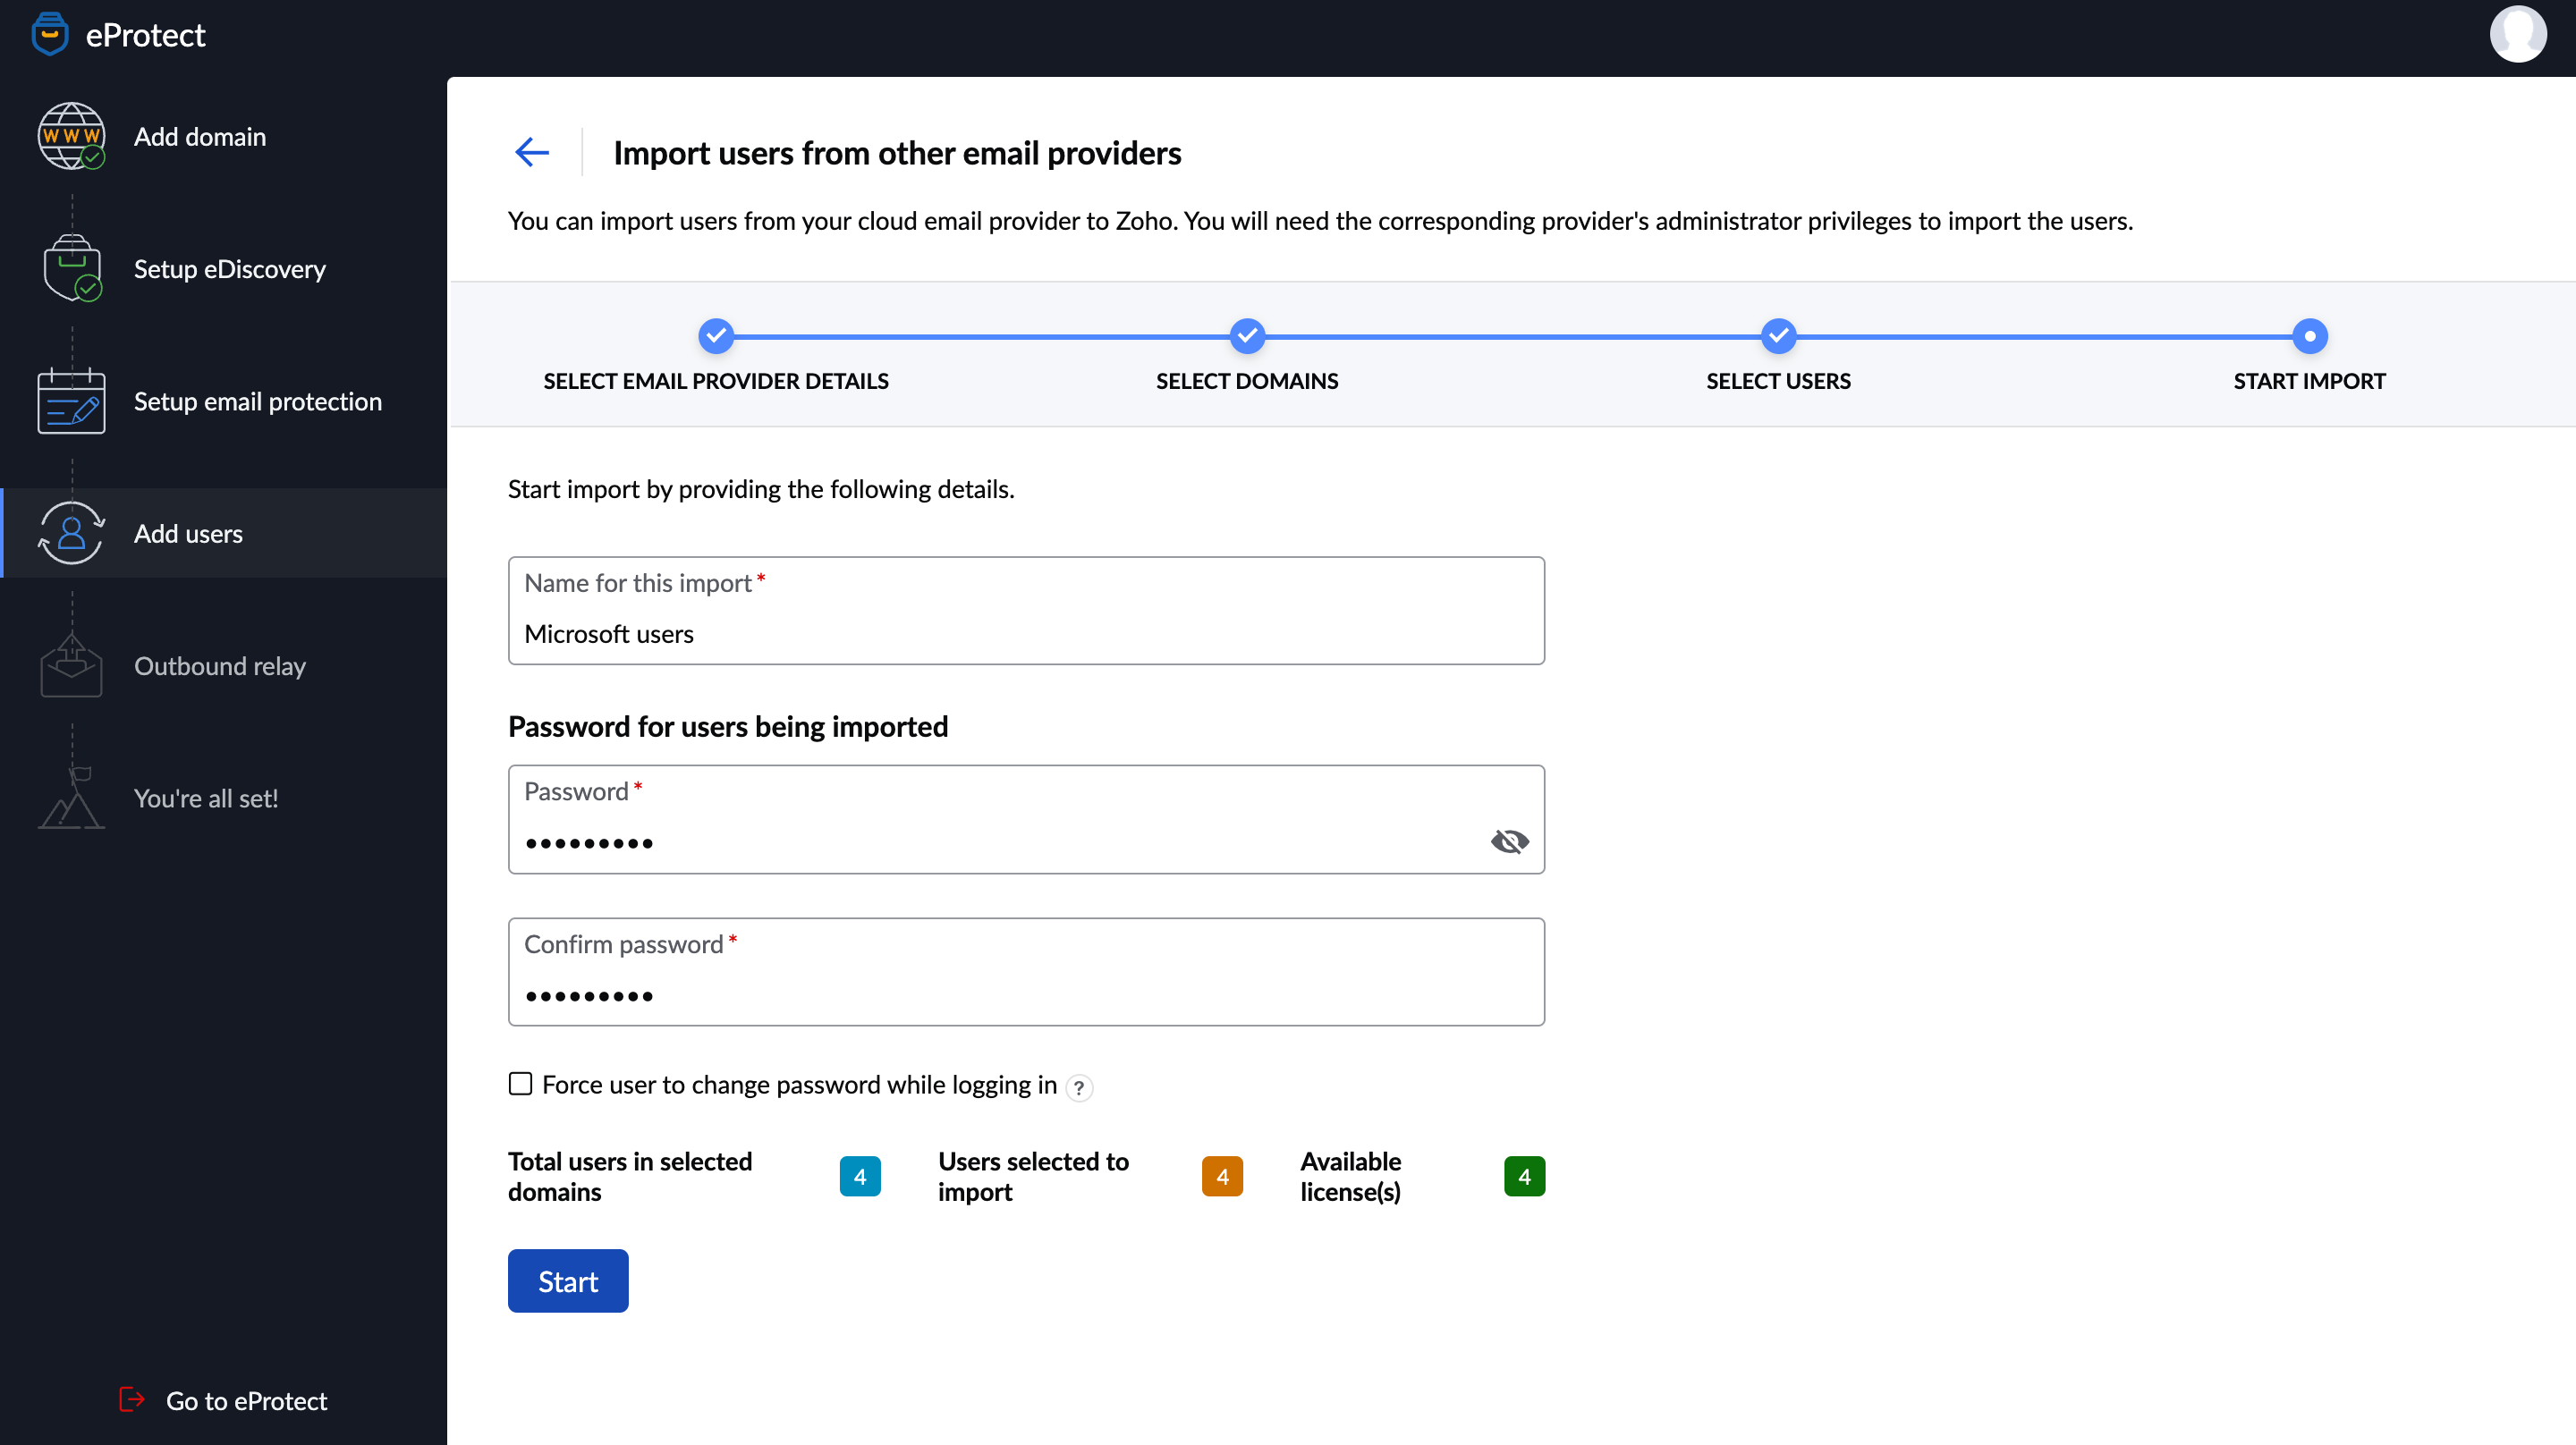
- On the Start import page, enter an import name and the password for the users being imported.
- If required, select Force user to change password on next log in.
- Click the Start button.
- Select Refresh from the top menu to view the import status.
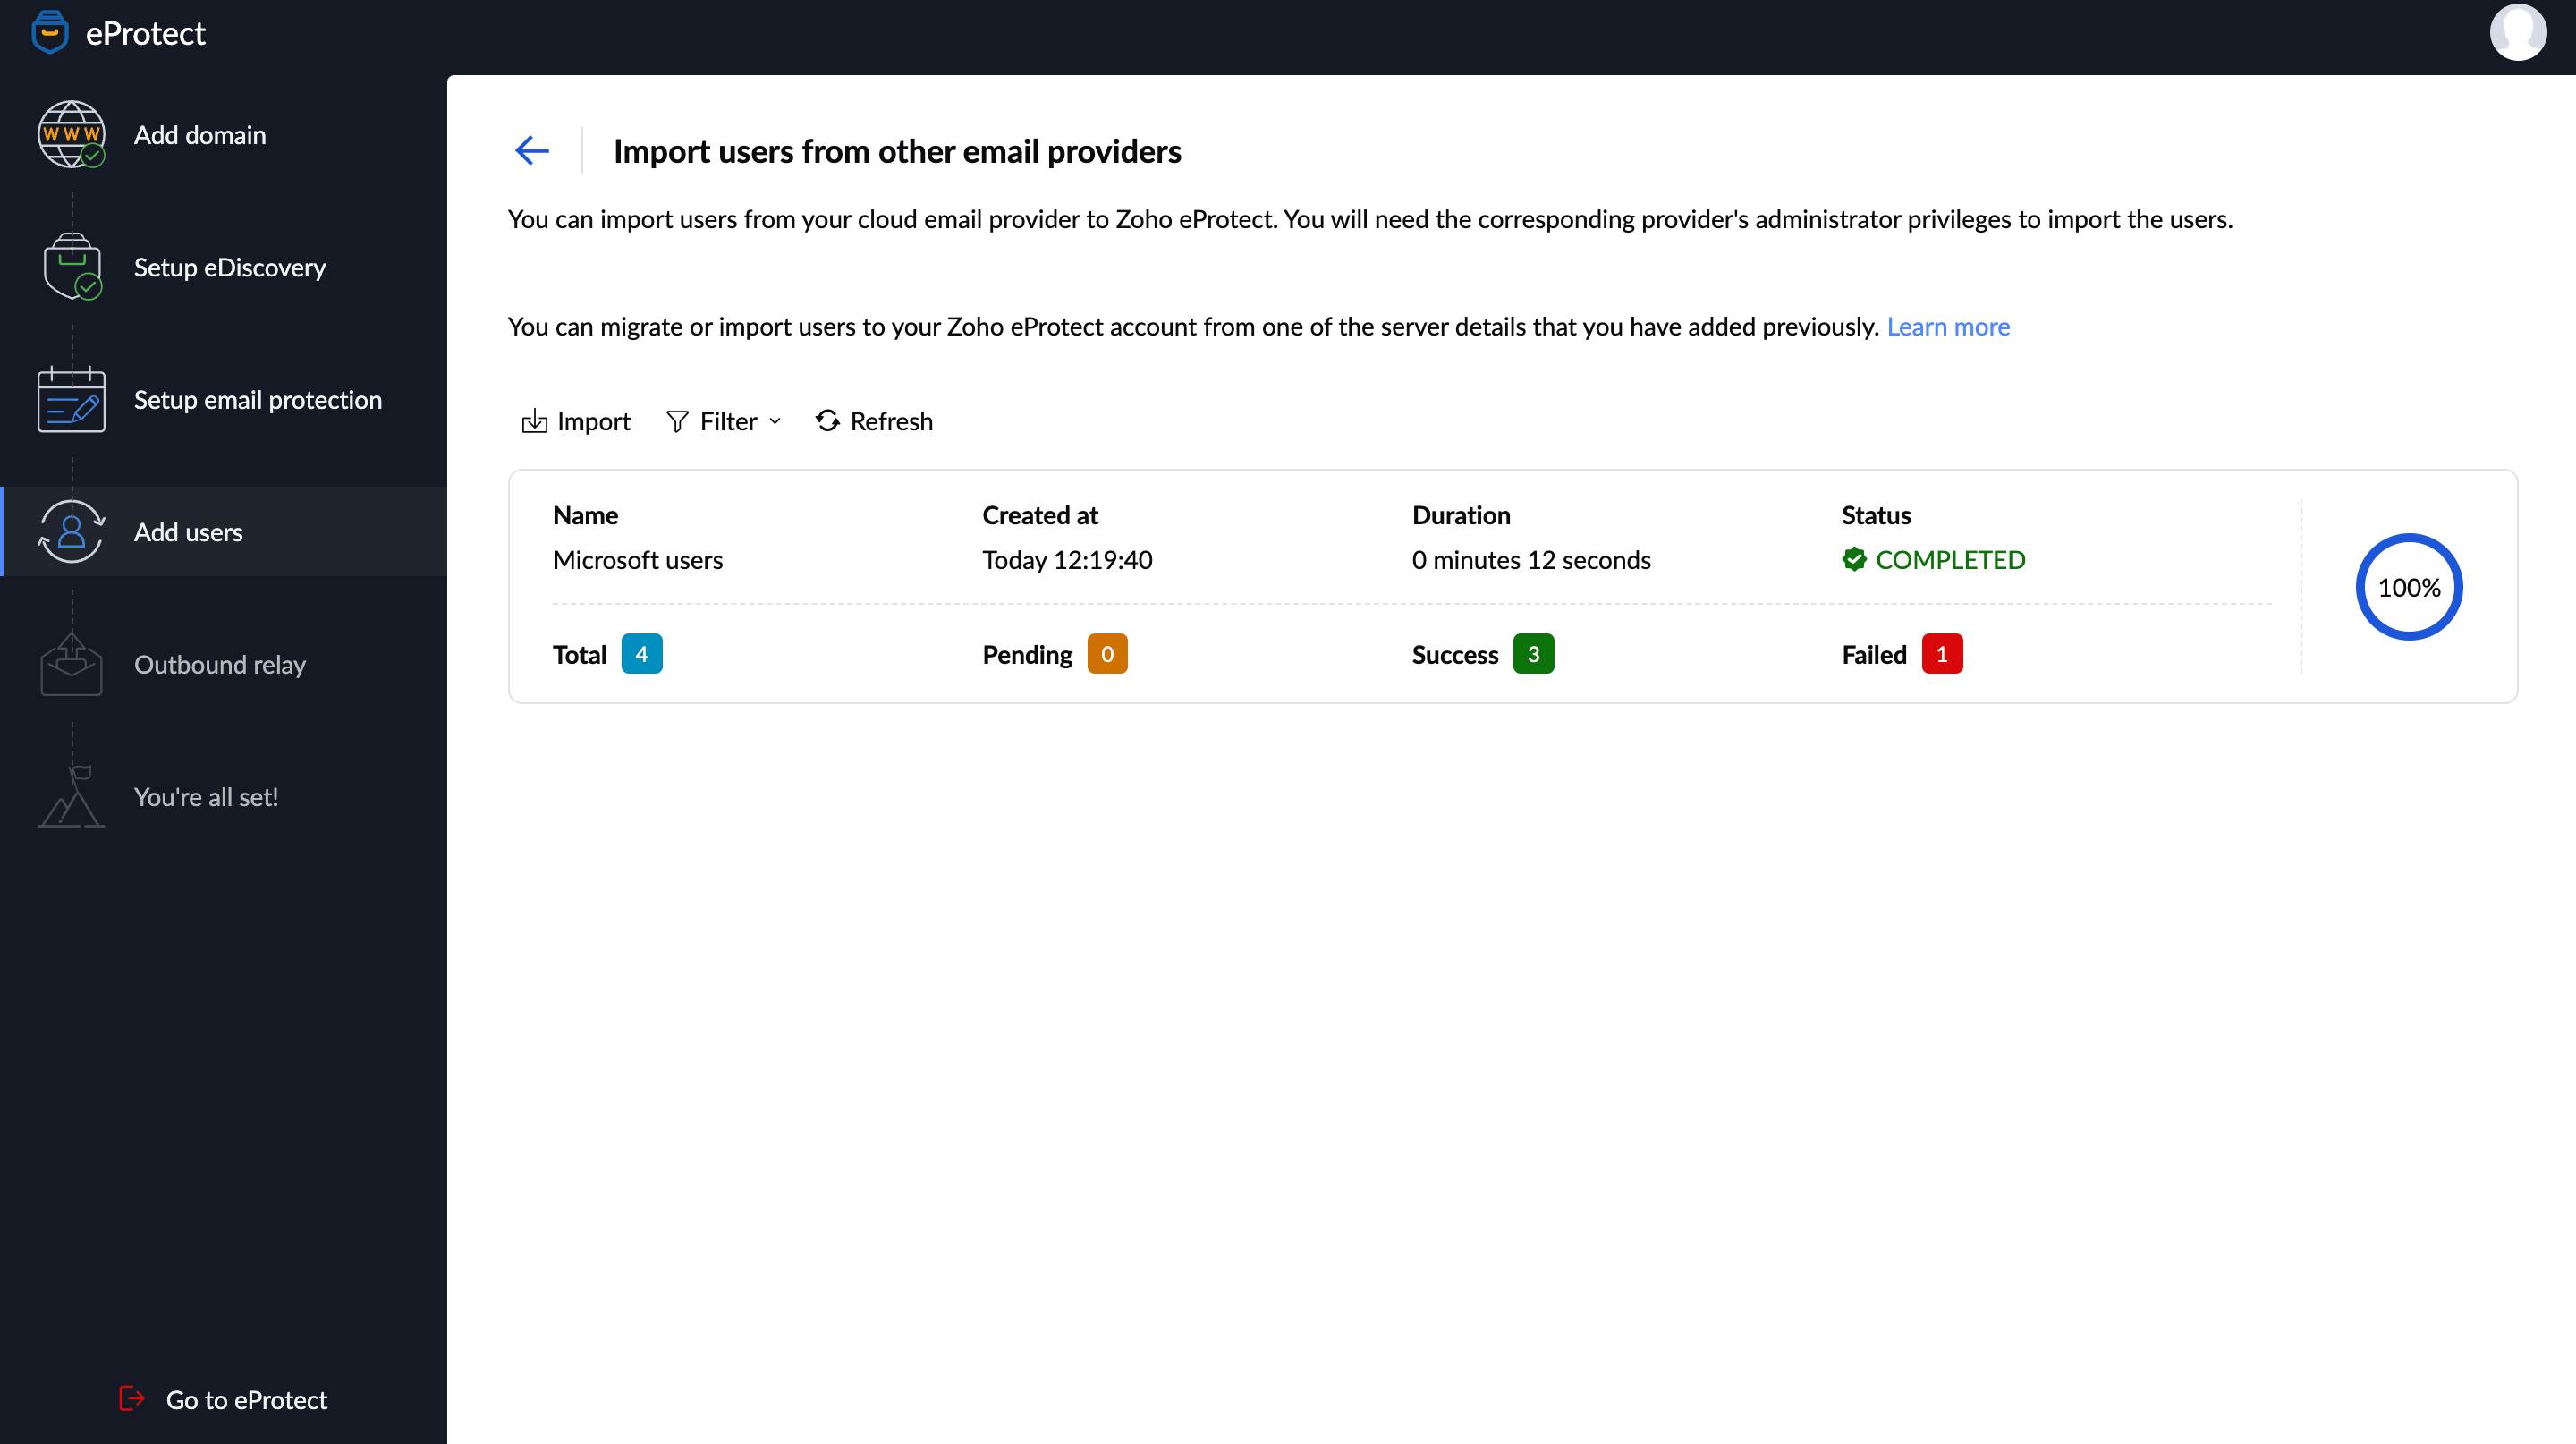
- Click the back arrow on the top page to navigate to the Users page.
The Users page shows the list of users with their Name, Email Address, and Status. If required you can change the Super Admin from the Roles & Permissions section under Organization.
Once you are done adding users, click Proceed.
Note:
Importing users from Microsoft 365 is easier and the recommended method to add users to Zoho eProtect. Alternatively, you can also use the Import using CSV file or Create User Manually options based on your requirement.
Setup Outbound Relay
The final step in setting up your organization in Zoho eProtect is configuring Outbound Relay. Follow the Outbound Relay configuration steps given below:
Configure Outbound Relay in Microsoft 365
Follow these steps to configure outbound server details in your Microsoft 365 account:
- Enable Outbound Relay in Zoho eProtect and enter your outbound IP address and IP mask.
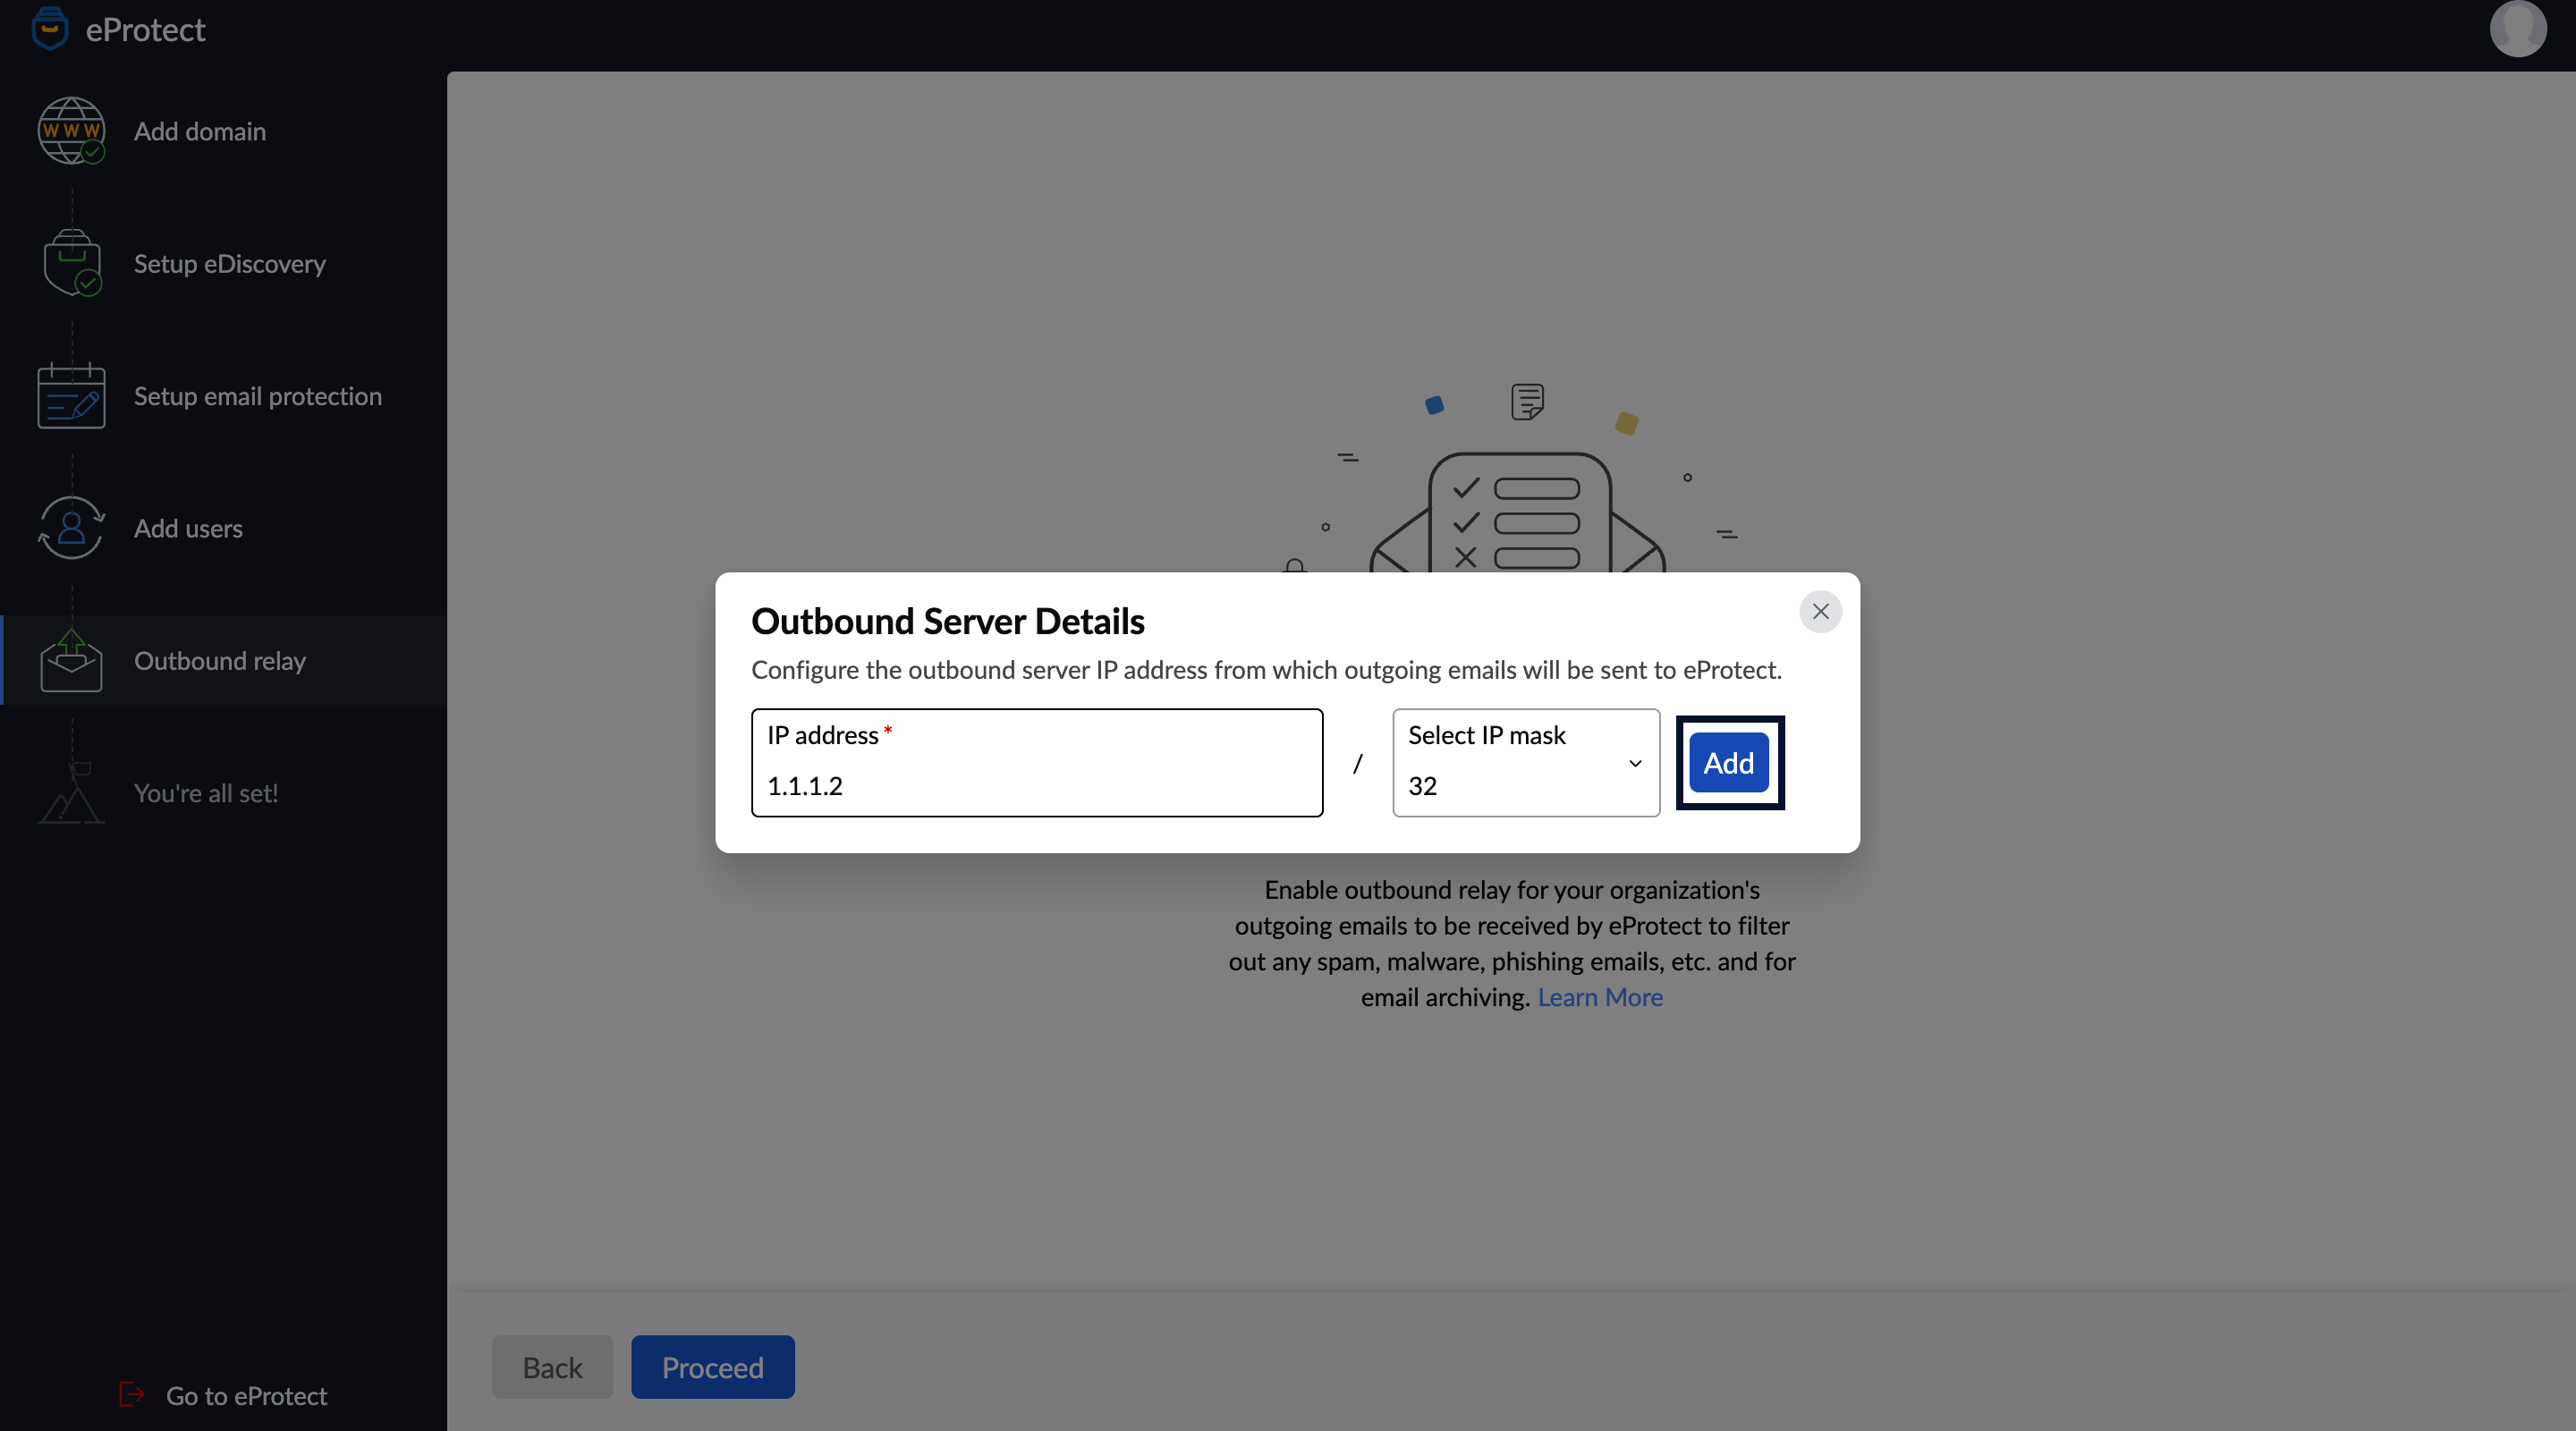
- Click the Add button.
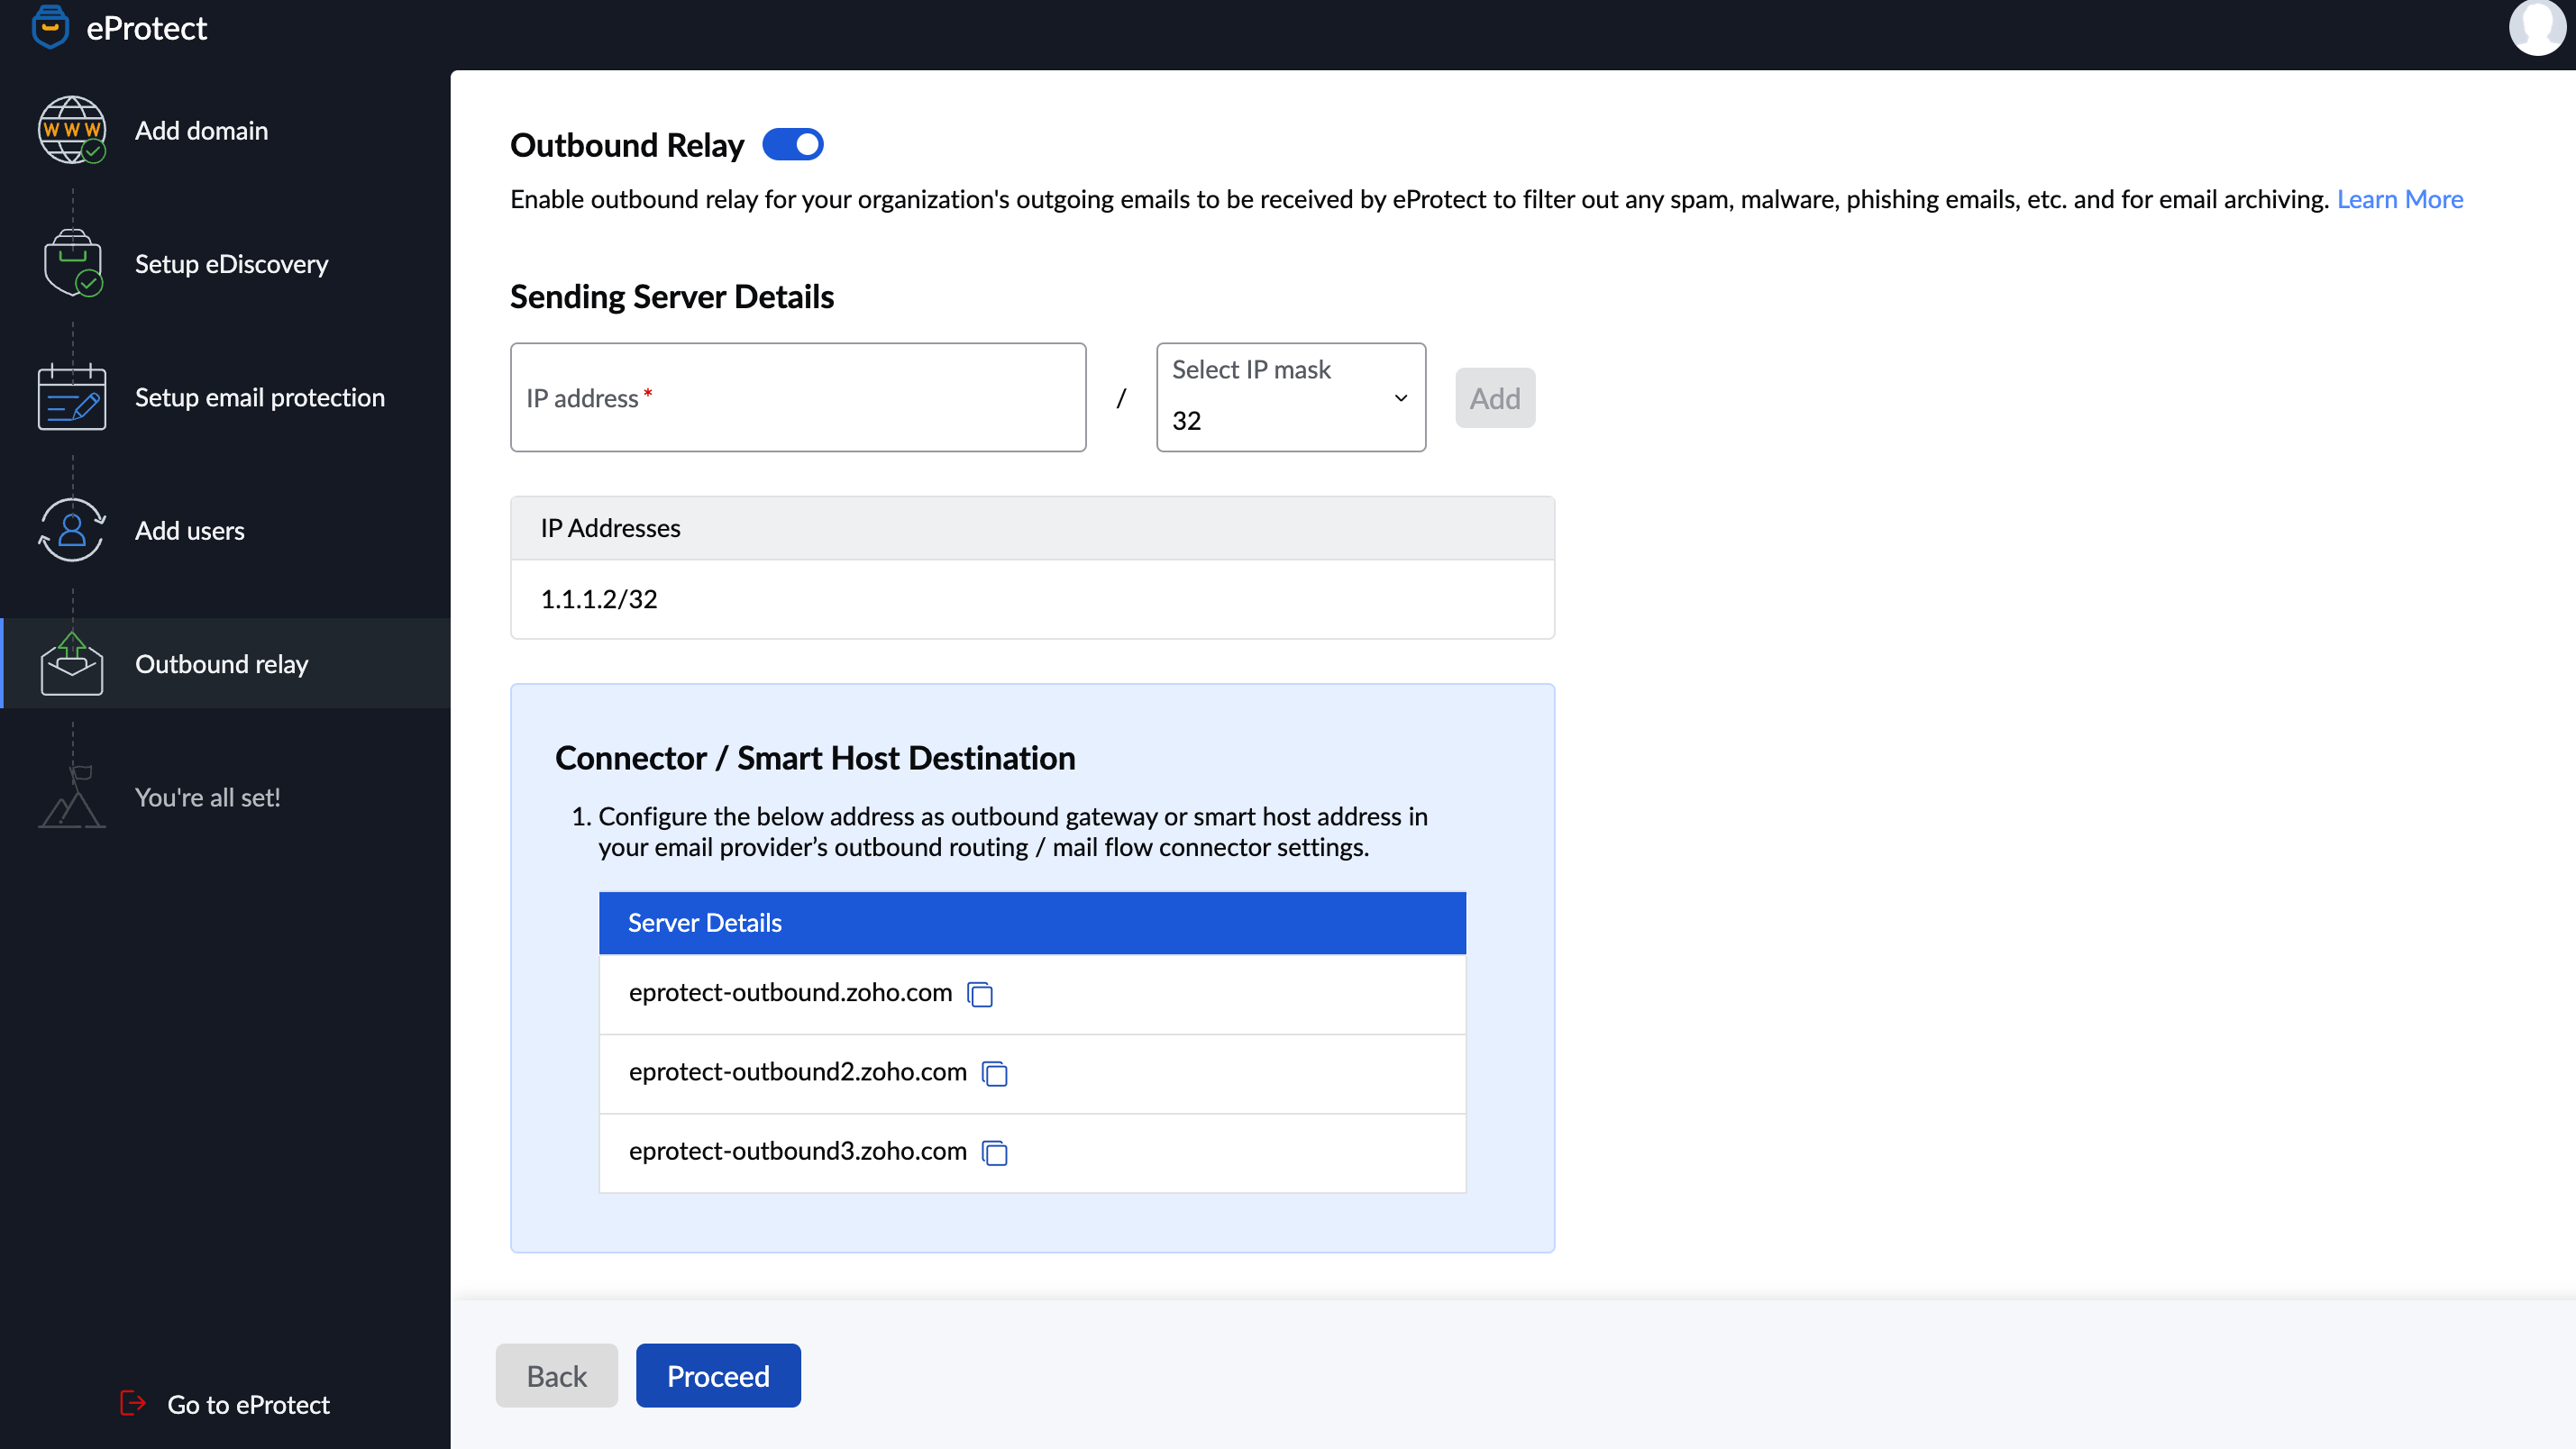
- Log in to your Microsoft Exchange Admin Center and select Mail flow on the left menu.
- To create a connector follow these instructions:
- Navigate to Connectors and click the Add a connector button. The New connector page appears.
- Choose Office 365 in the Connection from and Partner organization in the Connection to and click Next.
- Enter a connector name, an optional description and click Next. Make sure that the Turn it on checkbox is selected.
- Select Only when I have a transport rule set up that redirects messages to this connector and click Next.
- On the Routing page, select Route email through these smart hosts.
Switch to the Zoho eProtect setup tab in your browser and copy the Server details displayed on the screen.
Note: These server values are specific to your organization's region of operation.- Switch back to the Microsoft Exchange Admin Center and add the outbound Server details by clicking the + icon.
- Click Next. The Security restrictions page appears.
- Select the default security settings and click Next.
- Enter an active email address for validation, click the + icon and then select Validate.
- Click the Next button once validation is successful and click Save.
- To create a rule, navigate to the Rules section under Mail flow and follow the below steps:
- Click Add a rule on the top menu and select Create a new rule.
- Enter a rule name in the Set rule conditions page.
- Select The sender and is external/internal in the Apply this rule if field.
- Choose Inside the organization in the select sender location and click Save.
- Select Redirect the message to and the following connector in the Do the following field.
- Choose the connector which you created for eProtect in the select connector drop-down and click Save.
- Click Next. The Set rule settings page appears.
- Retain the default settings and click Next.
- Review the rule and click Finish.
You have successfully configured the outbound relay settings. Your organization's sent emails will be scrutinized by eProtect and then delivered to the intended recipients.
Note:
Since your emails will now be sent via Zoho eProtect, there is a possibility of an SPF mismatch and hence your emails could land in the spam folders. To avoid this, it is recommended that you configure Zoho eProtect's SPF records in your domain provider's DNS settings.
You have successfully completed setting up your account in Zoho eProtect. Click Start using eProtect to proceed to the Zoho eProtect's landing page.
You can familiarize the various options in Zoho eProtect by taking the site tour. Click the Get Started button to start the site tour. Based on your organization's need, navigate to the eDiscovery or Email Protection sections and configure the corresponding settings.


