


Connectors
How Can I...up
Zoho offers integration support for a wide range of third-party applications, including core Google services (Contacts, Calendar and AdWords) and Microsoft software (MS Office, MS Outlook, etc.). However, there are some services that cannot be integrated directly with your CRM, such as Dropbox, PandaDoc, and Google Drive. In these cases, you can use a connector to expand Zoho's third-party support. Connector uses OAuth 2.0 protocol to facilitate this integration.
OAuth 2.0
OAuth 2.0 is an industry-standard, open-source authorization protocol, which is used to gain partial access to a user's account on an HTTP service. An example of an OAuth 2.0 authorization is the sign in screen that appears when a third-party application (also known as a client) requests partial access to a social media account, such as Facebook, Google, or Yahoo.
Important terminology
- Client - The application requesting access to data stored in an external system. When creating a connector in Zoho Developer Console, the client is Zoho CRM or your custom vertical CRM system.
- Resource - The application or service that the client is trying to access. In our case, the resource is the third-party service (ex: Dropbox) you are trying to integrate.
- Request Token URL - This URL is used to send authorization requests to the resource server. The resource server prompts the resource owner (user) to authorize this request.
- Access Token URL - Once the request is authorized by the resource owner, the server sends an access token to the client. This token has to be exchanged every time the clients wants to access the resource data.
- Refresh Token URL - Some access tokens are valid only for a limited period of time. When an access token expires, the client has to get another access token from the resource, using the refresh token URL.
- Client ID - A unique identifier provided to every client application. This ID is provided by the resource owner.
- Client Secret - Every client application has a secret code mapped to it. This is done to prevent unauthorized access to the resource.
- Redirect URL - This is the URL to which the end user will be redirected, once data access has been authorized. The client application will generate a redirect URL automatically.
Create a connector
To create a connector
- Log in to Zoho Developer console and click Build Connectors.
- Click Create Connector.
- Provide a suitable name and description for the connector.
- Provide the following details about the third-party server:
- Request Token URL: This allow the connector to request authorization to access data on the resource server.
- Access Token URL: Once authorized, the Request Token and Token Key will be exchanged for the Access Token, allowing the connector to draw specific information from the third-party server.
- Refresh Token URL: Some applications increase security by limiting the duration of time a particular token is valid. In these cases, you will need to provide the Refresh Token URL to allow the connector to reauthorize access.
- Click Save.
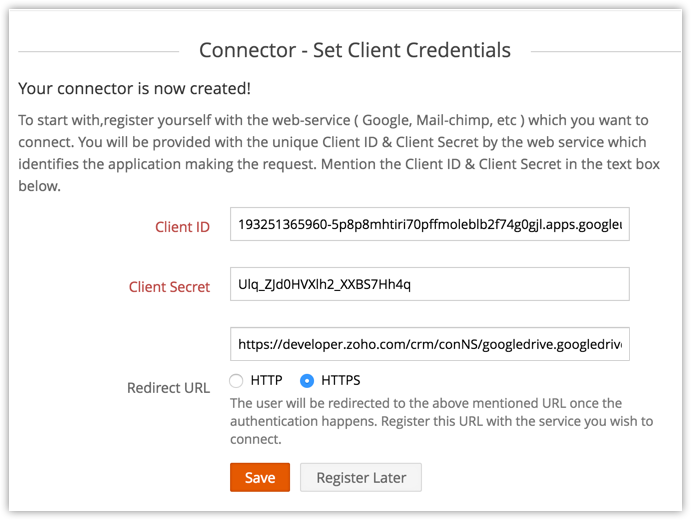
- Provide the Client ID and Client Secret of your application in the space provided.
This Client ID and Client secret can be obtained by creating a OAuth 2.0 client/ application (terminology varies with the resource application) . An example is provided at the bottom of this page. - Copy the Redirect URL available in the Set Client Credentials page and enter it in the appropriate space in your web application.
This is the URL to which the user will be redirected once the authorization process is complete. - Click Save.
About Tokens
Request Tokens, Access Tokens and Refresh Token URLs are provided by the web application. You can obtain these URLs from the developer space of the web app. For example, the URLs for Google applications can be obtained here .
For any service, the Request Token, Access Token and Refresh Token URLs will have multiple parameters, including scope, state, client id, and access type. These parameters can vary from service to service. However, three parameters are common to all the services: Redirect URL, Client ID and Response type. These parameters will be handled by Zoho. If there are any other mandatory parameters such as 'scope', 'state', or 'access type', the developer will have to supply them in the format specified by the third-party service.
Sample Google API:
scope=email%20profile&
state=security_token%3D138r5719ru3e1%26url%3Dhttps://oa2cb.example.com/myHome&
access_type=offline
Add APIs
Once your connector has been created, define the actions it can perform by adding an API for each action taken by the connector. For example, once you have integrated with Google Drive, you can export your CRM data to your google drive or import data from drive to CRM. Both these process will require different APIs. These APIs will be available in the developer documentation of the application.
To add an API
- In your Zoho Developer Console home page, click Connectors.
- Click Add API when hovering over your chosen connector.
The Create Connector API page will appear.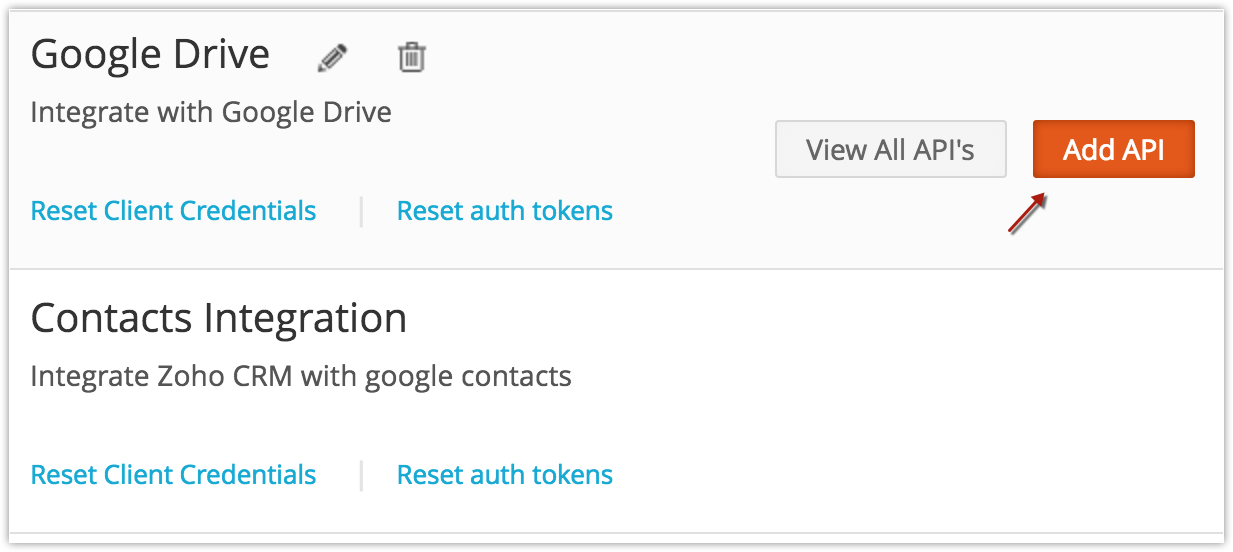
- In the Create Connector API page, fill in the following details:

- Provide a name for the API.
- Choose the Method type and provide the API URL.
The API method type and the API URL can be obtained from the resource application.
Incase your API's URL contains dynamic values, they should be preceded by a "$" symbol and enclosed within {..}.
For example, http://example.com/callback?id=${myid}&key=${mykey}.
Here myid and mykey are dynamic variables whose values you will have to define in the custom function that is used to invoke this API. - Specify the header fields and URL parameters.
- Specify the header fields and the URL parameters if applicable and click Create.
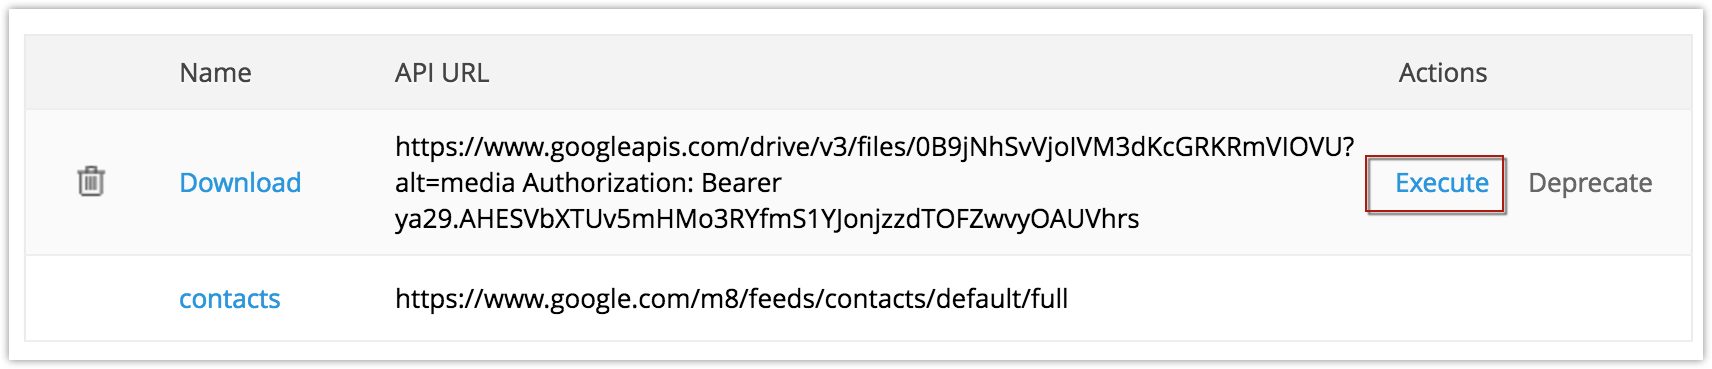
Once it's been is added, you can validate the API by executing and checking the response.
Once the API is added, you can validate the API by executing and checking the response.
- In the Connectors page, hover over the connector containing the API to be executed and click View All API.
A new page will appear, displaying all APIs associating with the connector. - Click Execute next to the API you're interested in.
- If the API fails, you will be notified in the API response area. Make changes in the code and then execute it again.

Publish a connector
Publishing a connector technically means publishing the APIs associated with the connector. Your connector will be automatically published as soon as the first API associated with it is published.
To publish an API
- In the Connectors page, hover over the connector in which the API has to be added and click View All API.
- Hover over the API you'd like to publish and click the Publish.

- Click OK.

Both the API and the connector will now be published, allowing you to add this connector to your extension.
Add connector to an extension
To associate connectors to your extension
- In your Zoho Developer Console home page, click Extensions for Zoho CRM.
- Select the extension to which you'd like to associate the connector.
- Click Connectors in the left pane.
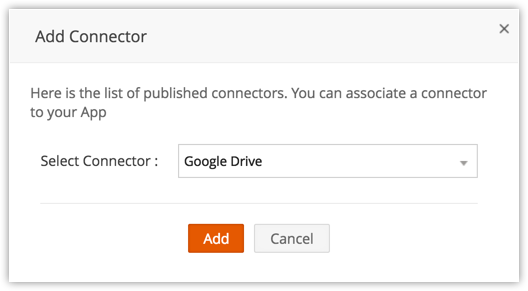
- Click Add Connector.
- Choose the connector you'd like to add from the list of available connectors and click Add.
- In the resulting pop up, enter the Client ID and Client Secret, unique codes provided by the third-party service.
This will be used to authorize your account during the integration. - Copy the auto-generated Redirect URL available in this page and provide it to the third-party service.
- Click Save.
- This adds the connectors and all its associated APIs to your extension.


Note
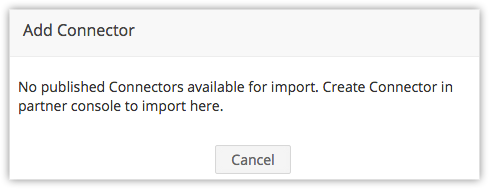
- Only the connectors that have been published will be displayed in the list of connectors in Add Connector pop-up. Before trying to add a connector with an extension make sure it is published and ready to access.

Invoke Connectors
Once your connector is published and added to an extension, it can be invoked whenever necessary. You can invoke a connector using a custom function.
The syntax for the custom function to invoke a connector is
response_variable =zoho.crm.invokeConnector("API unique identifier",map);
The API unique identifier can be obtained from the extension in which the connector is associated.
Map() function is used to replace dynamic values present in the API with user-specific values. For example, if the API must fetch the lead's details such as name, email address, contact number, etc., these values will be represented by a dynamic value in the API. This dynamic value can be replaced with the actual value from the Leads Details page using the map() function. Examples given later in this document will give more detailed information about this function.
To know more about the functions and variables used in writing custom functions, to learn more, click Custom Functions .
To find the API identifier
- In the Extension's Details page click Connectors and select the connector you're working on.
- Click View All APIs and select the API you're interested in. The page that appears contains the unique API identifier.

This page will contain the API unique- identifier.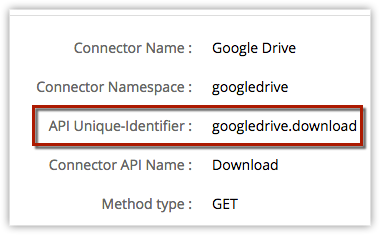
An example custom function is provided here .


Sample Connector
To demonstrate how connectors work, let's take a look at an example scenario. Suppose you want to add certain CRM contacts (those matching a particular criteria) to your Google contacts list. Zoho's existing Google contact integration won't work for your purpose because it syncs the entire CRM contact list with Google contacts. To get the functionality you need, you'll have to create a connector that integrates your CRM system with Google contacts and then write a custom function that executes this connector whenever particular conditions are satisfied.
Step 1: Provide the Request, Access, and Refresh Token URLs
The first step is to provide the Request Token, Access Token and Refresh Token URLs from the Google server.
- In your Zoho Developer Console homepage, click Build Connectors.
- Click Create Connector.
- Provide the Request, Access, Refresh token URLs for Google Contacts:
- Request Token URL:
https://accounts.google.com/o/oauth2/v2/auth?scope=https://www.google.com/m8/feeds - Access Token URL:
https://www.googleapis.com/oauth2/v4/token - Refresh Token URL:
https://www.googleapis.com/oauth2/v4/token
- Click Save.


Note
- The basic format for a Request Token URL is <requesttokenURL>?scope="<scopelink>".
- To create a specific Request token for Google Contacts, combine the Google Request token URL ("https://accounts.google.com/o/oauth2/v2/auth") with the scope for Google Contacts ("https://www.google.com/m8/feeds").
- Thus the complete request token URL should be
https://accounts.google.com/o/oauth2/v2/auth?scope=https://www.google.com/m8/feeds
Step 2: Provide the Client ID and Client Secret
The next step is getting your application's Client ID and Client Secret from Google.
To get these credentials
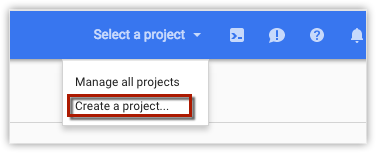
- In the Google Developer Console home-page , click Select a Project in the upper right corner of the screen. A drop-down list will open. Choose Create a Project.
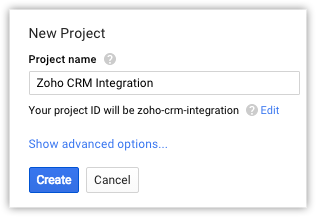
- Provide a name for your project.
- A default Project ID based on the project name will be generated. Click Edit to change the ID.
- Click Create.
- Click Enable and Manage APIs at the top of the dashboard on the Google Developer Console.
- Click Google APIs and select Contacts API under the Google Apps APIs tab.
- Click Enable.
- Once the API is enabled, choose Credentials in the left pane.
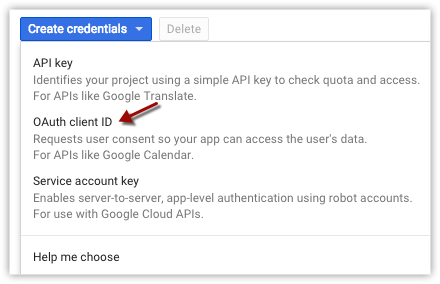
- Click Create Credentials and select OAuth Cliend ID.
- In the Create client ID page, do the following
- Select Web application as the Application type.
- Provide a Name for the credential.
- Provide a Redirect URL.
This URL can be obtained from the Zoho Developer Console. - Click Create.
- Your client ID and client secret will be generated.
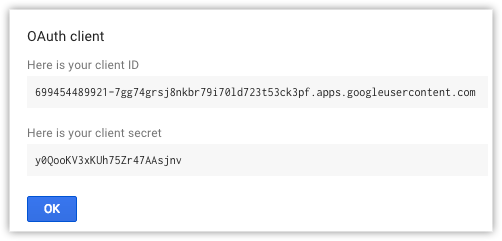
Copy the ID and Client Secret and paste them into the Zoho developer console.
- Click Save.


Step 3: Authorize your connector
Once your connector has been created, it will need to be authorized in order to sync with your Google account.
To authorize your connector
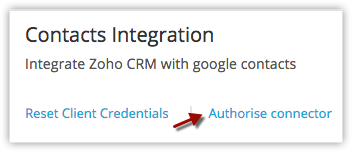
- In the Connectors page of your Zoho developer, click Authorize link next to the connector you're working on.
- If you're not already logged in to your Google account, you will be prompted to do so.
- Once you're logged in, the authorization window will explain the access permissions for the connector.
- Click Allow.
Your connector is now authorized.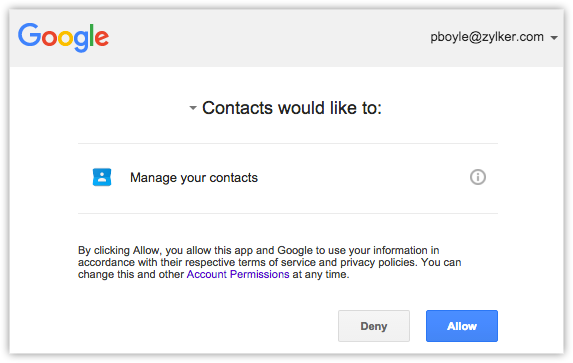


Step 4: Add APIs
After you've created your connector, you have to add APIs to perform the necessary action. Each operation will have a different API.
To add APIs
- In your Zoho Developer Console home page, click Connectors.
- Click Add API next to the connector you're wokring on.
- Fill in the required details on the Create Connector API page.
- To add new contacts to your Google Contacts, fill in the following API details:
- Method type- Post
- API URL- https://www.google.com/m8/feeds/contacts/{userEmail}/full
In place of "useremail" use default to refer to the authenticated user. - Header Fields- Content-Type: application/atom+xml
- Request Body-<atom:entry xmlns:atom="http://www.w3.org/2005/Atom"
xmlns:gd="http://schemas.google.com/g/2005">
<atom:category scheme="http://schemas.google.com/g/2005#kind"
term="http://schemas.google.com/contact/2008#contact"></atom:category>
<gd:name>
<gd:givenName>${Fname}</gd:givenName>
<gd:familyName>${Lname}</gd:familyName>
</gd:name>
<atom:content type="text">Notes</atom:content>
<gd:email rel="http://schemas.google.com/g/2005#work"
primary="true"
address="${Email}" displayName="${Fname}"></gd:email>
<gd:phoneNumber rel="http://schemas.google.com/g/2005#work"
primary="true">
${Mobile}
</gd:phoneNumber>
</atom:entry> - The APIs for other operations are available here .
- Click Create.
- Execute your API.
Once your API has been executed successfully, publish your API and assocaiate the connector to your extension.
Step 5: Write a custom function to invoke the connector
Once the connector has been published and associated with the extension, it can be invoked using a custom function. Using a connector, you can do either of the following:
1. Post data from CRM to your Google Contacts account.
For example, if you want to add a new contact from your CRM to Google Contacts if the contact's mailing address lists the country as Ireland. You'll need to write a custom function that invokes the connector, then associate the custom function with a workflow rule. Create a workflow rule with the following settings
- Module: Contacts
- Rule Trigger: Based on a record action whenever a record is created.
- Rule Criteria: Mailing country is Ireland.
- Instant Action: Call Custom Functions
The custom function for the case mentioned above is :
Fnam = input.contact.get("FIRSTNAME");
Lnam = input.contact.get("LASTNAME");
mail = input.contact.get("EMAIL");
Mob = input.contact.get("MOBILE");
map = { "Fname" : Fnam, "Lname" : Lnam, "Email" : mail, "Mobile" : Mob};
response = zoho.crm.invokeConnector("googledrive.contacts",map);
This custom function will create a Google Contact entry for your customer.
2. Get data from Google Contact to your Zoho CRM.
You can get data from third party services( Ex: Google Contacts) and add it to your Zoho CRM. The custom function to achieve this action is
mapp=Map();
resp=zoho.crm.invokeConnector("googleintegration.contactsintegration.addcontacttogoogle",mapp);
if(resp.get("status_code").contains ("201")){
apiresponse = resp.get("response");
//Use the variable "apiresponse" to get the required data from the API that was executed
}