Create Connections
To create a connection, you have two types of services:
- Default Services - a set of frequently used services are provided by default. You can choose a service from that set of services, and establish a connection.
- Custom Services- You are allowed to create your own services, if the desired service is not available in the list of default services and establish a connection.
Create Connection via Default Services
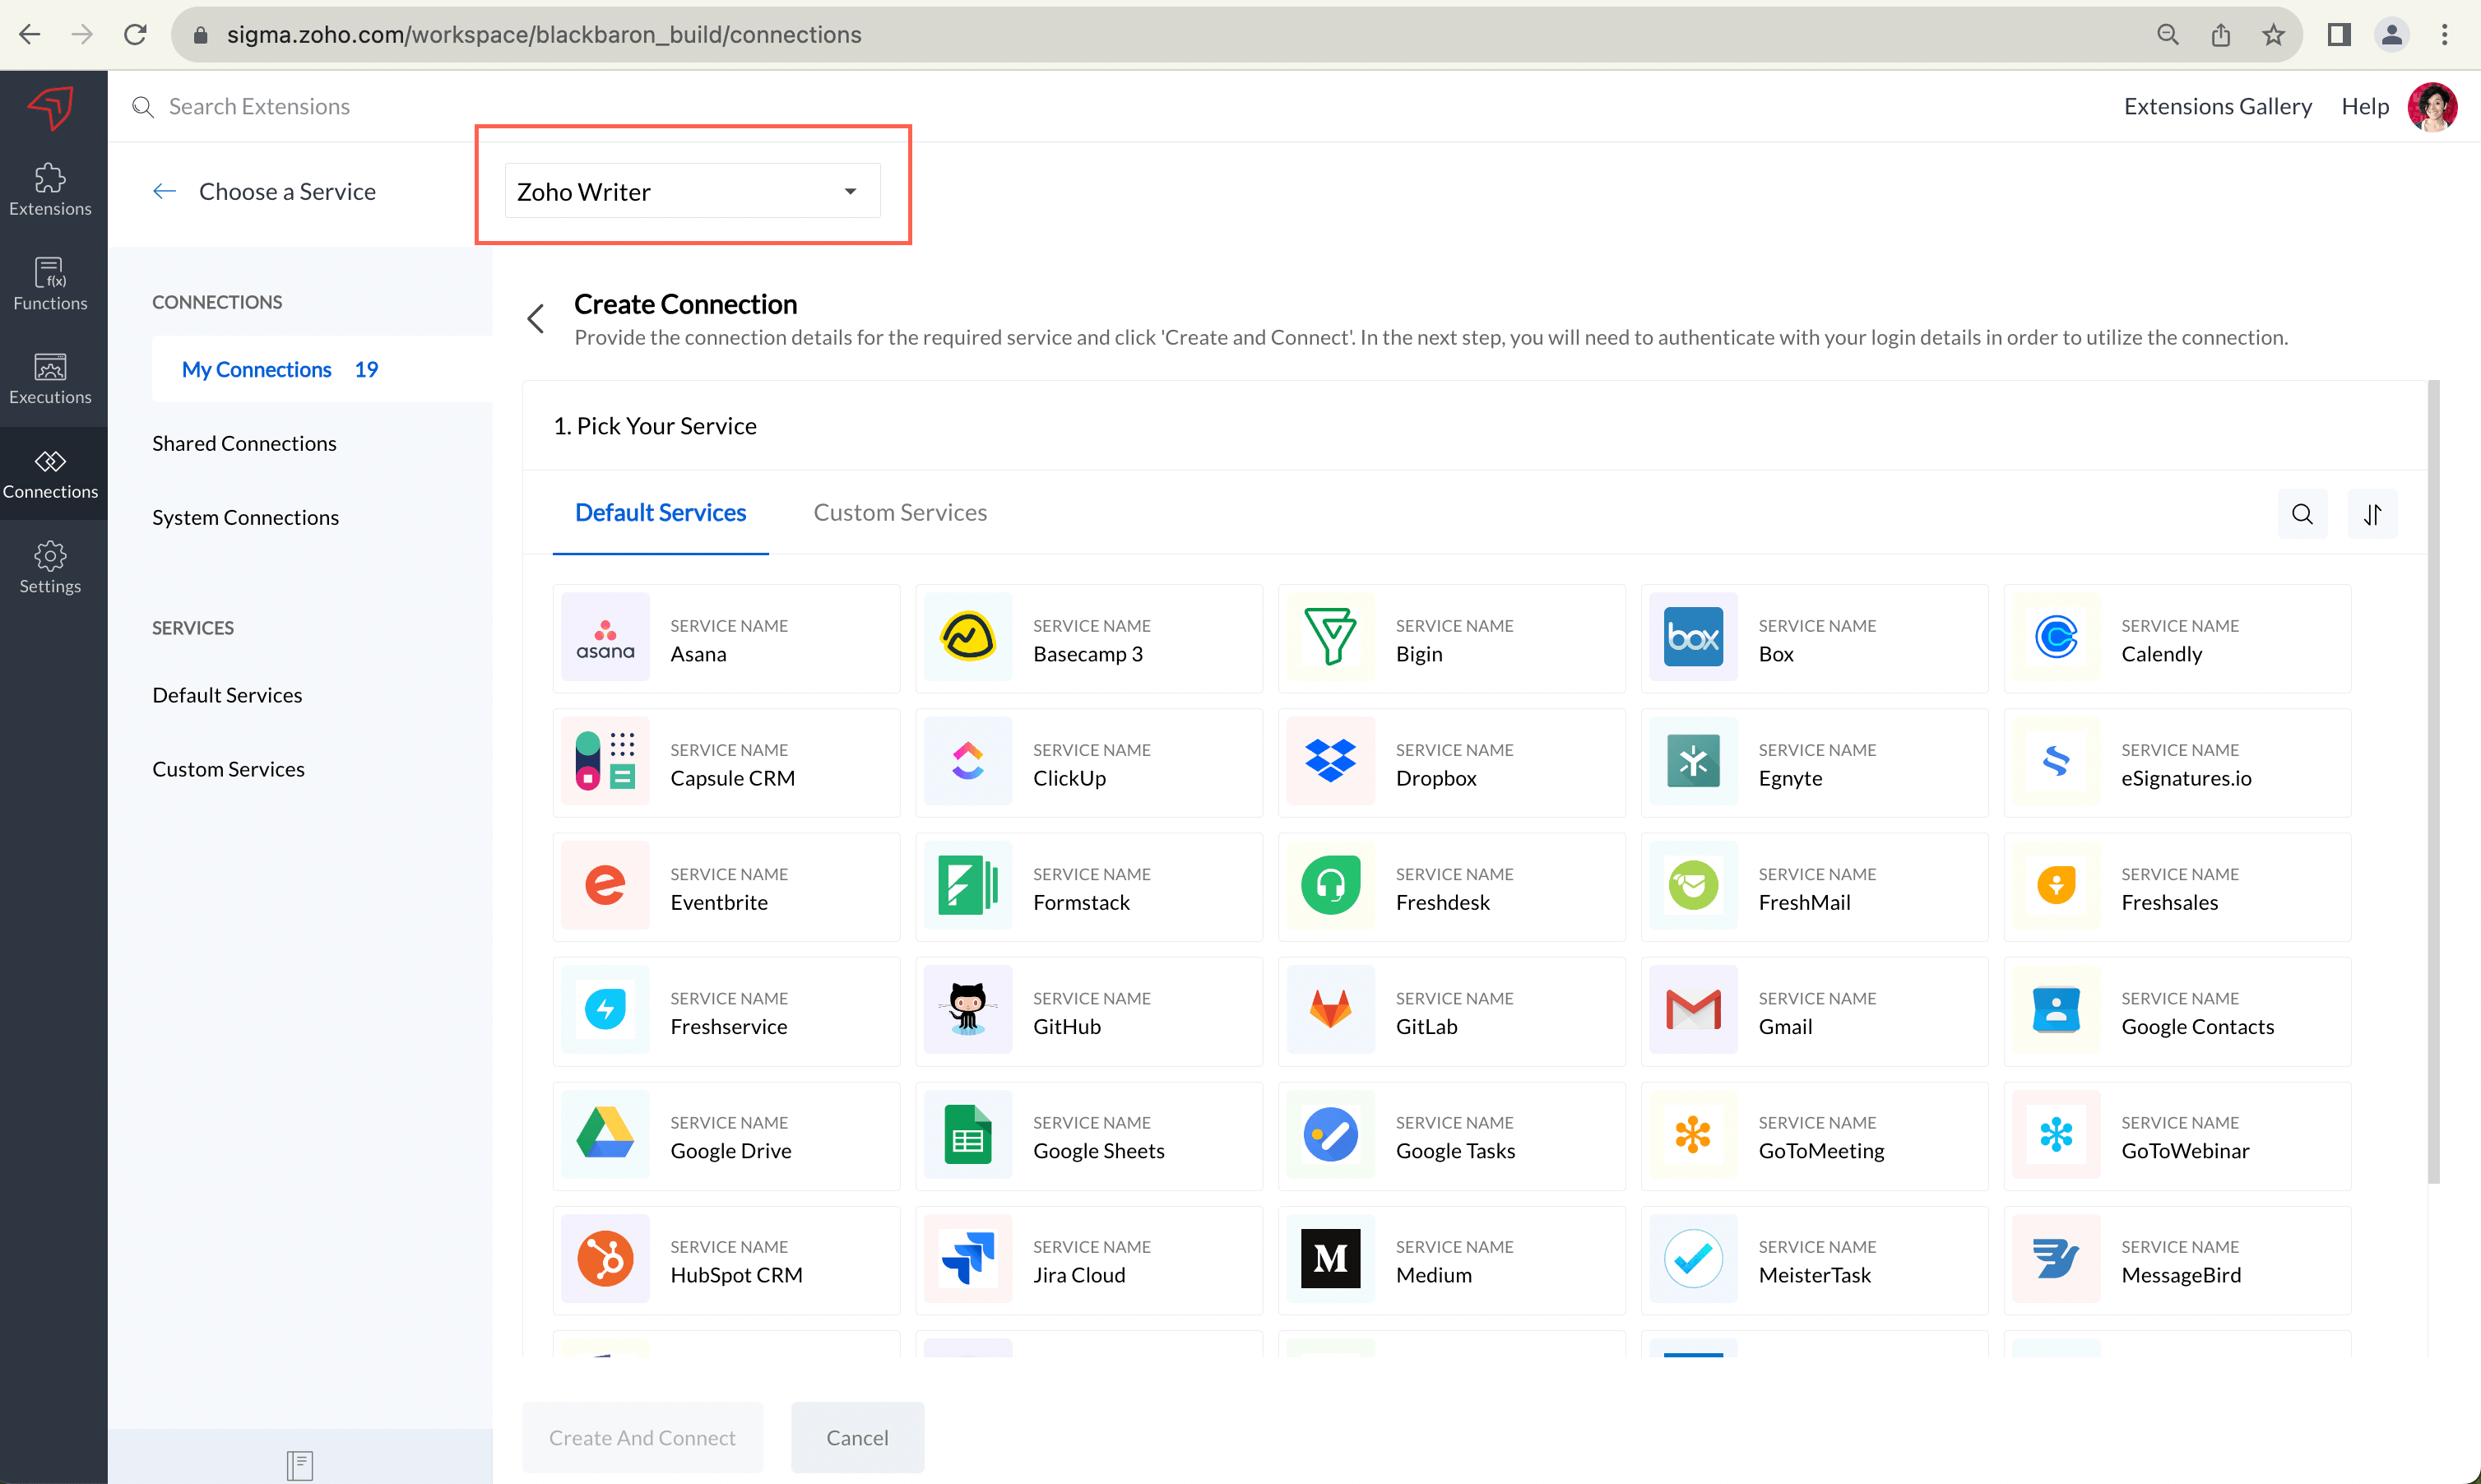
- Go to Sigma website > Connections
- On top of the Connections page, choose a Service as Zoho Writer.
- Click Create Connection at top-right corner of the page.
- Under Pick Your Service, select a third-party service or other zoho service as per your requirement.
- Create an account in the service that you chose, if you do not have.
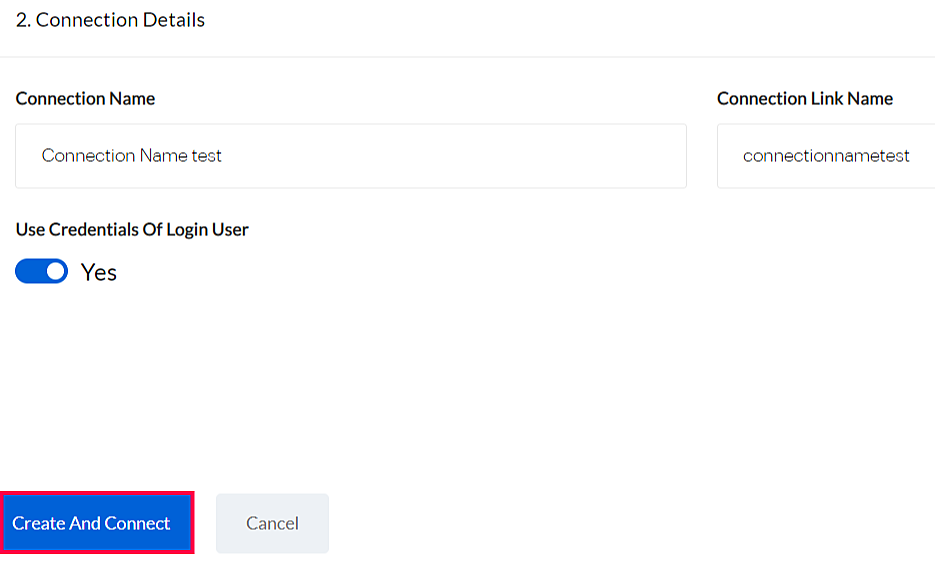
- Under Connection Details, enter Connection Name and Connection Link Name.
- Enable Use Credentials Of Login User and choose Scopes.
Click Create And Connect.
Attributes
Description
Connection Name
Represents display name for your connection. This name can contain up to 50 characters.
Connection Link Name
Link name will auto-create based on Connection Name. This name must be unique and can be used in Deluge integration tasks and invoke URL scripts to establish authentication.
Use Credentials of Login User
Allows other users to utilize the connection that you've created. If this checkbox is selected, other users can authenticate your connection using their credentials and a copy of it will be listed under “Shared connections” in their connections page. Based on this selection, a key "userAccess" is added in connection JSON.
No - If we select no, then only super admin can install and authenticate the extension, no other profile agent can install/uninstall/authenticate the extension.Yes - If we select yes, then any user who has marketplace access can install/uninstall/authenticate the extension individually.
Scopes
Displays sub-services for the service that you pick.
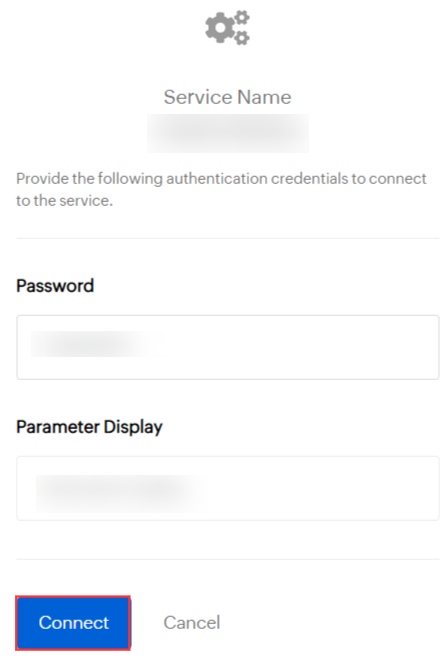
Now, you need to establish the connection between the service and extension by authenticating the service you created.
Enter the required details, such as the Domain ID and user credentials, to establish the connection. Once the authentication is successful, the service will be ready to use.
Note: The details required for authentication may vary based on the service that you choose.
- On the Connection Summary page, click the JSON tab under sample code.
Copy the JSON snippet.
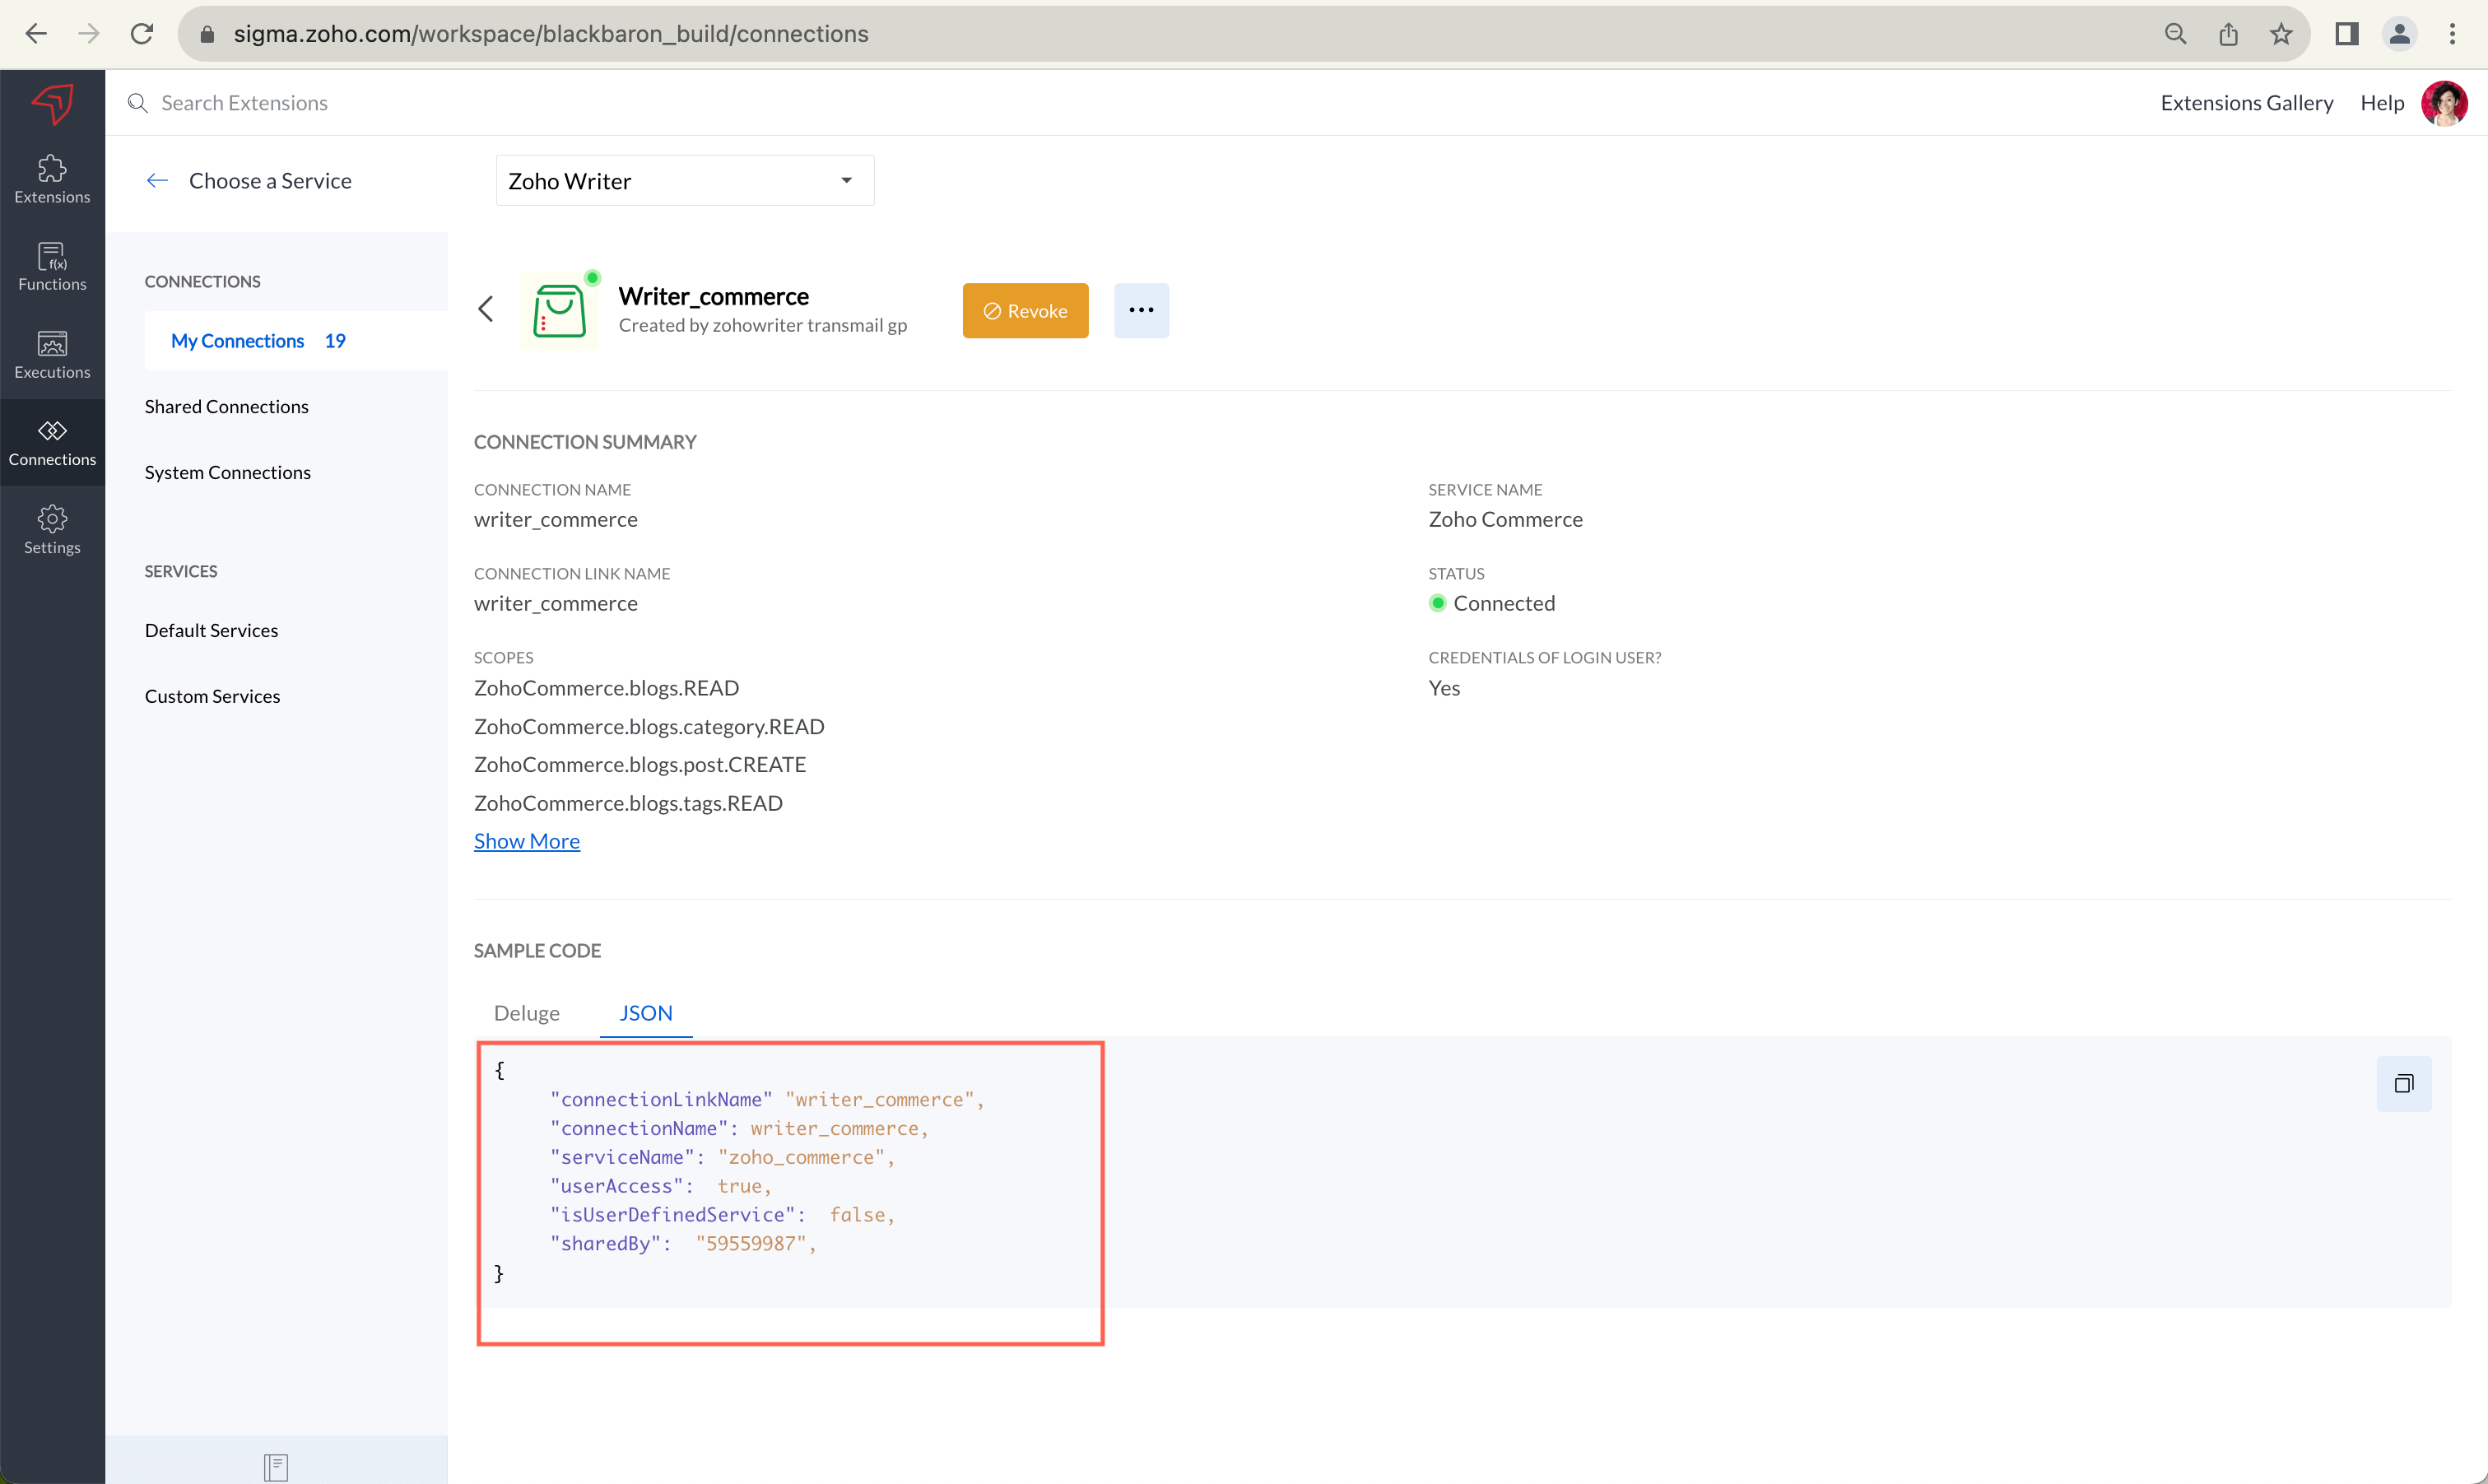
- Open the plugin-manifest file of your extension and paste the code snippet under the "connectors" attribute.


Your extension is now connected to the third-party service you want.
Note: You can create more than one connection for the same default or custom service by providing the code snippet of corresponding services under "connectors" attribute of plugin-manifest file.
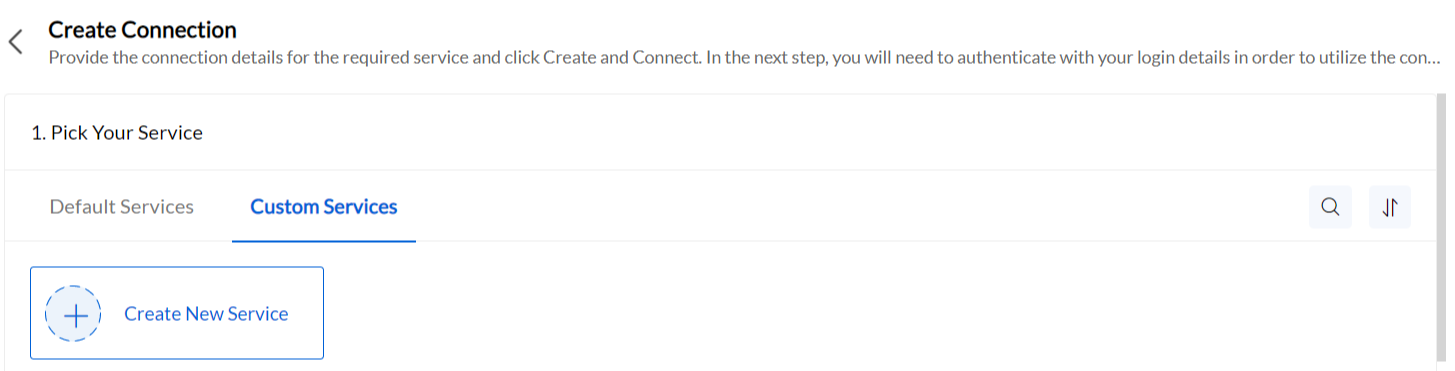
Create Connection via Custom Services
In addition to the services provided, users can also connect with other third-party services. To establish a custom connection.To create your own connection, follow the steps given below:
- In the Connections page, go to Custom Services tab and click Create New Service.
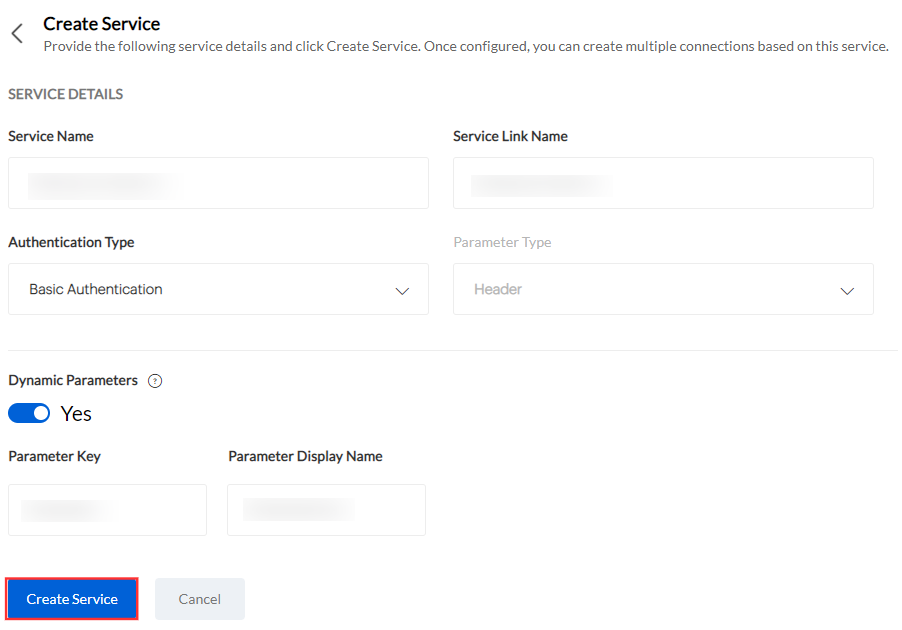
- Under the Custom Service tab, enter the service and connection details.
- Enter Service details:
- Service Name: Enter the name of the service.
Service Link Name will be auto-populated based on the service name. - Authentication Type: Select the authentication method used by the third-party service. For more info, click here.
- Fill in the parameter details with respect to the chosen authentication type.
Enable Dynamic Parameters toggle button if you want to use these parameters as placeholders in the input URL of Deluge webhook tasks and the connection's authentication URLs in the format {paramLinkName}.
>Note: You are allowed to add up-to 10 parameters.
- Service Name: Enter the name of the service.
- Click Create Service.
- Under Connectiona Details, enter Connection Name and Connection Link Name.
Connection Link Name can be used for integration tasks and invoke URL scripts to establish authentication. - Enable Use Credentials Of Login User.
- Click Create And Connect.
- Enter the authentication credentials to connect to the service that you created
- Click Connect.
Upon successful authentication, the connection will be created and listed in your connections page under "Own Connections". And, the configured service will be listed under Custom Service.
To know more about creating Custom Connections click here.
Note:
- For authentication methods using the Basic Auth protocol, configuring the Actual Parameter and Parameter Display Name fields help with the verification process. While establishing the connection, a dialogue box prompts you to enter the configured parameter value. The integration will only be successful if the parameter values match.
- For authentication methods using OAuth 2.0 protocol, a callback URL must be mentioned in the respective third-party service.