


Using Subforms
How Can I...
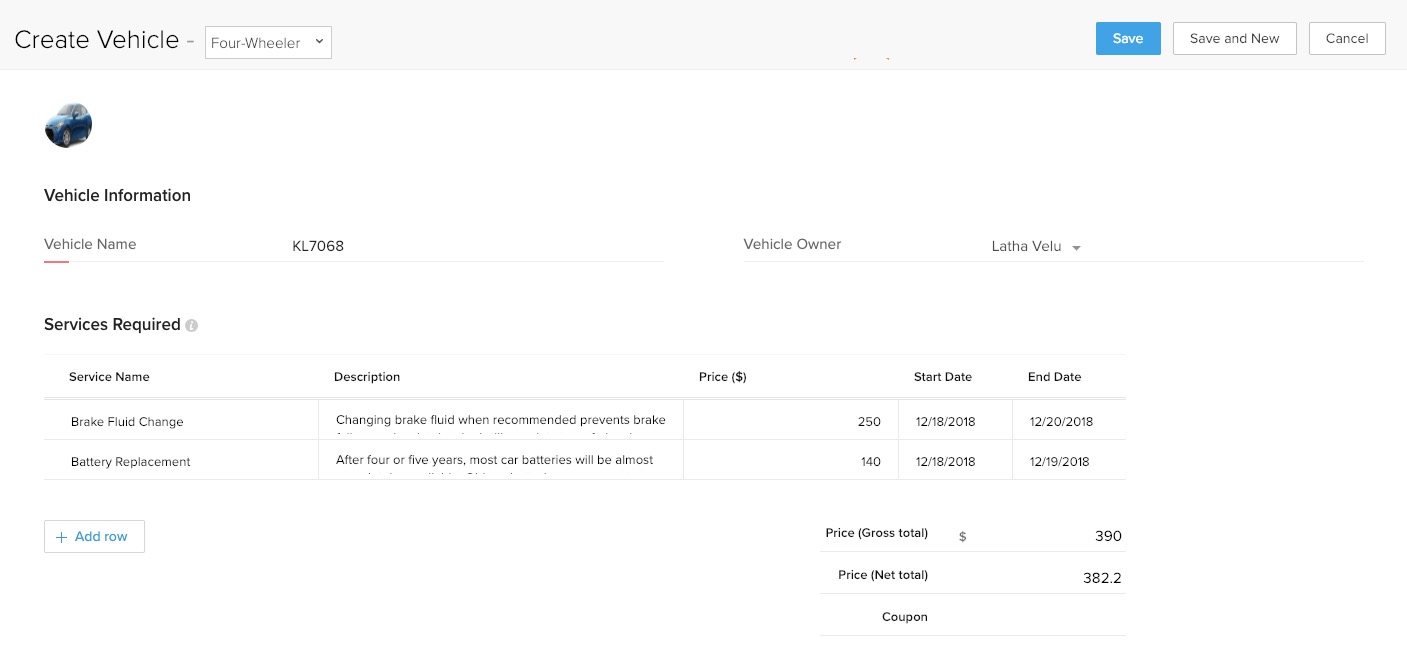
A Subform is an effective and useful way to present related data from tables within primary forms. Subforms can be added to existing forms to show corresponding values and data sets. For example, consider a car mechanic's garage management system: For a single vehicle, there might be several different recommended mechanic services. Adding a subform would help to associate these different data sets in relation to one another. Within the vehicle record, you can add multiple entries for the services.
Create a Subform
Listed below are the steps to create a subform. In this example, a subform has been added to include a vehicle's required mechanic services.
- Log in to the Zoho Developer Console and click Vertical Solutions.
- Select the application you'd like to modify and click Edit.
- Click Modules in the left panel. The Modules tab will be selected by default.
- Click the name of the module and then click the name of the layout that you want to add the subform to.
In our example, the module is Vehicles and the layout Four-Wheeler. - From the New Fields tray, drag and drop the Subform component and provide a name for the Subform.
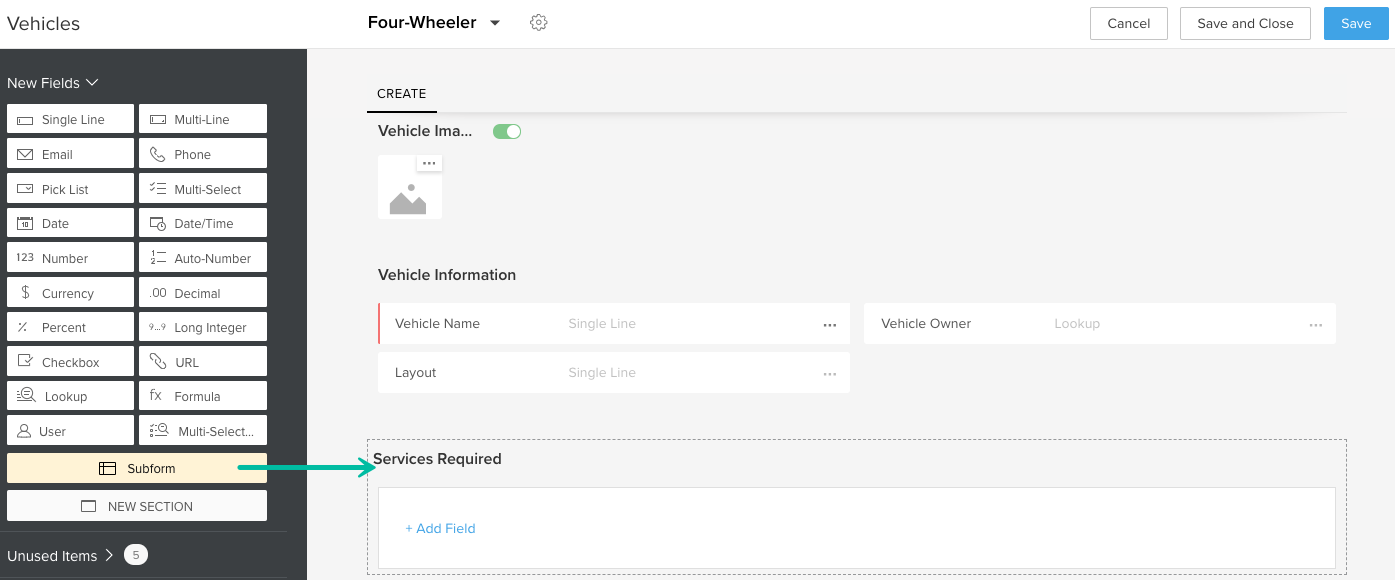
- Click + Add Field. Select the field type you want to add and provide a name for the field.
The added fields will be displayed as columns in the subform.
- Click Save.


Note
- You can create two subforms per module.
- You can add a maximum of eight subform fields to a layout.
- Subforms are layout specific. It's possible to have entirely different subforms for Layout A and Layout B within the same module. This includes subform fields as well as aggregate fields.
- Subforms are not available for Activities, Pricebooks and Purchase Orders, Sales Orders, Invoices, or Quotes.
Associate fields from a lookup module
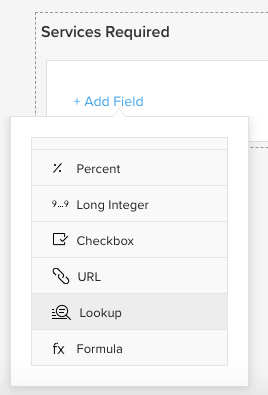
When you add a lookup field to the subform, you can also add fields from the associated module in the lookup field. For example, if you add Service Name as a lookup field, which uses Services as the Lookup Module, then you can also add fields from the Services module in the subform. After a lookup field is added, the + Add Field overlay will have two options (screenshot below):
- New Field
- Fields of Lookup Module
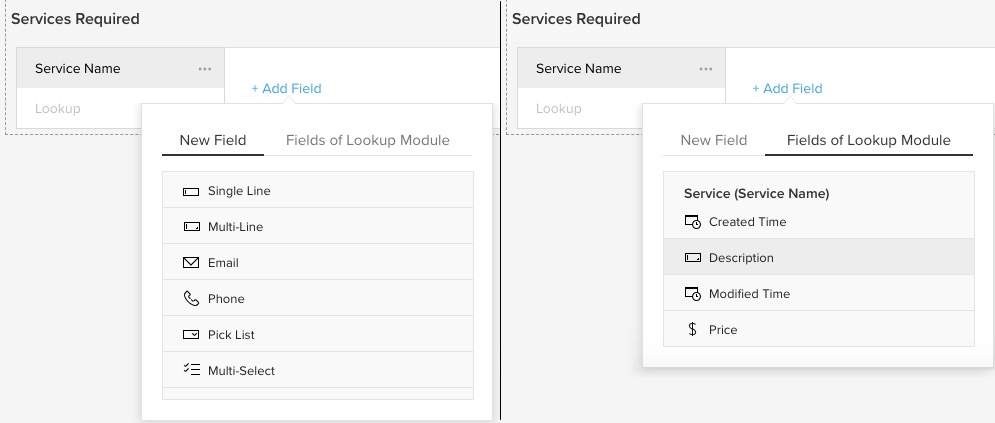
However, any changes you make in the lookup fields within the subform will not be reflected in the corresponding lookup module. For example, any changes you make in the Description field in subform will not be reflected in the Services module.
Add an aggregate field
Three types of aggregate fields are supported in Vertical Solutions: Aggregate, Formula and New Fields.
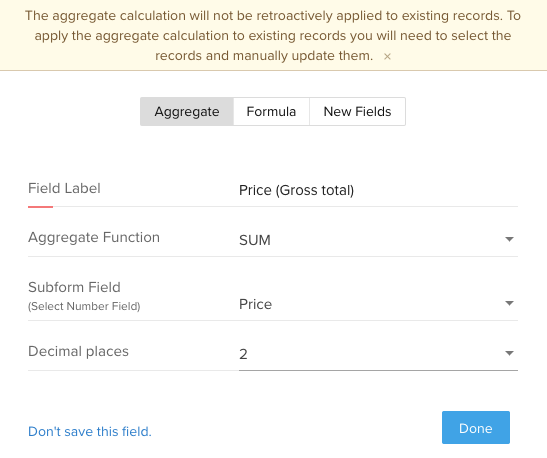
Aggregate: The mathematical functions SUM, AVERAGE, MAXIMUM, and MINIMUM can be associated with a field in the subform. For example, a field can be added in the subform that holds the gross total of the price of a vehicle's required mechanic services.
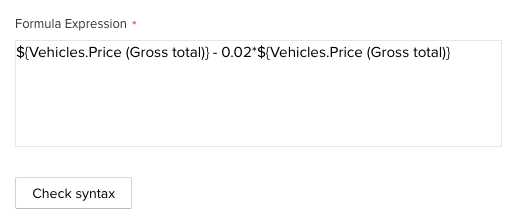
Formula: Add a field in the subform that solves a mathematical equation between one or more fields. Click here to find out how to create formula fields. The formula created for our example is shown in the screenshots below.

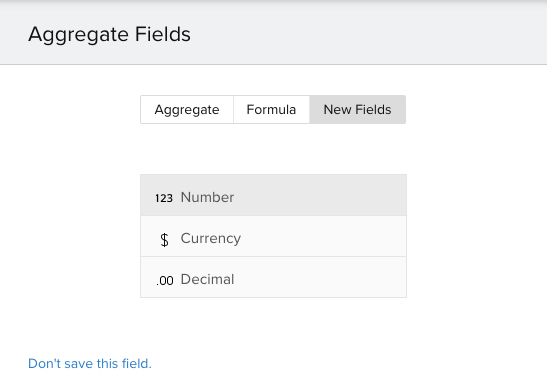
New Fields: You can add Number, Decimal, or Currency fields in a subform while manually adding values. For example, you can include a field for the value of a coupon.
To add an aggregate field in the subform, click Add Aggregate Field and choose the desired option and click Done. You are able to add an aggregate field when any of the following field types have been added to your subform:
- Number
- Currency
- Decimal
- Formula
Manage Field Properties
After the field is added to a subform, you can manage its properties and permissions. The list of actions that can be performed on a field are listed below:
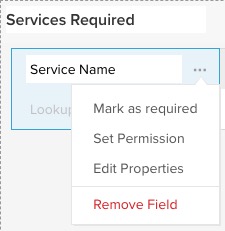
Mark as required: use this option for fields whose entry cannot be skipped by the user.
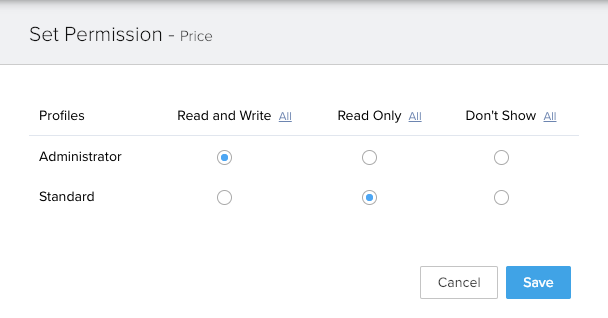
Set Permission: You can allocate field-level permissions based on profiles. For example, you can set permissions to allow a Supervisor to set the price for a service, whereas a cashier will only can view the price.
Edit Properties: You can change the label of the field and make other necessary changes.
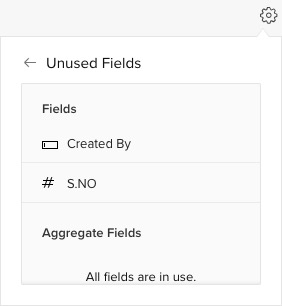
Remove Field: You can remove a field from the subform or delete it permanently. When removed from the subform, a field is moved to the Unused Fields list (refer screenshot below) of the form. To reuse a removed field, go to the Subform Settings [![]() ] and select Unused Fields. Click the field you want to reuse and it will be restored to the subform.
] and select Unused Fields. Click the field you want to reuse and it will be restored to the subform.

Edit a Subform
To edit the values of a subform, follow the steps below:
- Click the Subform Settings [
 ] icon and select Edit Properties.
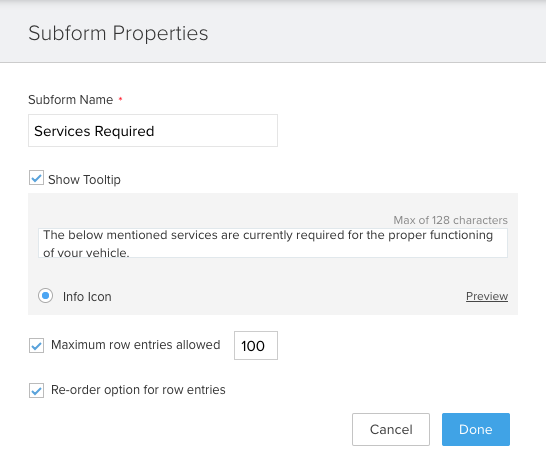
- Make changes in the Subform Properties overlay and click Done.

In the Subform Properties overlay, the following values of a subform can be edited:
Subform Name: Modify the title of the subform.
Show Tooltip: Select the checkbox and add a tooltip for the subform.
Maximum row entries allowed: Enter the number of entries you want the user to be able to add in the subform. The default value for this field is 100 and the admissible values are 1-100.
Re-order option for row entries: Select this checkbox to allow the user to rearrange the rows in the subform.
Delete a Subform
To delete a subform, follow the steps below:
- Click the Subform Settings [] icon and select Remove.

- When you receive the confirmation message, click Yes, Remove the Subform.
Upon deletion, the subform will be moved to the Unused Items tray. From here, it can then be added back to the subform or permanently deleted.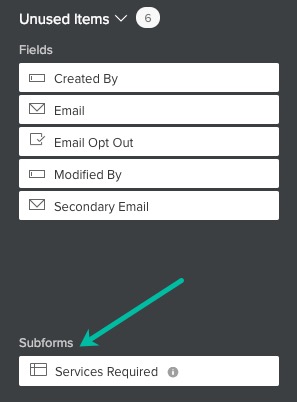


View Field Limits
You can view the defined limits for each field type in a subform. To view these details, click the Subform Settings [![]() ] icon and select Subform Fields Left.
] icon and select Subform Fields Left.
The maximum allowed limits for each type of field, along with the remaining number of fields available, will be displayed in the Subform Fields Limit pop-up.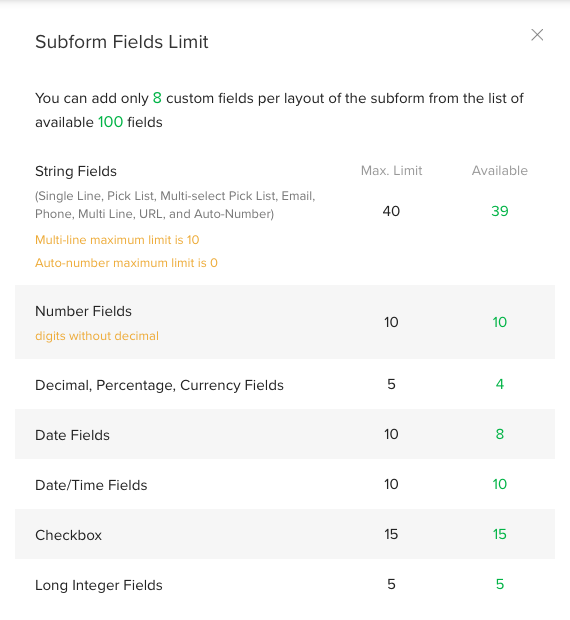
Use Subform data in Reports
Subform data can be used to create reports. Click here to find out how to create reports. The subform will appear among the Related Modules.