
Enable Zoho Inventory Add-ons
The default inventory management feature in Zoho Books lets you track stock, set preferred vendors to items, set reorder points, and adjust inventory. With the Zoho Inventory add-on, you can perform advanced inventory management using modules like Composite Items, Packages, Shipments, and more, all within Zoho Books.
Prerequisite: You must have a paid Zoho Inventory organization to enable Zoho Inventory add-ons in Zoho Books.
Note: This feature is available only in certain plans of Zoho Books. Visit our pricing page to check if it is included in your current plan.
To enable the Zoho Inventory add-on:
Go to Settings.
Select General under Setup & Configurations in Organisation Settings.
Scroll down to the Zoho Inventory Add-on, and check Enable Zoho Inventory modules in Zoho Books.
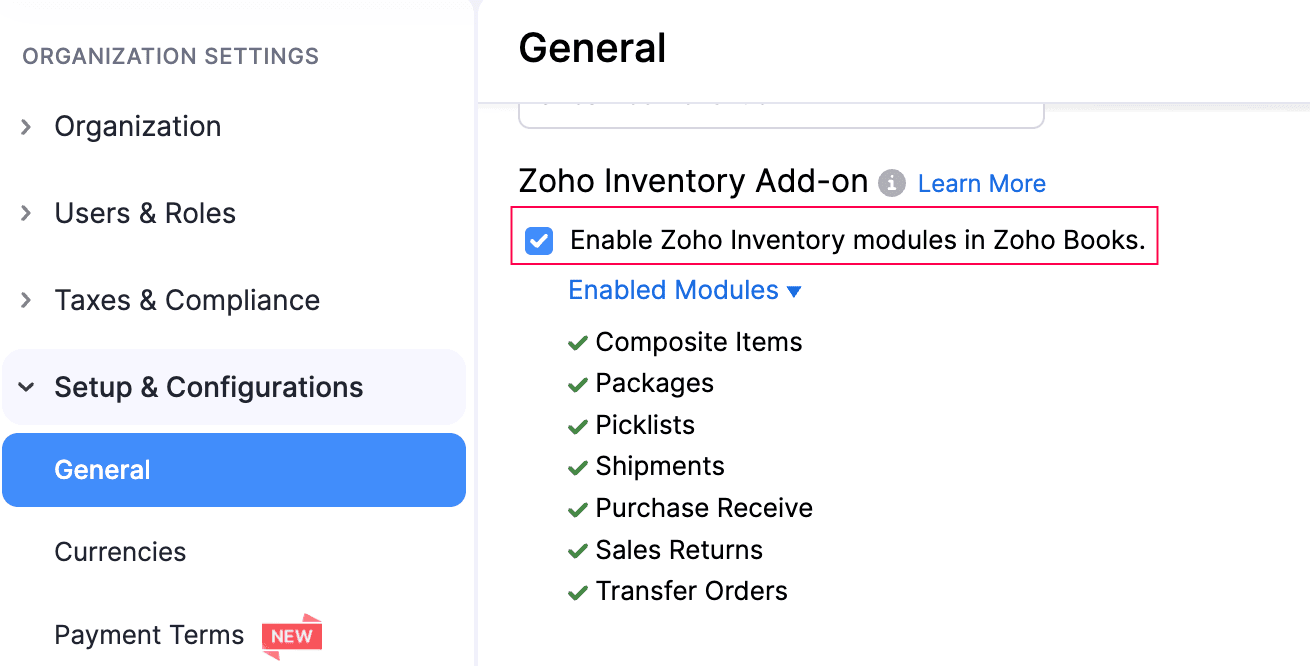
In the Enable Zoho Inventory Add-on pop-up, review the information and click Enable.
Click Save at the bottom of the page.
The Zoho Inventory add-on will be enabled for your organisation, and you will have access to the following modules:
Composite Items
A composite item is a single product that you create by combining two or more items. There are two types of composite items:
- Assemblies: Use this when you physically combine multiple items into one finished product. This works well for manufacturers and businesses that produce finished goods.
- Kits: Use this when you group items together and sell them as a single unit without physically assembling them. This works well for gift sets, product combos, and more. You can also set custom prices for kits.
Scenario: Zylker Electronics manufactures laptop bundles. Each bundle includes a laptop, a laptop bag, and a wireless mouse. Instead of selling these items separately, they create a composite item called Laptop Starter Kit using the Assembly type. When a customer purchases this kit, Zoho Books automatically tracks the stock of all three components, ensuring accurate inventory management.
To create a composite item:
Go to Items on the left sidebar and select Composite Items.
Click + New in the top right corner.
In the New Composite Item page, fill in the required details.
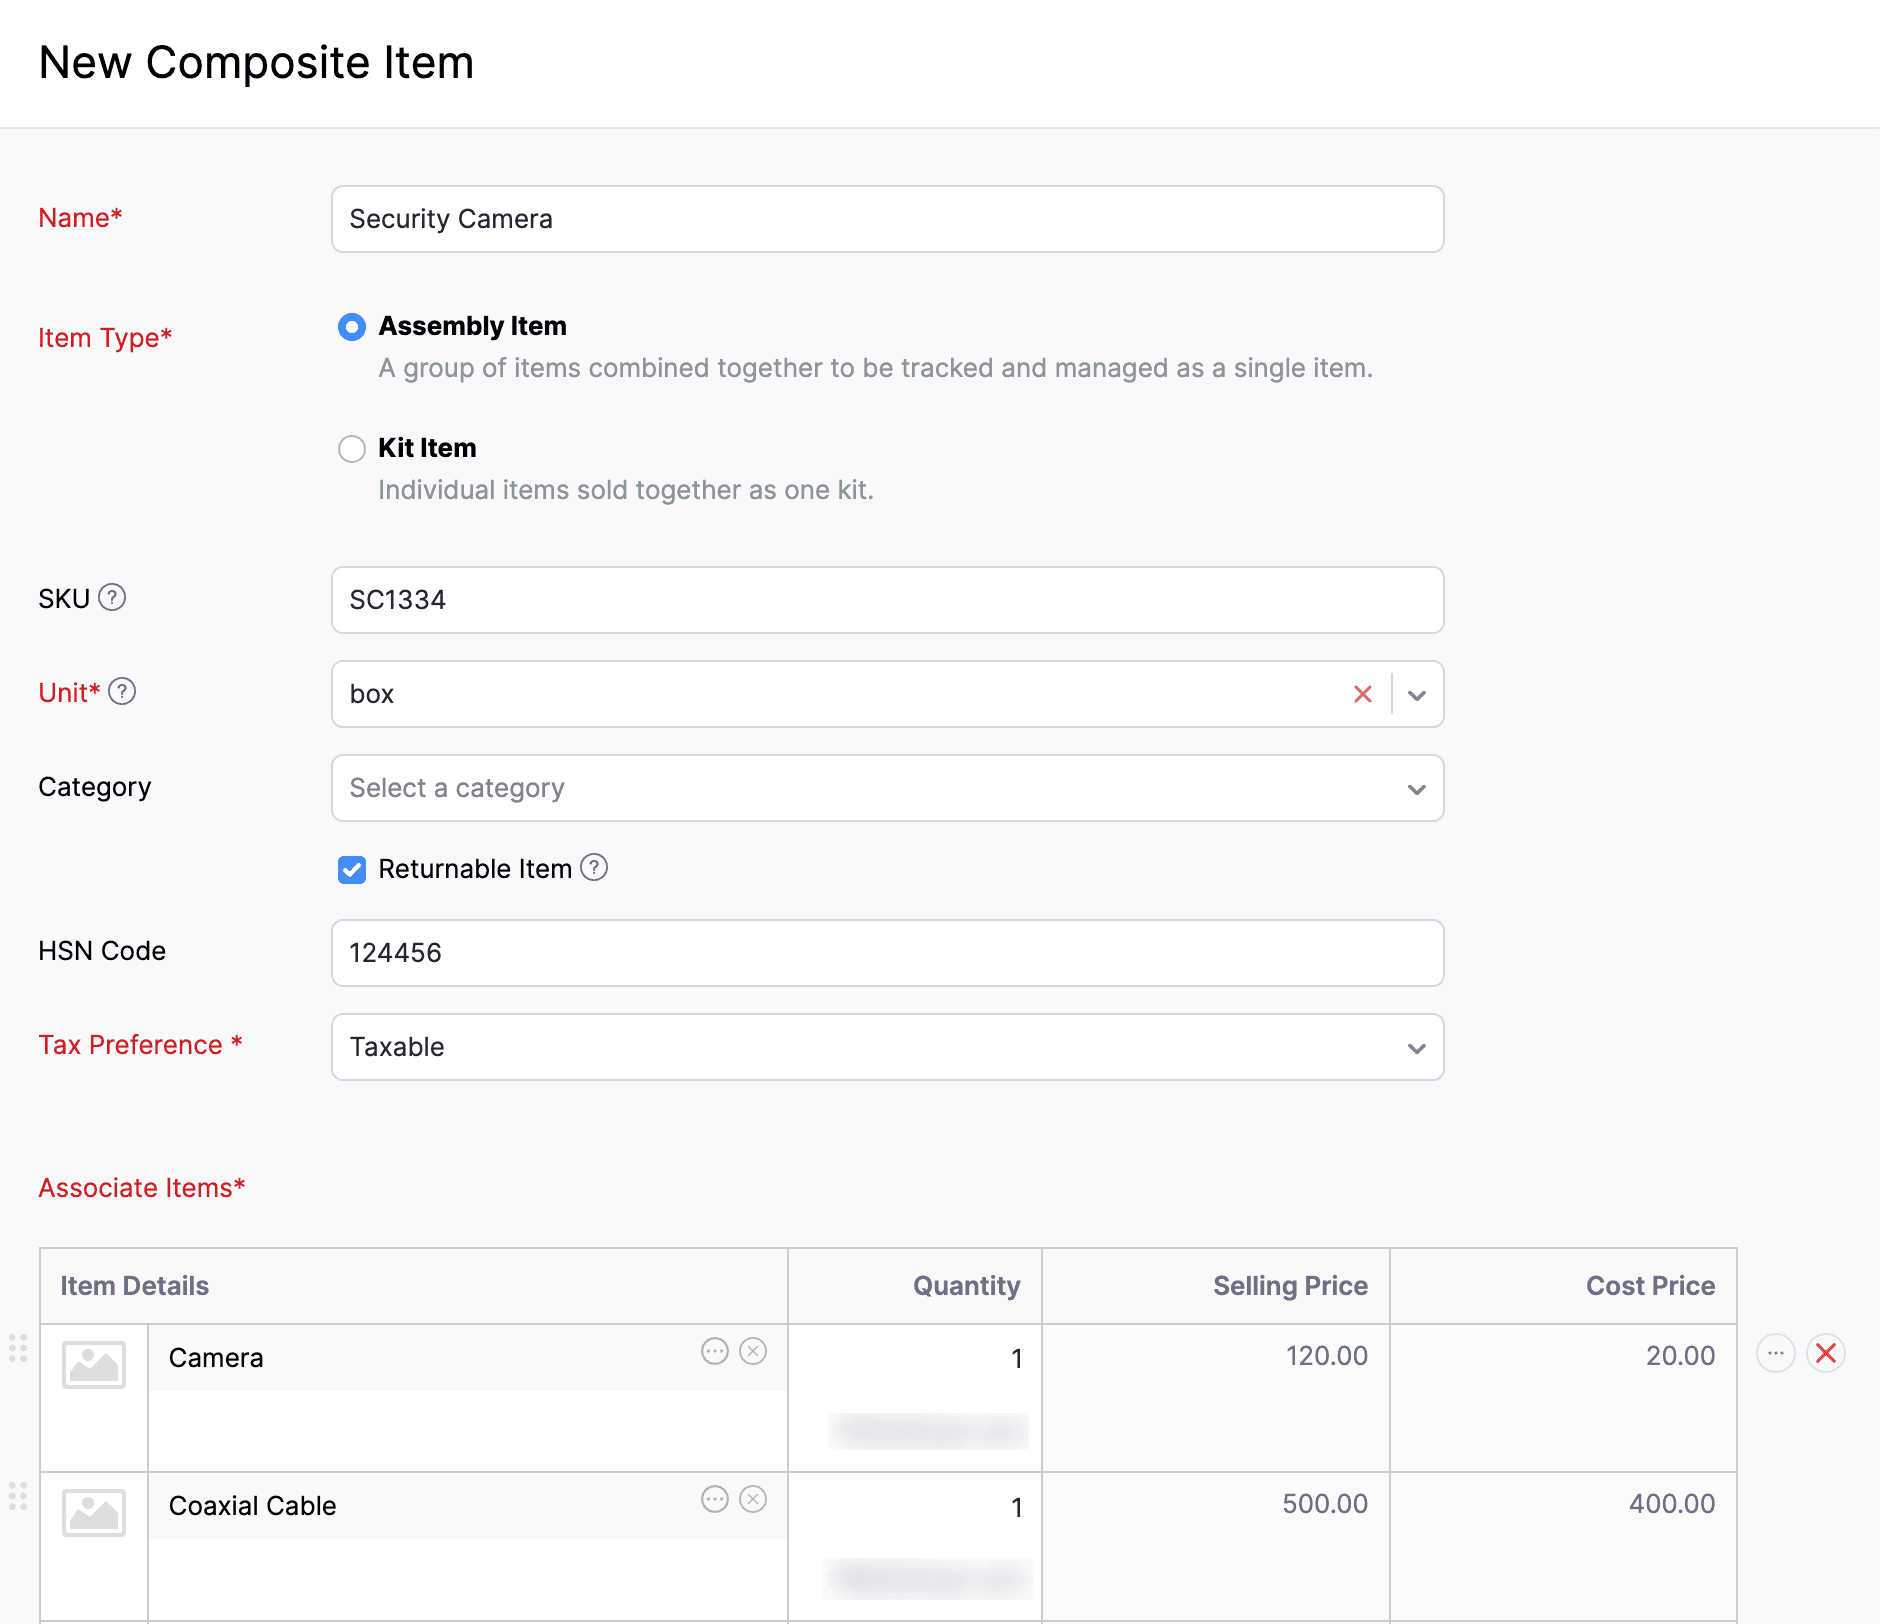
Click Save.
The composite item will be created. Learn more about Composite Items.
Packages
A package lets you group items from a sales order and assign a package slip number to them. You can use it to track your consignments as you ship them to your customer.
Prerequisites:
- The sales order must be confirmed.
- You must have the package slip numbers for your physical packages.
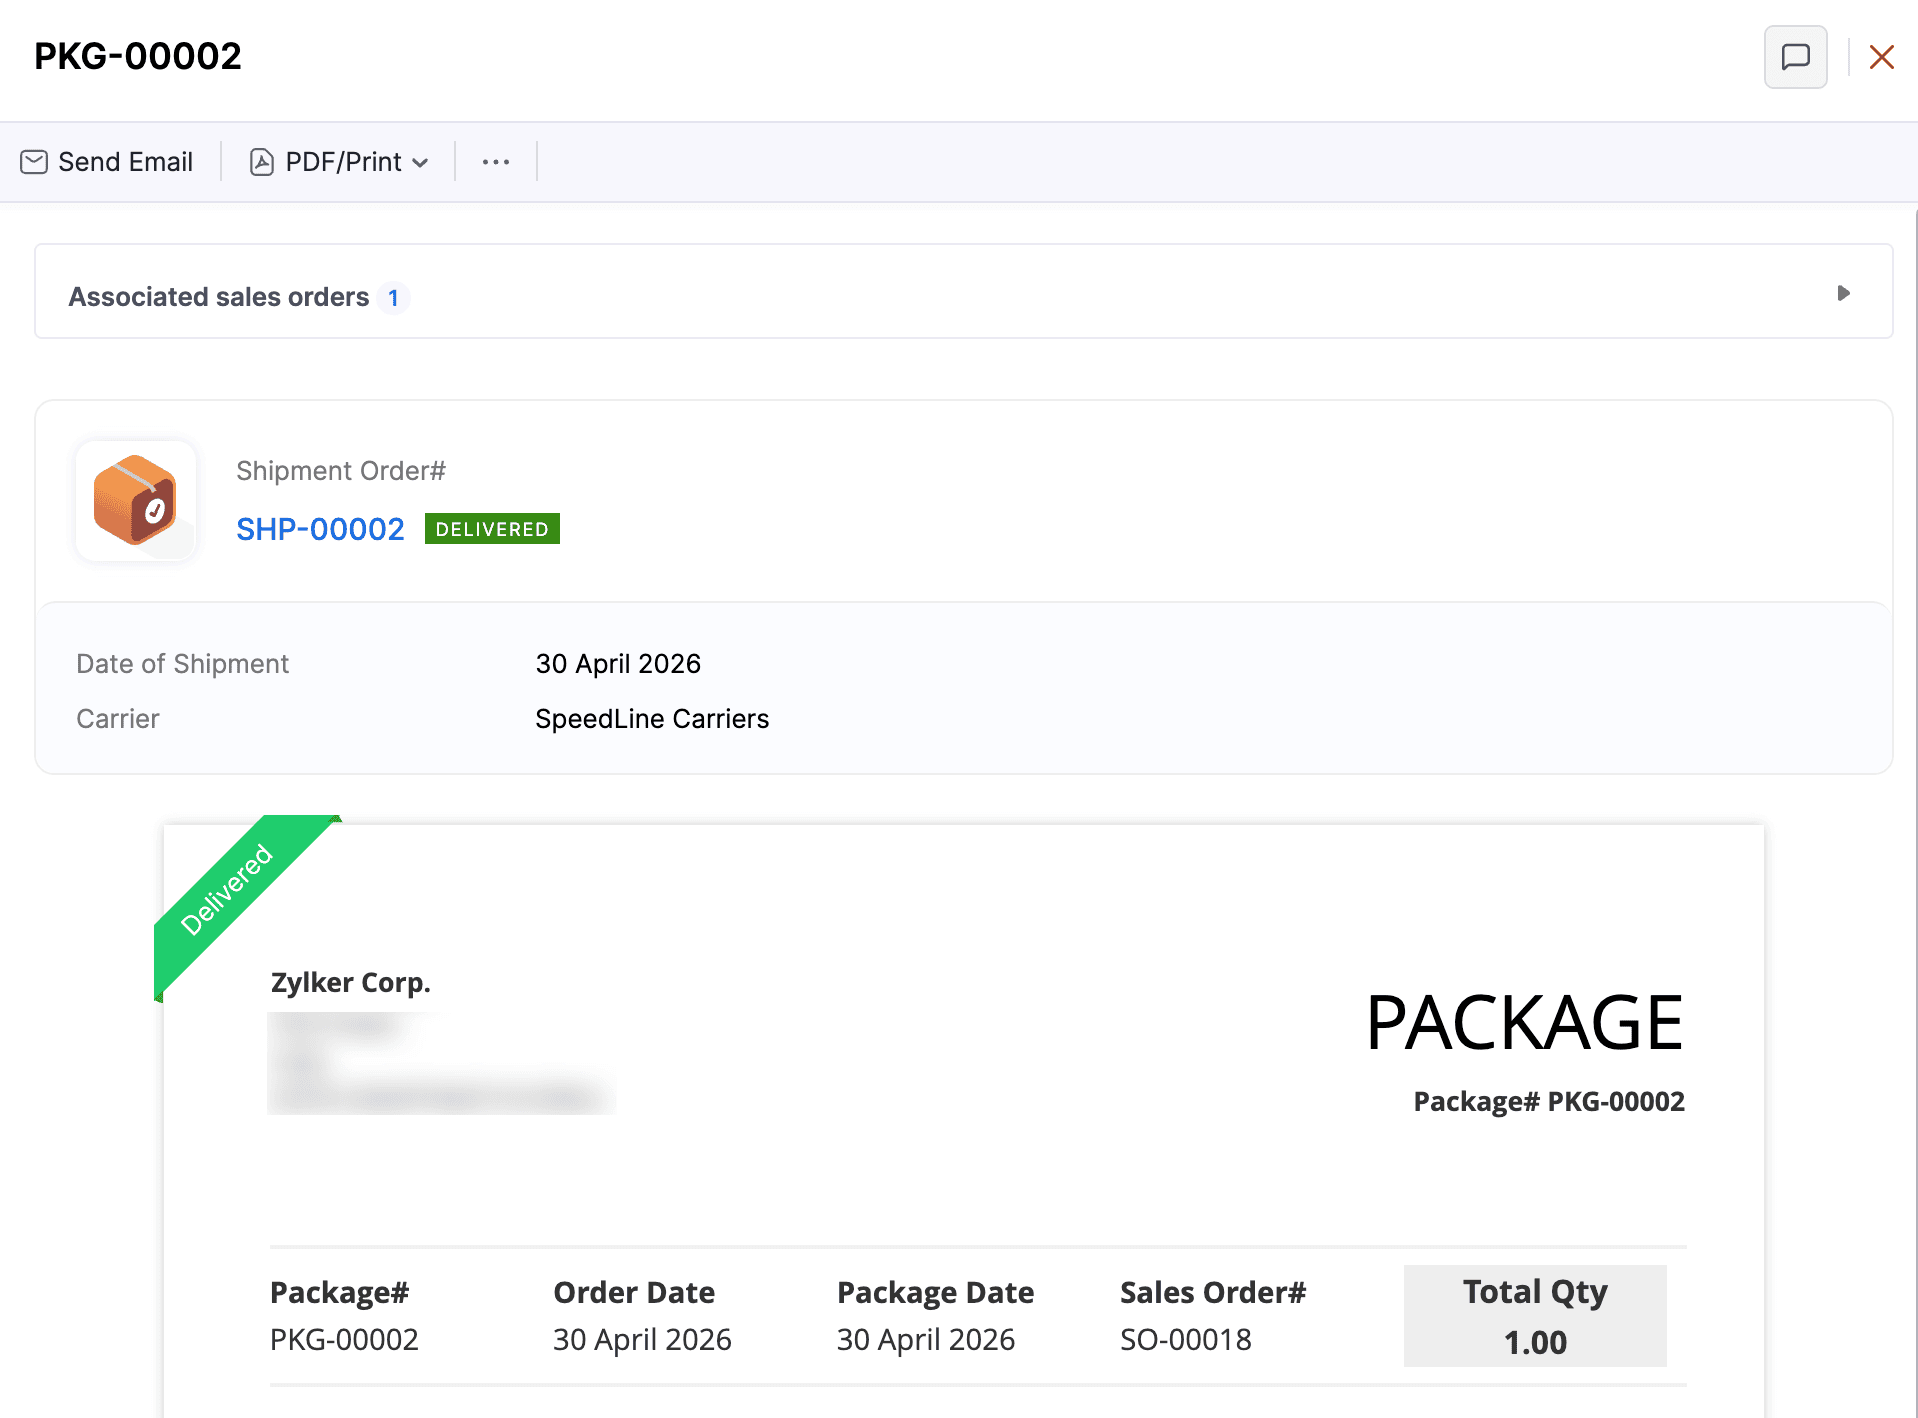
The statuses of a package include:
| Status | Description |
|---|---|
| Not Shipped | The package is created but has not been shipped yet. |
| Shipped | The package moves to this status when you create a shipment order for it. |
| Delivered | The package reaches this status when it is delivered to the customer. You can also manually mark a package as delivered for a manual shipment. |
To create a package:
- Go to Inventory on the left sidebar and select Packages.
- Click + New in the top right corner.
- In the New Package page, fill in the required details.
- Click Save.
The package will be recorded. Learn more about Packages.
Insight: You can also create a package from the Sales Orders module.
Picklists
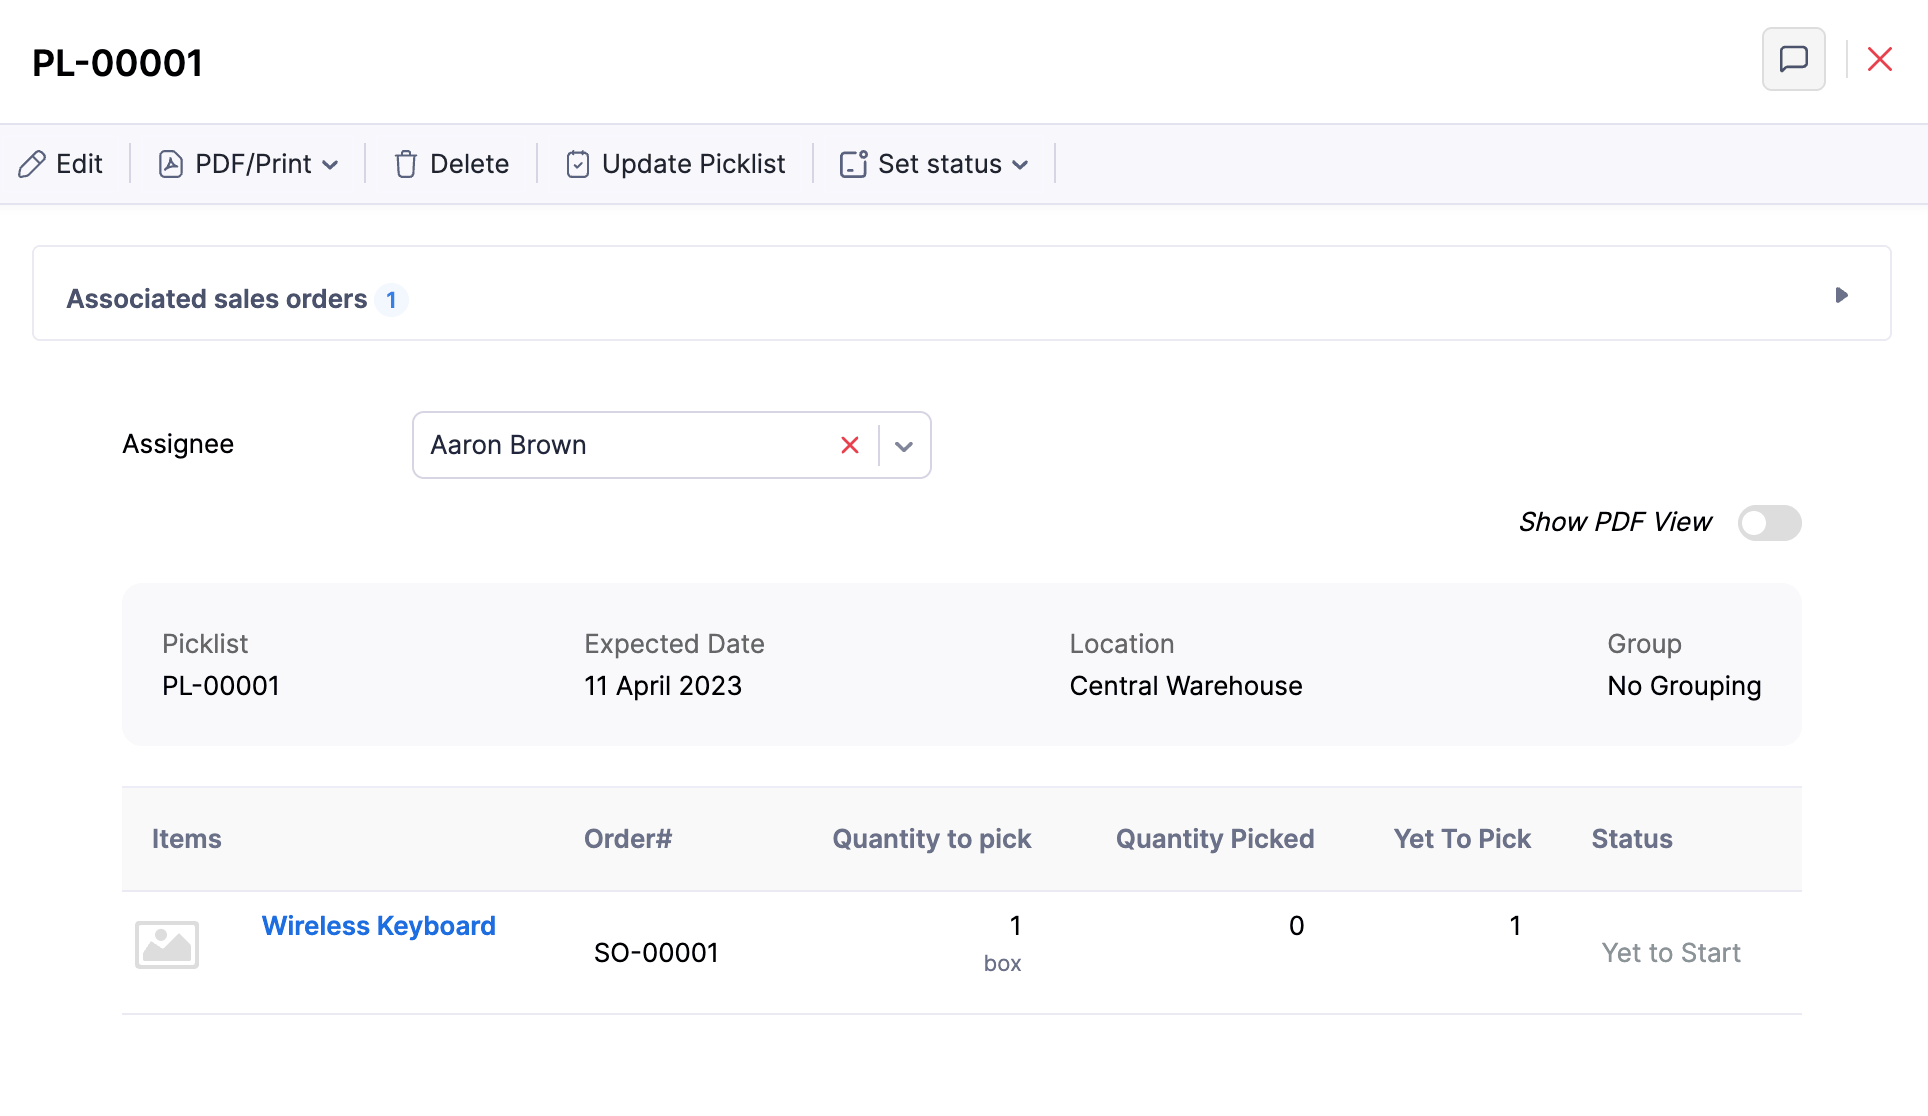
A picklist is a document assigned to a warehouse picker that lists the items and their quantities to be picked from a specific warehouse location to fulfil orders.
To create a picklist:
- Go to Inventory on the left sidebar and select Picklists.
- Click + New in the top right corner.
- In the New Picklist page, fill in the required details.
- Click Generate Picklist.
The picklist will be generated. Learn more about Picklists.
Shipments
Shipments lets you connect your Zoho Books organisation with multiple shipping service providers. You can use it to get shipping rates, ship packaged goods to your customers, track deliveries, and manage your shipments in one place.
To create a shipment:
- Go to Inventory on the left sidebar and select Shipments.
- Click + New in the top right corner.
- In the New Shipment page, fill in the required details.
- Click Save.
The shipment will be recorded. Learn more about Shipments.
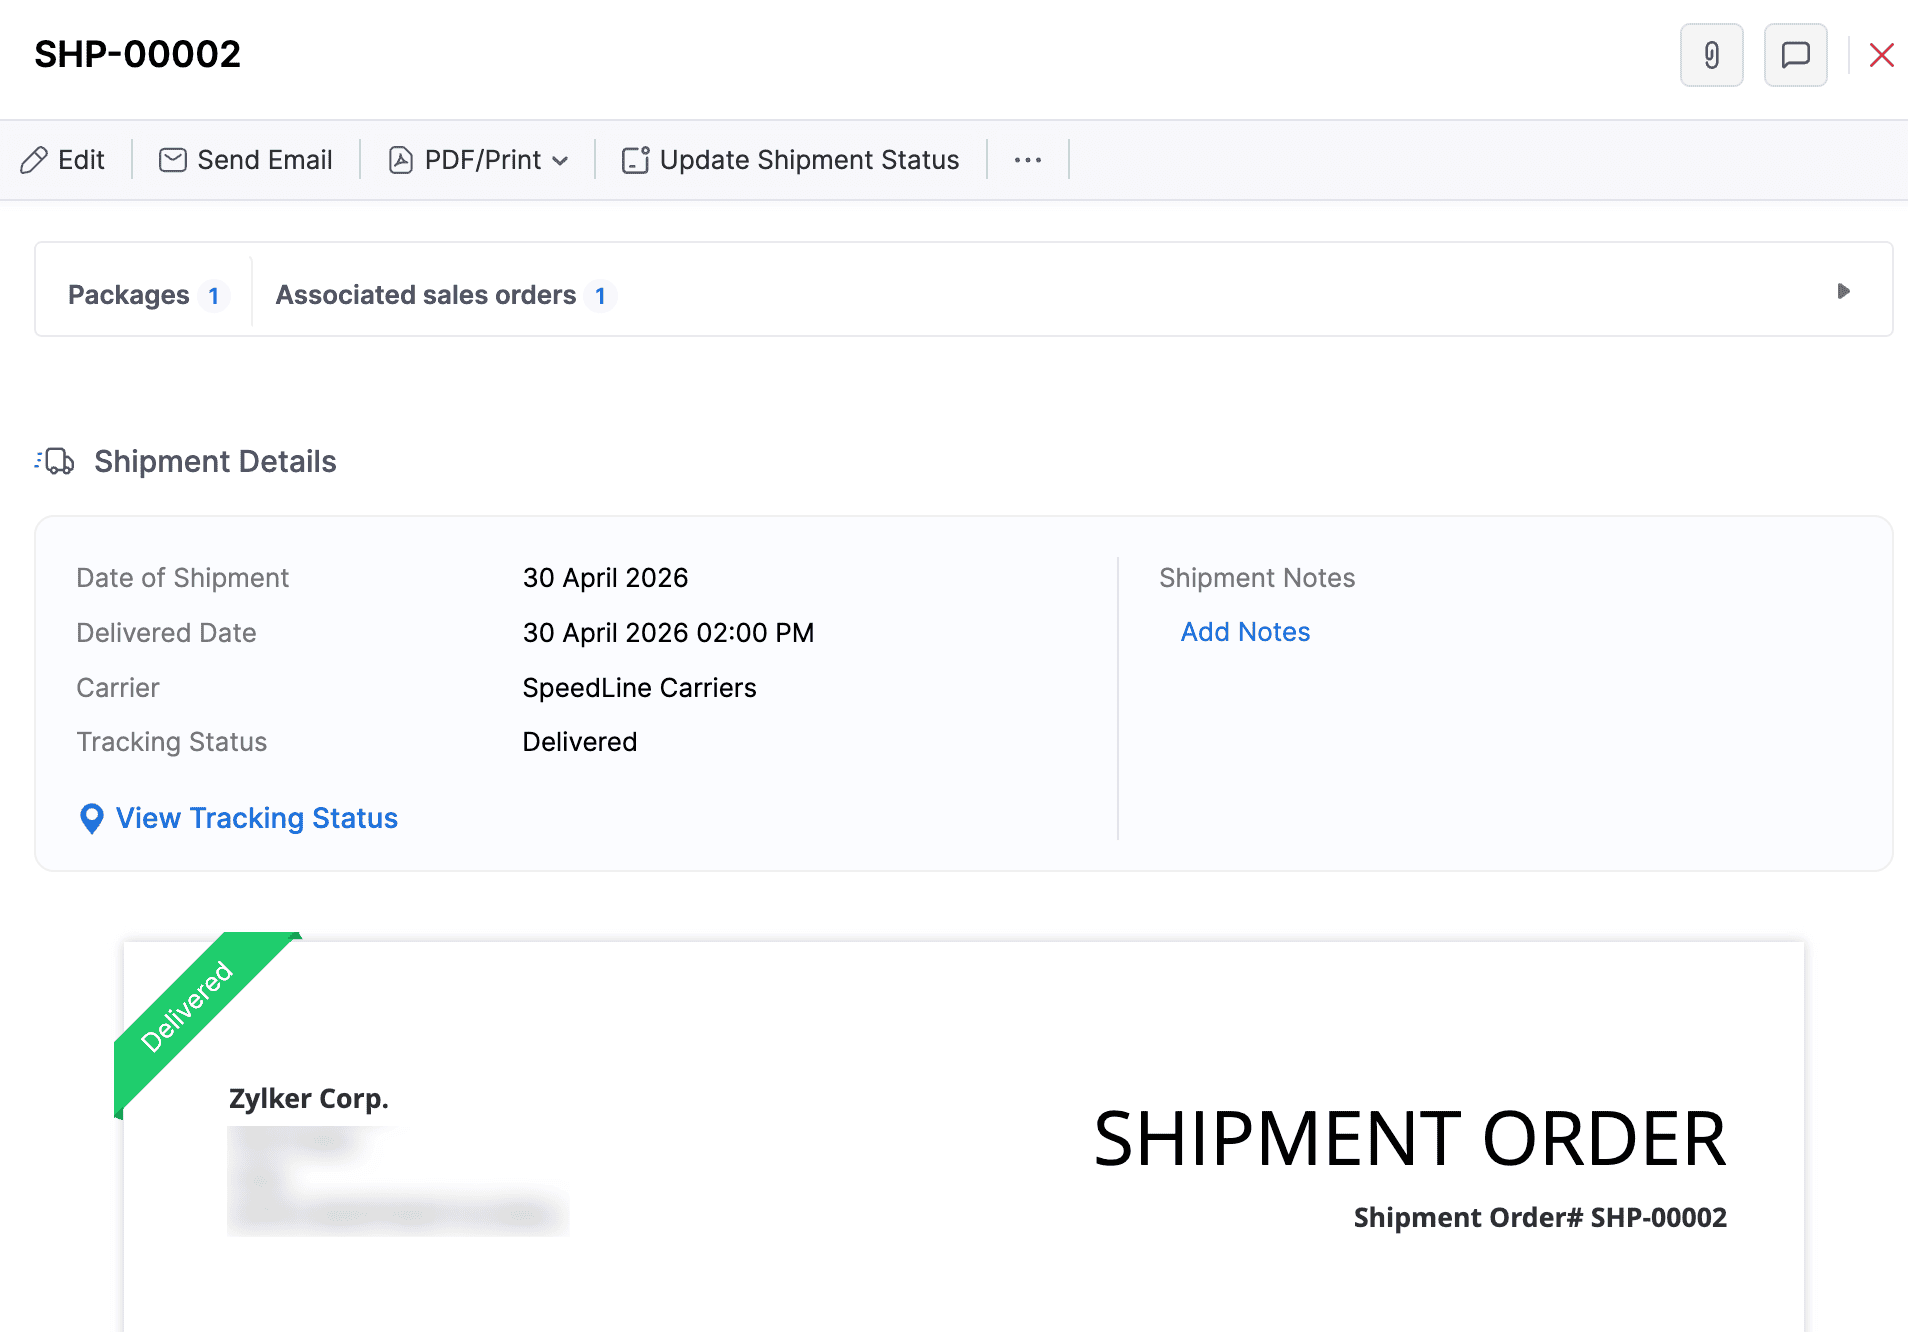
Insight: You can also create a shipment from the Sales Orders module.
Purchase Receives
A purchase receive is a document that records the items your vendor delivers to your warehouse location. You can use it to track full and partial deliveries against a purchase order.
To create a purchase receive:
- Go to Purchases on the left sidebar and select Purchase Receives.
- Click + New in the top right corner.
- In the New Purchase Receive page, fill in the required details.
- Click Save as Draft or Save as Received.
The purchase receive will be recorded. Learn more about Purchase Receives.

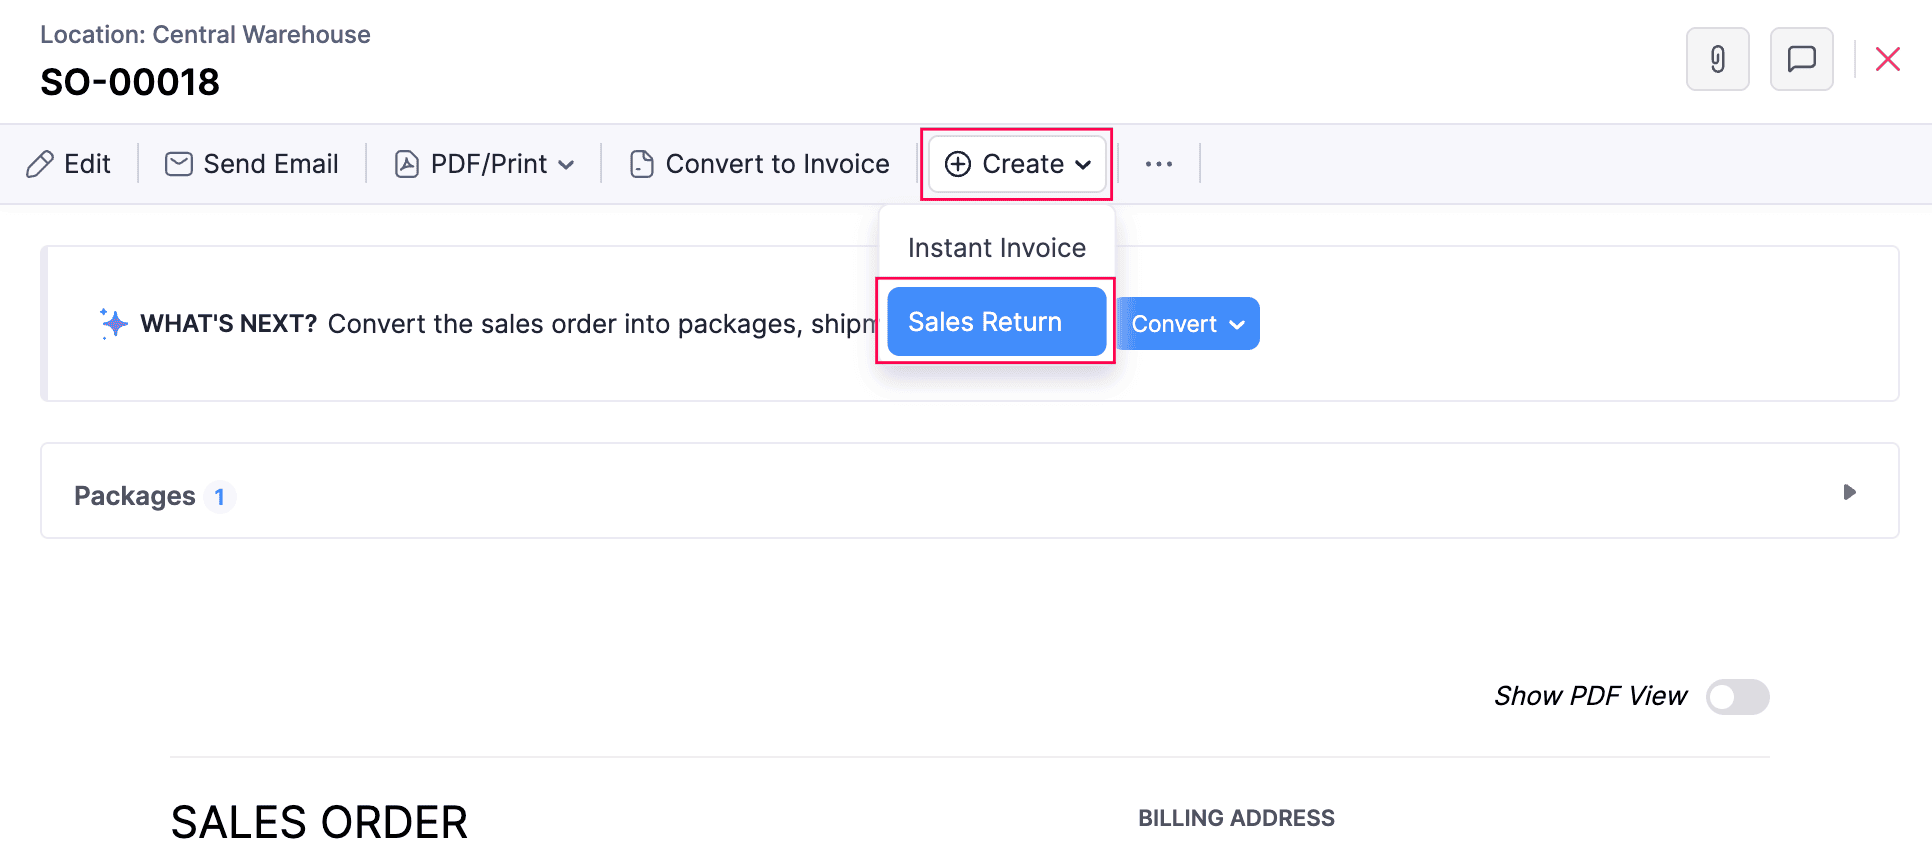
Sales Returns
A sales return is a process where a seller accepts a purchased item back from a customer. In return, the customer receives a credit, cash return, or a replacement. Common reasons for a sales return include damaged or expired product, incorrect delivery, and more.
To create a sales return:
- Go to Sales on the left sidebar and select Sales Orders.
- Select the sales order for which you want to record a sales return.
- Click the Create dropdown at the top of the page and select Sales Return.
- Fill in the required details.
- Click Save.
The sales return will be recorded. Learn more about Sales Returns.
Transfer Orders
A transfer order is a document that records all inventory transfers from one warehouse location to another. It helps you keep track of stock movements across your warehouse locations without manually updating stock levels. You can use transfer orders to ensure accurate stock counts at all times.
To create a transfer order:
Go to Inventory on the left sidebar and select Transfer Orders.
Click + New in the top right corner.
In the New Transfer Order page, fill in the required details.
Click Save as Draft.
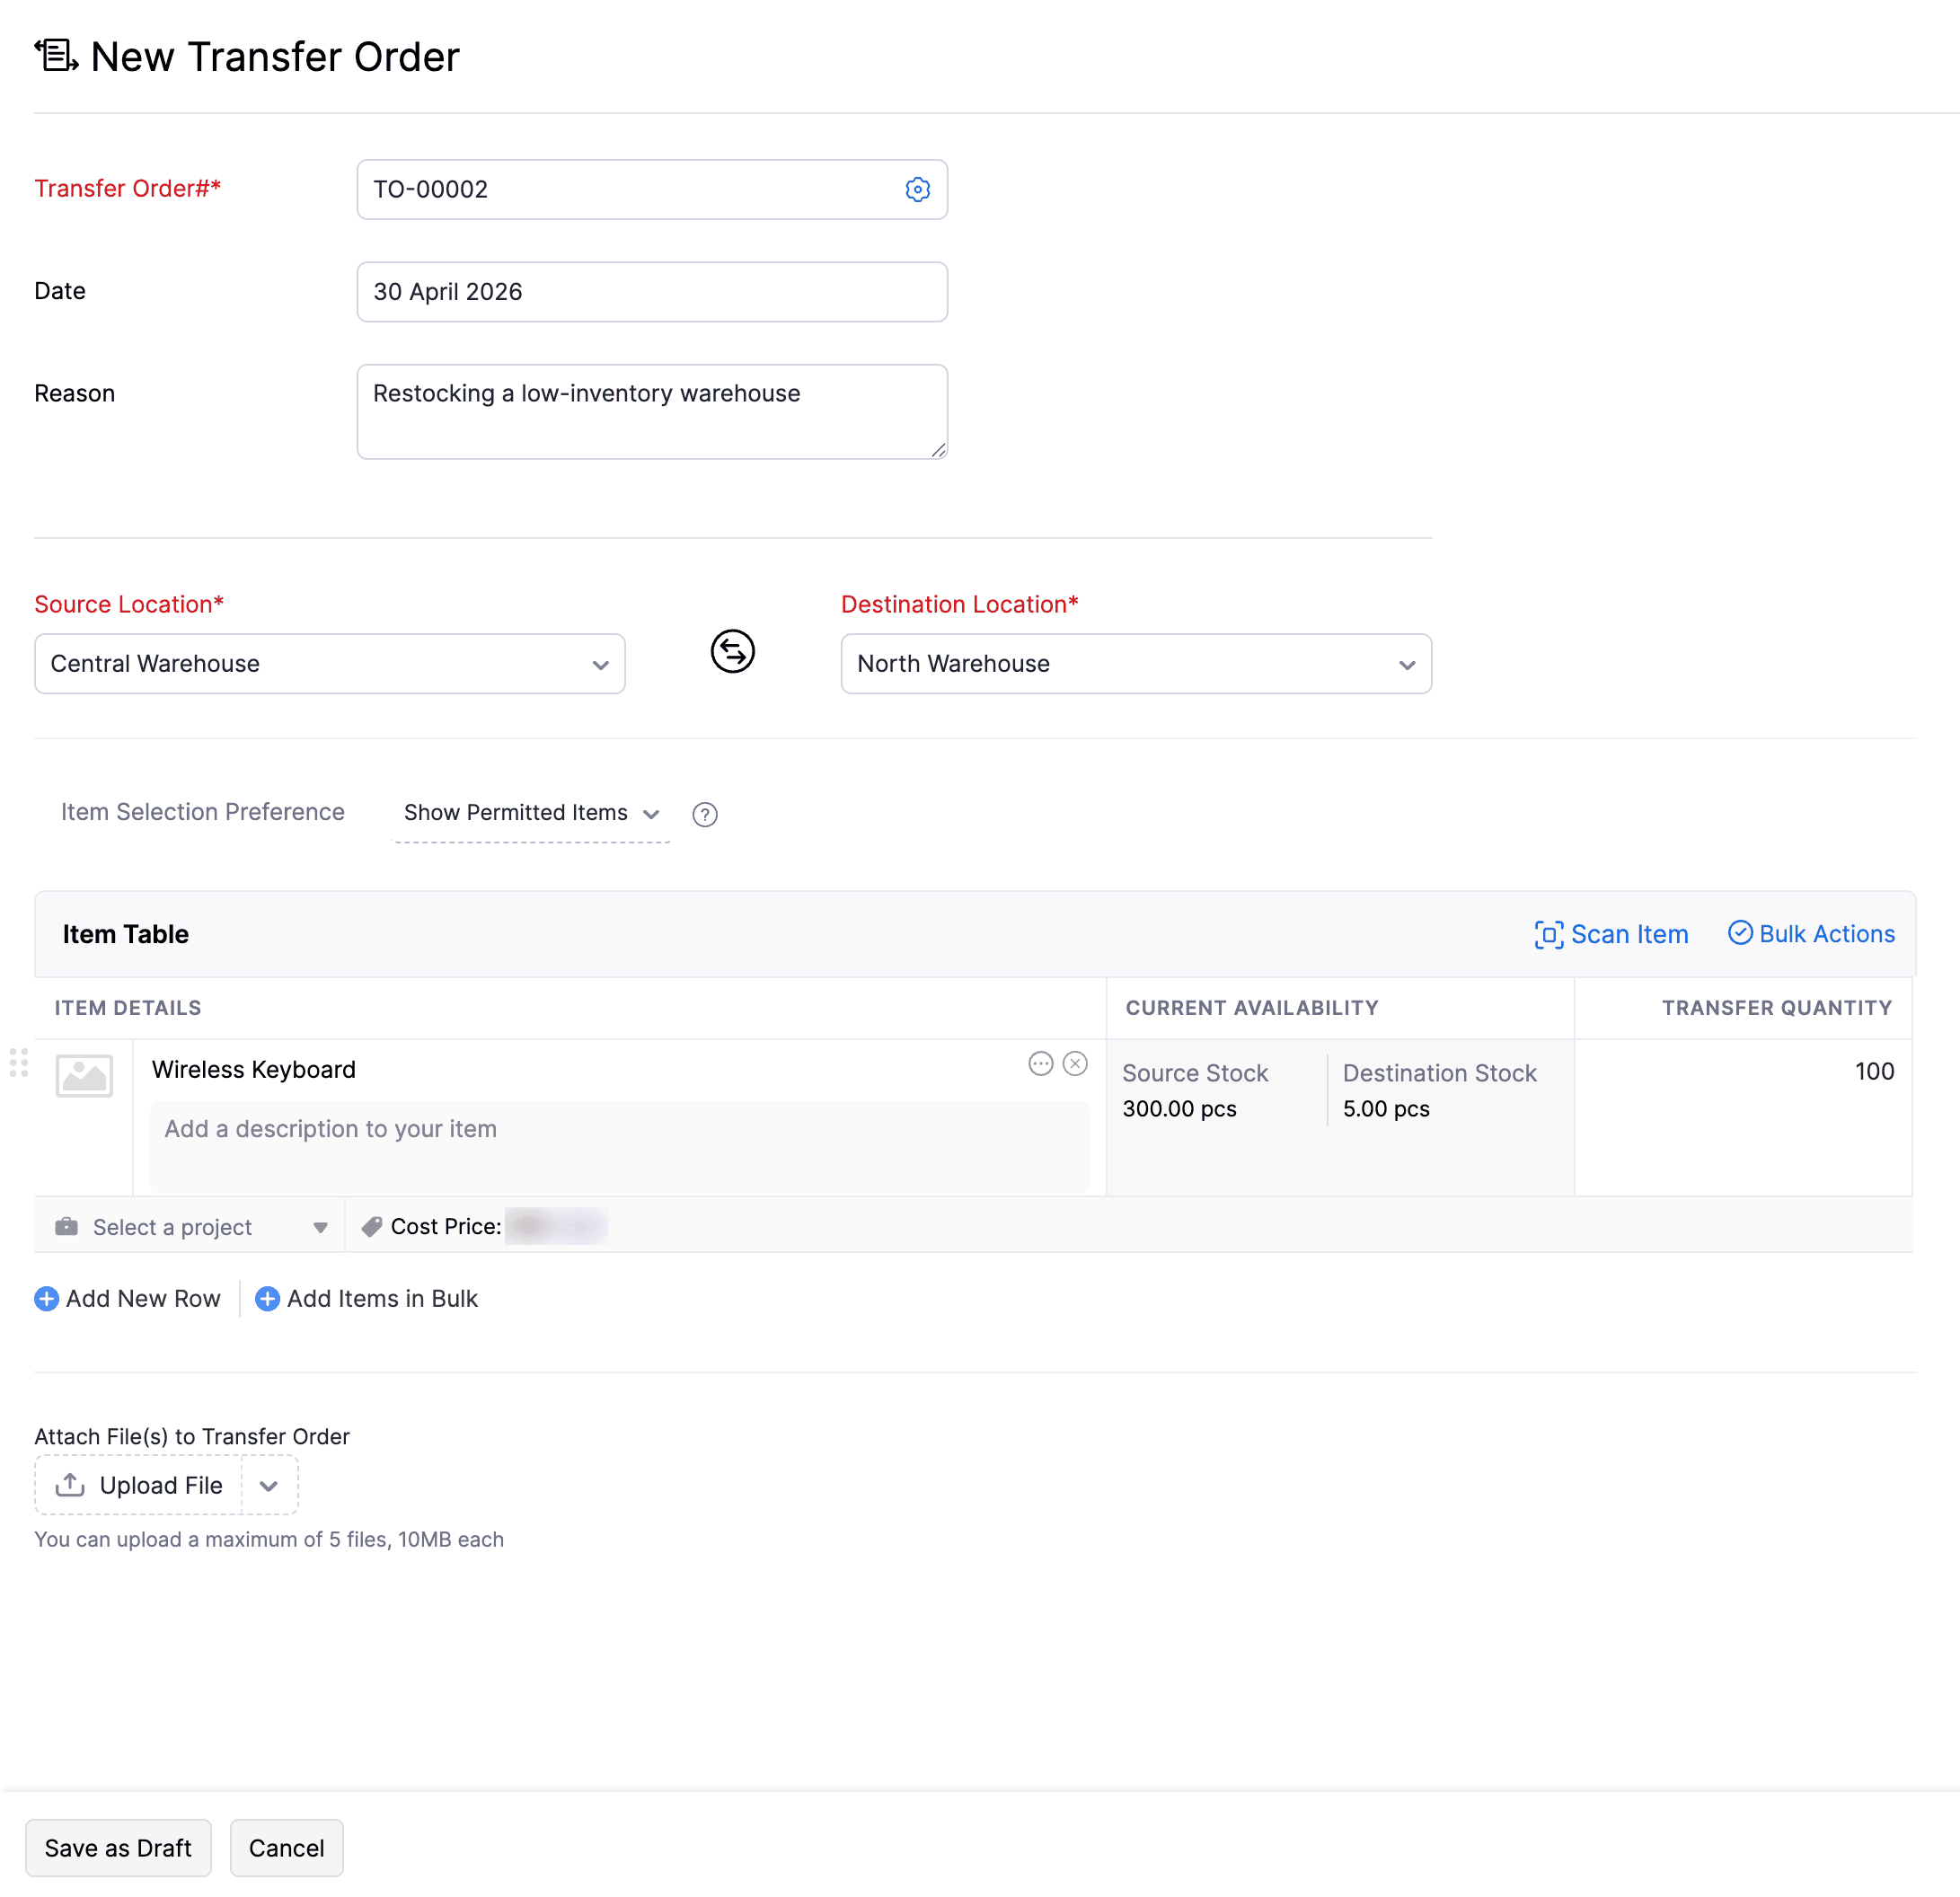
The transfer order will be recorded. Learn more about Transfer Orders.
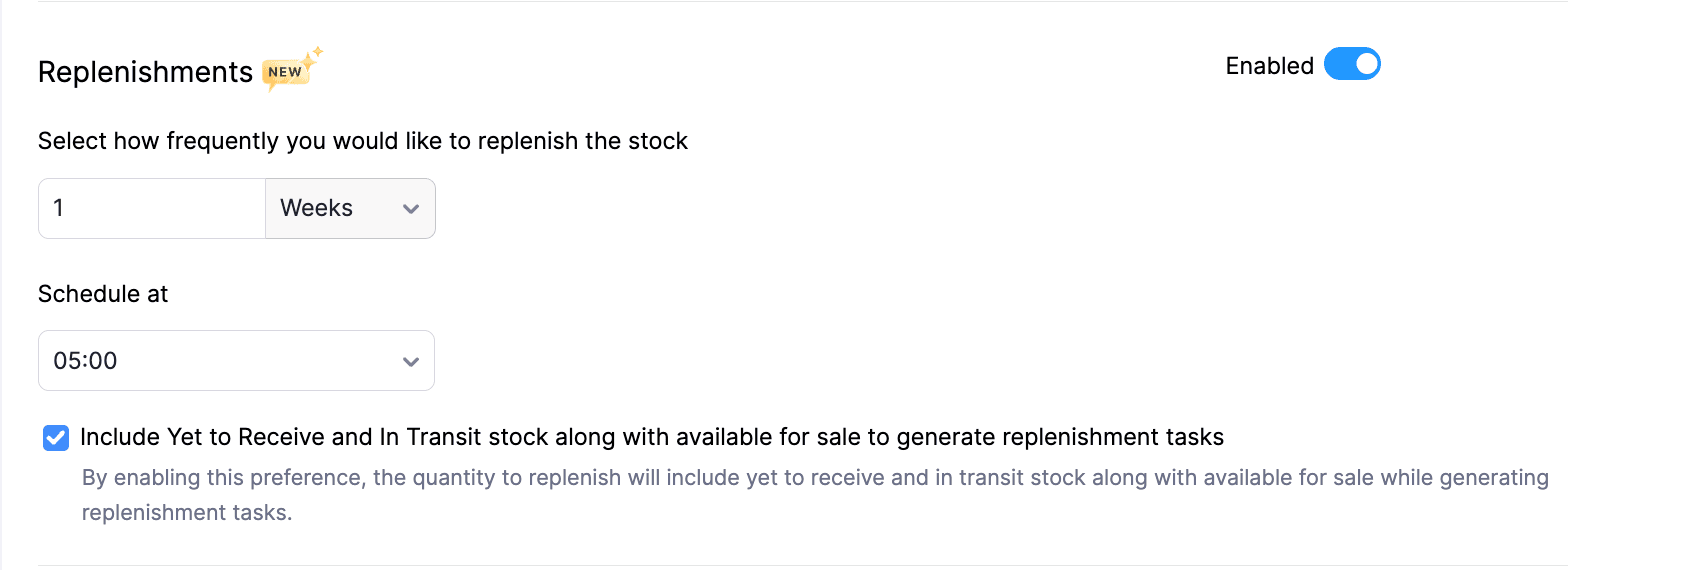
Replenishments
Replenishments help your business maintain right stock levels by identifying items that needs to be reordered. When an item reaches it’s reorder level, it is listed under Pending Replenishments. From there, you can create purchase orders or transfer orders and replenish the stocks.
To enable Replenishments in Zoho Books:
Go to Settings.
Under Module Settings, select Items under General.
In the next page, scroll down and enable the toggle next to Replenishments.
- Select how you would like to replenish the stock: Choose the frequency to replenish the stocks in your organization. The available options are Days, Weeks, and Months.
- Schedule at: Choose the time you want to replenish the stocks.
- Include Yet to Receive and In Transit stock along with available for sale to generate replenishment tasks: Enable this option if you want to include these stocks for replenishment tasks.
Click Save.
 Yes
No
Yes
No
Thank you for your feedback!