Adding a Microsoft Connector to Mail360
Adding a Microsoft connector in Mail360 involves two important steps:
Step 1: Setting Up an Azure Application
Creating an Azure application involves designing software that integrates with Microsoft services, such as Outlook, Microsoft Graph APIs, etc. The process involves registering a new Microsoft Azure App, enabling the necessary APIs for that registration, and handling authentication.
A. Registering an Azure Application
Creating an application in Azure AD enables secure authentication, authorization, and integration with Microsoft services.
To create an Azure application, follow the below steps:
- Go to Microsoft Azure Portal.
- Log in with your Outlook account.
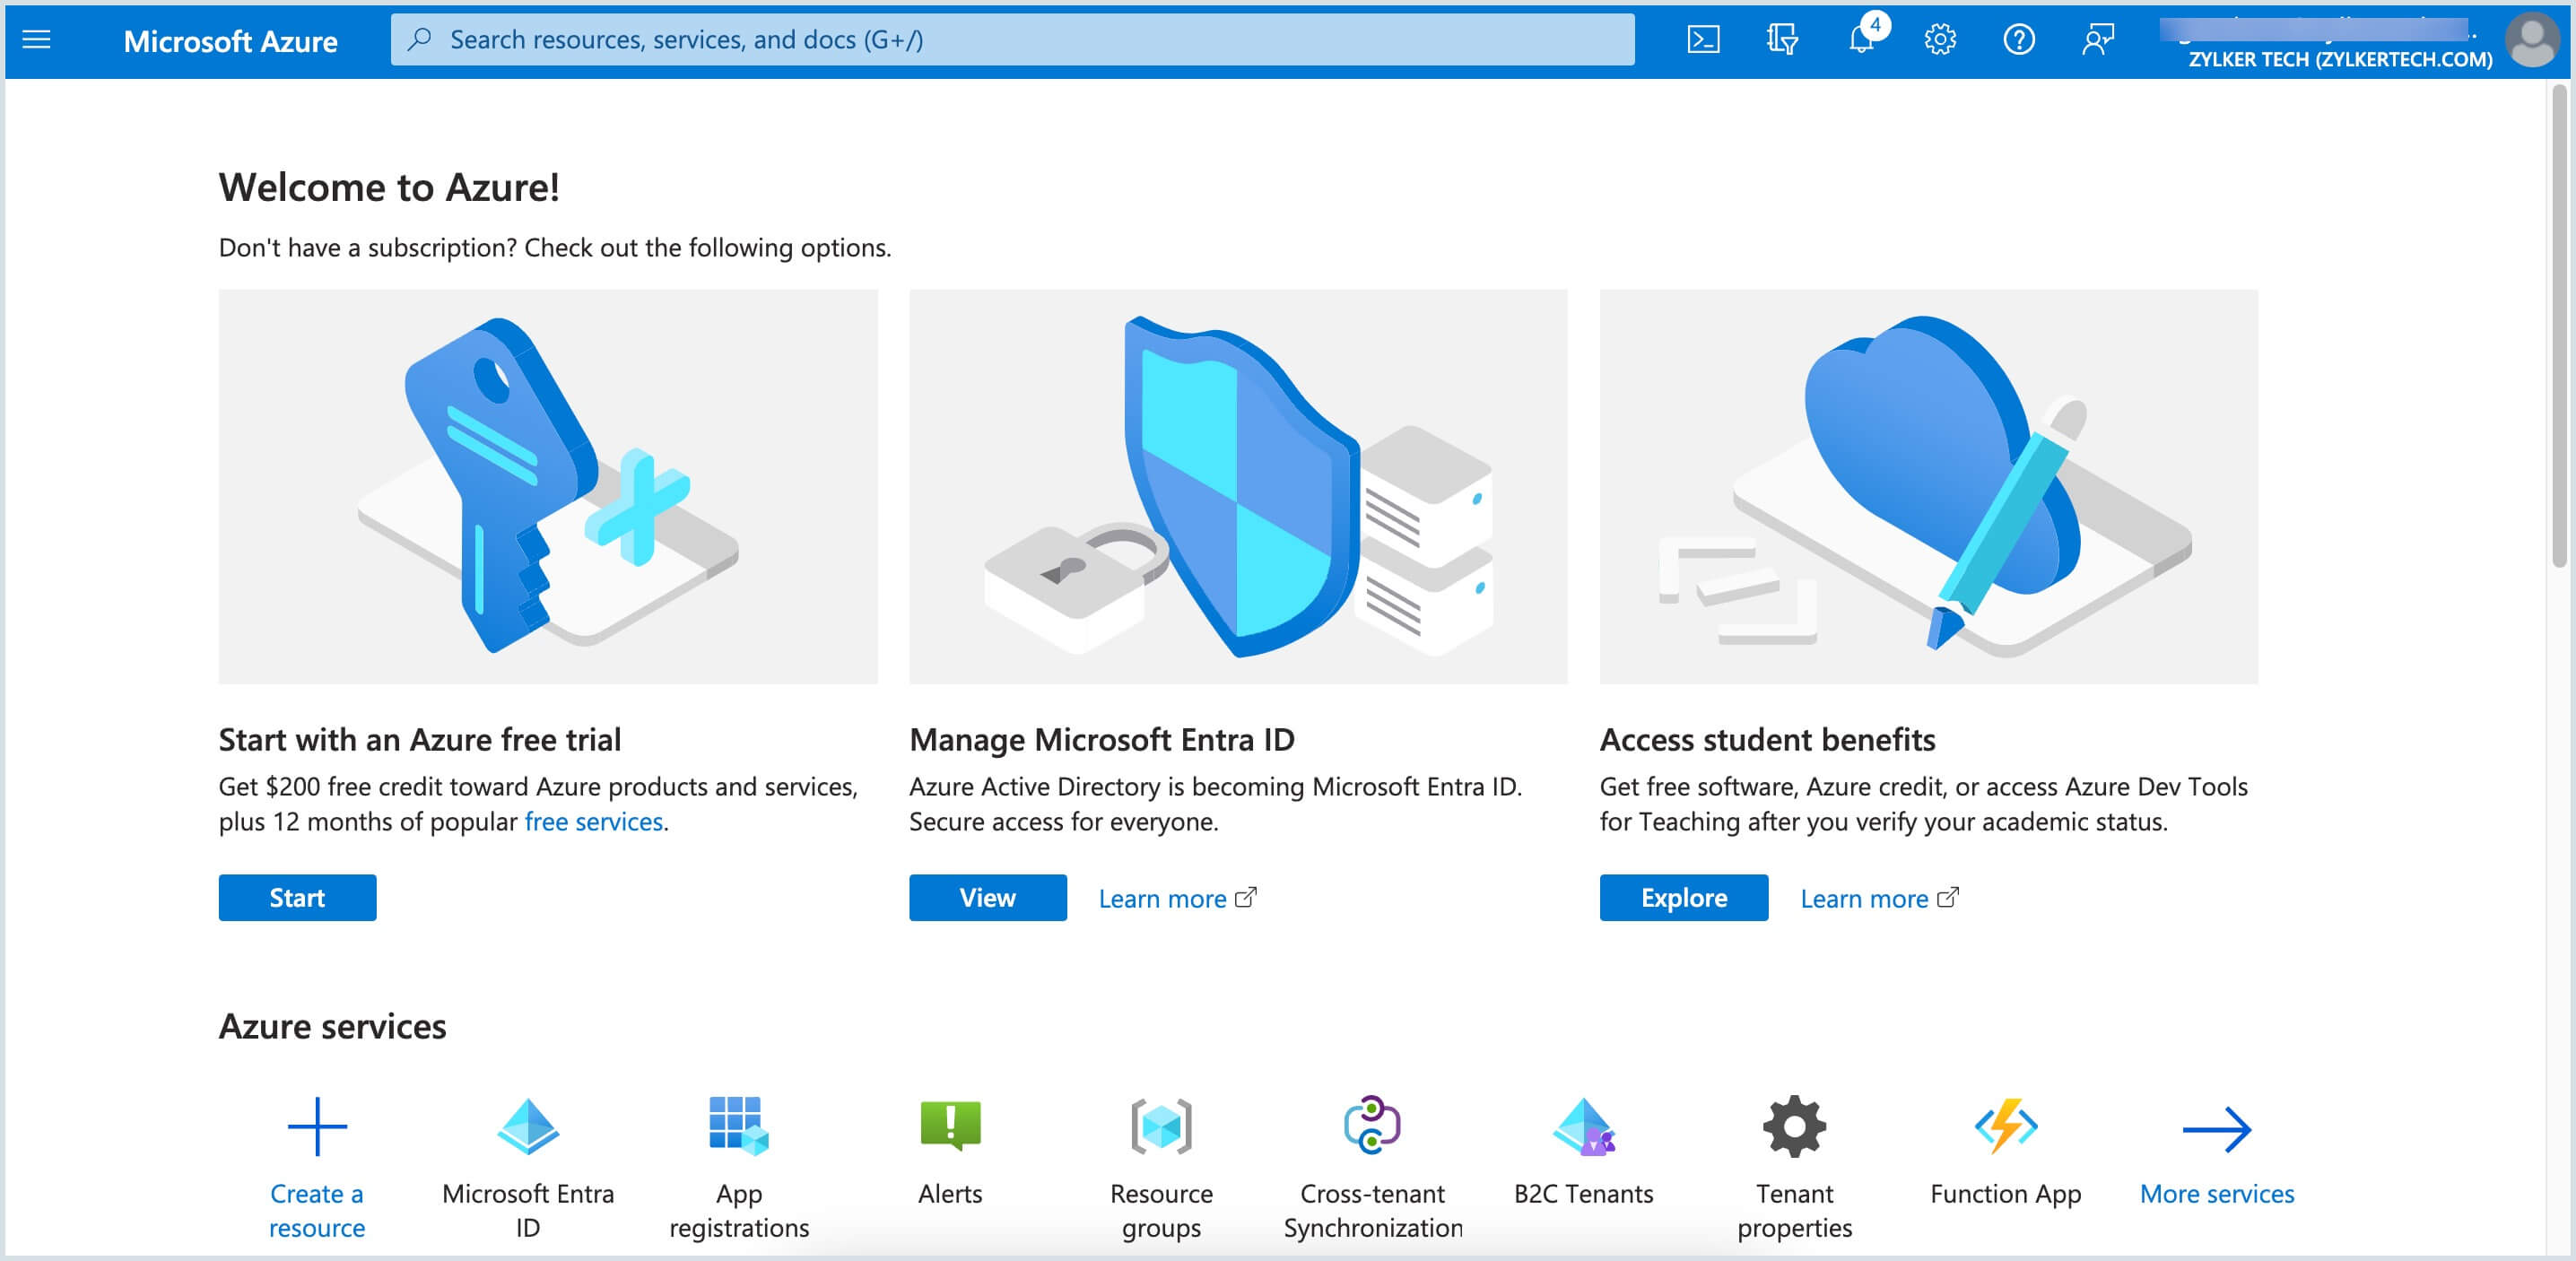
- Choose Microsoft Entra ID (previously named Azure Active Directory) in the left navigation menu.
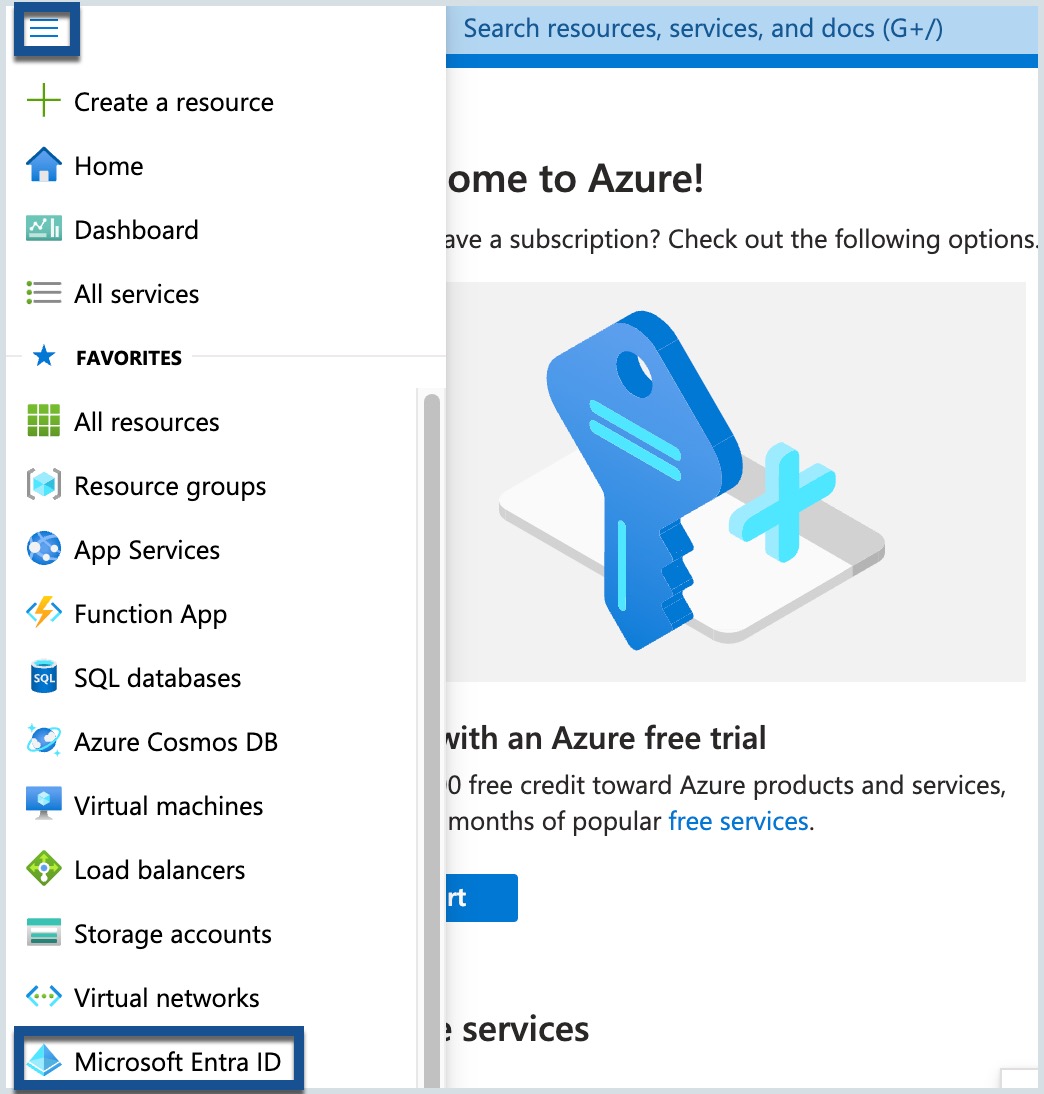
- Choose App Registration> New Registration.
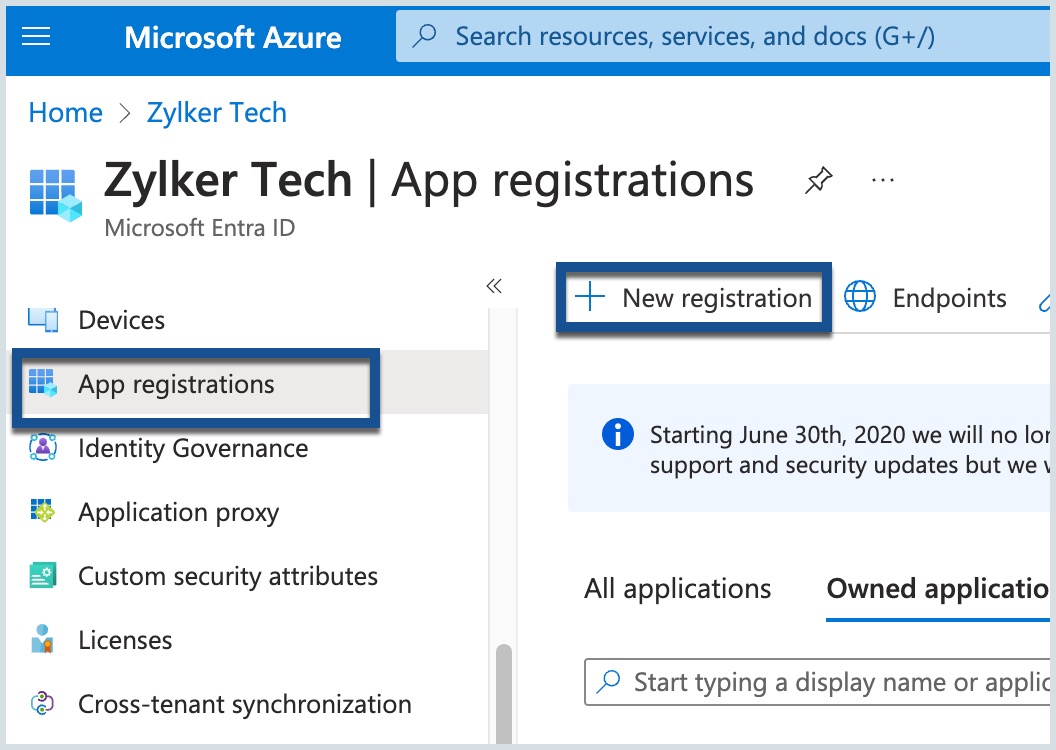
- Enter a name for your application. This name will be visible to your users, so choose one that aligns with your application's purpose.
- Choose the application's account type. This setting determines who can use the application or access its associated API.
- Choose the platform as Web. Provide the Redirect URI as https://mail360.zoho.com/api/connectors. This is to be mentioned to specify where the authentication server should send the authorization code (or tokens) after successful user authentication.
- Review Microsoft's Platform Policies, then click Register.
Note:
- Ensure that the service name you specify while setting up your application in the Google or Microsoft developer platform matches the Service Name you specify when adding a connector in Mail360.
- Ensure that the redirect URL you provide while setting up your application in Google or Microsoft developer platform, matches the redirect URL displayed on the Connector page within Mail360.
Your Azure application is successfully registered. Note that an Application (client ID) is created for your application.
B. Enabling the Necessary APIs & Permissions
Depending on your application's purpose, you'll need to enable specific APIs and define configured permissions that will control what actions your application can perform or what data it can access within a Microsoft system.
To enable APIs and define permissions for your application, follow the below steps:
- Navigate Home > Microsoft EntraID > API permissions in the Microsoft Azure portal.
- Select the application for which you want to configure.
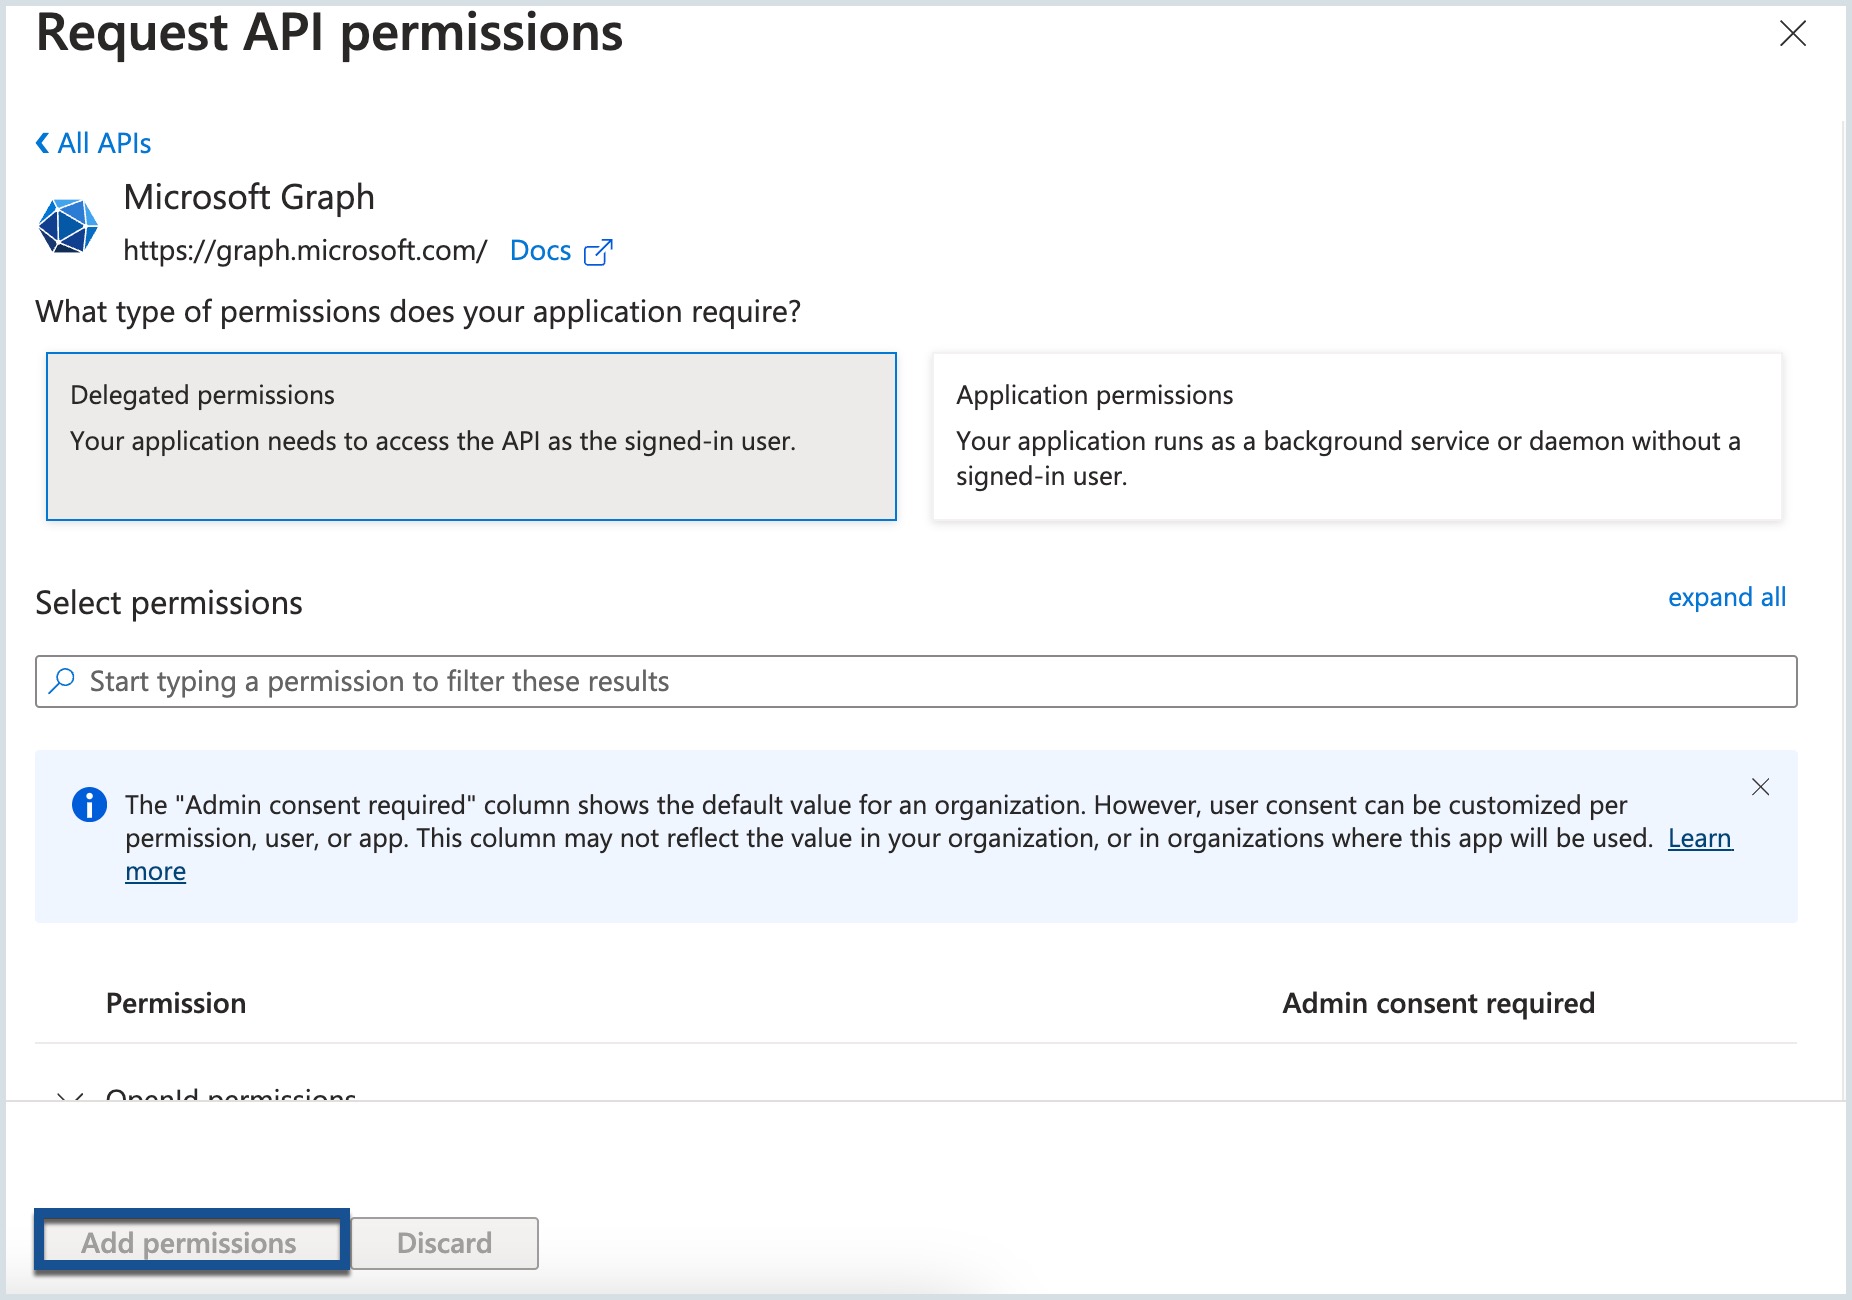
- Click + Add a Permission.
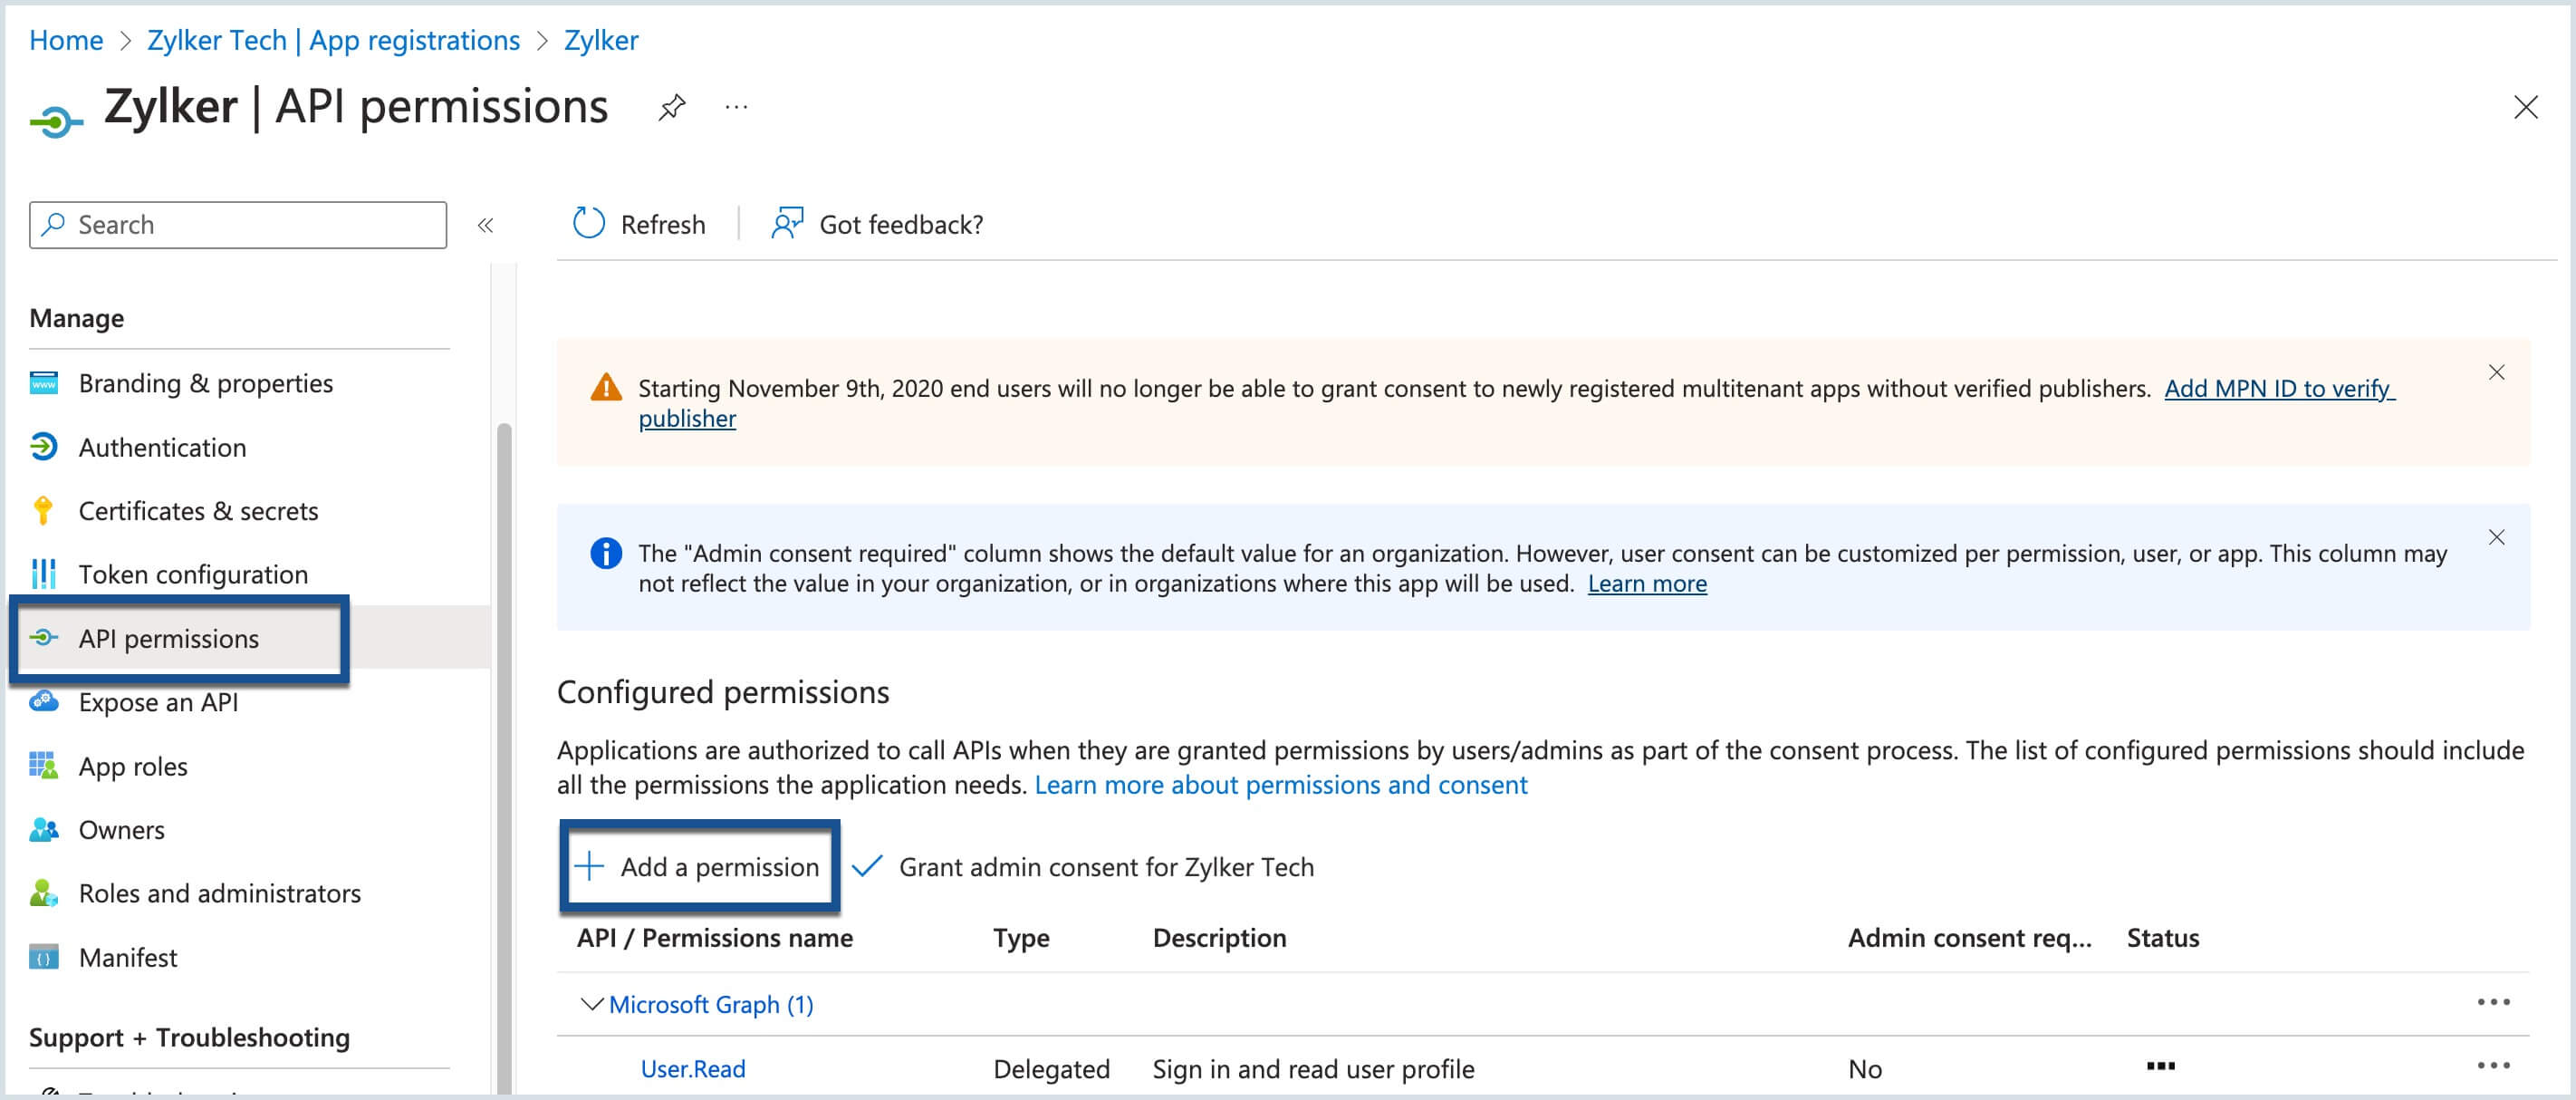
- Choose the type of permissions your application requires. Use Delegated permissions i.e.: Your application needs to access the API as the signed-in user.
- Click + Add a permission to add the following required permissions:
- Microsoft Graph: Microsoft Graph API provides a unified endpoint to access and manipulate data across Microsoft 365 and other cloud services. It streamlines development for apps integrating with Microsoft platforms.
- User.Read : Sign in and read user profiles.
- offline_access : Maintain access to data you have given it access to.
- profile : View the user's basic profile.
- Microsoft Graph: Microsoft Graph API provides a unified endpoint to access and manipulate data across Microsoft 365 and other cloud services. It streamlines development for apps integrating with Microsoft platforms.
- Click Add Permissions.
C. Creating OAuth 2.0 Credentials
Creating credentials is a crucial step to authenticate and authorize your application to access and interact with specified APIs. This ensures a secure and controlled data exchange between your application and the service.
To create the credentials, follow the below steps:
- Navigate Home > Microsoft EntraID > App Registrations in the Microsoft Azure portal.
- Select the application you want to configure.
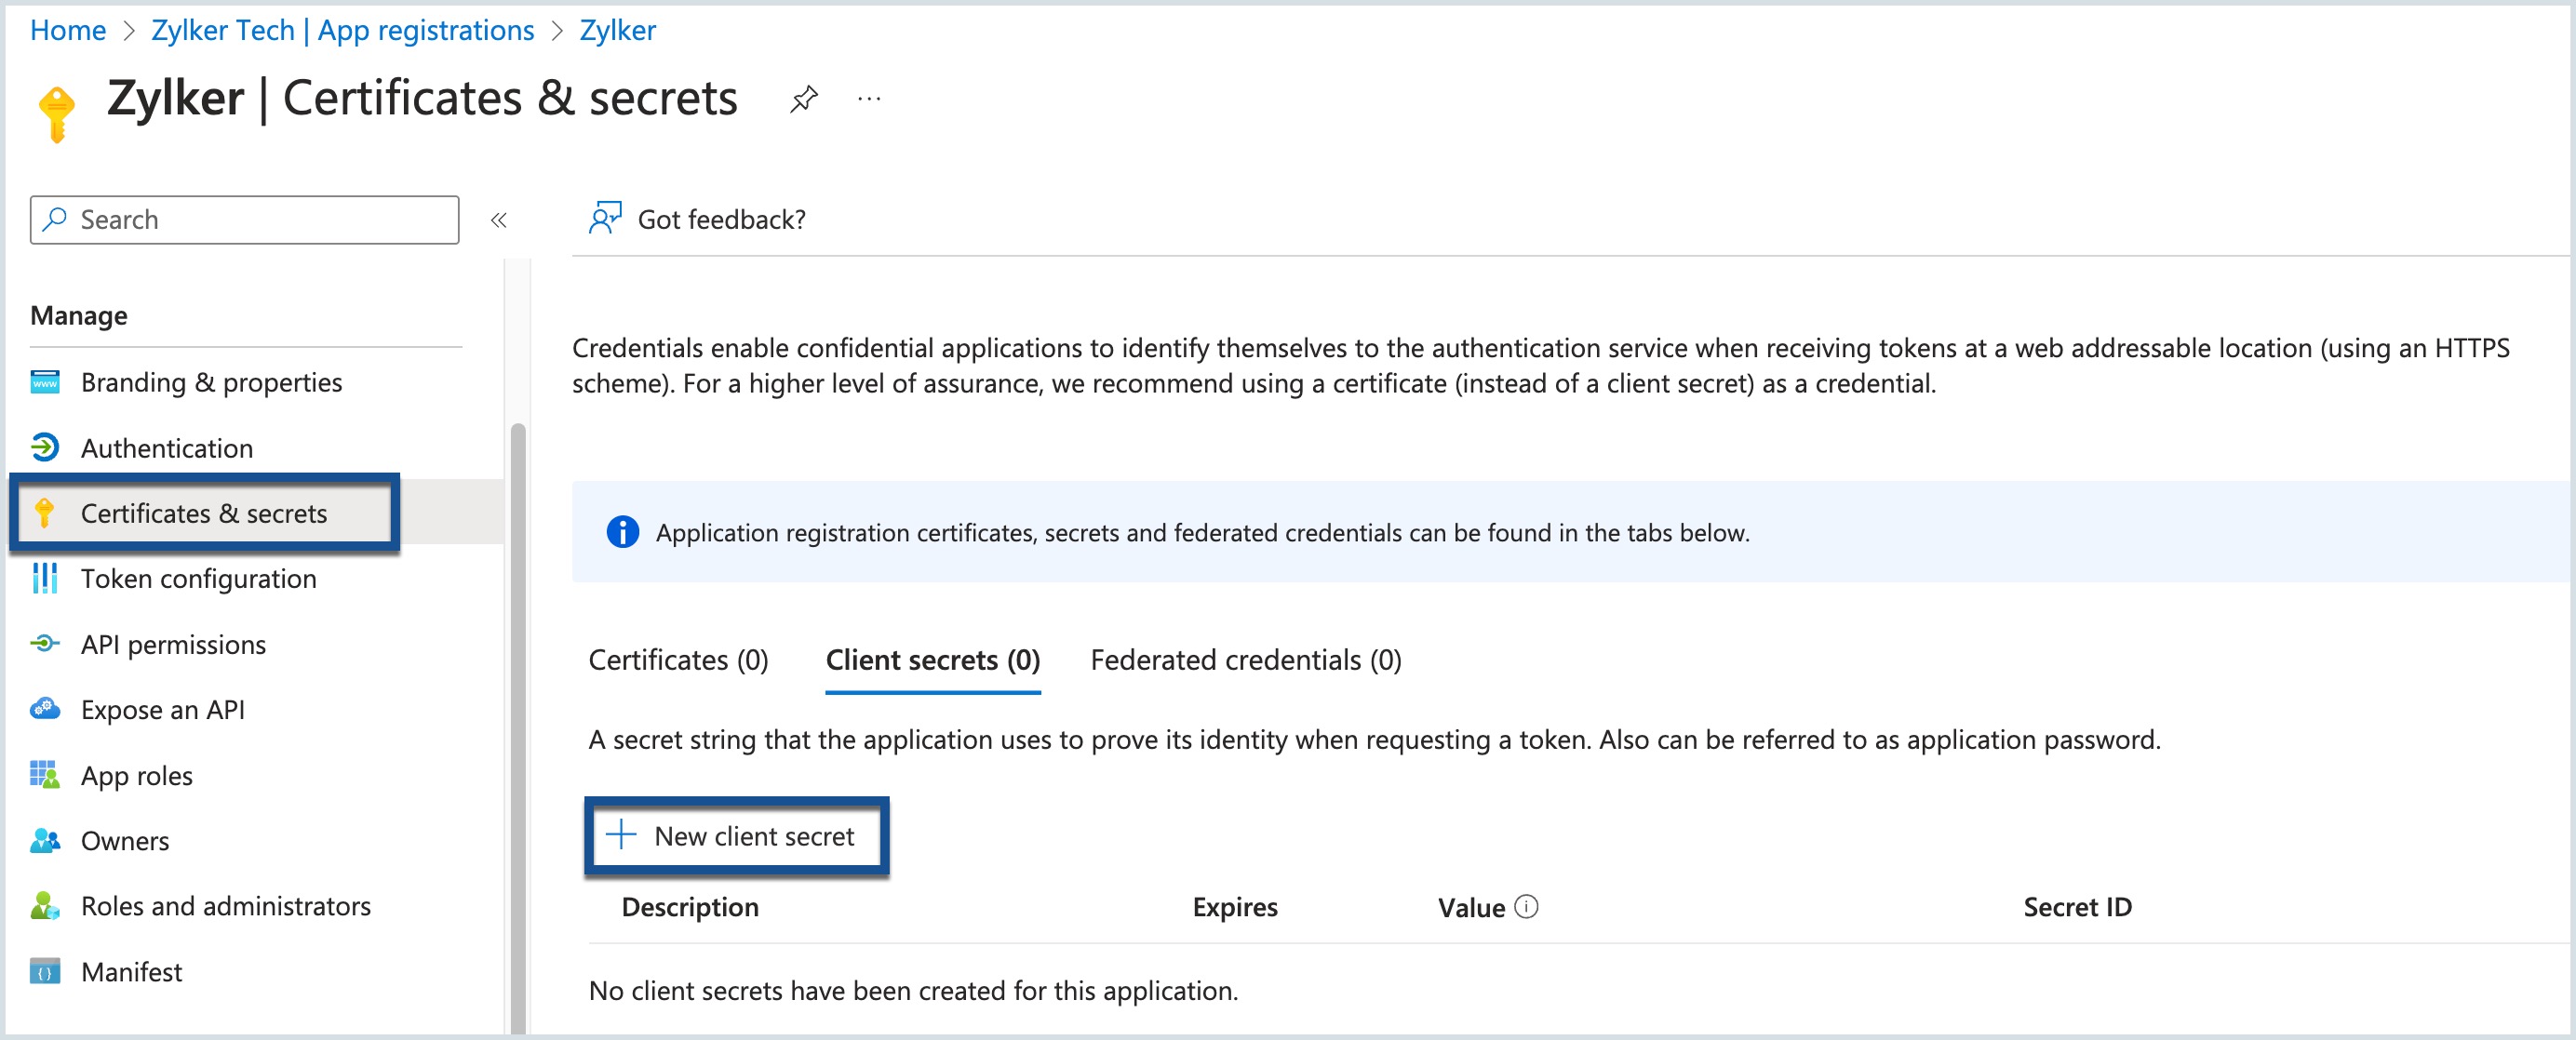
- Select Certificates & Secrets in the left navigation menu.
- Click + New client secret.
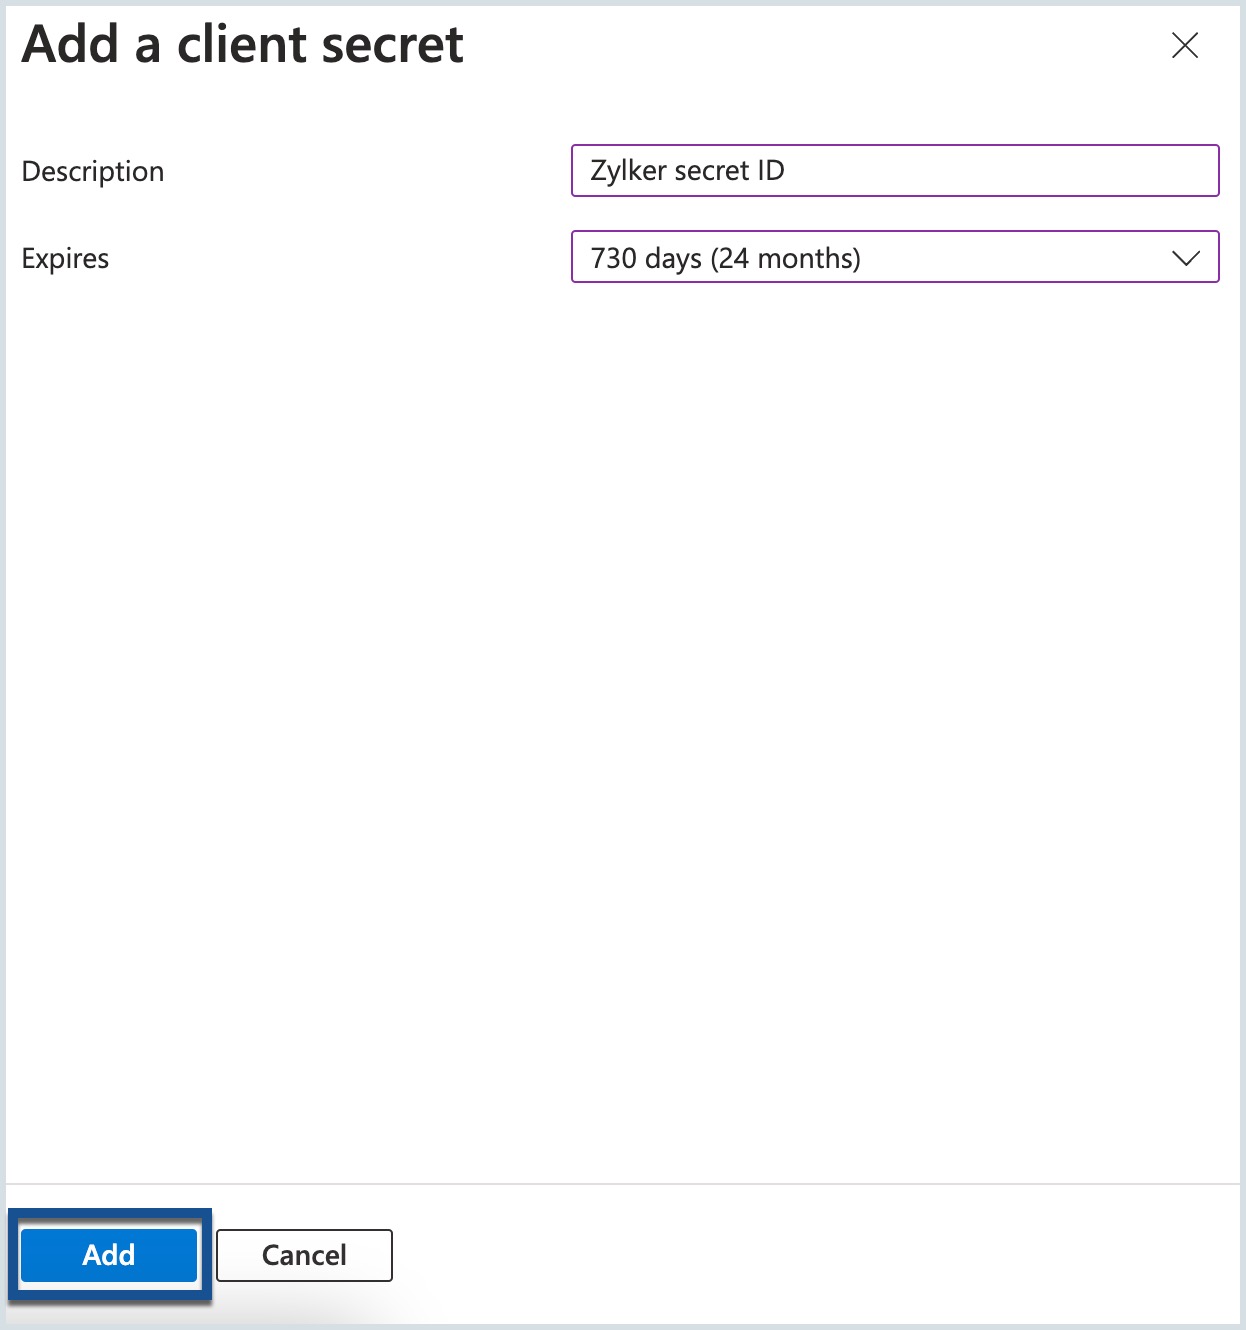
- In the Add a Client Secret window, enter a description and set the expiration date to 24 months.
- Click Add.
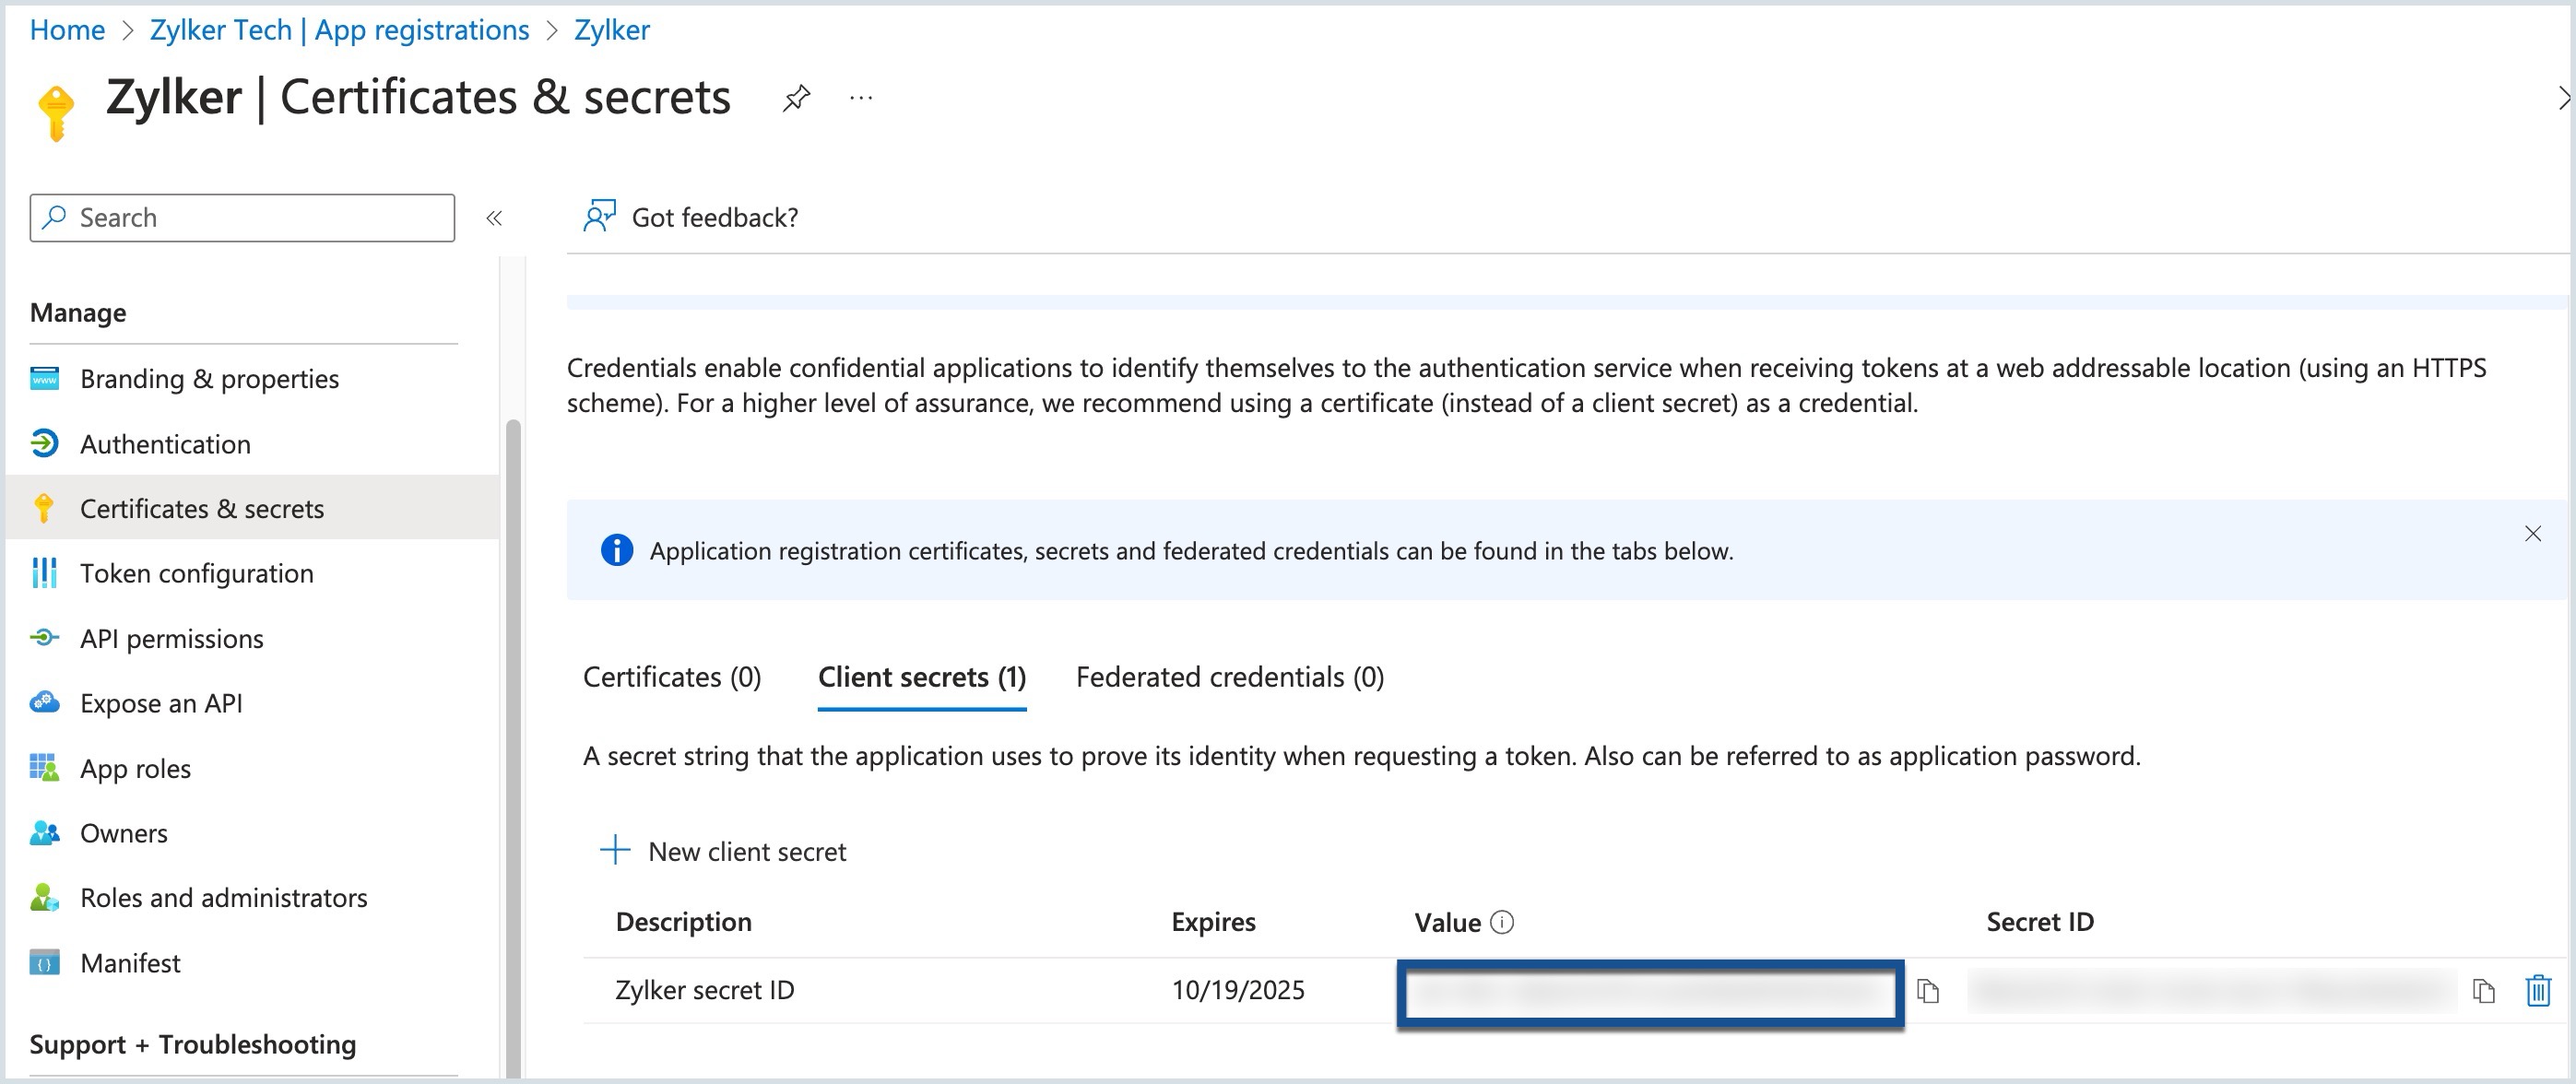
- Copy the value from the Client Secrets ID from the page and save it somewhere safe for future reference.
Step 2: Integrating the Created Azure application into Mail360.
Integrating the created Azure application with Mail360 is necessary to utilize the functionalities of Microsoft services, and enable your application to efficiently manage email communications and access contact information through the Mail360 platform.
To integrate the created Microsoft application to Mail360, follow the below steps:
- Log in to your Mail360 account.
- Go to Connectors on the left pane.
- Click Add connector.
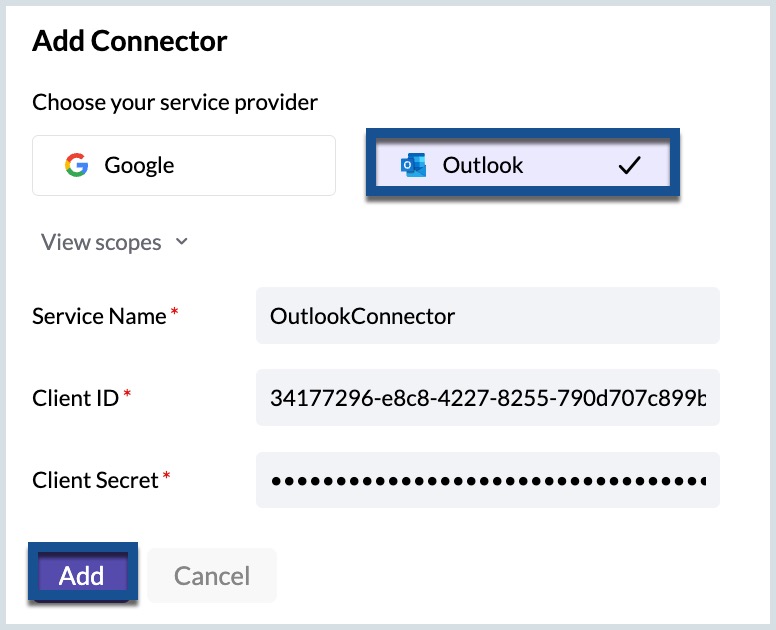
- In the Add Connector window, choose Outlook as your service provider.
- Provide a Service Name.
- Enter the Client ID and the Client Secret.
- Click Add.
Congratulations! The Microsoft connector has been successfully added to Mail360.


