


Accounts in Mail360
Accounts in Mail360 represent the mailboxes you want to access through Mail360's universal APIs in your application. Based on where the email accounts are hosted, there are two types of email accounts that can be added to Mail360.
They are:
- Sync Accounts - Sync accounts are email accounts hosted in third-party email providers such as Gmail, M365, Outlook, etc., and Mail360 syncs emails from these providers through the IMAP protocol, enabling access to those emails via Mail360 APIs.
- Native Accounts - In addition to syncing emails from third-party email service providers, Mail360 also offers the capability to send and receive emails directly if the email accounts are hosted within Mail360 itself. These specific accounts are referred to as Native accounts. Any emails sent or received within these Native accounts are processed by Mail360 and made accessible to your application through the unified Mail360 APIs.
Sync Account Addition
To add an account as a sync account in Mail360, follow these steps:
- Log in to your Mail360 account.
- Navigate to the Accounts section on the left pane.
- Click on Add Account located in the top right corner.

- In the pop-up, select the account type as Sync.

Note:
The option to select the account type in the Choose Account Type pop-up will only become available once you have successfully added and validated your domain in the Domains section. If you need guidance on how to add and verify your domain, please refer to the Domain Addition help page. If this step is not completed, the account type will be automatically set to the default, which is the sync account.
To proceed with adding sync accounts, you have the option to choose either of the two methods below:
1. Adding using Login Credentials
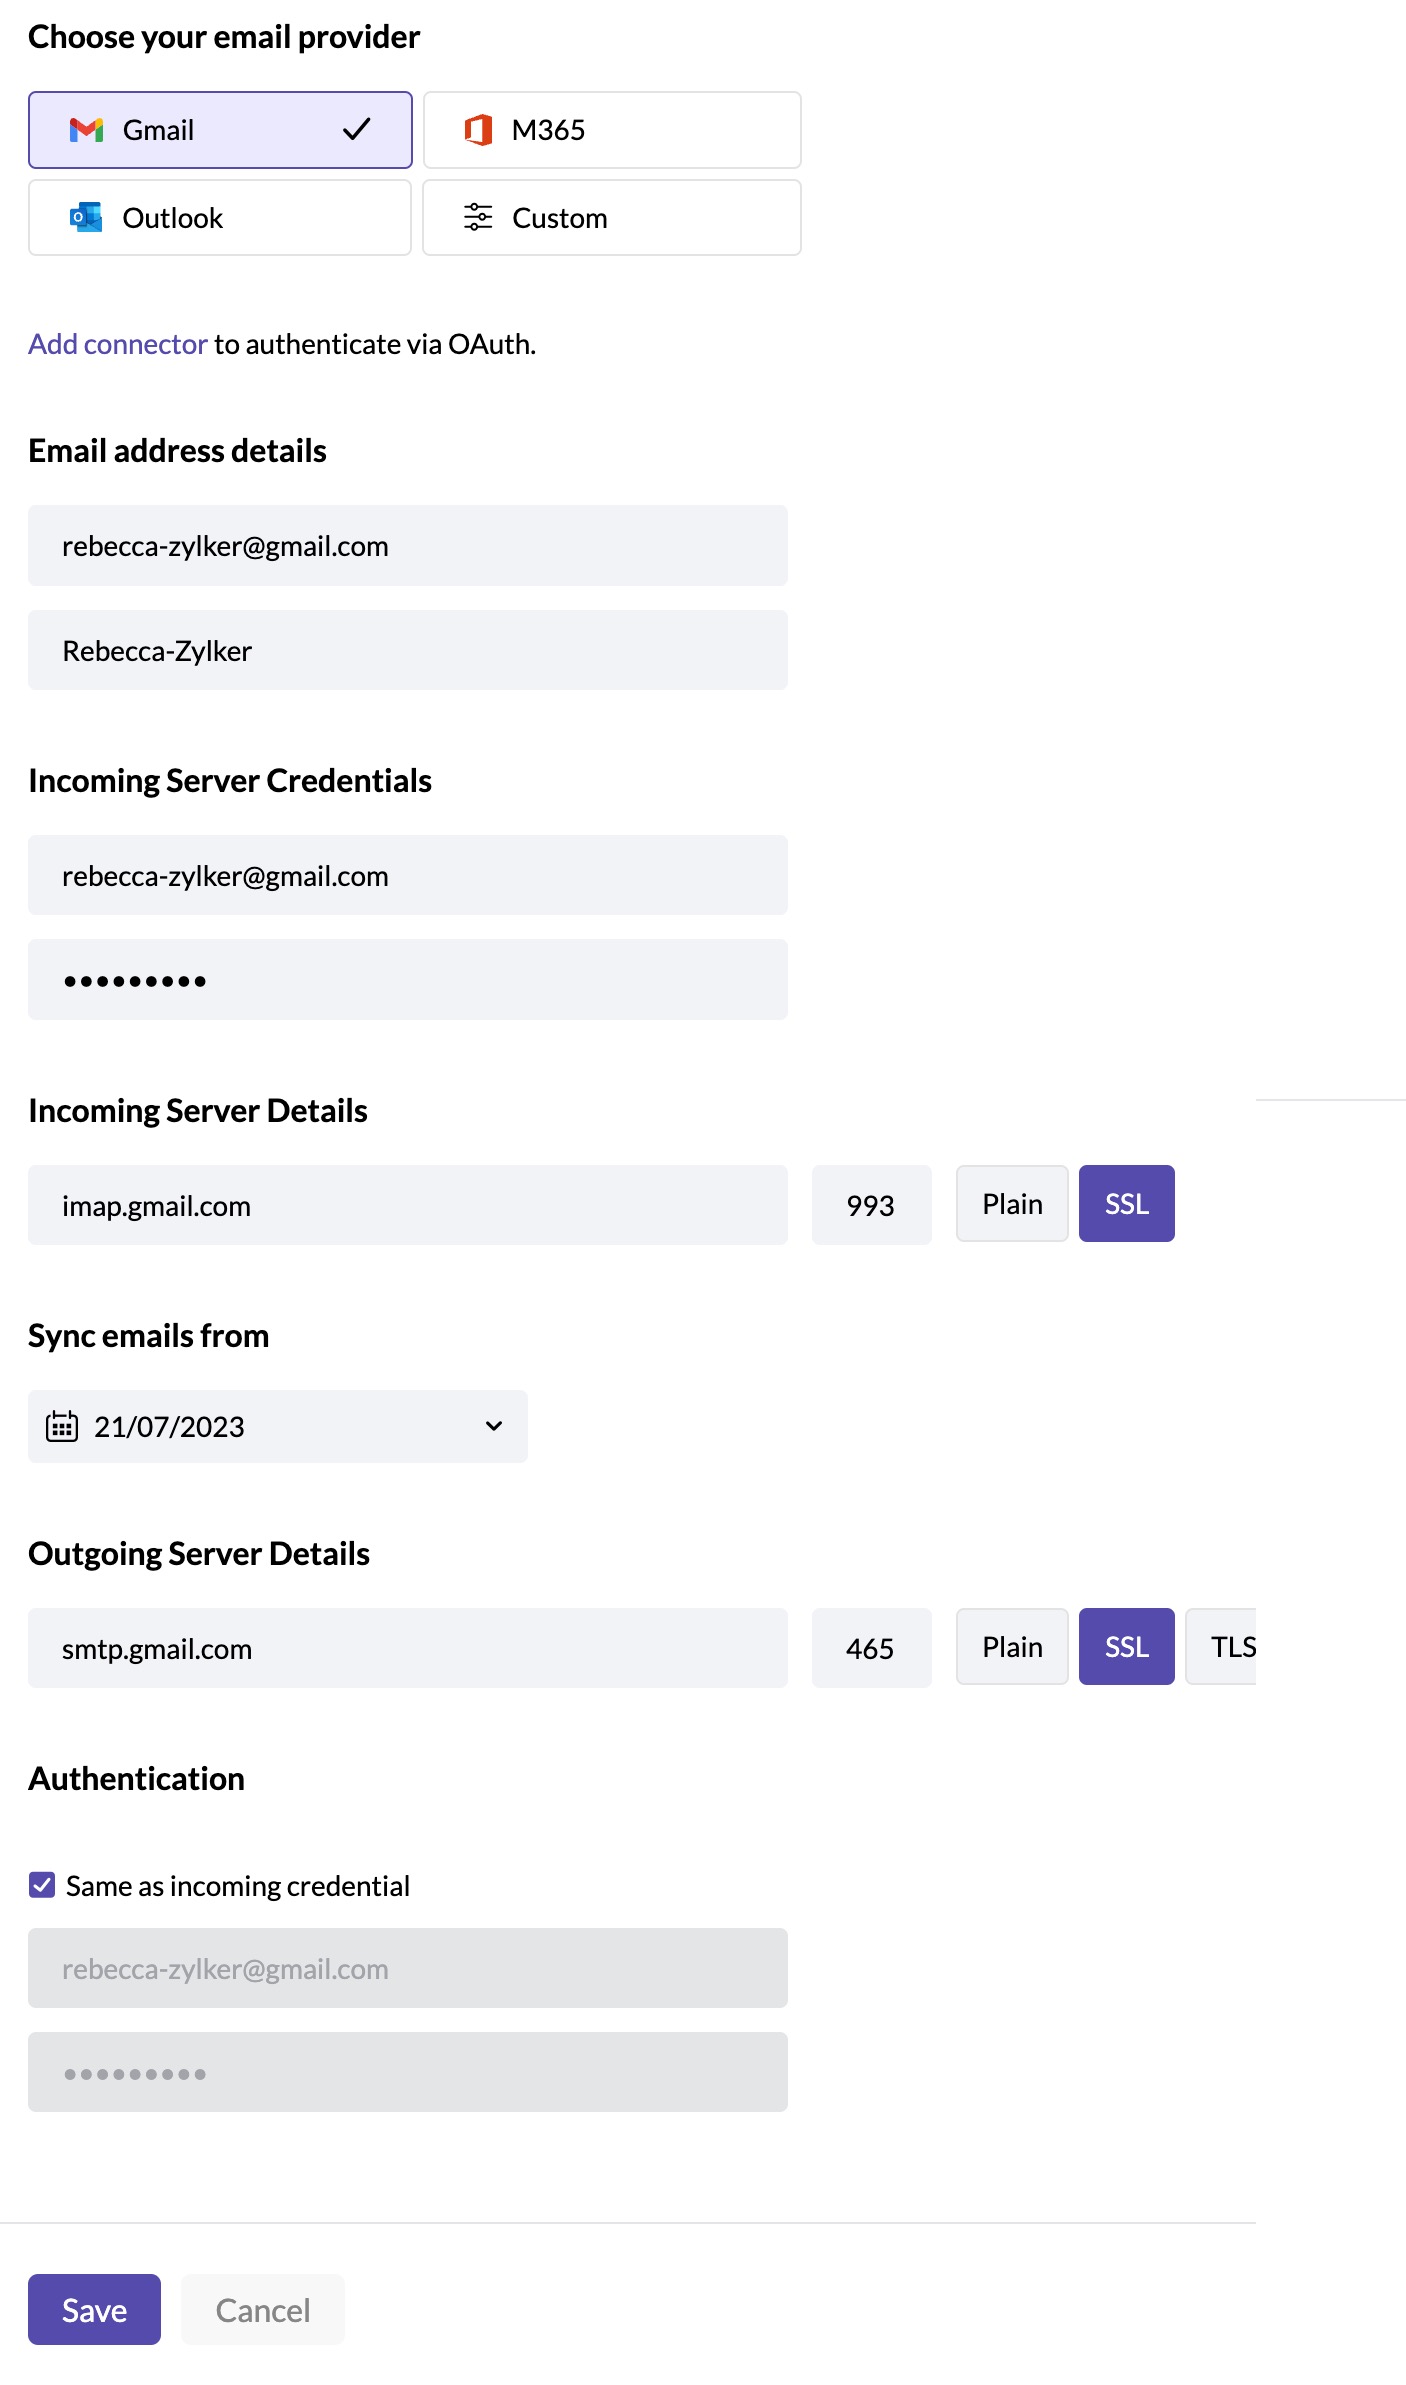
If you have chosen to add the account using login credentials, you can either choose from the list of available providers, with preset configuration information or provide all the required details manually.
- Some well-known providers are already listed by Mail360, with preset configuration details, to make the setup process simple.
- If your provider is not listed in the given options, choose Custom in Choose your email provider section to provide the required server details like hostname, port, and SSL settings manually and ensure a successful connection.
After selecting your email provider, follow the below steps:
- Provide the email address and display name in the Email Address Details section.
- Provide your username and password( or app-specific password) in the Incoming Server Credentials section.
- Provide the incoming server address and port number, and choose one of the encryption methods (Plain or SSL) in the Incoming Server Details section.
- Choose the date from which you want to synchronize your emails in the Sync Emails From section.
- Provide the outgoing server address and port number, and select one of the encryption methods (Plain, SSL, or TLS) in the Outgoing Server Details section.
- Provide your username and password in the Authentication for the outgoing server, or auto-fill them by clicking the checkbox in the Same as the incoming credentials section.
- Click Save to add the account

Once your account is added, it will be listed in the Accounts section.
Note:
- While providing details for the Incoming Server Credentials, ensure that you are providing an app-specific password if Two-Factor Authentication (TFA) is enabled. Because most of the mail providers like Gmail, Zoho Mail, etc., accept authentication only through app-specific passwords for added security. Therefore, to successfully sync your account with these providers, generating and using an app-specific password is essential when TFA is enabled.
- Incoming server details and outgoing server credentials will be auto-filled if one of the listed providers is chosen in the Choose your email provider section. Otherwise, if custom is chosen, you must make sure to provide the appropriate incoming and outgoing server details, port number, and encryption method to ensure a successful connection.
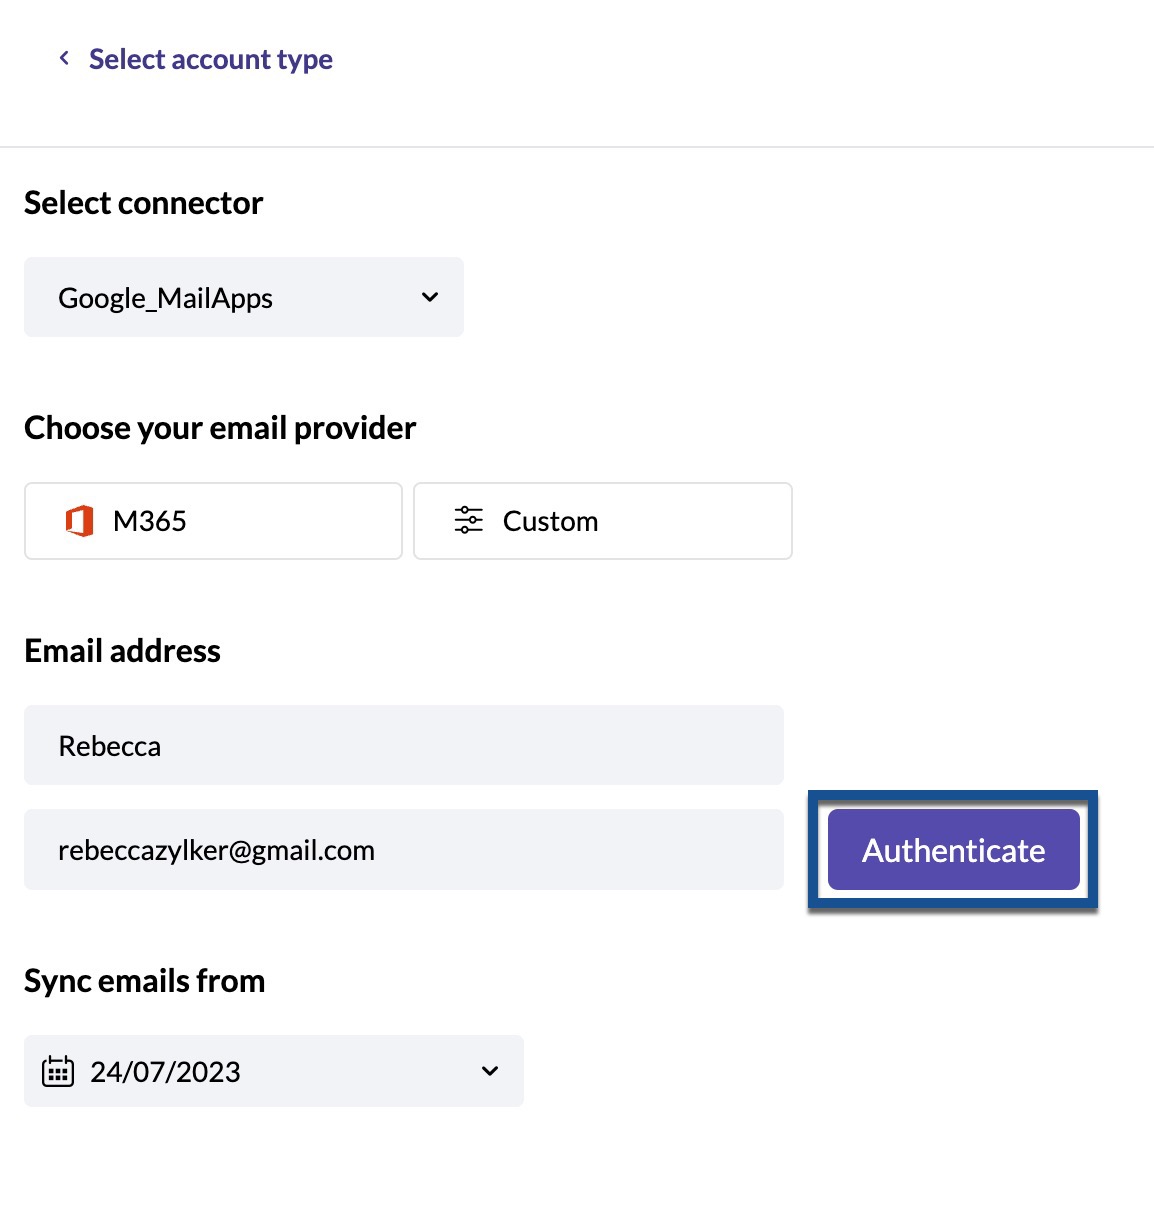
2. Adding using Connectors
- Select the connector in the drop-down menu provided in the Select Connector.
- Provide the display name and email address.
- Choose the date from which you want to synchronize your emails in the Sync Emails From section.
- Click Authenticate to add the account. The newly added account will be listed in the Accounts section.

Note:
- The option to choose Select Connector will be available only when you have already added connectors in the Connectors section.
- You can add connectors in the Connectors section located in the left pane of the Mail360 application. To add a connector, you need to provide the email provider details and server details, based on which the connectors will be configured to pull the email data from the respective accounts from the designated servers.
Native Account Addition
After successfully adding and verifying your domain in Mail360, you can proceed to add an account as a native account by following the provided steps:
- Login to your Mail360 account.
- Navigate to the Accounts section on the left pane.
- Click Add Account located on the top right corner.
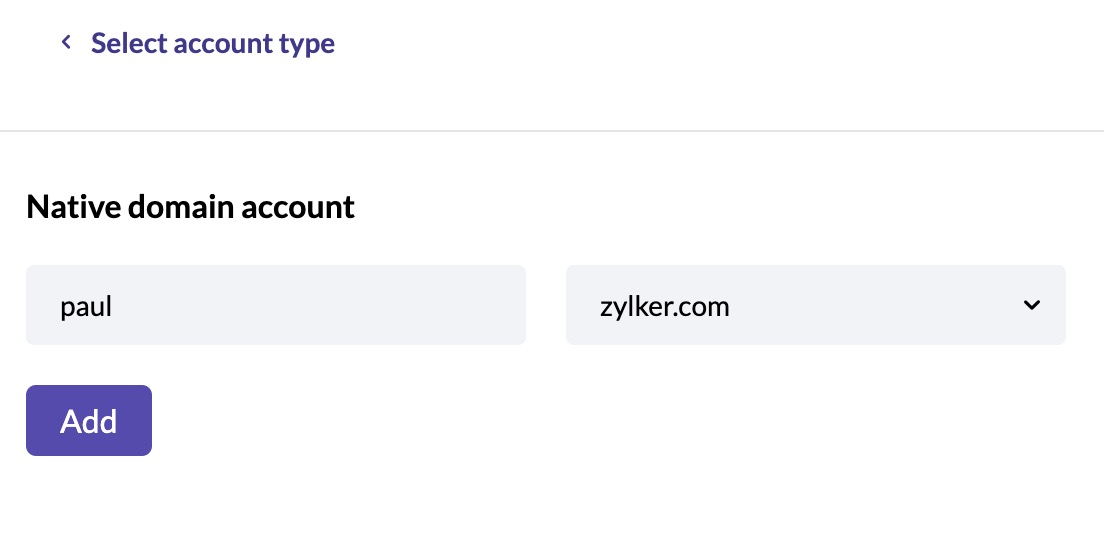
- To add a native account, Select the account type as Native in the pop-up window. Adding a native account page will pop up.
- Provide the username part of the email address, and then choose the domain from the list of already added domains using the drop-down menu.
- Click Add to add the account.

Once your account is added, it will be listed in the Accounts section.
Note:
If you need guidance on how to add and verify your domain, please refer to the Domain Addition help page.