Building Your Website
- Last Updated : October 13, 2023
- 12.5K Views
- 11 Min Read
Registering and Mapping Your Domain
The first step of building your website is getting your URL set up. This is the place your website will live, so spend some time thinking about the best URL for your website. As a general rule, shorter is better.
If you already have a domain registered and want to start building in Zoho Sites, skip to the "Building Your Website in Zoho Sites" section below.
Registering a New Domain
There are many different providers you can go to for registering a new domain. In fact, this service is offered via Zoho Mail. Going through Zoho to register your domain has the added benefit of automatically configuring your new domain with Zoho Mail. This guide will walk you through all the steps of registering a new domain with Zoho.
Mapping Your Domain
The steps you'll have to take to mapping your domain change depending on which provider you've purchased from. Fortunately, we have an extensive resource that provides you with instructions for many of the major providers here.
Getting an SSL Certificate
An often overlooked part of setting up your website is making sure it has an SSL certificate. Without getting into too much detail, having your website SSL certified means your website is encrypted. Once SLL certified, visitors of your website will be accessing an encrypted link between the web server storing your website and their browser. This keeps all data flowing between the web server and browser private, offering visitors an extra sense of security.
Just as importantly, without an SSL certificate, most browsers will alert visitors that your website isn't secure and should be avoided. Fortunately, getting your website SSL certified with Zoho Site is easy.
To get your website SSL certified, first choose the website you would like to get certified, then go into the Builder Mode for that website. Go into settings, and under "Configure" choose "SSL."
.png)
Click on "Get SSL Certificate" and you're done.
.png)
If you're seeing this screen when clicking "Get SSL Ceritificate," then check your Zoho One subscription settings, which I'll explain below:
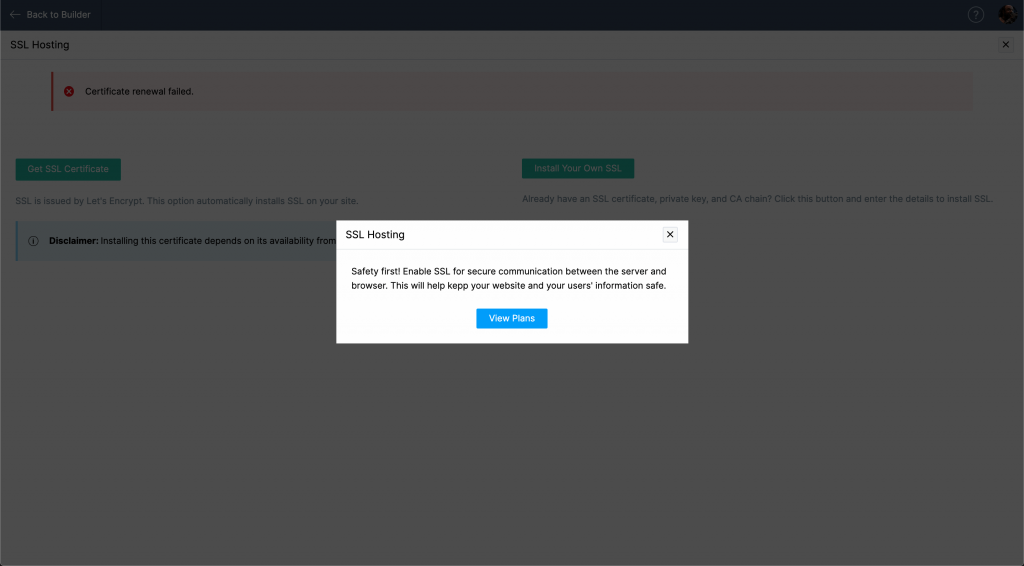
Zoho One includes 1 live site/10 employee licenses, up to 5 websites. So if you've built multiple websites, make sure you have the one you want certified chosen as your Zoho One licensed site. You can do this by clicking on your profile picture in the top right of Zoho Sites and choosing "Subscriptions." You'll see all the sites you've built listed here, and can choose which you want to be on your Zoho One license. So for example, in the screenshot below, I have two websites. As you can see, "Gaines Fitness II" is using my Zoho One license, and is able to get an SSL certificate.
.png)
Building Your Website in Zoho Sites
Building your website in Zoho Sites is easy. This guide will walk you through the general building process, mentioning particulars to keep in mind as you build, and also link you to valuable resources along the way.
Choosing a Template
Step one of building your website is deciding on what you want it to look like. Zoho Sites comes ready with dozens of pre-built templates to give you a head start on building your website.
Generally, it's good to choose a template that most resembles the site you're trying to build from the beginning. Consider large components of the template, like site structure, and more nuanced aspects of the template, like how it uses color. For example, some templates are geared toward having large images appear frequently throughout the site. That's perfect for a business where product images are important, but if you run a service-based business where images of products are less vital, you should look for a template that best fits your requirements out of the box. Selecting a template that is closest to your final vision will make the entire building process easier and put you on the fast track to getting your website up and running as quickly as possible.
Using the Visual Editor
Once you have your template, you'll want to make a few key decisions about the overall layout of your website before you start adding elements. To do this, go into the visual editor by clicking on the blue arrows to the right of the screen and selecting "Visual Editor."
.png)
The visual editor lets you make site-wide changes like the colors and fonts that are chosen as defaults for elements of your website, the layout of your site's header, and more. Making these decisions early on will help you start to build a cohesive visual style for your whole website, but you can also change your mind and edit these elements down the road.
.png)
Building a Homepage
Your homepage is the first thing a visitor sees, so you want it to be clear while also giving visitors the ability to find what they're looking for without too much digging. This means having clear, concise sections, and making good use of the footer and header. You can read all about the core goals of homepages and see some examples of great homepages here.
Using the Builder
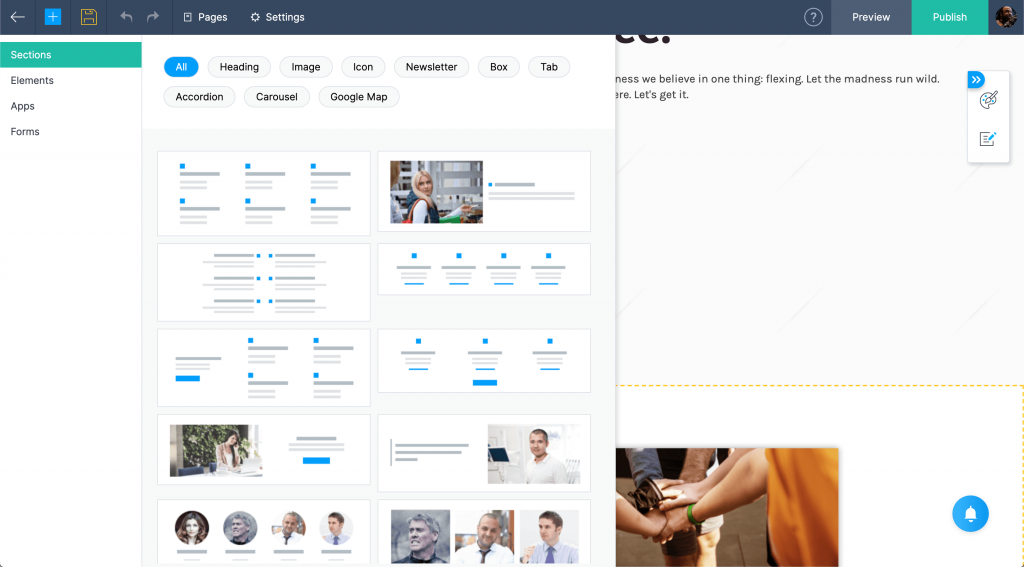
The drag-and-drop builder is the primary tool for building your website with Zoho Sites. It's useful to think of your website as being made up of sections, and each section is made up of elements.
Sections: These are 190+ pre-designed layout templates that you stack to make webpages. They're made up of various elements.
Elements: These are text, images, audio, and video on your website. Each element comes with individual customization options to give you all the flexibility you need.
Adding a section in Zoho Sites with the builder is easy. When you hover between two existing sections, you'll see the "+Add Section" button pop up. Once you click on it, you'll be given a bunch of different section options.
Editing Your Header's Navigation Menu
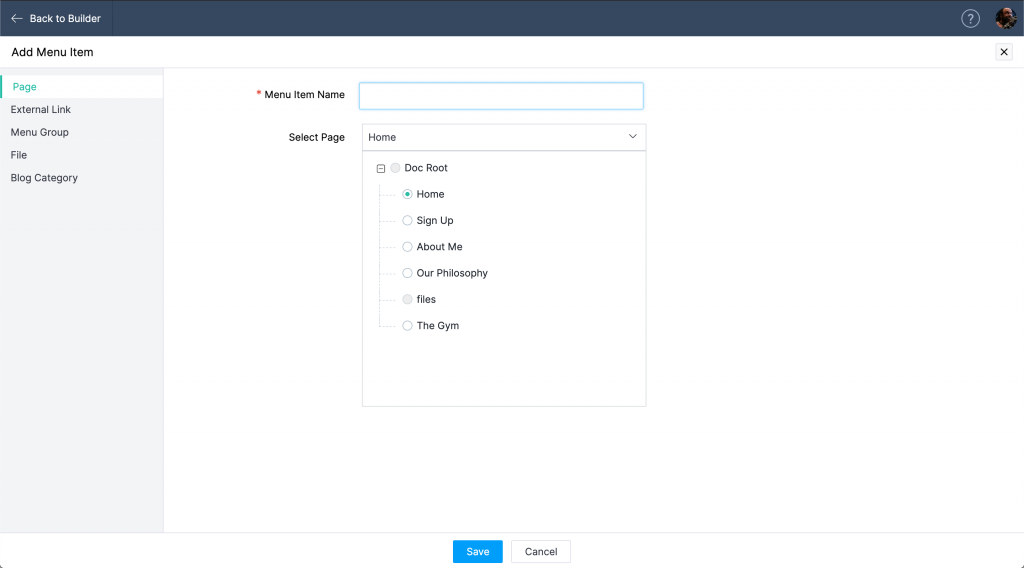
To edit the navigation menu in the header, go to Settings and click on "Menus" under "Customize." From here, you'll see that the menu selected automatically is called "default." That's your header's navigation menu. You can add and rearrange navigation menu items here. To add an item, click "add menu item," type a menu item name (which is the text that will be displayed in your header for this menu item) and choose the page you want it to link to, as seen below.
You can read more about making an efficient navigation menu here.
Creating Pages
You'll likely want multiple pages on your website to serve different purposes. For example, an "about" page for info on your business, a "pricing" page if you offer services, or a "store" page if you're selling products.
To add a page, click on the blue "+" button on the top left of the screen and choose "page". From here you can edit the page's info before saving it to your site.
Adding a CTA
CTA buttons can be extremely effective to get visitors to complete a specific action that you set as a goal. Because they are supposed to be the main sell, and the last action a visitor takes on a page, the CTA is generally placed at the bottom of a page, or at the top and bottom.
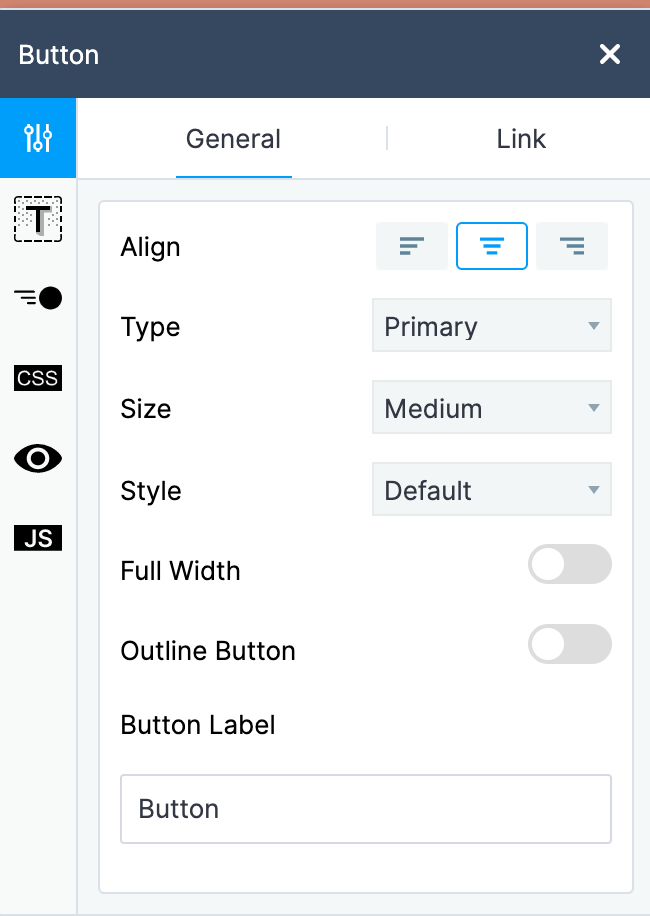
When in the Zoho Sites Builder mode, adding a CTA is easy. CTAs are "elements," so you can add them to any section in the the same way you can add other elements like images, headers, dividers, icons, etc.
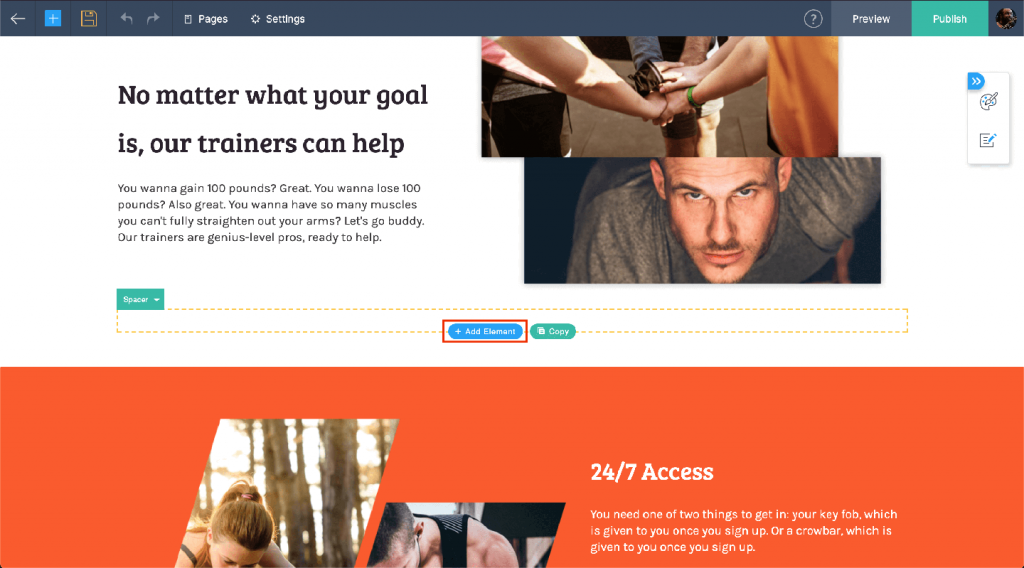
To add a CTA, hover your mouse over the section you want to add it and click the "+ Add Element" button that appears. In the menu that slides out, choose to add a button. Your button will automatically be placed on the page and you'll be shown a menu where you can edit button details like color, text displayed on the button (via the button label field), and where you want the CTA button to link to.
Adding Forms to your Website
Forms can be used on your website to collect visitor information for things like support or contact requests, lead generation, visitor feedback, and more. It's important to have the right form for the right job.
For more info on building and designing effective forms, check out this series we've written.
Adding Forms to Your Website
In Zoho SItes, forms are treated just like any other element, and they're added to your website via the Builder tool the exact same way.
Choosing the Right Form to Use
There are a few different types of forms you can add that each have particular use cases.
CRM webform: This will allow you to embed a form you've built in CRM directly onto your website. These forms are great for lead generation.
Zoho Forms: This will allow you to embed one of the Forms you've already built inside Zoho Forms. Zoho Forms integrates with many other apps and services, making it act as a sort of hub with which you can built a variety of forms, all with different purposes.
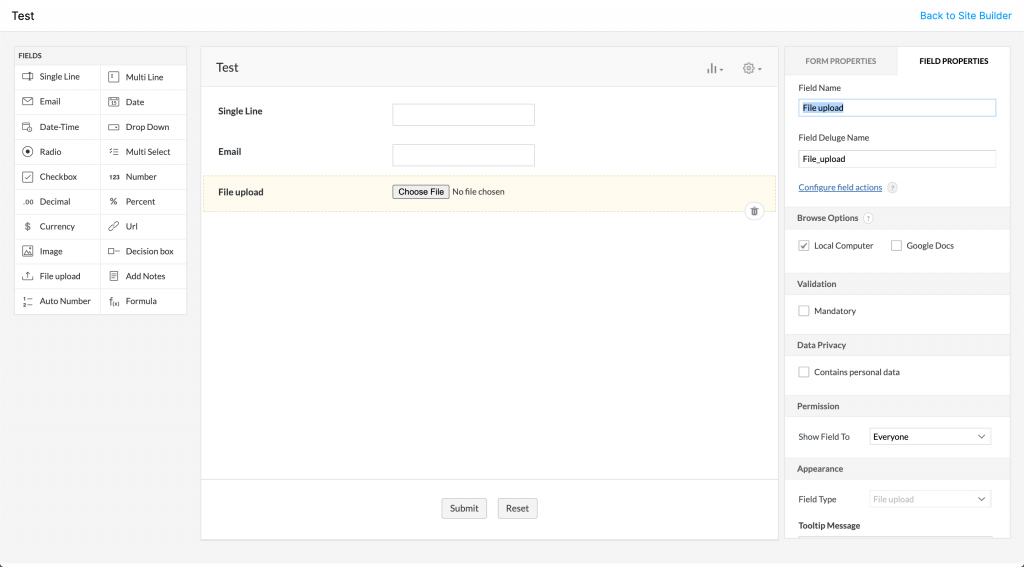
Custom form: You can also build a form in Zoho Sites. Data collected with forms built in Zoho Sites is stored in Zoho Sites, and can be exported as a CSV, PDF, and other file types. Below is an example of what the custom form builder in Sites looks like.
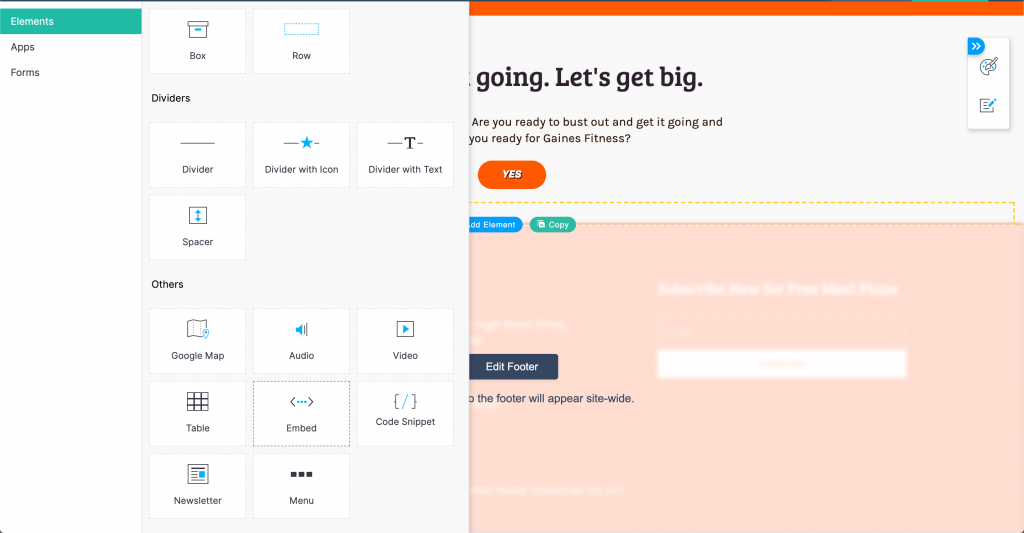
Embedded form: You can also opt to embed elements using iframe code. To do this, rather than selecting "Forms" when adding an element, click on "Elements" and choose "Embed."
For more on forms in Zoho Sites, you can access the help doc for them here.
Adding a Pricing Page
Many business websites will have a pricing page of some kind. Whether it's a page with a contact form, a way to get people to sign up for services, or a product-based offering, Sites has a way to quickly and easily get it up and running.
To start, you should make a new page on your site dedicated to displaying pricing info. Make this page visible in in the navigation menu at the top of your website. In the case of our demo website, the pricing page is found in the "sign up" section. 
Subscriptions or Service-based
Using Zoho Subscriptions, you can build multiple subscription offerings and embed them directly onto your website. To read about building a plan in Subscriptions, check out this page.
Once you have a plan built in Subscriptions, you can embed it onto your pricing page using a code snippet. To get the code snippet from Subscriptions follow these steps:
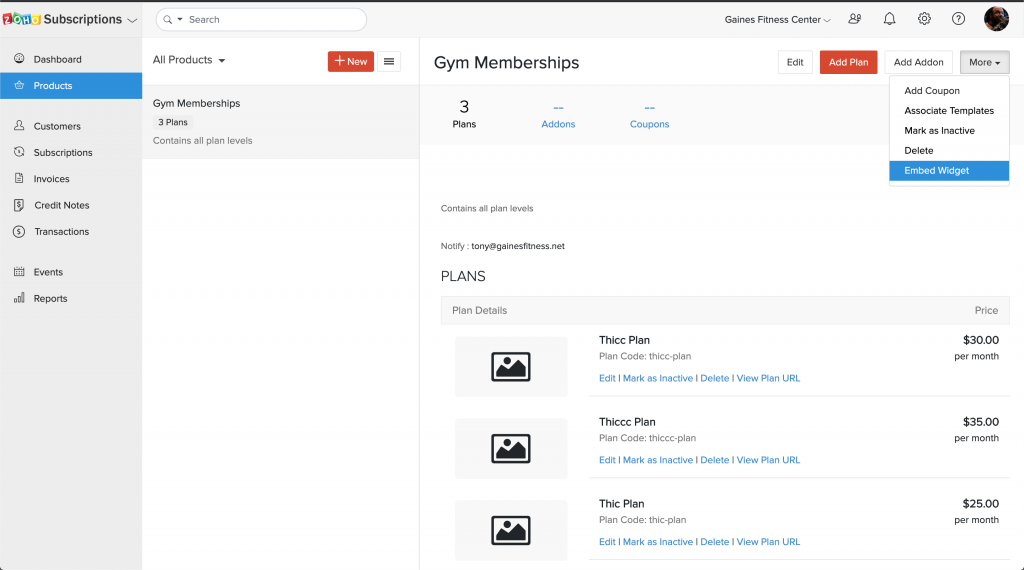
1. In Subscriptions, select "Products."
2. Select the subscription plan model you want to embed on your page.
3. Click "More" and choose "Embed Widget" in the dropdown menu.
After clicking "Embed Widget" you'll be taken to a page where you can customize the look and feel of the subscriptions widget, and copy the code once you're done.
Now that you have the widget embed code copied, it's time to put it on your website.
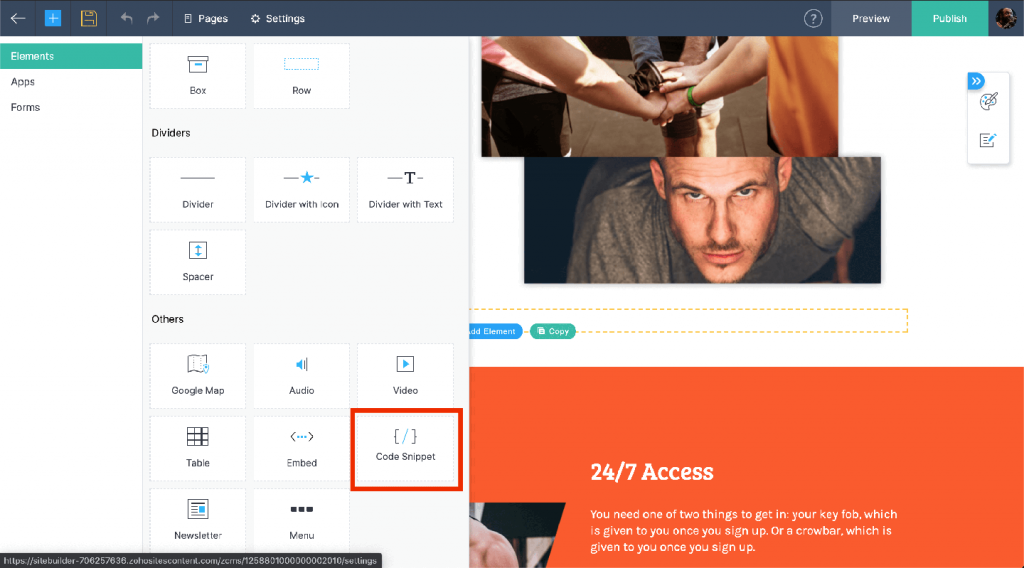
Code snippets are treated like elements in the site builder, so they're as easy to add as an image or a block of text. To add the Subscriptions widget to your site:
1. While in the Zoho Sites Builder mode, select where you want the Subscriptions info to go on your pricing page.
2. Click "+ Add Element."
3. Click the "Code Snippet" option.
4. Give your snippet a name (something clear like "subscription plans") and paste the code into the box. This code will be saved in your code snippet gallery, so you can place this same snippet on multiple pages without having to save the code snippet again. 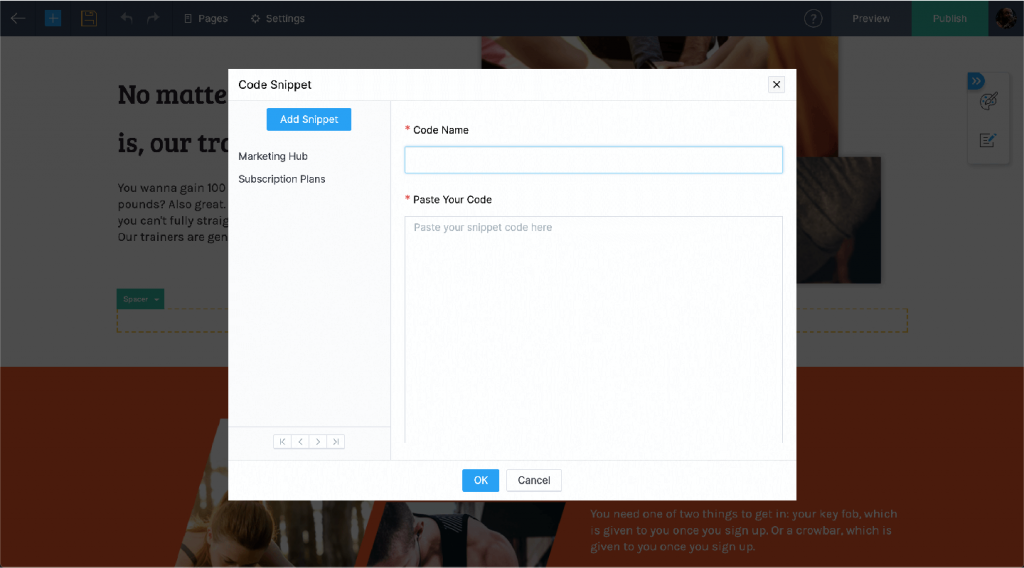
Now when you publish the page, the Subscriptions widget will be embedded onto your page.
Product-based
If your business deals in products and not services, and you want to have a robust fully online store, it's recommended you build your website using Zoho Commerce.
But if you've already built the skeleton of your product page in Sites, you can email support@zohosites.com and our team will port your work over to Commerce from Sites no problem.
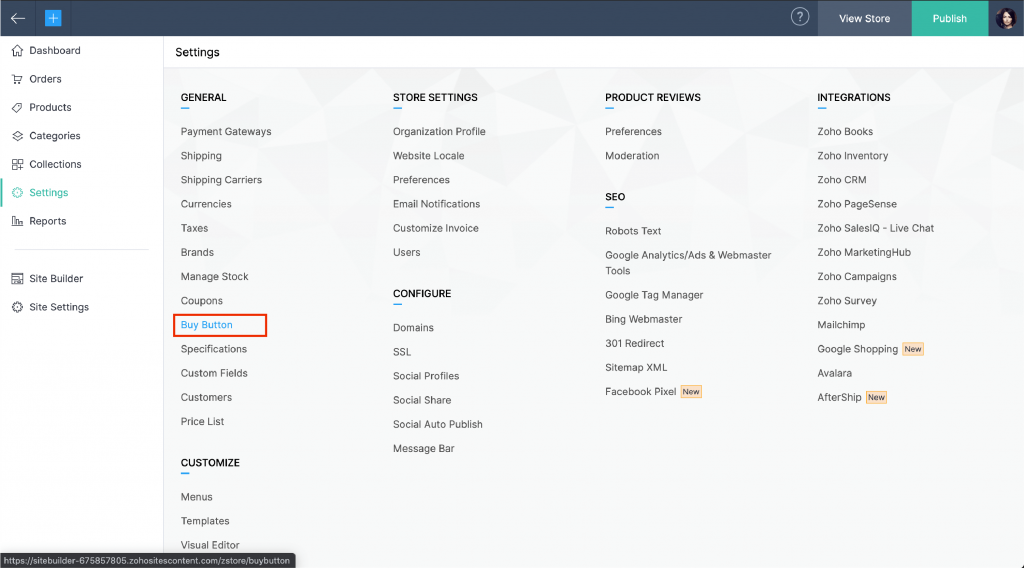
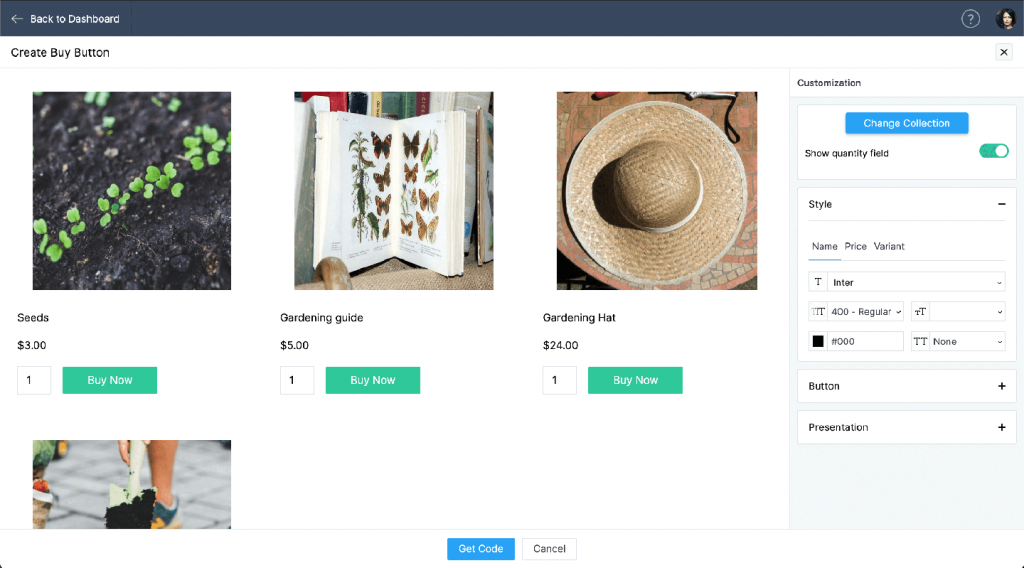
If you have just a few products you want to list, you can still build your product offerings in Zoho Commerce and use "buy buttons" to list them on a page you've built in Zoho Sites.
Start by going into Commerce and clicking Settings.

Click on "Buy Button"
- You can choose to generate code for an individual product or a collection. Either way, you can customize how you want it to look to make it fit the design of your website. Hit "Get Code."
Adding Live Chat with SalesIQ
Having live chat on your website can give visitors a channel to get instant support or get questions answered that can drive them to a sale. For you, live chat means more leads, more sales, and happier customers. You can read about live chat best practices here. Let's get into how you get it onto your website in Zoho Sites.
Getting Chat Up and Running On Your Site
There are two ways to get SalesIQ onto your website. We'll start with the first and easiest.
Method 1: Flip the Switch
In the settings, under "Integrations," click on "Zoho SalesIQ - Live Chat." Choose which portal you want to connect to your website. You should also choose which "app" from SalesIQ you want to add. "App" in this instance simply means which SalesIQ widget you want to add to your website. Some businesses may have SalesIQ on multiple websites, so they have a widget (or "app," using the wording in Sites) for each website.
Lastly, make sure "Add Live Chat" is toggled. If "Add Live Chat" is not toggled, you'll still capture visitor tracking and lead scoring data, but there will be no communication option.
Method 2: Code snippet
1. Go to SalesIQ. You'll be given a code snippet right as your first open up SalesIQ's home screen. It will look like this:
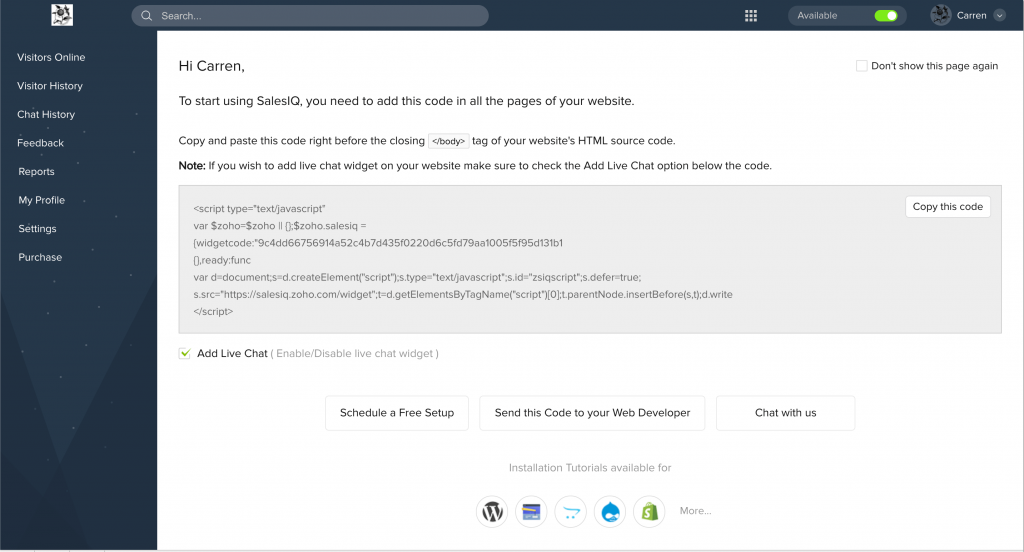
2. Click the the button that says "Copy This Code."
We want live chat to be available on every page of your website in Zoho Sites, so we'll have to embed in the footer/header, since every page can share common footer/header info easily.
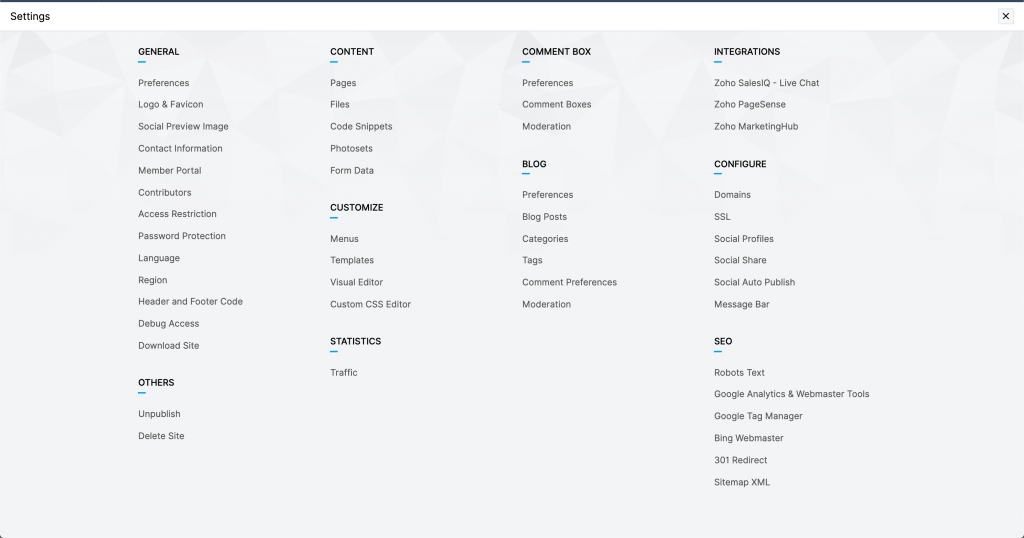
We can embed code into footer of each page by going to the Edit Page Info screen, but this wouldn't copy the code into every footer. To copy the code into every footer, go into Settings. Under the "General" category, click on "Header and Footer Code." Now just paste the code you got from SalesIQ into the "Footer Code" box, click save, and SalesIQ will be up and running on your website.
Optimizing Your Website Using PageSense
Now that you have the core of your website built and ready to launch, you'll want to build tools to improve it over time. There are multiple ways to do this with PageSense. You can measure key website metrics, understand your visitors' behavior, and give them a personalized website experience to boost conversions.
Adding PageSense
Getting PageSense on your website is easy, and works similarly to how you get SalesIQ on your website. This page will guide you through the steps.
Once you've installed PageSense, you'll have to choose which kind of experiment you want to run. We'll go over a few of these.
Tracking goals: Set goals to track, like seeing how many users click a particular link or other web page element. You can even set up custom funnels, to see how many visitors took a specific path through your website, like going from the homepage, to the the shop, to a specific product, and finally whether they added it to their cart.
Website Analysis: Set up heatmaps to track where visitors click on a page, how far down the page they scroll, and which parts they spent the most time on. You can also view anonymized session recordings and run form analytics to see how many people engage with, abandon, or submit specific forms on your site.
Optimization: Find what works best on your website with A/B testing to get reports on how audiences respond to different headlines or CTA buttons. You can supercharge your A/B testing with Split URL Tests, which test totally different webpage layouts to see which results in more conversions. For tips on how to run a successful A/B test, check out more info here.