Testing a Circuit and Execution
After defining your circuit,
Save your circuit. Click Test Run at the top-right corner.
Specify the data as input JSON for your test run and click Next.
Specify a name for your test run and click Run. You can view the execution in progress.
In the event of failure or data mismatch, click Run Again or Test Run to repeat the execution.
Every test run is considered an execution. Each circuit can have multiple simultaneous executions.
The Execution page consists of the following:
View Graph
View Code
View Logs
View Graph
After selecting Test Run, your circuit starts the execution with the test data provided from the first state, and traverses from one state to another. You can observe this flow visually.
View Code
Navigate to Code View of the circuit from the execution page using this option. This helps to instantly modify the circuit code once you observe the execution.
View Logs
The logs provide details of the task execution in each state. They display the following details:
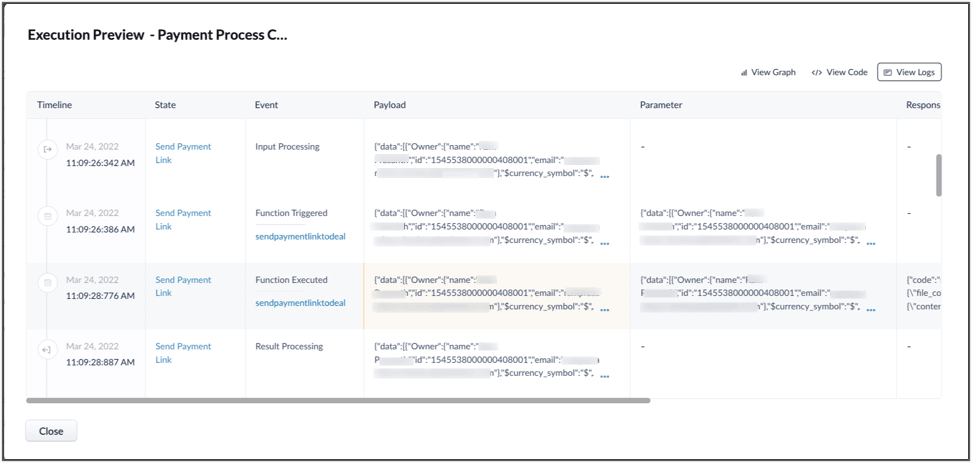
Timeline: The date and time at which the state was executed.
State: The name of the state.
Event: The event such as state entered, input processing etc, that occurred.
Payload: The input that was passed to that state of the circuit.
Parameter: The input parameters passed to that state's input.
Response: The response or the output when that state finished its execution.
Exception: The error or any exception that occurred while executing that state.
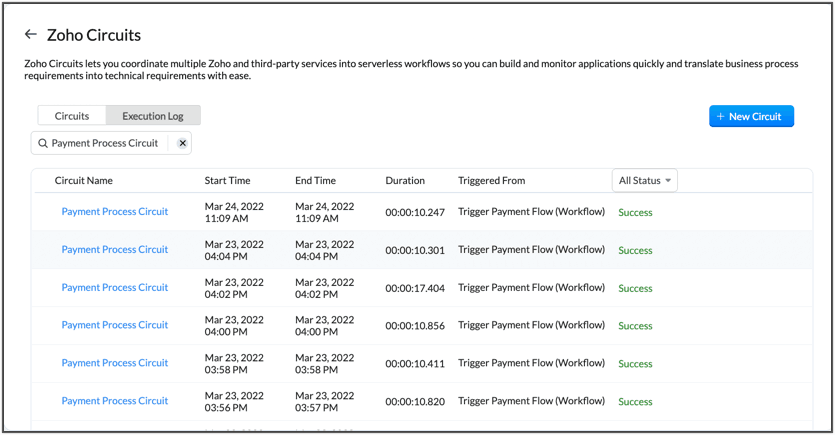
Execution Logs
The Execution Logs tab displays the details such as Circuit Name, Start Time, End Time, Duration, and Status.
you can filter out the details based on the execution status of a circuit using the all Status drop-down.