
Integrate Zoho Billing with Square
Zoho Billing allows you to integrate with Square, enabling you to manage payment processing efficiently. With this integration, you can collect payments through Square for your invoices and automatically sync transactions in Zoho Billing.
Highlights of the Integration
- Accept credit and debit card payments through Square.
- Collect customers’ credit card information and automatically charge customers in Zoho Billing.
- Ensure secure and PCI-compliant payment processing with Square’s fraud detection and encryption technology.
- Accept payments from customers in multiple currencies, including USD, CAD, GBP, and AUD.
Set Up Square Integration
To set up the integration, you must have a Square account. If you don’t have an account already, you can create one and proceed with the integration.
To set up the integration:
Log in to your Zoho Billing organisation.
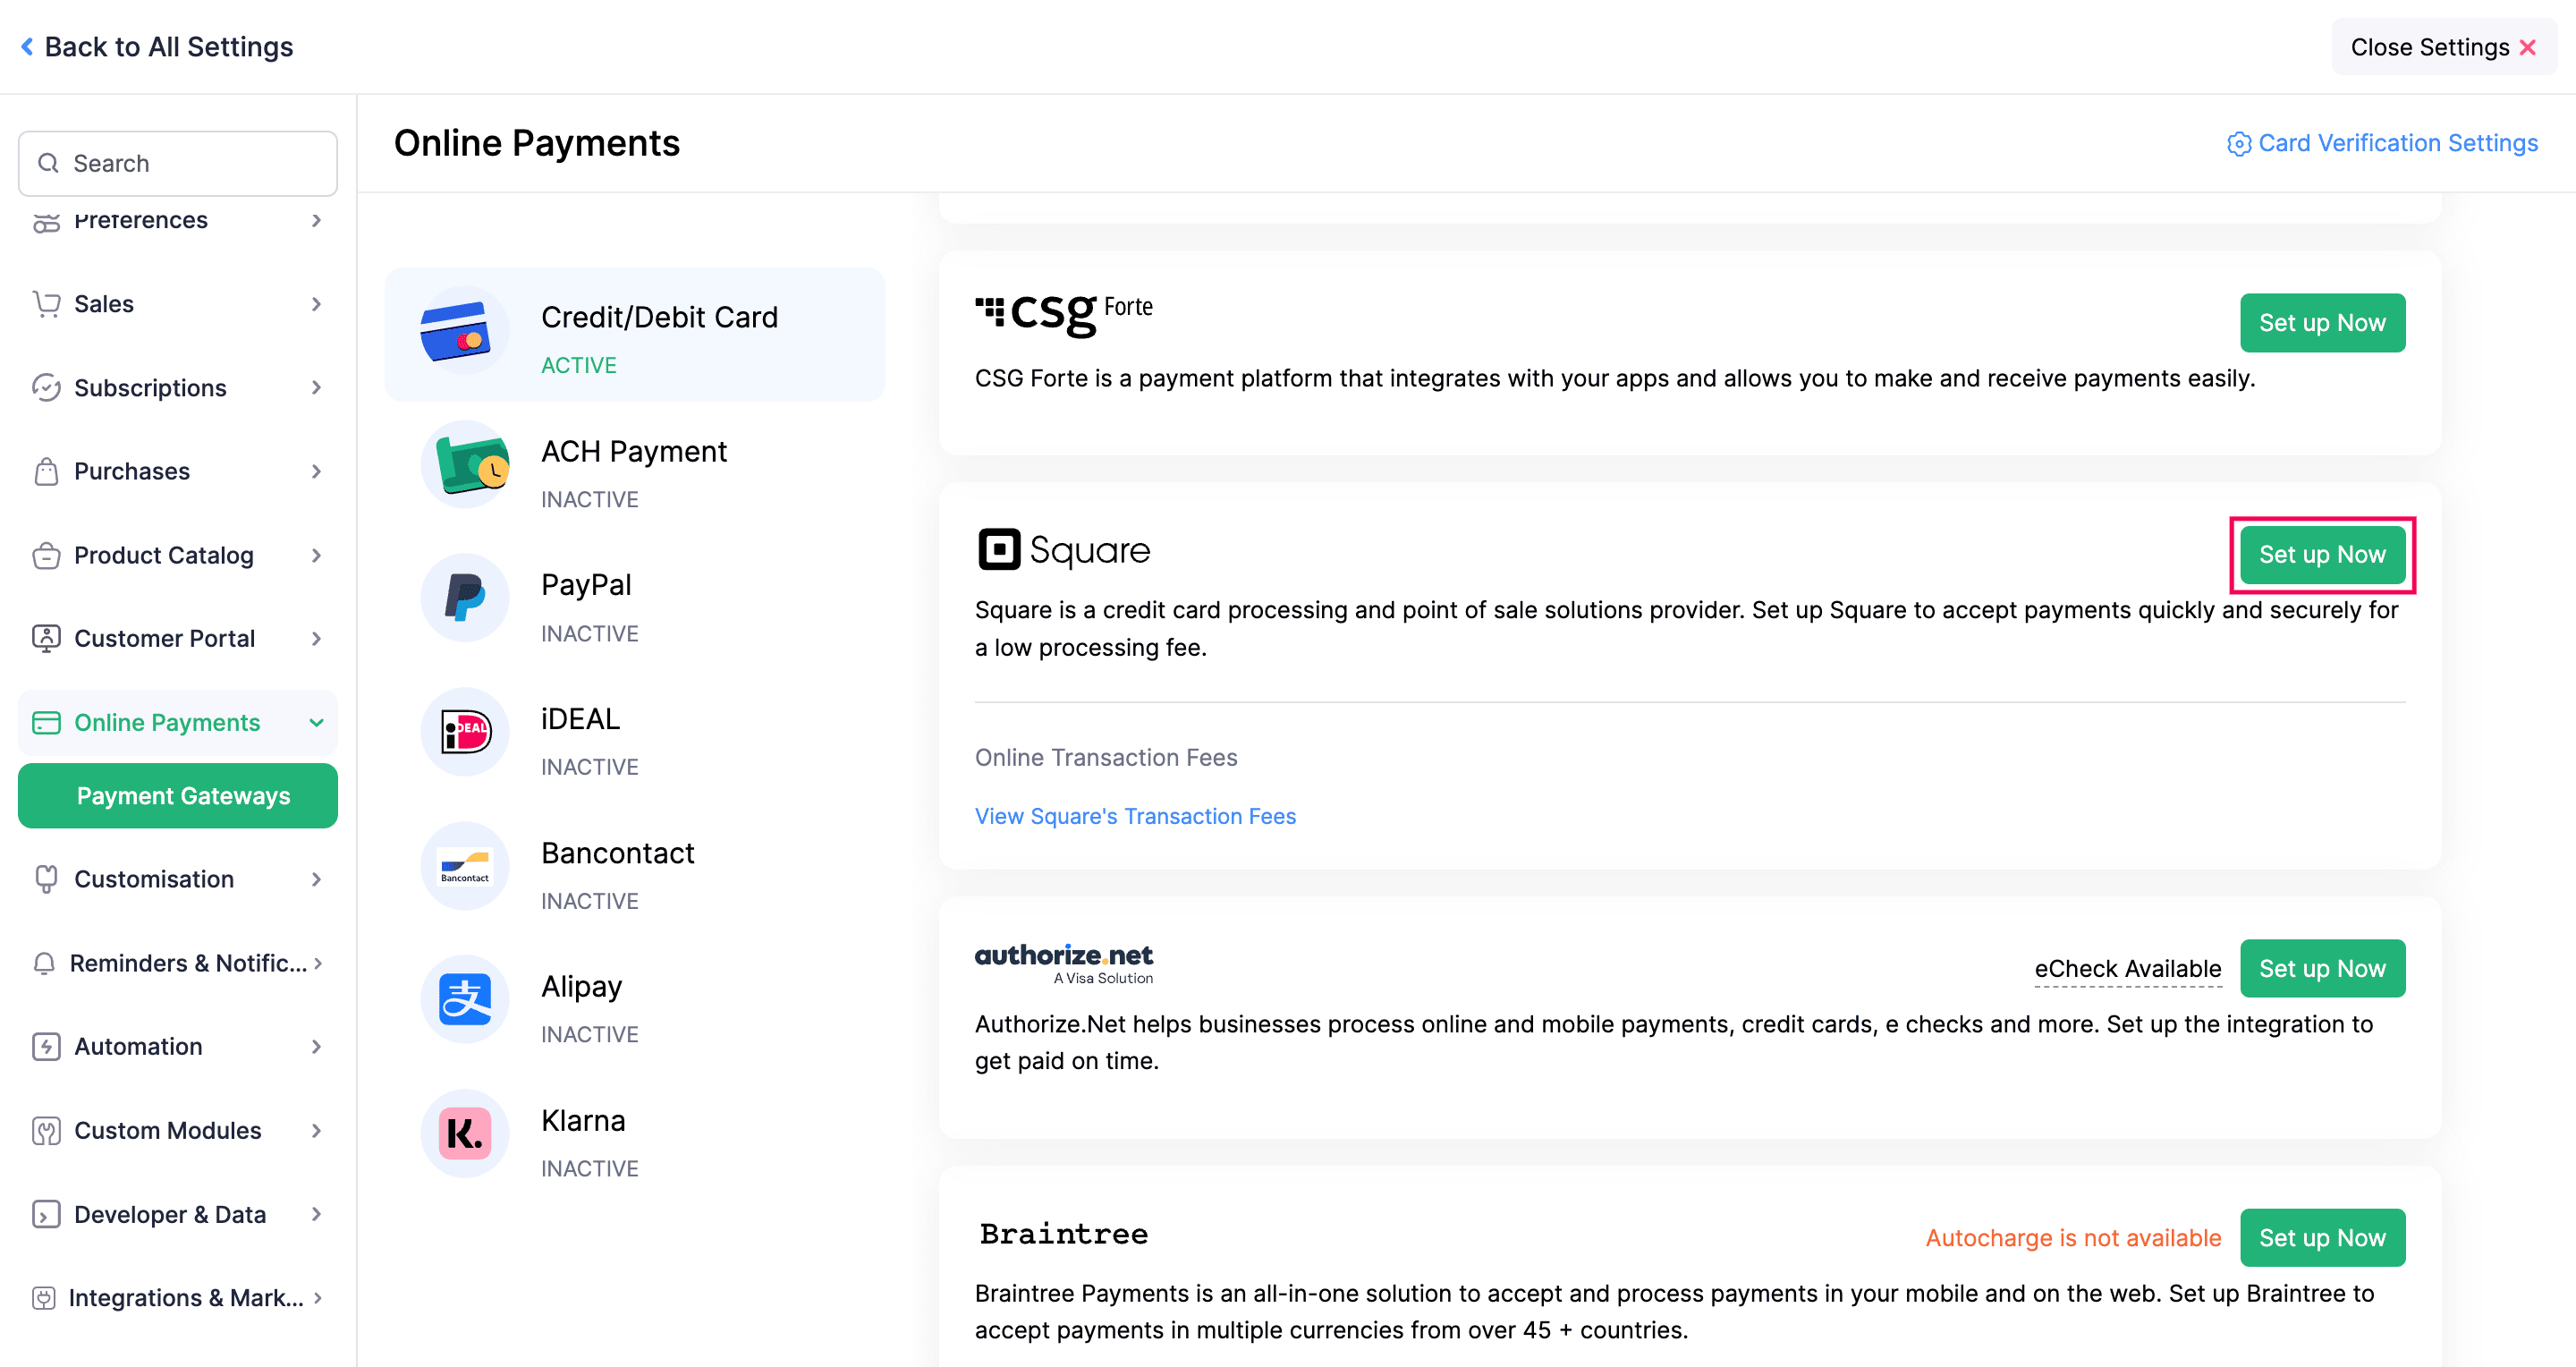
Go to Settings from the top-right corner.
Select Payment Gateways under Online Payments.
Click Set Up Now next to Square.
Click Connect Now in the popup that appears.
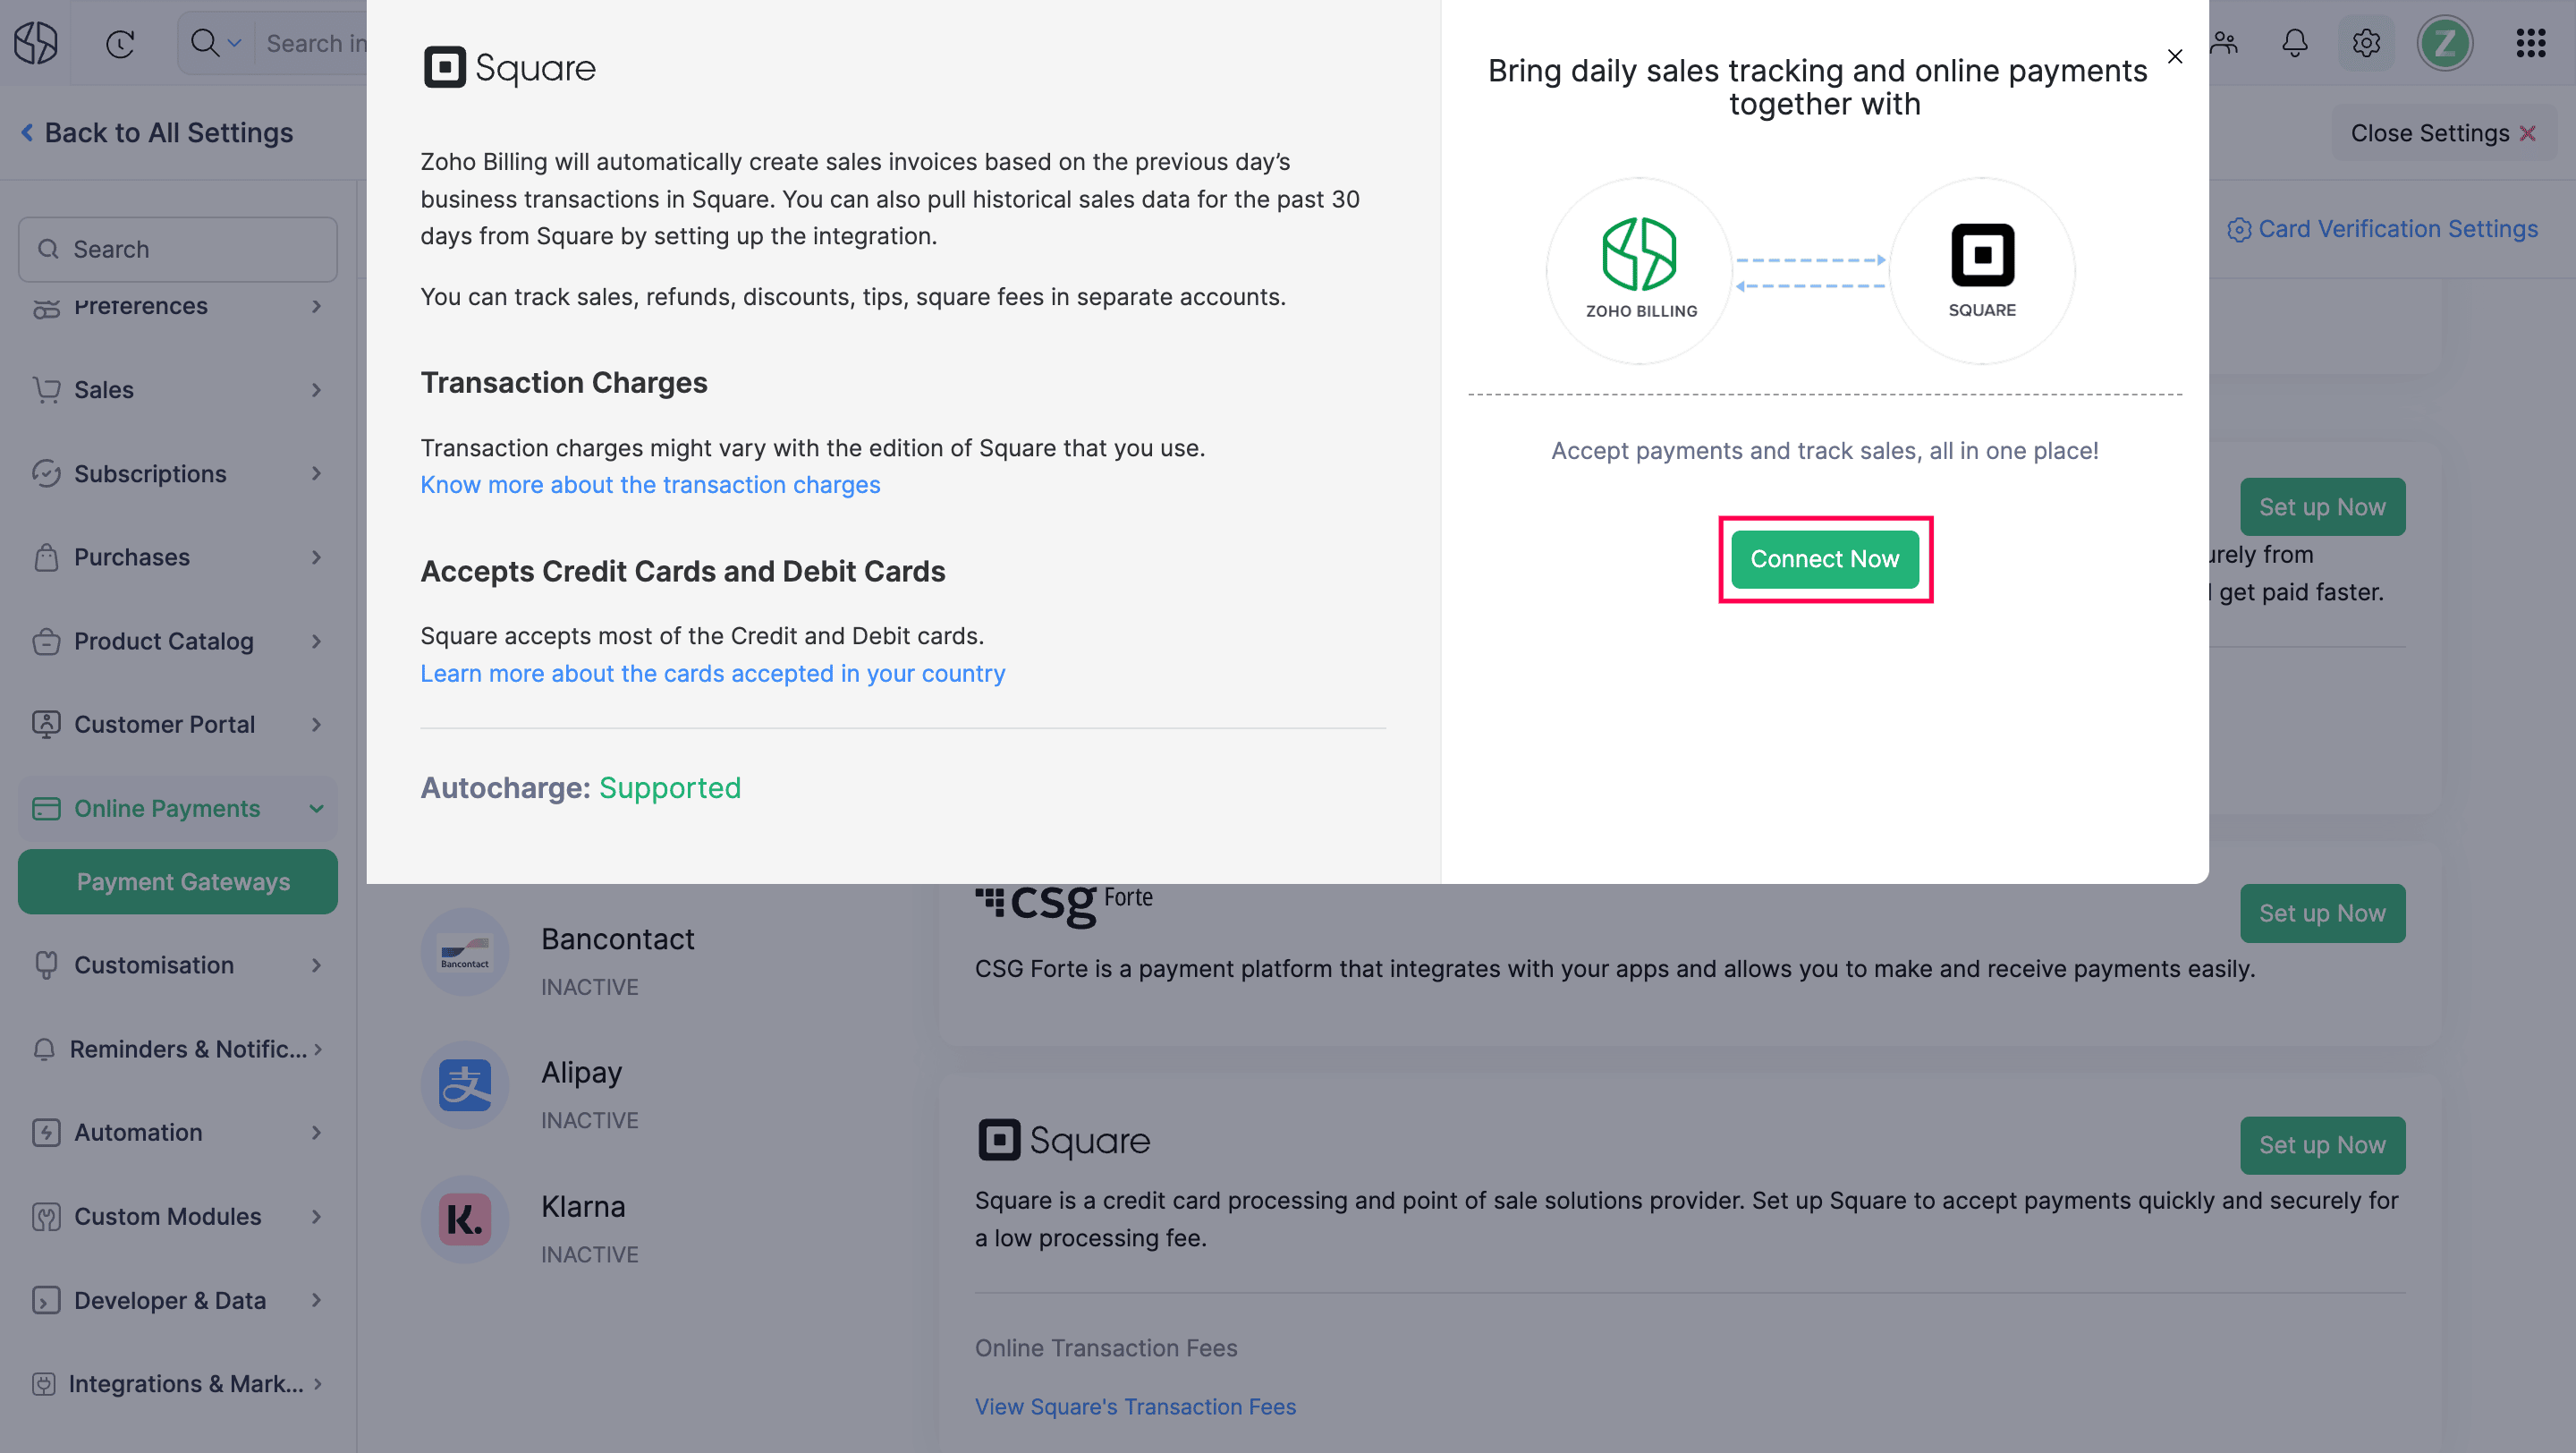
You will be navigated to the Square login page.
- Enter your Square credentials and click Sign In.
- Click Allow in the permission page to complete the connection with Zoho Billing.
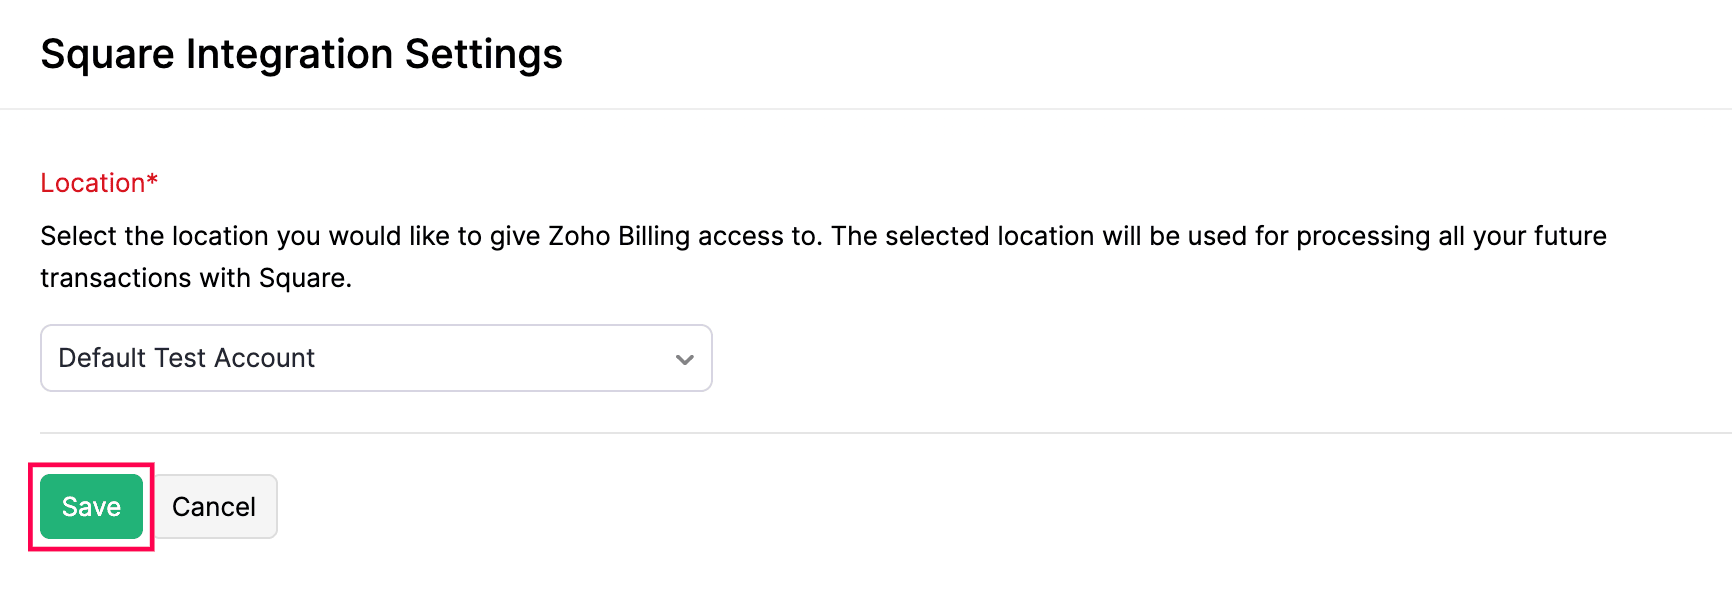
Once you have connected to Square, you will be directed to the Square setup page in Zoho Billing. Here, select the location you’ve set up in your square account to configure your settings for processing your transactions.
In the screen that appears,
Select your Location from the dropdown.
Click Save.
 Note: You will be able to track sales only for a single location.
Now, you can start collecting payments from your customers.
Collect Customer Payments
Enable Payment Options
After setting up the integration in Zoho Billing, enable Square as a payment option in invoices to receive payments.
To enable Square in your organisation:
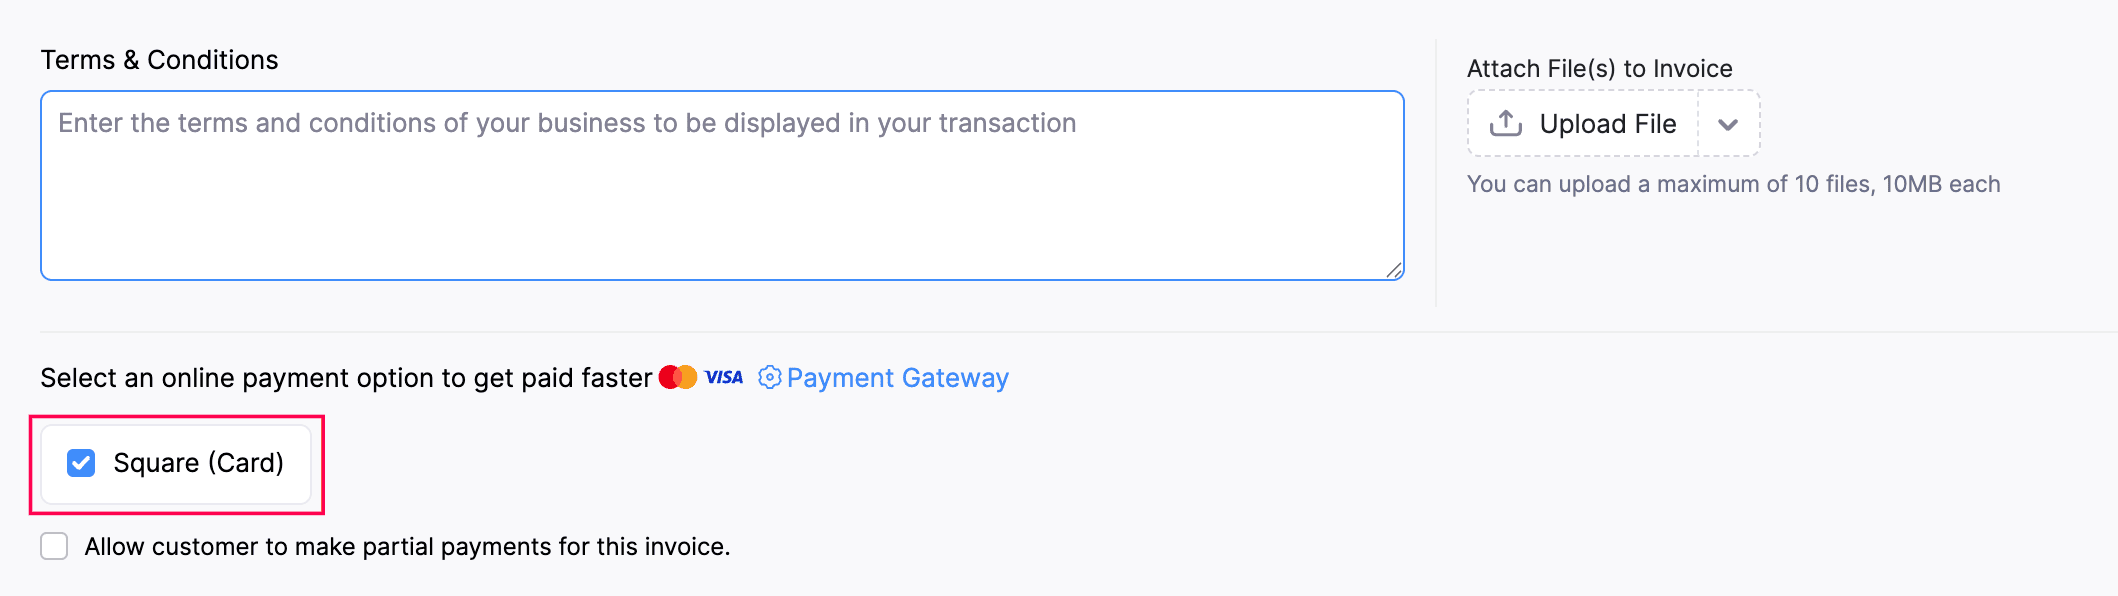
Go to Invoices under Sales.
Create a new invoice with the necessary details or edit an existing one for the customer.
Scroll to the bottom of the page and check Square as a payment option.
 Note: If you select multiple payment gateways, the last configured payment gateway will be used by default to receive payments.
Click Save.
Square will be available as a payment option to collect payments.
Receive Payments from Customers
Once you’ve enabled Square as a payment option, your customers can pay through the customer portal.
To make payments, your customers will have to:
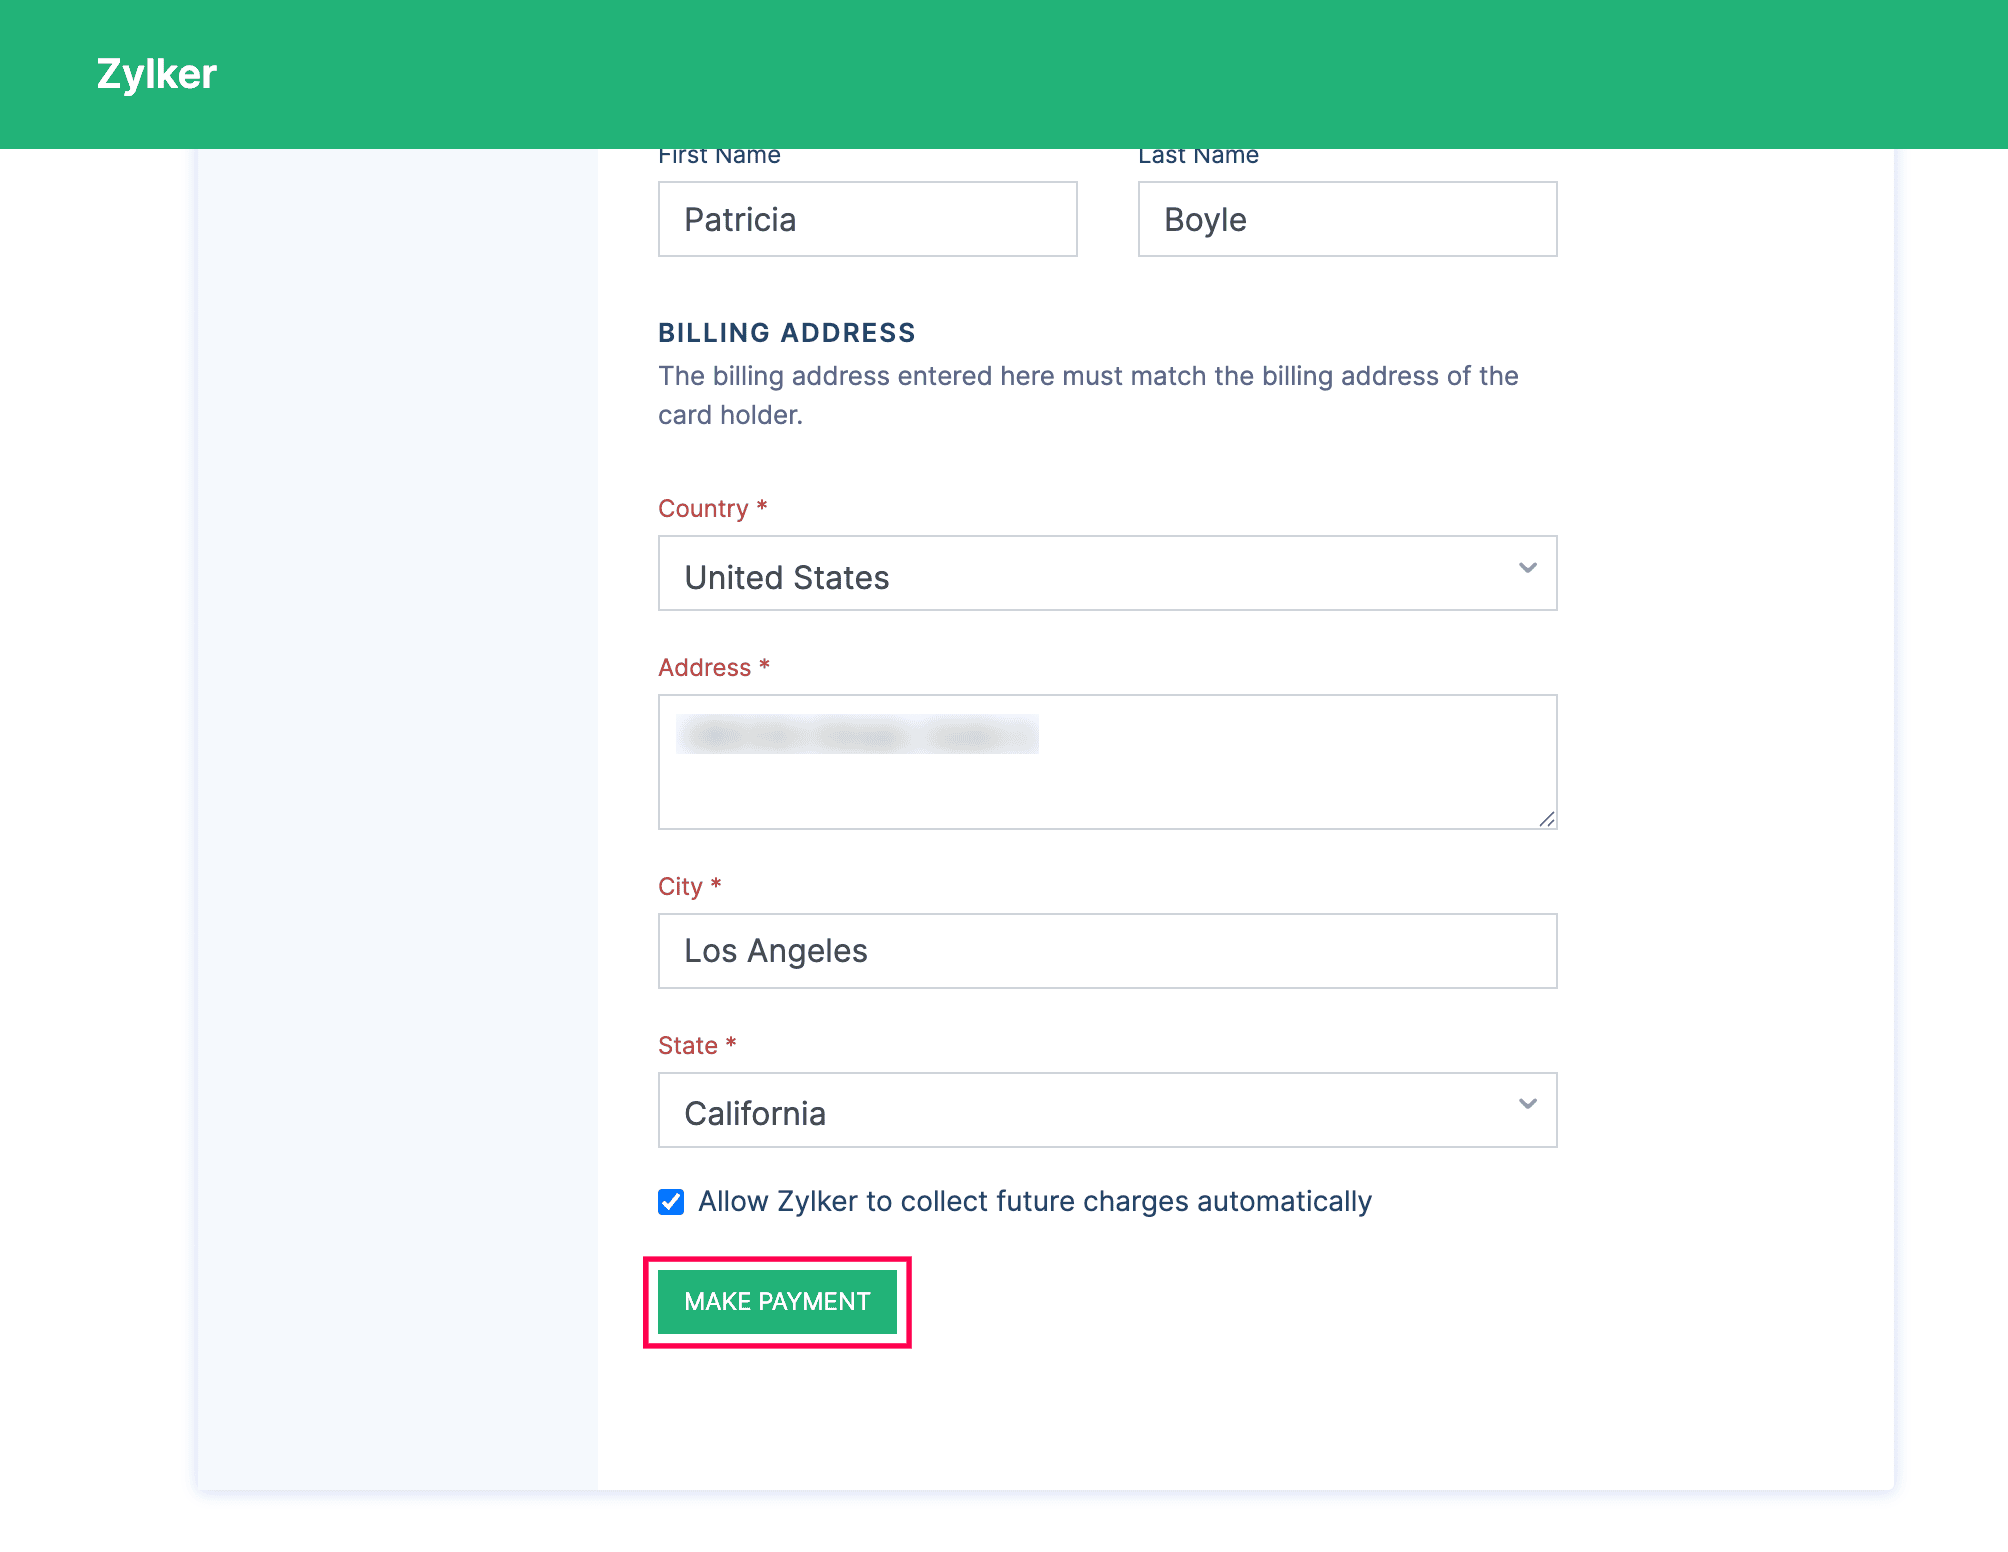
View the invoice from the customer portal.
Click Pay Now, and they will be redirected to the payment page.
Enter their payment information and click Make Payment.
Your customers can also make payments from the secure payment page shared with them via email or shared URL.
Once the payment is successful, you will receive an email regarding the payment made by your customer, and the invoice’s status will be marked as Paid.
Charge Customers
You can charge your customers manually for the invoices using their card details.
To charge manually:
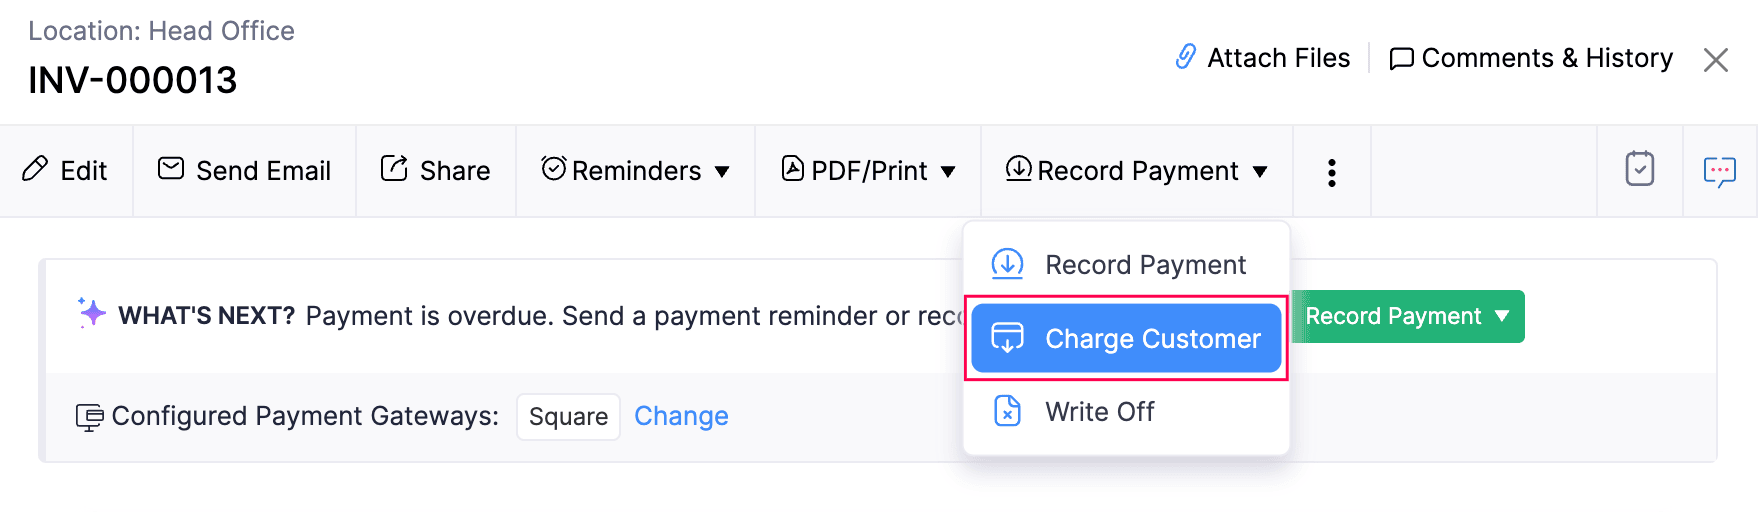
Go to the particular invoice from the Invoices module.
Click the Record Payment dropdown and select Charge Customer.
Choose the customer’s card to charge them.
Insight: If you have not saved your customer’s card, you can request payment information (recommended) or add them now.Click Proceed.
You will have charged your customer for the invoice.
Edit the Integration
If you would like to change the associated location, you can edit your integration settings.
To edit the integration:
Go to Settings from the top-right corner.
Select Payment Gateways under Online Payments.
Click Edit Settings next to Square.

Make the necessary changes and click Save.
Your integration settings will be updated.
Disable the Integration
If you want to pause the integration temporarily without losing your configuration, you can disable it.
To disable the integration:
- Go to Settings from the top-right corner.
- Select Payment Gateways under Online Payments.
- Click Disable next to Square.
- In the popup that appears, click Disable.
Delete the Integration
If you no longer wish to use this integration, you can delete it. However, before deleting, make sure to unmark Square as a payment option in unpaid invoices.
To delete the integration:
Go to Settings from the top-right corner.
Select Payment Gateways under Online Payments.
Click the Trash icon next to Square.

Click Delete to confirm.
Once deleted, the Square integration will be removed from Zoho Billing.
 Yes
No
Yes
No
Thank you for your feedback!