Zoho Mail Module for WHMCS
Zoho Mail Module for WHMCS helps all the Zoho Mail authorized Partners/ Resellers to provision Zoho Mail accounts using the WHMCS system. It allows the clients to buy Zoho Mail services with the preferred specifications from the options made available to them by the Resellers.
Table of Contents
Sign up as Partner
Zoho Mail provides opportunities to partner with Zoho. The partners can assist their client organizations to set up and use domain-based email accounts using the Zoho Mail Partner Admin Console. The Partner Admin Console helps the partners to manage multiple client organizations under them.
To become a partner of Zoho Mail, navigate to the Partner Sign-up page. Enter the relevant details in the respective fields of the Partner sign-up form and click Submit.
How to install Zoho Mail Module for WHMCS?
- You can download the Zoho Mail Provisioning module from the WHMCS Marketplace.
- A zip file with the name 'zoho_mail' will be downloaded. You have to unzip the file on your computer and upload the 'zoho_mail' folder into the /modules/servers Directory of your WHMCS installation.
Configuring Zoho Mail email module for WHMCS
Product Configuration
- Login to your WHMCS account and navigate to the WHMCS Admin Area.
- In order to create a new group for email hosting products, click on the Setup icon in the top-right corner of the window, choose System Settings and navigate to Products and services on the left pane. You can also use an existing group to create a new product for the Zoho Mail module.

- Click on the Products/Services card and provide your Admin password to continue.
- Click Create a New Group.

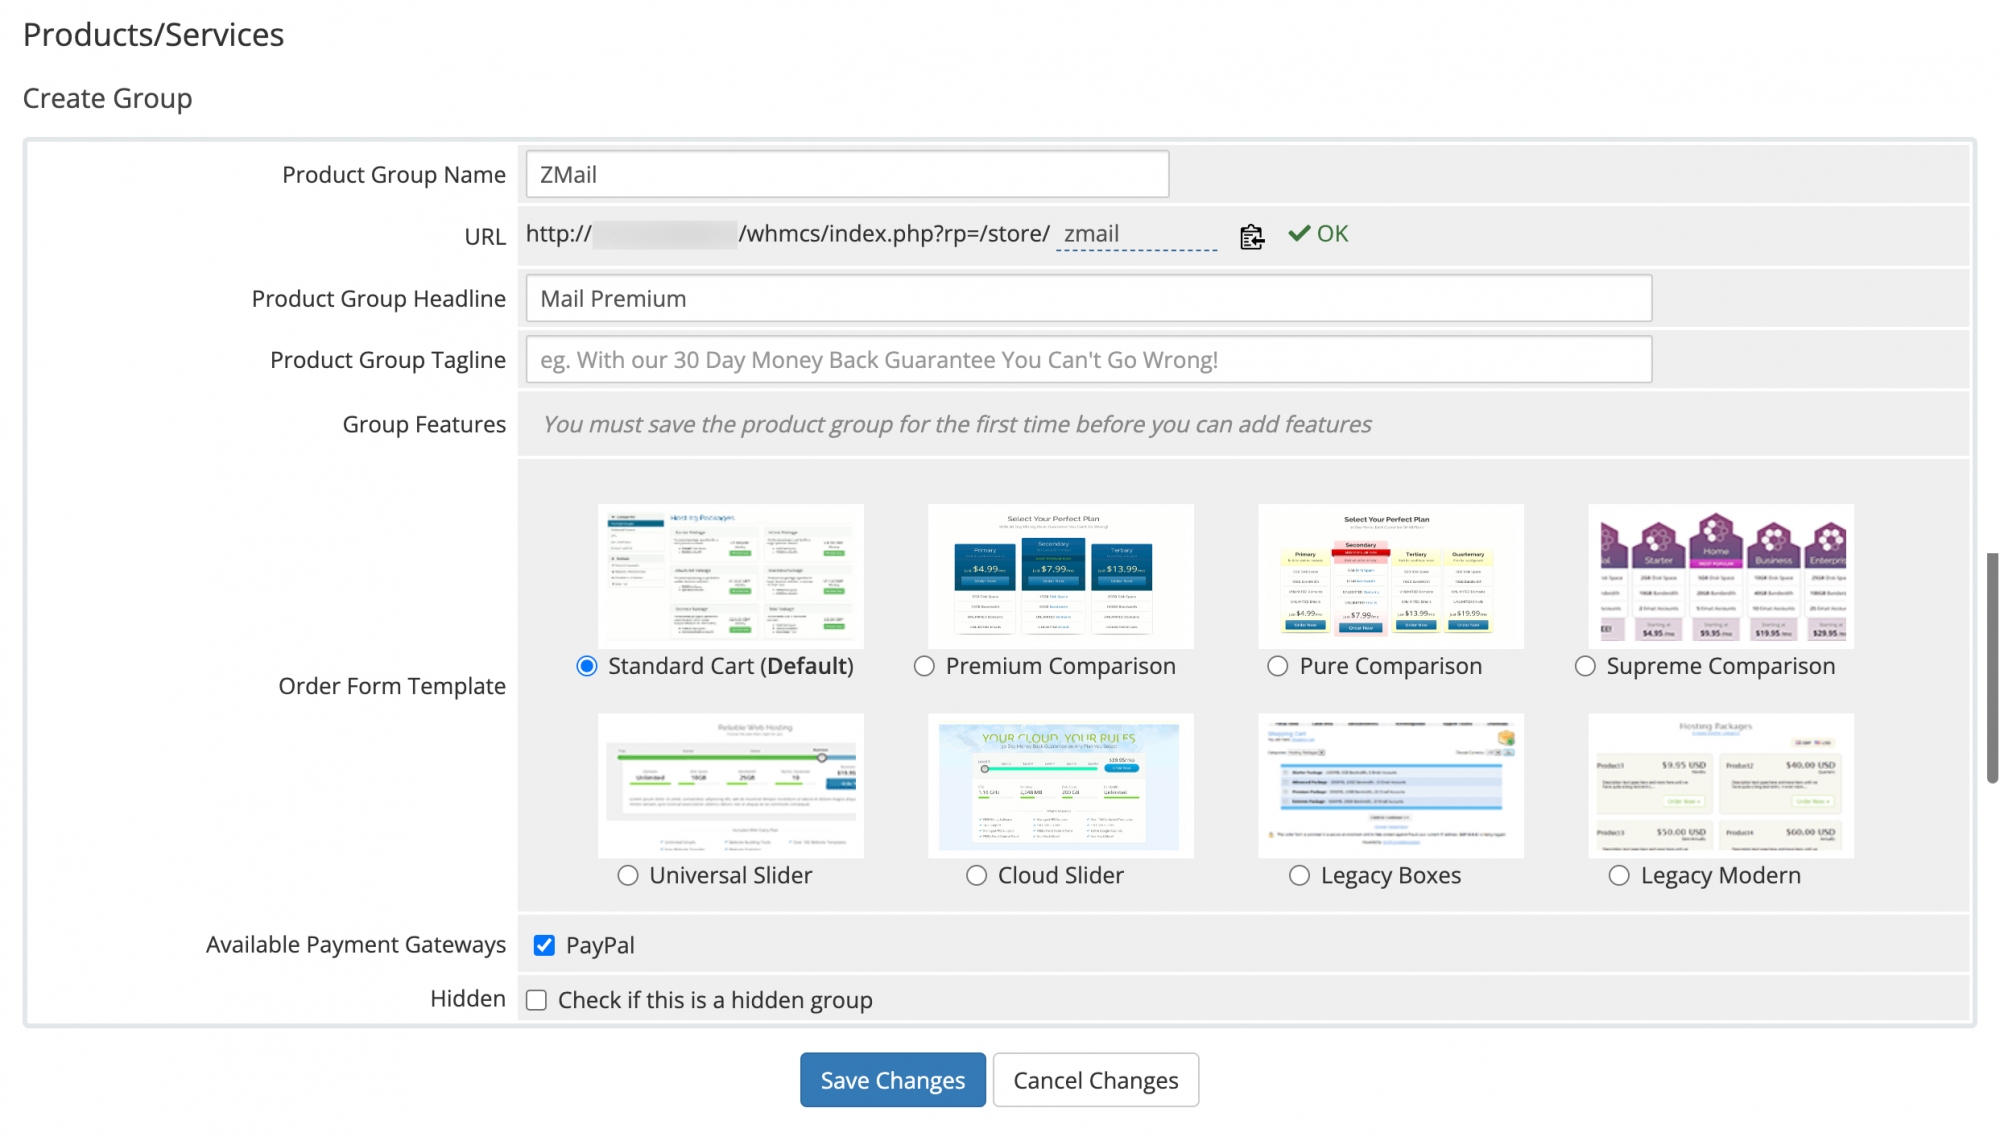
- Provide the desired Product Group Name, Headline, and tagline in the respective fields. Click Save Changes to create the group with the entered details.
- The next step is to create a product inside the created group for the Zoho Mail module. Click Create a New Product.

- Select the Product Type and Product Group from the respective dropdowns. Enter the preferred Product Name. From the Module dropdown, select Zoho Mail.
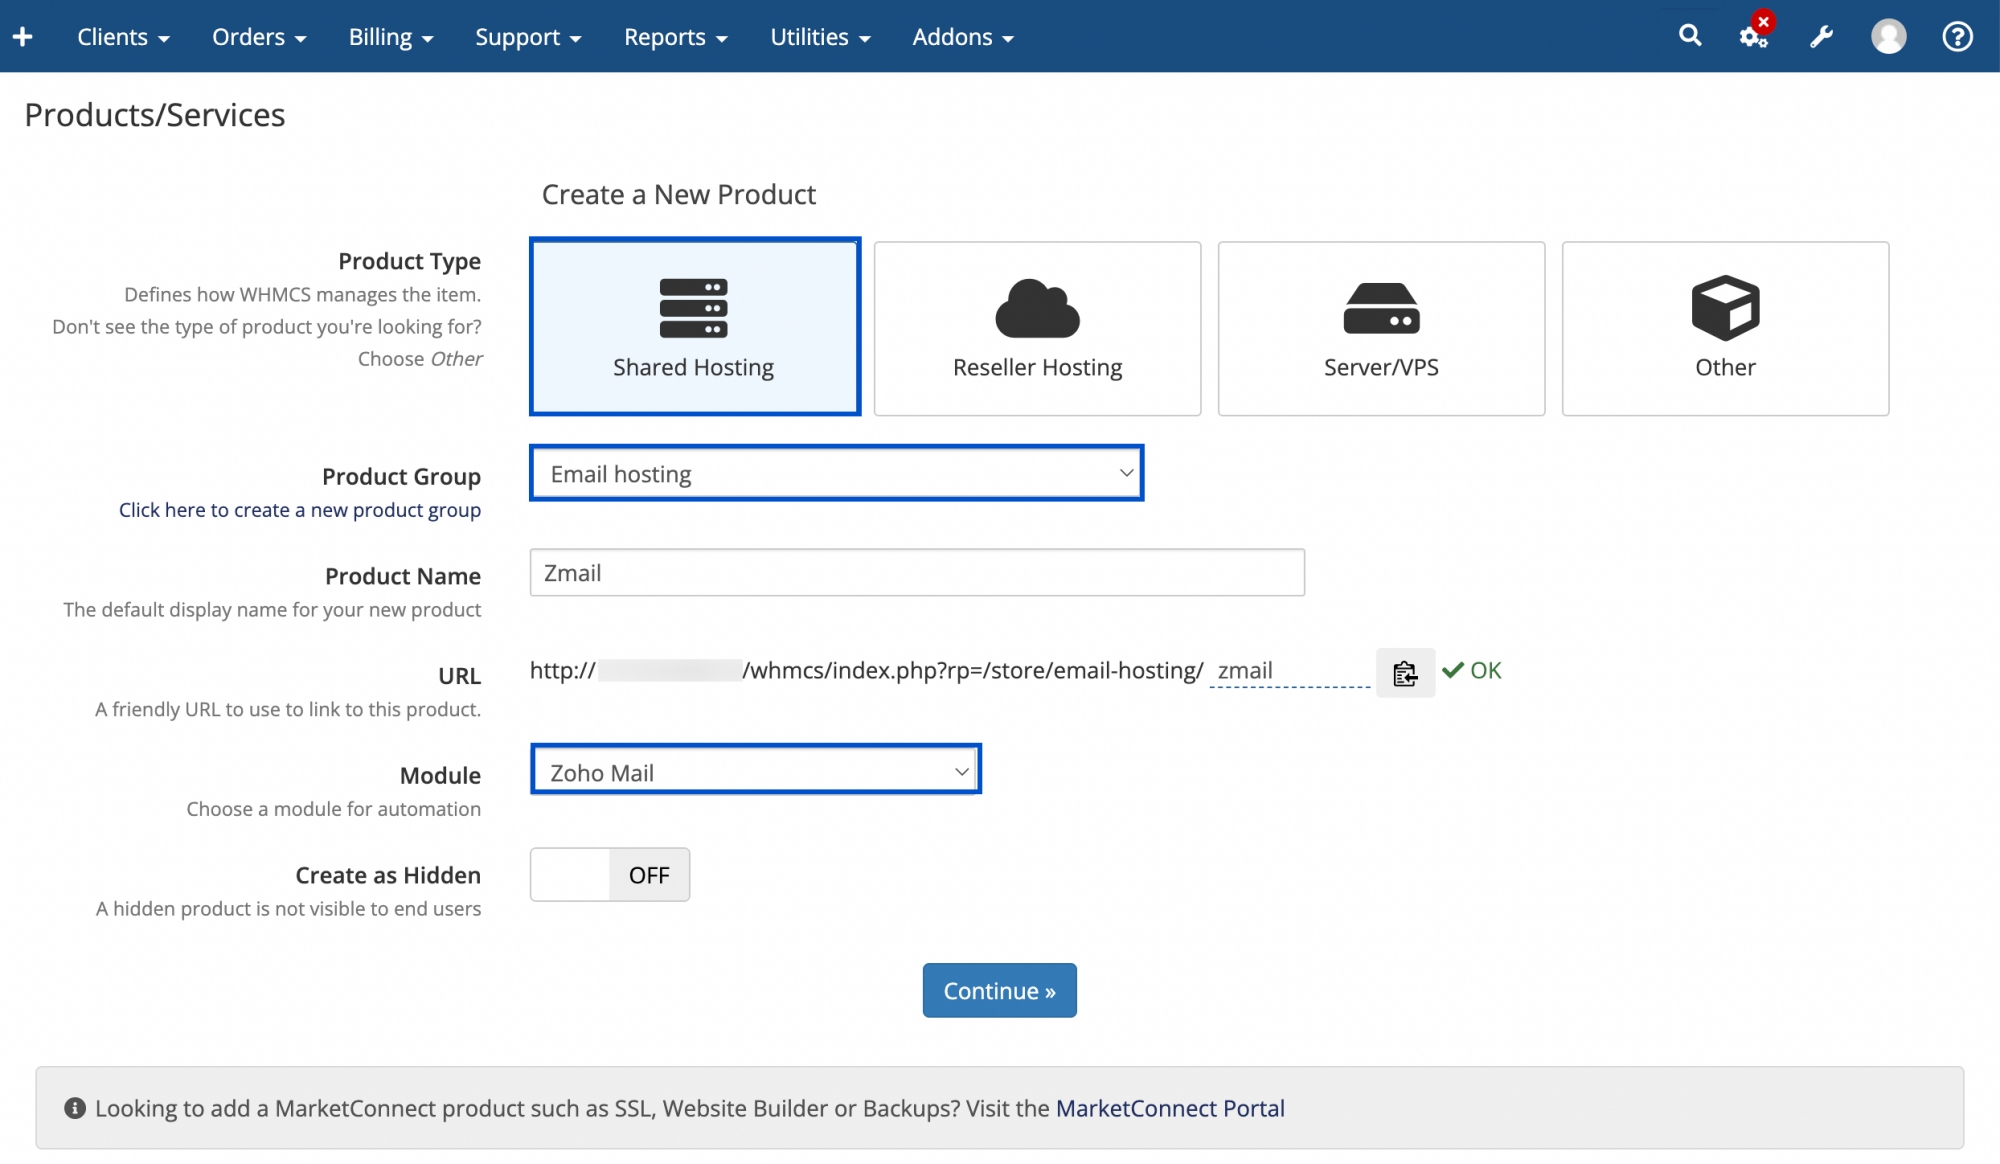
- Click Continue.
- The Edit Product page will open. In the Details tab, enter the Product Description.
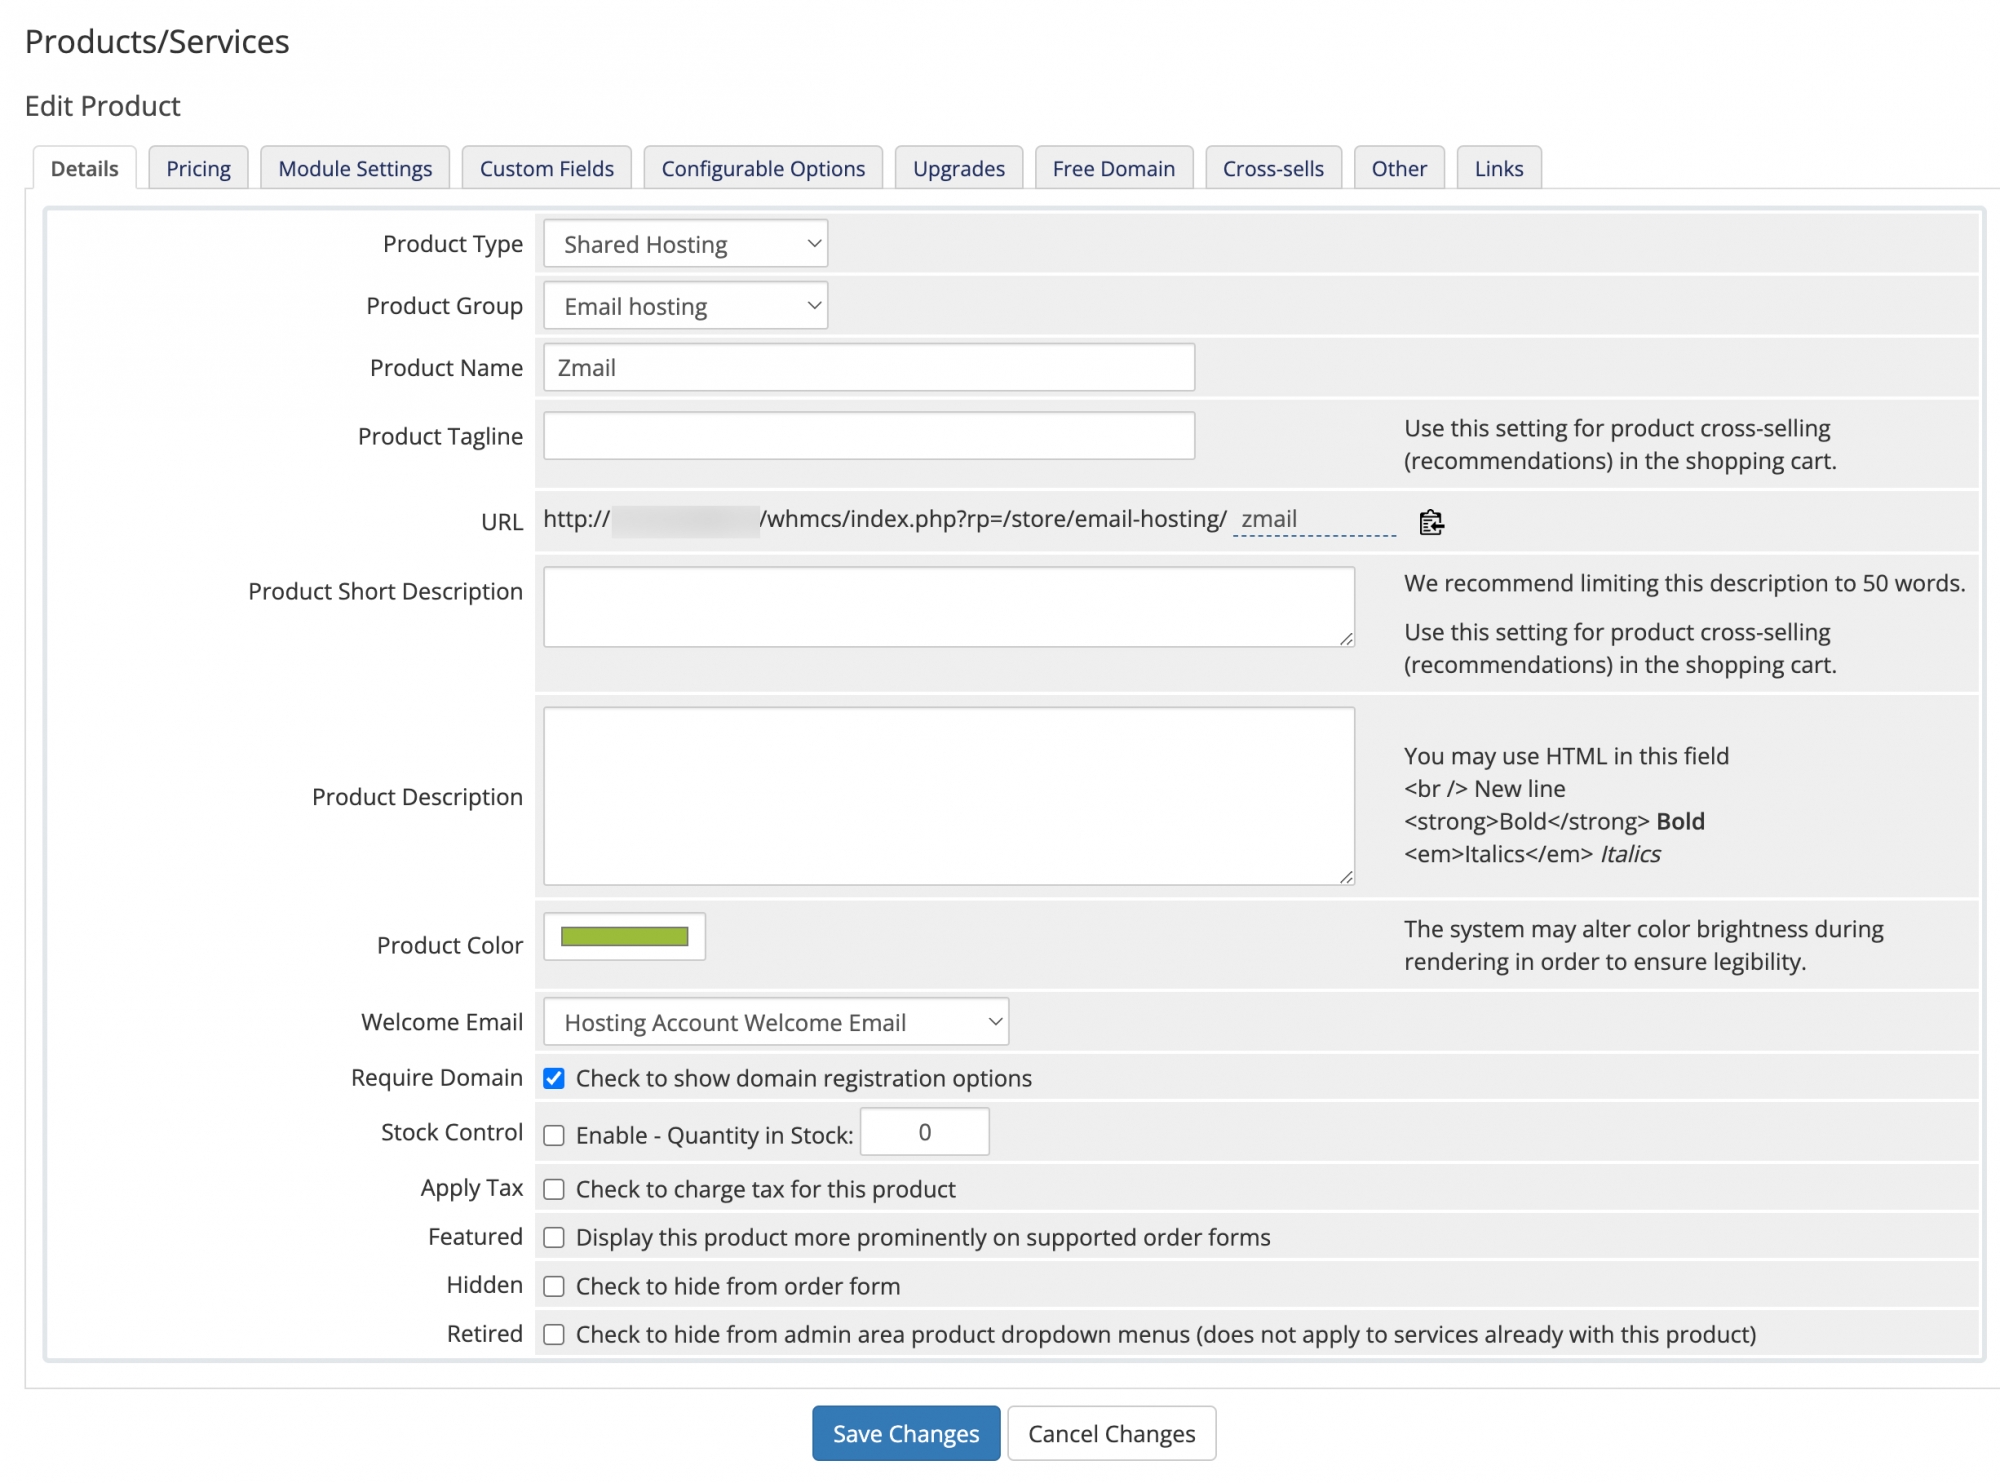
- Open the Module Settings tab of the Edit Product page.
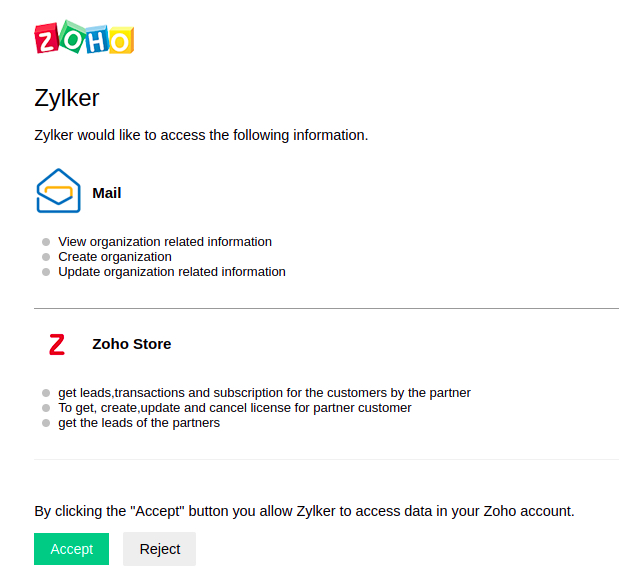
- In the Provide Zoho API credentials field, you need to provide the Client ID and Client Secret obtained from the Zoho API Console.
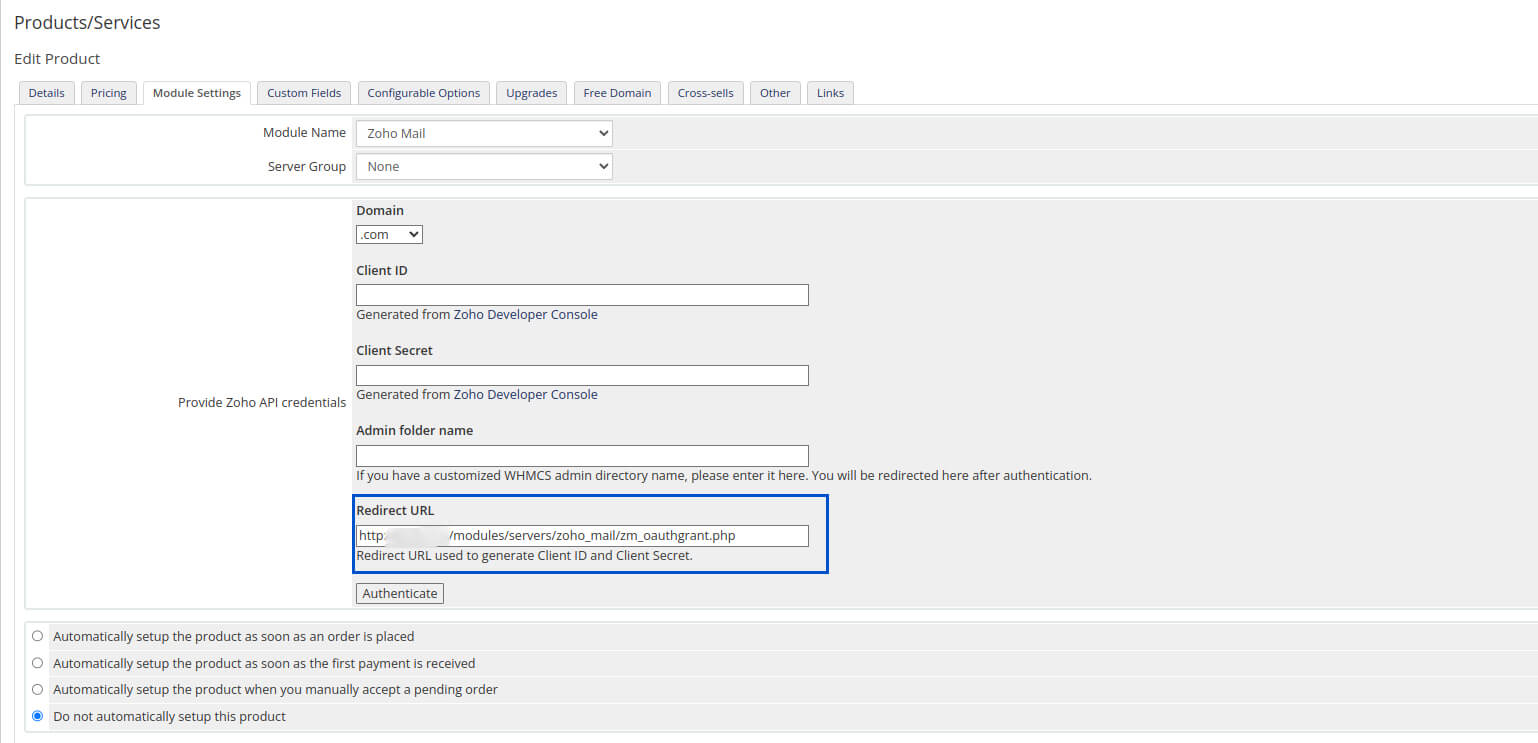
- To fetch the ID and secret, go to the Redirect URL field. copy the Redirect URL.
- Login to your Zoho Mail account and navigate to the Zoho API Console.
- Click Add Client ID to create a new Client ID and Client Secret to access Zoho Mail API.
- Provide the appropriate Client Name and Client Domain along with the Redirect URL copied from the WHMCS Admin Area.
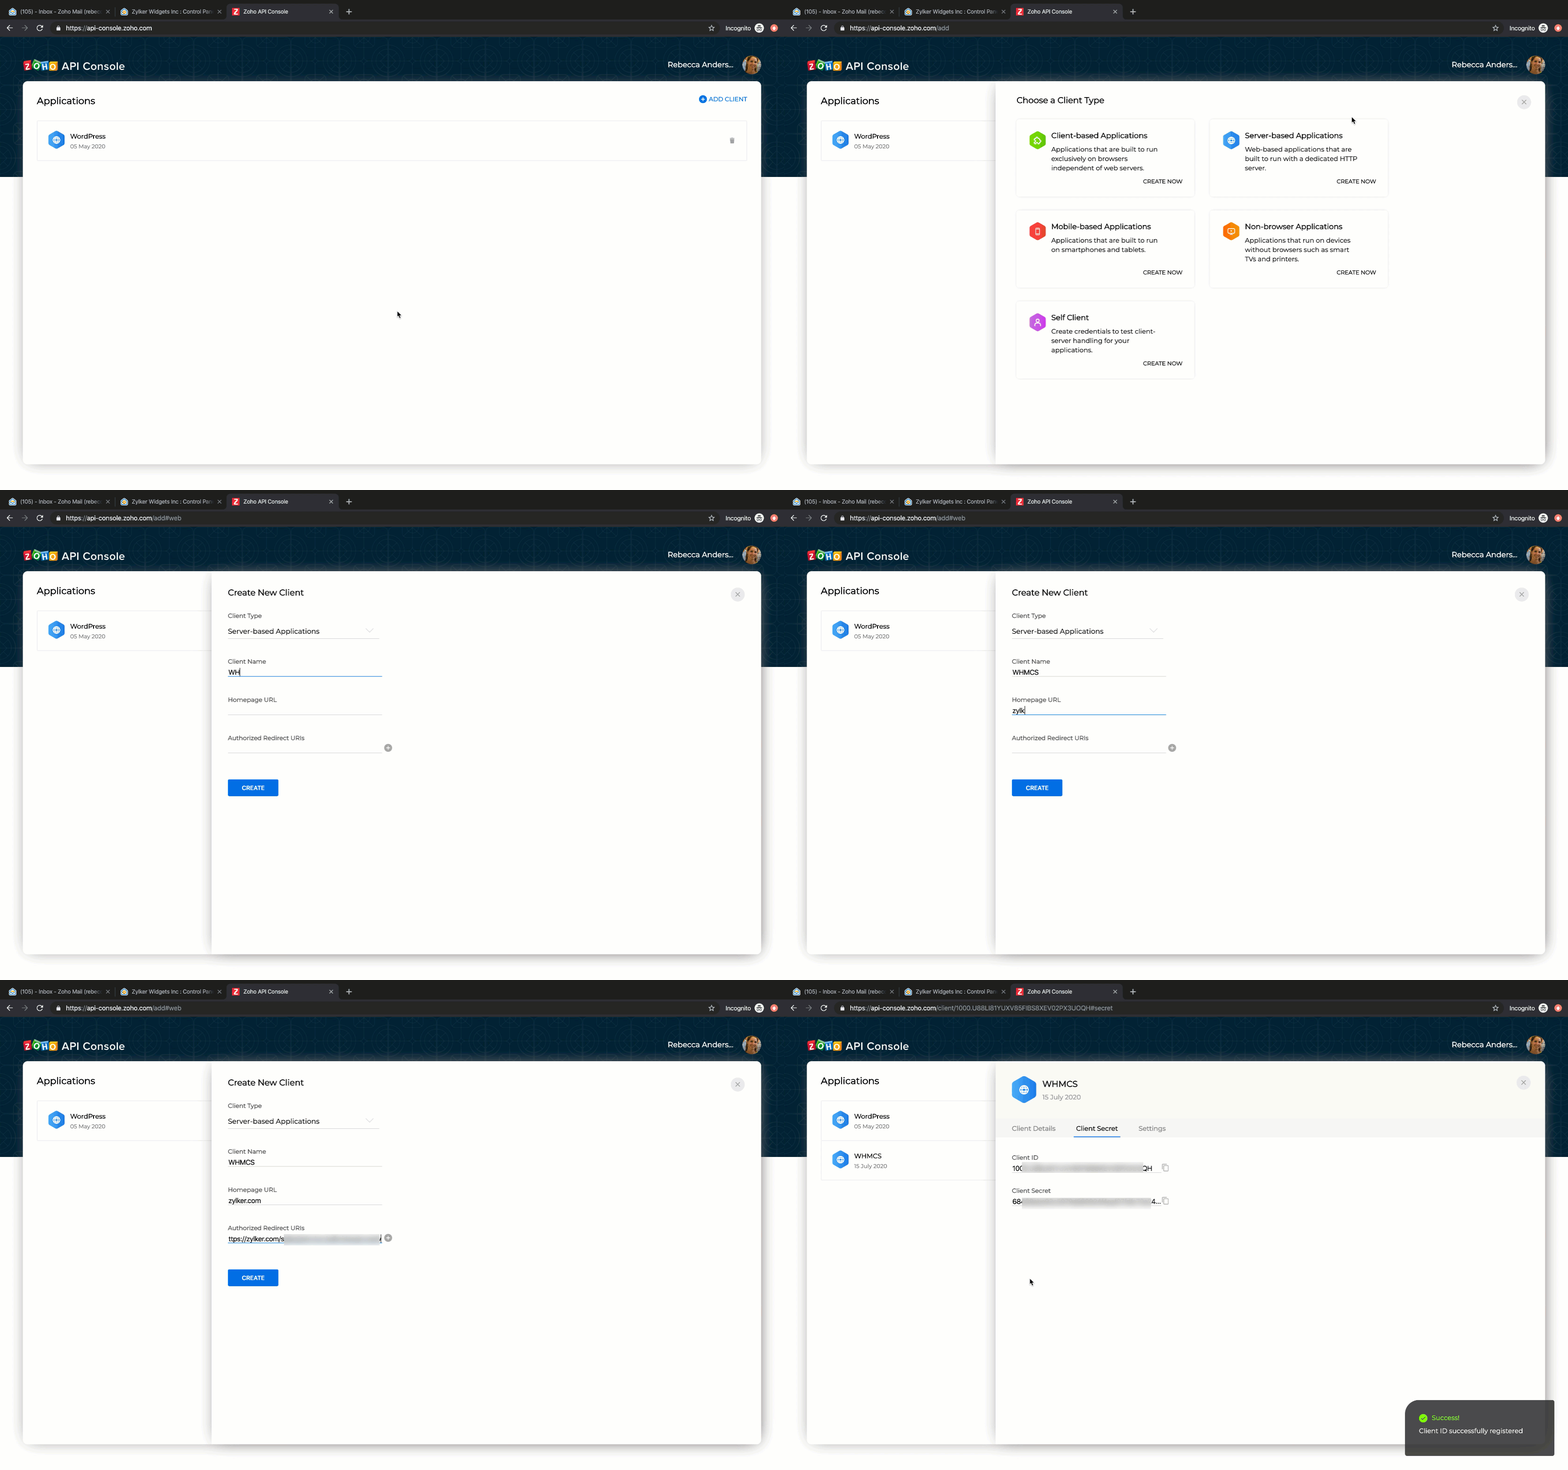
- Click Create to receive the Client ID and Client Secret.
- Go to the Module Settings tab in the WHMCS Admin Area to complete the process.
- Enter the obtained Client ID and Client Secret in the respective fields on the Module Settings page. Select your domain region from the dropdown.
- Provide the Admin folder name to which you need to be redirected after the authentication.
- Click Authenticate.
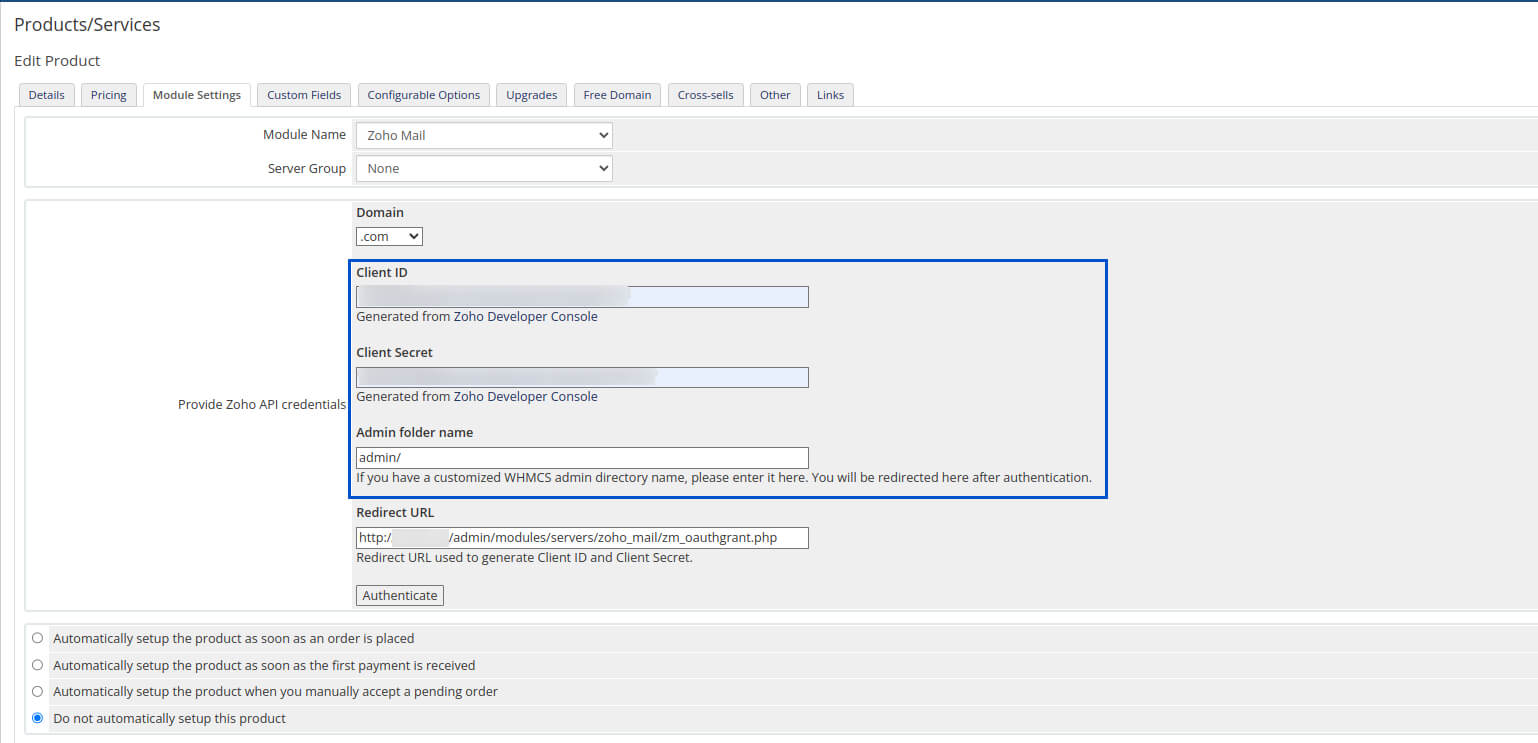
- A Consent screen asking permission to access your Zoho Account data is displayed. Click Accept.
- Authentication Success message will be displayed along with the customer listing. Click Save Changes.

You can manage the Customers License and their Mail Admin Console using the URLs provided in the Customer listing.
Configurable Options
Configurable Options allow you to provide customization options for the Zoho Mail service to your clients.
- In order to assign Configurable Option to a group, go to Setup > Products & Services > Configurable Options.
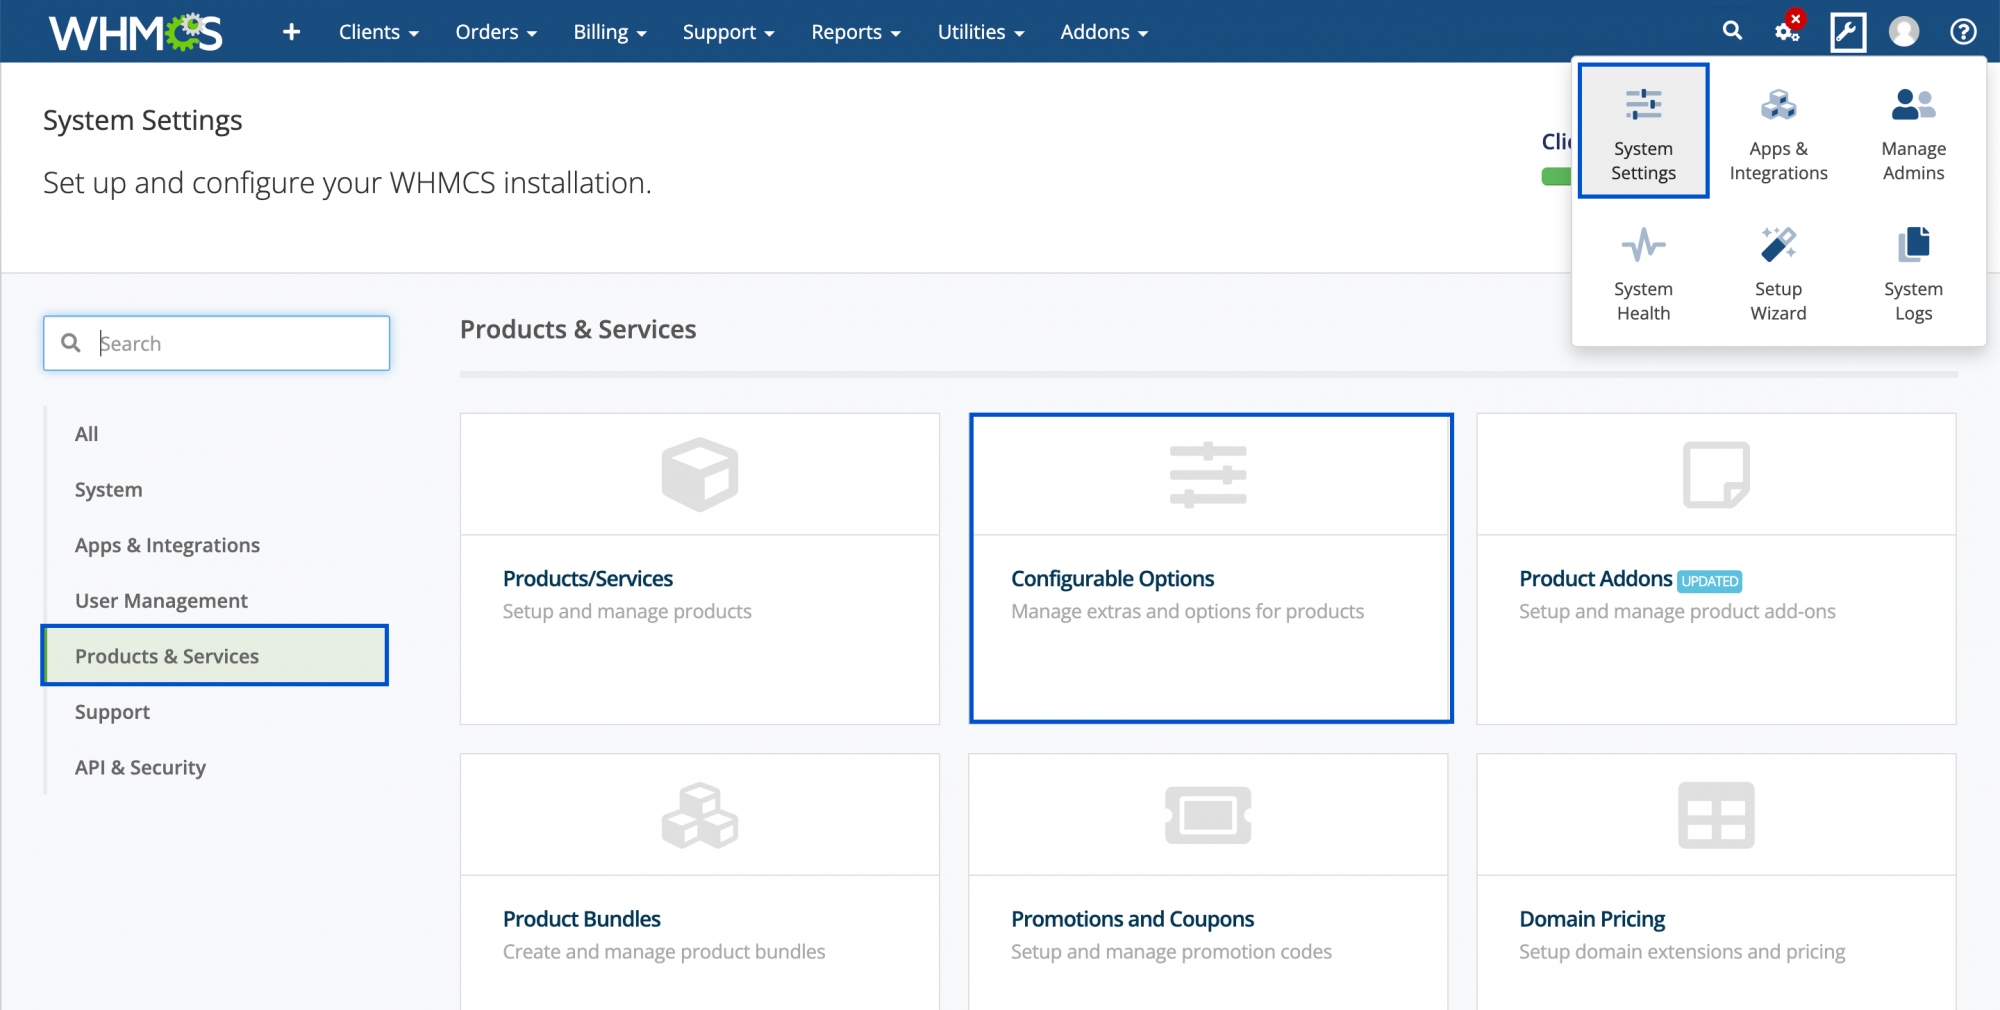
- Click Create a New Group.

- Enter the Group Name and Description. Select the newly created Zoho Mail product in the Assigned Products section and click Save Changes.

- Click on the Add New Configuration Option button. WHMCS Configurable Option window will open.

- Configurable Option 1: Plan Name
- Enter the Plan Name in the Option Name field and select the Option Type as Quantity from the dropdown. Click Save Changes and set the Minimum and Maximum quantity of mailboxes required. Set 0 as the maximum for an unlimited quantity.
- Enter Mailbox in the Add Option field and click Save Changes.

- Enter the preferred Setup and Pricing cost based on the payment frequency and click Save Changes.

- No. of Mailboxes Configurable Option has been set.
- Click Close Window to go back to the Configurable Options page in WHMCS Control Panel.
- Make sure that the Configurable Option you have set will be listed in the Configurable Option Groups page and click Save Changes. Click Back to Groups List.
Zoho Mail Email module has been installed and configured in your WHMCS Admin Panel.
Note:
This is the suggested way in which you can configure the settings. If your requirements vary, you can configure them accordingly.
Approving Client Orders
Your clients will now be able to buy Zoho Mail service with the preferred no.of mailboxes and Plan Type. Once your client purchases the Zoho Mail service, you need to approve the Pending Order to complete the Purchase procedure.
- In your WHMCS Admin Panel, go to Order > List All Orders from the top menu.

- All the pending orders will be listed on the Manage Orders page. Click on the Client Name of the order that needs to be approved.

- Client profile will open. Click on the Products/ Services tab.
- Click on the Create Account button in the Module Commands field.
- Module Command Confirmation dialog appears. Click Yes.
- Module Command Success message appears indicating that Mailbox has been created for the domain. The Client Domain, Super Admin, ZOID, and Domain Verification fields are automatically filled.
- Once this Authentication process is completed, select Active from the dropdown in the Status field to approve the order. Click Save Changes.
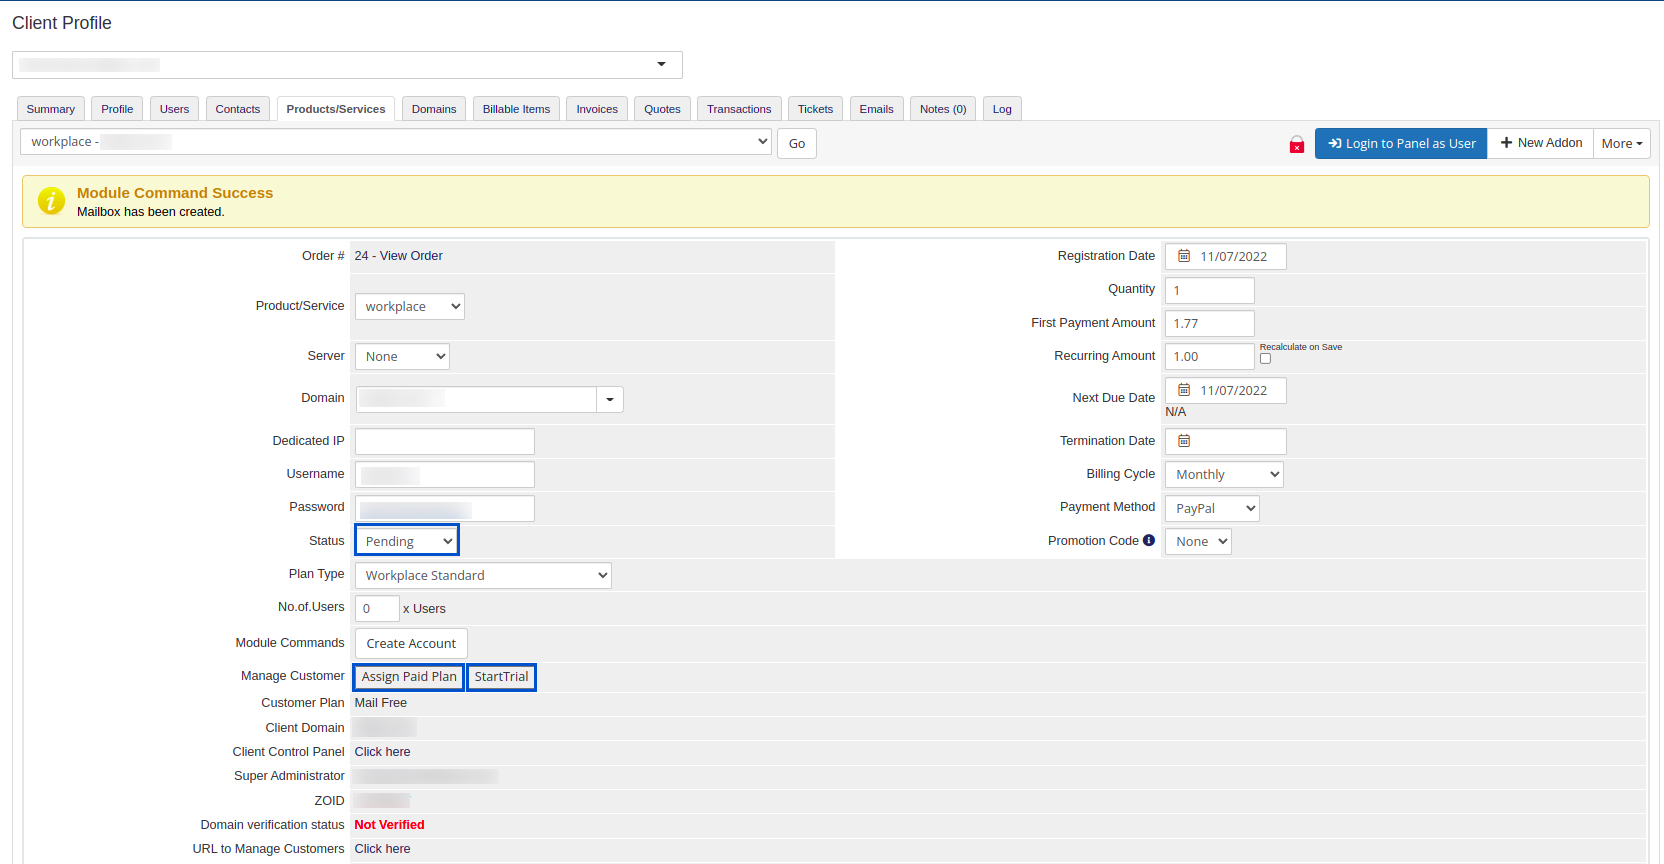
- You can also Assign Paid/ Trial plans using the buttons in the Manage Customers field.
Note:
You can view the Customer plan assigned and also use the Click here link in the Client Control Panel field to navigate to your Zoho Mail Partner Admin console. You can do the verification process for your customer from here.
The Order placed by your client is activated. They can now access their Zoho Mail Admin Console and Mailbox from the Manage Products page in the Client Area.


