

Integrate Zoho Invoice with Braintree
Braintree is an online payment service by PayPal known to offer a seamless and secure checkout experience. By integrating Zoho Invoice with Braintree, businesses can collect one-time card payments safely from multiple countries and currencies and seamlessly track received payments through reports.
Note:
- This integration is available only for users in the United States, United Kingdom, Canada, Australia, United Arab Emirates, Kuwait, Oman, Saudi Arabia, Mexico, and Global editions of Zoho Invoice.
- Transaction charges are applicable as per Braintree’s pricing policy. Zoho does not charge any additional fees.
Set Up Braintree
To set up Braintree in Zoho Invoice, you must have a Braintree account. If you don’t have an account already, you can create one and proceed with the integration.
To set up the integration:
- Log in to your Zoho Invoice organization.
- Go to Settings and select Online Payments.
- Click Set Up Now next to Braintree.

- Enter the following details:
| Field | Description |
|---|---|
| Merchant ID | A unique ID that identifies your Braintree account. You can find this ID in your Braintree > Settings > Business. |
| Public Key | A key that identifies the users in your Braintree account. You can find this key in your Braintree > Settings > API > API Keys. |
| Private Key | A secret key used with the public key to make secure API requests. You can find this key in your Braintree > Settings > API > API Keys. |
| Merchant Account ID | An ID assigned to a specific merchant account in Braintree, in case you have multiple accounts. You can find this ID in your Braintree > Settings > Business. |
| Currency | Select the currency associated with your merchant account ID in Braintree. |
| Client Side Encryption Key | This key encrypts payment details before sending them to Braintree. You can find this key in your Braintree > Settings > API > Client-Side Encryption Keys. |
| Bank Account | Select the bank account where you will receive payments. |
- Click Save.
Now you have configured Braintree in Zoho Invoice.
Collect Customer Payments
Enable Payment Options
After setting up the integration in Zoho Invoice, enable Braintree as a payment option in invoices to receive payments.
To enable Braintree in your organization:
- Go to Invoices on the left sidebar.
- Create a new invoice with the necessary details or click Edit on the particular invoice.
- Scroll to the bottom of the page and check Braintree as a payment option.
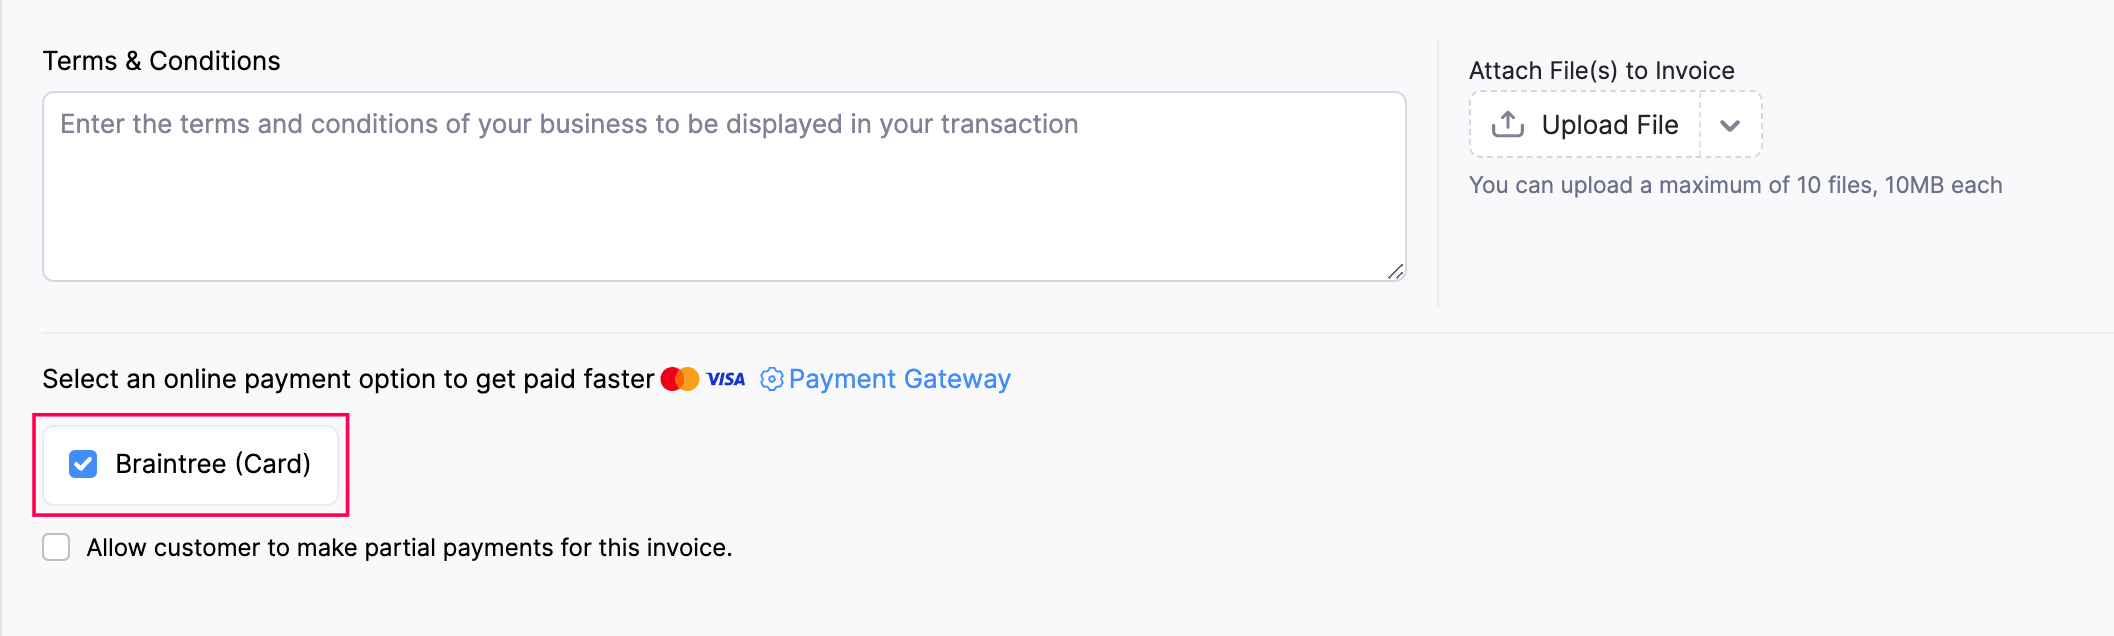
Note: If you select multiple payment gateways, the last configured payment gateway will be used by default to receive payments.
- Click Save.
Braintree will be chosen as the payment option to collect payments.
Receive Payments from Customers
After you’ve enabled Braintree as a payment option, your customers can pay through the shared link or the customer portal.
To make payments, your customers will have to:
- View the invoice from the customer portal or email.
- Click the Pay Now button, and they will be redirected to the payment page.
- Enter their payment information and click Make Payment.
Once the payment is successful, you will receive an email regarding the payment made by your customer, and the invoice’s status will be marked as Paid.
Charge Customers
You can charge your customers manually for the invoices using their card details.
To charge manually:
- Go to the particular invoice from the Invoices module.
- Click the Record Payment dropdown and select Charge Customer.
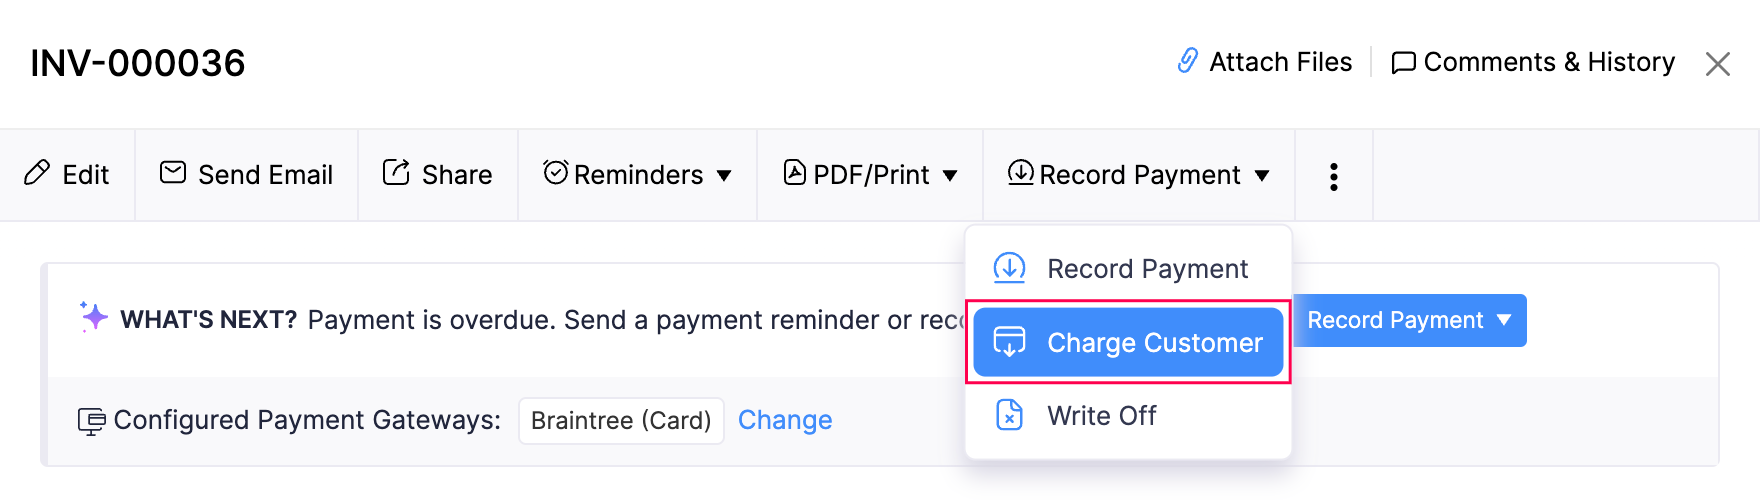
- Choose the customer’s card to charge them.
Insight: If you have not saved your customer’s card, you can request payment information (recommended) or add them now.
- Click Proceed.
Now you have charged your customer for the invoice.
Edit the Integration
If you like to change the associated bank account, you can edit your integration settings. To edit the integration:
- Go to Settings and select Online Payments.
- Click Edit Settings next to Braintree.
- Make the necessary changes and click Save.
Your integration settings will be updated.
Delete the Integration
If you no longer wish to use this integration, you can delete it. Before deleting, unmark Braintree as a payment option in unpaid invoices.
Warning: Braintree is automatically enabled across all your Zoho Finance apps, so disabling it in one app will disable it in all other Zoho Finance apps.
To delete the integration:
- Go to Settings and select Online Payments.
- Click the Trash icon next to Braintree.
- Click OK to confirm.
Your Braintree integration will be deleted in Zoho Invoice.
 Yes
No
Yes
No
Thank you for your feedback!