


How to create an event in the Zoho Calendar
Have you ever found yourself juggling multiple appointments, meetings, and important dates? If so, you know just how crucial it is to have a well-organized online calendar.
With numerous deadlines and tasks competing for our attention every day, managing all of this information in a single place is crucial for your productivity. One of the most effective ways to manage your schedule is by consolidating all the necessary details in your calendar.
Why do you need to create an event in the calendar?
Creating and updating your schedules in an online calendar is essential not only for effective time management but also for maximizing productivity for the following reasons:
- To plan your schedule. Setting specific times for each of your tasks and appointments gives you clarity on how your day, week, or month is going to look like. This allows you to prioritize your tasks and prevent overbooking or double-booking your schedule.
- To improve focus. A structured schedule reduces distraction and helps sustain momentum throughout the day. This allows you to do more tasks in less time and achieve your goals more efficiently.
- To prepare you for busy days. A well-organized calendar allows you to anticipate busy periods and plan accordingly. This minimizes stress and last-minute rushes, allowing you to always perform to your full potential.
How to create an event in the Zoho Calendar
To create an event, sign into Zoho Calendar with an existing Zoho account, or sign up for free using your email address.
- Click on the Create Event button in the top-left corner.
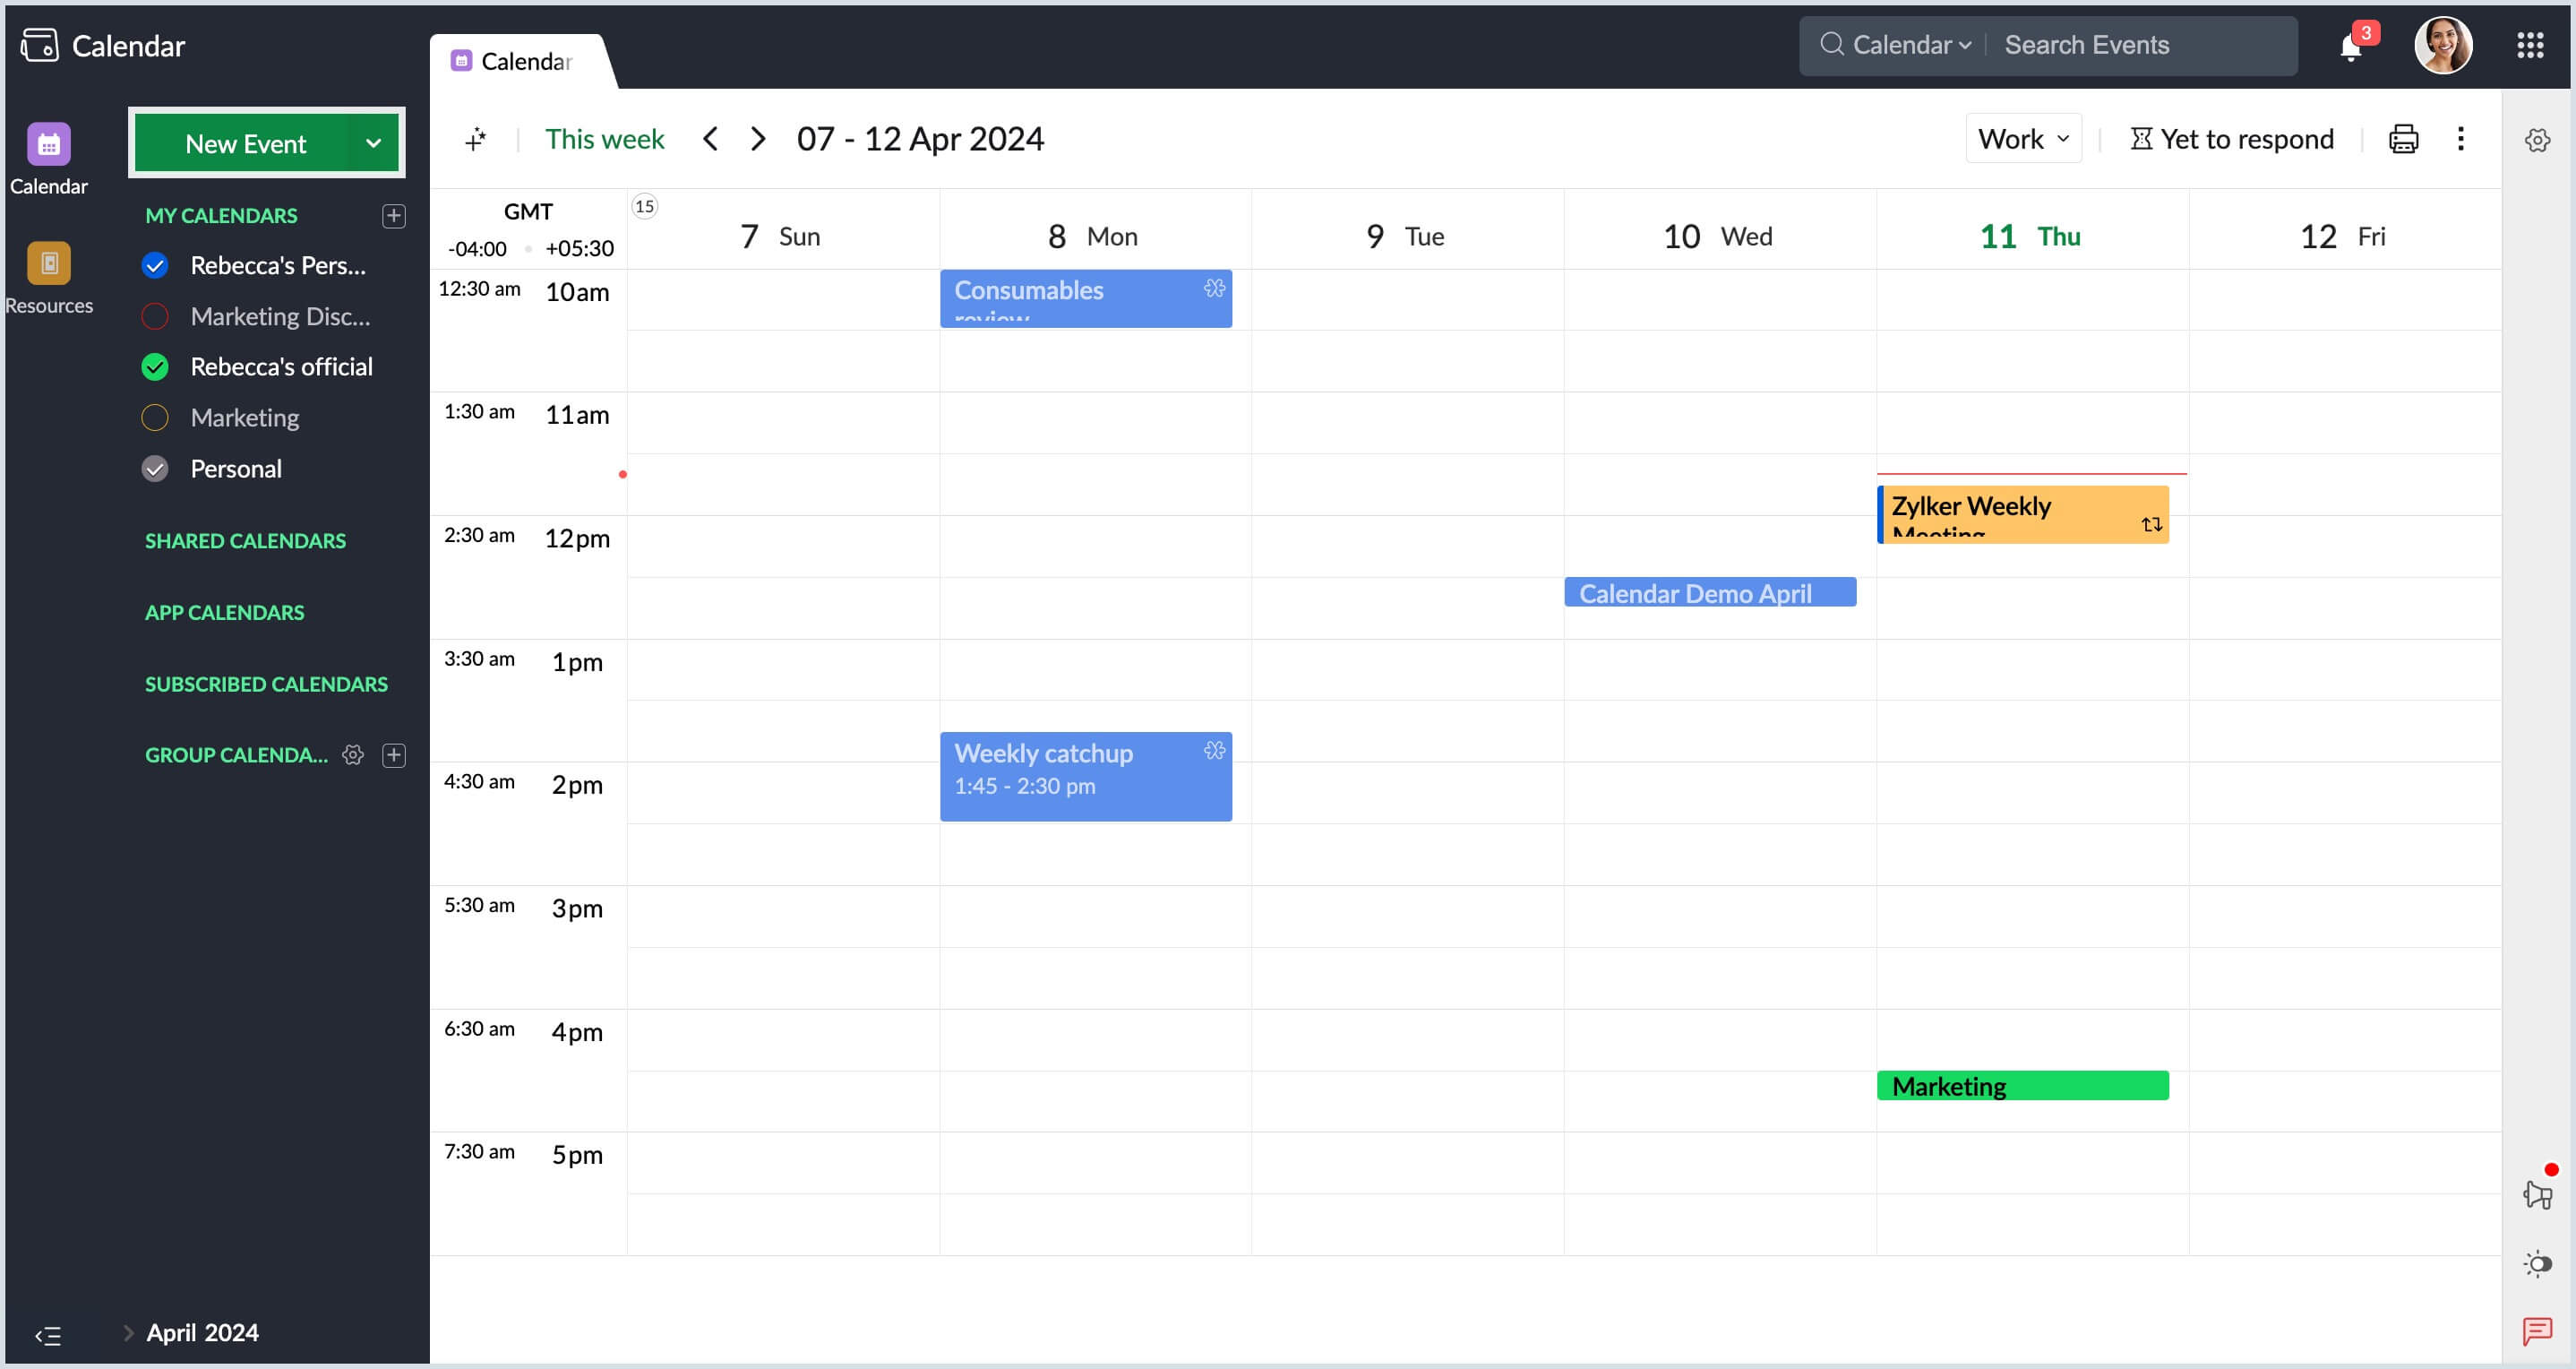
- In the Event creation form, enter a title for your event.
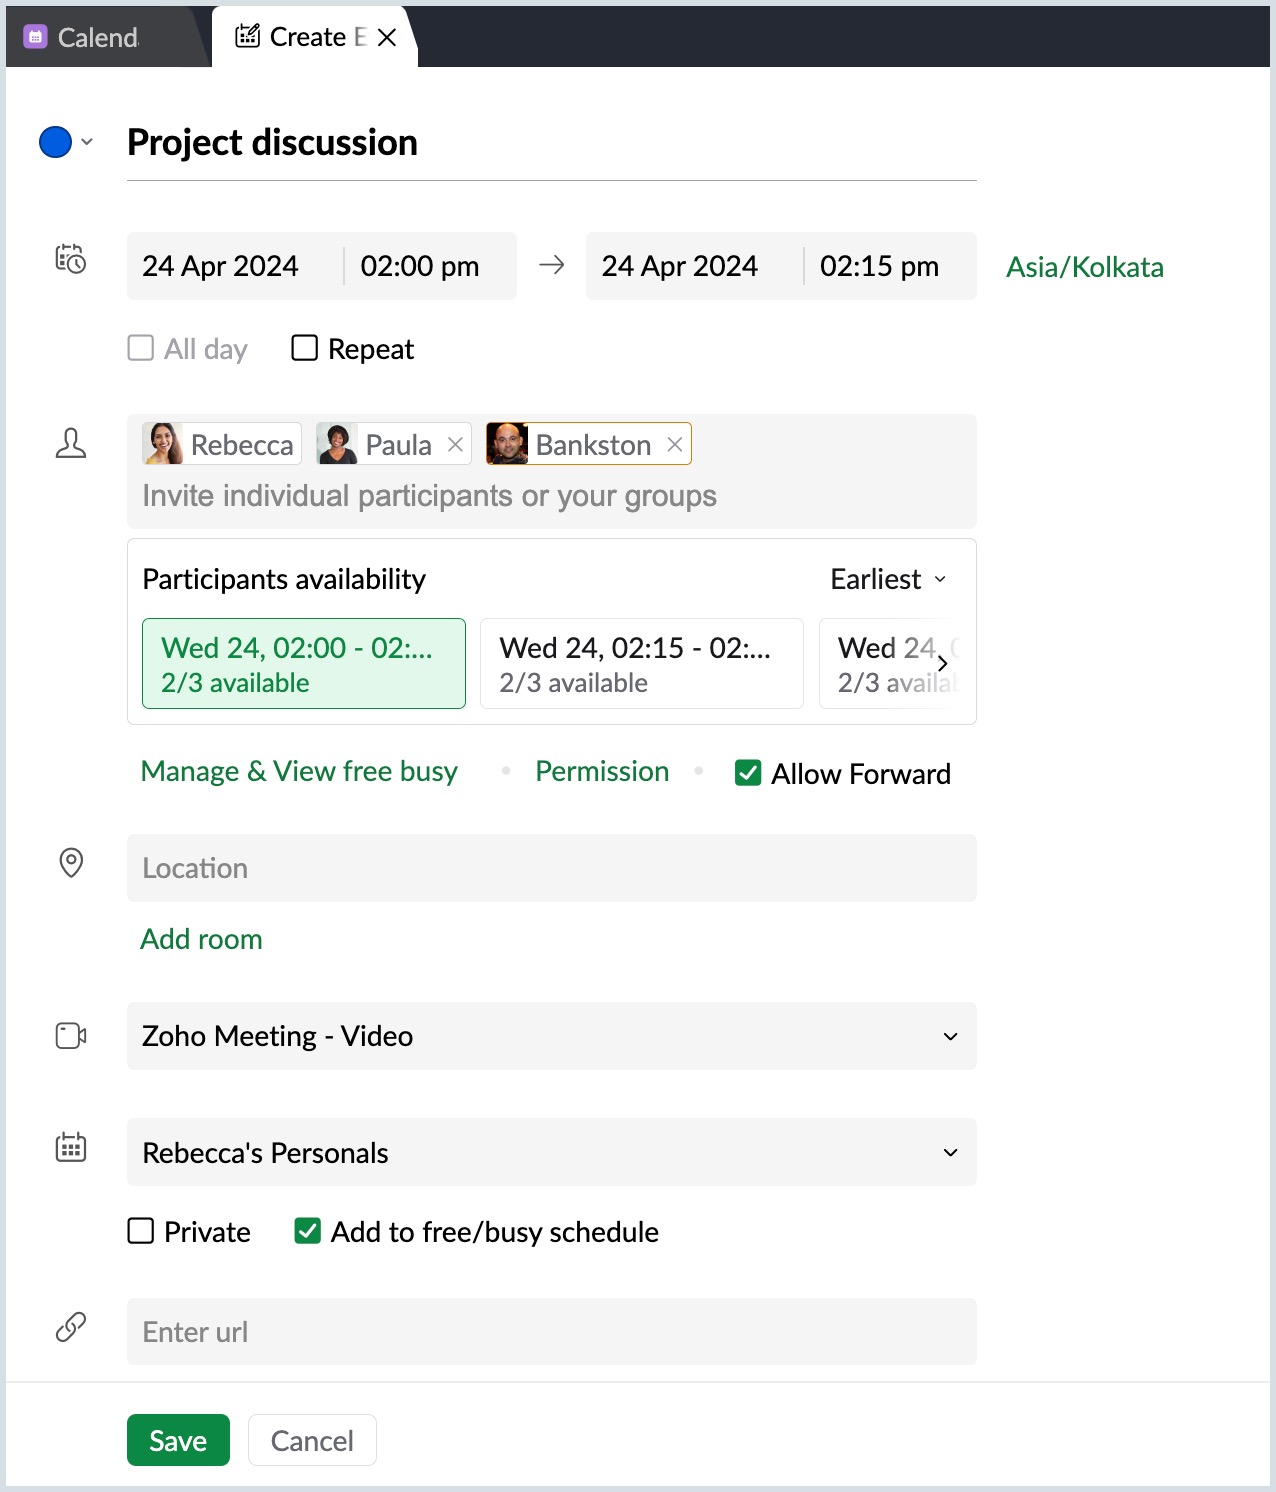
Next, choose your desired date and time.
Note: You can choose whether you'd like it to be an all-day event or a repeating event. If it's a repeating event, enable the Repeat event checkbox, set your time interval in the pop-up, and click Save.
Now that you've chosen your preferred time slot, enter the email IDs of individual or group participants as necessary.
Note: You can check your participants’ availability by checking their next available time slots in the Participants' Availability section or by selecting Manage Free/Busy.
- Enter the location of your event. If it's a virtual event, choose your preferred video conferencing option.
- Next, choose the calendar you'd like this event to be part of.
- If you want this to be a private event (only attendees can view the event; anyone having access to the calendar will not be able to view the event), enable the Private checkbox.
- You can add this event to your free/busy schedule by enabling the Add to free/busy schedule checkbox.
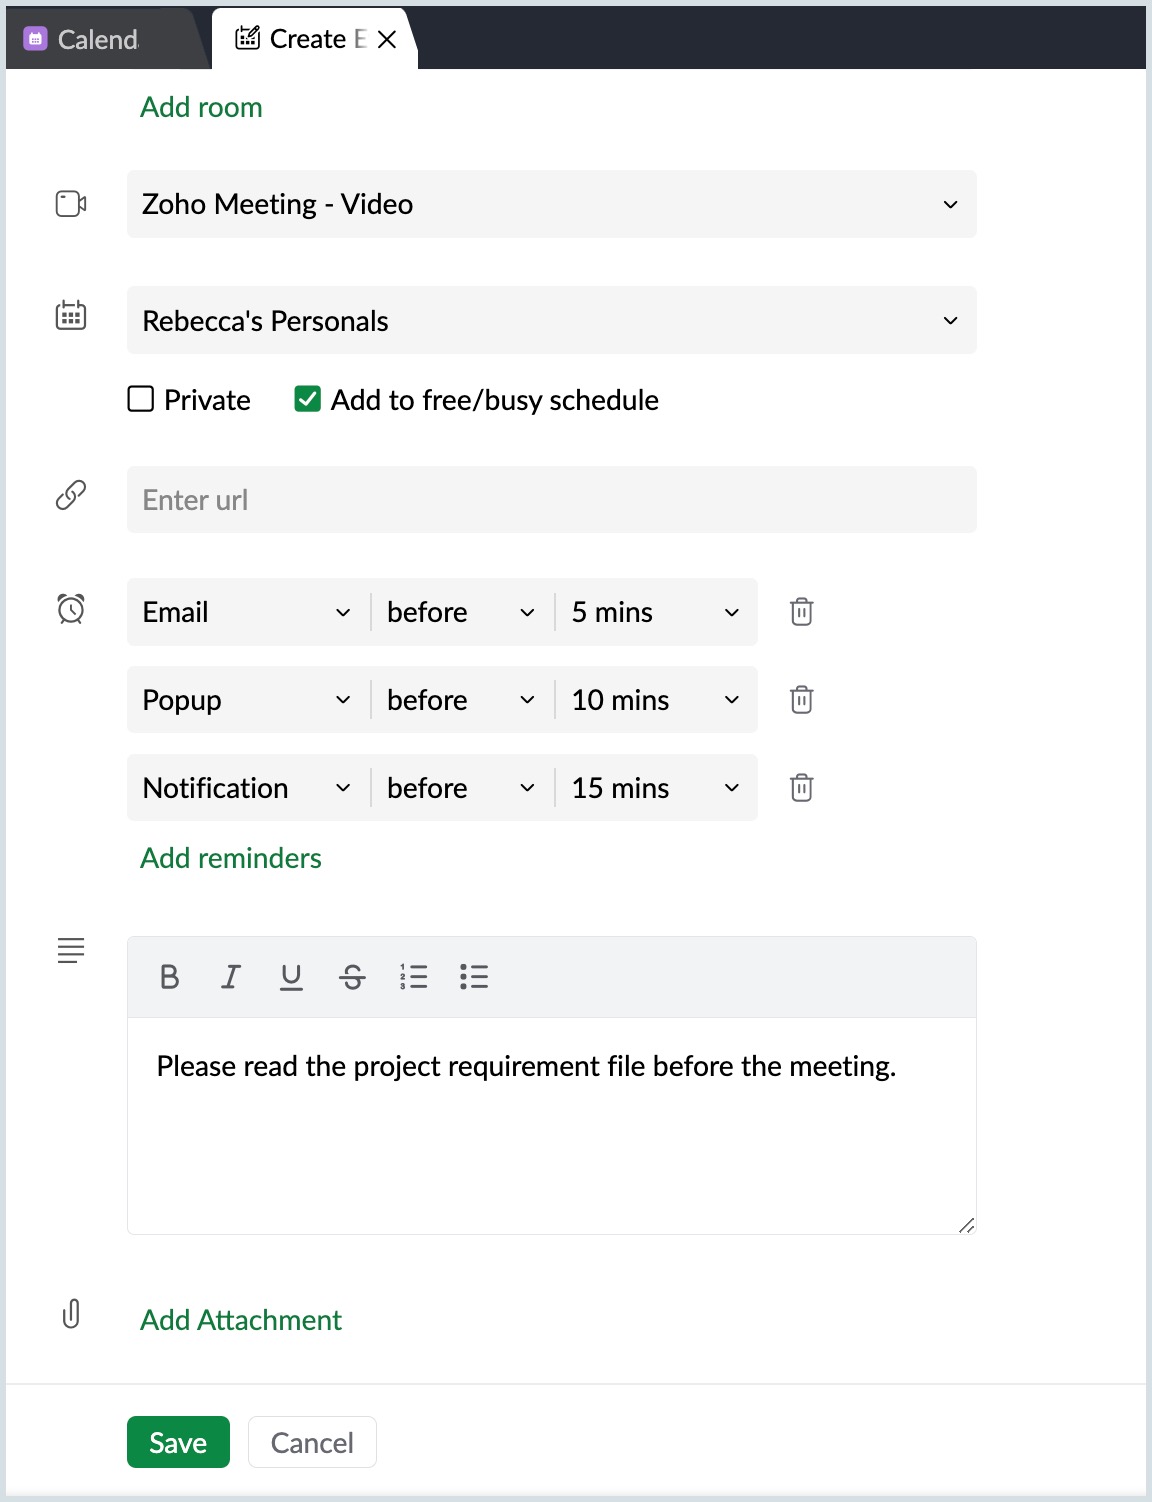
- Choose your preferred reminder type, time, and duration from the Add reminder dropdown and click Save.
- Now, in the pop-up box, choose your preferred option on whom to send the calendar invite and select Confirm.
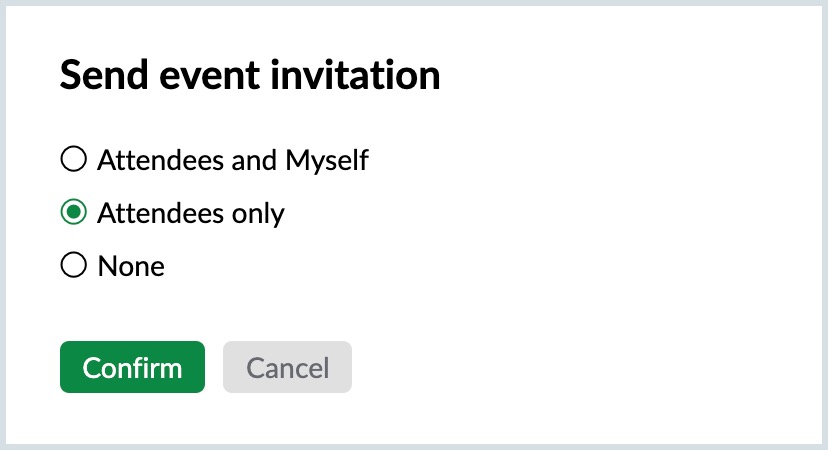


That’s it. You’ve created your event and sent an email invite to your invitees containing all the necessary details.


