Why should I configure webhooks for Razorpay?
Sometimes, the payments that your customers make via the Razorpay integration may not reflect in Zoho Billing, even if the payment went through successfully.
A few common reasons this could happen is:
- Your customers closed their browser window as soon as their payment was completed on Razorpay, but did not wait until they’re redirected back to your website/webapp or Zoho Billing’s hosted payment pages.
- Your customers chose to make their payment via a UPI app like Google Pay but closed Google Pay before it could redirect back to your website/webapp or Zoho Billing’s hosted payment pages.
- Miscellaneous cases where a transaction will be marked as successful on Razorpay’s side only after a particular period of time.
In most of these cases, Razorpay will eventually mark a transaction as successful if the payment went through and money was deducted from your customer, but this might not reflect in Zoho Billing because of the delay in doing so. These transactions in Zoho Billing might remain in the Failure status, even after Razorpay marks the transaction as successful on its side.
Enabling webhooks for Razorpay ensures that the status of your customers’ payments made via the Razorpay integration always reflects in Zoho Billing.
Setting up the Webhooks
Here’s how to set it up:
Go to Zoho Billing > Settings > Integrations > Online Payments. Click Set it up next to Razorpay. Copy the URL present in the pop-up that follows.

Log in to your Razorpay dashboard at https://dashboard.razorpay.com.
Go to Settings from the left sidebar and navigate to the Webhooks tab.
Click + Add New Webhook.

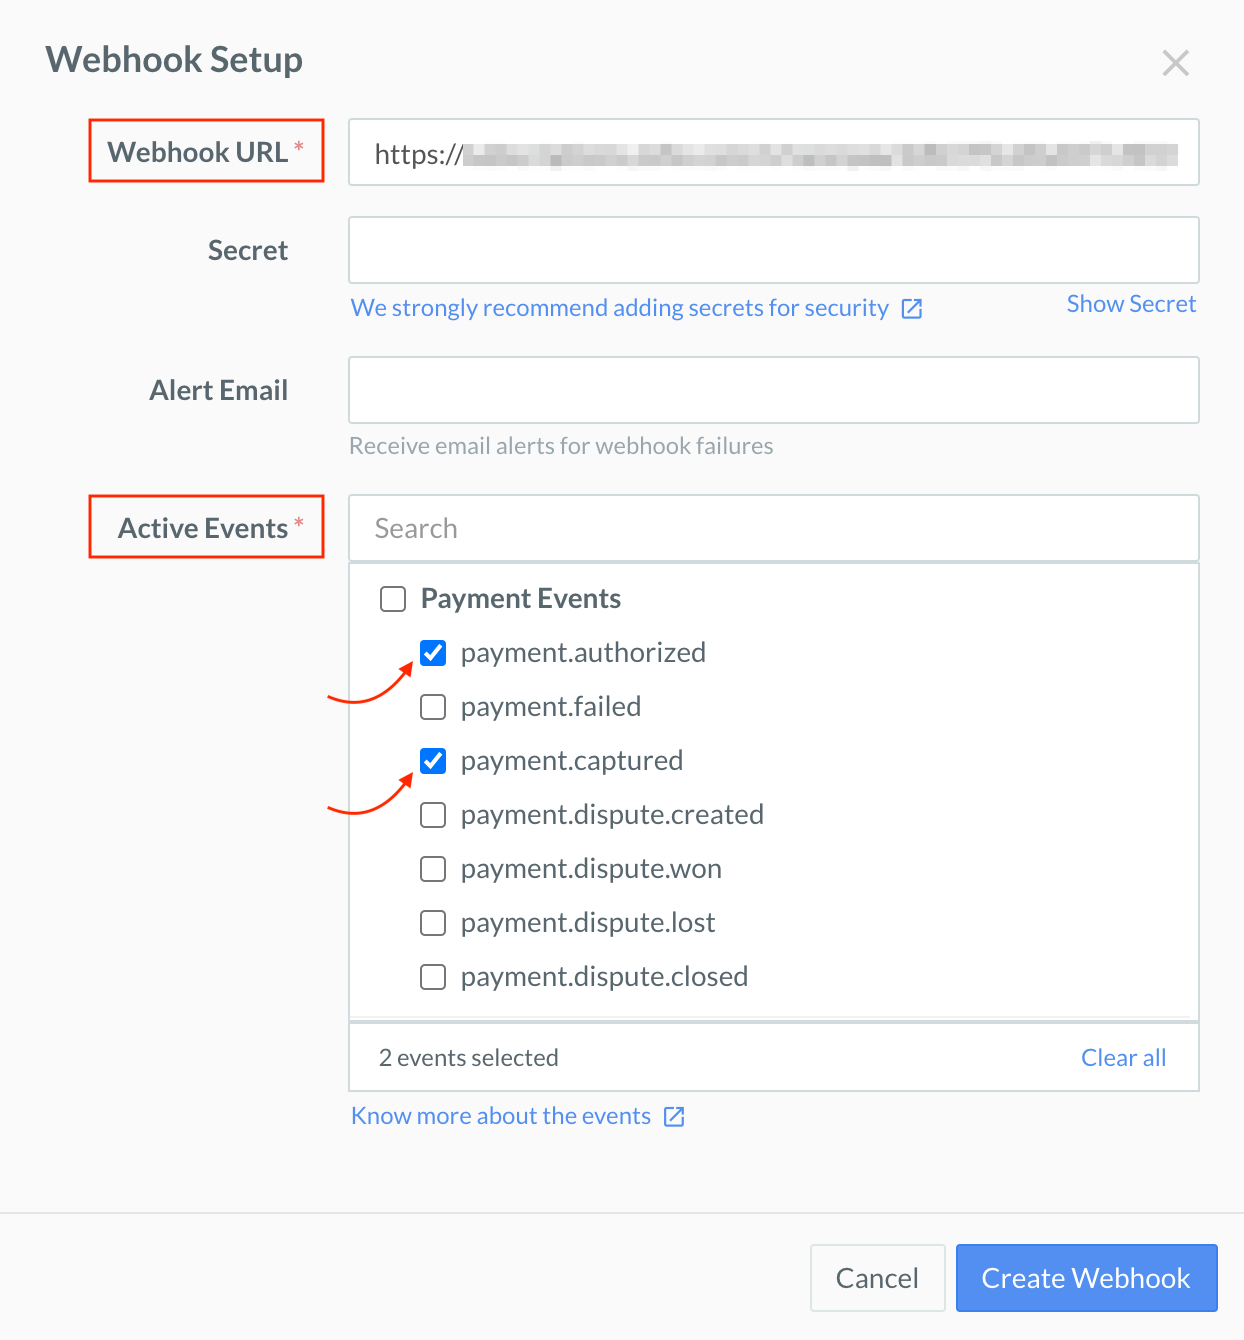
Paste the URL, which you had copied from Zoho Billing, in the Webhook URL field in the pop-up.

Select payment.authorized and payment.captured under Payment Events in the Active Events field.
Click Create Webhook.
Now, all your customers’ payments via the Razorpay integration will reflect in Zoho Billing accurately.


 Yes
Yes