Authenticating Watson Assistant account to connect with Zobot
To Setup:
- In Zoho SalesIQ, navigate to Settings > Bot, click Zobot.
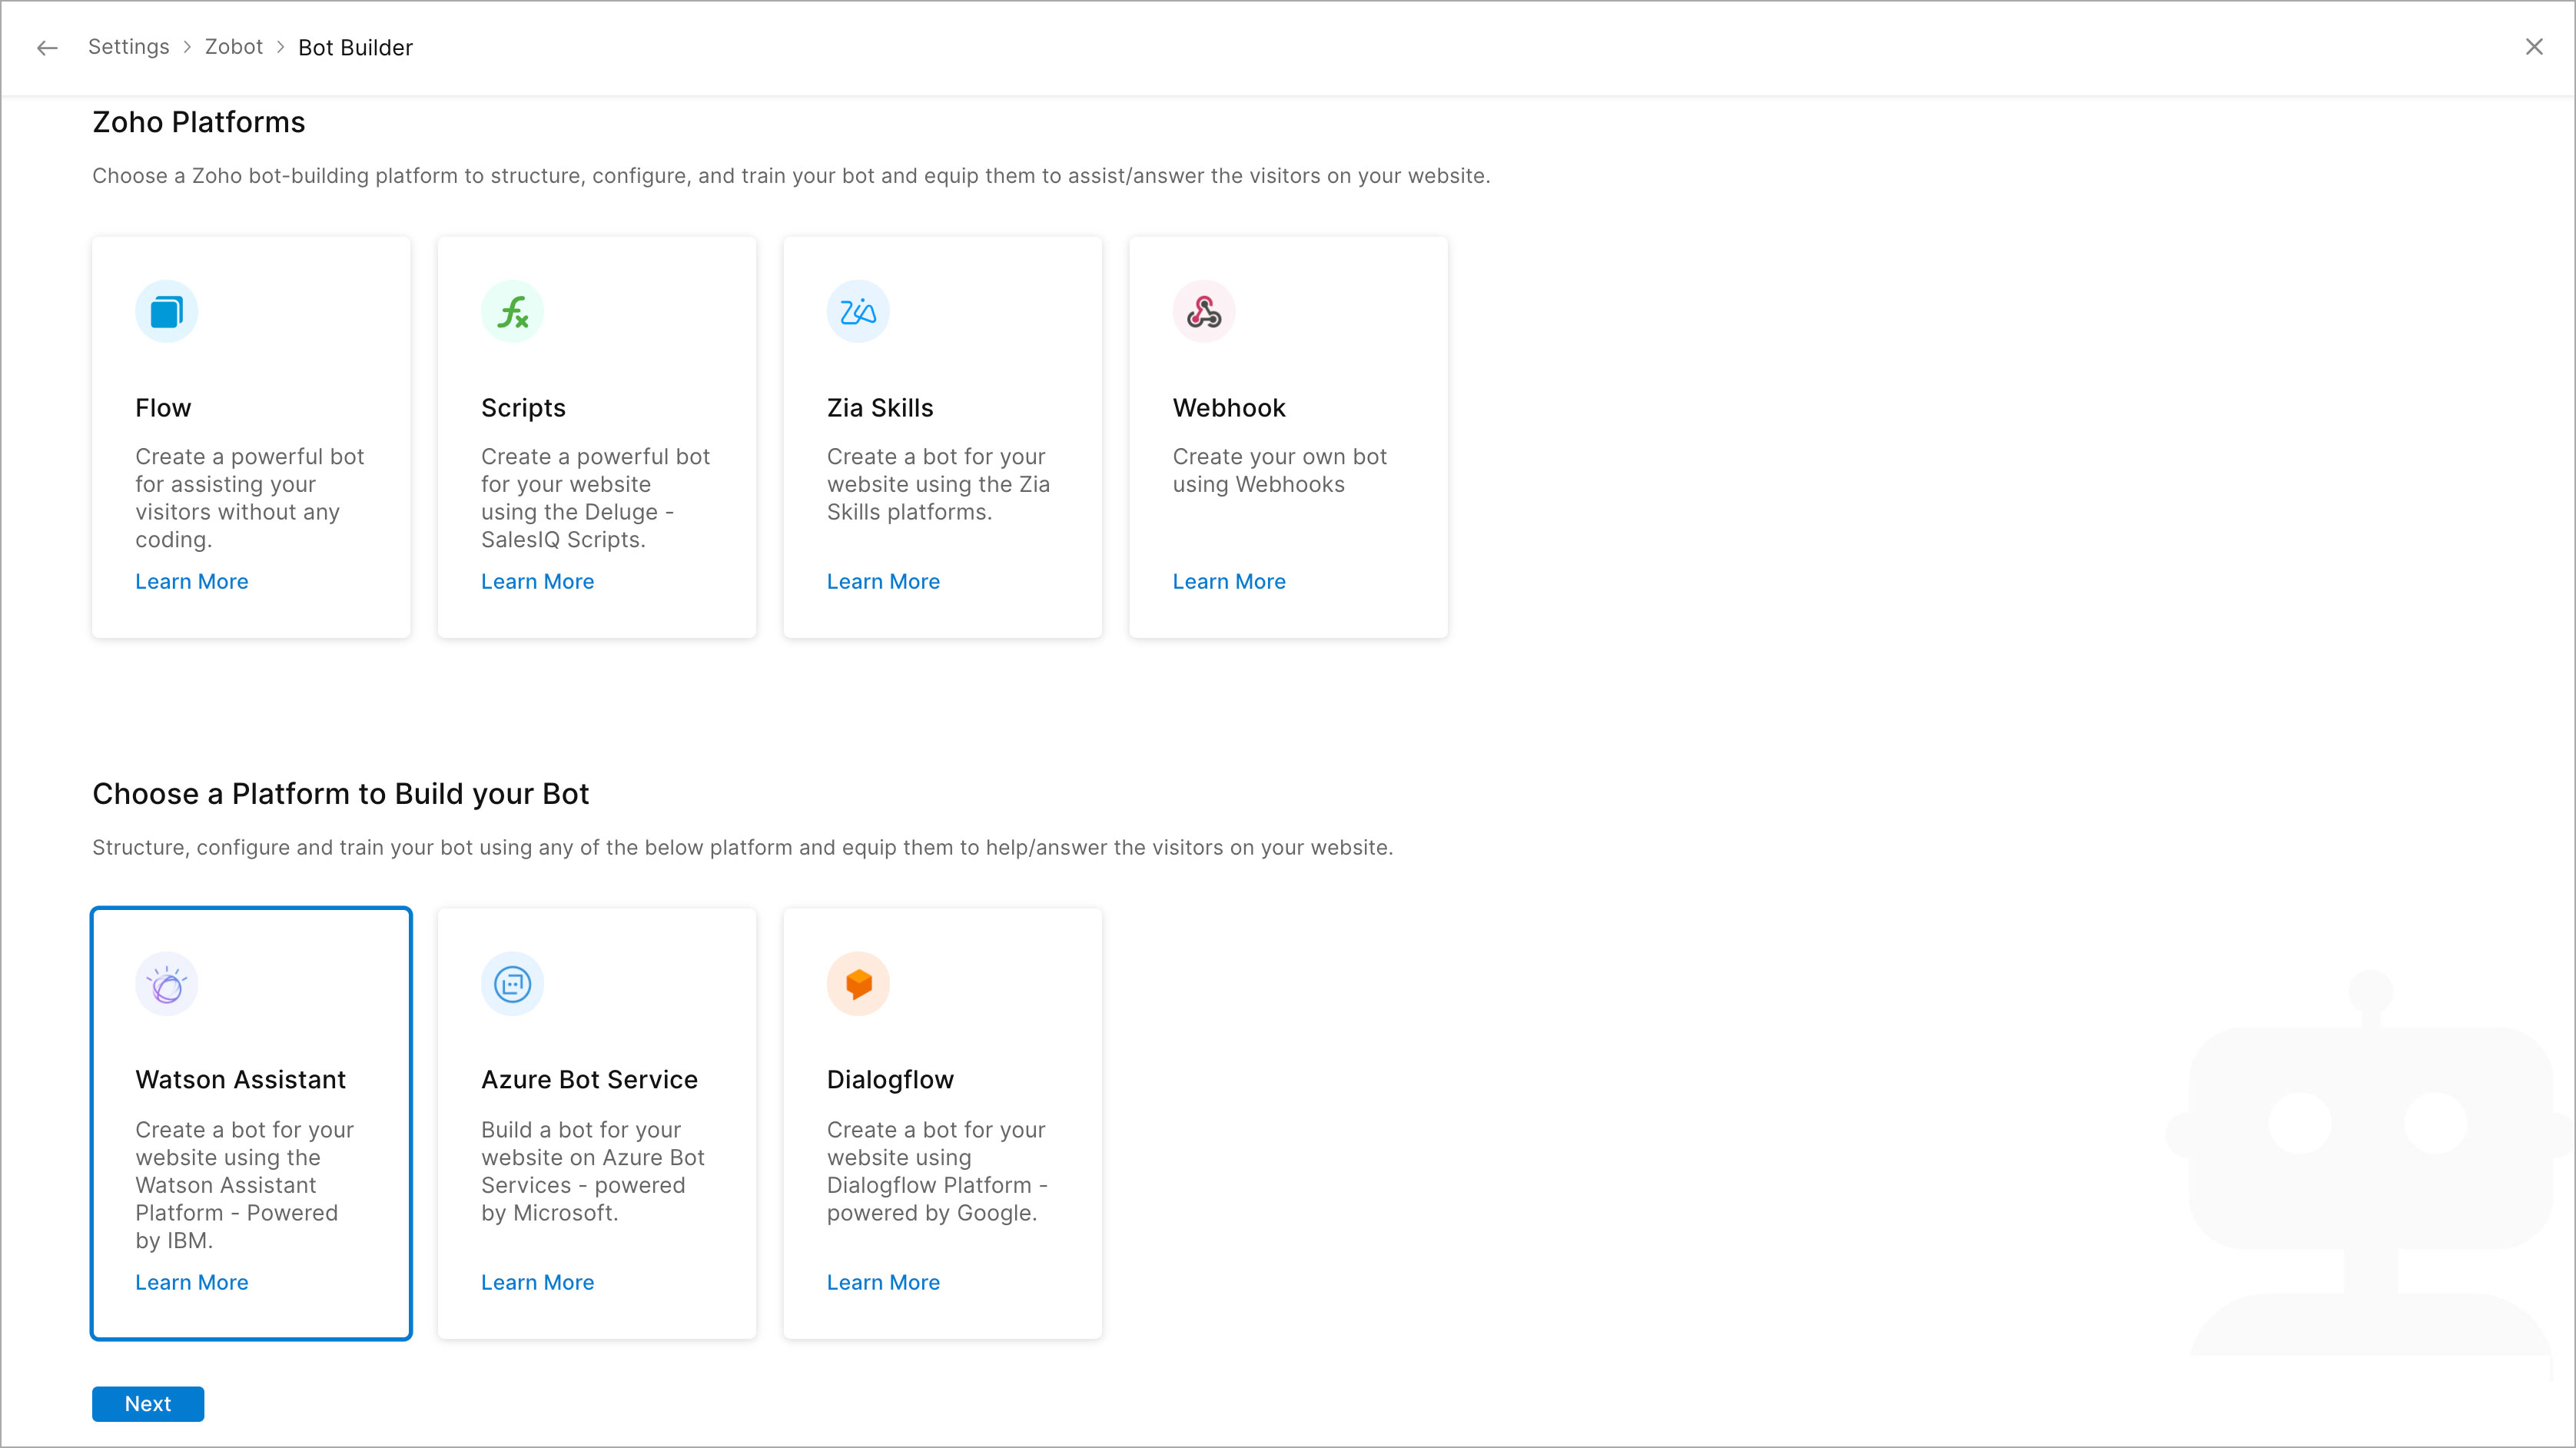
- Inside the bot builder, give your bot a Name.
- Then, choose the platform to structure, configure, and train your assistant - Watson Assistant. Click Next.
- Then, choose the brand on which you would like to deploy the bot on. Click Next.
- Your bot will be fully set up and ready to configure.

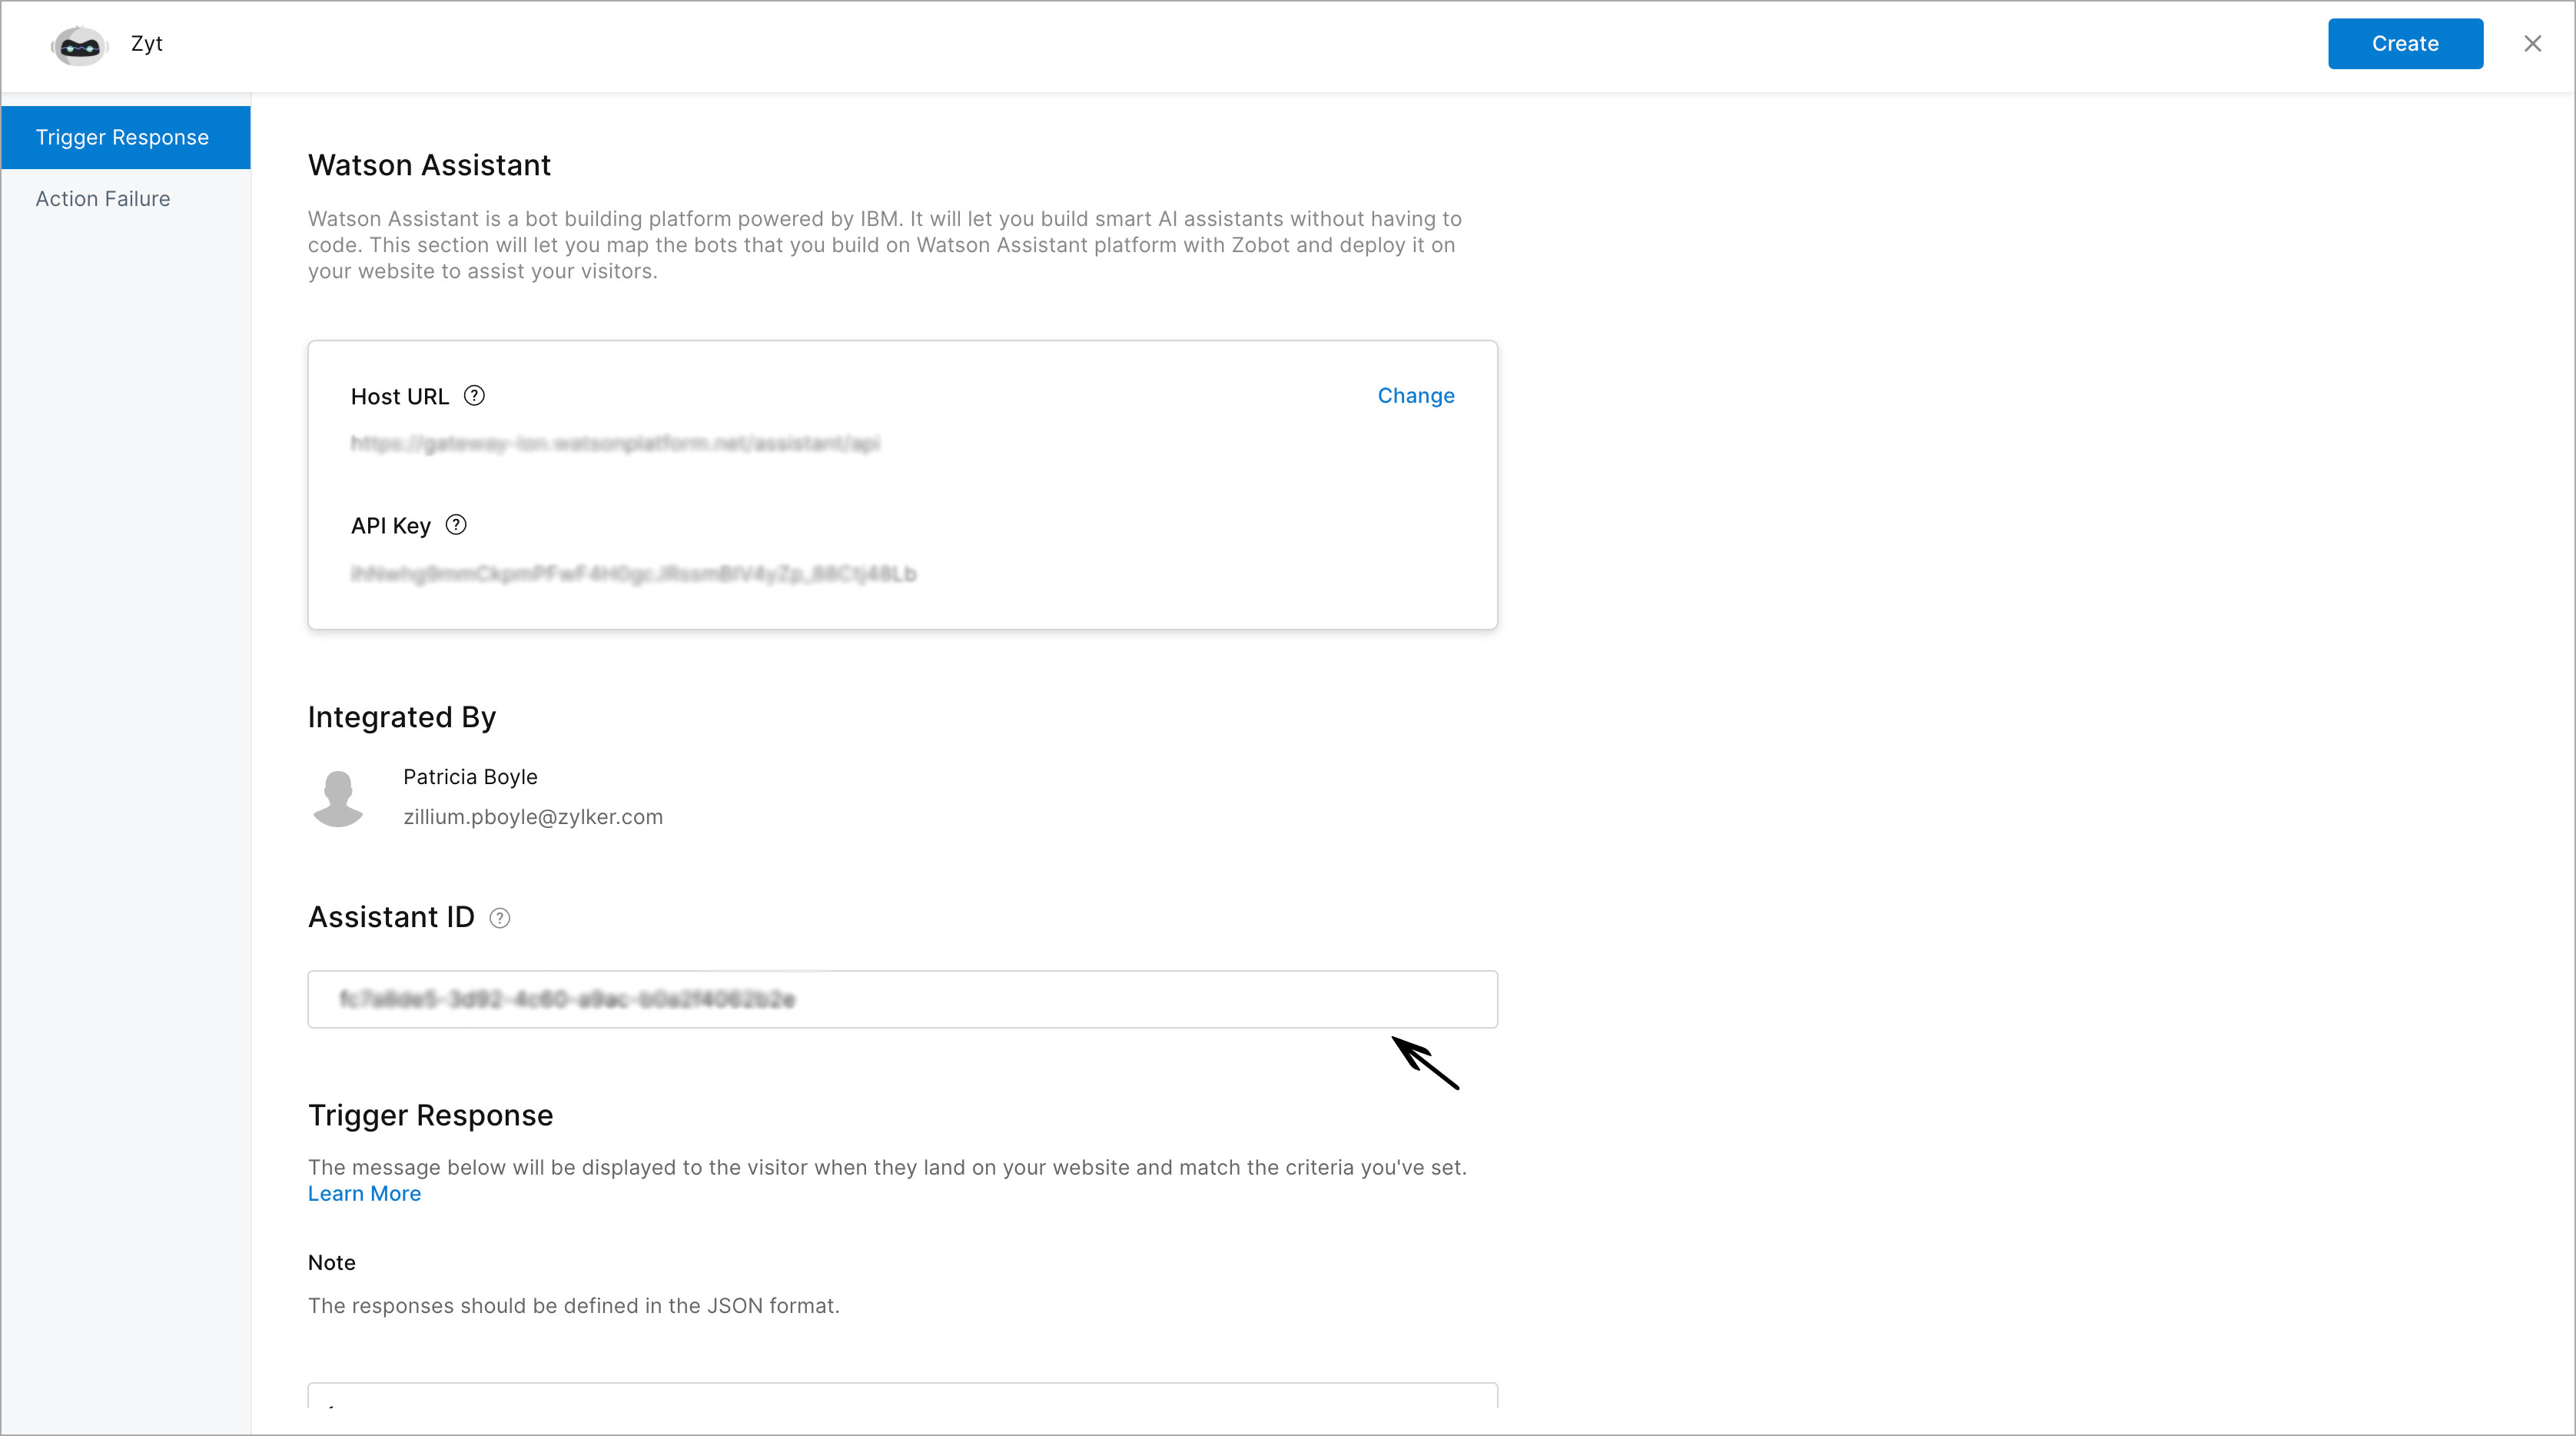
- The Watson Assistant Configuration window appear. You should enter the Watson Host URL and API key in the respective box and click Authenticate Watson Assistant.
To get the Host URL and the API Key:
- Login to IBM Cloud. In the left menu, choose Watson.
- You'll land on the Build with Watson page, click Watson services.
- If you're a new user, then you can create a service by clicking Browse service and choose one or more APIs from the catalog, click Add Services,
- If you have an exisiting service then you can click on the Existing Service and choose the Service name under Services option
- You can find the API Key and URL, you can use the credentials to integrate with Zobot.

- The integrated person's name will be displayed here. You can click Change, to integrate a different Watson Assistant account.
- If you are a Portal owner/ Administrator who created the Watson assistant connection then the Access the Watson Resources button will appear on the top right corner.
- If you are a Portal owner or Administrator then you will be able to access the Zobot and edit. For Supervisor, he will be able to view the Zobot but will not be able to edit the Zobot. Associate will not be able to access the Zobot.

- Then a prompt to enter the Assistant ID will appear. An assistant ID is given to the bot to differentiate one from another, ie., each Watson Assistant created in your IBM cloud account will have a distinguished assistant ID. You can use the ID to deploy the Assistant in your Zobot to connect with your website visitors. If you wish to change the assistant, you can change the Assistant ID here and the bot you wish will be deployed to assist your website visitors. (Note: You should have an account IBM cloud and an assistant built in it, to get the Assistant ID.)
Where to get the Assistant ID?
- In the Watson Assistant dashboard, Click the Assistants tab.
- The assistants you've created will be listed, choose the assistant you wish to deploy on your website via Zobot and click the options icon and click Settings in the right corner of each assistant.
- The Watson Assistant Settings page appears, click API Details, and copy the Assistant ID from the page.

- Then, provide a Trigger Response in the text box. You can use only JSON format to setup the trigger response, SalesIQ does not support the text format. The message can be a text or input/display cards, you should follow the JSON format given below to add the trigger response.Note: The message you've provided here will be triggered only if you have set the trigger in the Settings > Bots > Add Bot > Choose Visitor Type section.

- You can also define Action failure responses, if you have defined an action for your bot and if in case the bot will not not be able to complete the given action then the message configured here will be displayed to the visitors.
- After standard business hours - The message/action configured in this section will be displayed to the visitor if they try to connect with an operator outside the standard business hours.
- Operators not available - The message/action configured in this section will be displayed when the bot tries to forward a visitor chat to the operator and all the operators are busy assisting other visitors and no one is available to take up the chat.
- Operator does not exist - The message/action configured in this section will be displayed when the bot tries to forward the chat and finds the mentioned operator is inactive or not a part of the portal anymore.

Text Message: You can use this format to trigger a text message.
{
  "replies": [
    {
      "text": "Hello there, I'm Zappy. "
    },
    {
      "text": "How may I help you today?"
    }
  ]
}
Text and Input Cards: You can use this format to trigger a message using text and an input card.
{
  "replies": [
    {
      "text": "Hello there, I'm Zappy.  "
    },
    {
      "text": "How may I help you today?"
    }
  ],
  "input": {
    "type": "select",
    "options": [
      "I would like to buy a property",
      "Thanks. Just browsing!"
    ]
  }
}
Text and Display Cards: You can use this format to trigger a message using text and a display card.
{
  "replies": [
    {
      "text": "Hello there, I'm Zappy. "
    },
    {
      "text": "How may I help you today?",
      "image": "http://zylker.com/help/common.png",
      "type": "links",
      "links": [
        {
          "url": "https://zylker.com/home",
          "text": "Zylker-home",
          "icon": "http://zylker.com/help/home.png"
        },
        {
          "url": "https://zylker.com/special-discounts",
          "text": "Zylker-discounts",
          "icon": "http://zylker.com/help/discounts.png"
        }
      ]
    }
  ]
}
Text, Input and Display Cards: You can use this format to trigger a message using text, an input card and a display card.
{
  "replies": [
    {
      "text": "Hello there, I'm Zappy."
    },
    {
      "text": "How may I help you today?",
      "image": "http://zylker.com/help/common.png",
      "type": "articles",
      "title": "Articles about property",
      "articles": [
        "121212121",
        "123434343",
        "123334678"
      ]
    }
  ],
  "input": {
    "type": "select",
    "options": [
      "I would like to buy a property",
      "Thanks. Just browsing!"
    ]
  }
}
Text and Suggestions: You can use this format to trigger a message using text and suggestions.
{
  "replies": [
    {
      "text": "Hey there! How may I help you today?"
    },
    {
      "text": "Here is the reference image",
      "image": "http://zylker.com/help/common.png"
    }
  ],
  "suggestions": [
    "I want to buy a property.",
    "Thanks. Just browsing"
  ]
}
- Click Create.

- You can edit Trigger message and also edit the assistant name to change the bot deployed.
- You can Access Watson Assistant Resources window from the bot dashboard


