Bigin Extension
Bigin is a CRM(Customer Relationship Management) tool tailored to seamlessly meet the needs of small businesses. With Bigin you can organize customer information and sales activities to manage and improve customer relationships effortlessly. Using Bigin extension, you can view all information, add someone as a contact, add note to a record along with editing and scheduling activities and insert an email template from Bigin into your Zoho Mail composer all within your mailbox.
Bigin integration is enabled by default in Zoho Mail for all users who use both these services. Hence, no further configuration is required to access the Bigin from the eWidget.
Table of Contents
Using Bigin in eWidget
- Log into your Zoho Mail account.
- Click on the eWidget icon on the right-hand side pane of your mailbox.
- By default, the Bigin extension is not pinned to the right-side tab. To pin the Bigin extension to the eWidget, follow these steps:
- Click on the eWidget icon .
- Search for 'Bigin'.
- Click on the pin icon.
Note:
If you do not have a Bigin account, you will have the option to create one directly from the eWidget. If you already have a Bigin account, you can view all the details about the contact, including both the sender and the receiver.
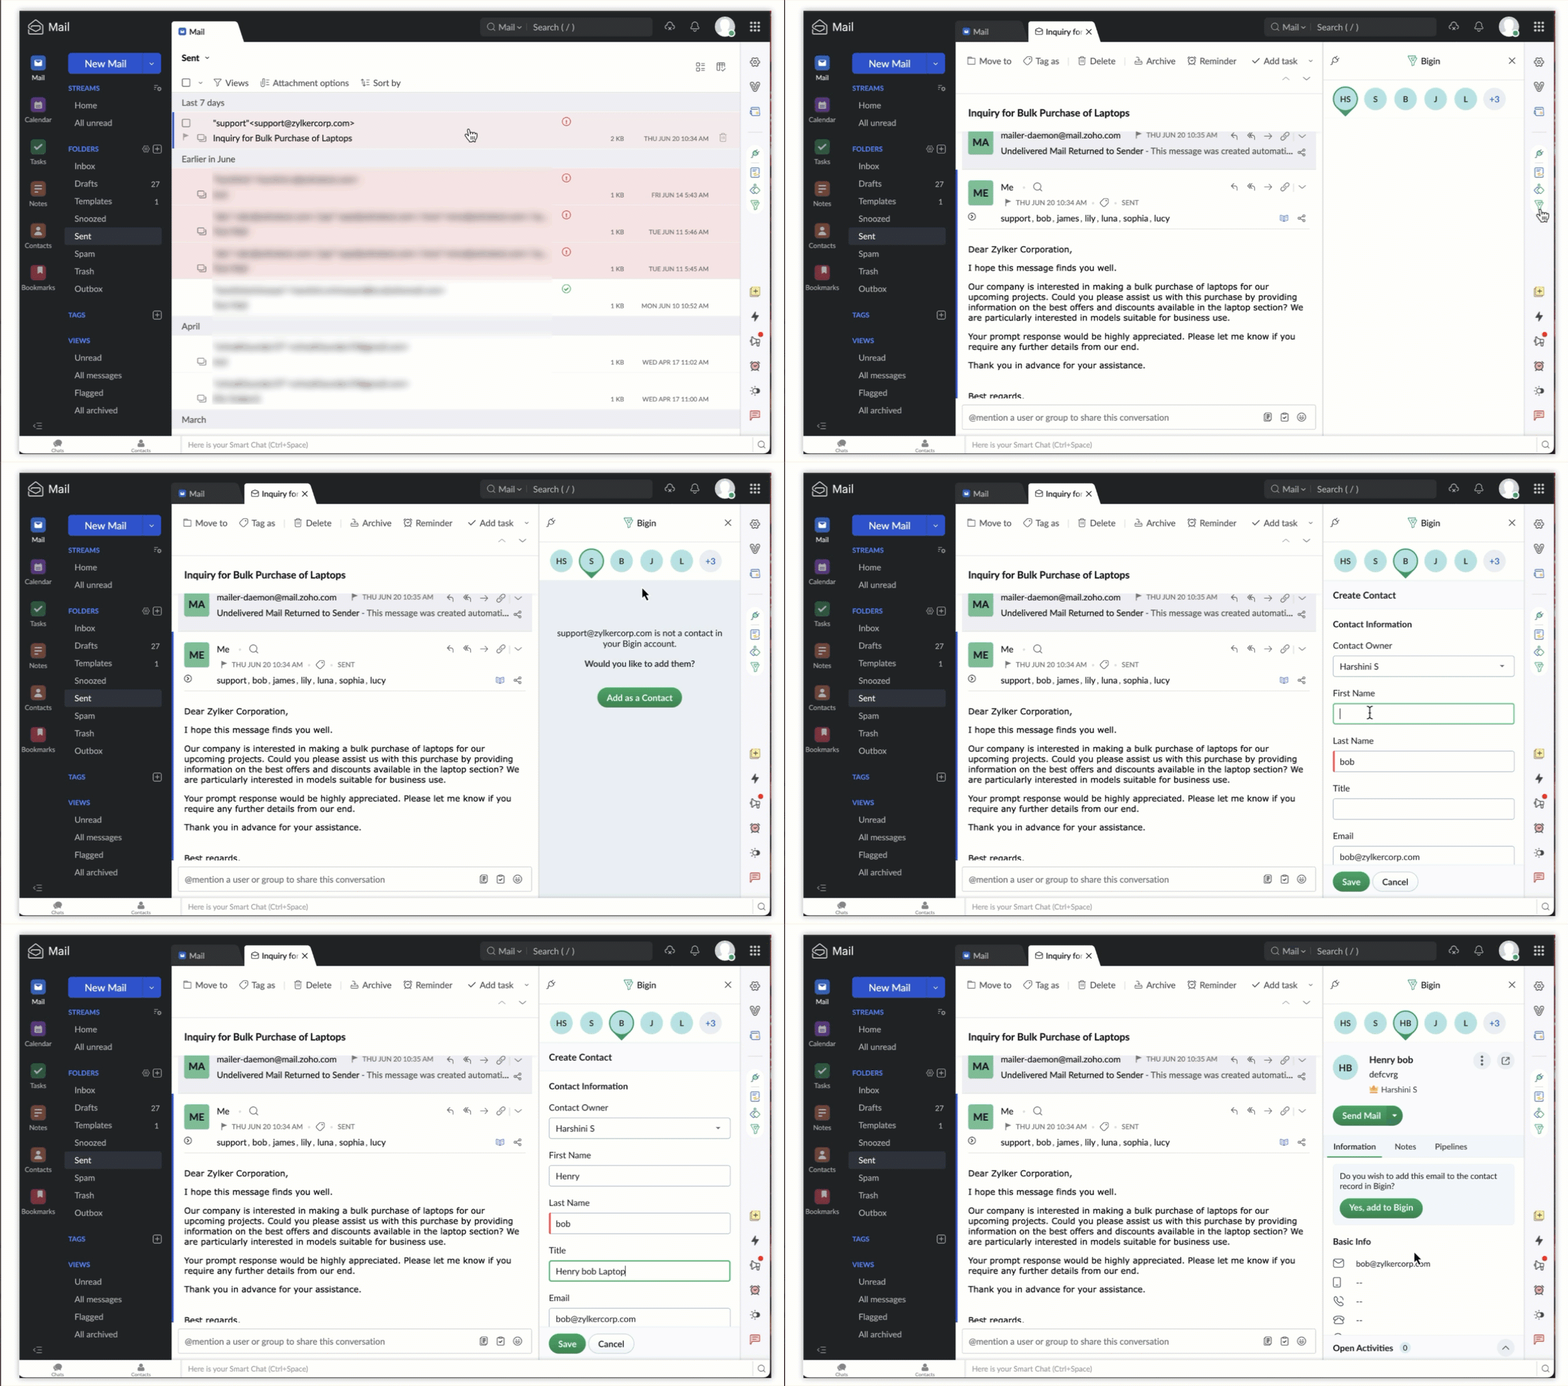
Add Contact from an Email
- Select Bigin from the app menu in eWidget .
- Open the email alongside. If the contact already exits, you will see a quick preview of their details.
- If it is a new contact, you will see"Add as a Contact" options to add them as contact.
- Enter the required information and click on the Save button to add the contact to your Bigin account.
Viewing Contacts
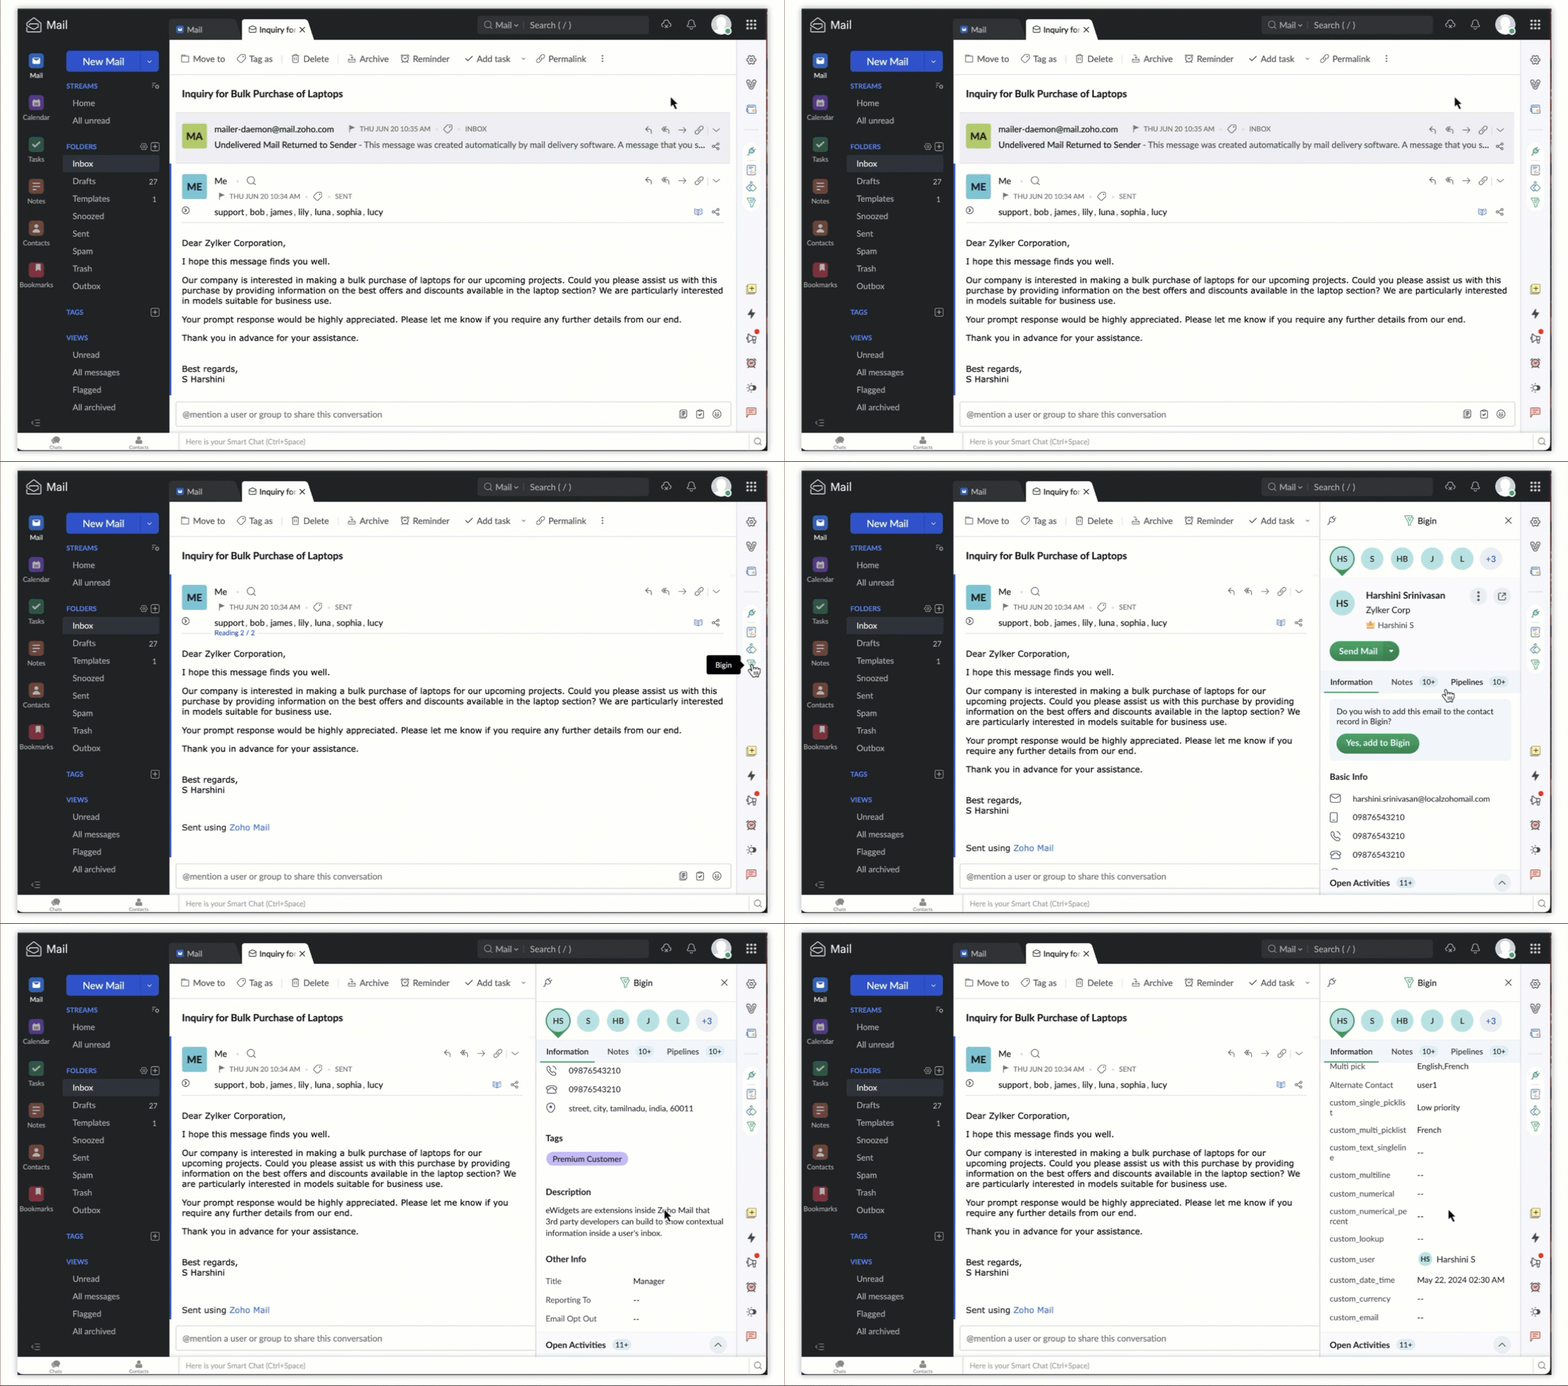
View and update all your Bigin contacts in Zoho Mail. Any changes made to your Bigin contacts through Zoho Mail will be reflected in your Bigin account.
- Select Bigin from the app menu in eWidget .
- Open the email. If if the email address matches an existing record in the Contacts module, the contact's information will be displayed.
- Preview of the contact will be displayed in the right menu. You can also update the contact's details.
Updating Contact Details
Manage your contacts effortlessly by not only viewing them but also making necessary update to contact details. You can perform the below mentioned actions to your contacts:
- Edit Information
- Add Notes
- Create Activities
- Send Emails
- Use Bigin's Email Templates
- Pipeline Stages
- Delete Contact
Edit Information
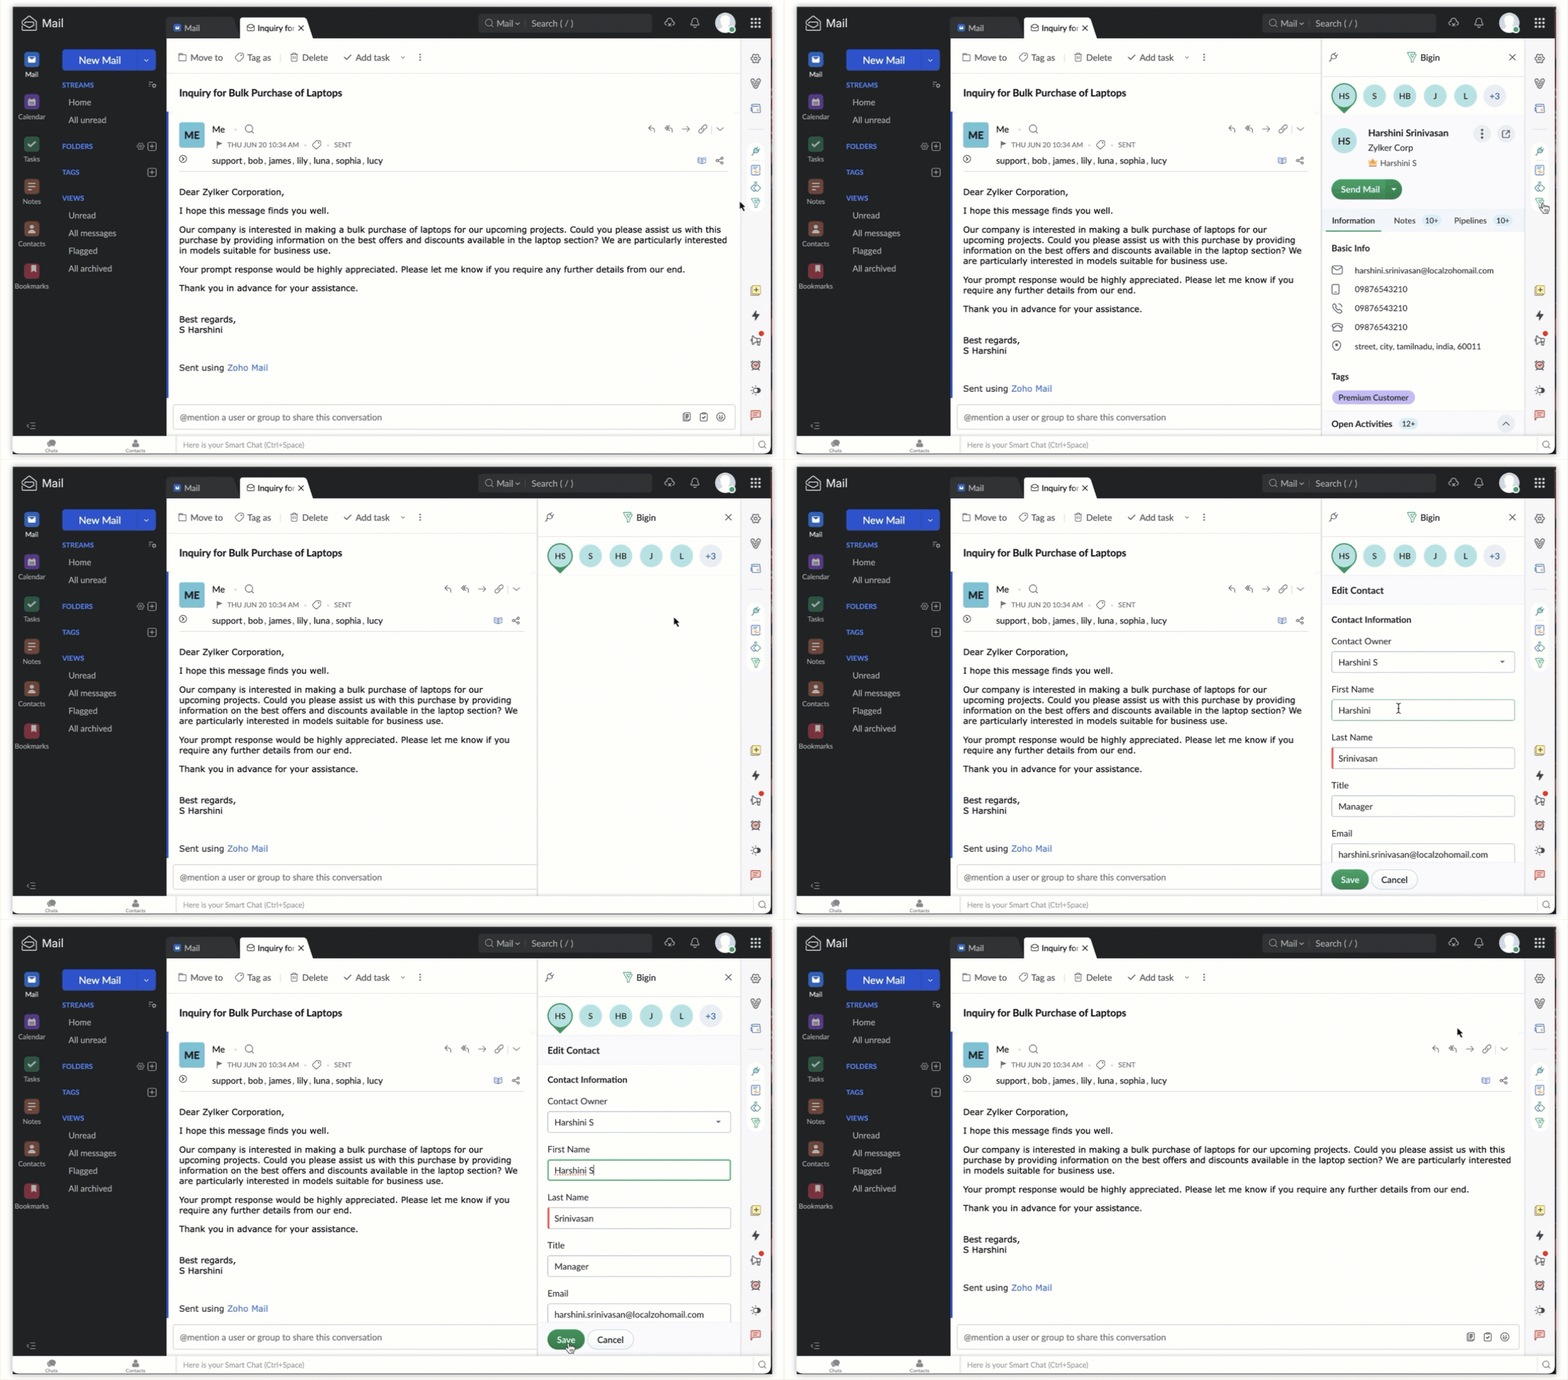
Directly add updated contact details when received through email using the Bigin extension. Necessary changes can be made accordingly after which they will be reflected in your Bigin account as well.
- Click on the Edit icon in the options menu on the top right corner of the contact details.
- Enter the updated details.
- Click on the Save icon to add the updated details of the contact.
Add Notes
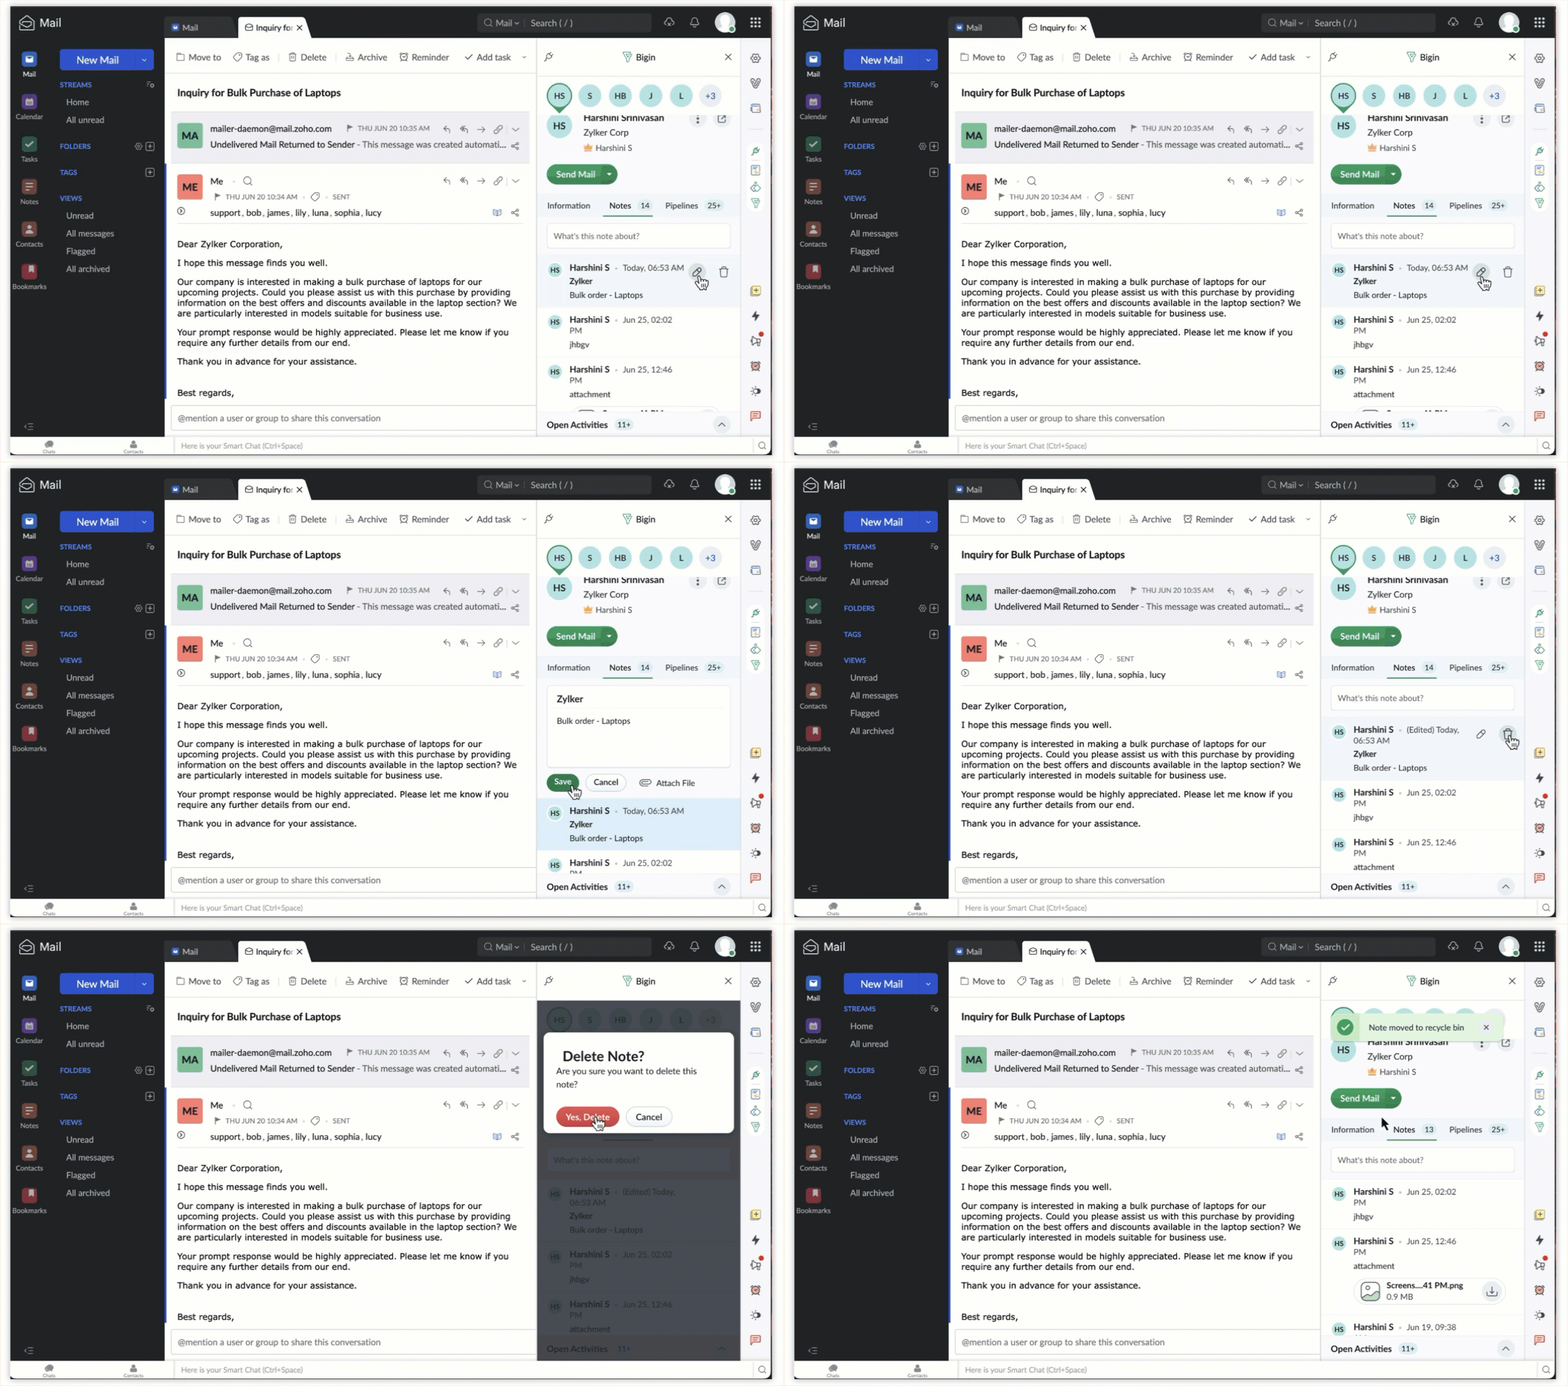
When you receive an email containing important points, you can add these details directly as notes. Take down key information like action items, deadlines, or observations without leaving Zoho Mail. Notes added in the Bigin extension through Zoho Mail will be automatically synced to the corresponding contact’s record in your Bigin CRM.
To add a notes:
- Select Bigin from the app menu in eWidget .
- Click on the Notes section in the contact details.
- Provide details and enter your notes along with attachments if necessary.
- Click on Save to add a note.
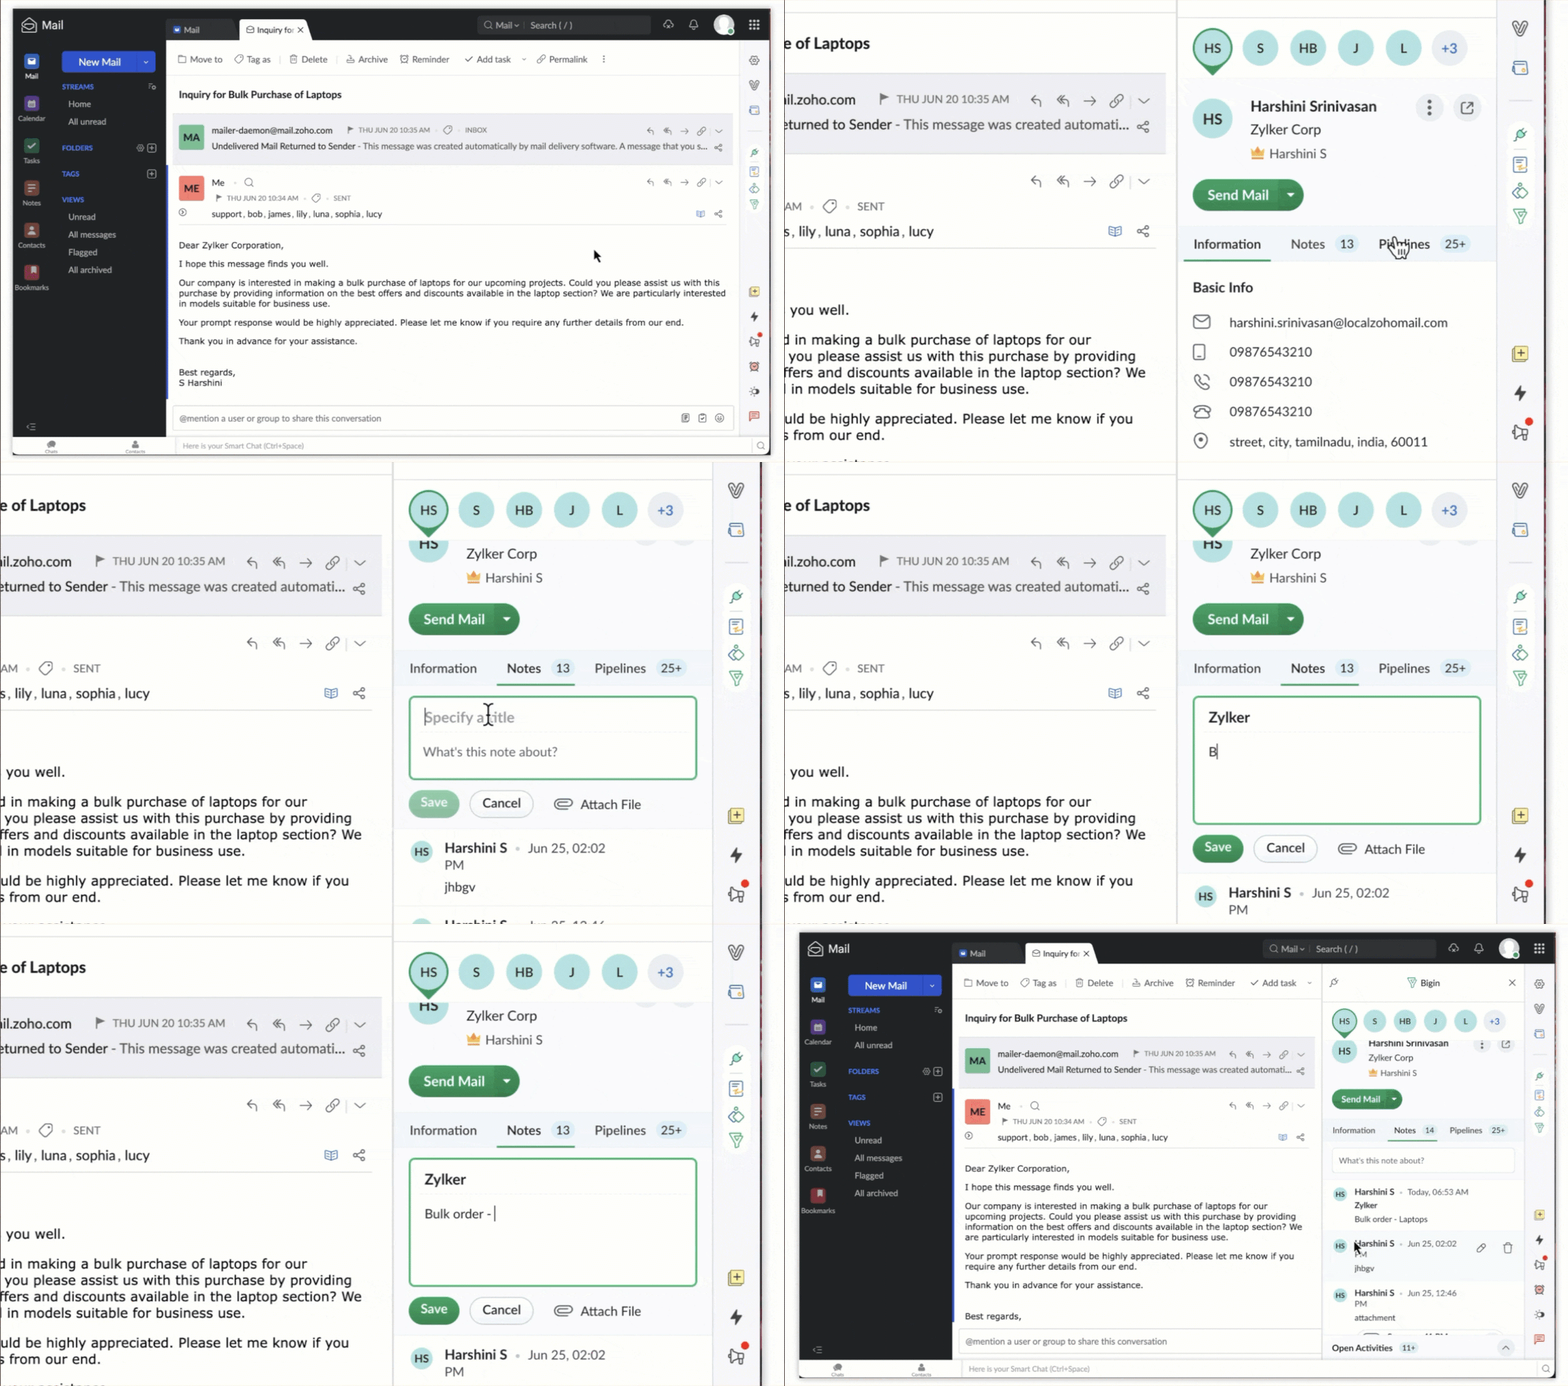
You can also edit or delete a note if needed by hovering over the specific note.
Create Activities
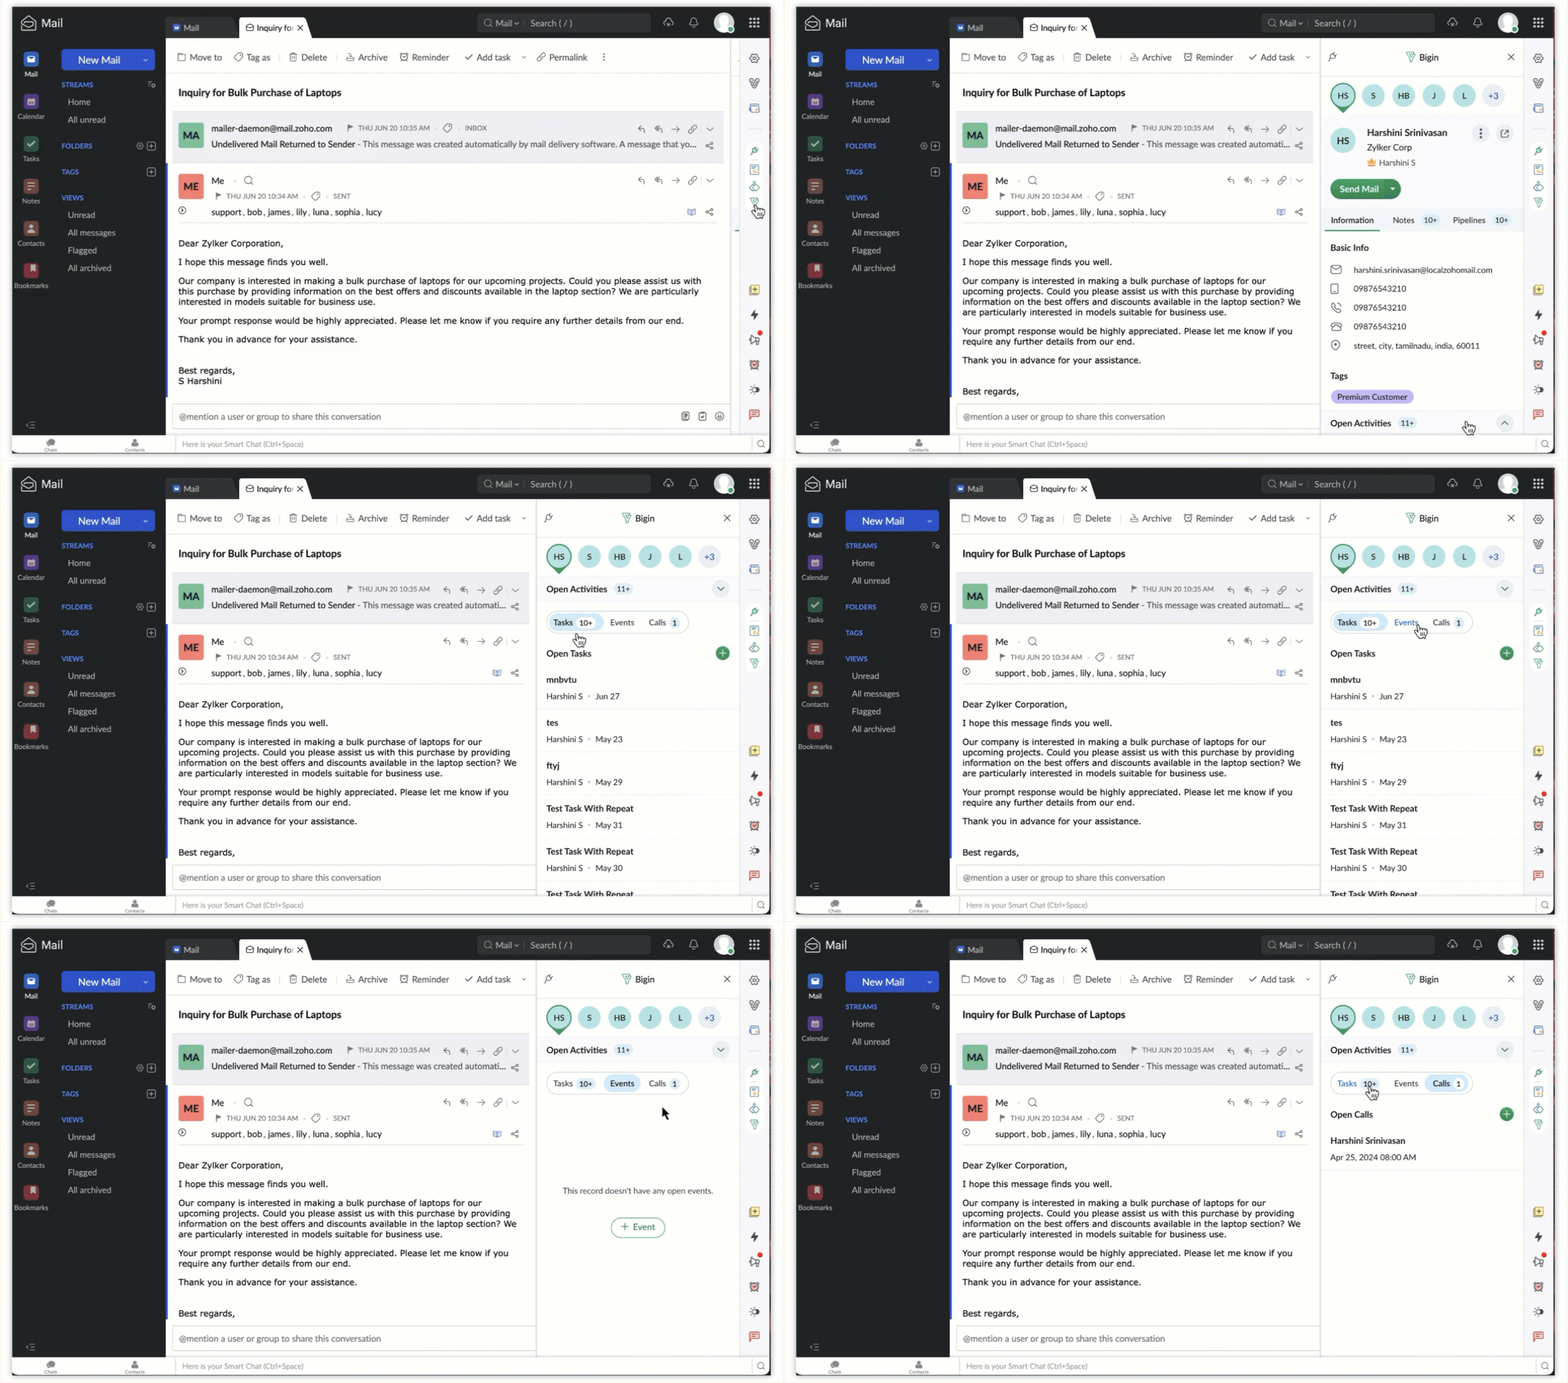
Events with a client can be scheduled directly from Zoho Mail. You can create events by clicking on Open Activities. These activities are automatically synced to your Bigin account, appearing under the contact's record. This allows you to manage tasks, events, and calls directly from Zoho Mail, keeping you organized without needing to switch between applications.
To create Activities:
- Select Bigin from the app menu in eWidget .
- Click on Open Activities in the bottom of the contact.
- Click on the + icon to create new events, specify the date, time, and purpose.
- You can also set a task to call the contact the day before the event or make a call.
Send Emails
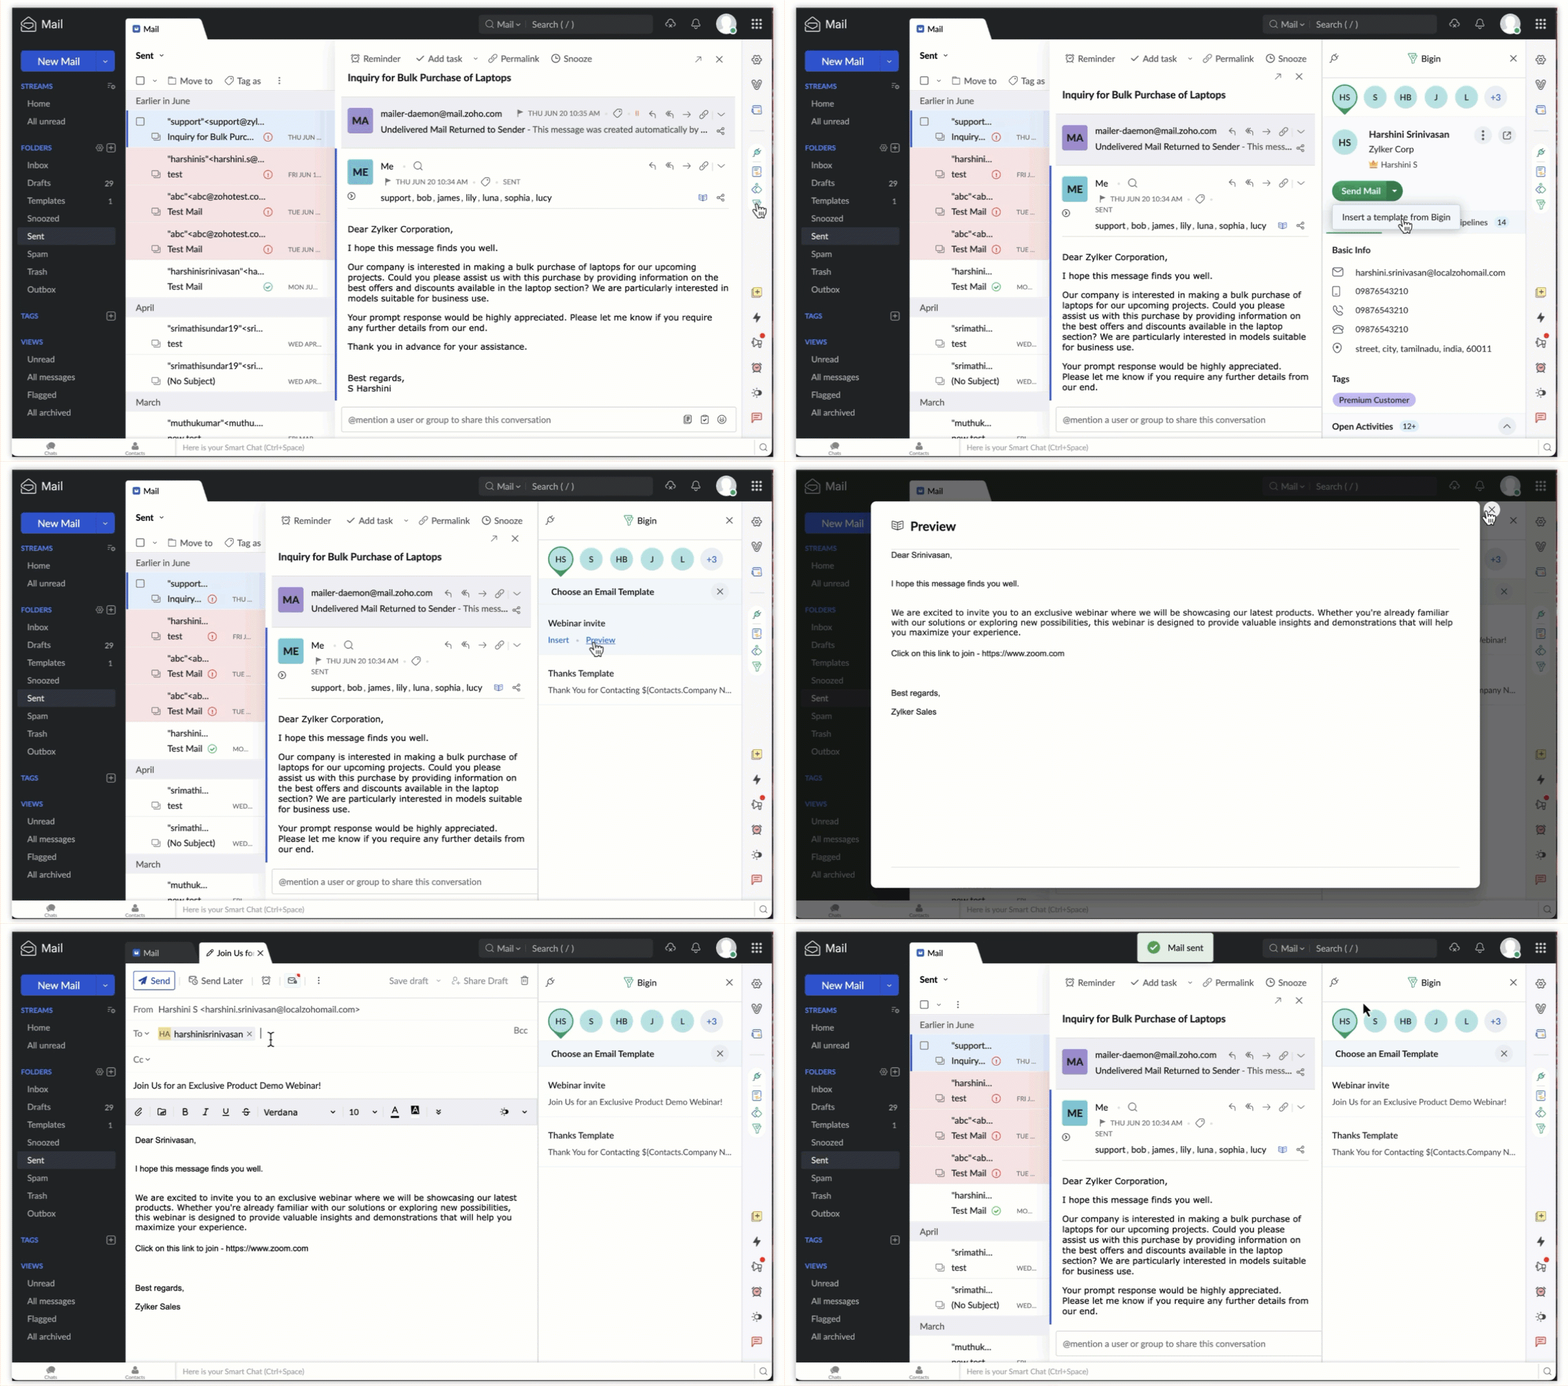
You can effortlessly insert emails templates instead of having to repeat the formatting multiple times If you need to follow up with a contact's email. The email is automatically recorded in the contact’s profile in Bigin, making it easy to track and follow up without switching between applications.
To send an email using template:
- Select Bigin from the app menu in eWidget .
- Open the email and click the Send Mail button.
- Zoho Mail compose page will be displayed.
- Click on Insert template and choose your preferred template to be added to the email.
- After previewing the templates, customize it with the necessary details, and send it directly from Zoho Mail.
Sync your email accounts to view emails from a contact in Bigin. Click the Yes, add to Bigin button to sync your emails. Emails will be automatically visible in Bigin if your Zoho Mail account is connected to Bigin account.

Note:
If you want to see emails from another email account in Bigin, you can link that account too. This allows you to manage emails from multiple accounts directly within Bigin. All the emails send through this widget will be displayed under All Emails, in the contact's releated list.

Pipeline Stages
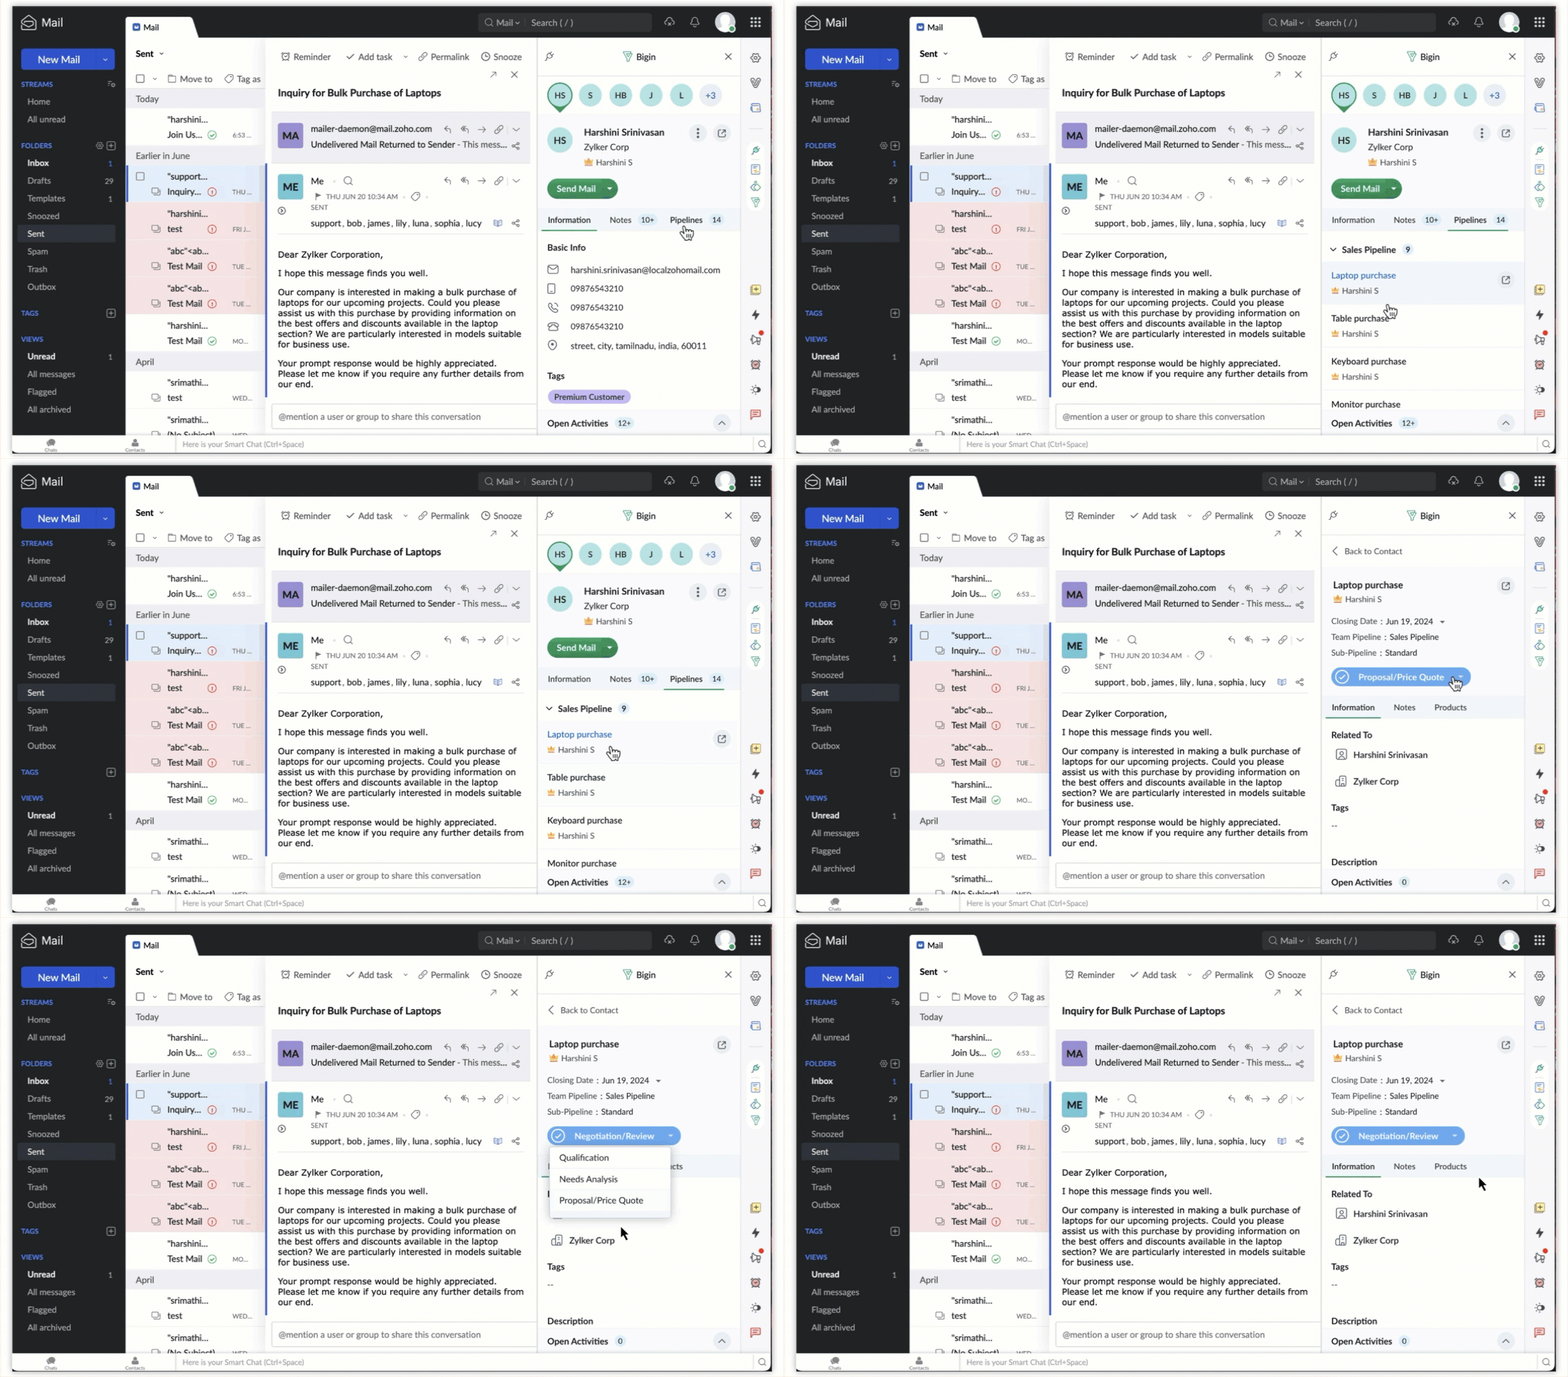
Different Pipeline stages can be updated directly from Zoho Mail using the Bigin extension. The changes made using the extension in Zoho Mail will be immediately reflected in Bigin account as well.
To update a Pipeline Stage:
- Select Bigin from the app menu in eWidget .
- Select the pipeline tab. The list of deals and pipelines will be displayed.
- Click on a specific deal, and within the pipeline field, you can make direct changes.
Delete Contact
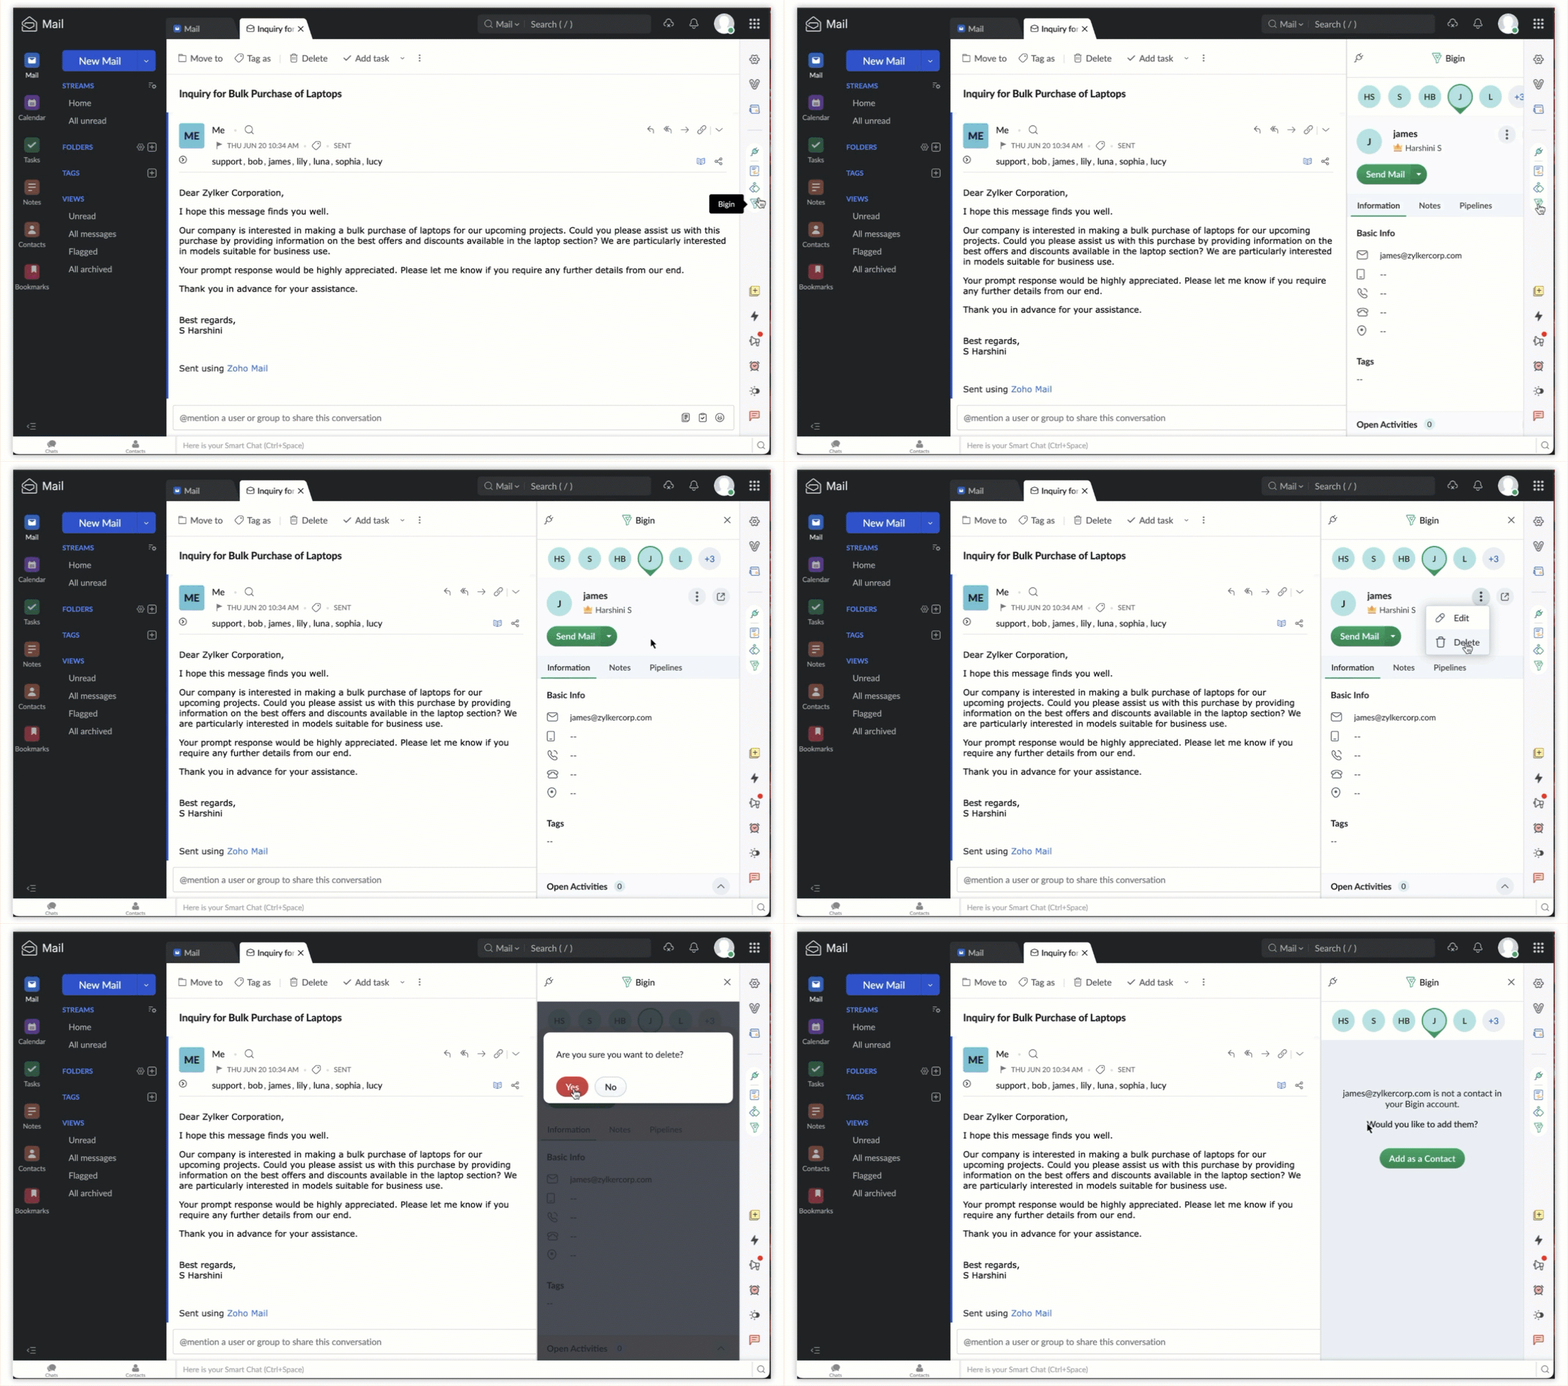
Suppose you want to delete a mistakenly added contact and would like to remove it from Bigin, you can delete the contact directly from Zoho Mail. These changes will be reflected in your Bigin account.
To delete a contact:
- Select Bigin from the app menu in eWidget .
- Click on the contact you want to delete.
- Click on more options icon in the top right corner of the contact to view the Delete option.
- Click on the Delete icon to remove the contact.
Note:
You will only be able to make changes to the contact details based on the access permissions set by your admin.


