Welcome to Portal
Welcome to Zoho Cares
Bienvenido a Soporte de Zoho
Salesforce Integration
Overview

- Leads
- Contacts
- Accounts
- Opportunity
- Custom Objects
Every form entry will be pushed instantaneously to the mapped Salesforce object. You can also push form attachments, upsert a record, and trigger approvals and assignment workflows in Salesforce when pushing form entries.
Integration Setup
To integrate your form with Salesforce,
- In your form builder, navigate to the Integrations tab and click Salesforce under the Integrations.
- Select Production mode if you wish to push form entries to your Salesforce account or select Sandbox mode if you wish to test the integration.
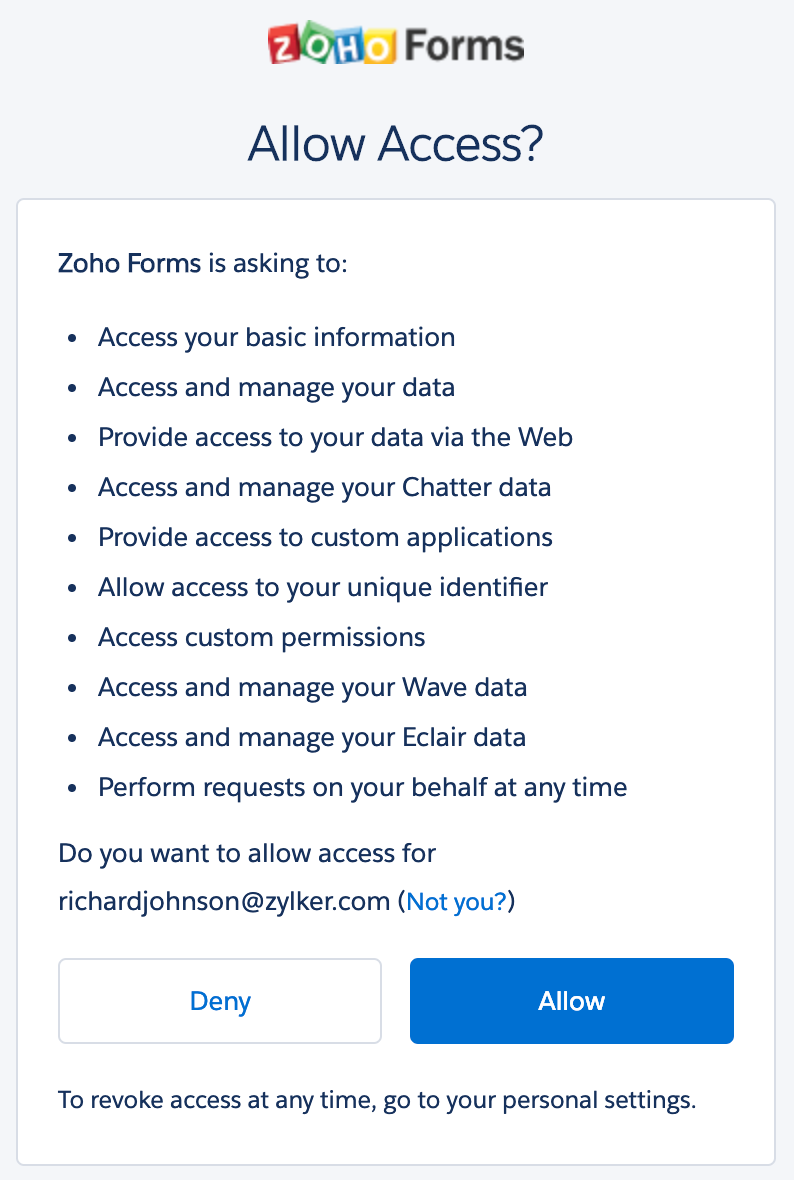
- Click Integrate and authenticate your Salesforce account.
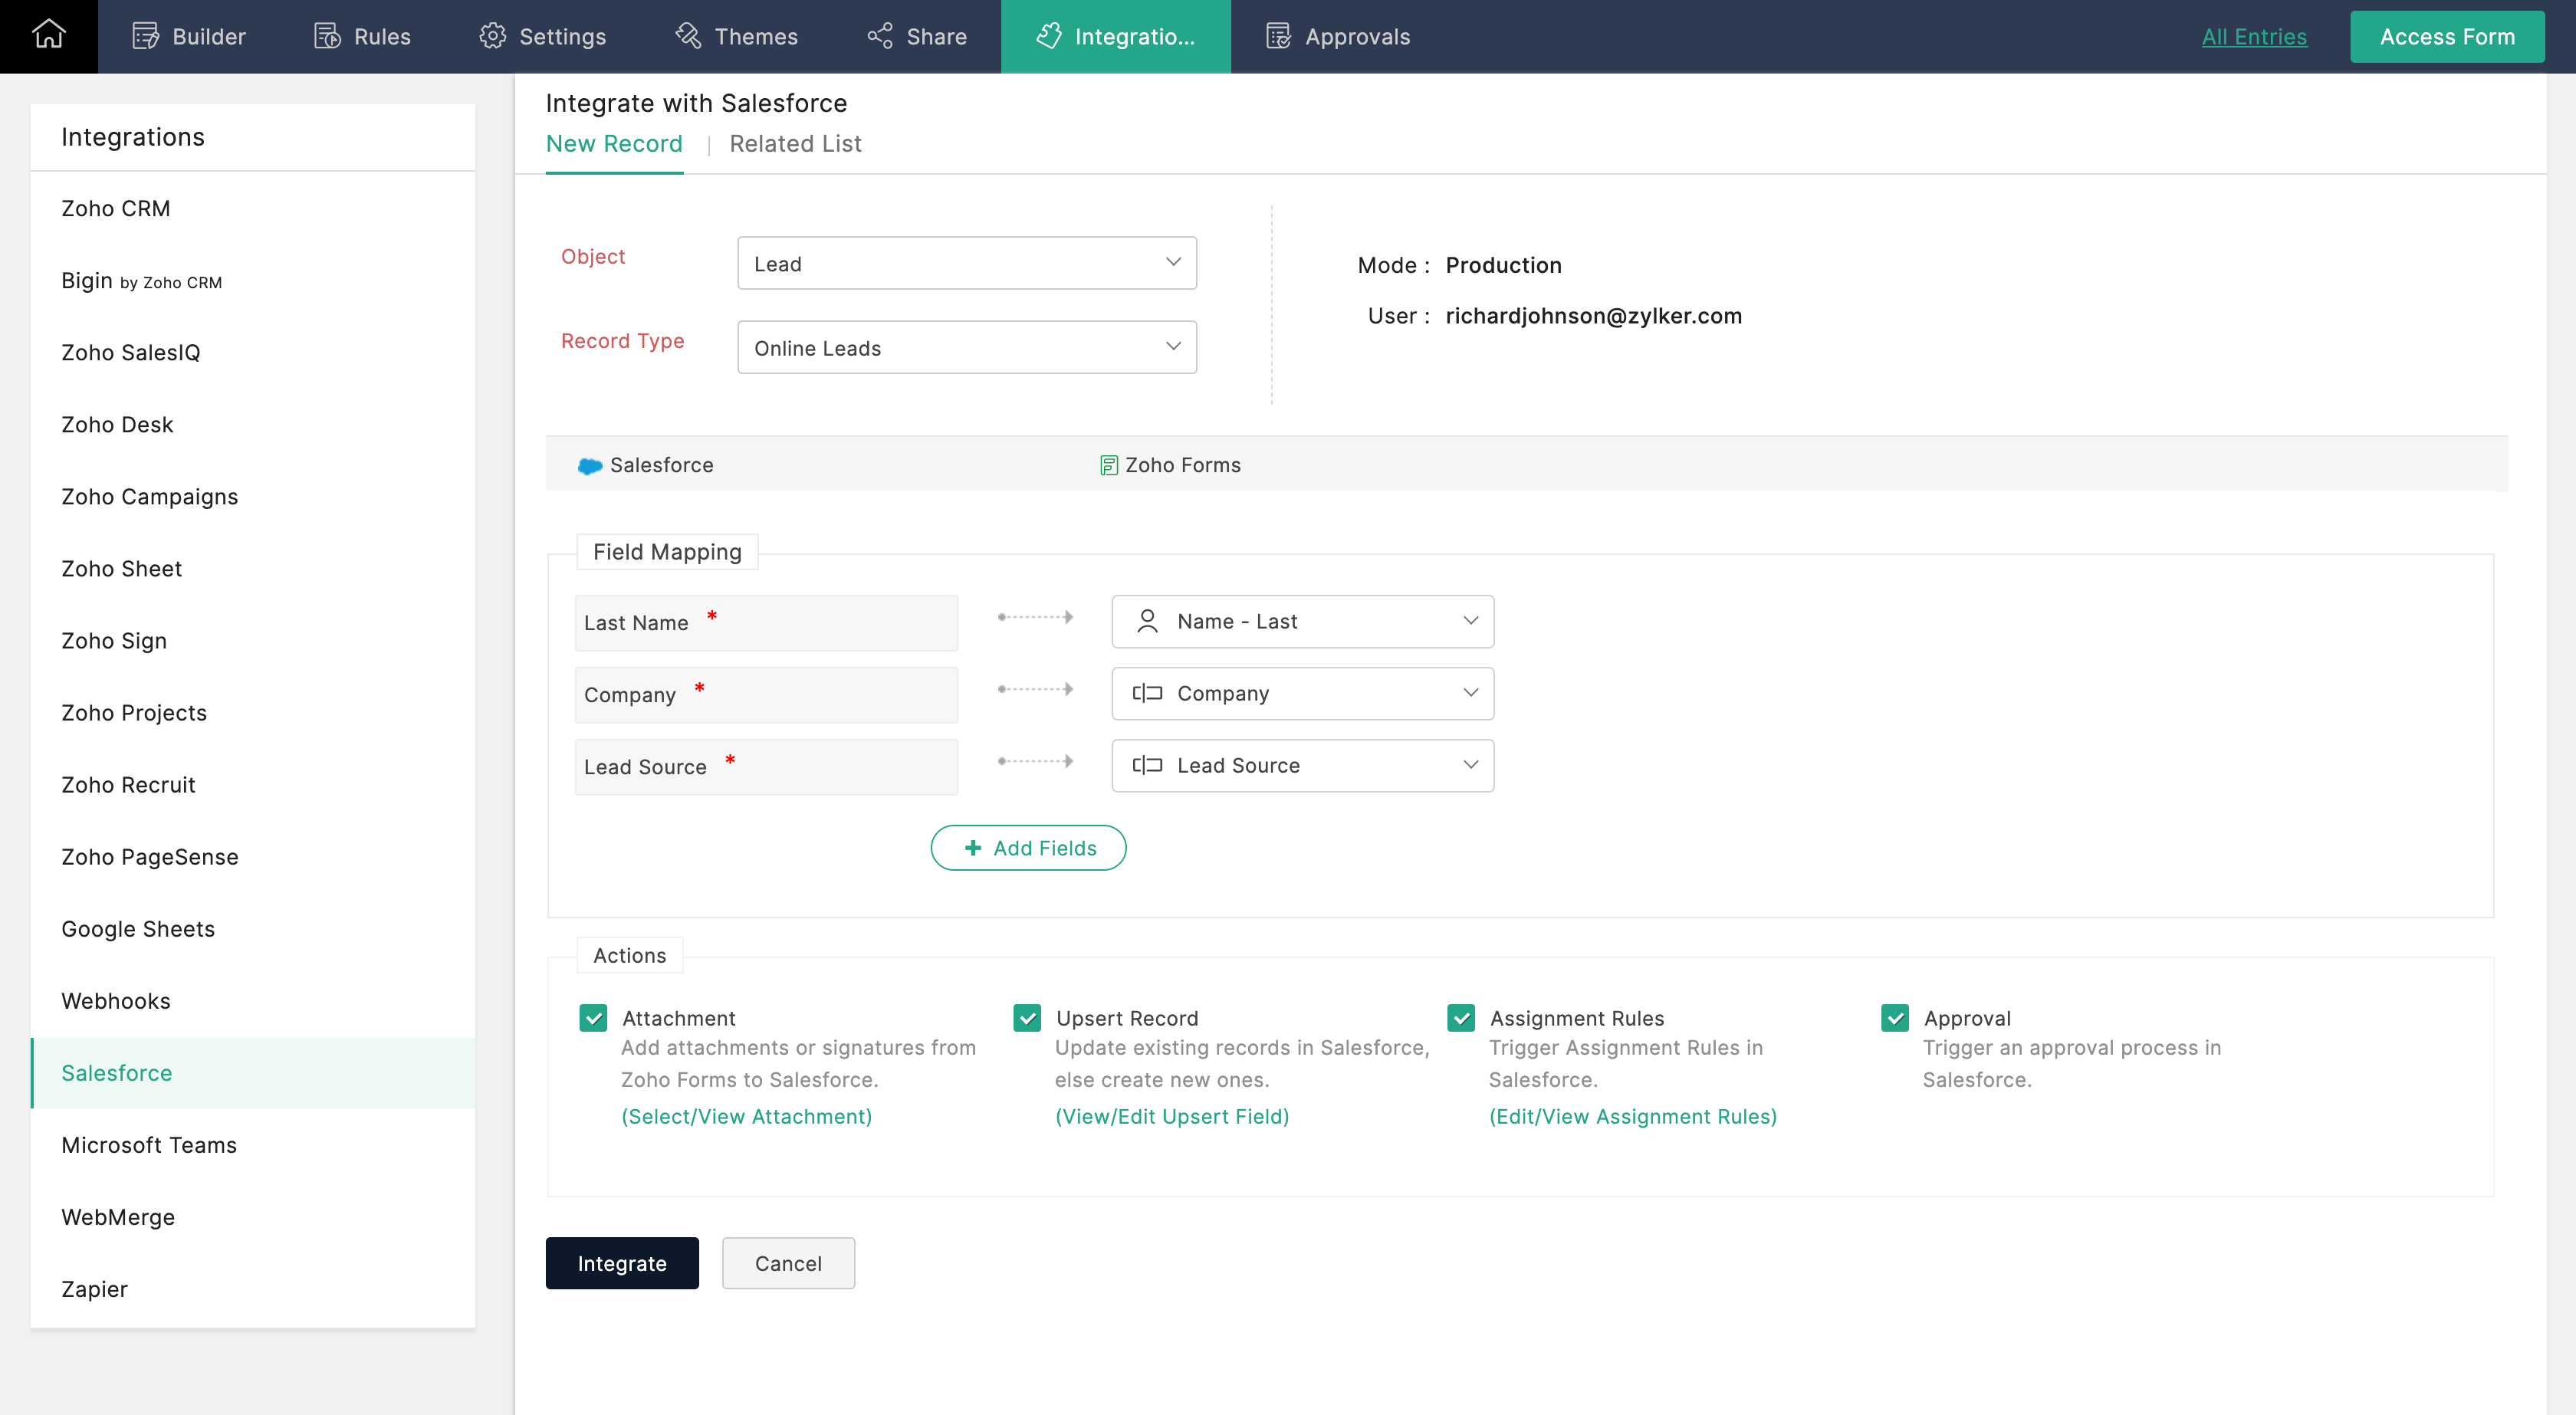
- Choose the Salesforce Object and Record Type.
- Map all mandatory fields in Salesforce with corresponding fields in Zoho Forms. You can customize the input value of a form field before passing it to the Salesforce object for certain Salesforce fields.
- If you wish to map more fields, click Add Fields.
- Select the actions that you wish to trigger while pushing form data to Salesforce objects.
- Click Integrate to save your settings.
Supported Field Types
These are the Zoho Forms fields that can be mapped with the respective fields in Salesforce.
| S. No | Salesforce Field | Supported Zoho Forms Fields |
| 1 | Checkbox | Decision Box |
| 2 | Currency | Number, Decimal, Currency, Slider, Rating, Formula, Payment Amount |
| 3 | Date | Date |
| 4 | Date/Time | Date-Time, Added Time |
| 5 | Single Line, Email, UTM Campaign Details | |
| 6 | Geolocation | Geolocation |
| 7 | Number | Number, Decimal, Currency, Slider, Rating, Formula |
| 8 | Percent | Number, Decimal, Currency, Slider, Rating, Formula |
| 9 | Phone | Single Line, Phone, UTM Campaign Details |
| 10 | Picklist | Single Line, Dropdown, Radio, Matrix Choice, Image Choices, Terms & Conditions, UTM Campaign Details, Payment Currency, Payment Status |
| 11 | Picklist (Multi-Select) | Multiple Choice, Checkbox, Matrix Choice, Image Choices |
| 12 | Text | Single Line, Multi Line, Name, Address, Phone, Email, Website, Unique ID, Dropdown, Radio, Multiple Choice, Checkbox, Matrix Choice, Image Choices, Number, Decimal, Currency, Slider, Rating, Formula, Date, Time, Date-Time, Referrer Name, IP Address, Terms & Conditions, Geolocation, UTM Campaign Details, Payment Transaction ID, Payment Currency, Payment Status |
| 13 | Text Area | Single Line, Multi Line, Name, Address, Phone, Email, Website, Unique ID, Dropdown, Radio, Multiple Choice, Checkbox, Matrix Choice, Image Choices, Number, Decimal, Currency, Slider, Rating, Formula, Date, Time, Date-Time, Referrer Name, IP Address, Terms & Conditions, Geolocation, UTM Campaign Details, Payment Transaction ID, Payment Currency, Payment Status |
| 14 | Text Area (Long) | Single Line, Multi Line, Name, Address, Phone, Email, Website, Unique ID, Dropdown, Radio, Multiple Choice, Checkbox, Matrix Choice, Image Choices, Number, Decimal, Currency, Slider, Rating, Formula, Date, Time, Date-Time, Referrer Name, IP Address, Terms & Conditions, Geolocation, UTM Campaign Details, Payment Transaction ID, Payment Currency, Payment Status |
| 15 | Text Area (Rich) | Single Line, Multi Line, Name, Address, Phone, Email, Website, Unique ID, Dropdown, Radio, Multiple Choice, Checkbox, Matrix Choice, Image Choices, Number, Decimal, Currency, Slider, Rating, Formula, Date, Time, Date-Time, Referrer Name, IP Address, Terms & Conditions, Geolocation, UTM Campaign Details, Payment Transaction ID, Payment Currency, Payment Status |
| 16 | Text (Encrypted) | Single Line, Multi Line, Name, Address, Phone, Email, Website, Unique ID, Dropdown, Radio, Multiple Choice, Checkbox, Matrix Choice, Image Choices, Number, Decimal, Currency, Slider, Rating, Formula, Date, Time, Date-Time, UTM Campaign Details |
| 17 | Time | Time |
| 18 | URL | Single Line, Website, UTM Campaign Details |
Add Input Manually while mapping fields
You can customize the input value of a form field before passing it to the Salesforce object by merging form field tags or entering a value manually.
You can use the custom input option for the following Salesforce fields:
- Text
- Text Area
To do so,
- While mapping the above Salesforce fields with Zoho Forms fields, select the Add Input Manually option in the Zoho Forms fields column.
- In the pop-up, you can either enter a value manually or click the
icon to merge the form fields in the input box. The input can also be a combination of both: a manual value and fields tags.

Trigger Actions while pushing form entries
Add Attachments
When you select this option, file attachments from Zoho Forms will be pushed to the mapped Salesforce object. The following attachments can be pushed from Forms to Salesforce:
- Signatures
- File upload/ Image Upload field attachments
- PDF of form submissions
You can choose to push the Default Template, Custom Template(s), PDFs sent in form submission workflows, and PDFs sent in approval process as attachments to Salesforce. If you choose PDFs in form submission workflows, the PDF template sent to the respondent after submitting the form (for example, the PDF downloaded from the Thank You page, or any PDF sent via email notification) will be pushed to Salesforce as an attachment.
If you choose PDFs in approval process, the PDF template sent to the respondent along with the Final Approval Email will be pushed to Salesforce as an attachment.
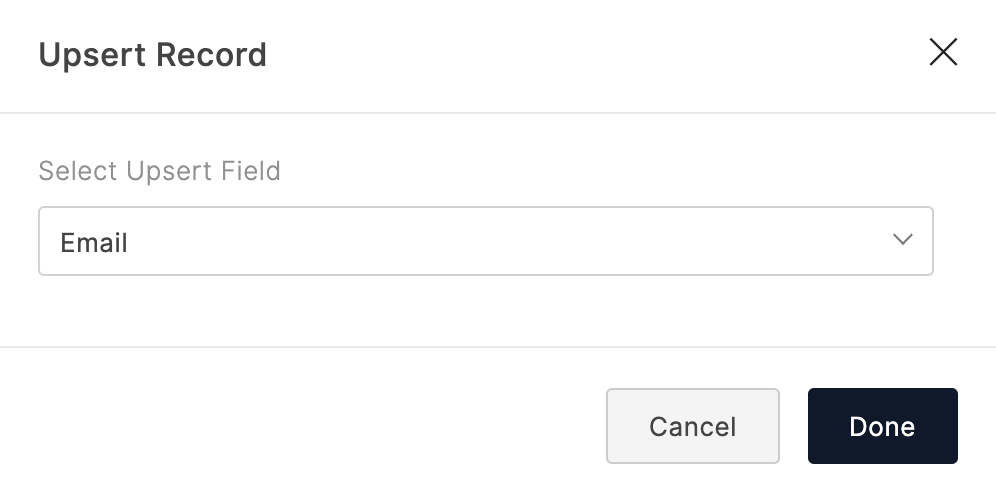
Upsert a record
When you choose the Upsert Record option, if a record with identical upsert value exists in Salesforce, then it will be updated with the new values. If not, a new record will be created in Salesforce.

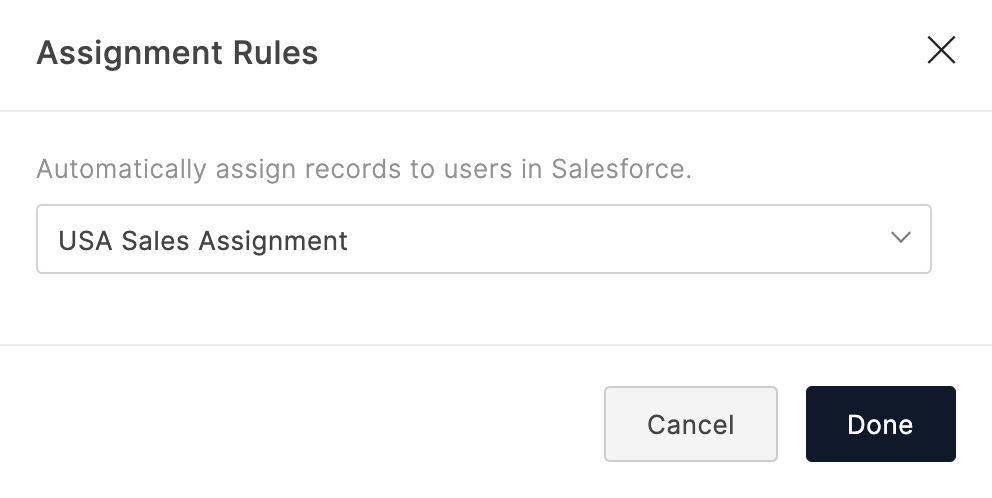
Assignment Rules
When you choose this option, Assignment Rules defined in Salesforce can be triggered when form entries are added to a Salesforce object. To do this, you must configure assignment rules in Salesforce under Feature Settings > Marketing > Lead Assignment Rules. All the rules configured for the selected Salesforce object will be displayed in the drop-down. You can select one rule to trigger upon every new form entry.
Approvals
When you choose this option, form entries pushed to a Salesforce object will be sent for approval in Salesforce. To configure the approval process in Salesforce, go to Process Automation > Approval Processes.
Set Alert on Integration Failure
- Click Set Alert in the top-right corner.
- Configure the email alert template and click Save.
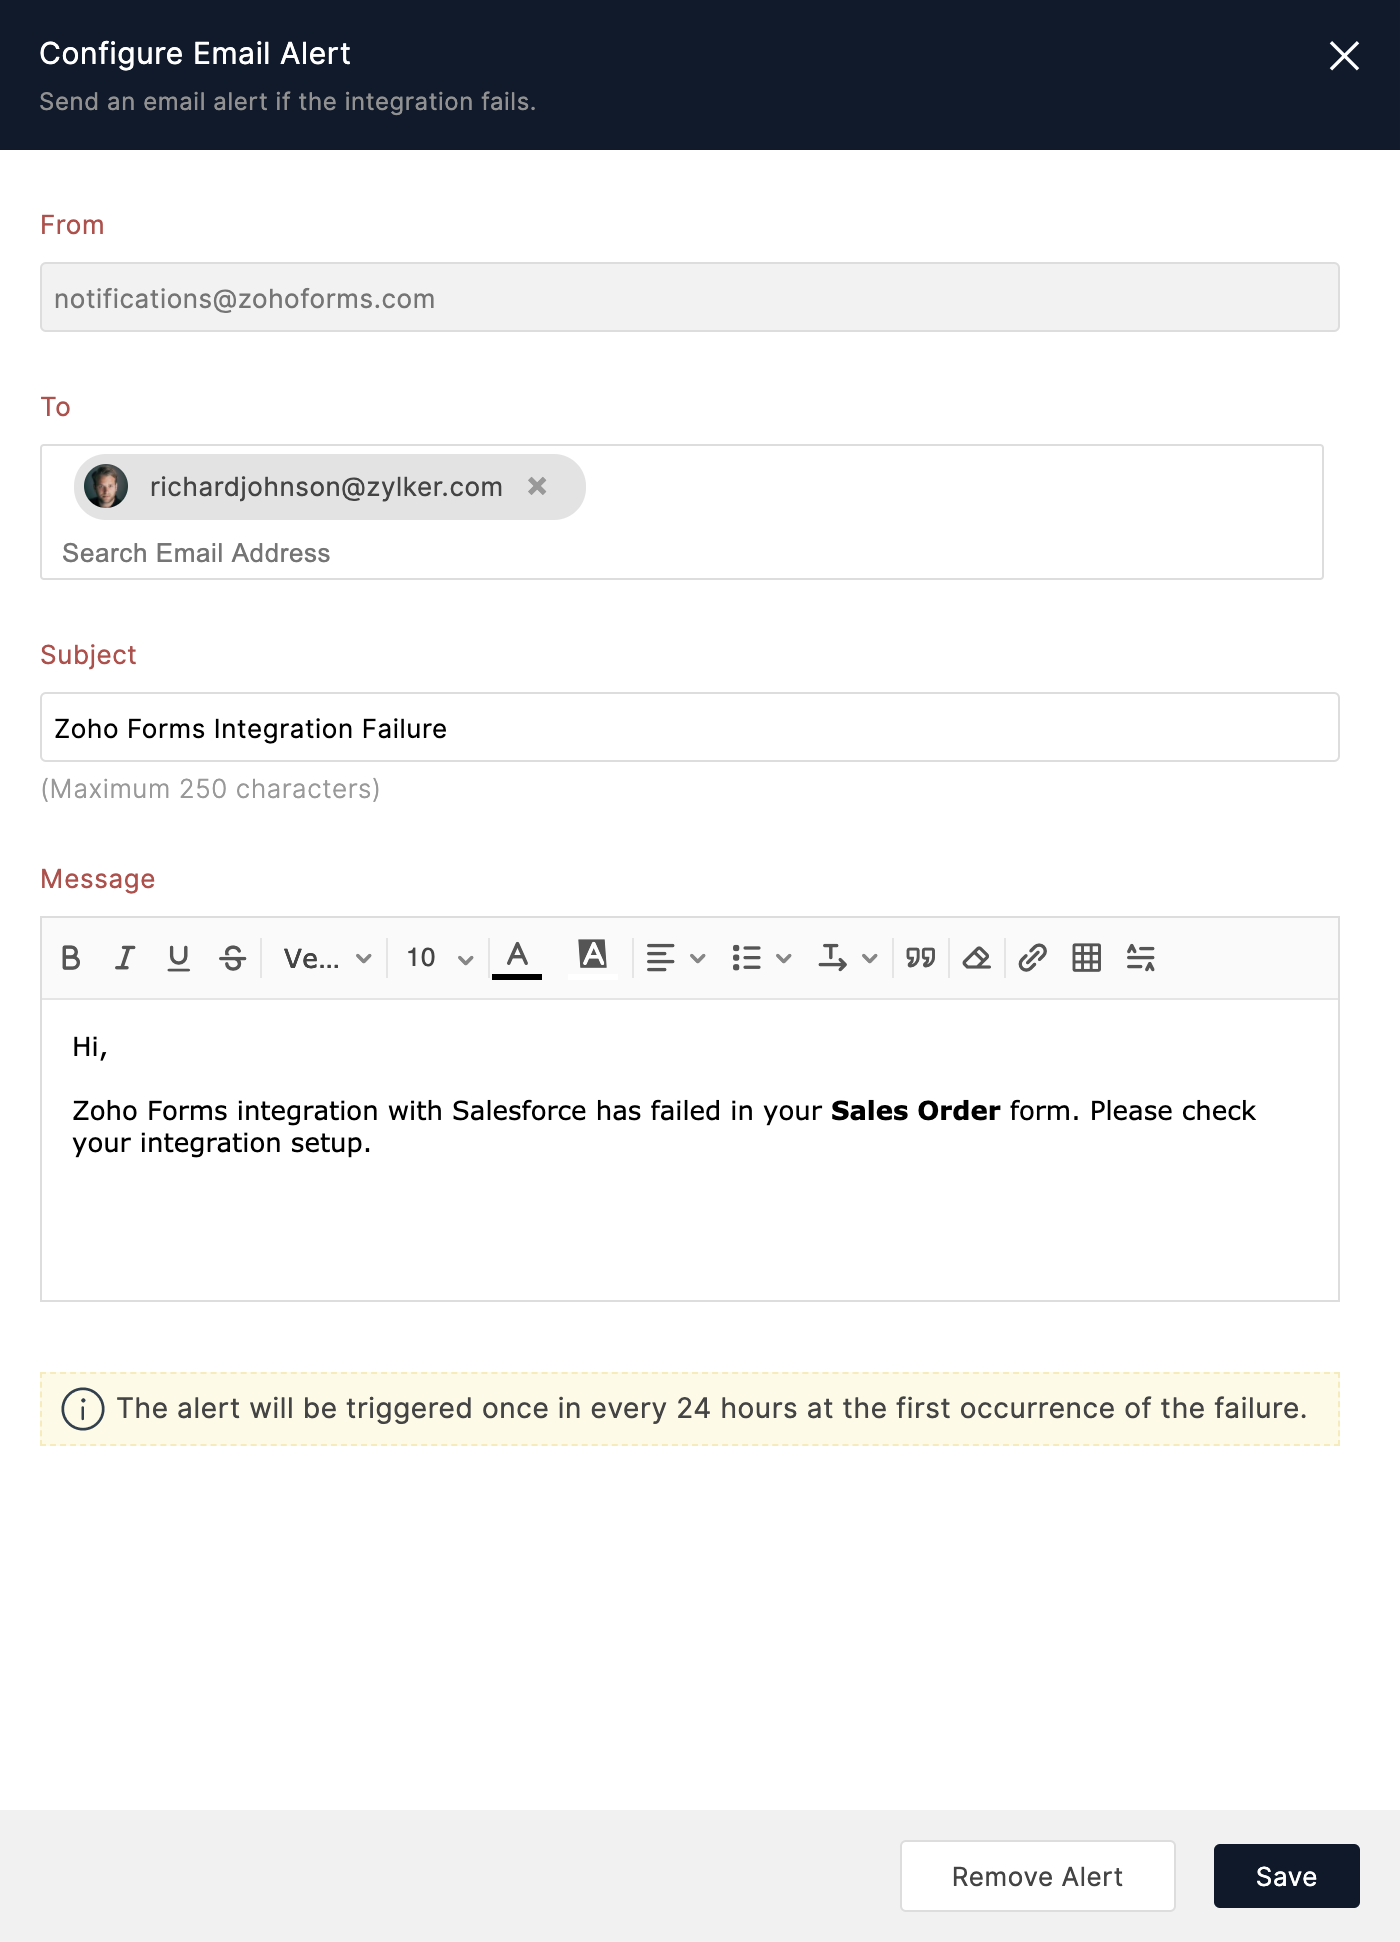
Note :
- The option to set an email alert on integration failure is available only in our paid plans.
- You can send email alerts to a maximum of 5 users within your organization.
- An email alert will be triggered only on the first occurrence of integration failure every 24 hour

Subscribe to receive notifications from this article.

- Zoho ホーム
- プレスリリース
- Zohoについて
- お問い合わせ
- セミナー・イベント開催予定
- Zoho コミュニティ
- 製品サポートガイドライン
- データセンターについて
- 情報セキュリティについて
- コンプライアンス一覧
- 知的財産権について
- 迷惑メール防止規定
- プライバシーポリシー
- GDPRコンプライアンス
- 悪用防止規定
- 販売規約
- サイトの利用条件
© 2025, ZOHO Japan Corporation. All Rights Reserved.
