Zoho Expense - Zoho Projects Integration
Zoho Projects is an online project management tool that helps you plan and track your work efficiently. By integrating with Zoho Expense, you can fetch your projects and customers from Zoho Projects to record the related expenses in Zoho Expense.
Here’s how this integration will benefit your business. You can:
- Fetch projects from Zoho Projects and record the project related expenses in Zoho Expense.
- Bring in all the users in your Zoho Projects, to help them report expenses in Zoho Expense.
- Import the clients who are associated with projects, in Zoho Projects, as customers and bill them in Zoho Expense.
- Access Zoho Expense from within Zoho Projects. View, record expenses, and create reports without switching apps.
Connect to Zoho Projects
To connect to Zoho Projects:
- Click Admin View.
- Click the
Gear icon at the top right side.
(OR)
Go to Settings on the left sidebar.

- Go to HR & Projects under Integrations.

- Click Zoho Projects.

- Click Connect Now.

- In the page that opens, click Connect Zoho Projects.
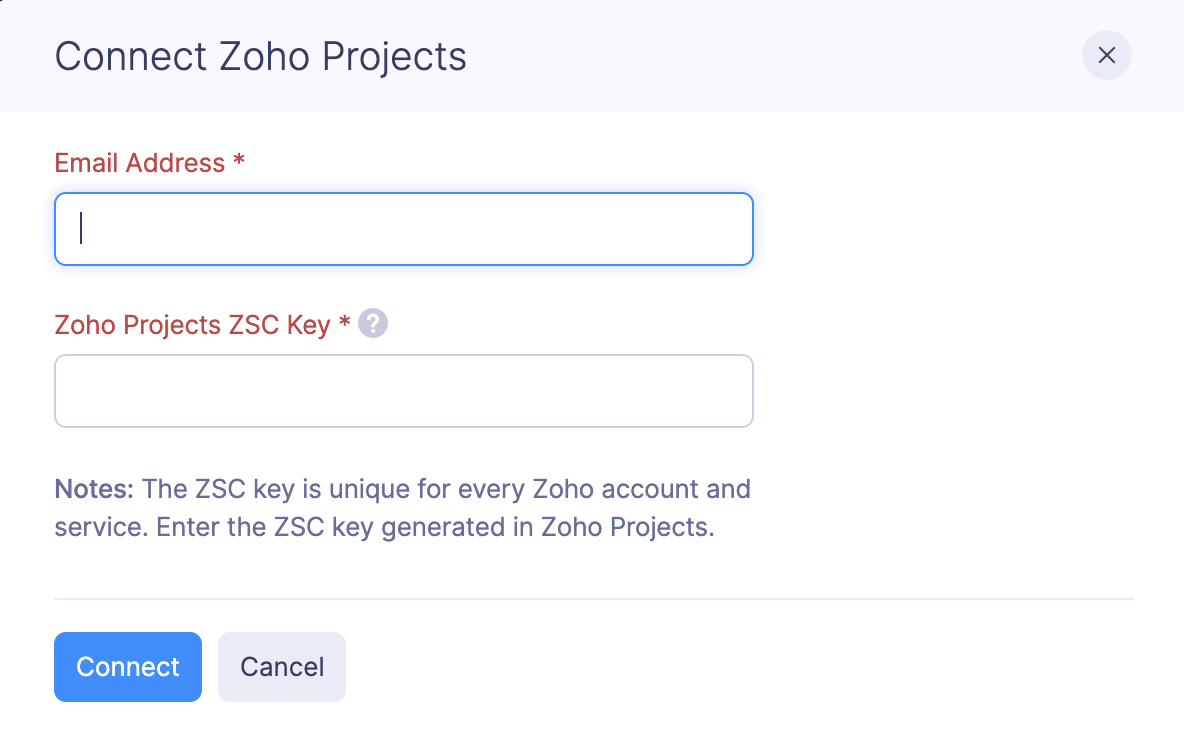
- In the pop-up that appears, provide your email address, Zoho Projects ZSC key, and configure the integration preferences.

Generate ZSC Key
If you haven’t generated a Zoho Service Communication (ZSC) key, you can generate it easily. If you already have the ZSC key, you can use that and skip this section.
To generate a ZSC key:
- Go to Zoho Projects.
- Click the Setup icon in the top right corner of the page.

- Click Marketplace and select ZSC Key under Developerspace. Copy the ZSC Key.

- Paste the ZSC key in the integration page in Zoho Expense.
- Click Connect.

Configure the Integration
After entering your credentials, you can configure the integration preferences and complete the setup.
- Select a Portal in Zoho Projects with which you want to connect your Zoho Expense organization. Only the portals in which you are an admin will be listed in the dropdown.
- All the primary clients, and the projects that are associated with the primary clients will be imported from the selected portal into Zoho Expense.
Note: If you have an organization in Zoho Books and if it is integrated with Zoho Projects and Zoho Expense, the projects and clients in Zoho Projects would have been fetched into Zoho Expense already.
- You can choose how you want to import the clients from Zoho Projects into Zoho Expense.
- Clone: Select the Clone option if you want to add the clients from Zoho Projects while retaining customers with the same name in Zoho Expense.
- Overwrite: Select the Overwrite option if you want to overwrite customers with the same name in Zoho Expense with the client details from Zoho Projects.
- Select the user preferences:
- Auto-sync: All the users who are associated with the projects in Zoho Projects will be fetched automatically.
Note: If the number of auto-synced users exceed the plan limit of your Zoho Expense organization, the additional users will be added as inactive users in Zoho Expense. You can either mark the existing users as inactive and mark the newly added users as active or upgrade the plan.
- Add Users Manually: Select this option to add the users in Zoho Expense manually. If the user you are adding is also a user in Zoho Projects, they will be associated with their projects automatically.
- Click Connect once you select the preferences. Your Zoho Expense is now integrated to Zoho Projects.

Add Client Company to a Project
To record the project related expenses from within Zoho Projects, you should associate a client company with the projects in Zoho Projects. To add a client company to a project:
- Go to Zoho Projects.
- Click Projects on the left sidebar and select the project for which you want to create expenses.
(OR)
Click a project under Recent Projects. - Click Users on the top bar.
- Click the Users dropdown in the top left corner and select Client Users.
- Click Add Client Company and add the details of the customer for whom you will incur the project expenses.

- Click Add.

The client company will be added to the project and you can now record expenses for that project from Zoho Projects.
Note: At times, you may not be able to create expenses for a project even after adding the client company, as the client company details may have failed to be synced with Zoho Expense. If that happens, you can check the sync error summary, fix the error, and try creating expenses again.
Create Expenses from Zoho Projects
You can create expenses and reports for your projects from within Zoho Projects. To do this:
- Go to Zoho Projects.
- Click Projects on the left sidebar and select the project for which you want to create expenses.
(OR)
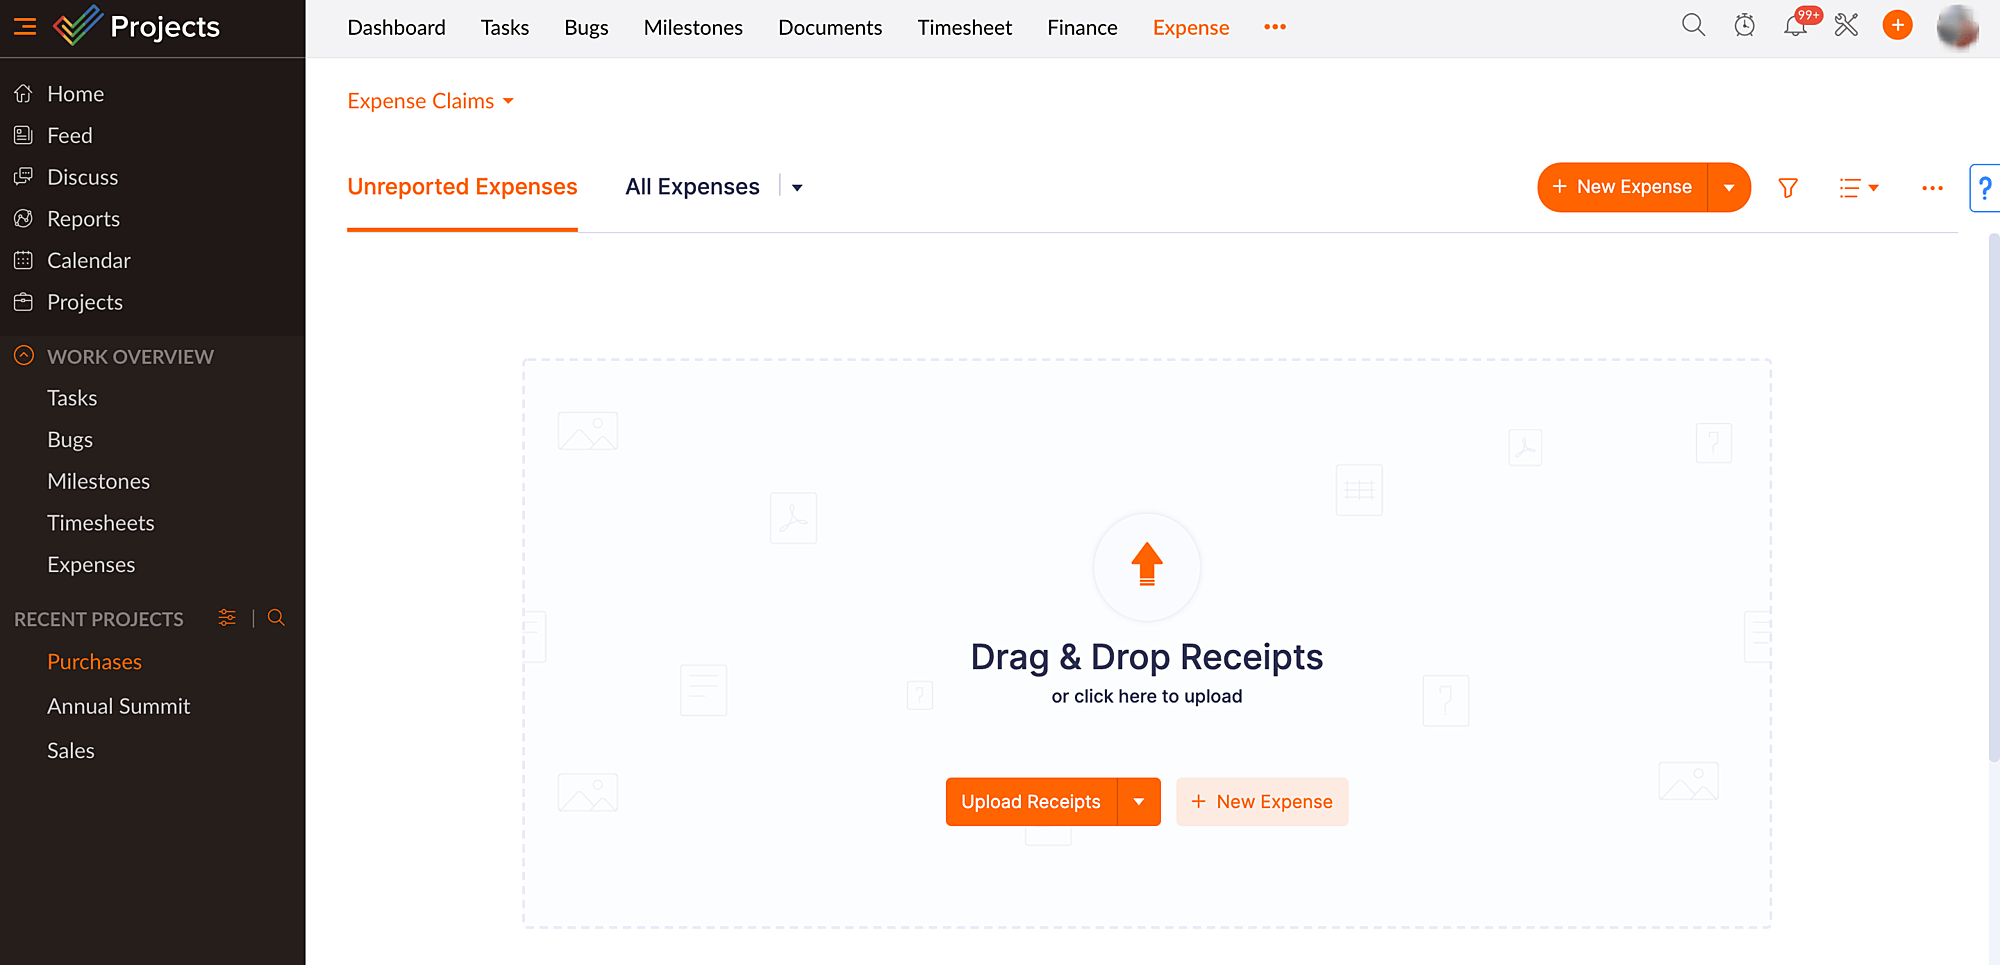
Click a project under Recent Projects. - Click the More icon on the top bar and select Expense.

- You can now view the expenses and reports that were created in Zoho Expense for the project you’ve selected. You can also create new expenses and reports for this project.

Pro-tip: If you want to view all the expenses and reports within Zoho Projects, click the Expenses tab on the left sidebar.

Instant Sync and Other Options
Instant Sync
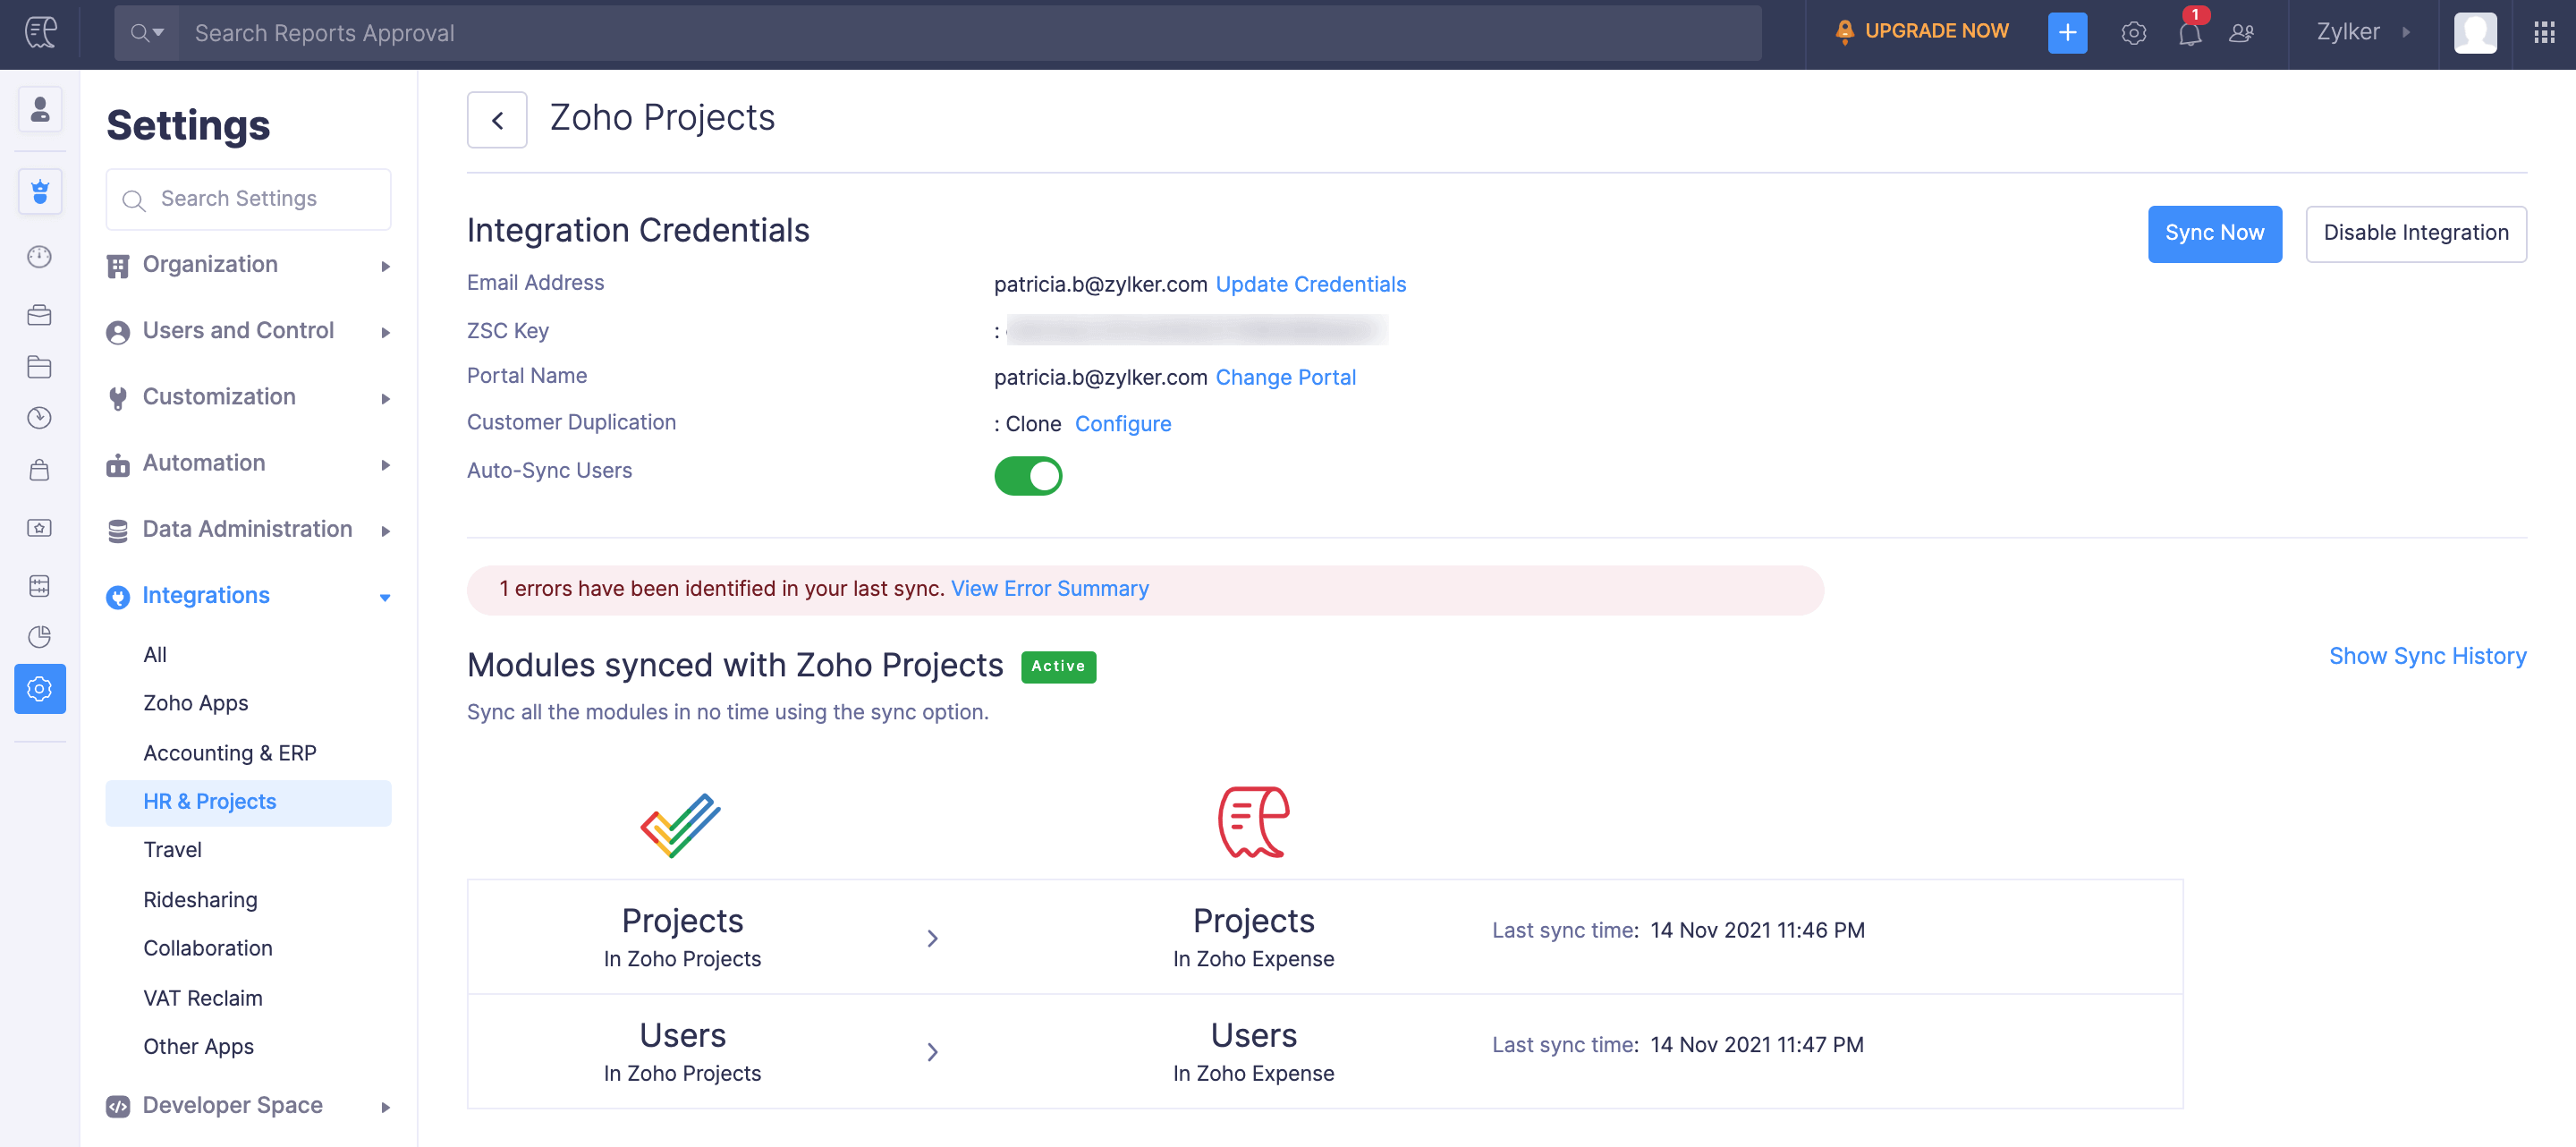
Once you’ve configured the integration, any new data you add will be updated via the auto-sync that occurs once every hour, after the initial sync. However, there’s a manual instant sync option with which you can sync data any time.
To sync your data instantly:
- Click Admin View.
- Click the
Gear icon at the top right side.
(OR)
Go to Settings on the left sidebar. - Go to HR & Projects under Integrations.
- Click Zoho Projects.
- Click Sync Now.

Error Summary
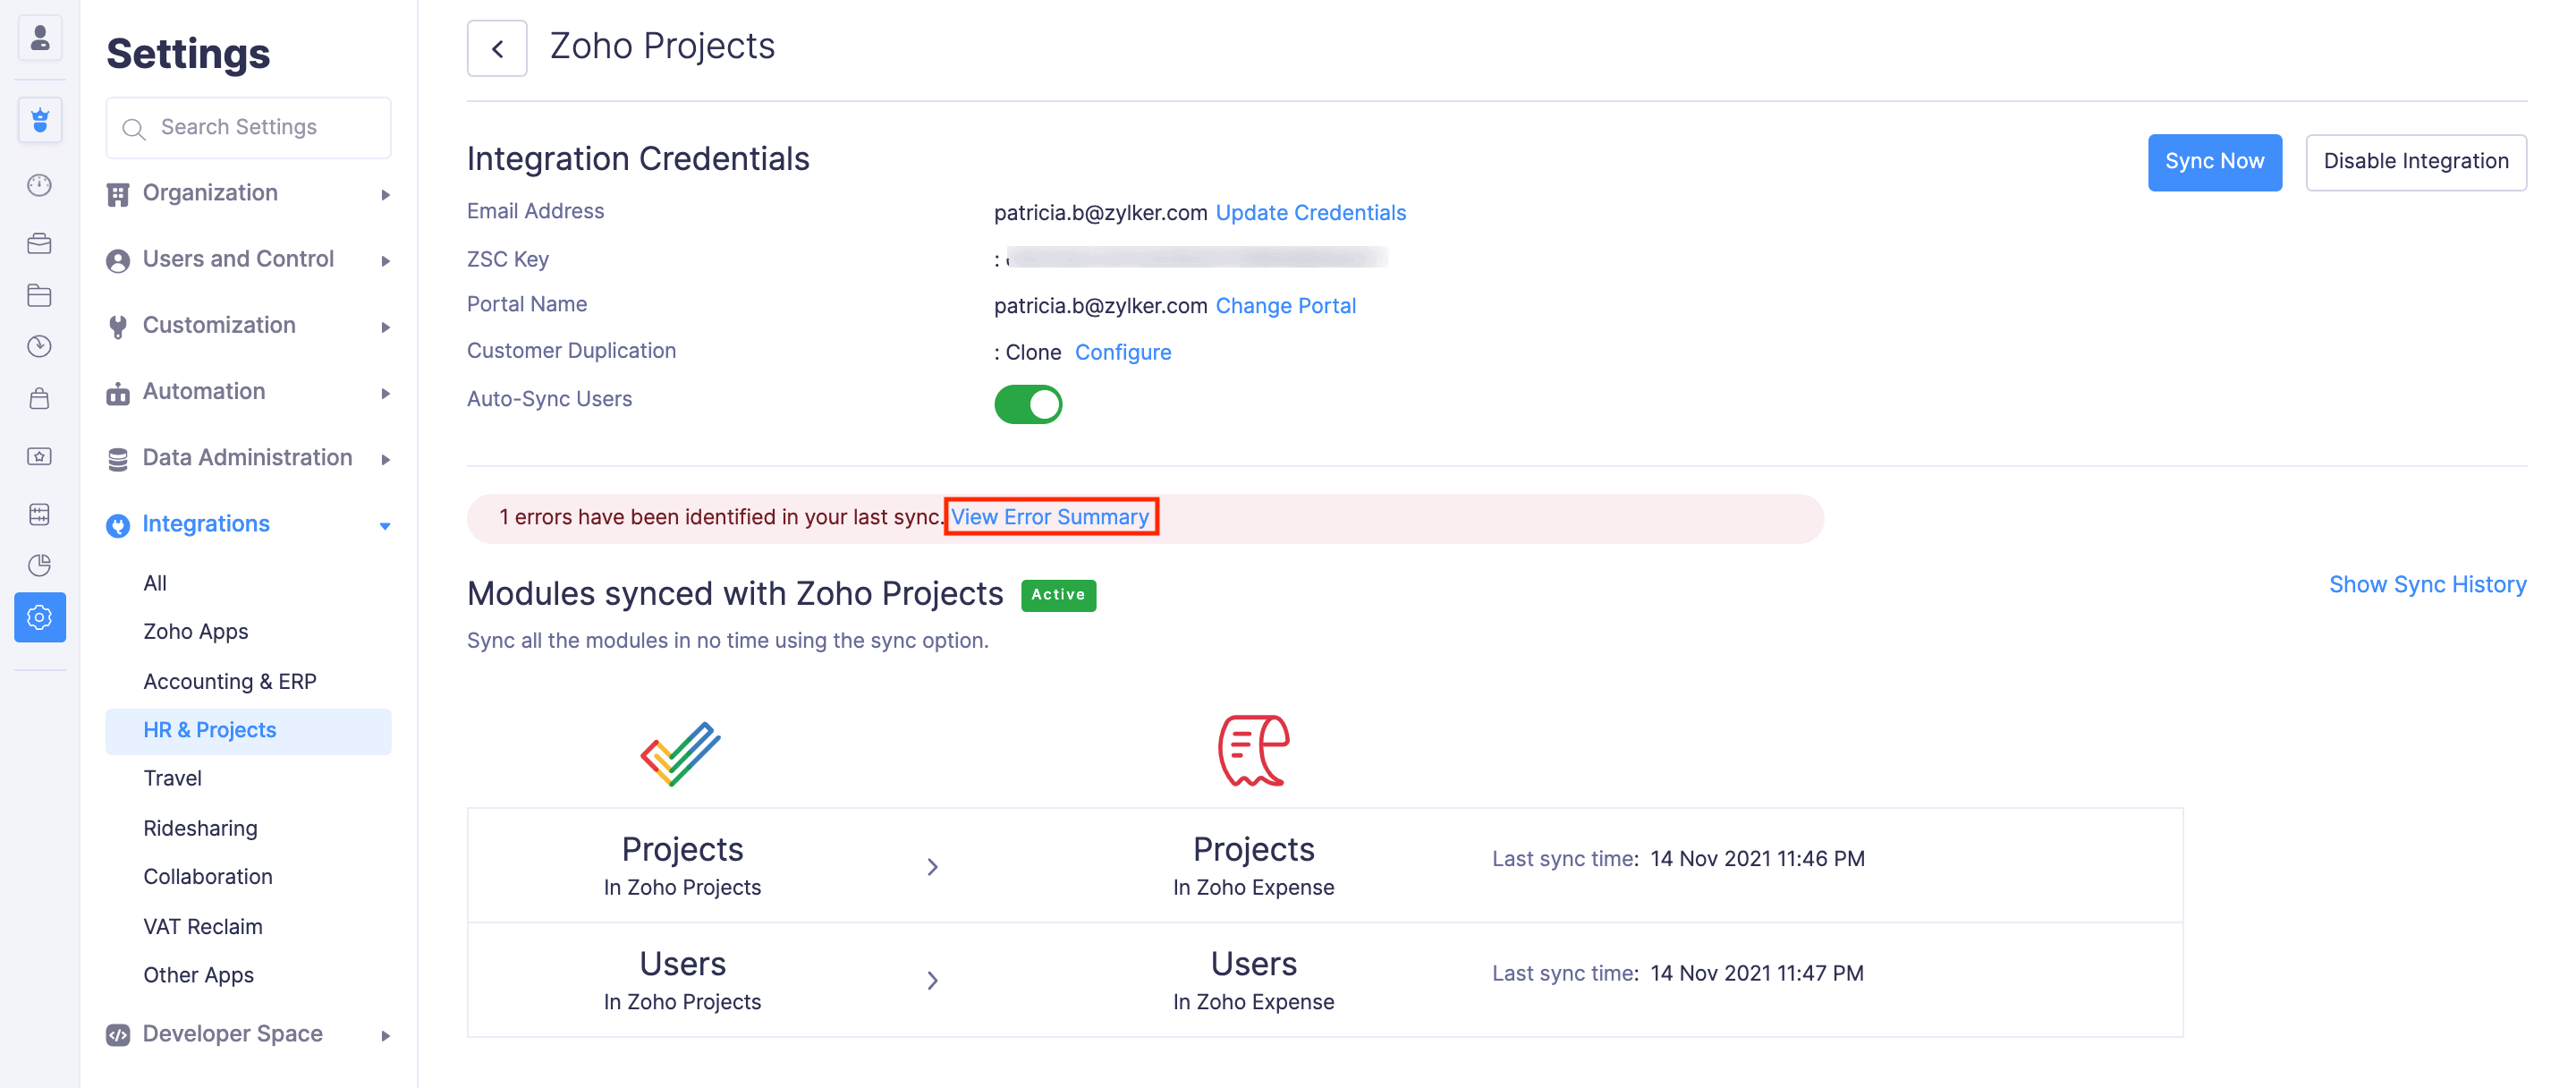
During the sync, few projects and clients may have failed to be fetched into Zoho Expense. You can view the sync error details by clicking the View Error Summary button on the integration details page.

Update Credentials
If you want to change your integration credentials like email address and ZSC key, click Update Credentials and enter the new details.
Change Portal
You can also change the portal with which your Zoho Expense organization is integrated. Click Change Portal and select the portal with which you want to integrate your Zoho Expense organization.
Customer Duplication Preferences
Also, you can change your customer duplication preferences, if required. You can choose to [clone or overwrite the customers].
Disable Auto-sync
If you don’t want the users to be synced automatically, disable the auto-sync button in the integration details page and fetch the users manually.

Disable the Integration
You can disable the integration if you don’t want to sync the projects and customers between Zoho Expense and Zoho Projects. To disable the integration:
- Click Admin View.
- Click the
Gear icon at the top right side.
(OR)
Go to Settings on the left sidebar. - Go to HR & Projects under Integrations.
- Click Zoho Projects.
- Click Show Details.
- Click Disable Integration.

- Click Confirm to disable your integration.
Your integration will be disabled and you can enable it later when needed.