Increase API Credits
API calls in Zoho CRM are associated with credits. These credits are deducted from your credit count based on the criteria discussed on the API Limits page.
Zoho CRM has now introduced the "Pay as you go" model where CRM orgs can increase their API credits right from the API dashboard. The highlight of this feature is that although you increase your credits based on an estimate, you only pay for the extra credits you have consumed through API calls in that monthly billing cycle.
Prerequisites to increase the credits
- You must be the super admin of your account.
- Your account must be a paid account.
- You must have paid only by card and not through the accumulated payments credits.
- Your account must not be an offline-purchased or a one-time paid account. If it is, then to increase your limit, please send an email to renewal@zohocorp.com or support@zohocrm.com.
The below table gives the pricing details for different credit slabs.
| Add-on Credits per 24 hours | Price in $ per 1000 Credits |
|---|---|
| First 25,000 | 0.14 |
| Next 75,000 | 0.06 |
| Next 150,000 | 0.05 |
| Above 250,000 | 0.025 |
Here is a calculator to know the amount payable based on your DC, add-on credits and the payment period.
The total amount payable for 100,000 Add-on credits is 240 US Dollars, billed monthly.
How can you increase the credits from the API Dashboard?
As the super admin of the org,
- Estimate the number of extra credits that your org will require.
- Go to Setup > Developer Hub > APIs and SDKs.
Click the Credits tab. You can see the Credit details section.
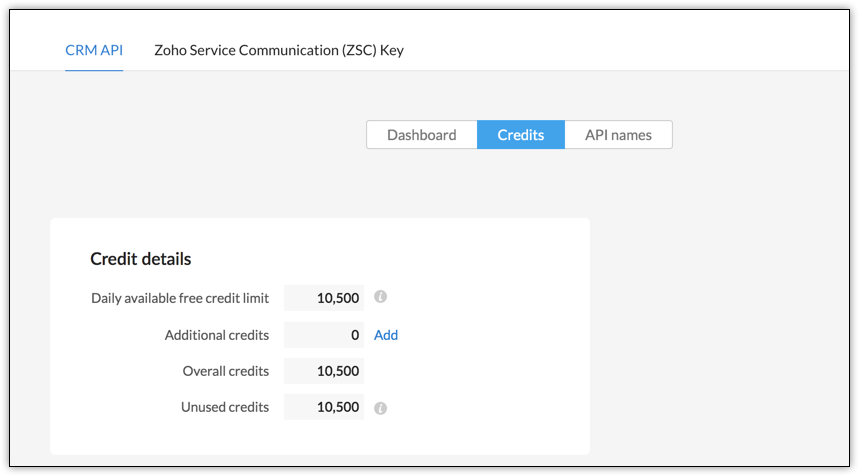
Credit details
This section displays the Daily available free credit limit, Overall credits, Unused credits (in the last 24 hours), and the Additional credits.
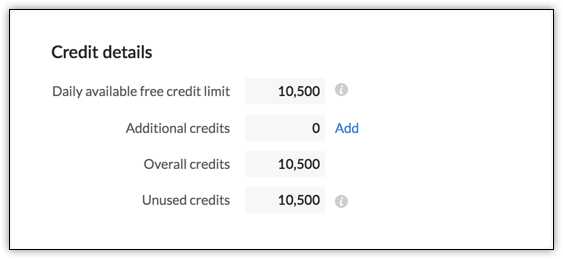
- Daily available free credit limit - This limit represents the number of credits available for your edition in a 24-hour rolling window. This limit includes the base credits plus the credits for each user in the org.
- Additional credits - These are the extra credits you want for your org. To set your limit on the additional credits,
- Click Add. The Set daily credit limit pop up opens.
- Enter the number of extra credits you want in the Enter additional credit limit field.
- Based on the additional credits, the tariff is applied and the amount to be paid is displayed.
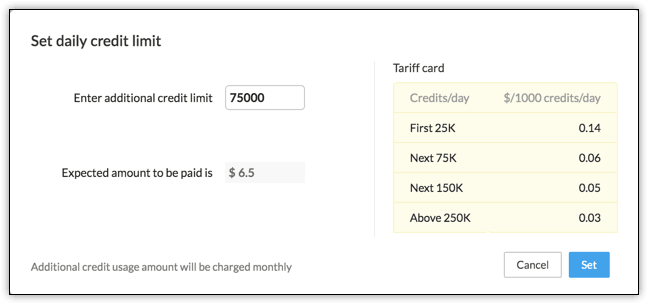
- If you want to increase by 75,000 credits for your org, two tariff slabs apply— $0.14 for the first 25,000 credits, and $0.06 for the next 50,000 credits. The pricing is as below.
For the first 25,000 credits - (25,000 x $0.14)/1000 = $3.5
For the next 50,000 credits - (50,000 x 0.06)/1000 = $3
Therefore, the total amount to be paid will be $6.5 per day ($3.5+$3). - Click Set. You can now see that the overall credits and the used credits are calculated based on the set limit.
- Overall credits - This limit is the sum of the daily available credit limit and the additional credits, if any.
- Unused credits - These are the credits still left for your org in that 24-hour rolling window.
Note
- All credit calculations are for a 24-hour period.
- You can increase your credits by either a maximum of 500,000 extra credits, or the difference between your edition's maximum credit limit and your current API limit, whichever is lower. For example, you are in the Standard edition with the maximum credits at 100,000, and used 20,000 credits. So, you can increase your credits by a maximum of 80,000 (100,000 - 20,000).
- You will be charged monthly for your additional credits based on the usage, even though you pay for your subscription yearly.
- You cannot use the additional credits in your trial account of any edition.
After you set the limit, the Credits tab displays the Billing details section.

Billing details
This section gives you the details of the billing for the extra credits you have consumed until that day of the billing cycle, the billing period, and the next billing date.
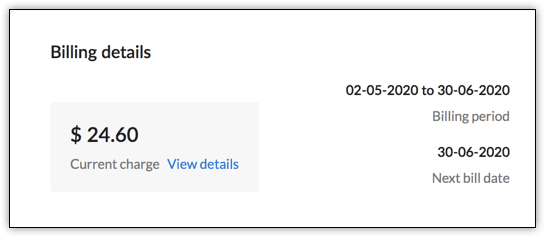
When you click View details, the Charge details pop up opens. This gives you a break-up of the utilization of additional credits based on a time period, and the amount you must pay for consuming those credits. The View tariff option comes in handy when you want to view the pricing slabs at a glance.
You can view the usage in the last 30 days or set a custom range. You can view the usage stats for a maximum of the last three months.
Use the more option icon (the three dots icon) to download the billing and usage details as a PDF or print it.
The Amount charged column gives you the amount you are charged on a particular day. When you click the amount, another pop up displays the price break-up based on the credit slabs.
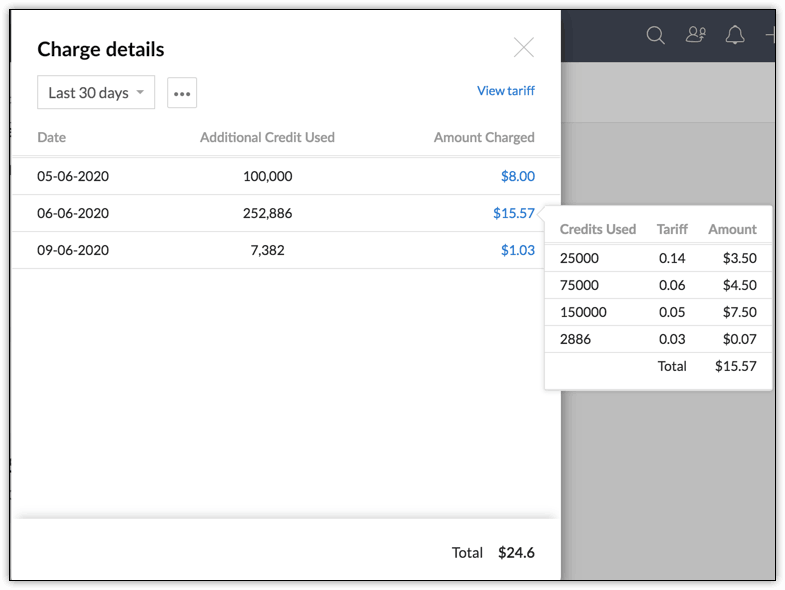
Let us assume that you have set the additional credit limit as 270,000, but you have consumed only 252,886 credits on a given day. Although you have set your limit as 270,000, you will only pay for the credits you have consumed.
Here is the price break-up:
| Pricing Slab | Chargeable Amount | Remaining Credits |
|---|---|---|
| 25,000 credits at $0.14/1000 credits | $3.5 ((25,000 x 0.14)/1000) | 227,886 (252,886-25,000) |
| Next 75,000 credits at $0.06/1000 credits | $4.5 ((75,000 x 0.06)/1000) | 152,886 (227,886-75,000) |
| Next 150,000 credits at $0.05/1000 credits | $7.5 ((150,000 x 0.05)/1000) | 2886 (152,886-150,000) |
| Remaining credits at $0.025/1000 credits | $0.07 ((2886 x 0.025)/1000) | 0 |
As you can see, you pay $15.50 on that day for the 252,886 credits you have consumed, despite setting the additional credit limit at 270,000.

