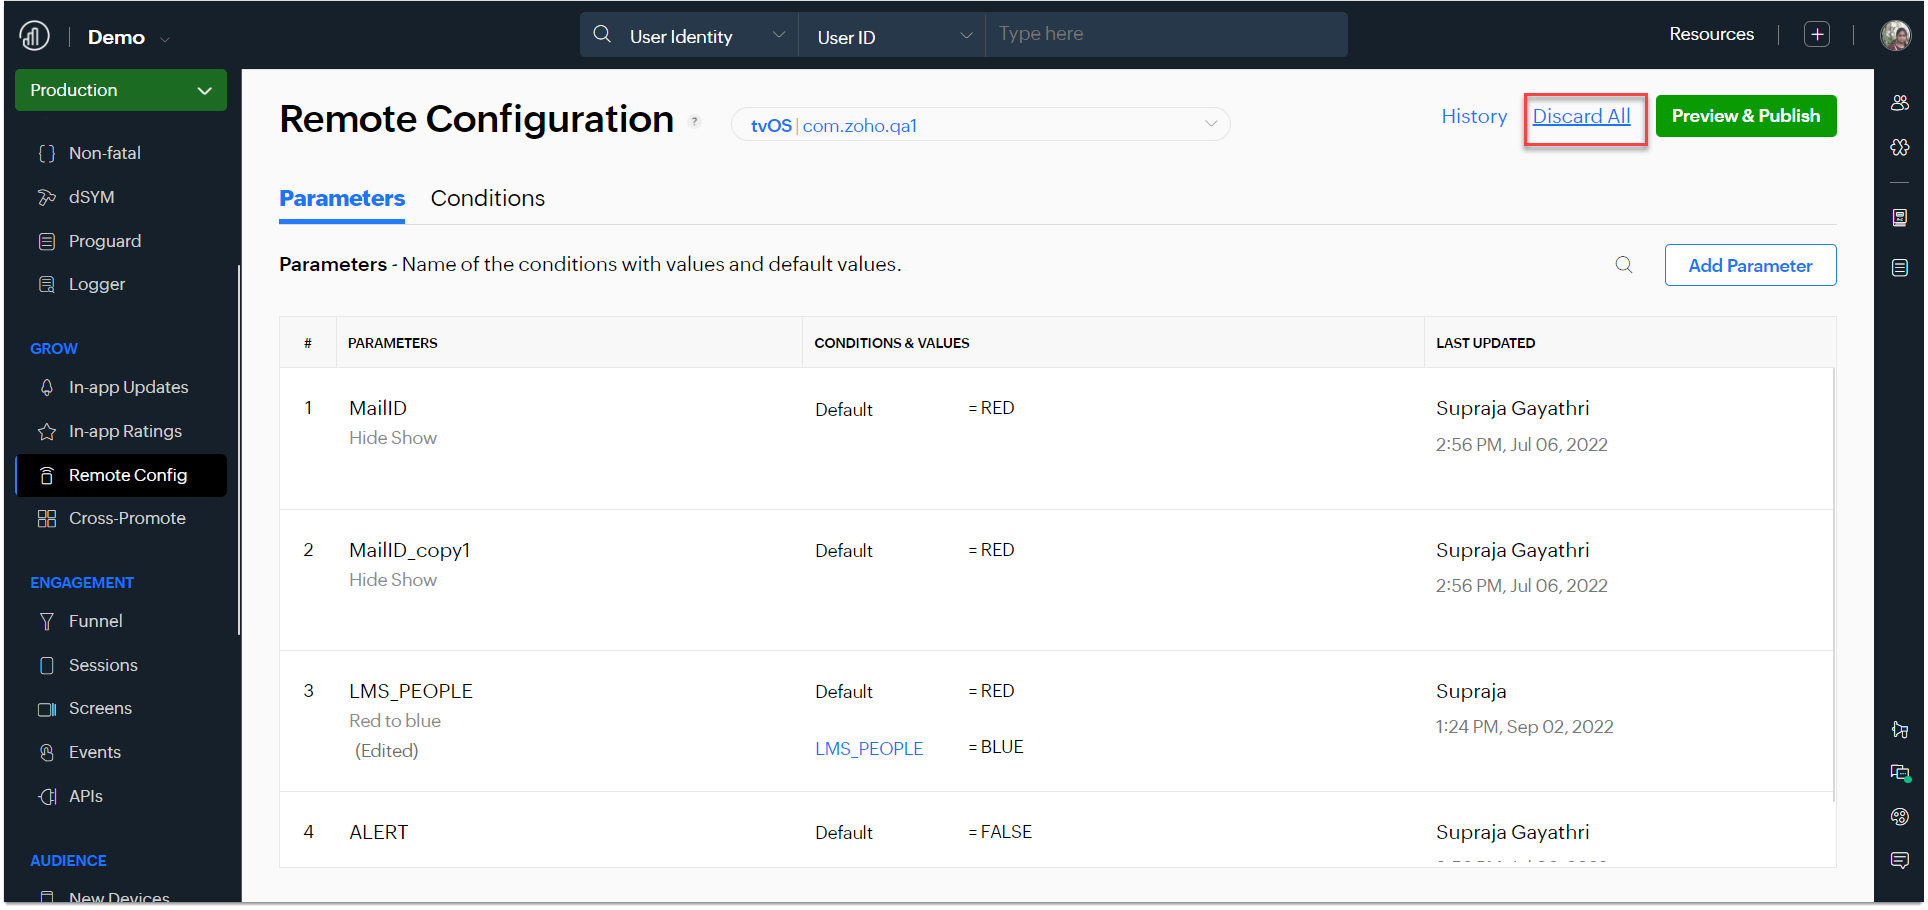
Remote Config
Overview
Remote Configuration allows you to make dynamic changes in your app's behavior and appearance without releasing an update.
You configure in-app default values that control the appearance and behavior of your app. Toggling app features, changing button colors, updating the label text, changing promo banners, etc. are a few examples of app experiences that you can dynamically change using Remote Config.
- Navigate to Growth > Remote Configuration.

Parameters
Parameters are the key-value pairs that are used to control the appearance and behavior of your app.
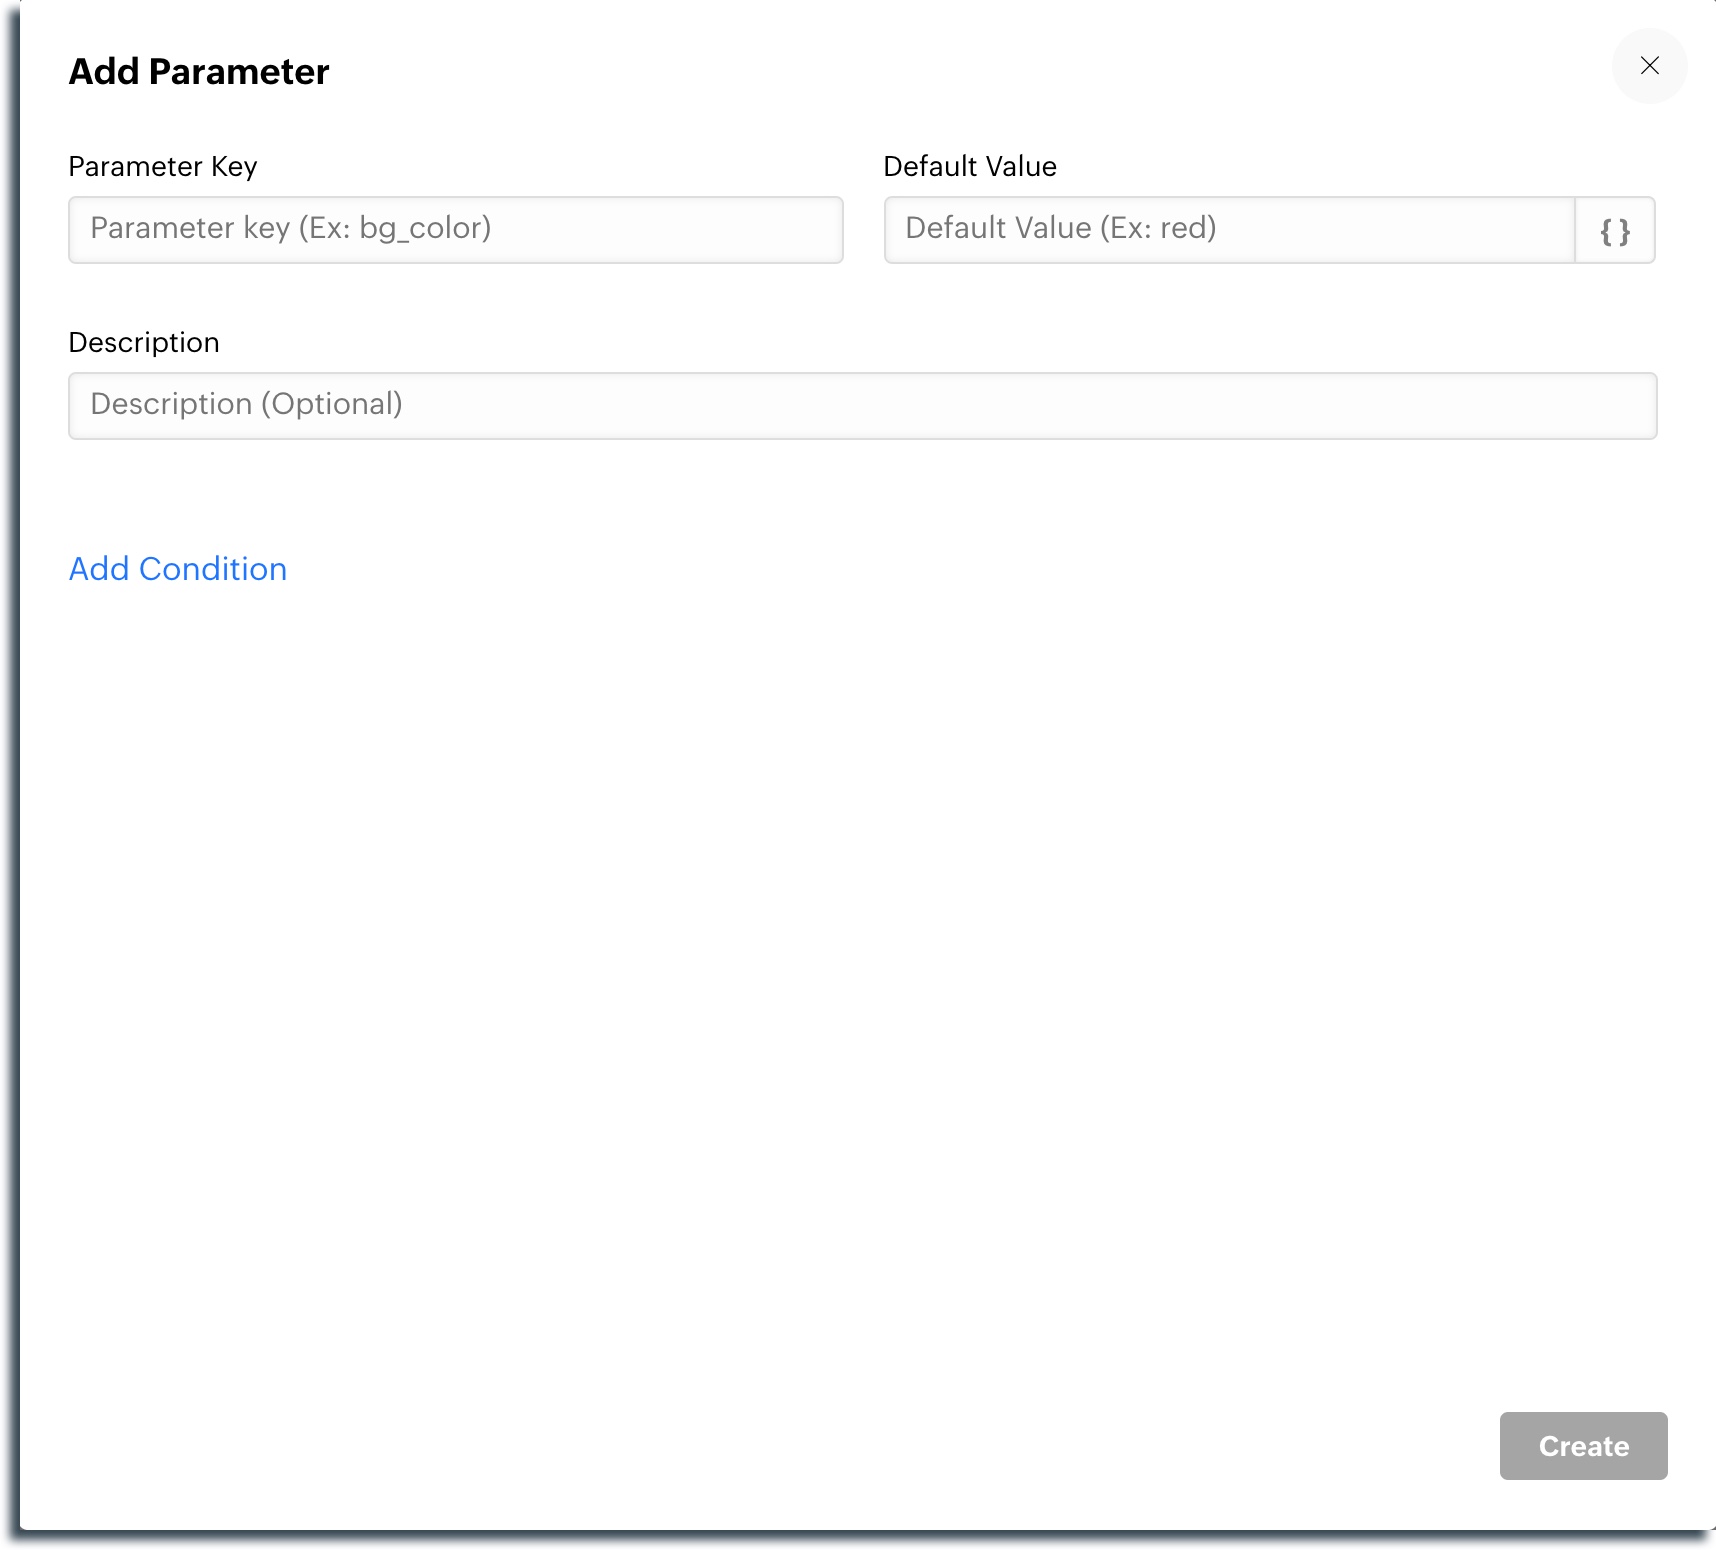
Add parameters in Remote Config
- Click on Add New Parameter and a pop-up will appear on the screen.
- Add the details like the parameter key, default value, and description (optional).
- Click Create and the parameter will be created and will appear in the parameters list in the dashboard.
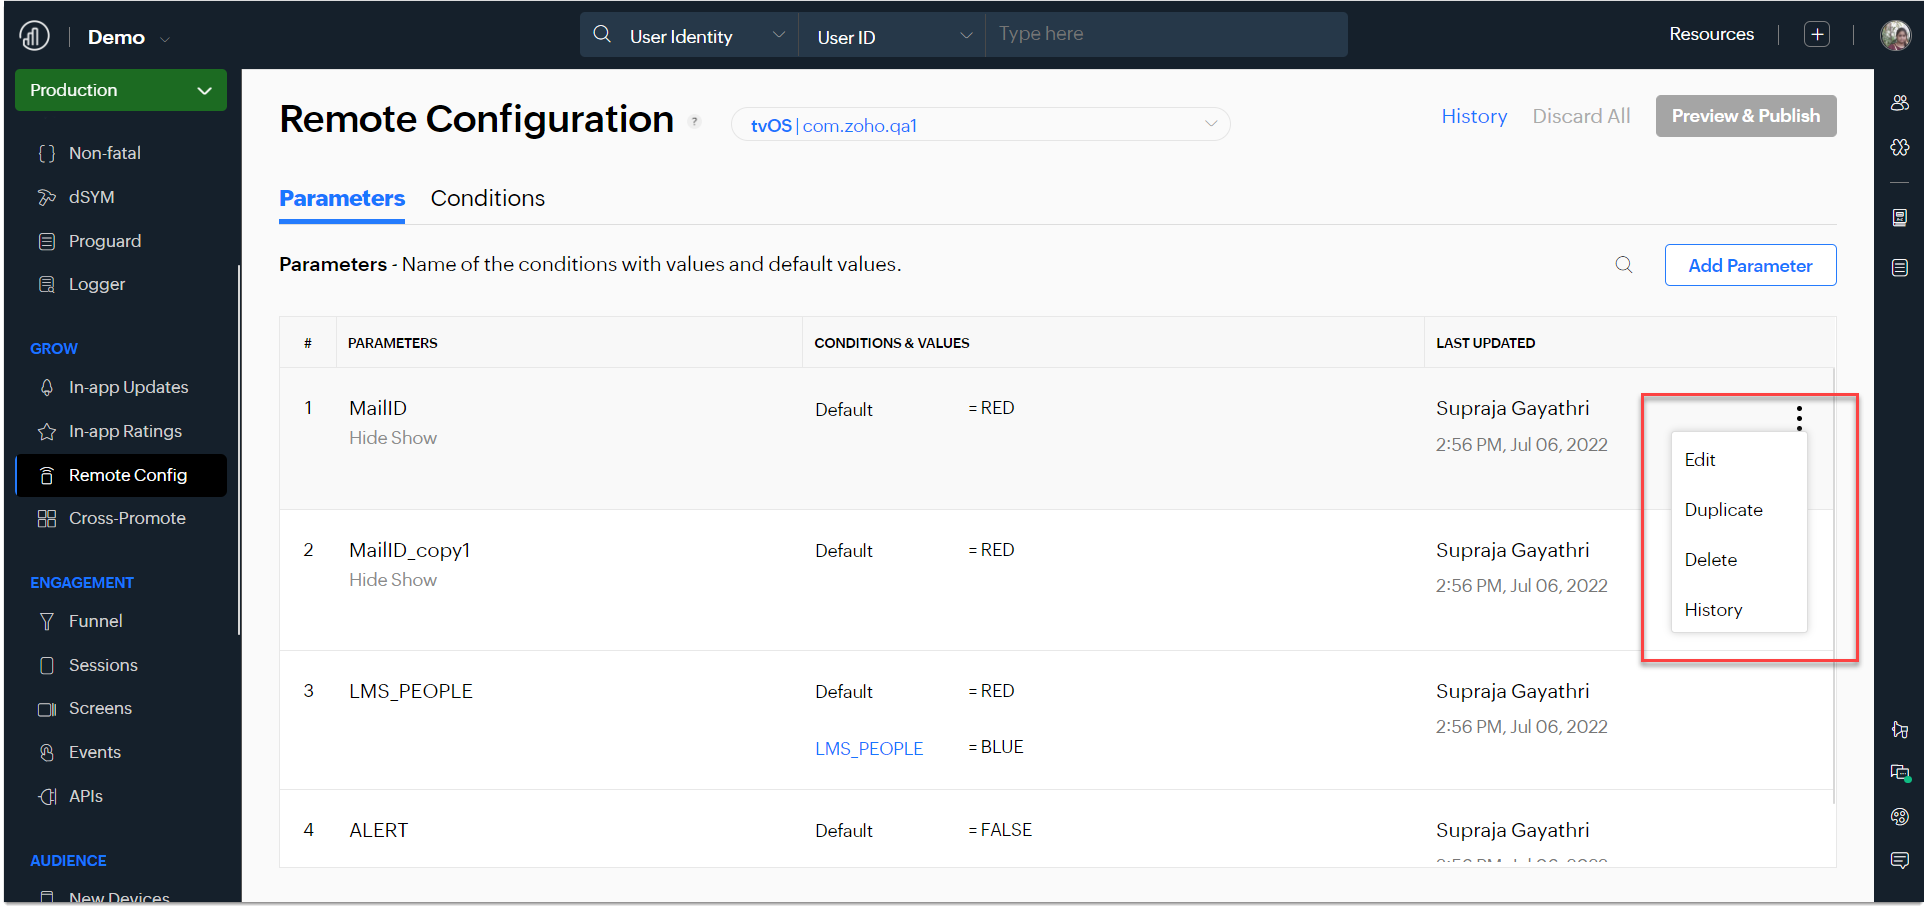
- Hover on the individual Parameters and click the overflow icon to see the advanced menu like edit, duplicate, delete, and history.
Conditions
A condition is used to assign different values to a given parameter. Conditions are made up of one or more filters that must all be true for the condition.
You can add conditions in Remote Config either while adding new parameters, or from the Conditions tab.
Add Conditions while adding a new parameter
.
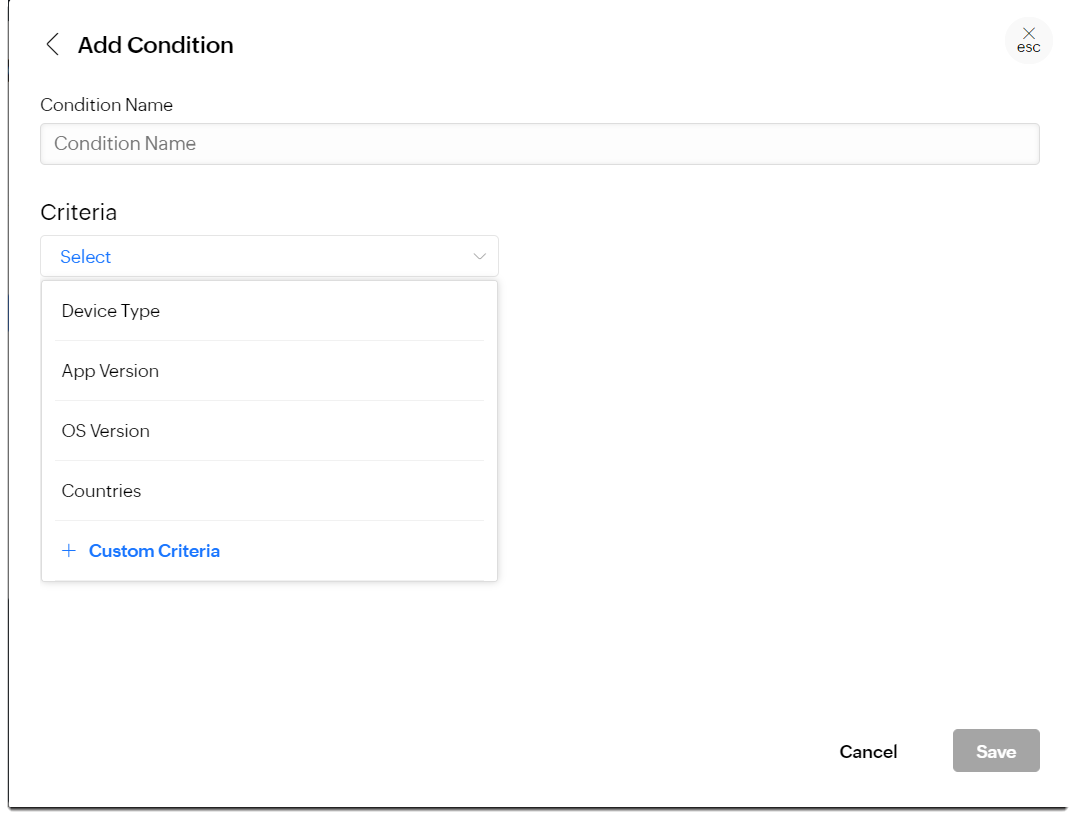
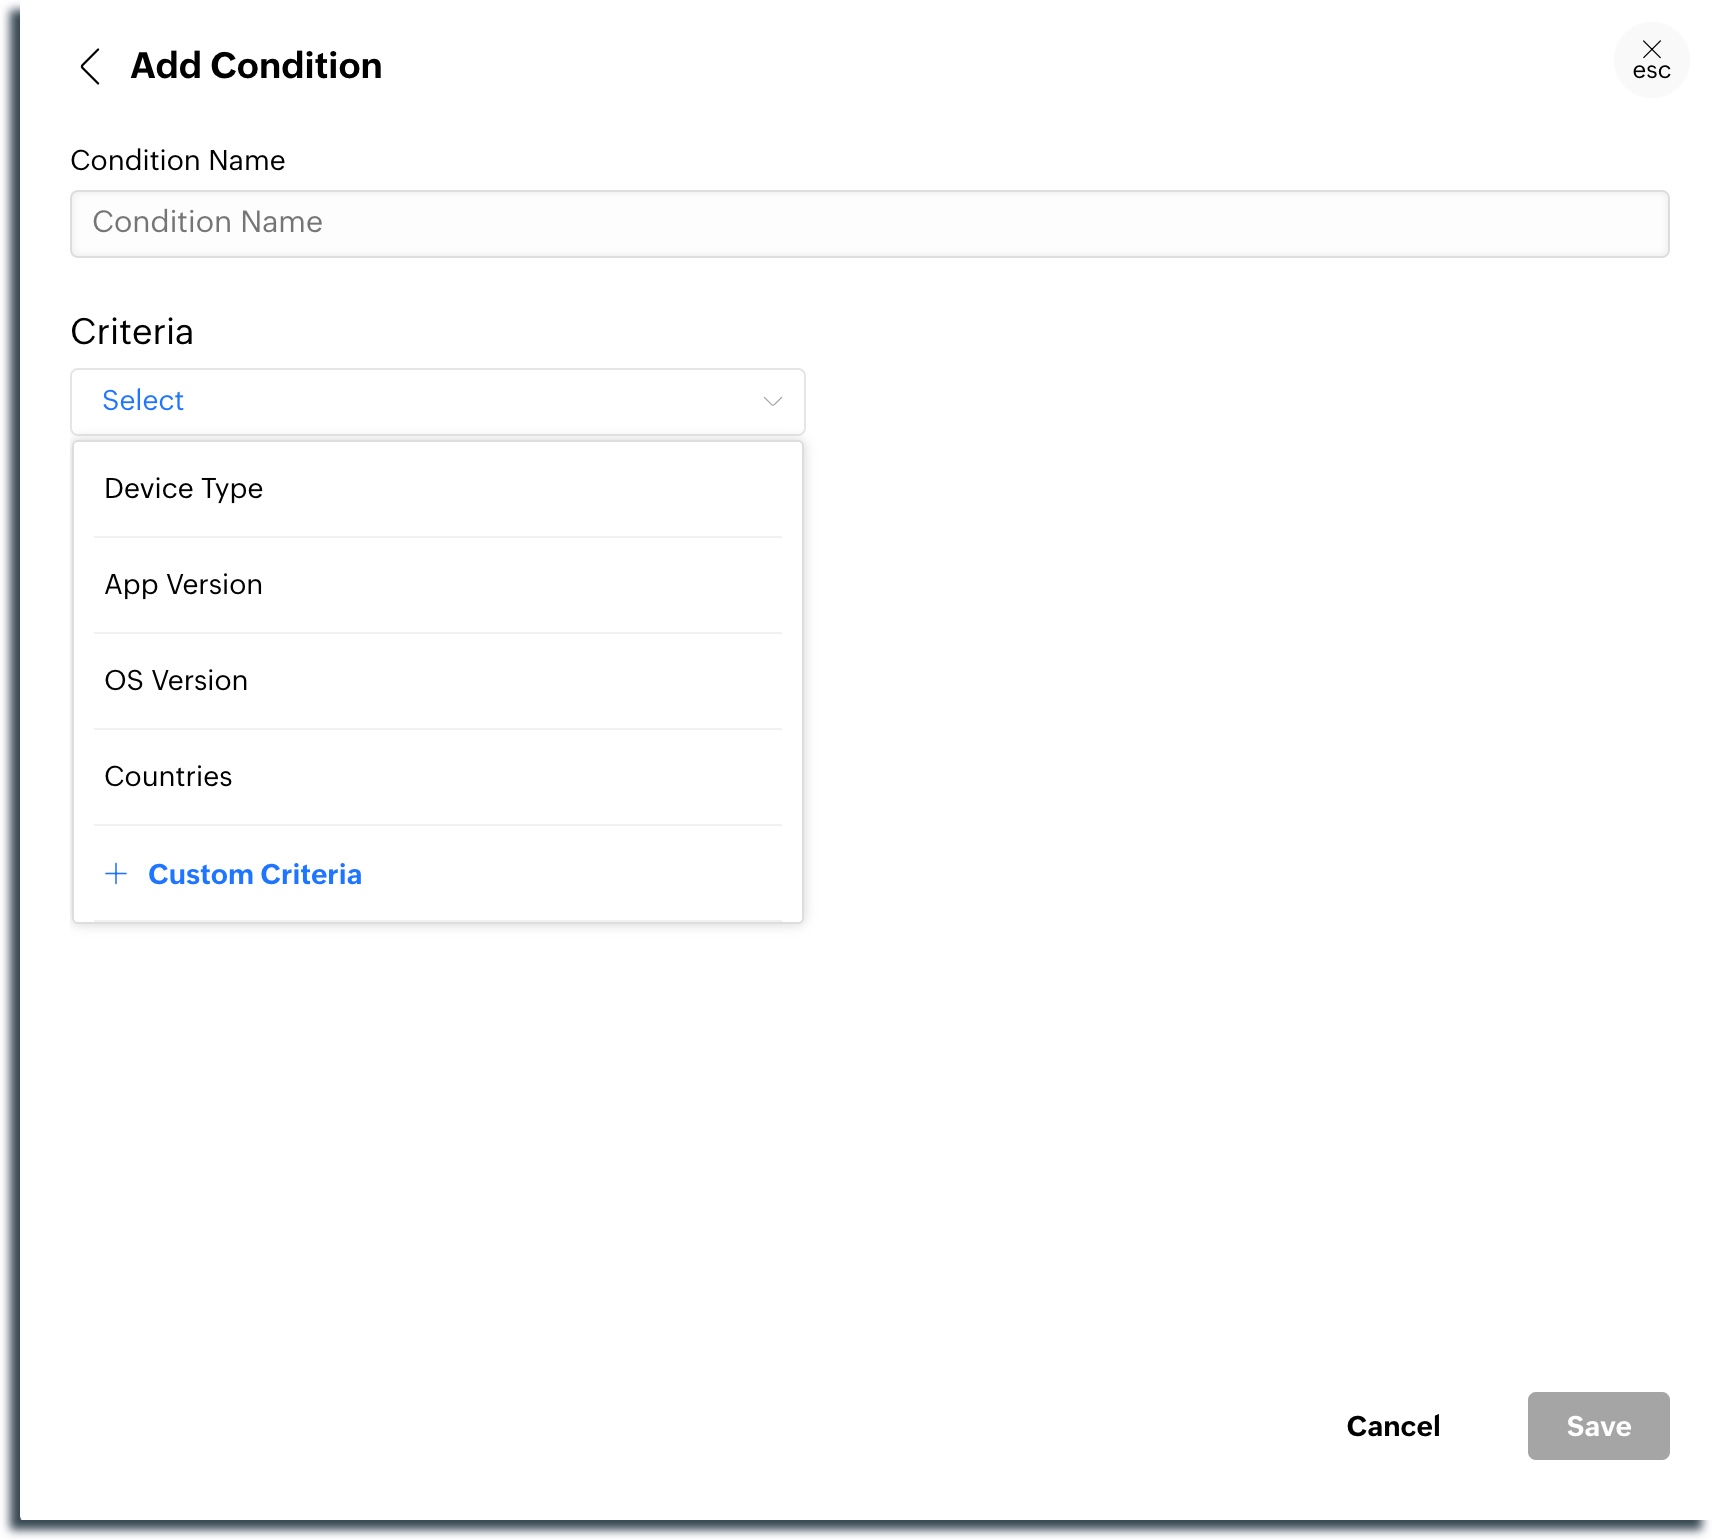
- Click Add Condition > New Condition. Add Condition pop-up will appear on the screen.
- Add a unique condition name and select the condition filters that you want to configure, i.e., brand, platform, bundle id, device model and type, app and OS version, and country.
- Click Save and the condition will be created and will appear in the Conditions list in the dashboard.

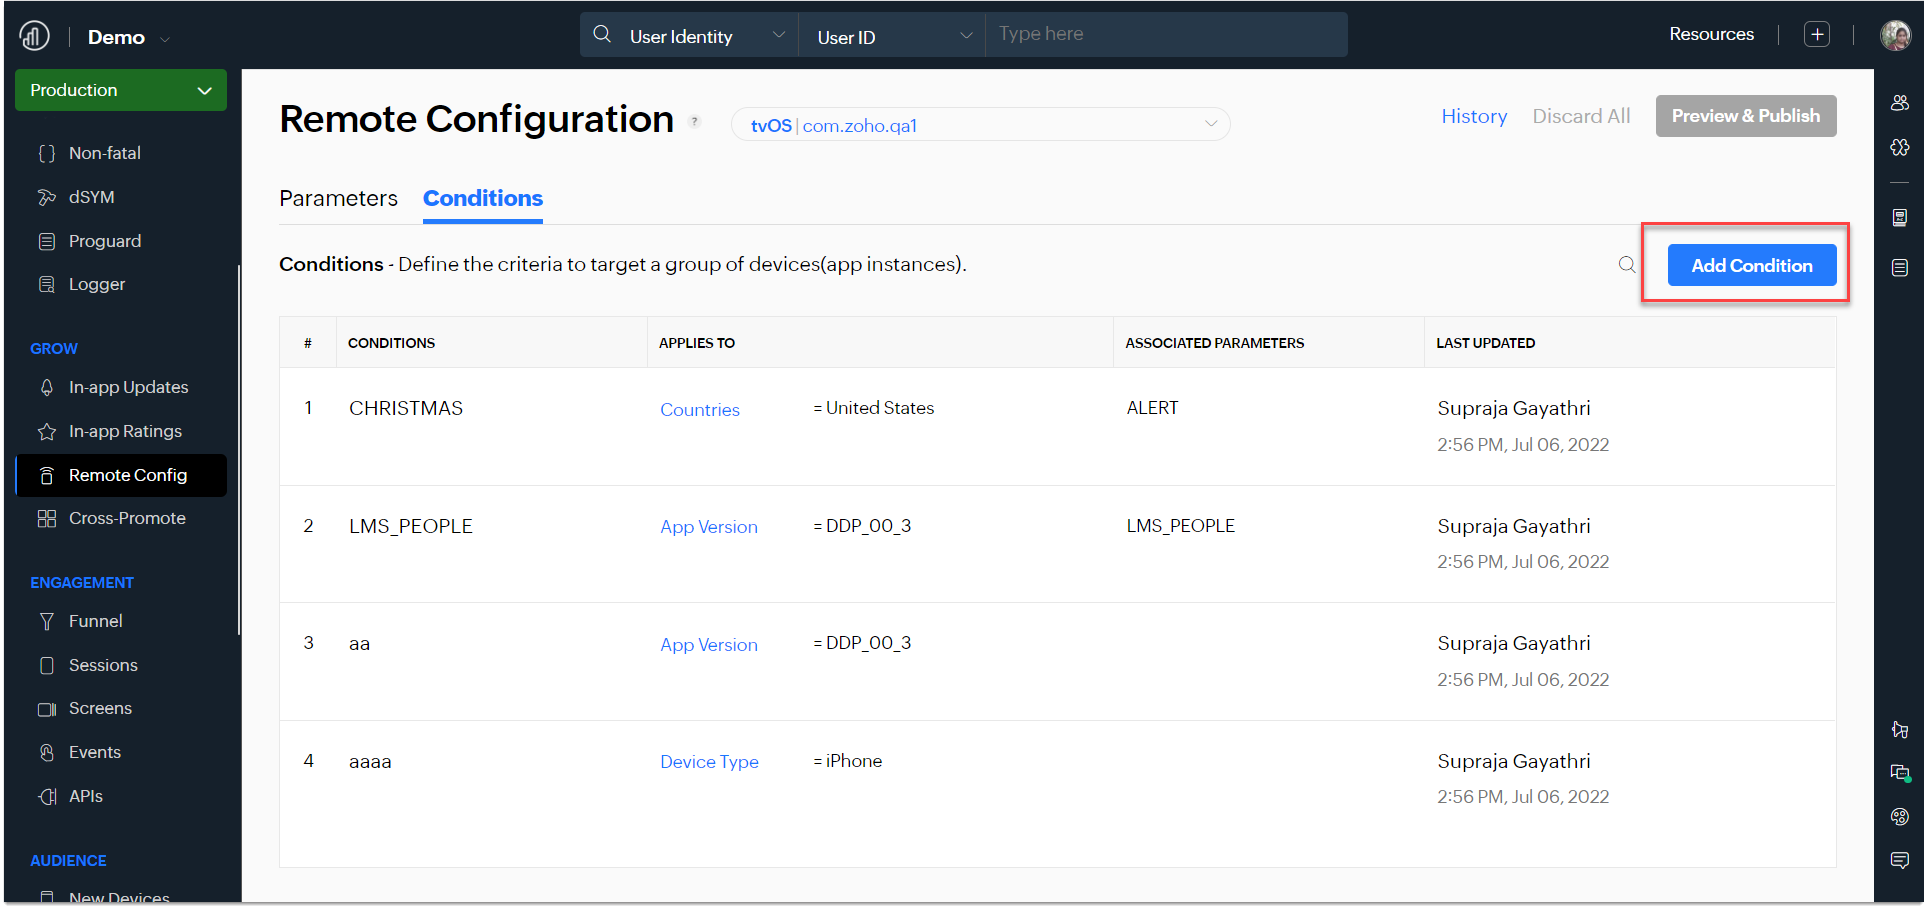
Add Conditions from the Conditions tab
 .
.
 .
.- Click Add Condition and a pop-up will appear on the screen.
- Add a unique condition name and select the condition filters that you want to configure, i.e., brand, platform, bundle id, device model and type, app and OS version, and country.
- Click Create and the condition will be created and will appear in the conditions list in the dashboard.
Adding Conditions to Parameters
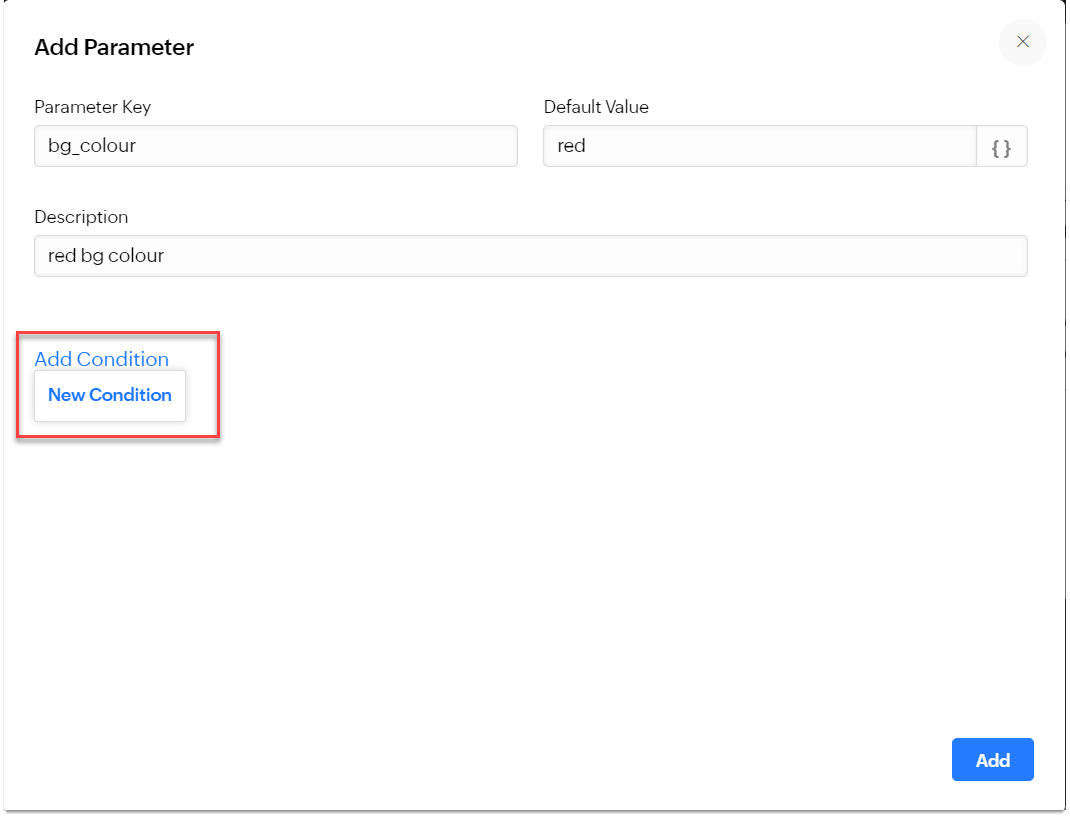
- Click add new parameter and a pop-up will appear on the screen.
- Click add condition and a drop-down list of all the configured conditions will be displayed.
- Select the condition that you want to associate with your parameter.
- Click new condition to create a new condition for your parameter.
- Once the conditions are associated with the parameter, you can see them in the parameters list.

Publish the configuration
- Click Preview & Publish and a pop-up will appear on the screen.
- Add your comments and click Publish. Once it is published, the changes will be reflected in the app immediately.
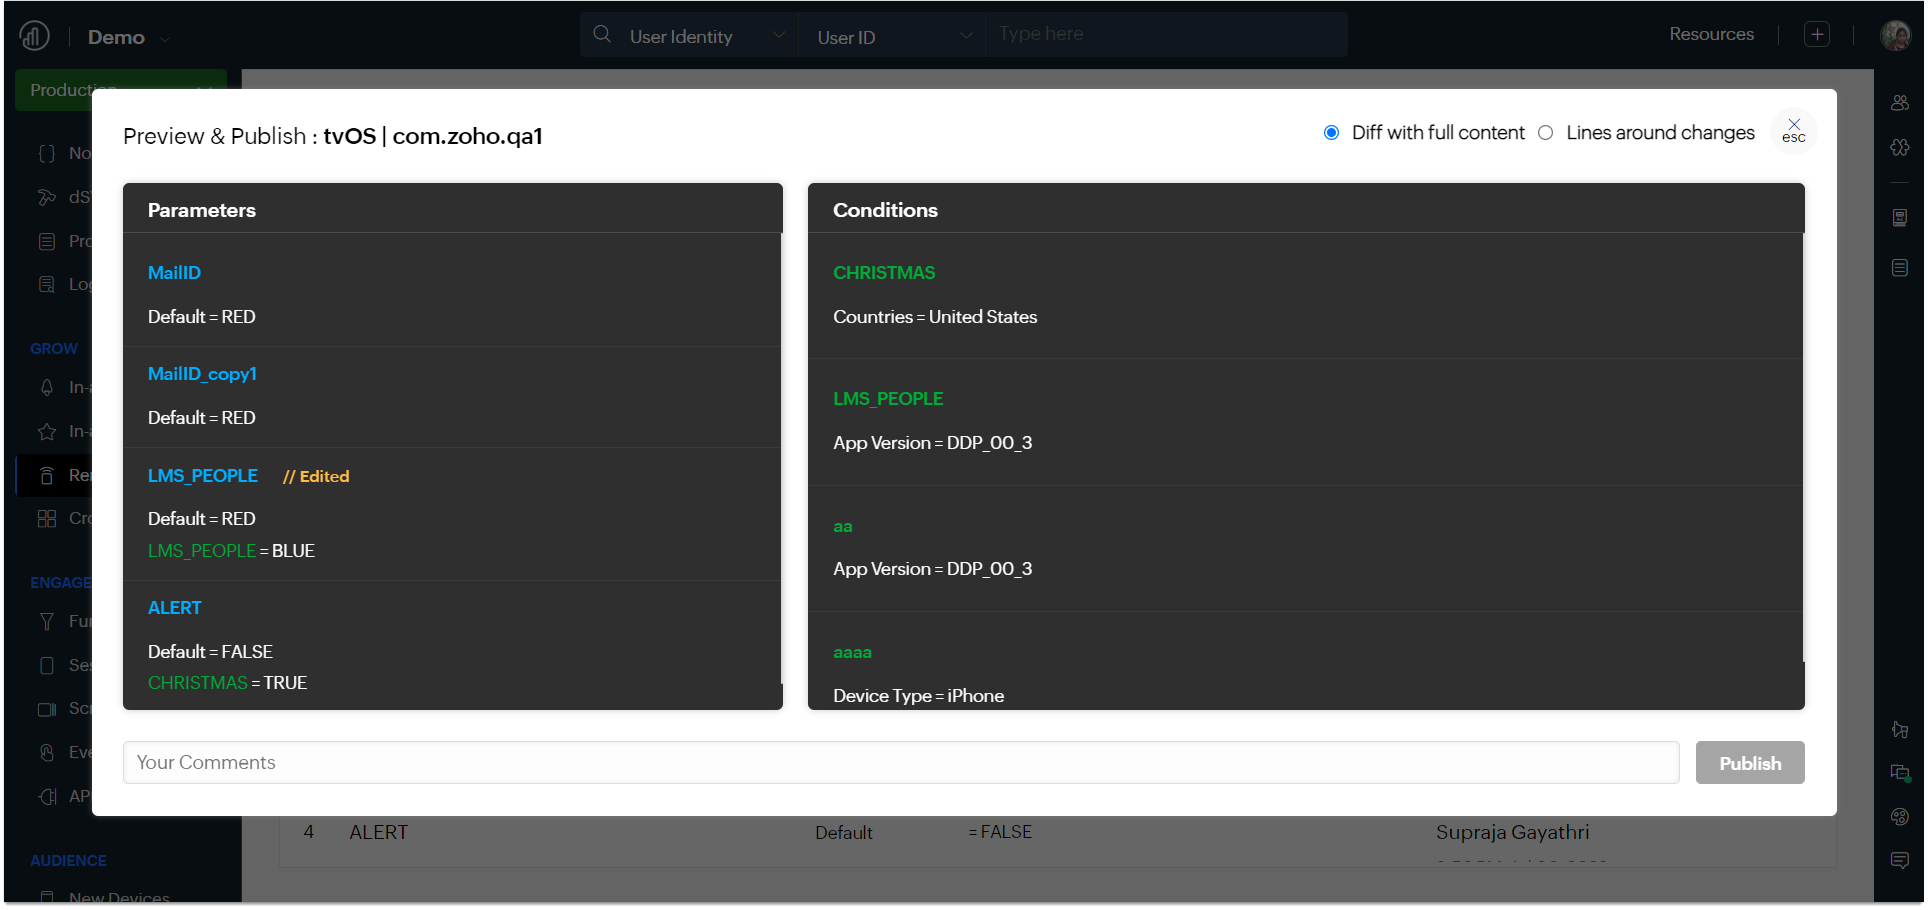
Note: A parameter can be associated with multiple conditions but the first condition that evaluates to true gets assigned to the parameter. You can always switch to any previous configurations that you have made using the Revert to this version & Publish in the history console.

- Click Discard All to delete all the previous configurations that you made so far and configure anew.