Multiple sync intervals for tables
Zoho Analytics enables you to set different synchronization intervals for tables of the same data source, offering the flexibility to customize data synchronization schedules based on the unique update frequency of individual tables. For example, some tables can be configured to sync every hour, while others can be set to sync daily or weekly, based on your specific needs.
- Synchronization frequencies
- Configure multiple sync intervals
- Move tables from one sync schedule to another
- Delete sync schedule
Synchronization frequencies
Zoho Analytics offers flexible sync schedules to keep your data up-to-date, ensuring accurate and timely analysis. The following are the available synchronization frequencies:
- Every 'N' hour: This option allows you to schedule the import every 3, 6, and 12 hours.
- Everyday: This option enables you to schedule the import daily at a particular time.
- Weekly Once: This option allows you to schedule the import once a week on a specific day and time.
- Monthly Once: This option lets you schedule the import once every month on a particular day and time.
Configure multiple sync intervals
Zoho Analytics allows you to configure multiple sync intervals in the following ways:
For existing tables
Case 1: Setting up a different sync schedule when all tables have uniform or no schedule configured
- Open the desired workspace, click the More option from the side panel, and choose Data Sources.
- Navigate to the desired Data Sources page.
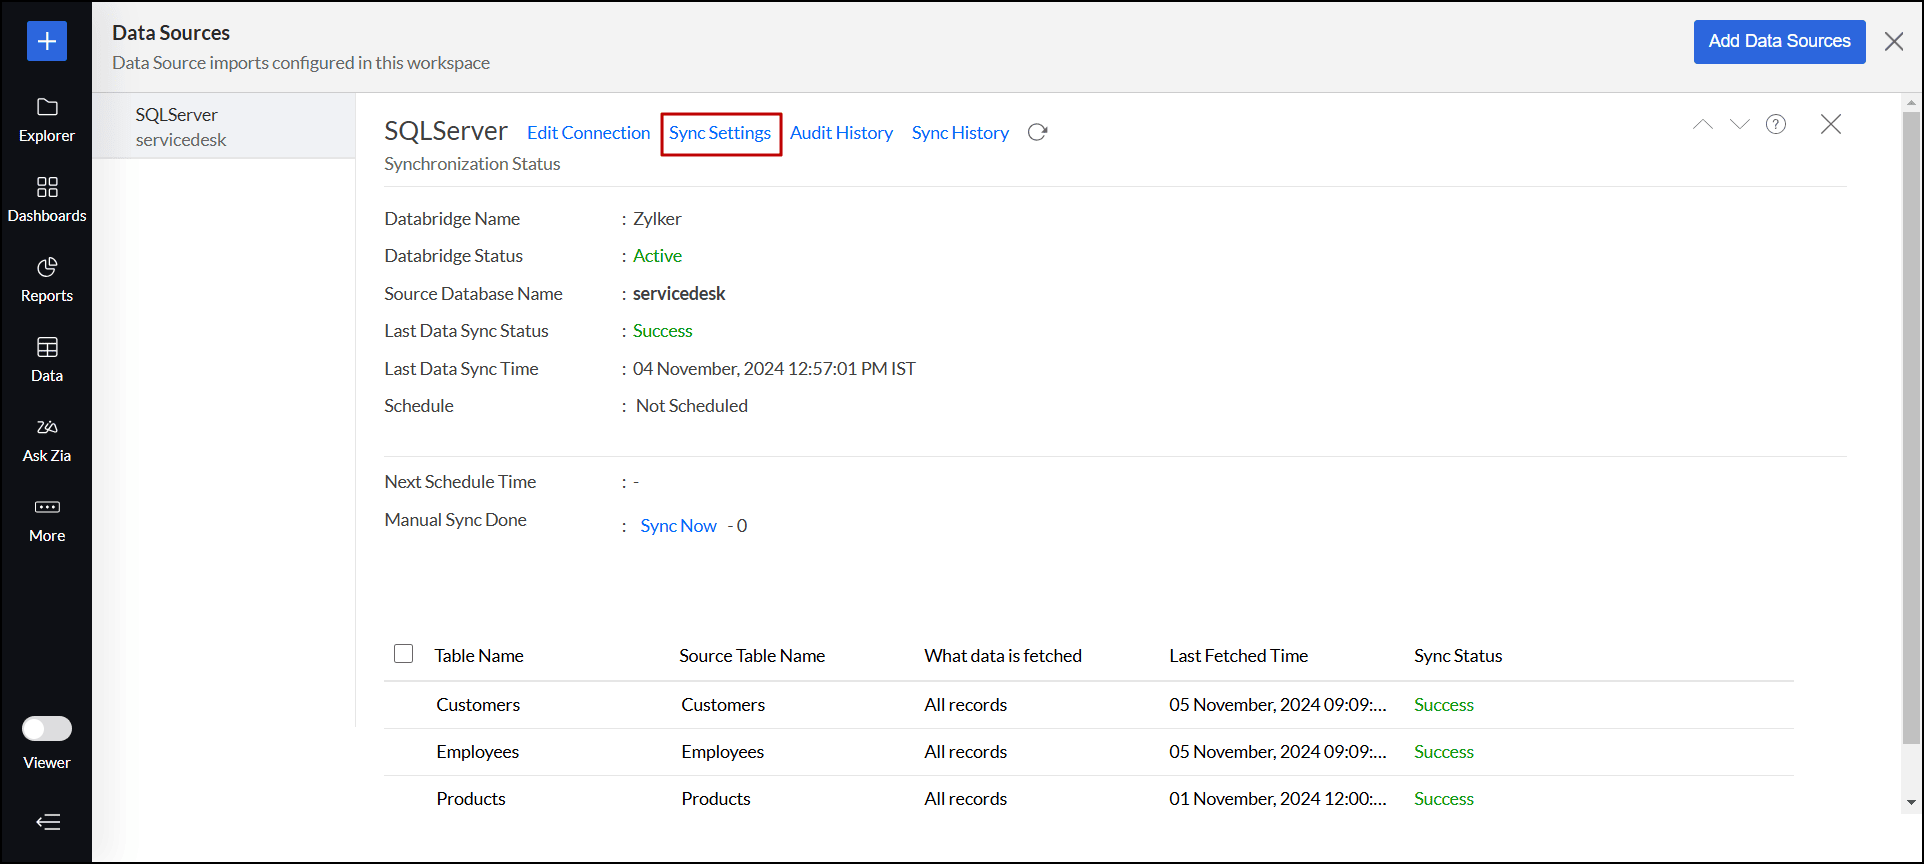
Click the Sync Settings link.
In the dialog that appears, click the Set Multiple Sync Intervals link at the top right corner.
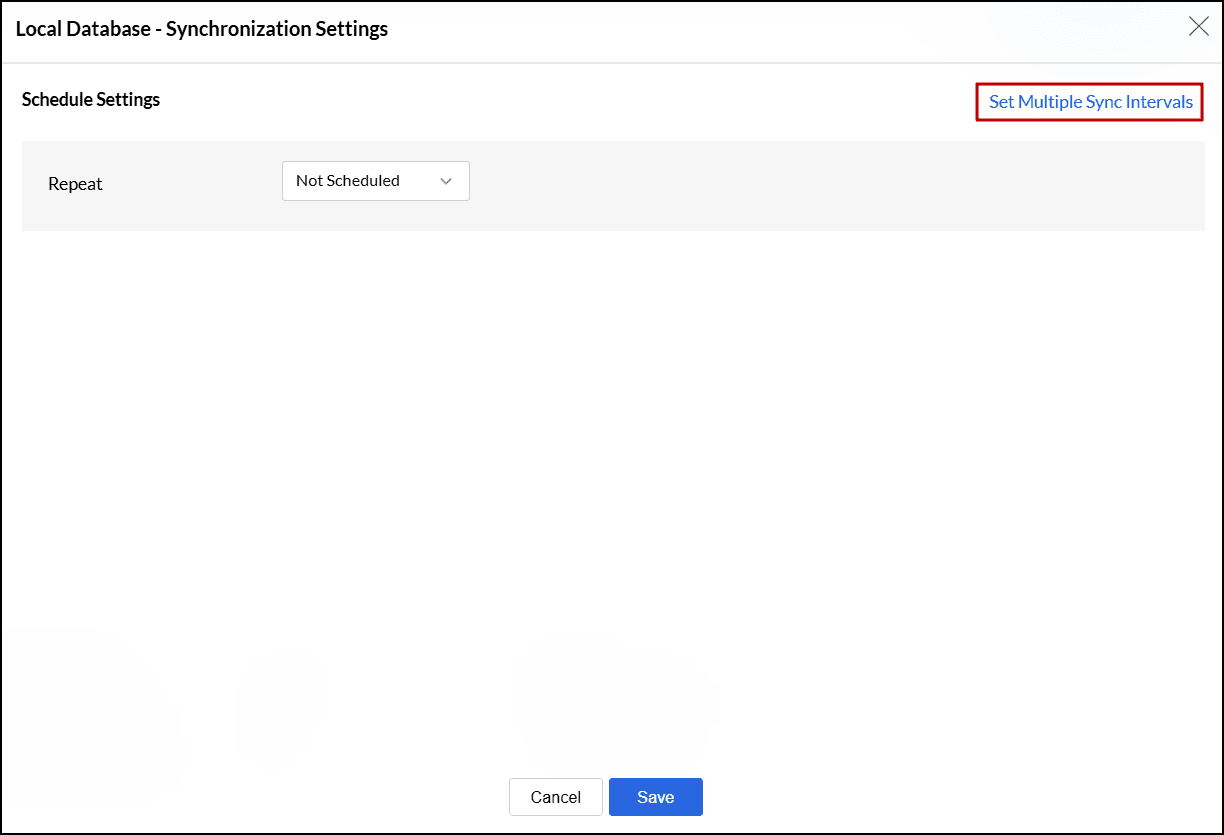
- Select the desired tables for which you need to schedule the data import.
- Navigate to the Schedule Settings section, and choose the desired synchronization frequency from the Repeat drop-down.
- Select a number from the Notify me after every 'N' Sync Failure(s) drop-down to receive notifications after the specified number of consecutive import failures. You can also notify the Account Admin and all the Workspace Admins, Organization Admins, and Custom Users of the change in sync schedules.
- Click Save to schedule the import.

After configuring multiple sync schedules, tables are categorized by their synchronization frequencies. Tables without a sync schedule are placed under the Not Scheduled category.

Case 2: Setting up a different when more than one sync schedule is configured
Follow the steps below to create a new sync interval when the data source connection is configured with more than one sync schedule.
- Open the desired workspace, click the More option from the side panel, and choose Data Sources.
- Navigate to the corresponding Data Sources page, where the tables are organized by their sync schedule frequencies. If no sync schedule is set, the tables are grouped under the Not Scheduled category.
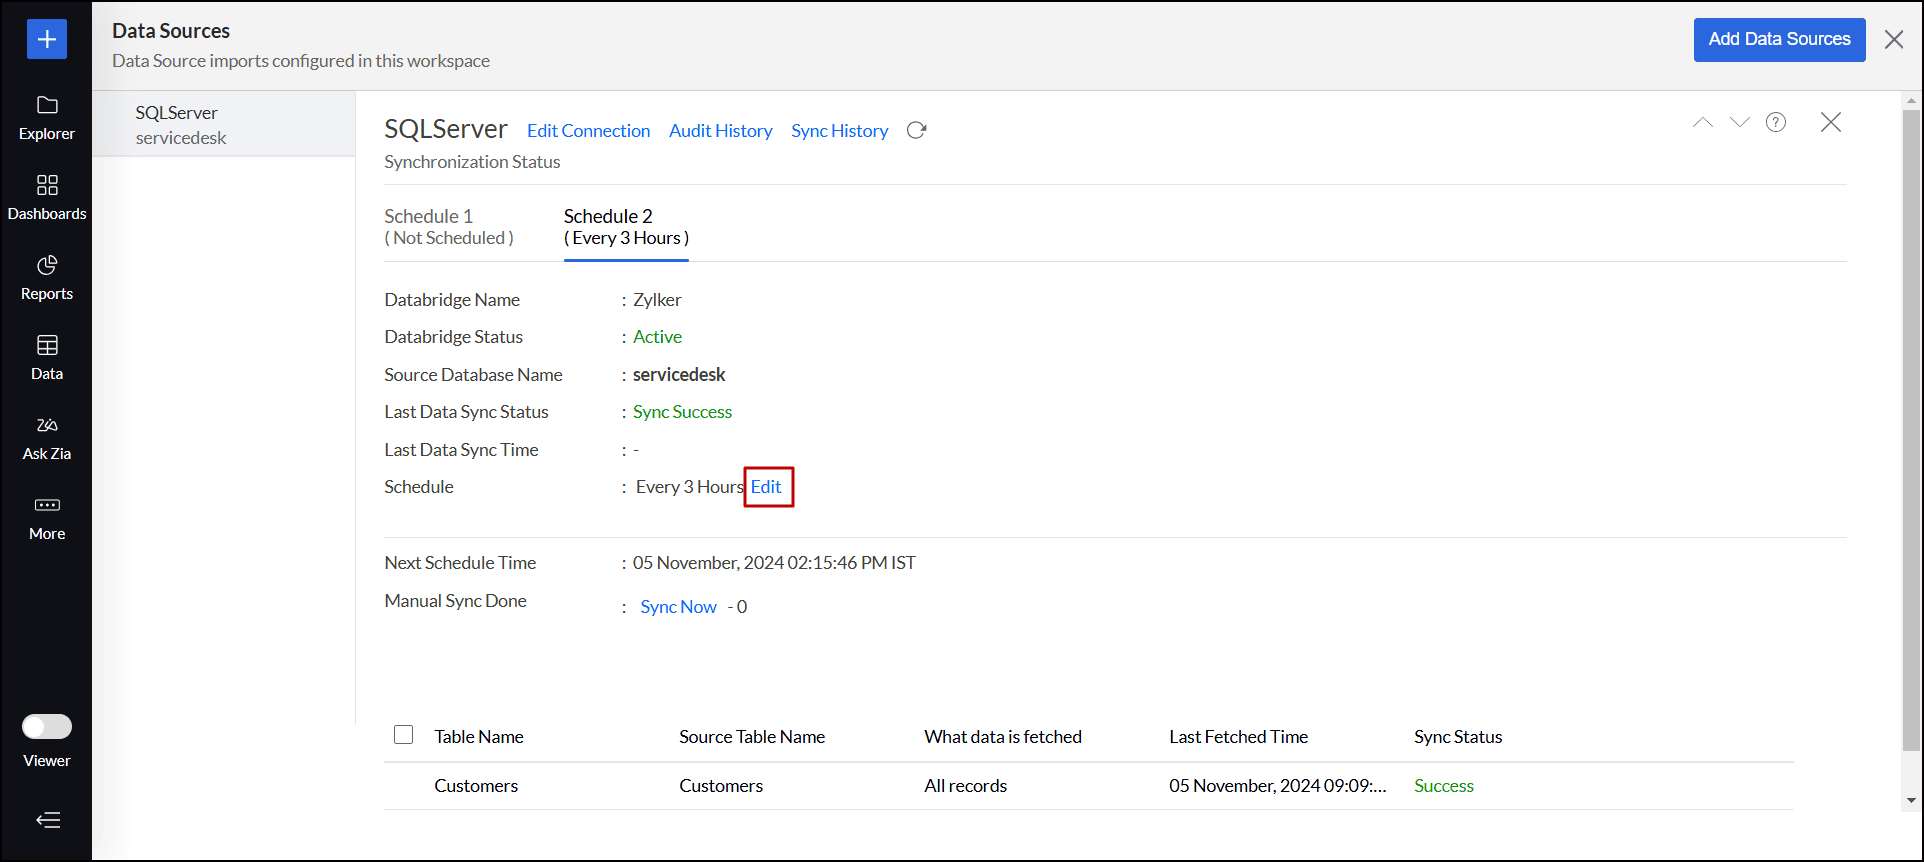
- Navigate to the appropriate sync interval where the table you want to configure a new sync interval is located.
Click the Edit link.
In the dialog that appears, click the Create New Sync Interval link at the top right corner.
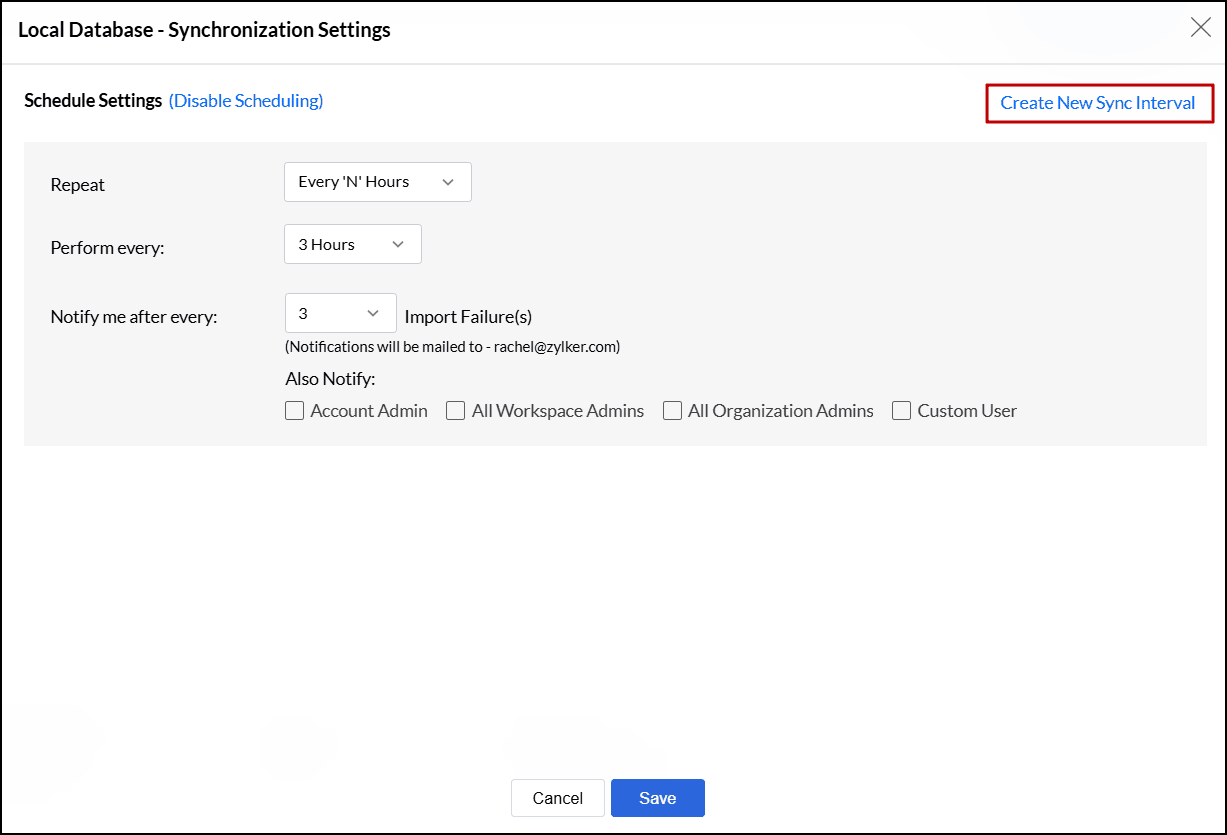
- Select the tables for which you need to create a new import schedule. You can search for the specific table using the search bar.
- Navigate to the Schedule Settings section, and choose the desired synchronization frequency from the Repeat drop-down.
- Select a number from the Notify me after every 'N' Sync Failure(s) drop-down to receive notifications after the specified number of consecutive import failures. You can also notify the Account Admin and all the Workspace Admins, Organization Admins, and Custom Users of the change in sync schedules.
Click Save to schedule the import.
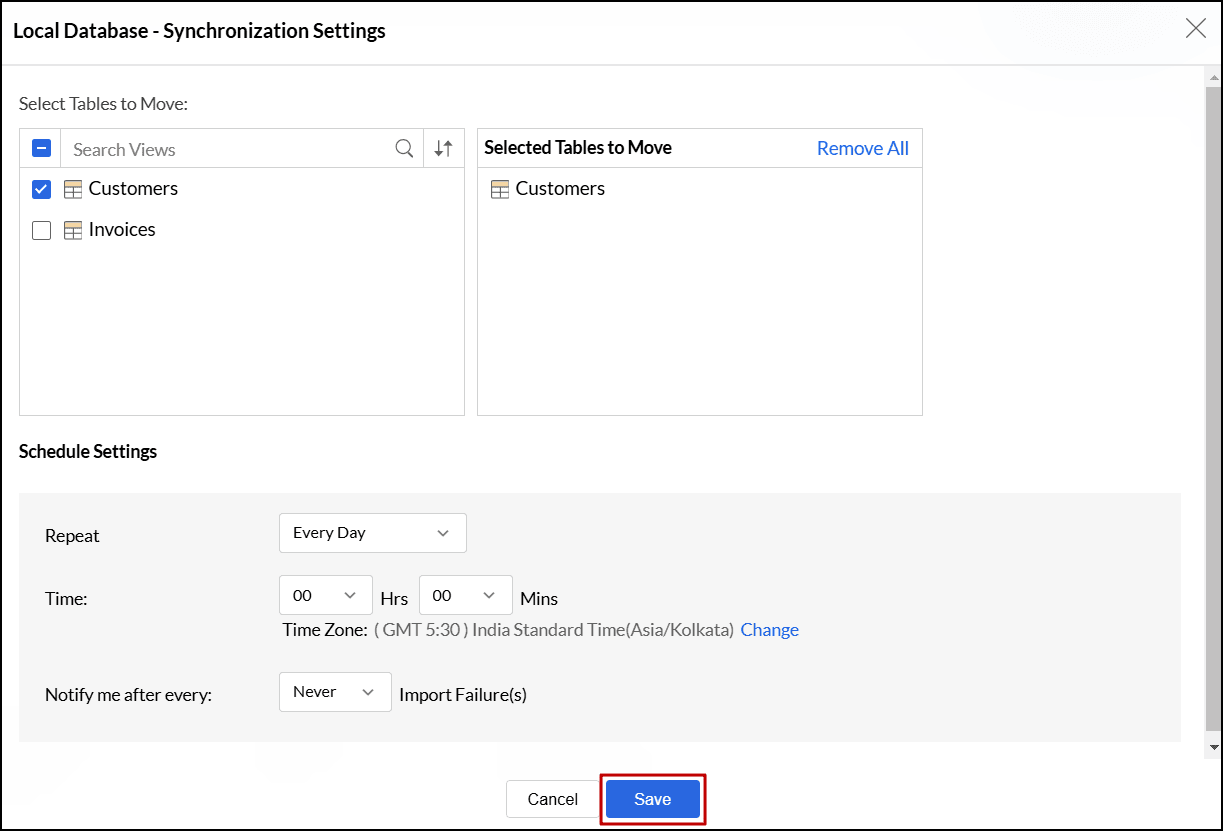
Now, the selected tables are moved to the newly created import schedule.

For new tables imported into an existing connection
When you import new tables into an existing data source connection configured with multiple synchronization schedules, Zoho Analytics automatically assigns the first synchronization schedule (Schedule 1) to the new table. However, you can modify this by following the steps below:
- After successfully importing the new tables, click the Schedule this Import or Edit Schedule option.
In the dialog that appears, choose the desired synchronization schedule or create a new one.
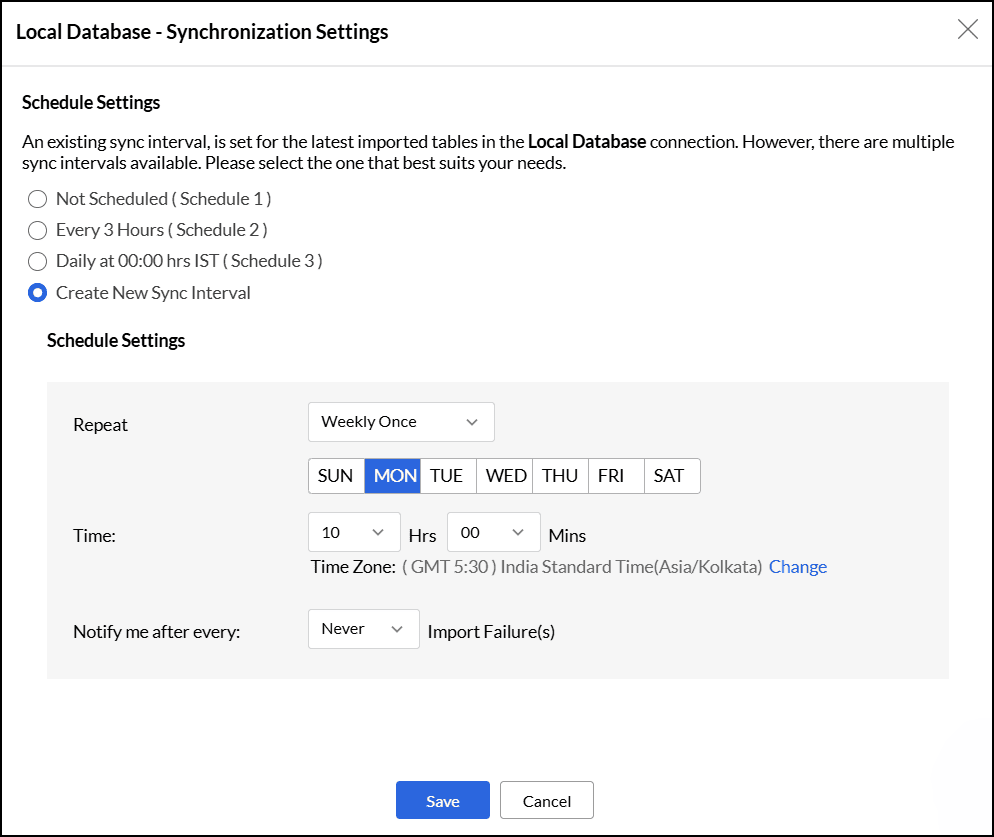
- Click Save.
Move tables from one sync schedule to another
Zoho Analytics allows you to transfer tables from one synchronization schedule to another. Follow the steps below to do this:
- Open the desired workspace, click the More option from the side panel, and choose Data Sources.
- Navigate to the corresponding Data Sources page, where the tables are organized by their sync schedule frequencies. If no sync schedule is set, the tables are grouped under the Not Scheduled category.
- Navigate to the desired schedule interval and select the table you need to move.
Click the Move button at the top.
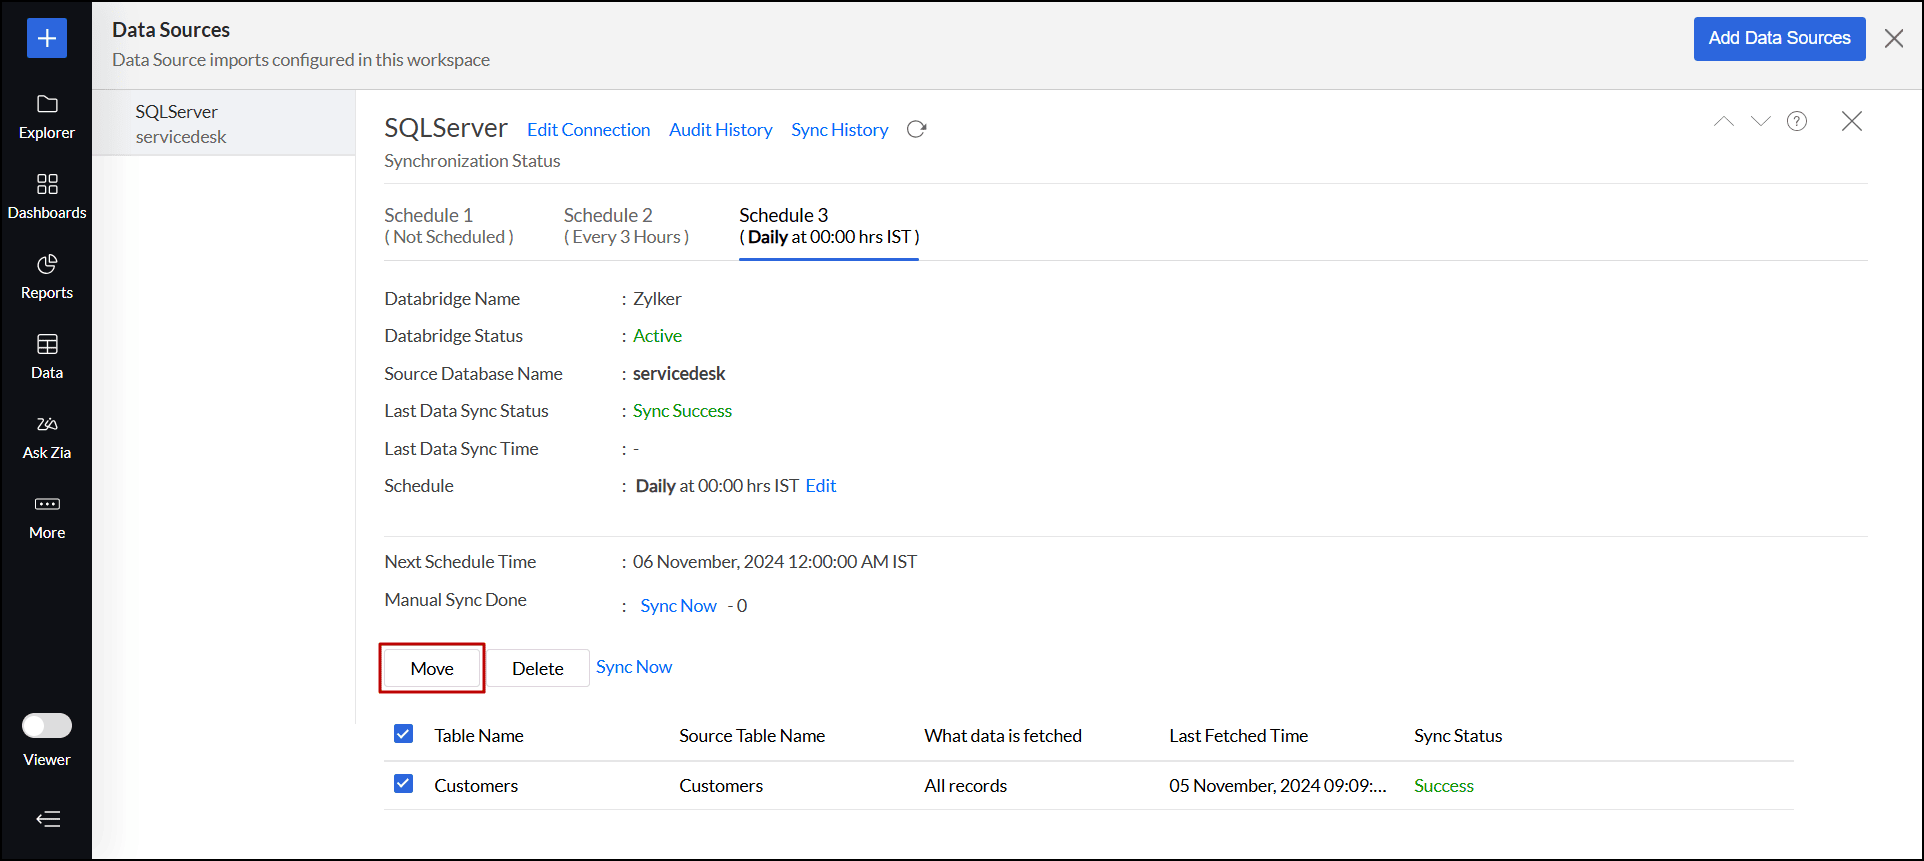
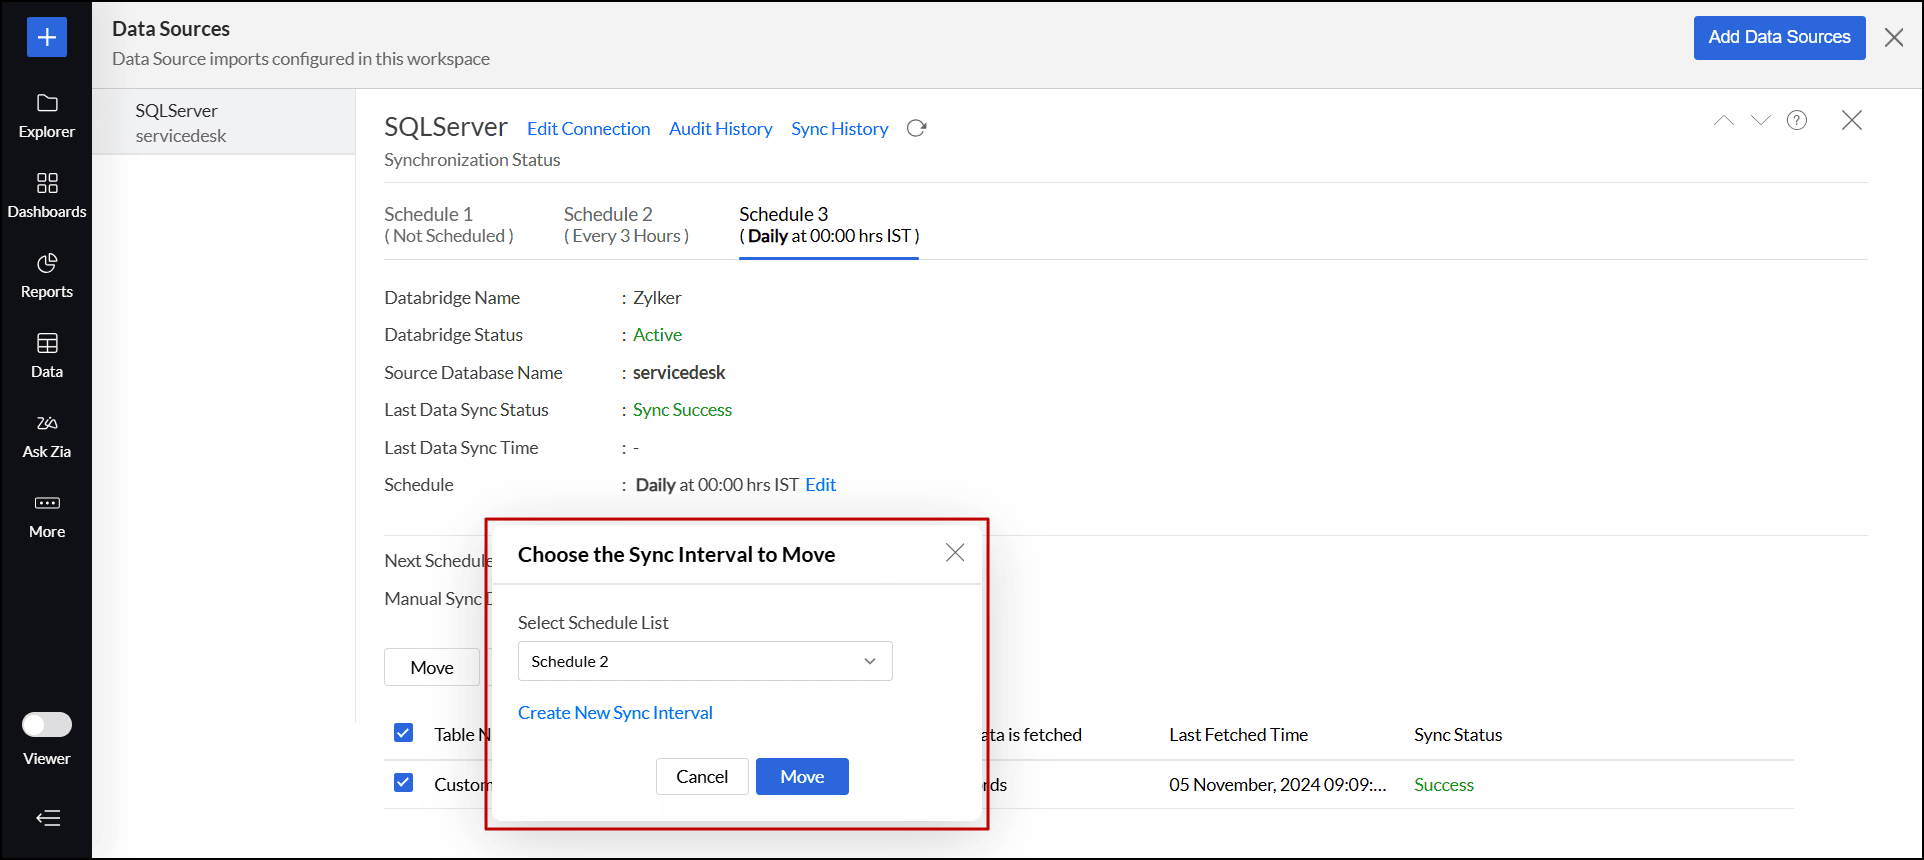
- In the pop-up that appears, choose an existing schedule interval from the Select Schedule List drop-down or create a new schedule interval.
Click Move.
Delete sync schedule
Follow the steps below to delete a synchronization schedule.
- Open the desired Data Sources page.
- Navigate to the corresponding Synchronization Schedule to be deleted.
- Move the tables to a different sync schedule. Click here to learn about the steps to move tables.
- Click Delete Schedule.


